LEXUS LS430 2003 Factory Repair Manual
Manufacturer: LEXUS, Model Year: 2003,
Model line: LS430,
Model: LEXUS LS430 2003
Pages: 4500, PDF Size: 87.45 MB
LEXUS LS430 2003 Factory Repair Manual
LS430 2003
LEXUS
LEXUS
https://www.carmanualsonline.info/img/36/57050/w960_57050-0.png
LEXUS LS430 2003 Factory Repair Manual
Trending: CD player, fuel filter, wiring, v belt tensioner pulley, head, wheel, drain bolt
Page 3811 of 4500
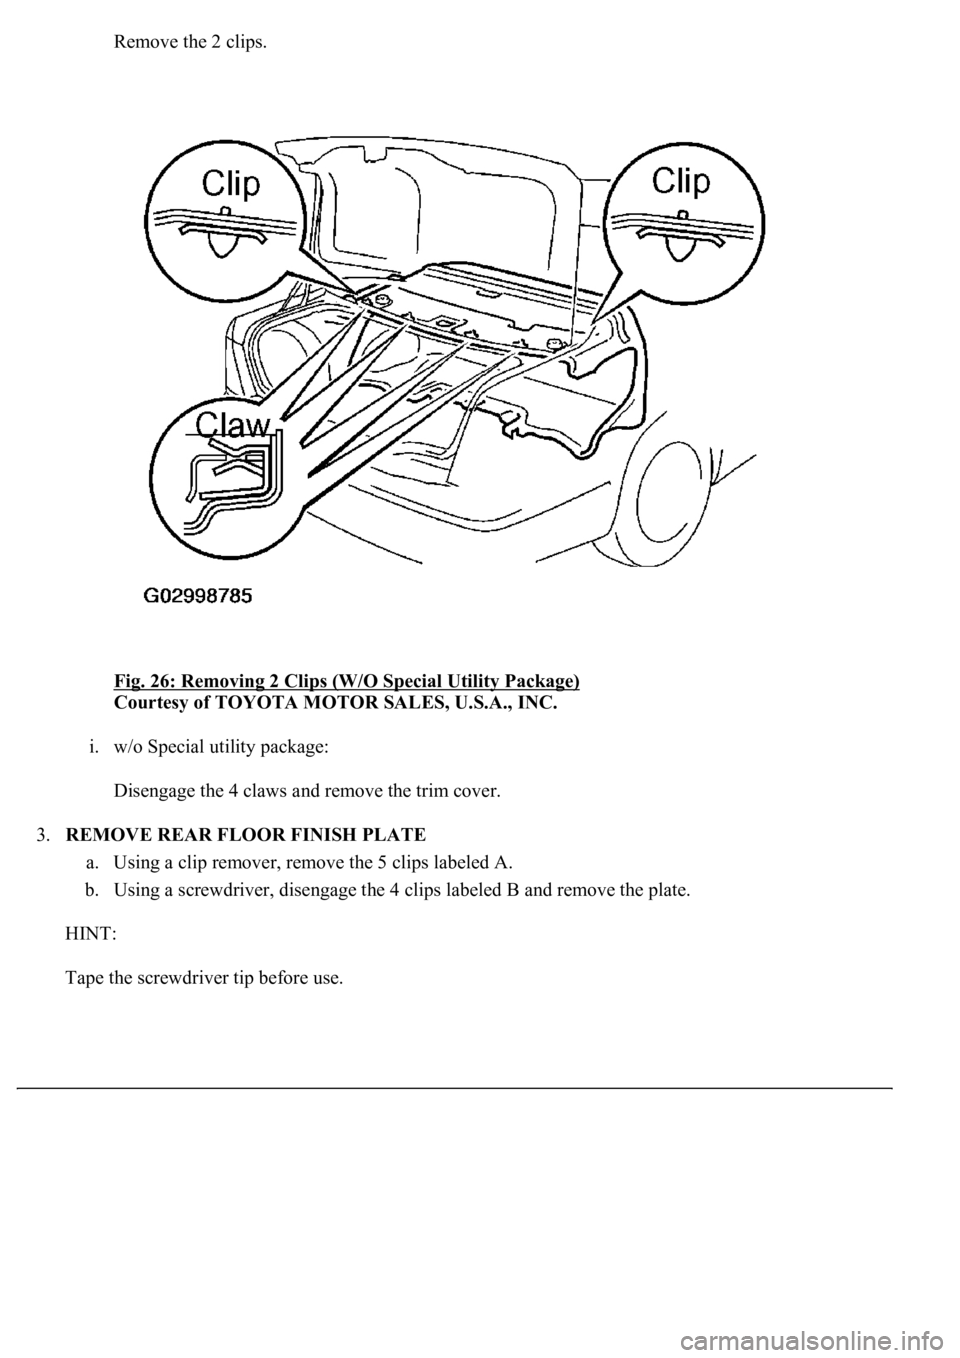
Remove the 2 clips.
Fig. 26: Removing 2 Clips (W/O Special Utility Package)
Courtesy of TOYOTA MOTOR SALES, U.S.A., INC.
i. w/o Special utility package:
Disengage the 4 claws and remove the trim cover.
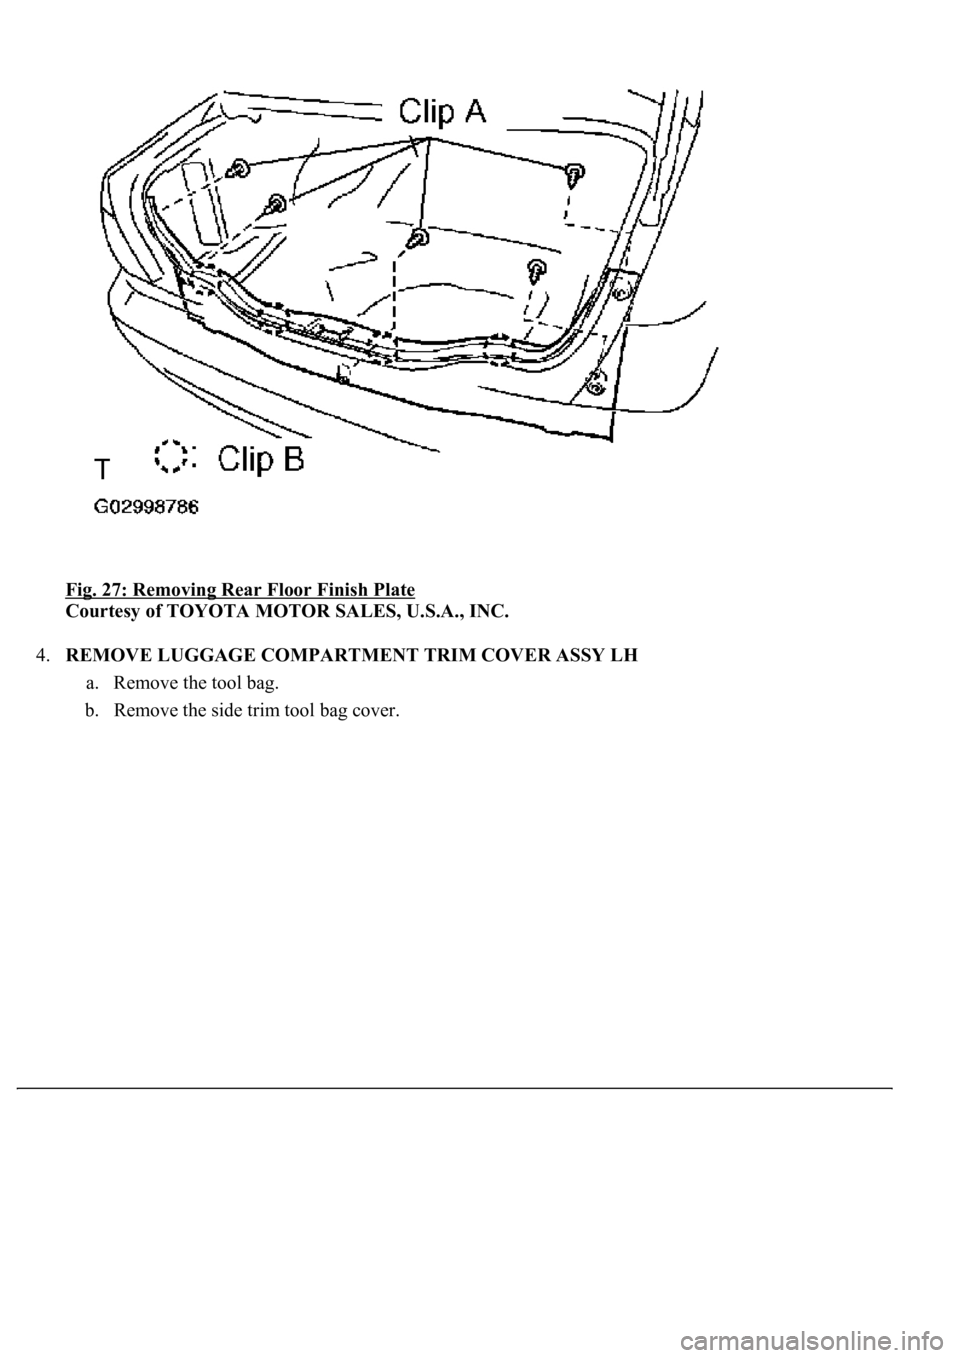
3.REMOVE REAR FLOOR FINISH PLATE
a. Using a clip remover, remove the 5 clips labeled A.
b. Using a screwdriver, disengage the 4 clips labeled B and remove the plate.
HINT:
Tape the screwdriver tip before use.
Page 3812 of 4500
Fig. 27: Removing Rear Floor Finish Plate
Courtesy of TOYOTA MOTOR SALES, U.S.A., INC.
4.REMOVE LUGGAGE COMPARTMENT TRIM COVER ASSY LH
a. Remove the tool bag.
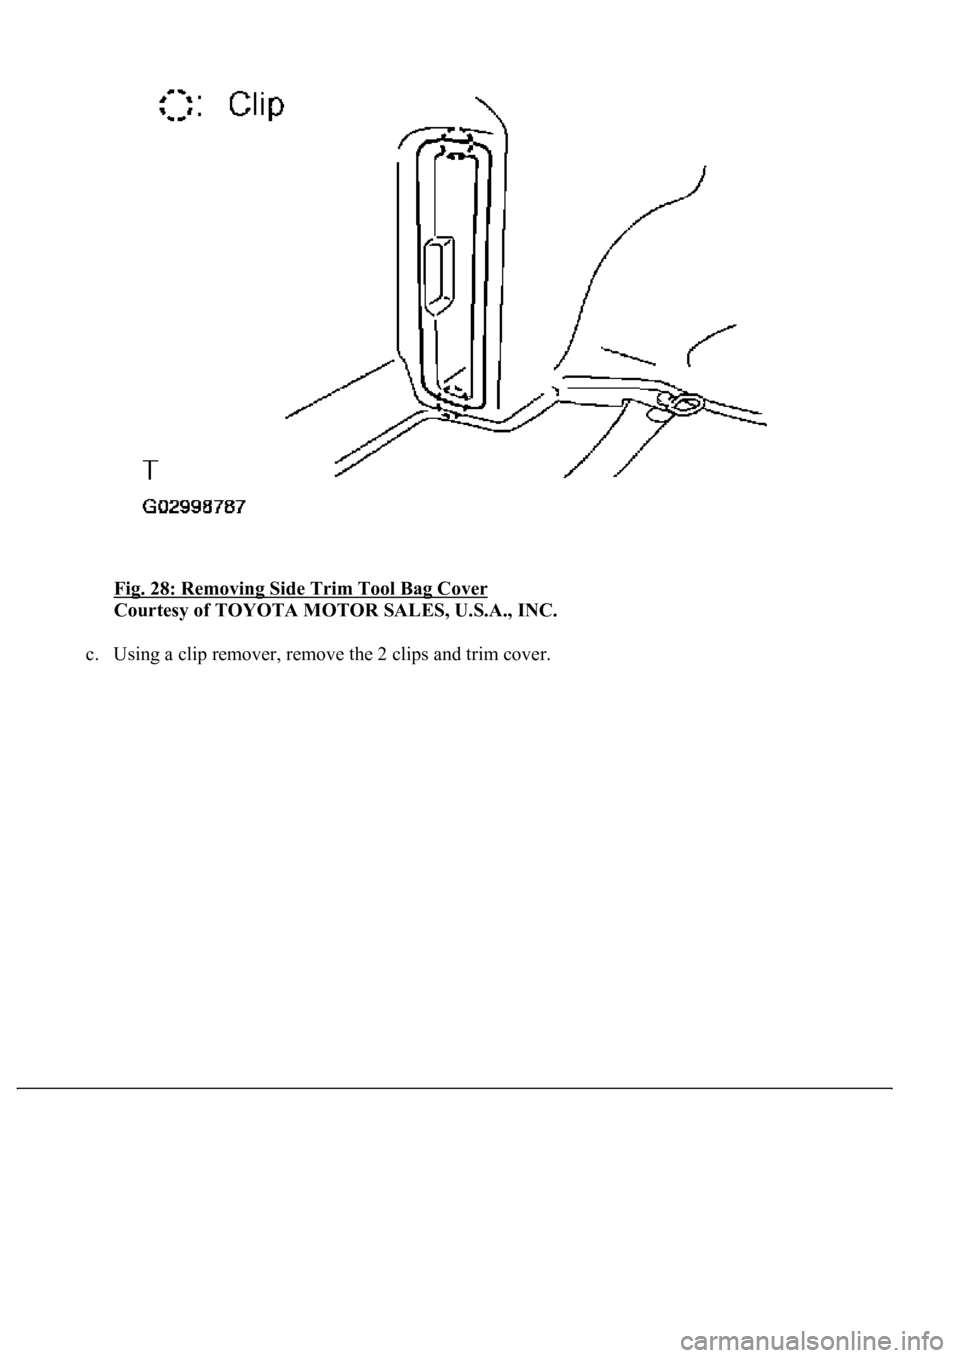
b. Remove the side trim tool bag cover.
Page 3813 of 4500
Fig. 28: Removing Side Trim Tool Bag Cover
Courtesy of TOYOTA MOTOR SALES, U.S.A., INC.
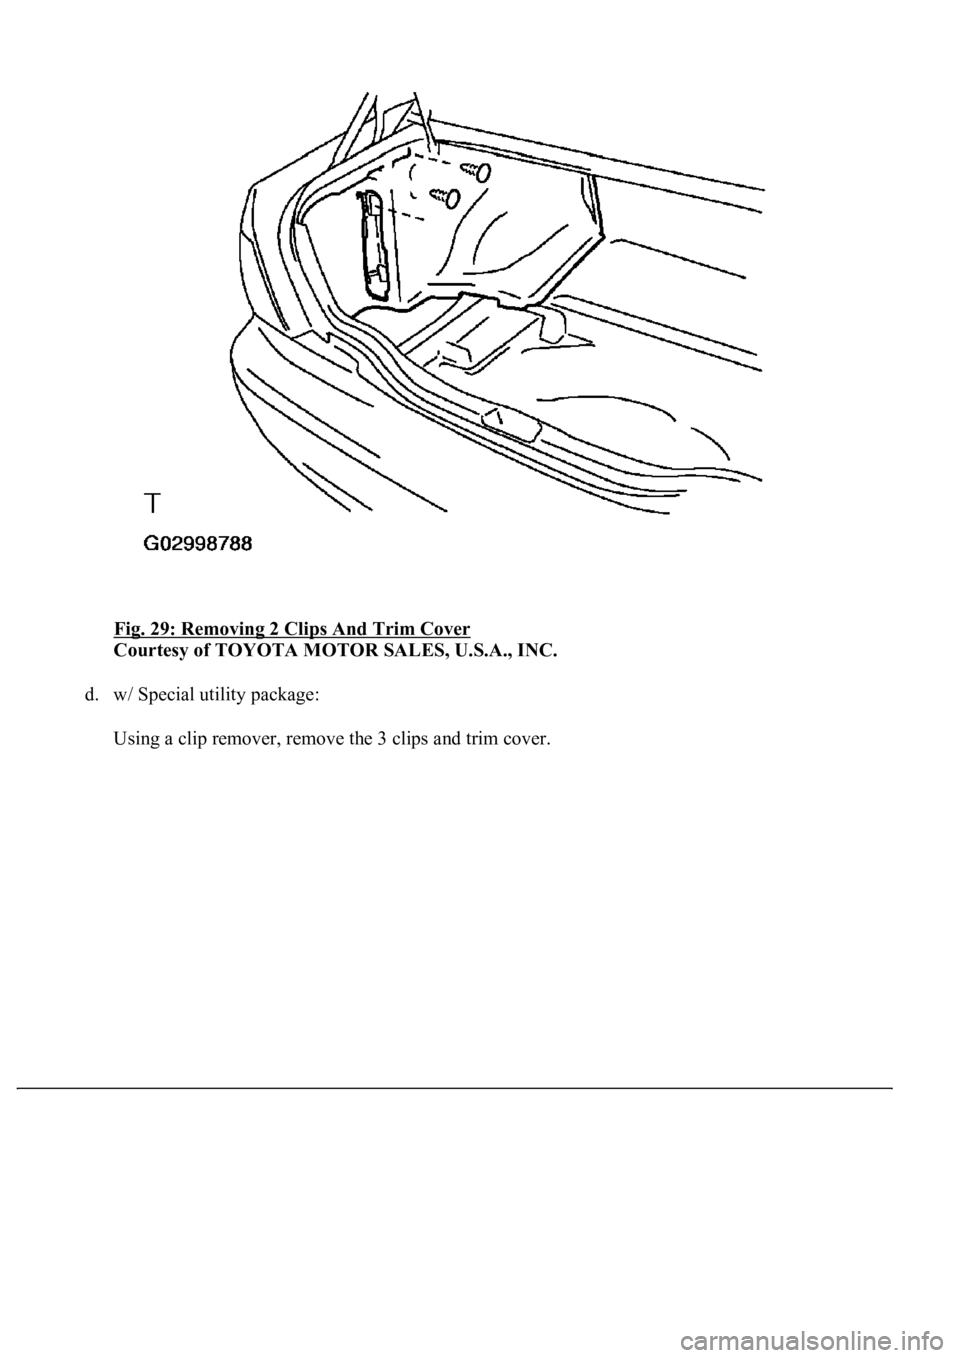
c. Using a clip remover, remove the 2 clips and trim cover.
Page 3814 of 4500
Fig. 29: Removing 2 Clips And Trim Cover
Courtesy of TOYOTA MOTOR SALES, U.S.A., INC.
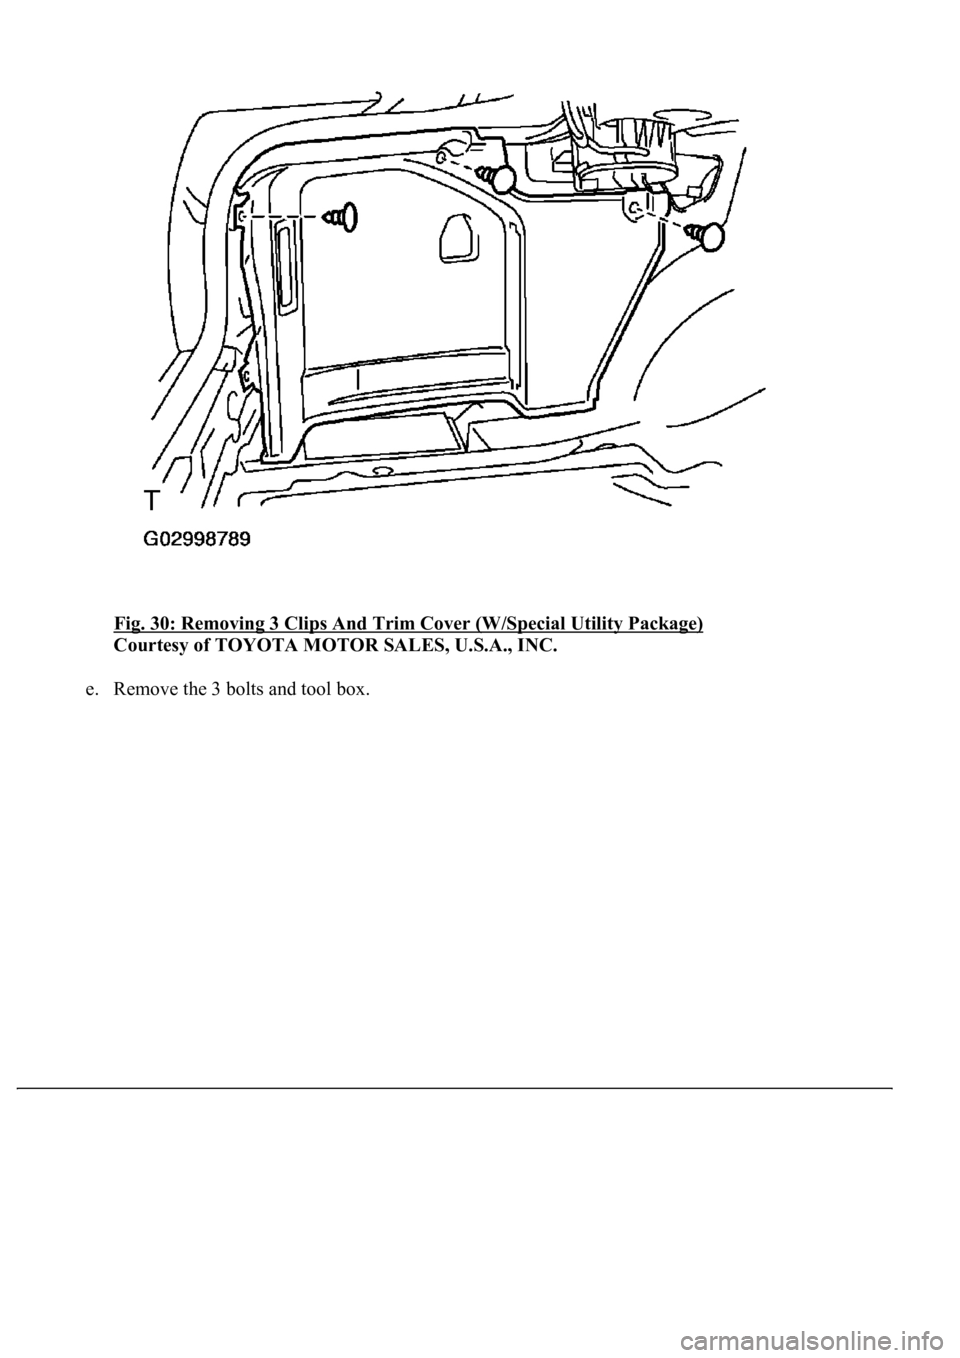
d. w/ Special utility package:
Usin
g a clip remover, remove the 3 clips and trim cover.
Page 3815 of 4500
Fig. 30: Removing 3 Clips And Trim Cover (W/Special Utility Package)
Courtesy of TOYOTA MOTOR SALES, U.S.A., INC.
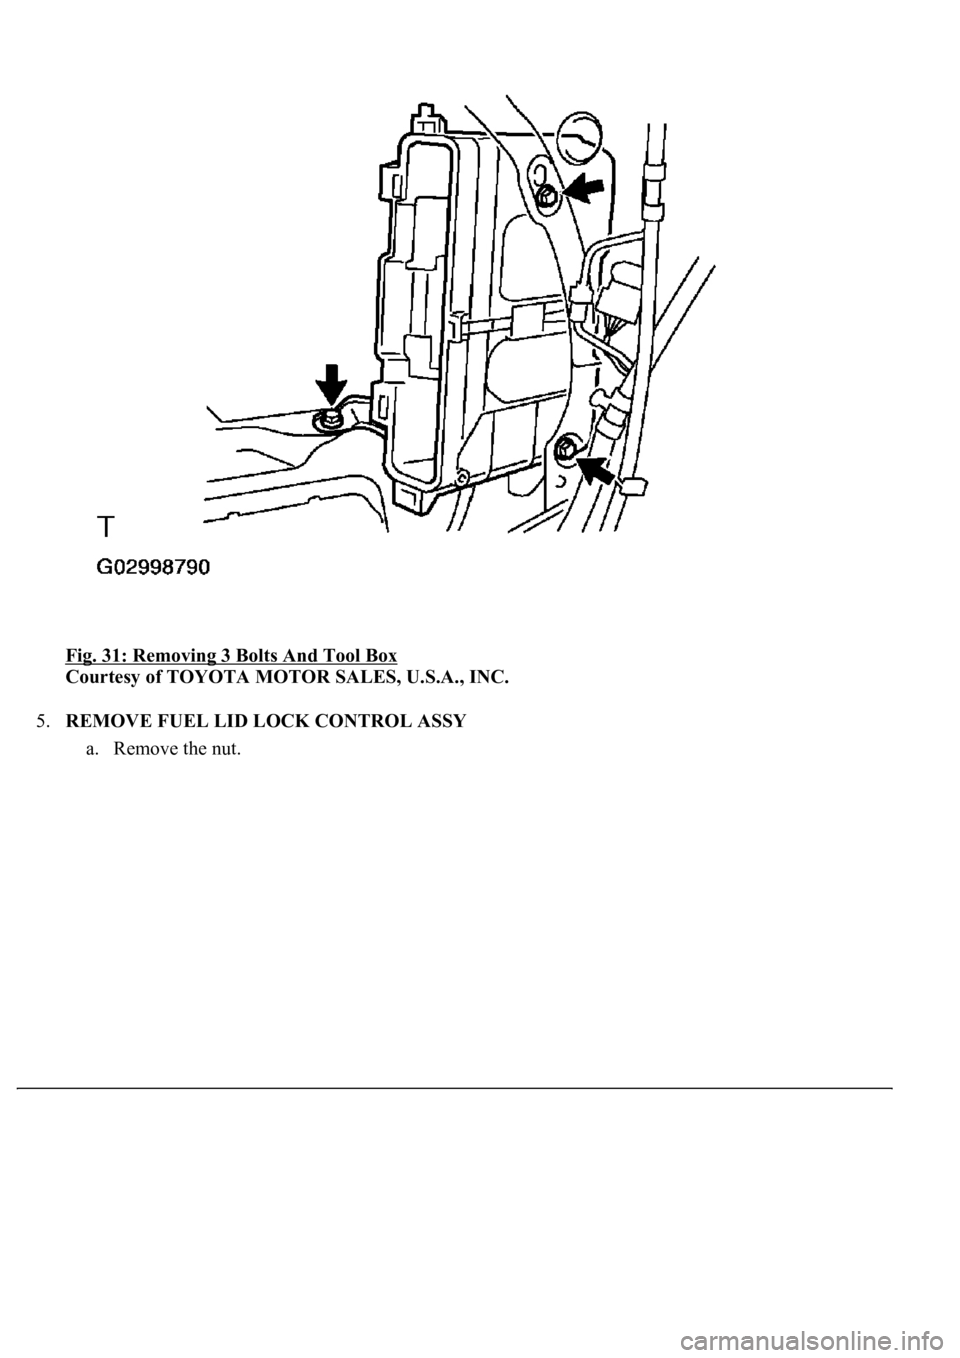
e. Remove the 3 bolts and tool box.
Page 3816 of 4500
Fig. 31: Removing 3 Bolts And Tool Box
Courtesy of TOYOTA MOTOR SALES, U.S.A., INC.
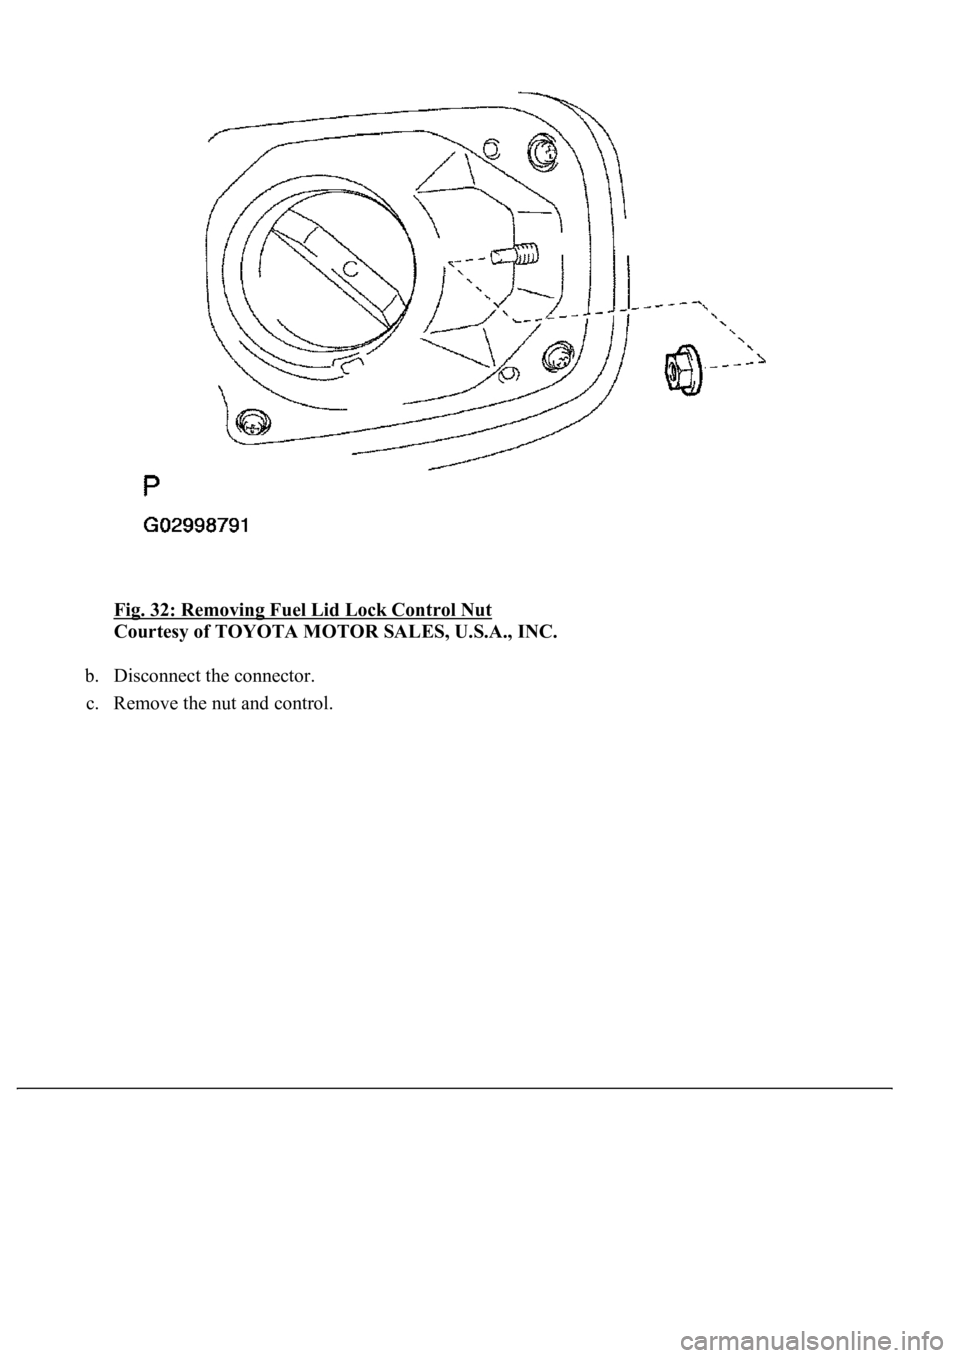
5.REMOVE FUEL LID LOCK CONTROL ASSY
a. Remove the nut.
Page 3817 of 4500
Fig. 32: Removing Fuel Lid Lock Control Nut
Courtesy of TOYOTA MOTOR SALES, U.S.A., INC.
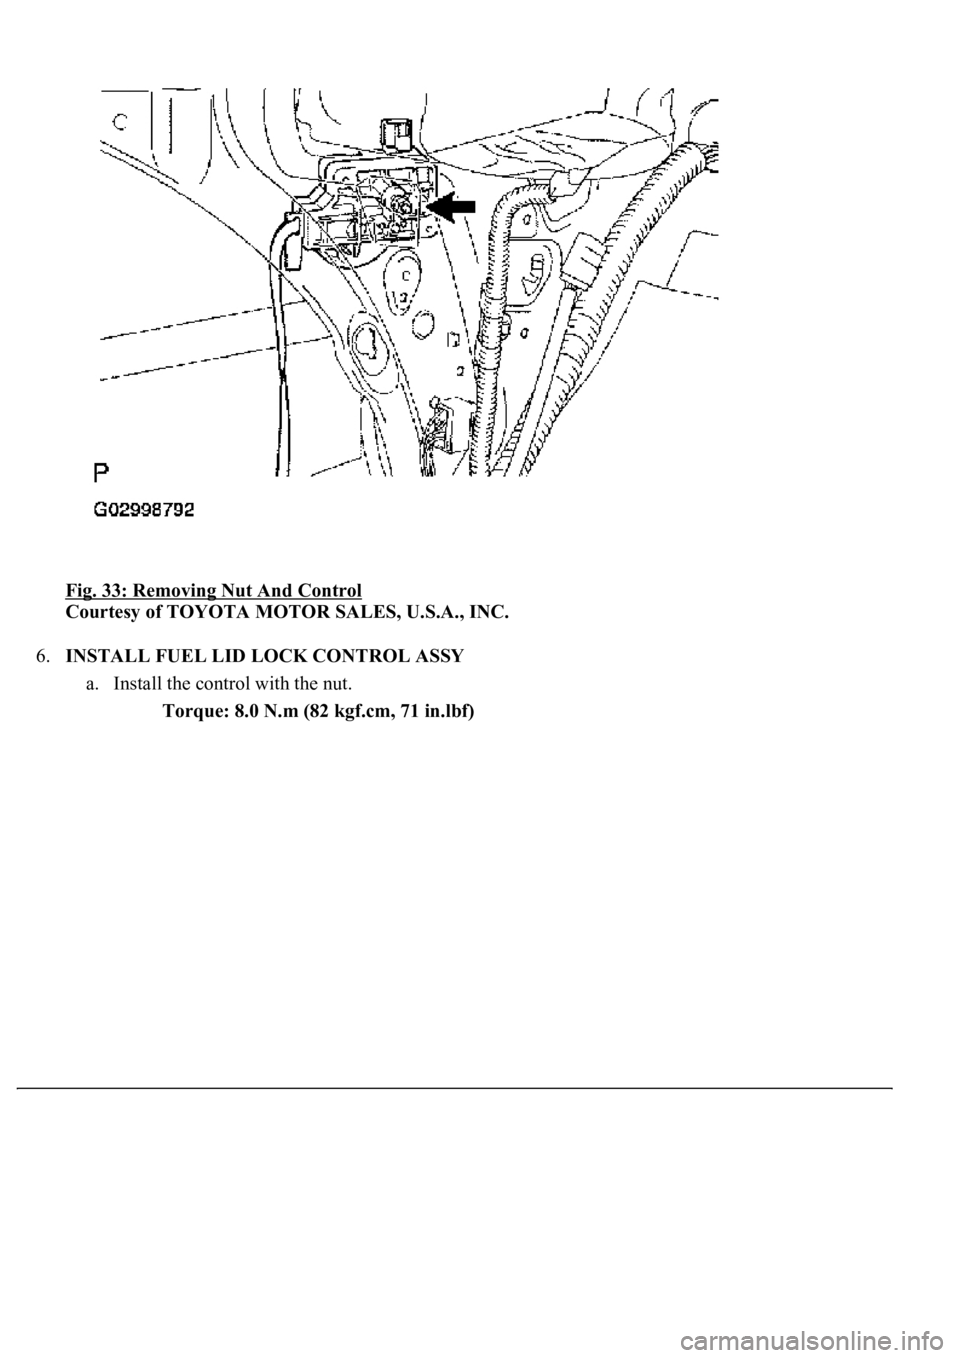
b. Disconnect the connector.
c. Remove the nut and control.
Page 3818 of 4500
Fig. 33: Removing Nut And Control
Courtesy of TOYOTA MOTOR SALES, U.S.A., INC.
6.INSTALL FUEL LID LOCK CONTROL ASSY
a. Install the control with the nut.
Torque: 8.0 N.m (82 kgf.cm, 71 in.lbf)
Page 3819 of 4500
Fig. 34: Installing Control With Nut
Courtesy of TOYOTA MOTOR SALES, U.S.A., INC.
b. Connect the connector.
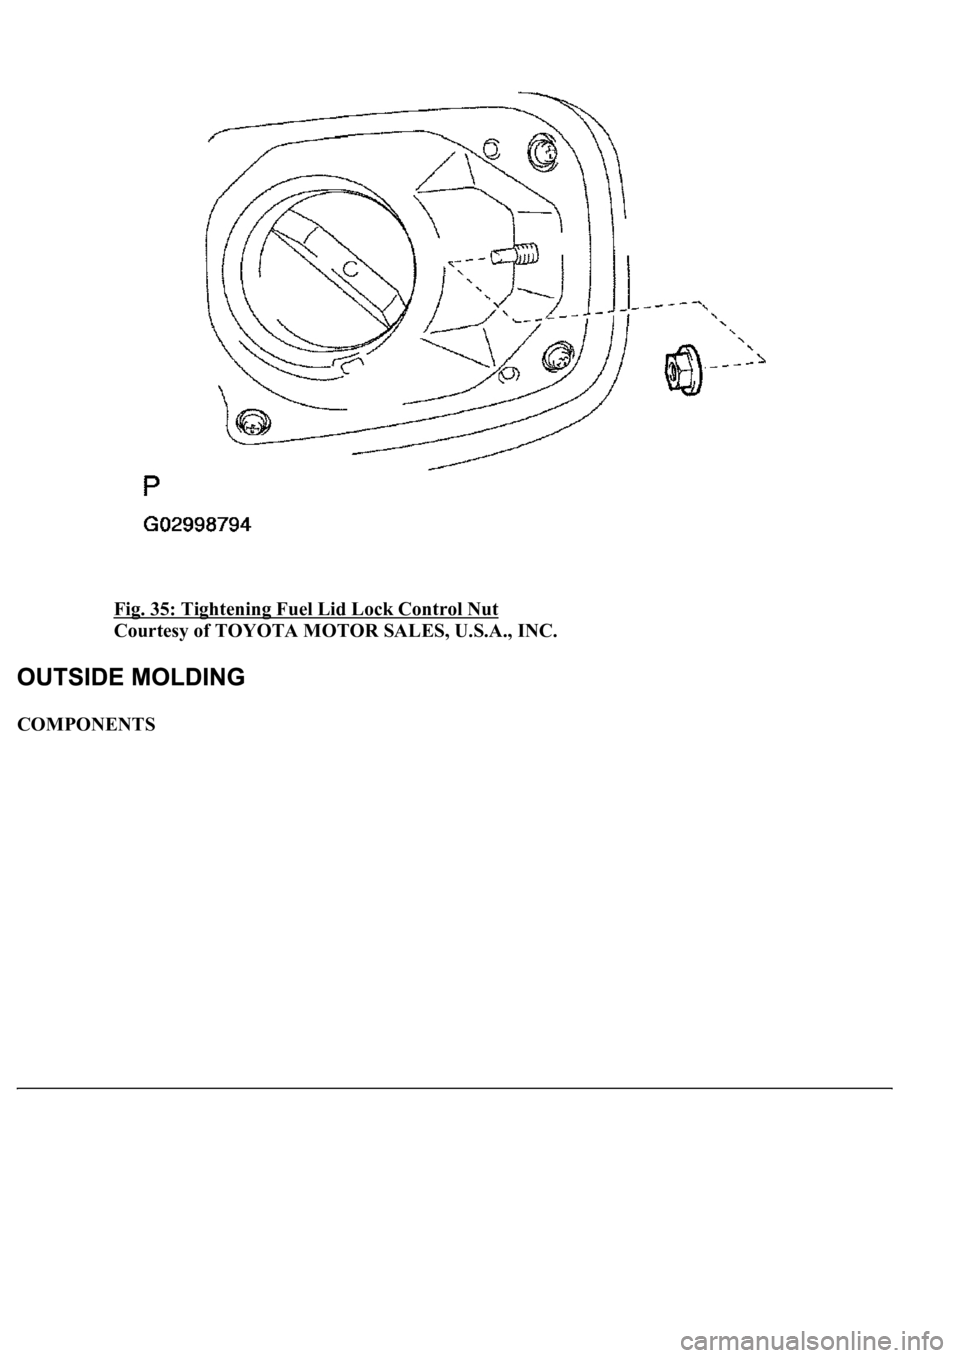
c. Tighten the nut.
Torque: 11.5 N.m (117 kgf.cm, 8 ft.lbf)
Page 3820 of 4500
Fig. 35: Tightening Fuel Lid Lock Control Nut
Courtesy of TOYOTA MOTOR SALES, U.S.A., INC.
COMPONENTS
Trending: alternator, radiator, airbag off, oil capacity, illumination, oil filter, hood release
