LEXUS LS430 2003 Factory Repair Manual
Manufacturer: LEXUS, Model Year: 2003,
Model line: LS430,
Model: LEXUS LS430 2003
Pages: 4500, PDF Size: 87.45 MB
LEXUS LS430 2003 Factory Repair Manual
LS430 2003
LEXUS
LEXUS
https://www.carmanualsonline.info/img/36/57050/w960_57050-0.png
LEXUS LS430 2003 Factory Repair Manual
Trending: sport mode, automatic transmission, trunk, key, light, oil, charging
Page 3841 of 4500
Fig. 56: Installing Front Fender Outside Moulding LH (W/O Mudguard)
Courtesy of TOYOTA MOTOR SALES, U.S.A., INC.
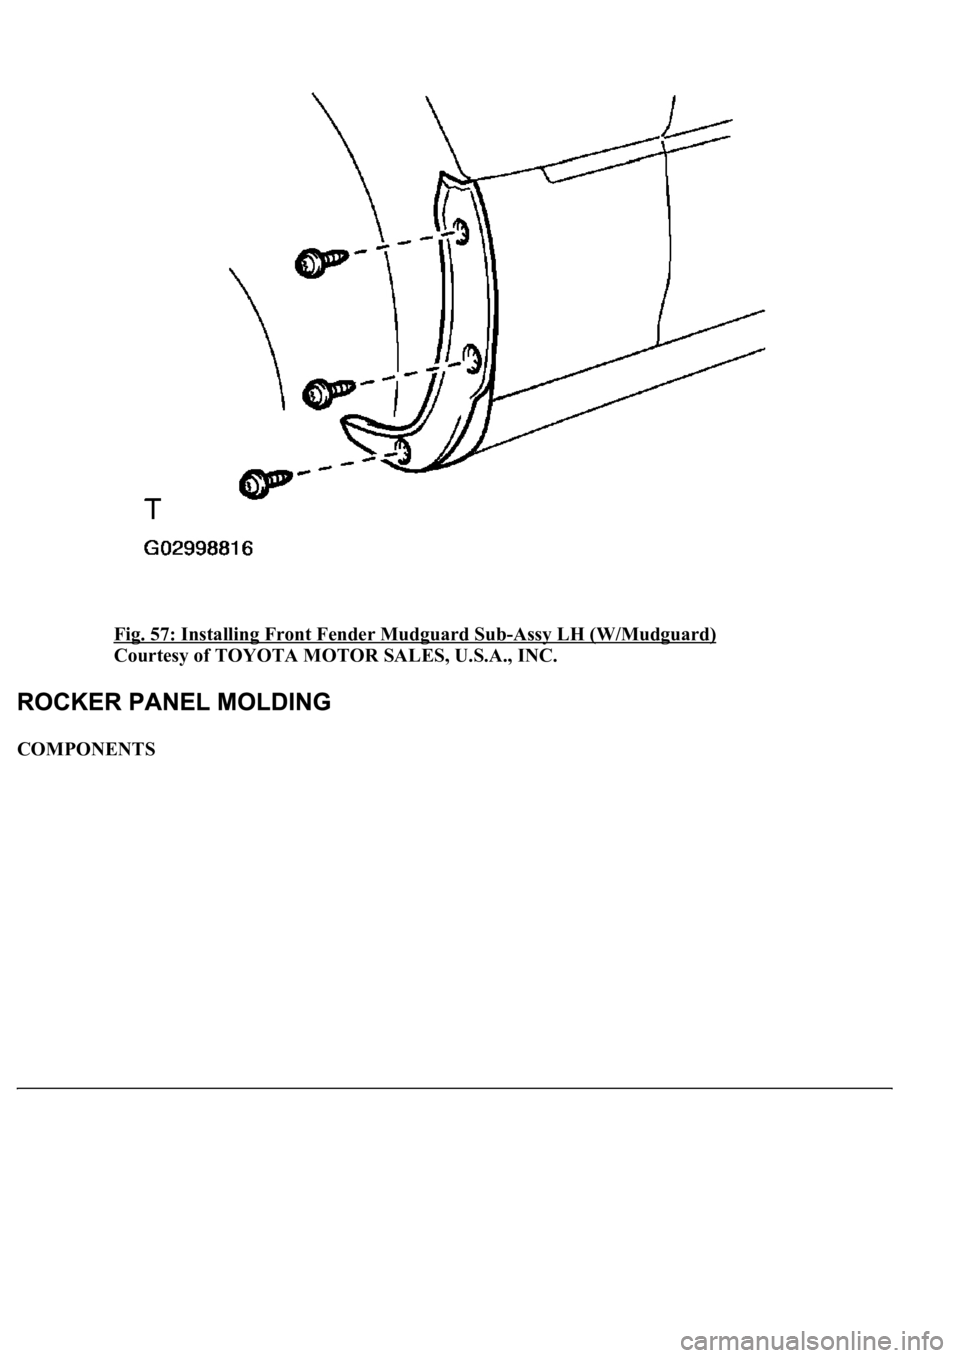
f.INSTALL FRONT FENDER MUDGUARD SUB-ASSY LH (W/ MUDGUARD)
a. Usin
g a hexagon wrench, install the mudguard with the 3 screws.
Page 3842 of 4500
Fig. 57: Installing Front Fender Mudguard Sub-Assy LH (W/Mudguard)
Courtesy of TOYOTA MOTOR SALES, U.S.A., INC.
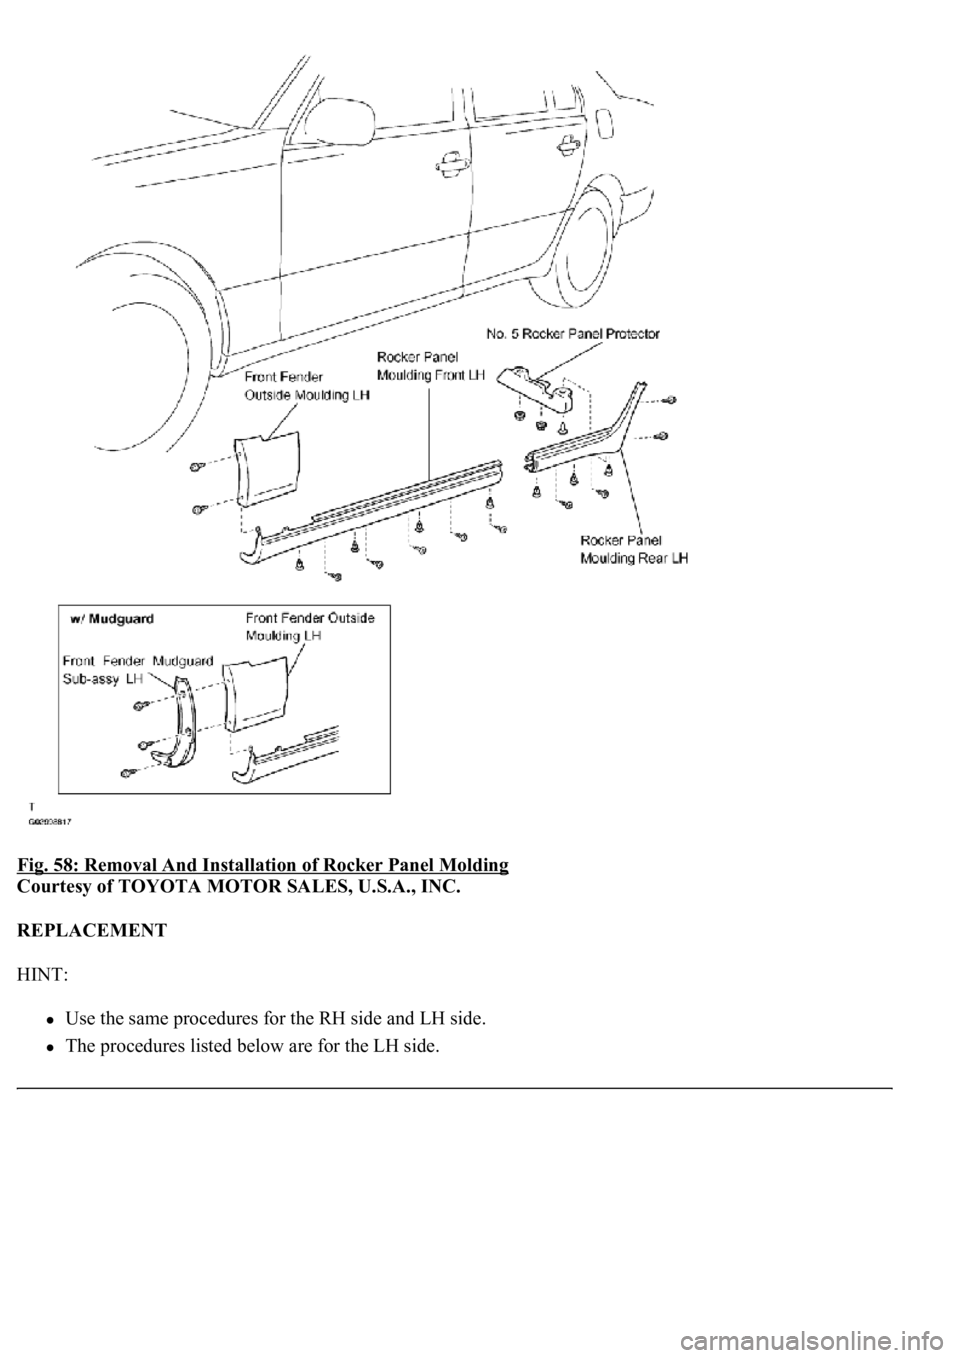
COMPONENTS
Page 3843 of 4500
Fig. 58: Removal And Installation of Rocker Panel Molding
Courtesy of TOYOTA MOTOR SALES, U.S.A., INC.
REPLACEMENT
HINT:
Use the same procedures for the RH side and LH side.
The procedures listed below are for the LH side.
Page 3844 of 4500
A bolt without a torque specification is shown in the standard bolt chart (see SPECIFIED TORQUE
FOR STANDARD BOLTS ).
When replacing the molding, heat the body and molding using a heat light.
Heating temperature:
HEATING TEMPERATURE CHART
1.REMOVE FRONT FENDER MUDGUARD SUB-ASSY LH (W/ MUDGUARD)
a. Remove the 3 screws and mudguard.
2.REMOVE FRONT FENDER OUTSIDE MOLDING LH (See REPLACEMENT
)
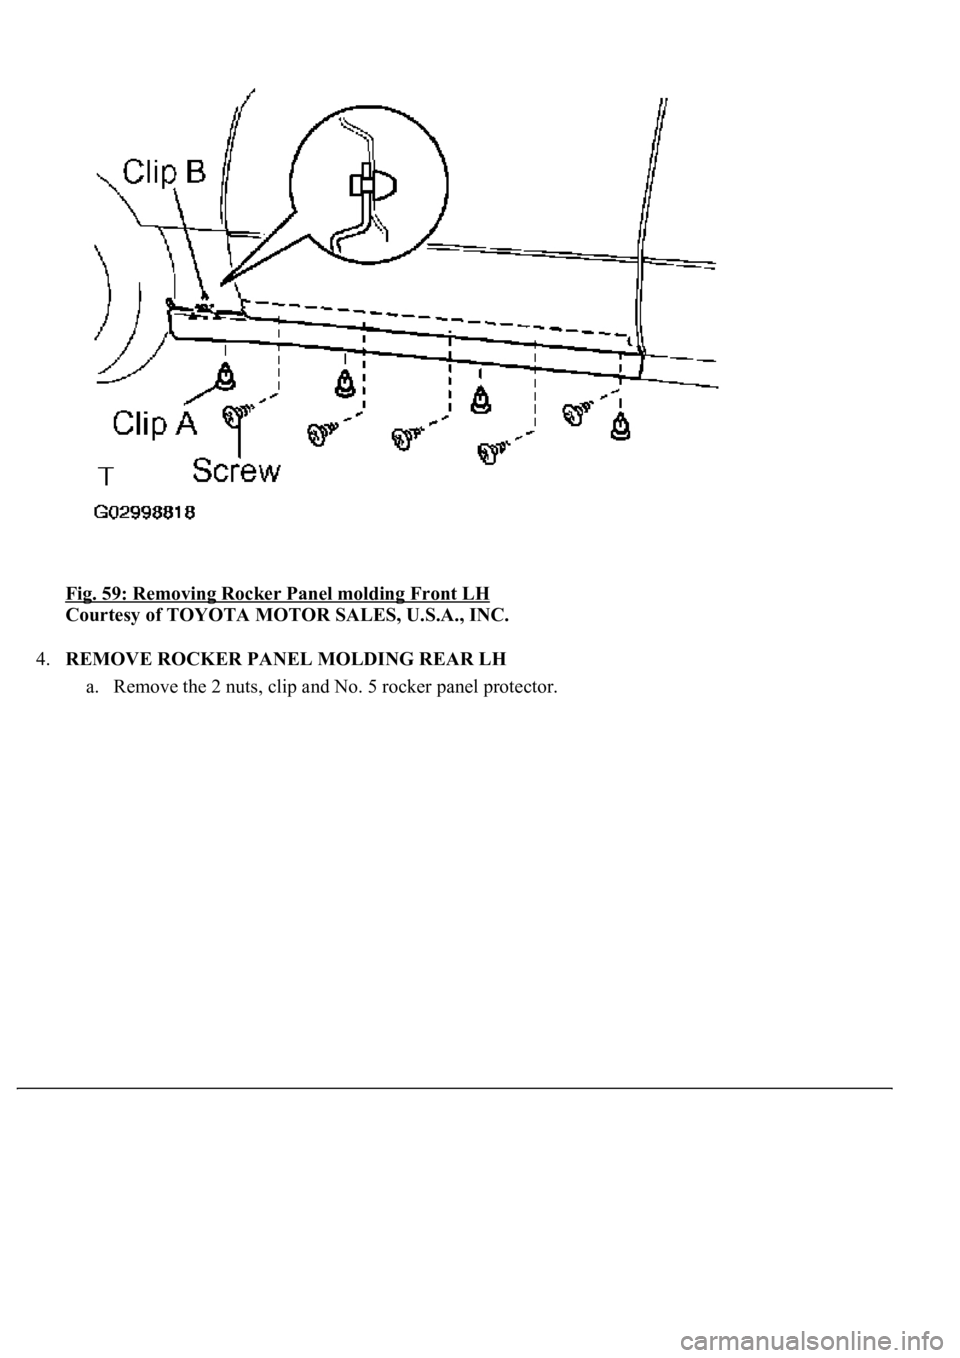
3.REMOVE ROCKER PANEL MOLDING FRONT LH
a. Remove the 5 screws and the 4 clips labeled A.
b.Using a molding remover, disengage the clip labeled B and remove the molding.
ItemTemperature
Body40 to 60°C (104 to 140°F)
molding20 to 30°C (68 to 86°F)
Page 3845 of 4500
Fig. 59: Removing Rocker Panel molding Front LH
Courtesy of TOYOTA MOTOR SALES, U.S.A., INC.
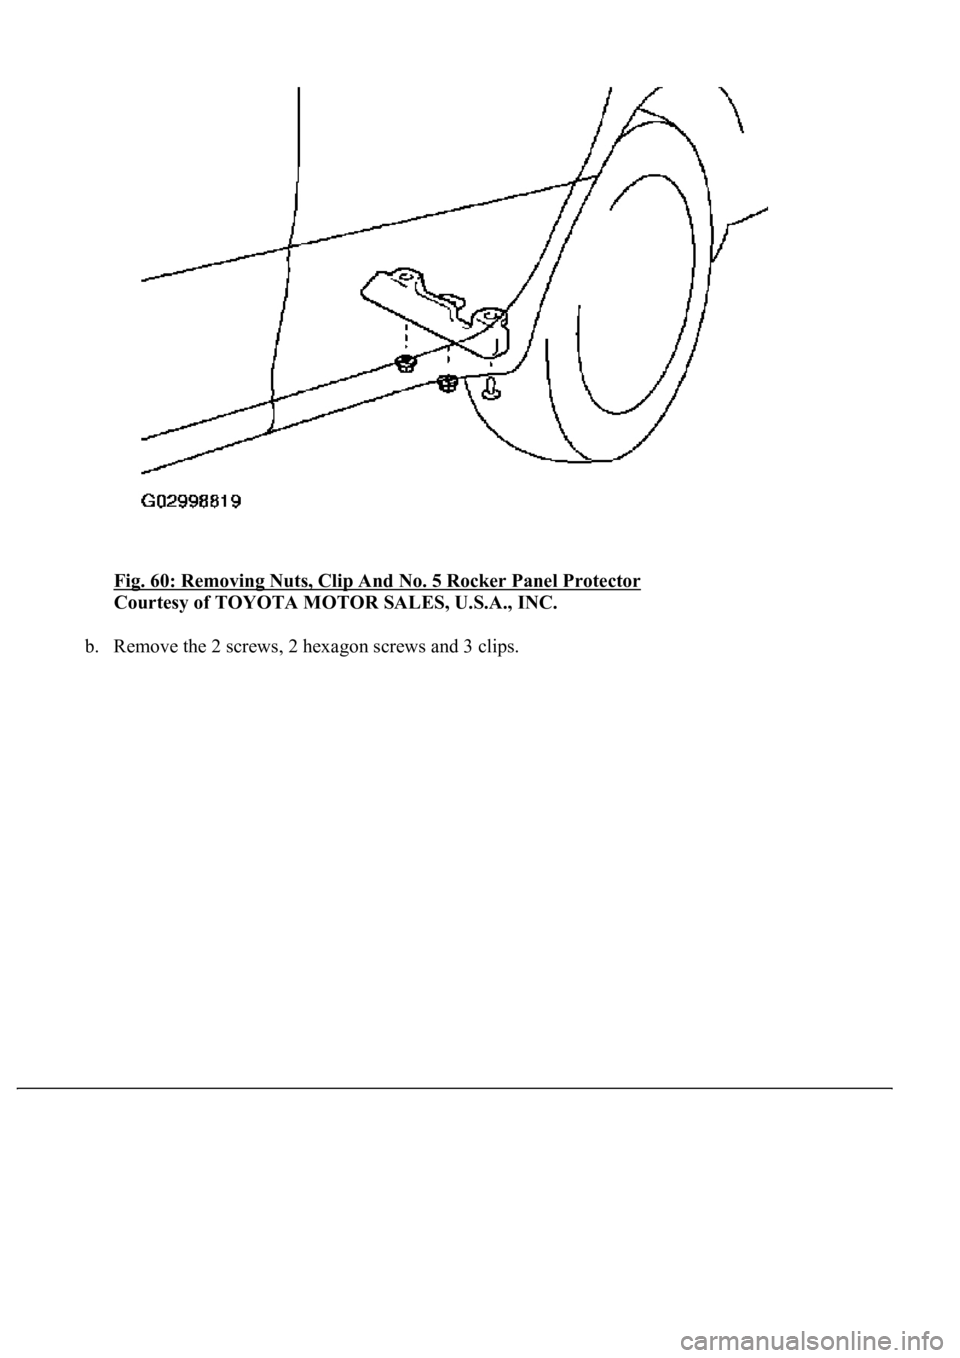
4.REMOVE ROCKER PANEL MOLDING REAR LH
a. Remove the 2 nuts, clip and No. 5 rocker panel protector.
Page 3846 of 4500
Fig. 60: Removing Nuts, Clip And No. 5 Rocker Panel Protector
Courtesy of TOYOTA MOTOR SALES, U.S.A., INC.
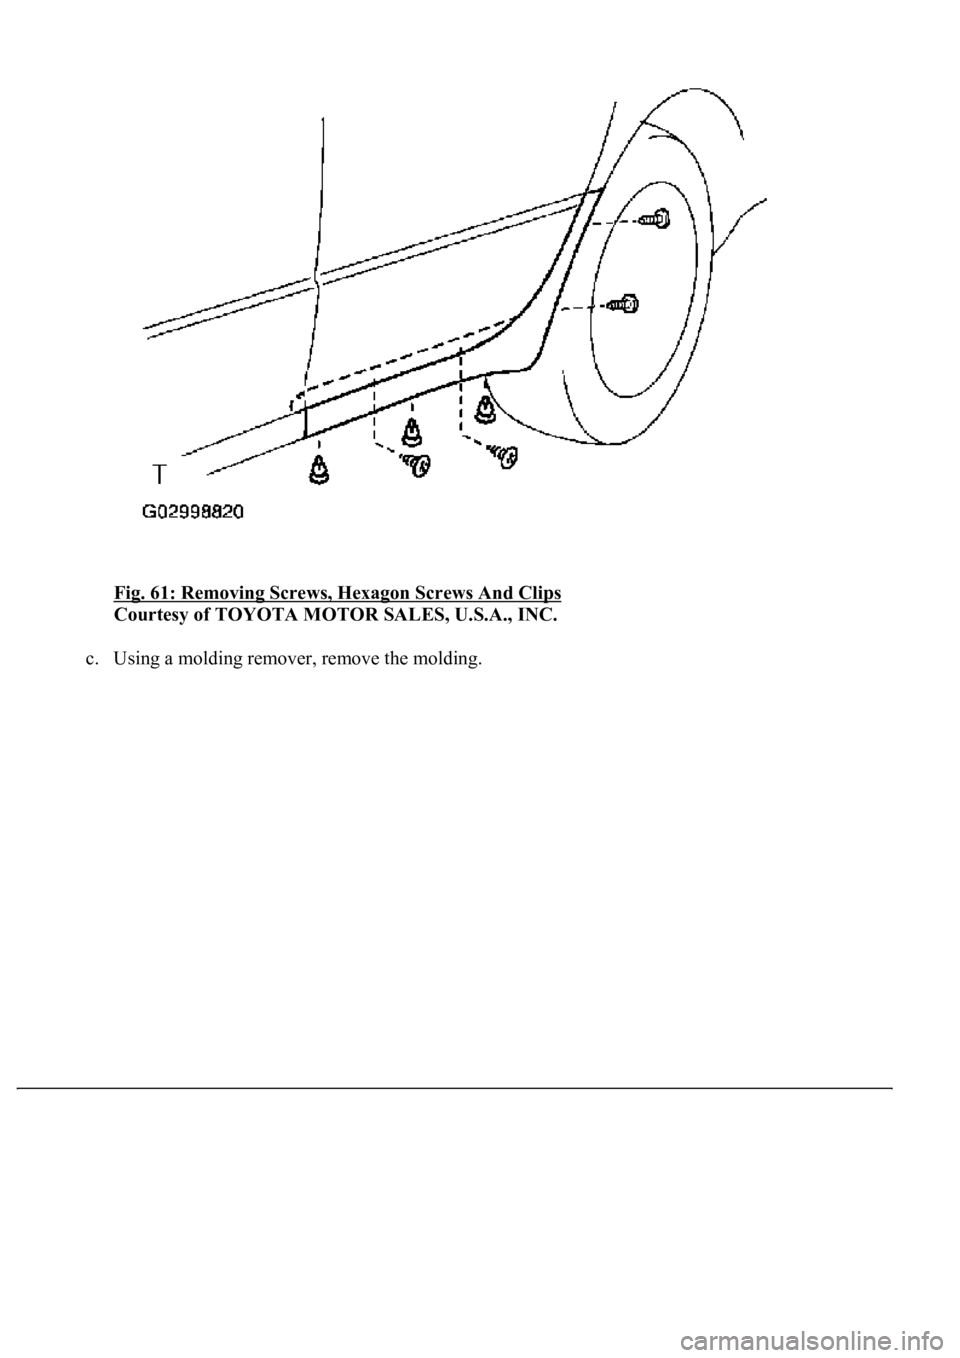
b. Remove the 2 screws, 2 hexagon screws and 3 clips.
Page 3847 of 4500
Fig. 61: Removing Screws, Hexagon Screws And Clips
Courtesy of TOYOTA MOTOR SALES, U.S.A., INC.
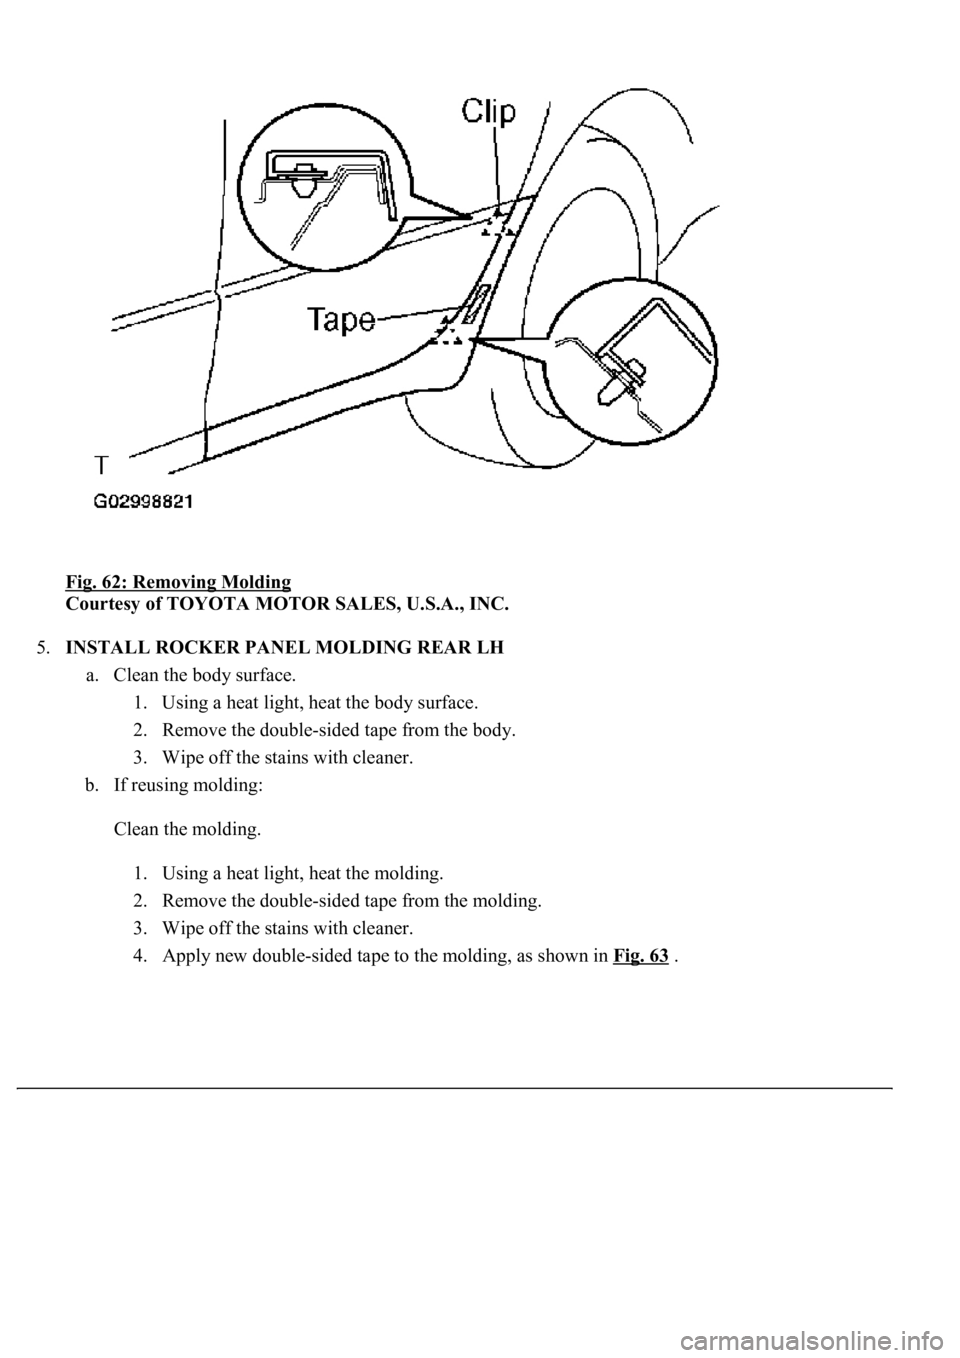
c. Usin
g a molding remover, remove the molding.
Page 3848 of 4500
Fig. 62: Removing Molding
Courtesy of TOYOTA MOTOR SALES, U.S.A., INC.
5.INSTALL ROCKER PANEL MOLDING REAR LH
a. Clean the body surface.
1. Using a heat light, heat the body surface.
2. Remove the double-sided tape from the body.
3. Wipe off the stains with cleaner.
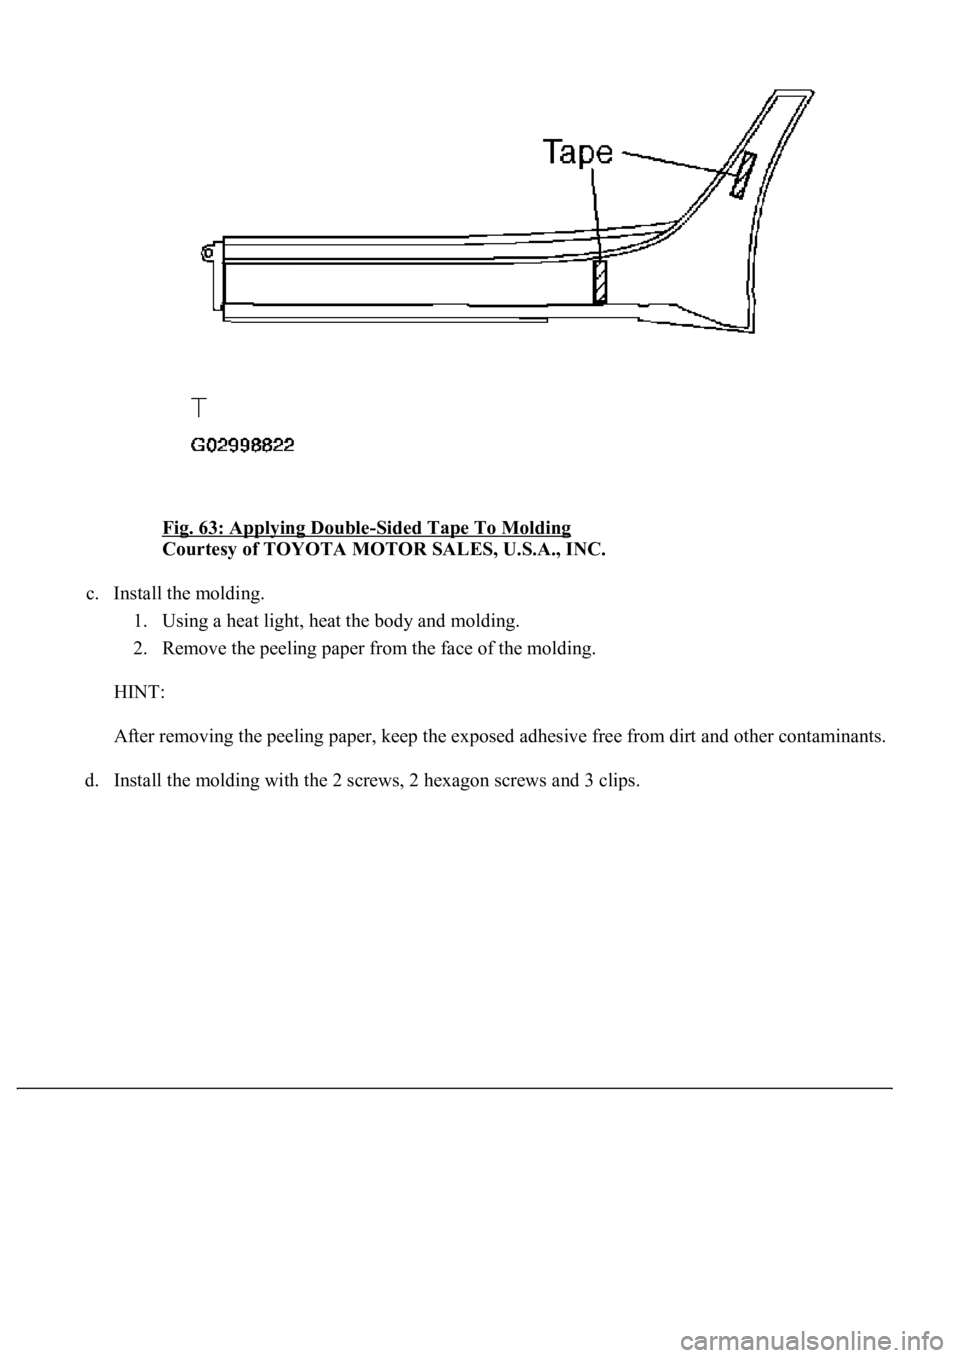
b. If reusing molding:
Clean the molding.
1. Using a heat light, heat the molding.
2. Remove the double-sided tape from the molding.
3. Wipe off the stains with cleaner.
4. Appl
y new double-sided tape to the molding, as shown in Fig. 63 .
Page 3849 of 4500
Fig. 63: Applying Double-Sided Tape To Molding
Courtesy of TOYOTA MOTOR SALES, U.S.A., INC.
c. Install the molding.
1. Using a heat light, heat the body and molding.
2. Remove the peeling paper from the face of the molding.
HINT:
After removing the peeling paper, keep the exposed adhesive free from dirt and other contaminants.
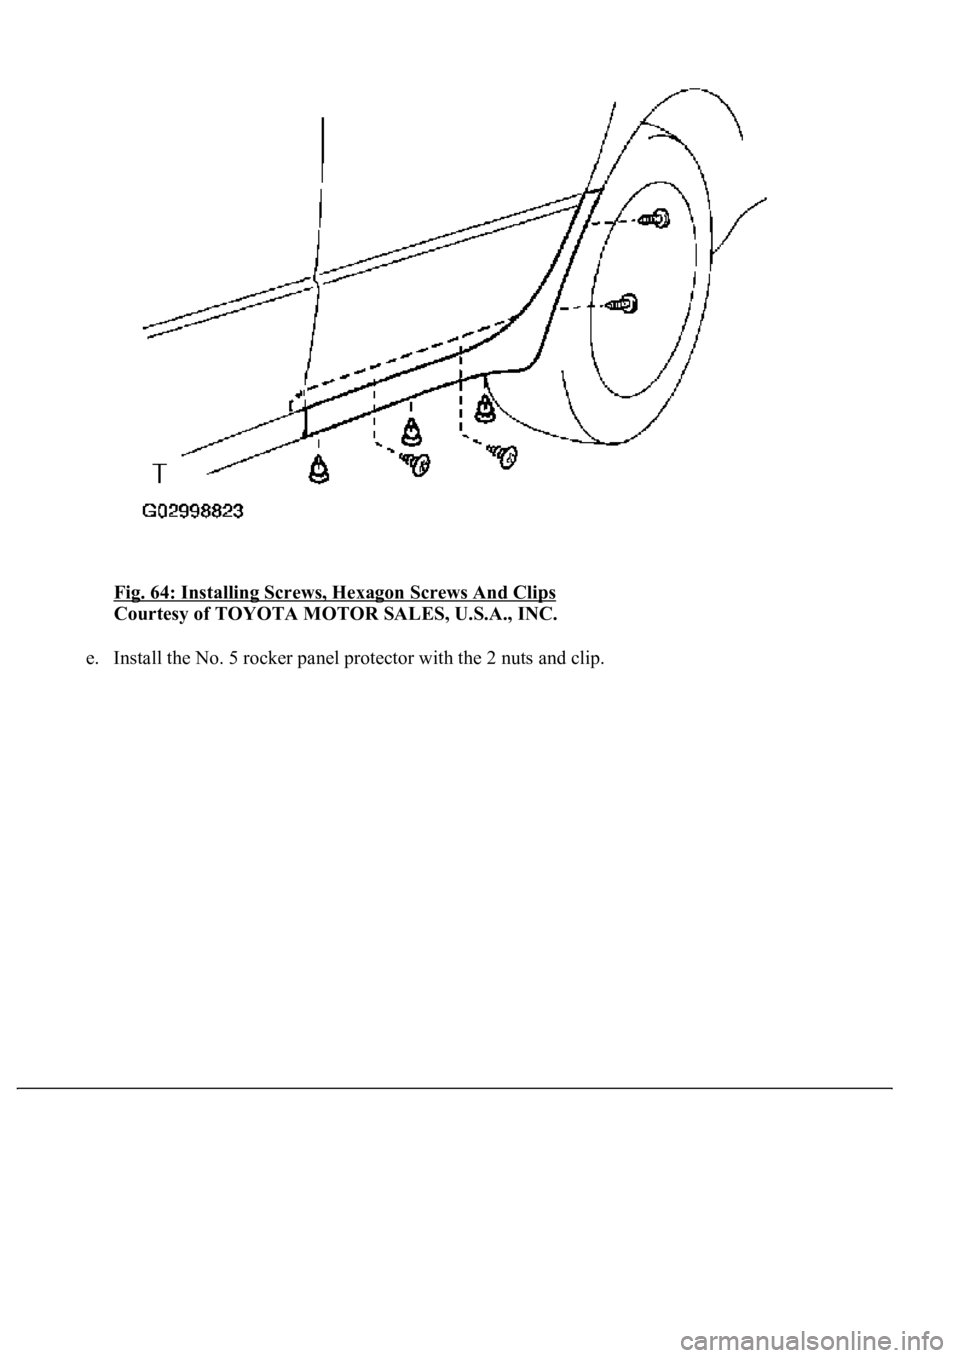
d. Install the moldin
g with the 2 screws, 2 hexagon screws and 3 clips.
Page 3850 of 4500
Fig. 64: Installing Screws, Hexagon Screws And Clips
Courtesy of TOYOTA MOTOR SALES, U.S.A., INC.
e. Install the No. 5 rocker panel protector with the 2 nuts and clip.
Trending: low beam, engine mechanical, idler tensioner pulley, drain bolt, shock absorber, Air Conditioning Compressor, driver seat adjustment
