LEXUS LS430 2003 Factory Repair Manual
Manufacturer: LEXUS, Model Year: 2003,
Model line: LS430,
Model: LEXUS LS430 2003
Pages: 4500, PDF Size: 87.45 MB
LEXUS LS430 2003 Factory Repair Manual
LS430 2003
LEXUS
LEXUS
https://www.carmanualsonline.info/img/36/57050/w960_57050-0.png
LEXUS LS430 2003 Factory Repair Manual
Trending: automatic transmission, change key battery, rear view mirror, fuel cap, fuel consumption, park assist, AC Expansion Valve
Page 3871 of 4500
REPLACEMENT
HINT:
The installation procedures are the removal procedures in reverse order.
A bolt without torque specification is a standard bolt (see SPECIFIED TORQUE FOR STANDARD
BOLTS ).
1.REMOVE REAR COMBINATION LAMP SERVICE COVER RH (See OVERHAUL
)
2.REMOVE REAR COMBINATION LAMP SERVICE COVER LH (See OVERHAUL
)
3.REMOVE LUGGAGE COMPARTMENT LAMP ASSY NO. (See step 4 in OVERHAUL
)
4.REMOVE BACK DOOR TRIM COVER (See step 5 in OVERHAUL
)
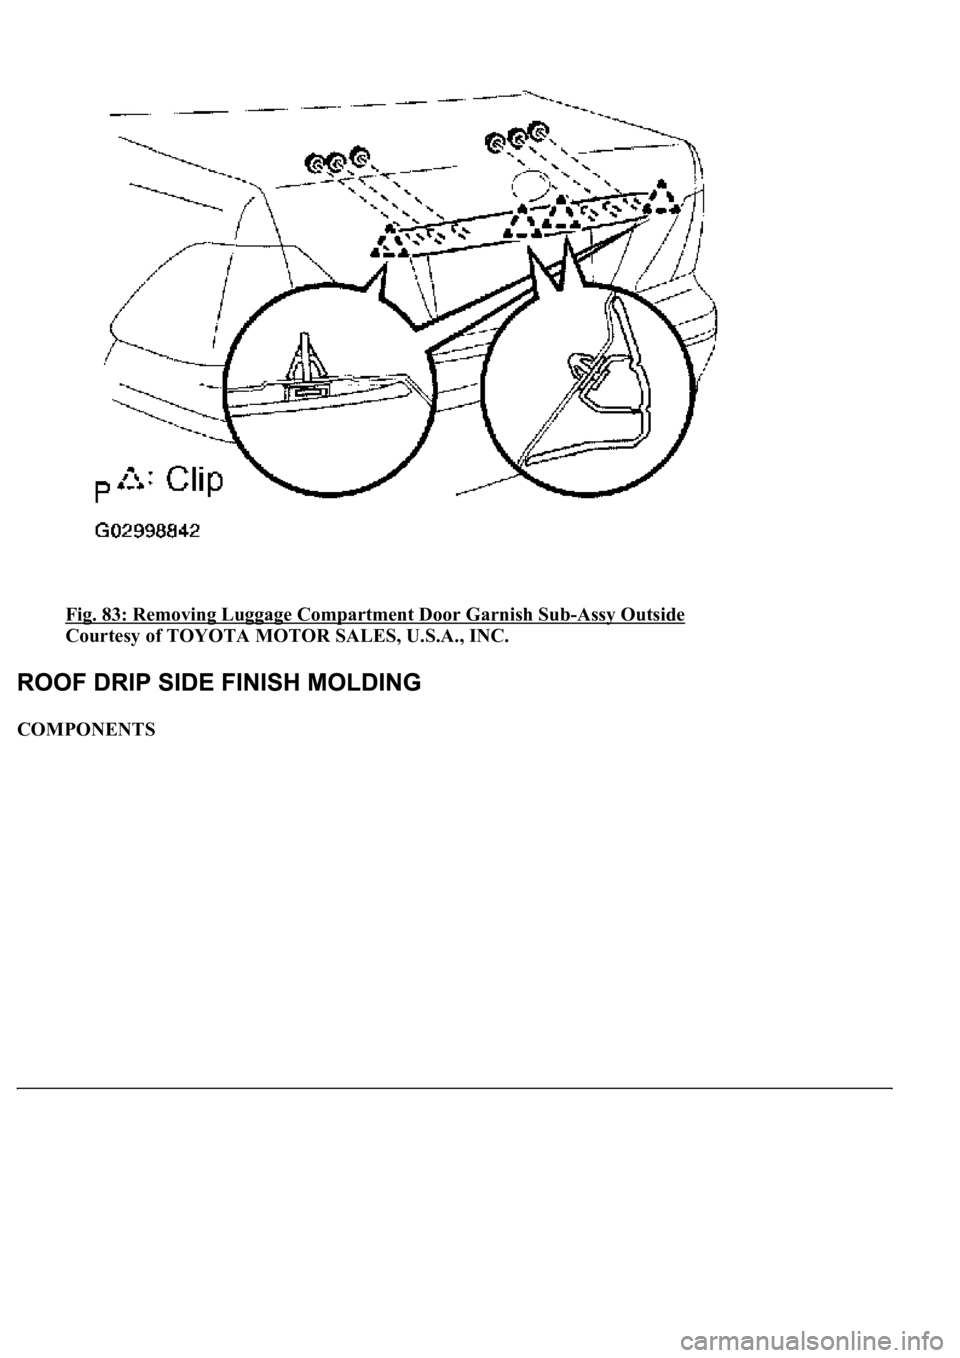
5.REMOVE LUGGAGE COMPARTMENT DOOR GARNISH SUB-ASSY OUTSIDE
a. Remove the 6 nuts and key cylinder. Then remove the luggage compartment door opener switch.
b.Disengage the 4 clips and remove the garnish from the luggage compartment door.
Page 3872 of 4500
Fig. 83: Removing Luggage Compartment Door Garnish Sub-Assy Outside
Courtesy of TOYOTA MOTOR SALES, U.S.A., INC.
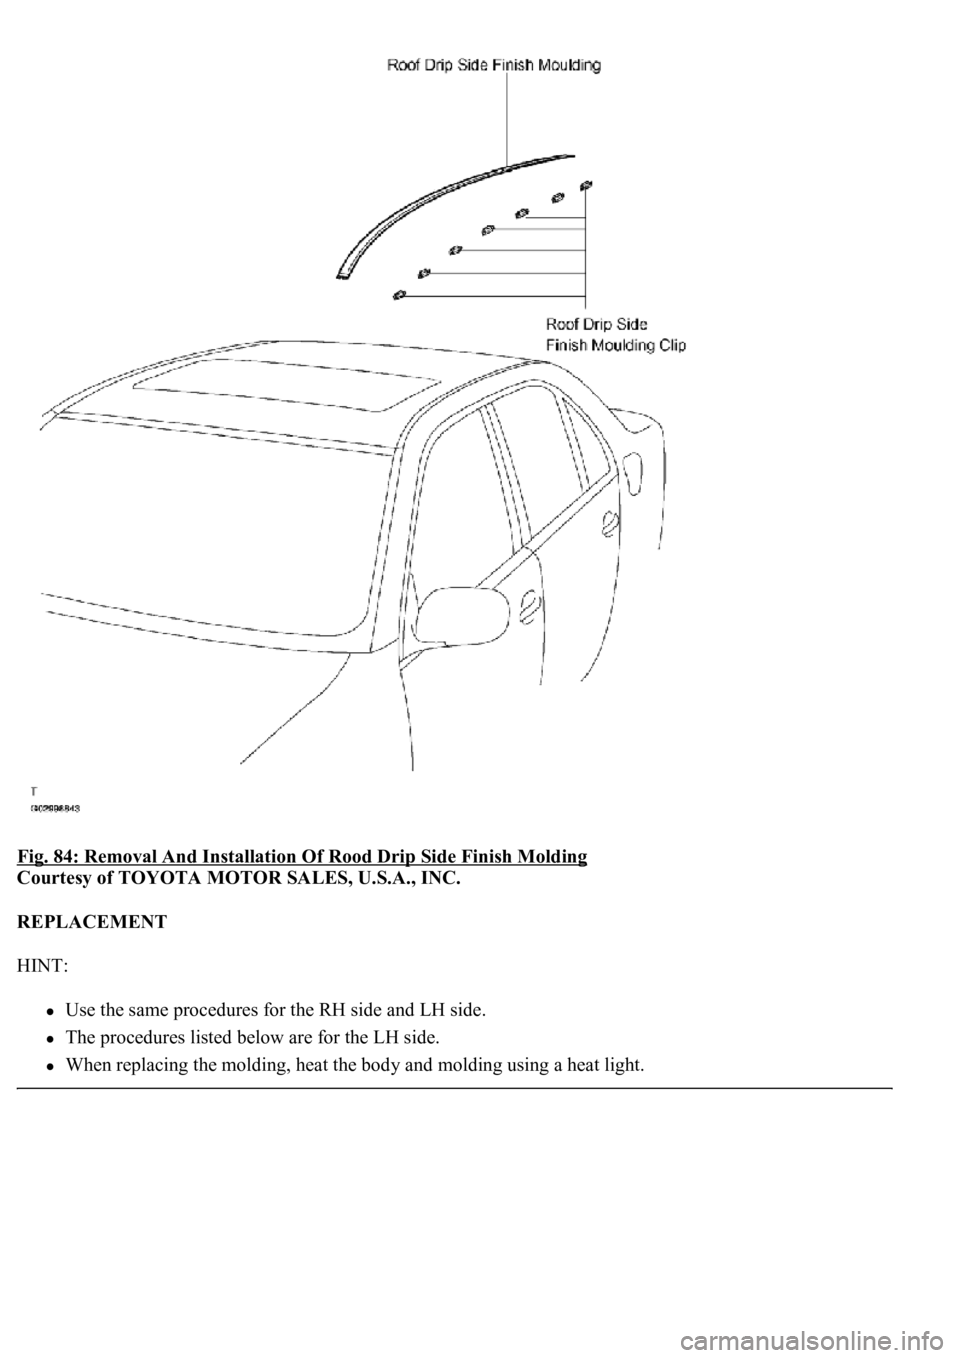
COMPONENTS
Page 3873 of 4500
Fig. 84: Removal And Installation Of Rood Drip Side Finish Molding
Courtesy of TOYOTA MOTOR SALES, U.S.A., INC.
REPLACEMENT
HINT:
Use the same procedures for the RH side and LH side.
The procedures listed below are for the LH side.
When replacing the molding, heat the body and molding using a heat light.
Page 3874 of 4500
HEATING TEMPERATURE CHART
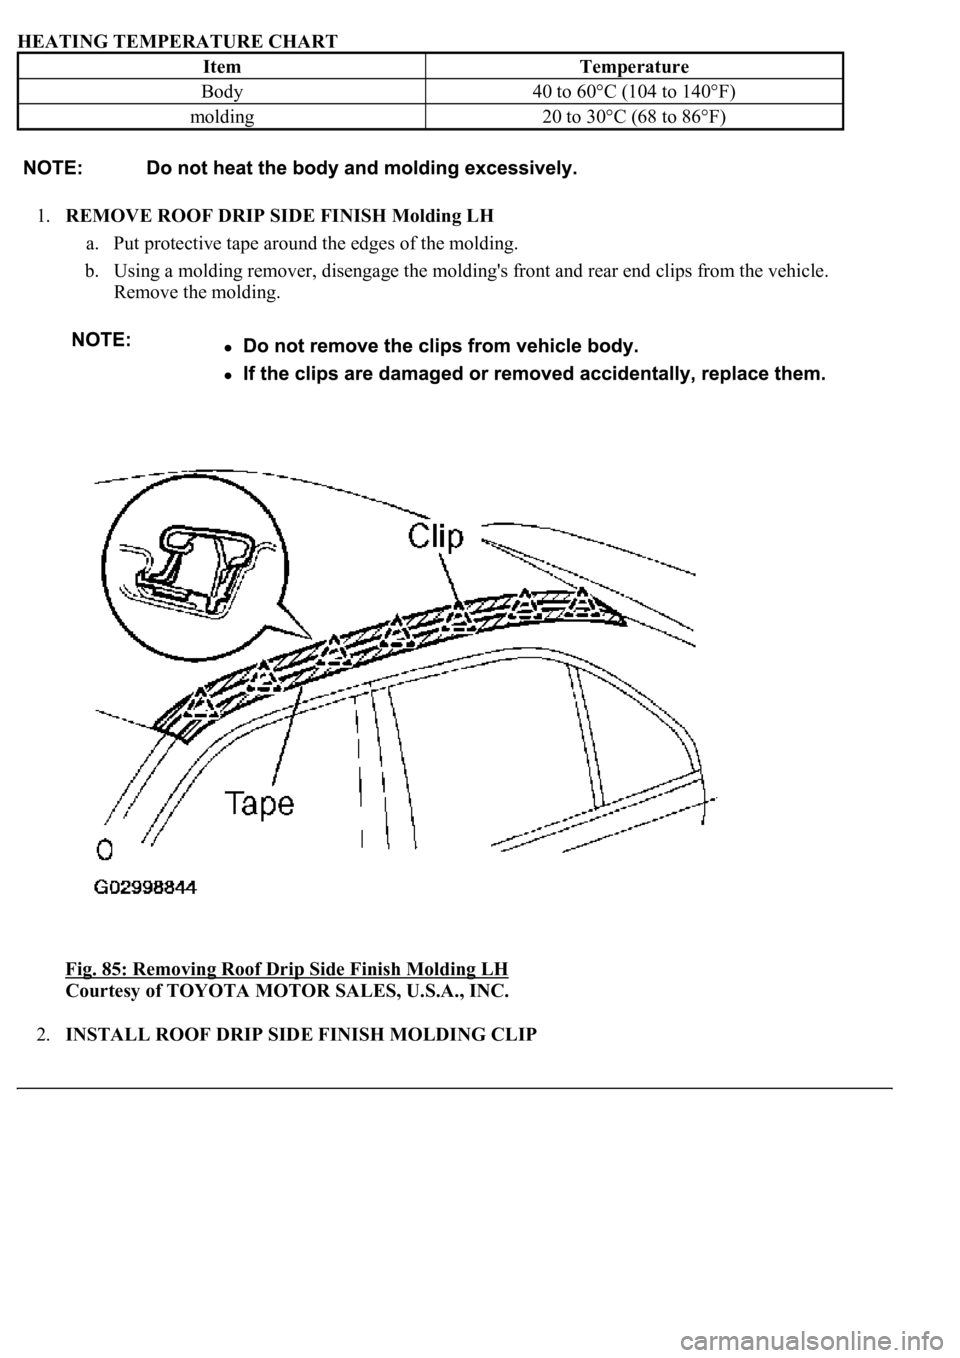
1.REMOVE ROOF DRIP SIDE FINISH Molding LH
a. Put protective tape around the edges of the molding.
b. Using a molding remover, disengage the molding's front and rear end clips from the vehicle.
Remove the molding.
Fig. 85: Removing Roof Drip Side Finish Molding LH
Courtesy of TOYOTA MOTOR SALES, U.S.A., INC.
2.INSTALL ROOF DRIP SIDE FINISH MOLDING CLIP
ItemTemperature
Body40 to 60°C (104 to 140°F)
molding20 to 30°C (68 to 86°F)
Page 3875 of 4500
Fig. 86: Installing Roof Drip Side Finish Molding Clip
Courtesy of TOYOTA MOTOR SALES, U.S.A., INC.
HINT:
Use the following steps (a) to (c) to replace damaged or accidentally removed clips. If not necessary, go
to step 3.
a. Remove the tape that remains on the mounting surface of the body, and then clean the surface with
white gasoline.
b. Heat the clip installation surfaces of the body and molding.
c. Install new clips in the positions shown in Fig. 86
. Press-fit the clips by hand.
HINT:
Minimum hardening time: 30 minutes
Time needed for complete hardening: 24 hours
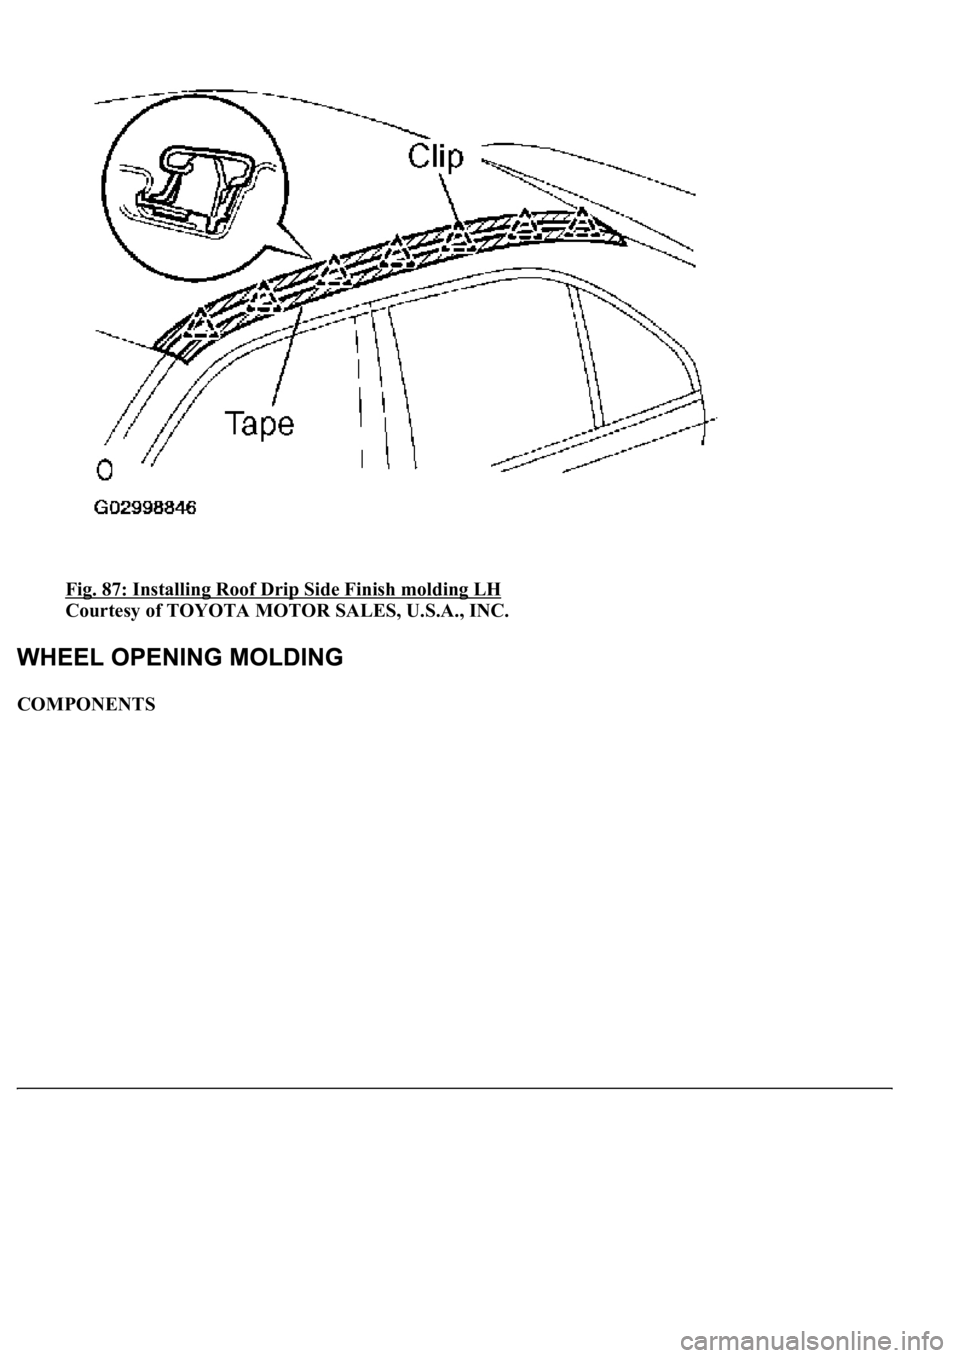
3.INSTALL ROOF DRIP SIDE FINISH MOLDING LH
a. Adjust the position of the molding so that the front and rear ends attach to the vehicle's clips, and
install the molding.
b. Remove the protective tape from the edge of the molding.
Page 3876 of 4500
Fig. 87: Installing Roof Drip Side Finish molding LH
Courtesy of TOYOTA MOTOR SALES, U.S.A., INC.
COMPONENTS
Page 3877 of 4500
Fig. 88: Removing And Installing Wheel Opening Molding
Courtesy of TOYOTA MOTOR SALES, U.S.A., INC.
REPLACEMENT
HINT:
The installation procedures are the removal procedures in reverse order.
Use the same procedures for the RH side and LH side.
The procedures listed below are for the LH side.
1.REMOVE FRONT FENDER WHEEL OPENING MOLDING LH
a. Remove the 4 screws and molding.
Page 3878 of 4500
Fig. 89: Removing Front Fender Wheel Opening Molding LH
Courtesy of TOYOTA MOTOR SALES, U.S.A., INC.
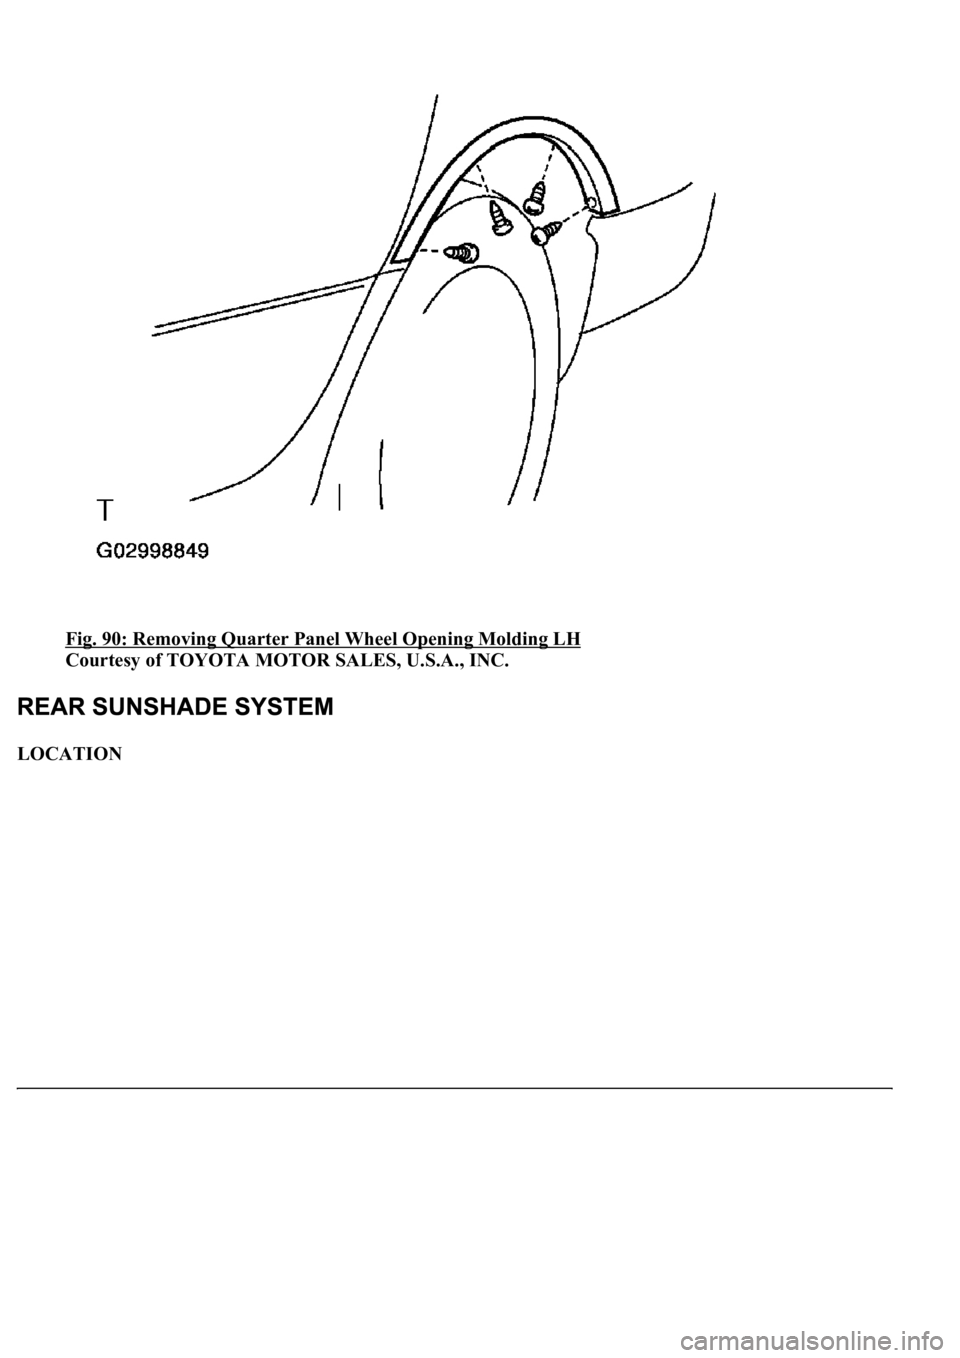
2.REMOVE QUARTER PANEL WHEEL OPENING MOLDING LH
a. Remove the 4 screws and molding.
Page 3879 of 4500
Fig. 90: Removing Quarter Panel Wheel Opening Molding LH
Courtesy of TOYOTA MOTOR SALES, U.S.A., INC.
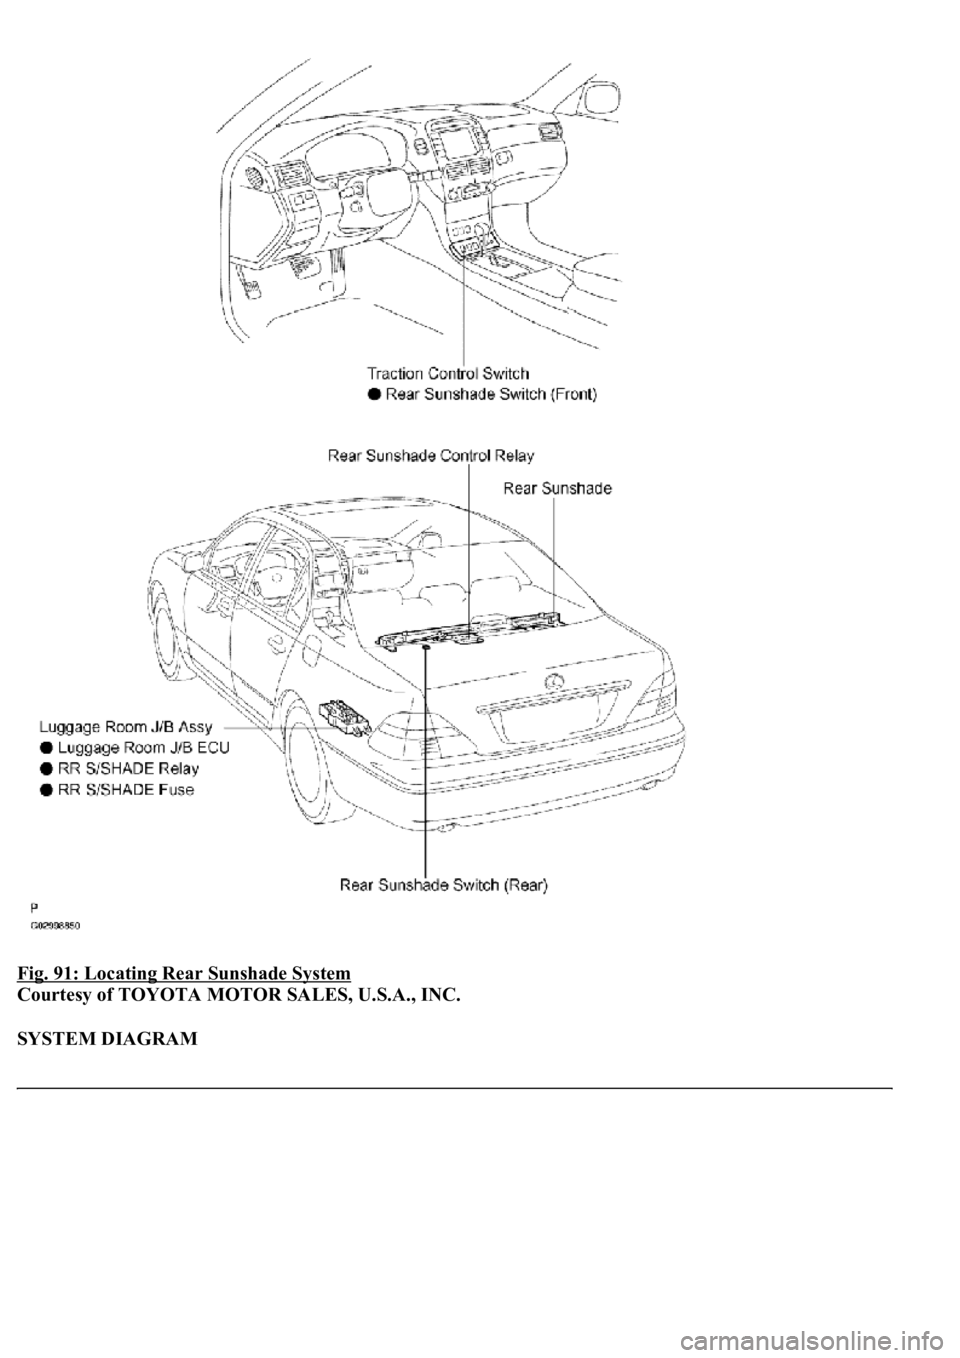
LOCATION
Page 3880 of 4500
Fig. 91: Locating Rear Sunshade System
Courtesy of TOYOTA MOTOR SALES, U.S.A., INC.
SYSTEM DIAGRAM
Trending: air condition, torque, change key battery, Spark plug, suspension, ESP, Bean
