LEXUS LS430 2003 Factory Repair Manual
Manufacturer: LEXUS, Model Year: 2003,
Model line: LS430,
Model: LEXUS LS430 2003
Pages: 4500, PDF Size: 87.45 MB
LEXUS LS430 2003 Factory Repair Manual
LS430 2003
LEXUS
LEXUS
https://www.carmanualsonline.info/img/36/57050/w960_57050-0.png
LEXUS LS430 2003 Factory Repair Manual
Trending: key battery, steering interlock cable, alarm, oxygen sensor, gas type, trip computer, Absorber suspension
Page 4121 of 4500
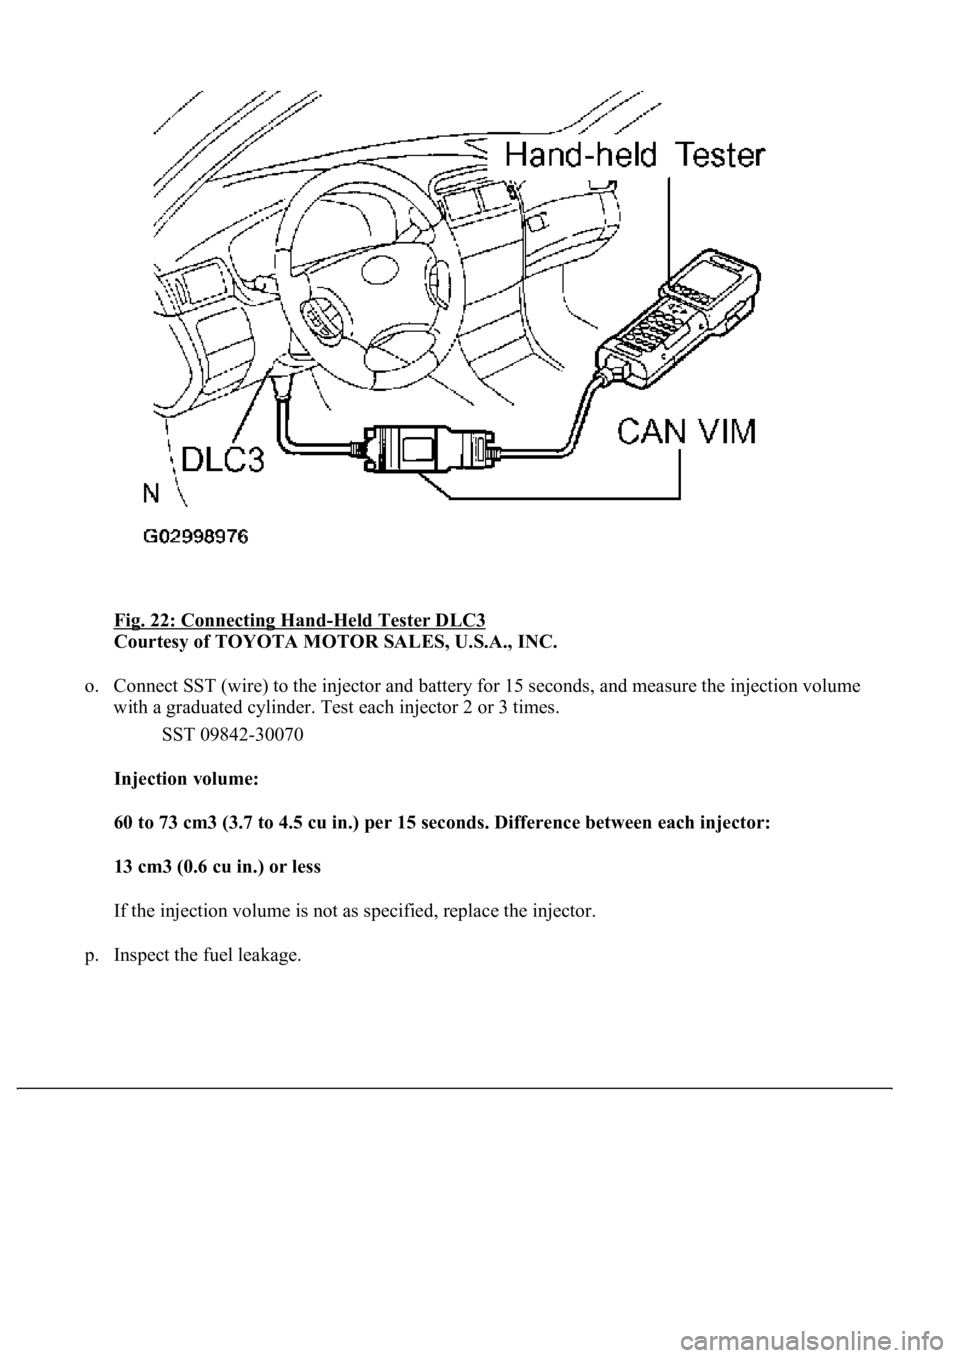
Fig. 22: Connecting Hand-Held Tester DLC3
Courtesy of TOYOTA MOTOR SALES, U.S.A., INC.
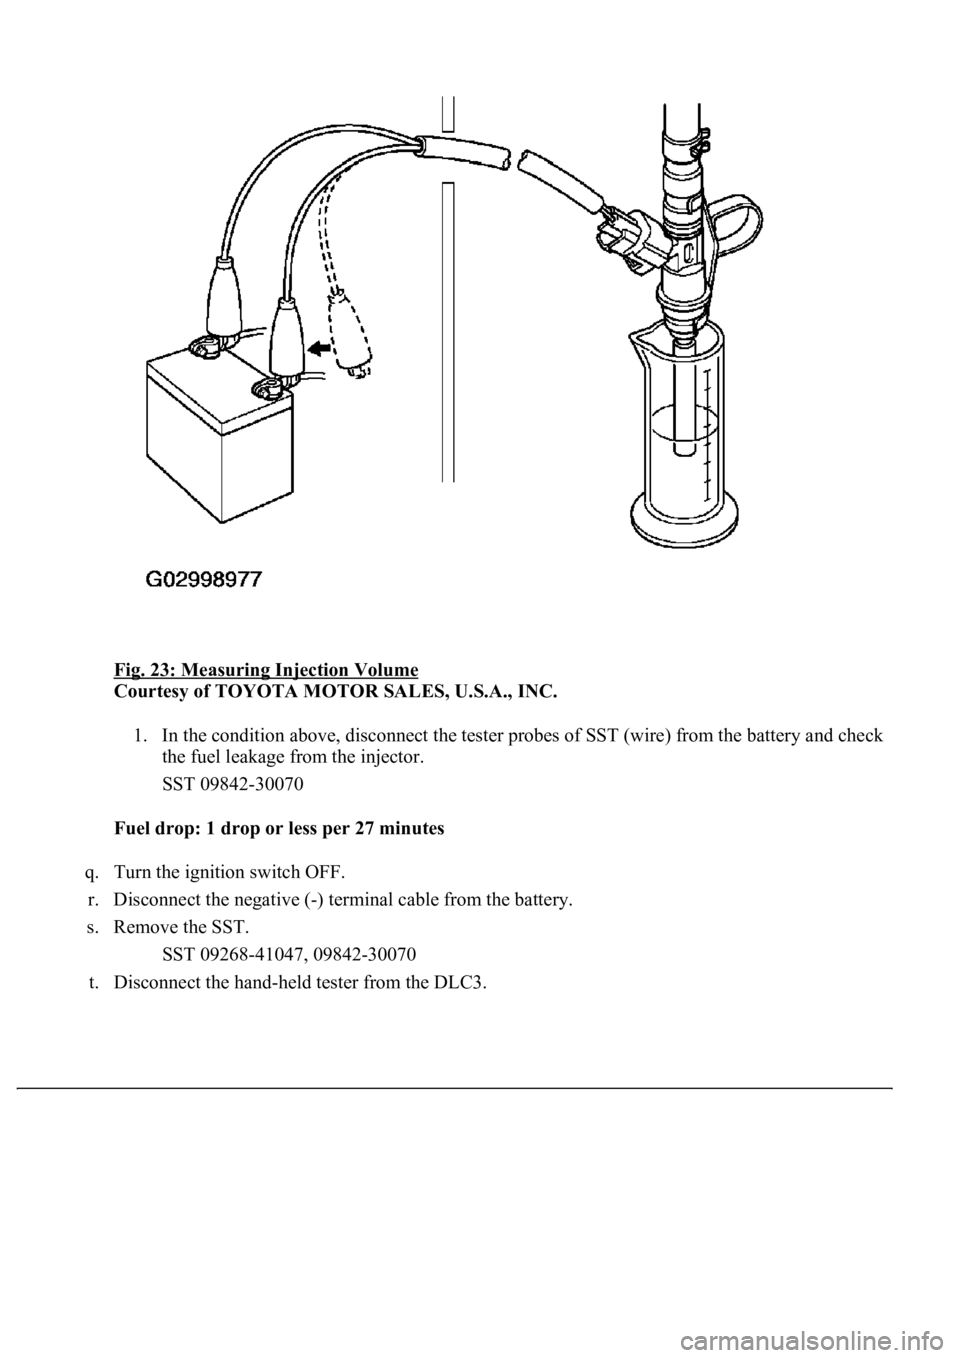
o. Connect SST (wire) to the injector and battery for 15 seconds, and measure the injection volume
with a graduated cylinder. Test each injector 2 or 3 times.
SST 09842-30070
Injection volume:
60 to 73 cm3 (3.7 to 4.5 cu in.) per 15 seconds. Difference between each injector:
13 cm3 (0.6 cu in.) or less
If the injection volume is not as specified, replace the injector.
p. Inspect the fuel leaka
ge.
Page 4122 of 4500
Fig. 23: Measuring Injection Volume
Courtesy of TOYOTA MOTOR SALES, U.S.A., INC.
1. In the condition above, disconnect the tester probes of SST (wire) from the battery and check
the fuel leakage from the injector.
SST 09842-30070
Fuel drop: 1 drop or less per 27 minutes
q. Turn the ignition switch OFF.
r. Disconnect the negative (-) terminal cable from the battery.
s. Remove the SST.
SST 09268-41047, 09842-30070
t. Disconnect the han
d-held tester from the DLC3.
Page 4123 of 4500
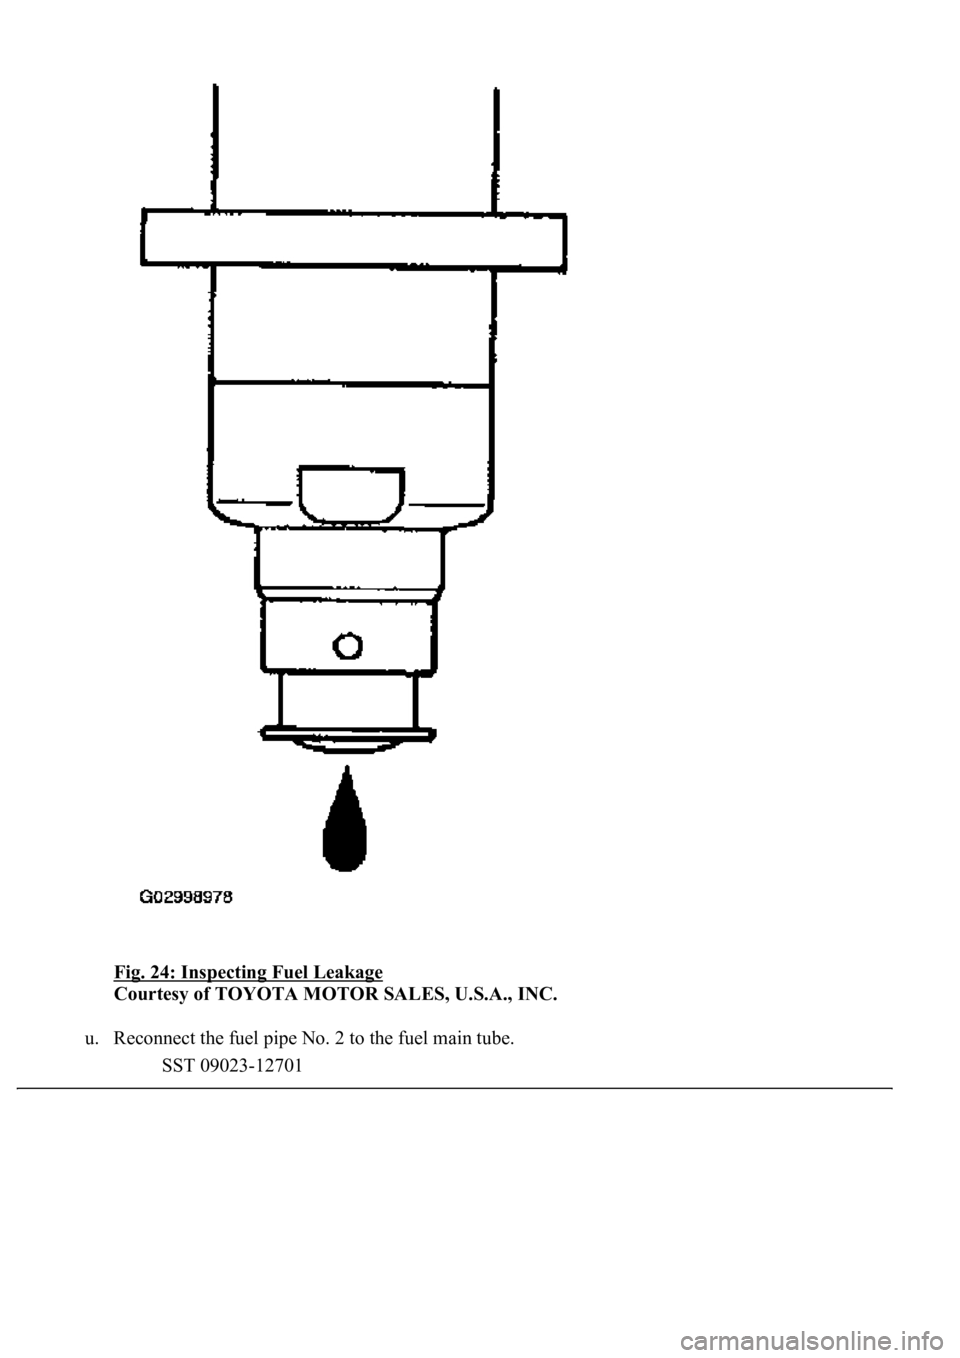
Fig. 24: Inspecting Fuel Leakage
Courtesy of TOYOTA MOTOR SALES, U.S.A., INC.
u. Reconnect the fuel pipe No. 2 to the fuel main tube.
SST 09023-12701
Page 4124 of 4500
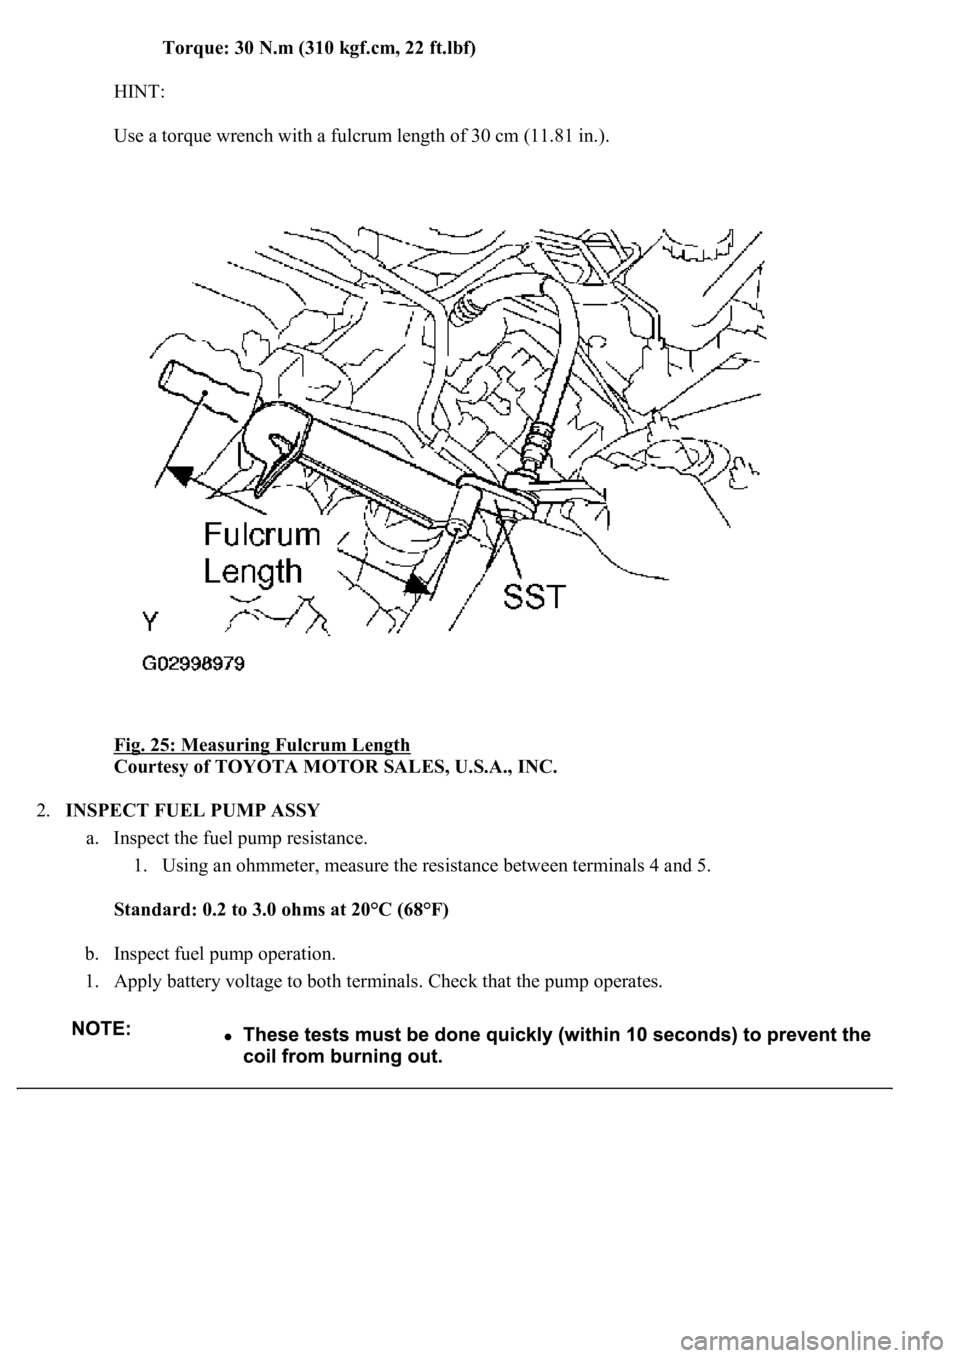
Torque: 30 N.m (310 kgf.cm, 22 ft.lbf)
HINT:
Use a torque wrench with a fulcrum length of 30 cm (11.81 in.).
Fig. 25: Measuring Fulcrum Length
Courtesy of TOYOTA MOTOR SALES, U.S.A., INC.
2.INSPECT FUEL PUMP ASSY
a. Inspect the fuel pump resistance.
1. Using an ohmmeter, measure the resistance between terminals 4 and 5.
Standard: 0.2 to 3.0 ohms at 20°C (68°F)
b. Inspect fuel pump operation.
1. Apply battery voltage to both terminals. Check that the pump operates.
Page 4125 of 4500
<0029004c004a0011000300150019001d0003003000480044005600580055004c0051004a0003003500480056004c0056005700440051004600480003002500480057005a00480048005100030037004800550050004c00510044004f005600030017000300
240051004700030018[
Courtesy of TOYOTA MOTOR SALES, U.S.A., INC.
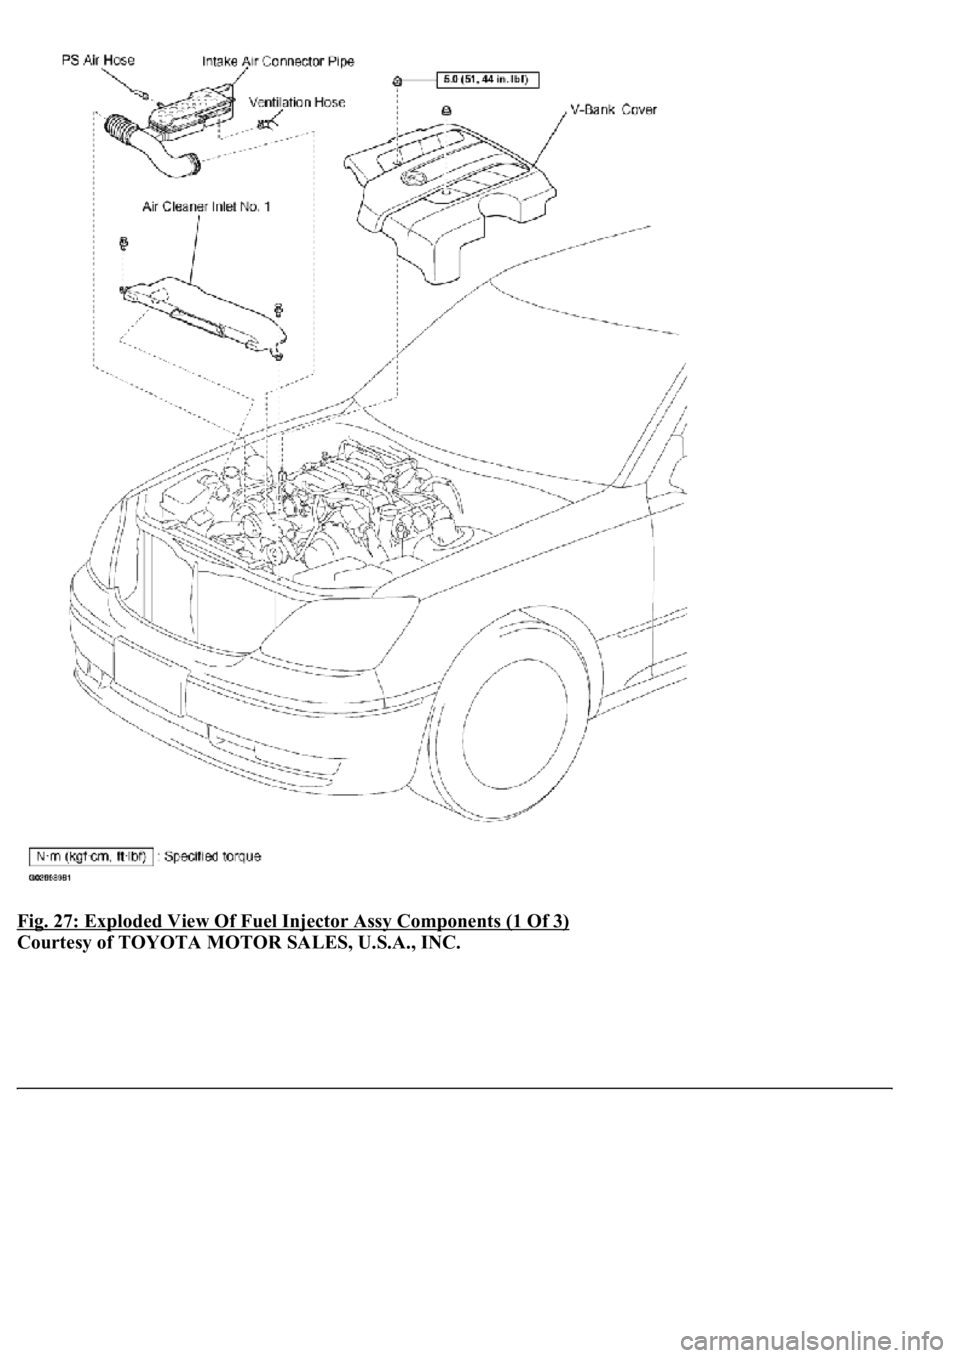
COMPONENTS
Page 4126 of 4500
Fig. 27: Exploded View Of Fuel Injector Assy Components (1 Of 3)
Courtesy of TOYOTA MOTOR SALES, U.S.A., INC.
Page 4127 of 4500
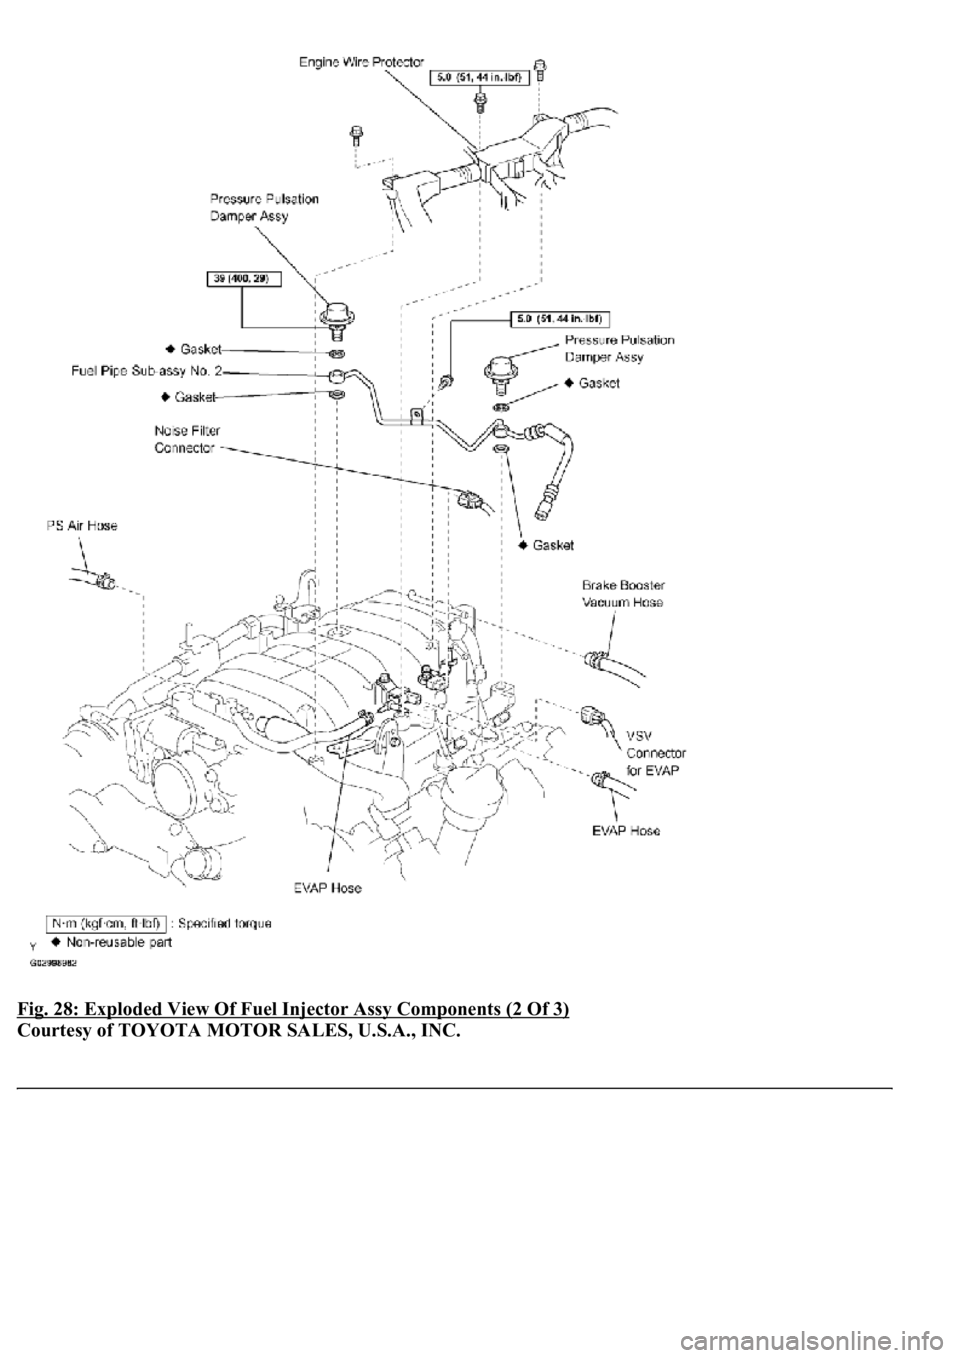
Fig. 28: Exploded View Of Fuel Injector Assy Components (2 Of 3)
Courtesy of TOYOTA MOTOR SALES, U.S.A., INC.
Page 4128 of 4500
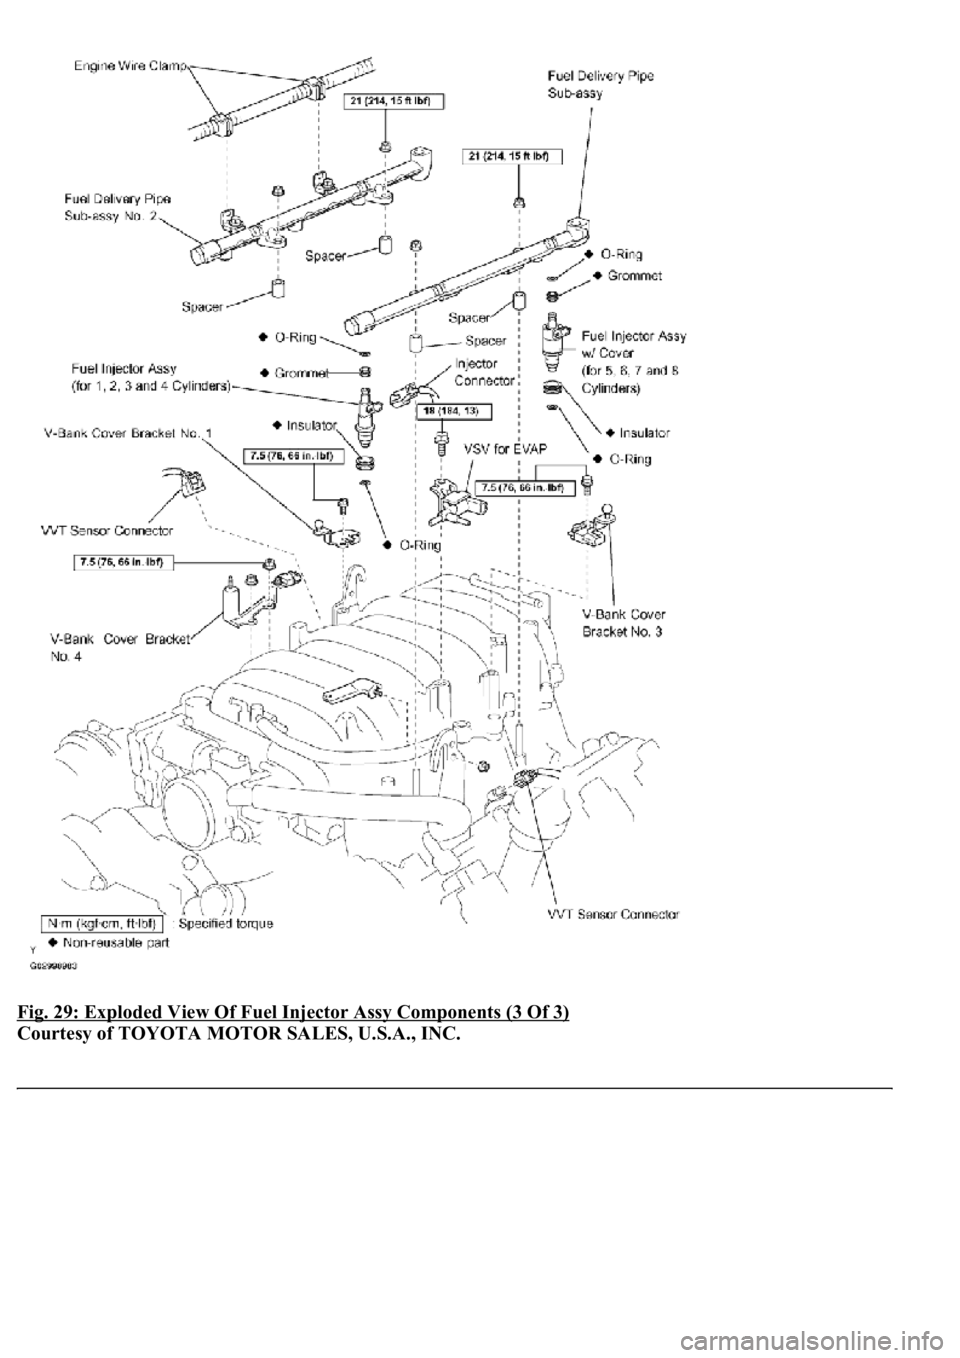
Fig. 29: Exploded View Of Fuel Injector Assy Components (3 Of 3)
Courtesy of TOYOTA MOTOR SALES, U.S.A., INC.
Page 4129 of 4500
REPLACEMENT
1.WORK FOR PREVENTING GASOLINE FROM SPILLING OUT (See PRECAUTION
)
2.DISCONNECT BATTERY NEGATIVE TERMINAL
3.REMOVE V-BANK COVER
a. Remove the 2 nuts and V-bank cover.
4.REMOVE AIR CLEANER INLET NO.1
5.REMOVE INTAKE AIR CONNECTOR PIPE
a. Disconnect the air hose and ventilation hose No. 1.
b. Loosen the hose clamp.
c. Remove the bolt and intake air connector pipe.
6.REMOVE V-BANK COVER BRACKET NO.1
7.REMOVE V-BANK COVER BRACKET NO.2
8.REMOVE V-BANK COVER BRACKET NO.3
9.REMOVE V-VANK COVER BRACKET NO.4
10.REMOVE VACUUM SWITCHING VALVE ASSY
11.DISCONNECT ENGINE WIRE
Page 4130 of 4500
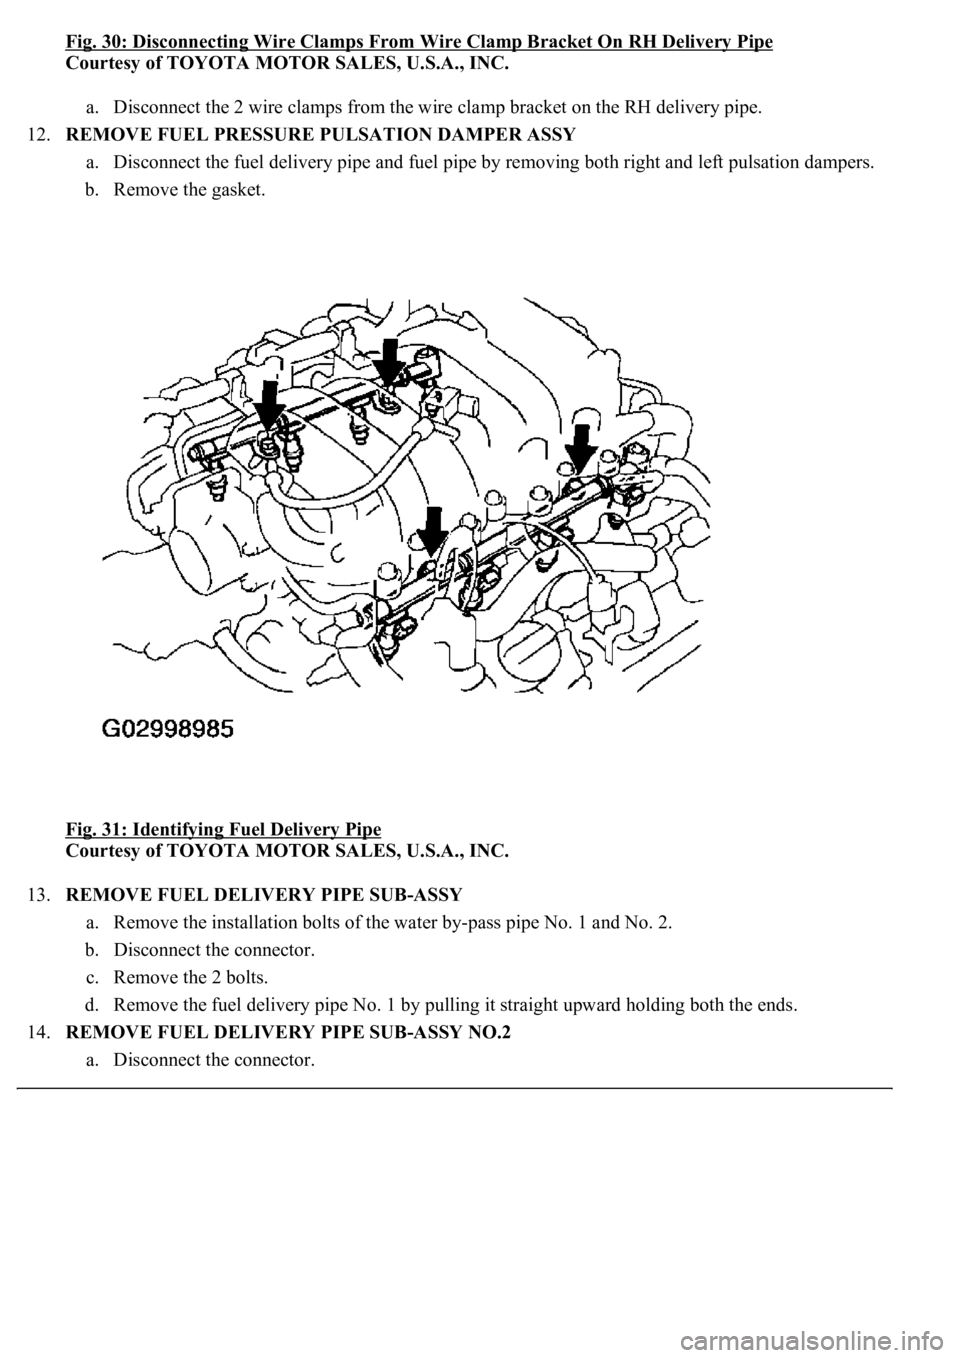
Fig. 30: Disconnecting Wire Clamps From Wire Clamp Bracket On RH Delivery Pipe
Courtesy of TOYOTA MOTOR SALES, U.S.A., INC.
a. Disconnect the 2 wire clamps from the wire clamp bracket on the RH delivery pipe.
12.REMOVE FUEL PRESSURE PULSATION DAMPER ASSY
a. Disconnect the fuel delivery pipe and fuel pipe by removing both right and left pulsation dampers.
b. Remove the gasket.
Fig. 31: Identifying Fuel Delivery Pipe
Courtesy of TOYOTA MOTOR SALES, U.S.A., INC.
13.REMOVE FUEL DELIVERY PIPE SUB-ASSY
a. Remove the installation bolts of the water by-pass pipe No. 1 and No. 2.
b. Disconnect the connector.
c. Remove the 2 bolts.
d. Remove the fuel delivery pipe No. 1 by pulling it straight upward holding both the ends.
14.REMOVE FUEL DELIVERY PIPE SUB-ASSY NO.2
a. Disconnect the connector.
Trending: back seat removal, drain bolt, Spark plug, radio antenna, head, TPMS, warning light
