LEXUS LS430 2003 Factory Repair Manual
Manufacturer: LEXUS, Model Year: 2003,
Model line: LS430,
Model: LEXUS LS430 2003
Pages: 4500, PDF Size: 87.45 MB
LEXUS LS430 2003 Factory Repair Manual
LS430 2003
LEXUS
LEXUS
https://www.carmanualsonline.info/img/36/57050/w960_57050-0.png
LEXUS LS430 2003 Factory Repair Manual
Trending: wheel torque, seats, roof, Suspension Control actuator, air conditioning, cruise control, headlamp
Page 861 of 4500
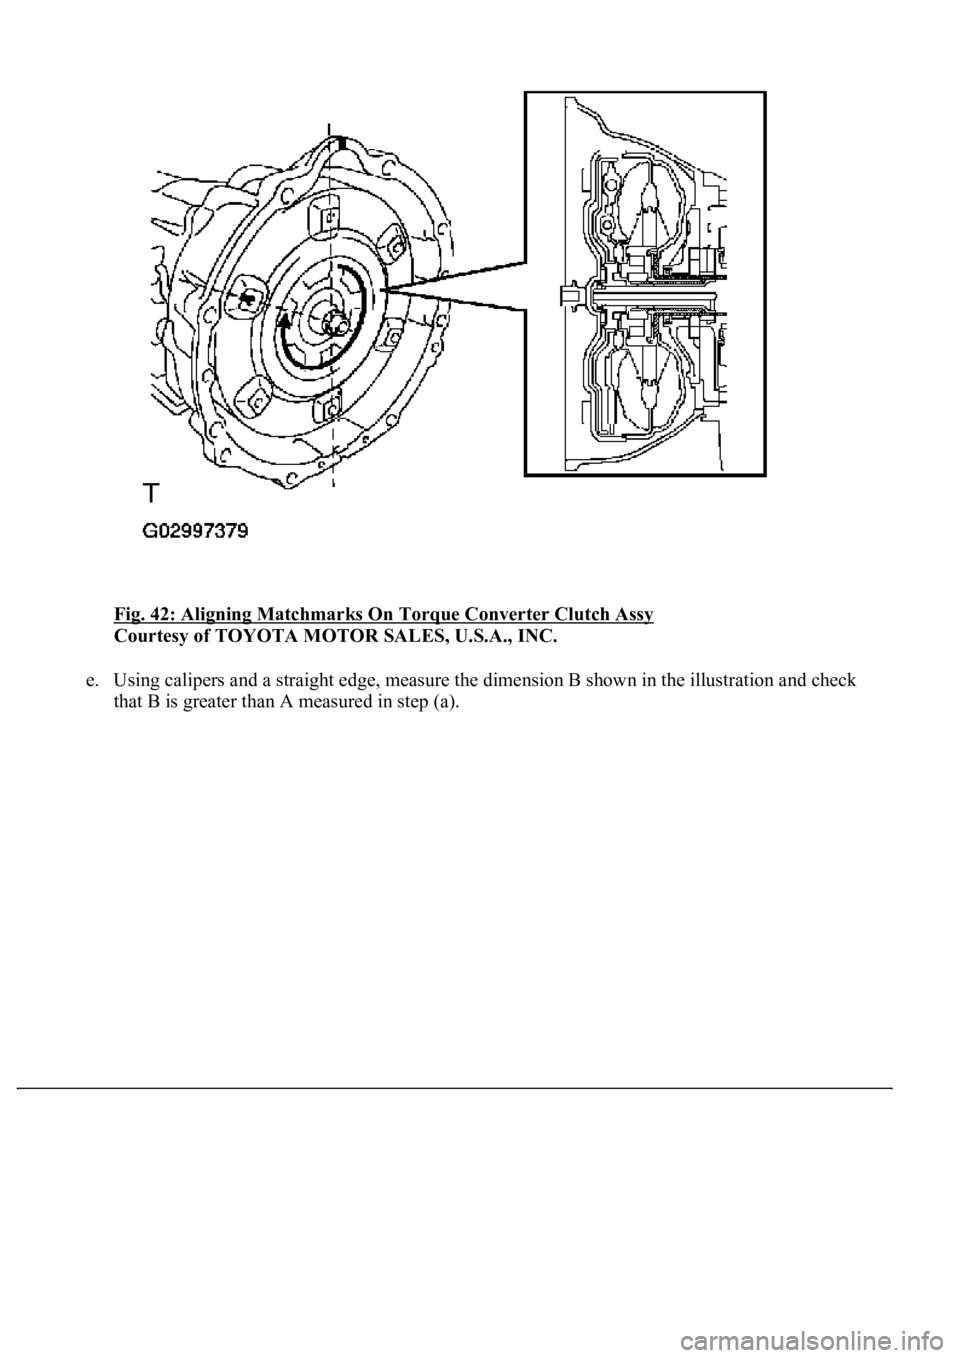
Fig. 42: Aligning Matchmarks On Torque Converter Clutch Assy
Courtesy of TOYOTA MOTOR SALES, U.S.A., INC.
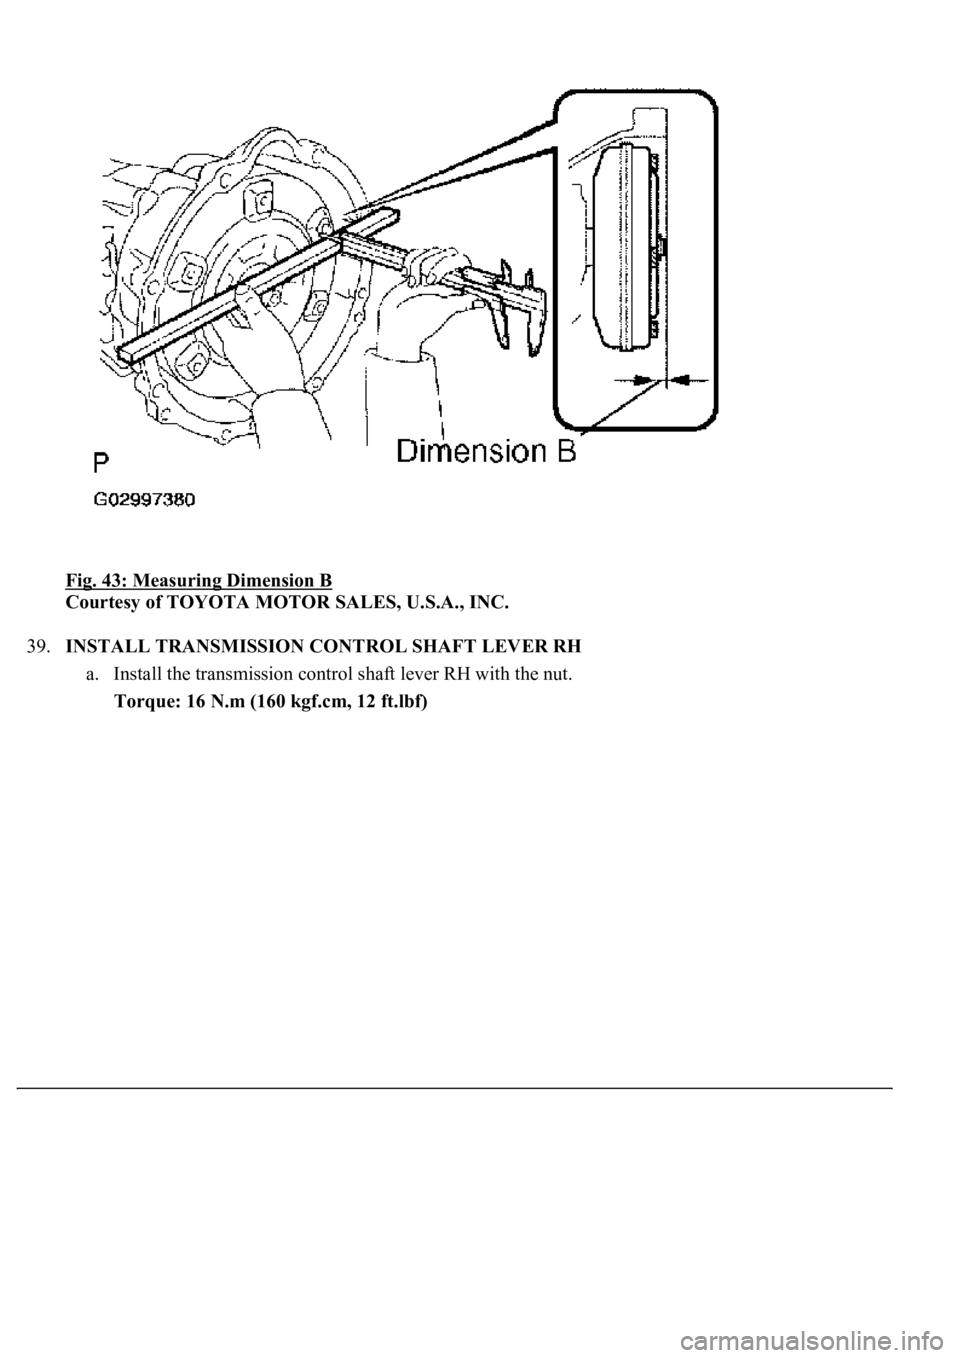
e. Using calipers and a straight edge, measure the dimension B shown in the illustration and check
that B is
greater than A measured in step (a).
Page 862 of 4500
Fig. 43: Measuring Dimension B
Courtesy of TOYOTA MOTOR SALES, U.S.A., INC.
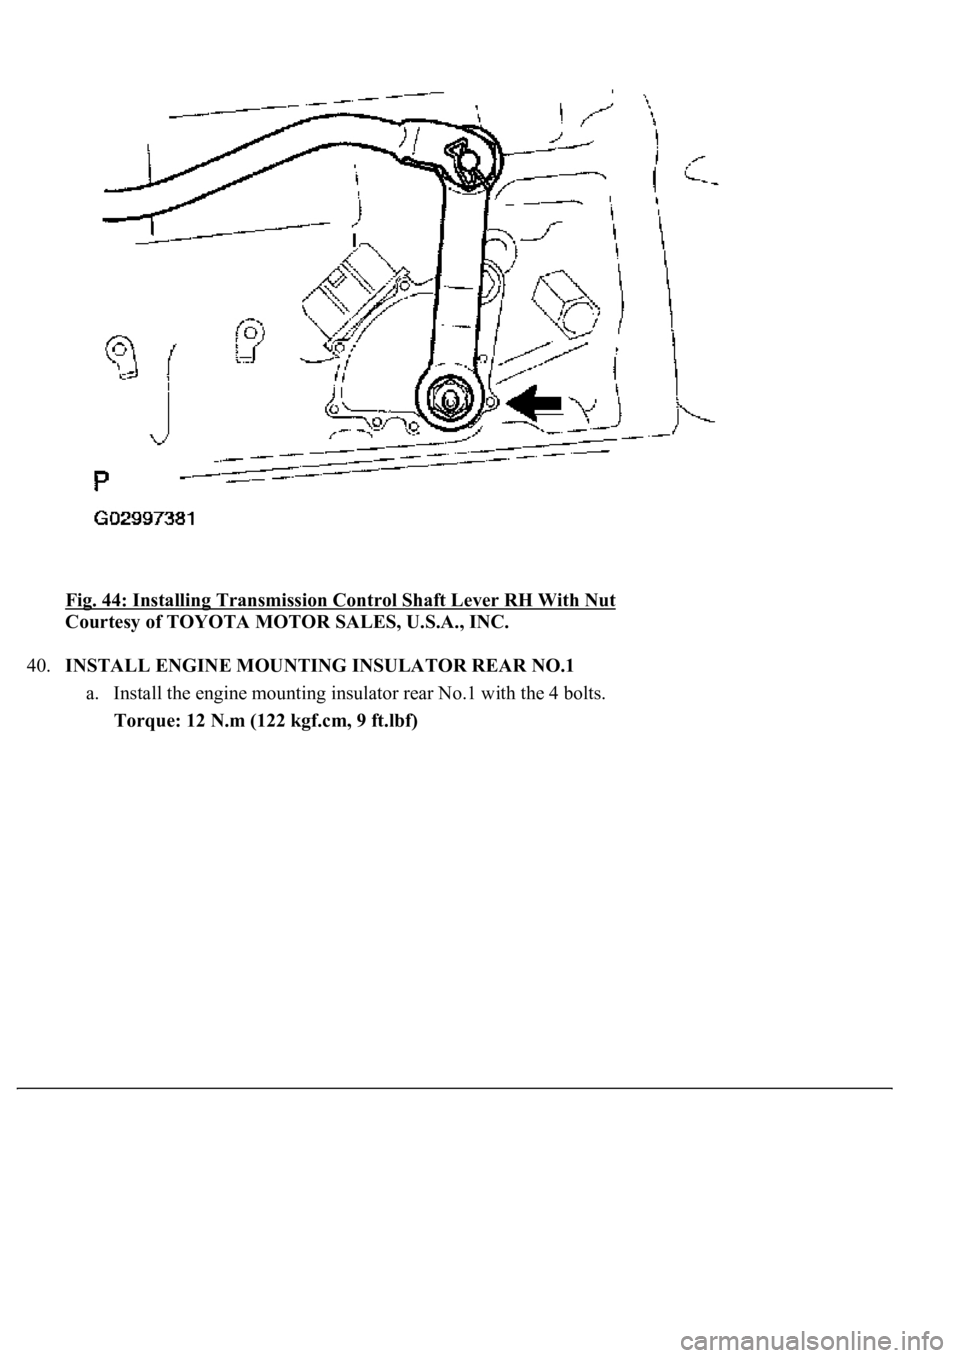
39.INSTALL TRANSMISSION CONTROL SHAFT LEVER RH
a. Install the transmission control shaft lever RH with the nut.
Torque: 16 N.m (160 kgf.cm, 12 ft.lbf)
Page 863 of 4500
Fig. 44: Installing Transmission Control Shaft Lever RH With Nut
Courtesy of TOYOTA MOTOR SALES, U.S.A., INC.
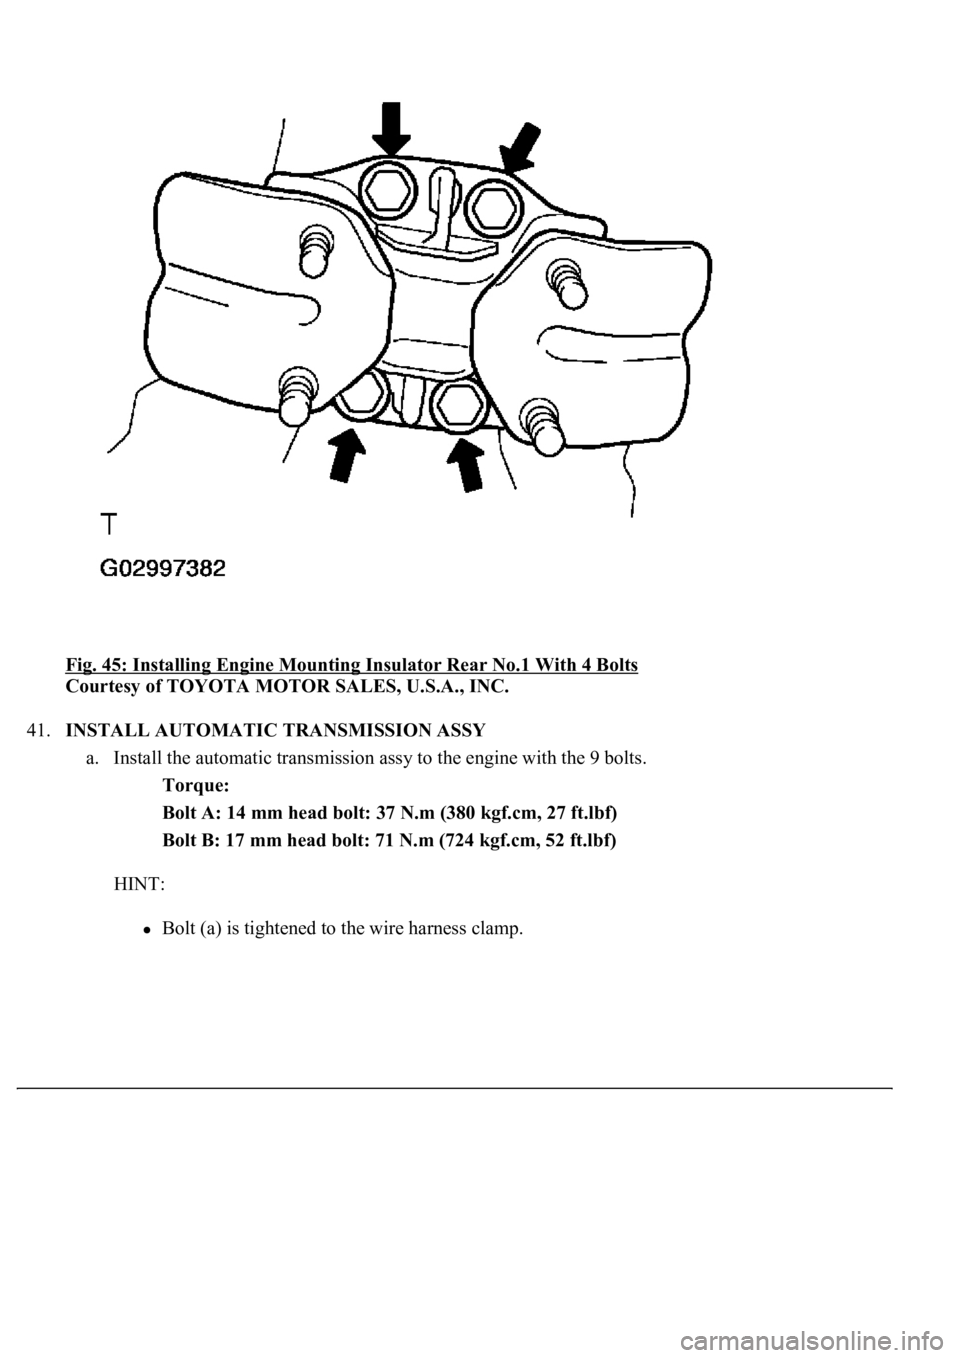
40.INSTALL ENGINE MOUNTING INSULATOR REAR NO.1
a. Install the engine mounting insulator rear No.1 with the 4 bolts.
Torque: 12 N.m (122 kgf.cm, 9 ft.lbf)
Page 864 of 4500
Fig. 45: Installing Engine Mounting Insulator Rear No.1 With 4 Bolts
Courtesy of TOYOTA MOTOR SALES, U.S.A., INC.
41.INSTALL AUTOMATIC TRANSMISSION ASSY
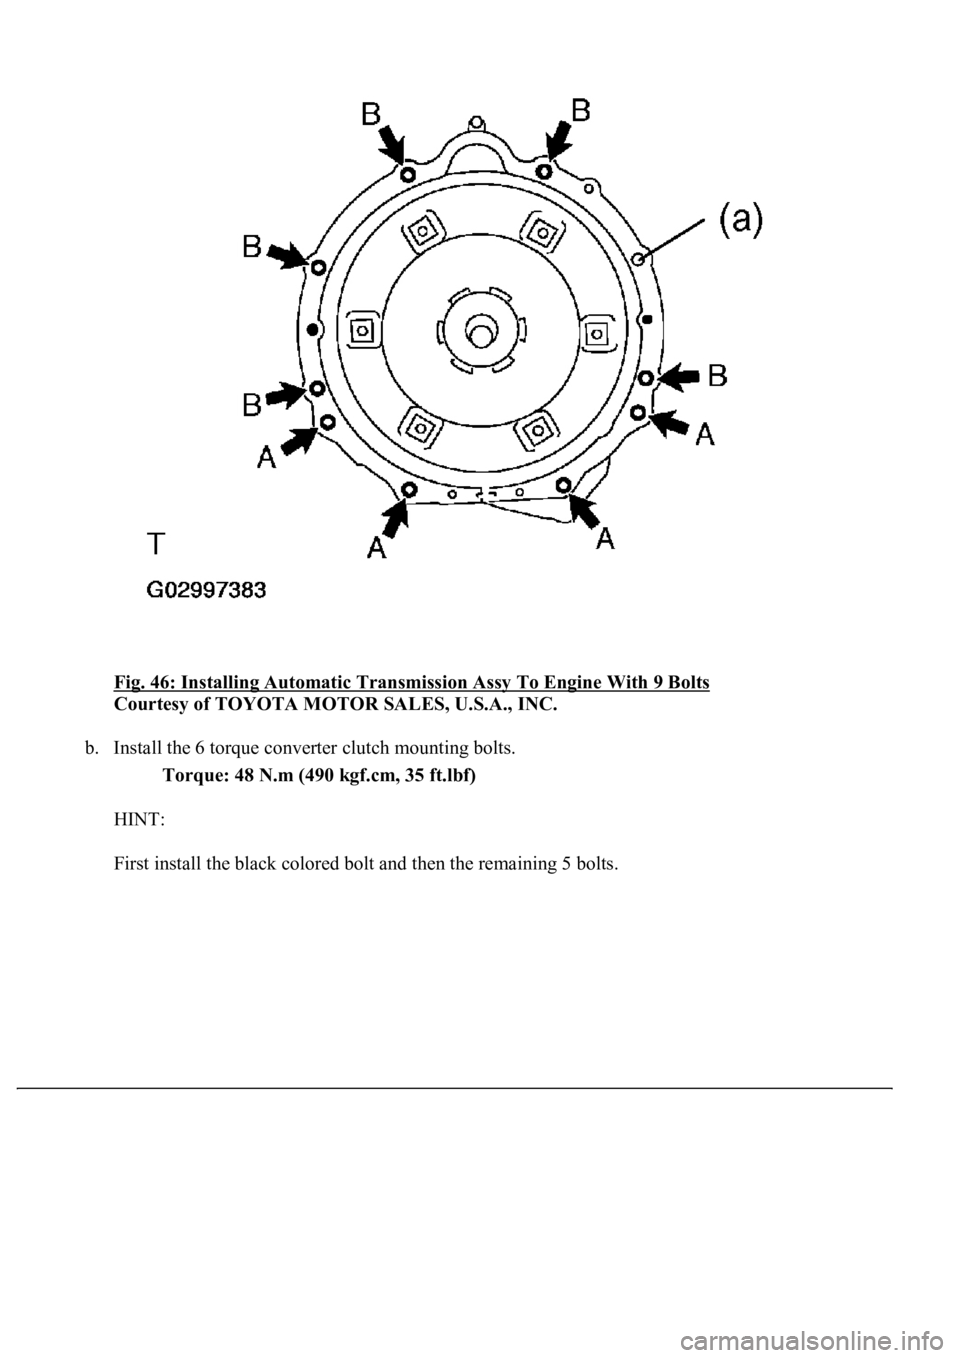
a. Install the automatic transmission assy to the engine with the 9 bolts.
Torque:
Bolt A: 14 mm head bolt: 37 N.m (380 kgf.cm, 27 ft.lbf)
Bolt B: 17 mm head bolt: 71 N.m (724 kgf.cm, 52 ft.lbf)
HINT:
Bolt (a) is tightened to the wire harness clamp.
Page 865 of 4500
Fig. 46: Installing Automatic Transmission Assy To Engine With 9 Bolts
Courtesy of TOYOTA MOTOR SALES, U.S.A., INC.
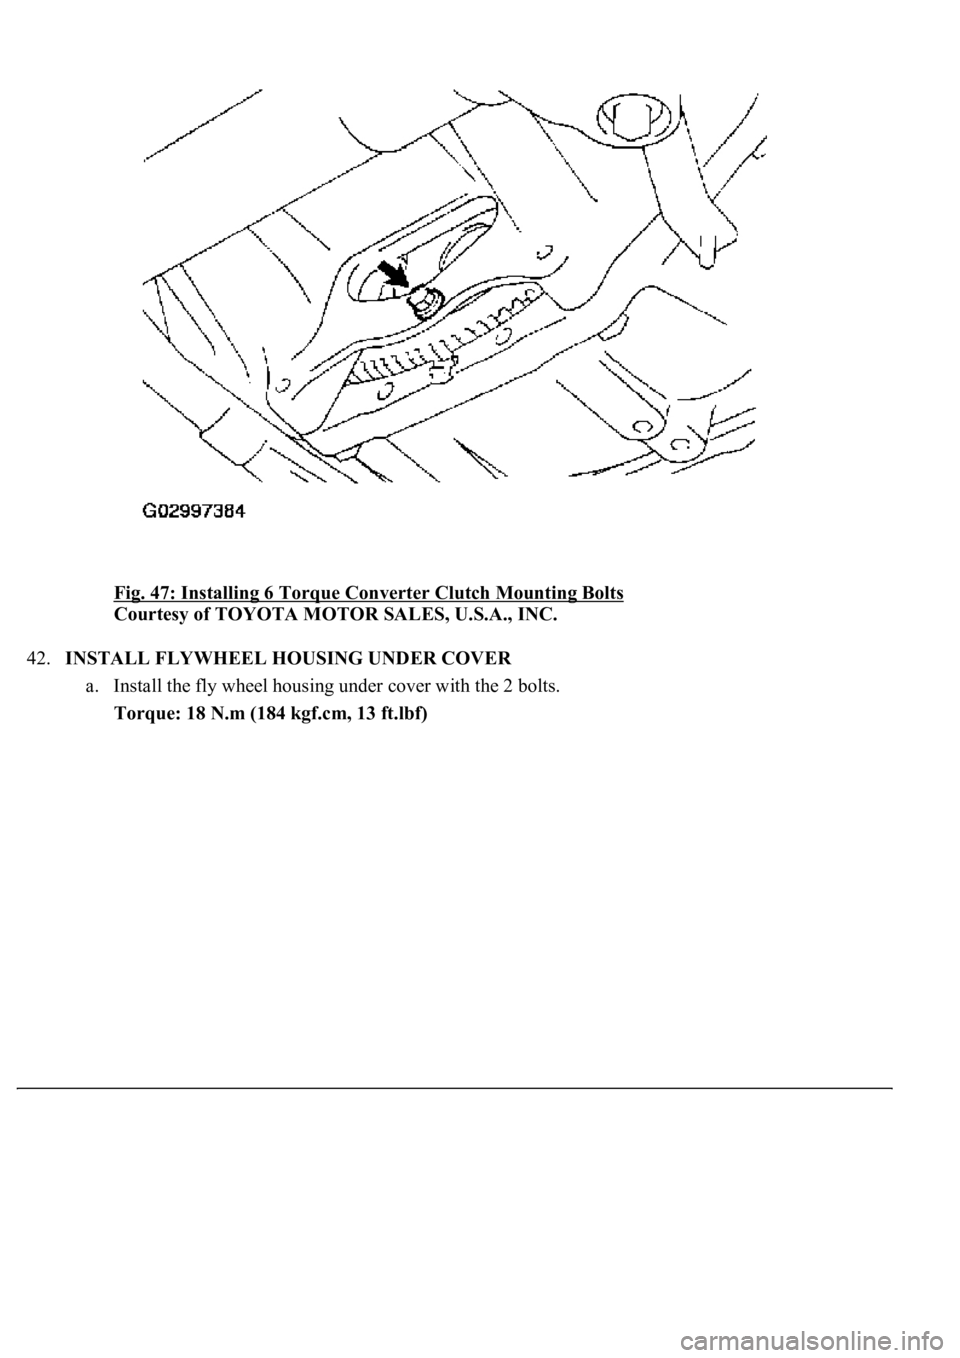
b. Install the 6 torque converter clutch mounting bolts.
Torque: 48 N.m (490 kgf.cm, 35 ft.lbf)
HINT:
First install the black colored bolt and then the remainin
g 5 bolts.
Page 866 of 4500
Fig. 47: Installing 6 Torque Converter Clutch Mounting Bolts
Courtesy of TOYOTA MOTOR SALES, U.S.A., INC.
42.INSTALL FLYWHEEL HOUSING UNDER COVER
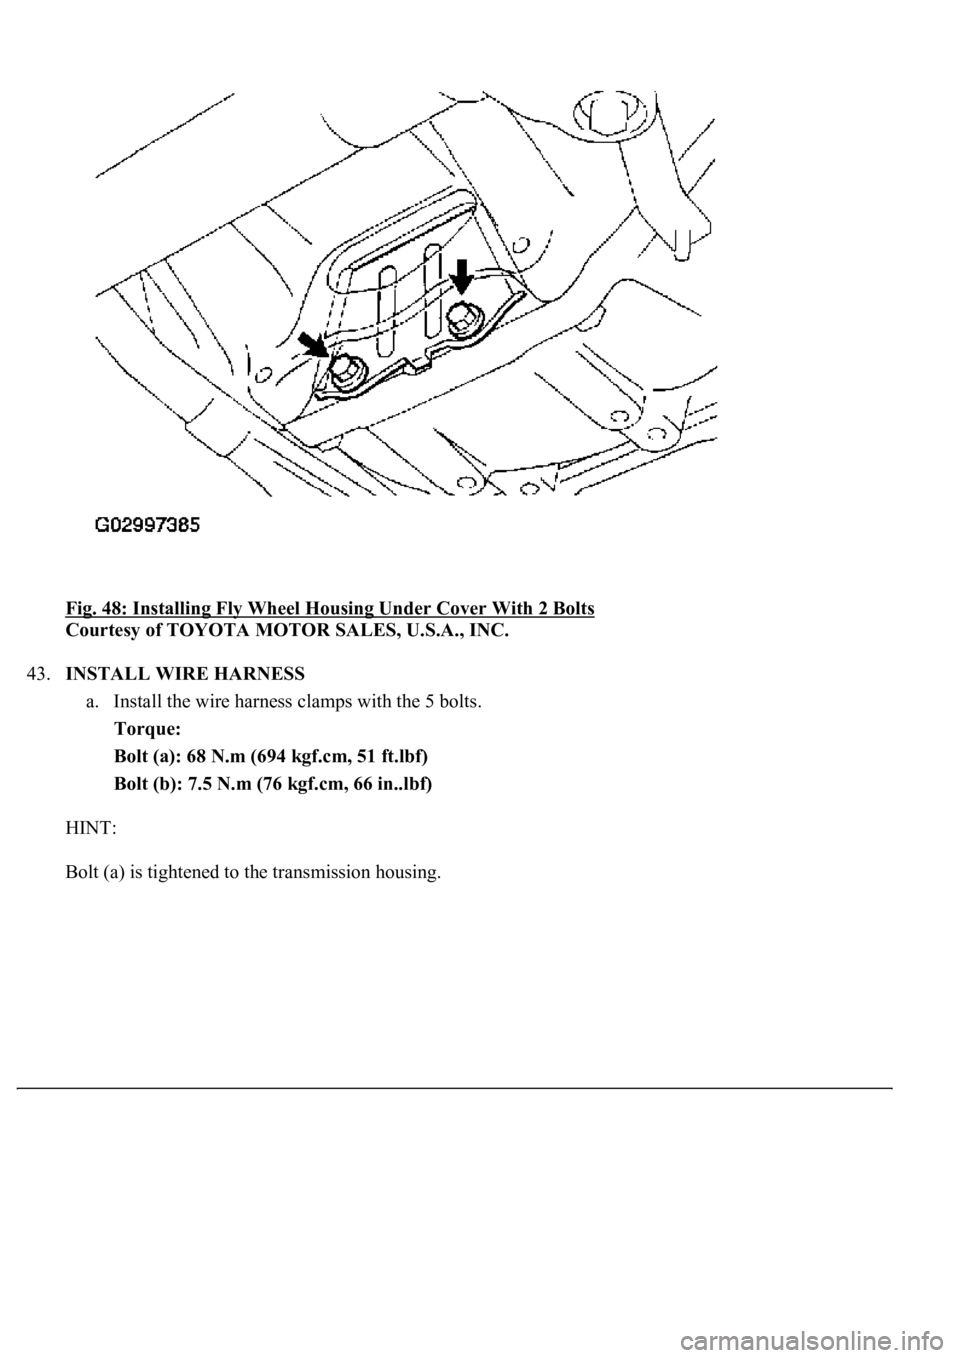
a. Install the fly wheel housing under cover with the 2 bolts.
Torque: 18 N.m (184 kgf.cm, 13 ft.lbf)
Page 867 of 4500
Fig. 48: Installing Fly Wheel Housing Under Cover With 2 Bolts
Courtesy of TOYOTA MOTOR SALES, U.S.A., INC.
43.INSTALL WIRE HARNESS
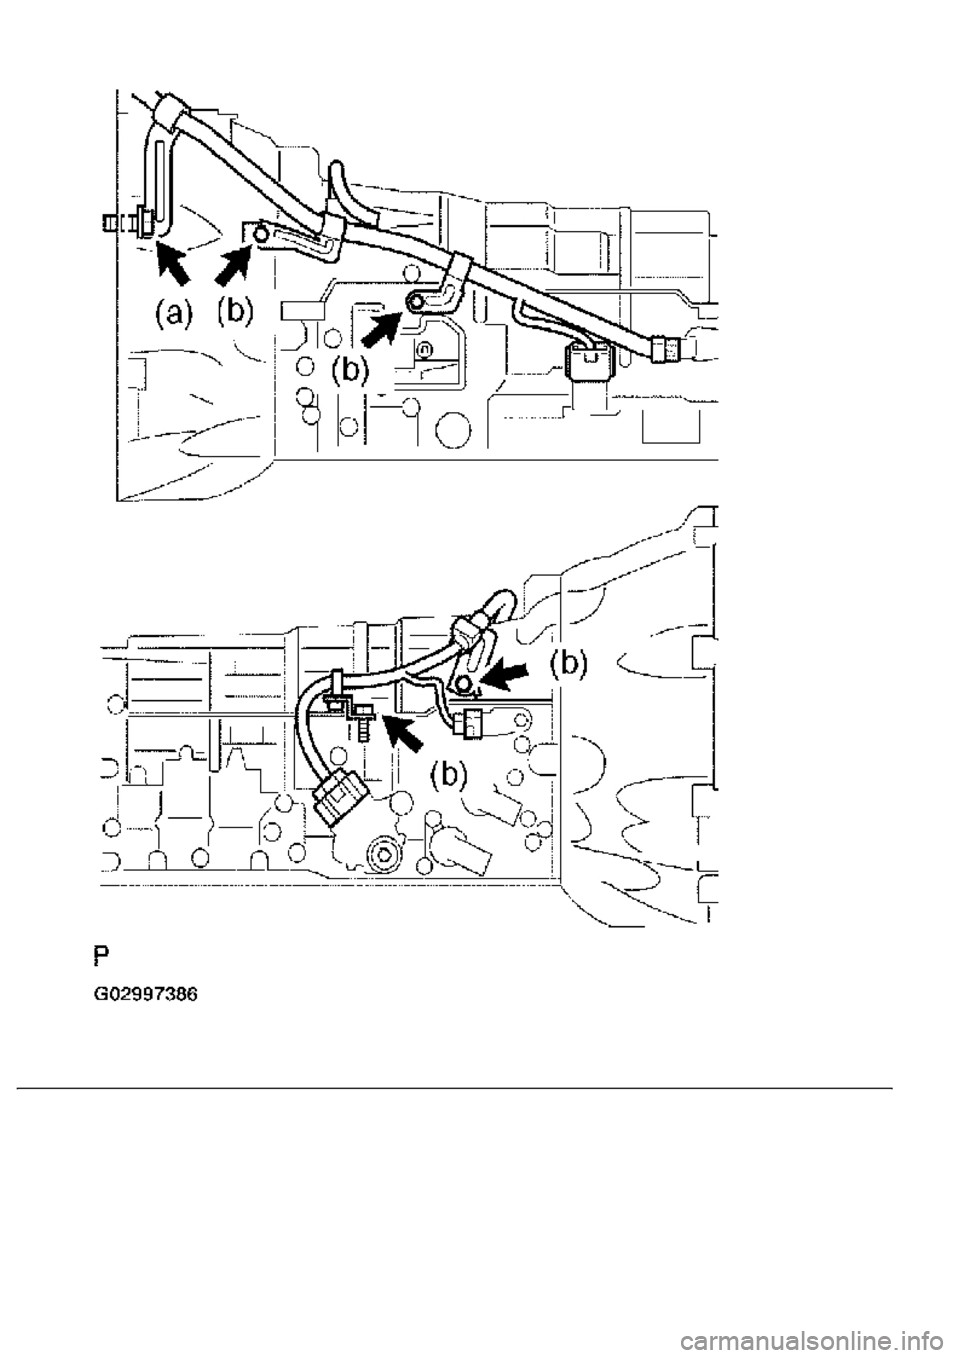
a. Install the wire harness clamps with the 5 bolts.
Torque:
Bolt (a): 68 N.m (694 kgf.cm, 51 ft.lbf)
Bolt (b): 7.5 N.m (76 kgf.cm, 66 in..lbf)
HINT:
Bolt (a) is ti
ghtened to the transmission housing.
Page 868 of 4500
Page 869 of 4500
Fig. 49: Installing Wire Harness Clamps With 5 Bolts
Courtesy of TOYOTA MOTOR SALES, U.S.A., INC.
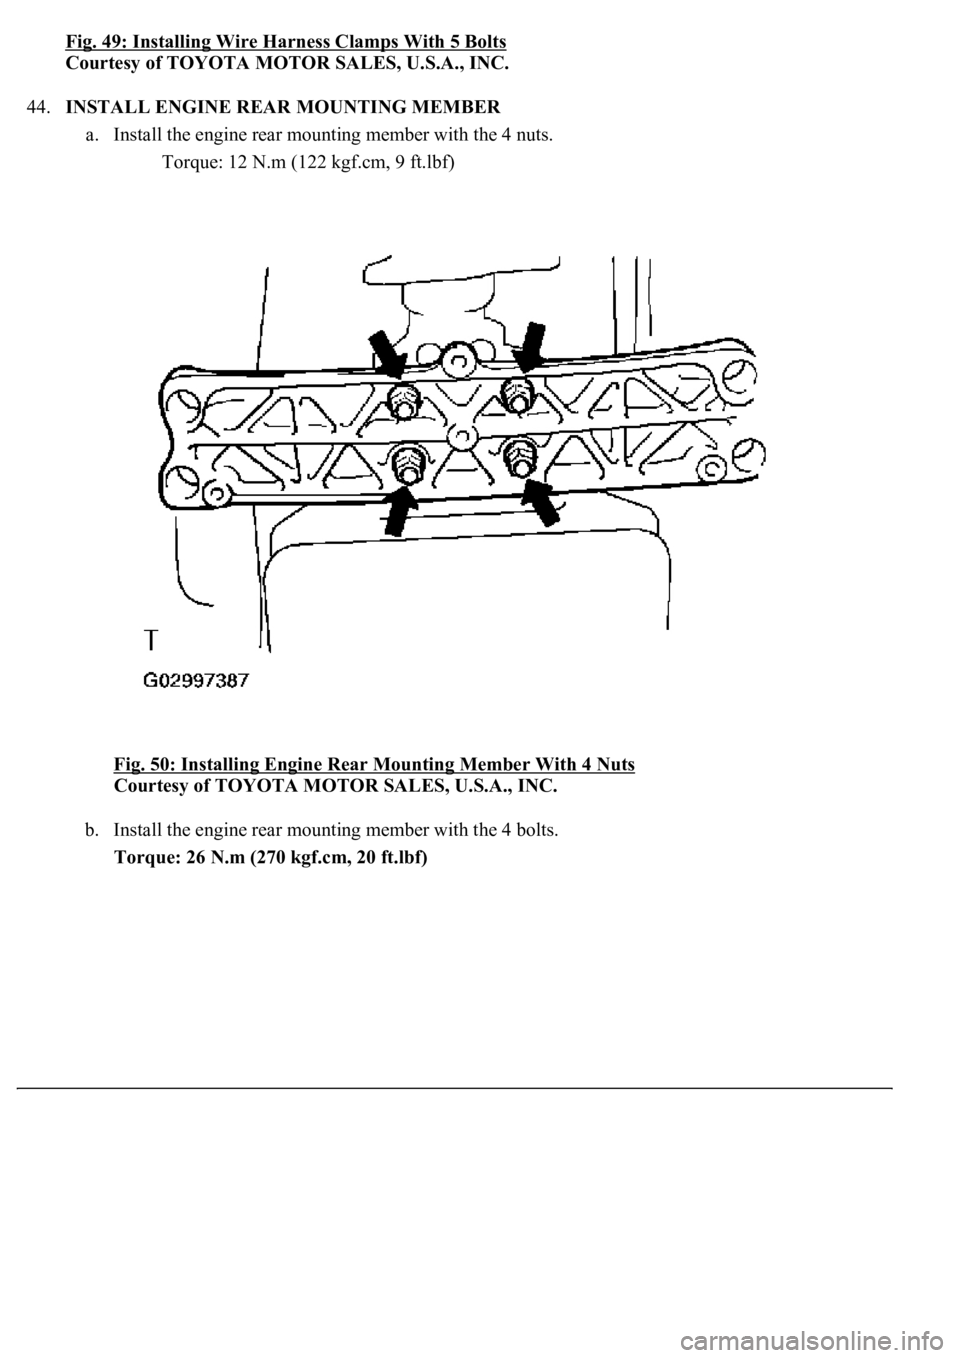
44.INSTALL ENGINE REAR MOUNTING MEMBER
a. Install the engine rear mounting member with the 4 nuts.
Torque: 12 N.m (122 kgf.cm, 9 ft.lbf)
Fig. 50: Installing Engine Rear Mounting Member With 4 Nuts
Courtesy of TOYOTA MOTOR SALES, U.S.A., INC.
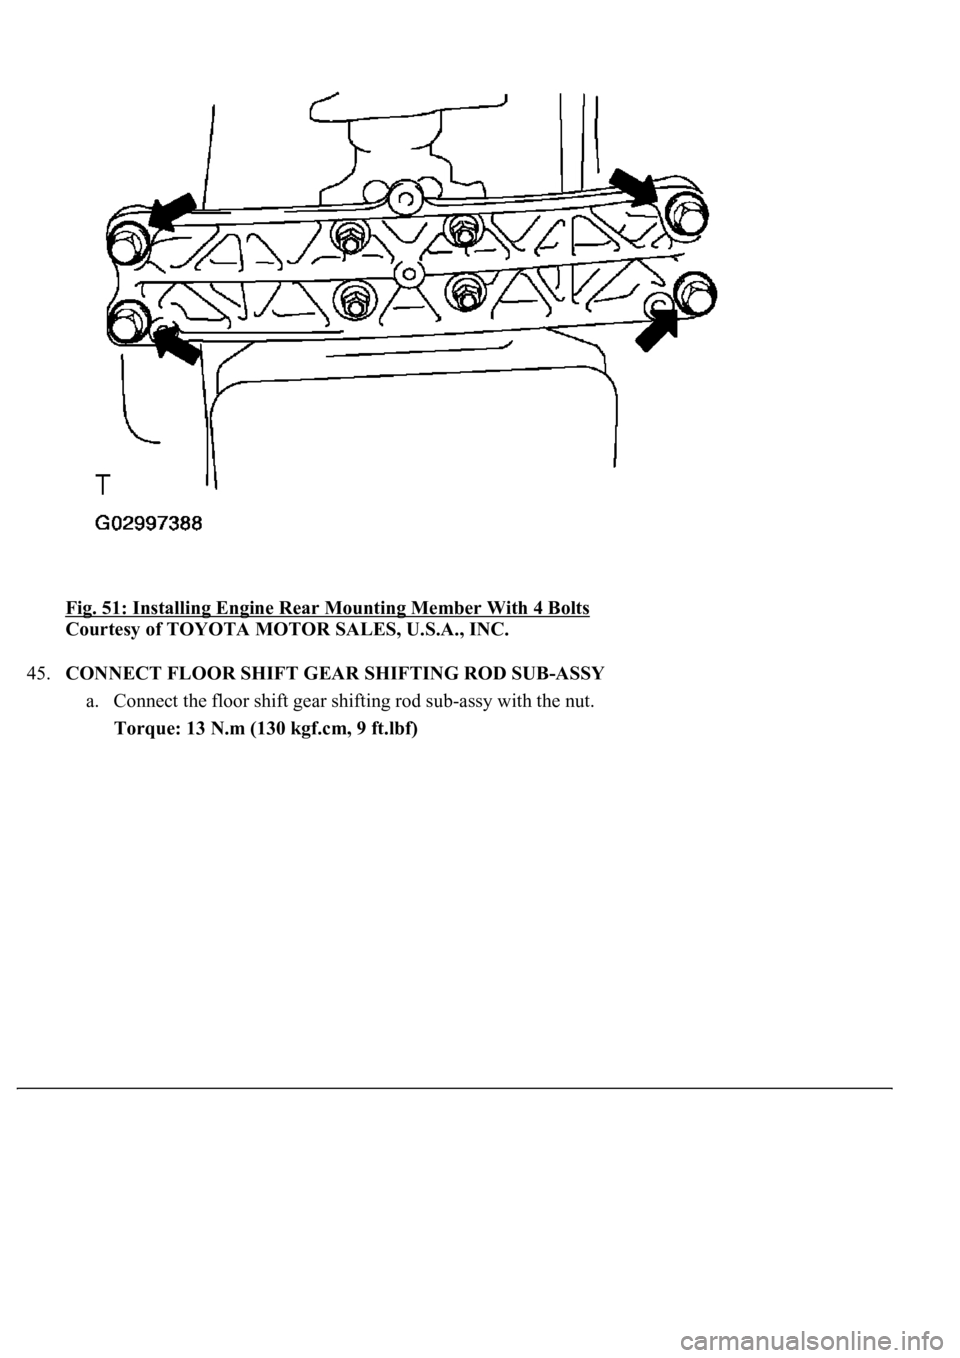
b. Install the engine rear mounting member with the 4 bolts.
Torque: 26 N.m (270 kgf.cm, 20 ft.lbf)
Page 870 of 4500
Fig. 51: Installing Engine Rear Mounting Member With 4 Bolts
Courtesy of TOYOTA MOTOR SALES, U.S.A., INC.
45.CONNECT FLOOR SHIFT GEAR SHIFTING ROD SUB-ASSY
a. Connect the floor shift gear shifting rod sub-assy with the nut.
Torque: 13 N.m (130 kgf.cm, 9 ft.lbf)
Trending: seat adjustment, tires, air condition, C1752, fuse, Sp2, odometer
