LEXUS LS430 2003 Factory Repair Manual
Manufacturer: LEXUS, Model Year: 2003,
Model line: LS430,
Model: LEXUS LS430 2003
Pages: 4500, PDF Size: 87.45 MB
LEXUS LS430 2003 Factory Repair Manual
LS430 2003
LEXUS
LEXUS
https://www.carmanualsonline.info/img/36/57050/w960_57050-0.png
LEXUS LS430 2003 Factory Repair Manual
Trending: service interval, oil temperature, OBD port, fuel filter location, zero point calibration, spare tire, damper
Page 841 of 4500
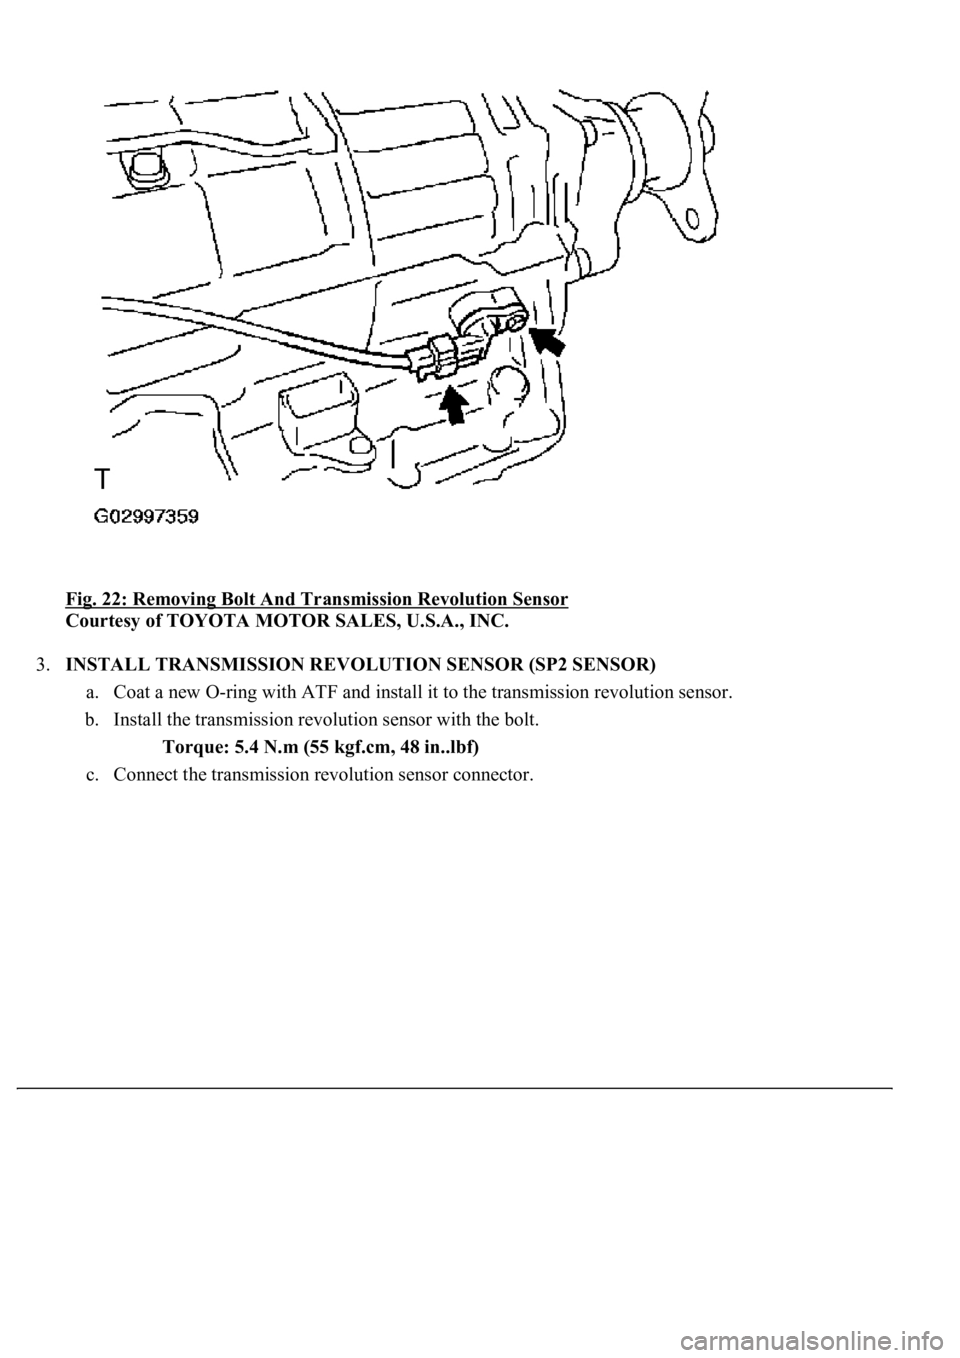
Fig. 22: Removing Bolt And Transmission Revolution Sensor
Courtesy of TOYOTA MOTOR SALES, U.S.A., INC.
3.INSTALL TRANSMISSION REVOLUTION SENSOR (SP2 SENSOR)
a. Coat a new O-ring with ATF and install it to the transmission revolution sensor.
b. Install the transmission revolution sensor with the bolt.
Torque: 5.4 N.m (55 kgf.cm, 48 in..lbf)
c. Connect the transmission revolution sensor connector.
Page 842 of 4500
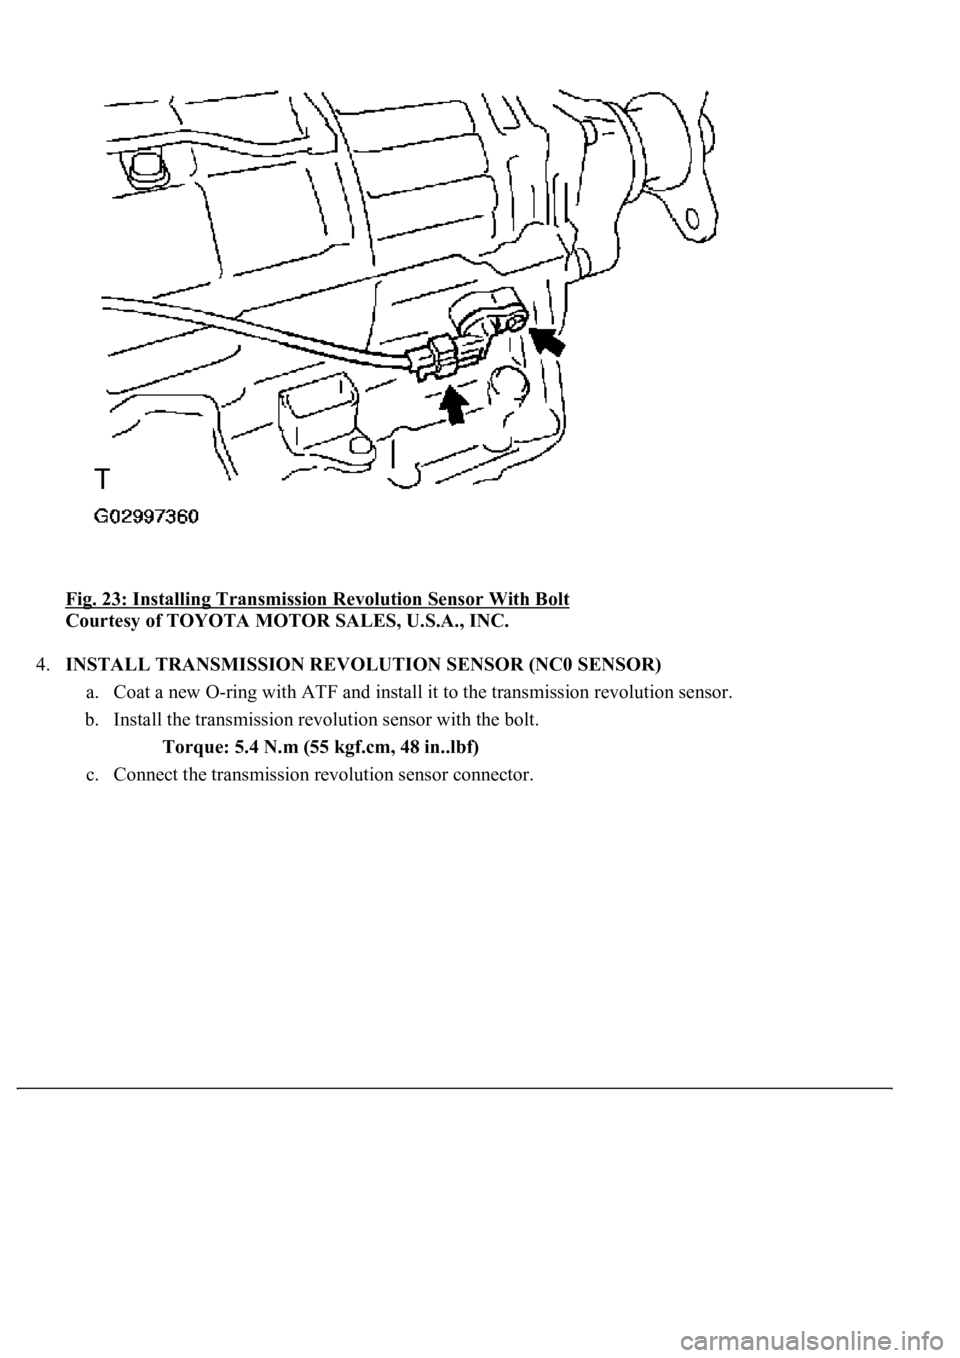
Fig. 23: Installing Transmission Revolution Sensor With Bolt
Courtesy of TOYOTA MOTOR SALES, U.S.A., INC.
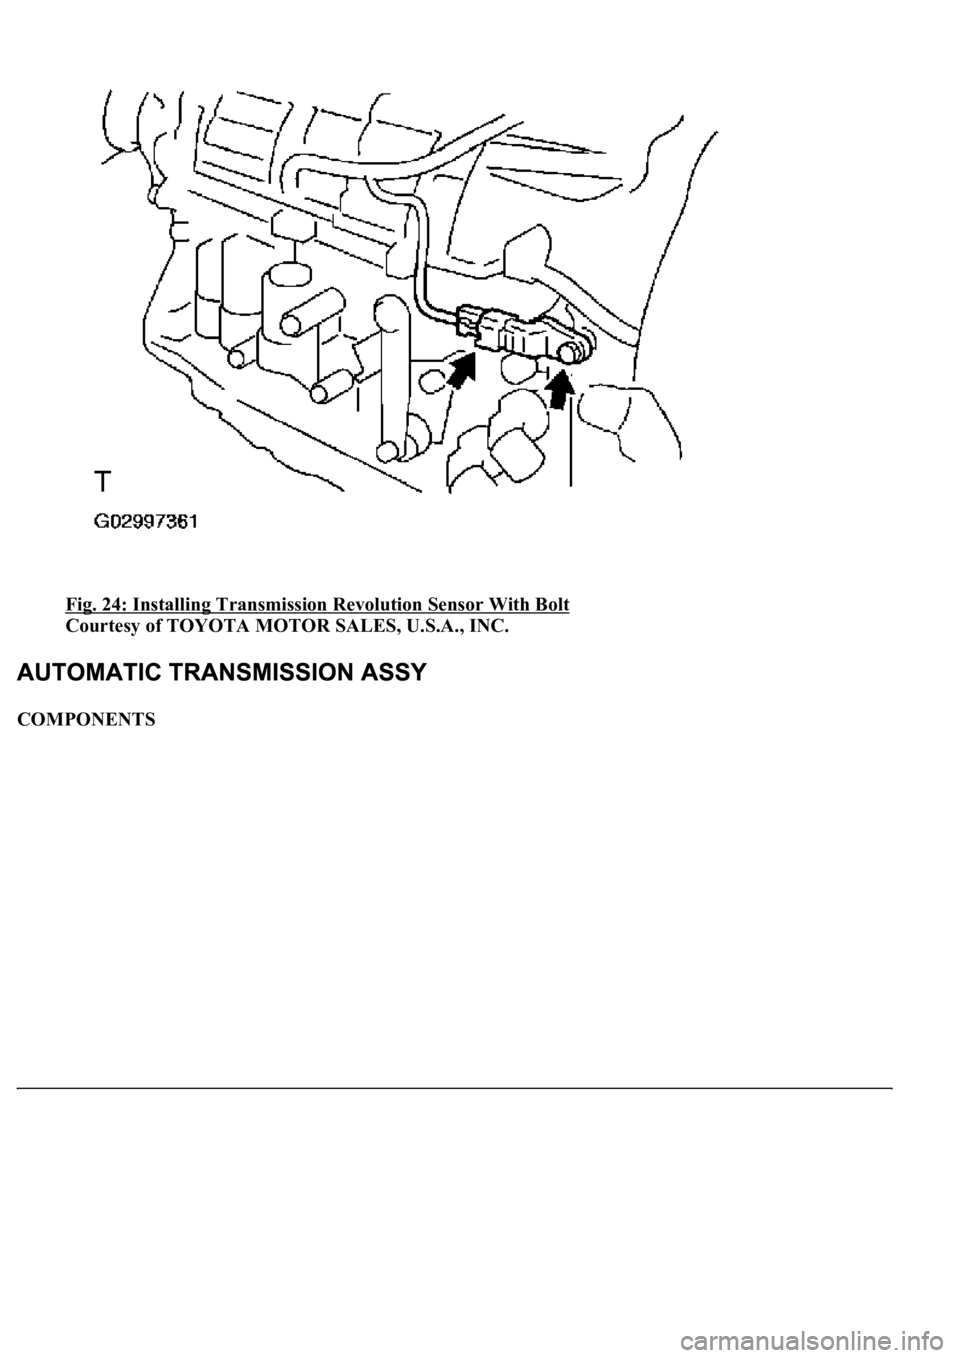
4.INSTALL TRANSMISSION REVOLUTION SENSOR (NC0 SENSOR)
a. Coat a new O-ring with ATF and install it to the transmission revolution sensor.
b. Install the transmission revolution sensor with the bolt.
Torque: 5.4 N.m (55 kgf.cm, 48 in..lbf)
c. Connect the transmission revolution sensor connector.
Page 843 of 4500
Fig. 24: Installing Transmission Revolution Sensor With Bolt
Courtesy of TOYOTA MOTOR SALES, U.S.A., INC.
COMPONENTS
Page 844 of 4500
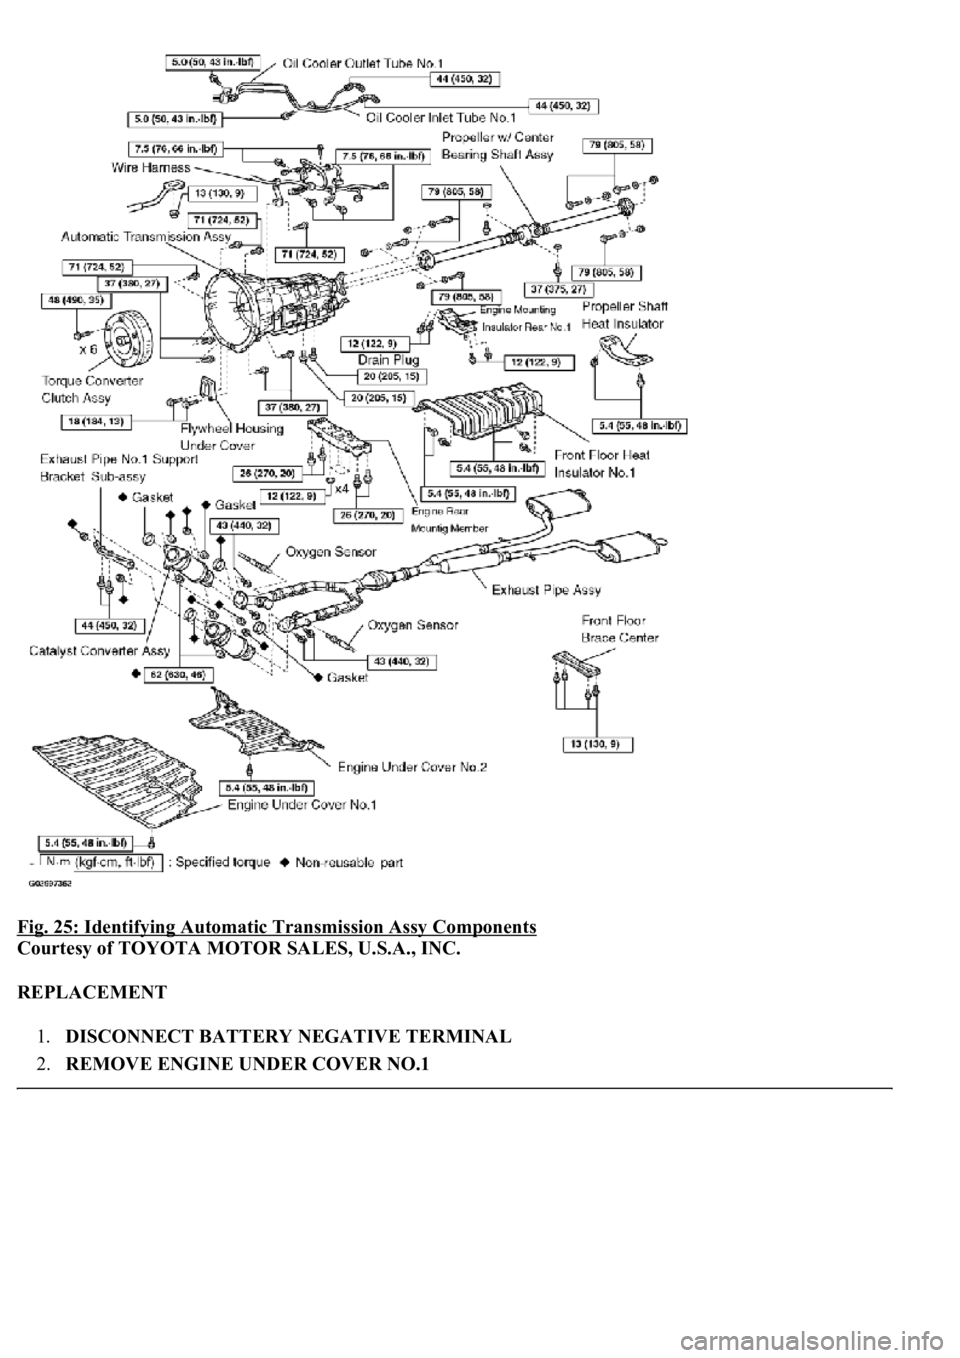
Fig. 25: Identifying Automatic Transmission Assy Components
Courtesy of TOYOTA MOTOR SALES, U.S.A., INC.
REPLACEMENT
1.DISCONNECT BATTERY NEGATIVE TERMINAL
2.REMOVE ENGINE UNDER COVER NO.1
Page 845 of 4500
3.REMOVE ENGINE UNDER COVER NO.2
4.REMOVE INSTRUMENT PANEL UNDER COVER SUB-ASSY NO.2 (SEE REPLACEMENT
)
5.REMOVE INSTRUMENT PANEL GARNISH SUB-ASSY LH (SEE REPLACEMENT
)
6.REMOVE INSTRUMENT PANEL FINISH PANEL (SEE REPLACEMENT
)
7.REMOVE INSTRUMENT PANEL UNDER COVER SUB-ASSY NO.1 (SEE REPLACEMENT
)
8.REMOVE SWITCH BRACE HOLE COVER (SEE REPLACEMENT
)
9.REMOVE INSTRUMENT PANEL SAFETY PAD SUB-ASSY NO.1 (SEE REPLACEMENT
)
10.REMOVE INSTRUMENT PANEL CUP HOLDER ASSY (SEE REPLACEMENT
)
11.REMOVE CONSOLE UPPER REAR PANEL SUB-ASSY (SEE REPLACEMENT
)
12.REMOVE CONSOLE BOX CARPET (SEE REPLACEMENT
)
13.REMOVE REAR CONSOLE ARMREST ASSY (SEE REPLACEMENT
)
14.REMOVE INSTRUMENT PANEL FINISH PANEL LOWER CENTER (SEE REPLACEMENT
)
15.REMOVE INSTRUMENT CLUSTER FINISH PANEL SUB-ASSY CENTER (SEE
REPLACEMENT
)
16.REMOVE CONSOLE PANEL SUB-ASSY UPPER (SEE REPLACEMENT
)
17.REMOVE CONSOLE BOX (SEE REPLACEMENT
)
18.SEPARATE OXYGEN SENSOR (SEE REPLACEMENT
)
a. Separate the 2 heated oxygen sensors.
19.REMOVE FRONT FLOOR BRACE CENTER (SEE REPLACEMENT
)
20.REMOVE EXHAUST PIPE ASSY (SEE REPLACEMENT
)
21.REMOVE FRONT FLOOR HEAT INSULATOR NO.1 (SEE OVERHAUL
)
22.REMOVE PROPELLER W/CENTER BEARING SHAFT ASSY (SEE OVERHAUL
)
SST 09922-10010
23.DRAIN AUTOMATIC TRANSMISSION FLUID
a. Remove the drain plug, gasket and drain the ATF.
b.Install a new gasket and the drain plug.
Torque: 20 N.m (205 kgf.cm, 15 ft.lbf)
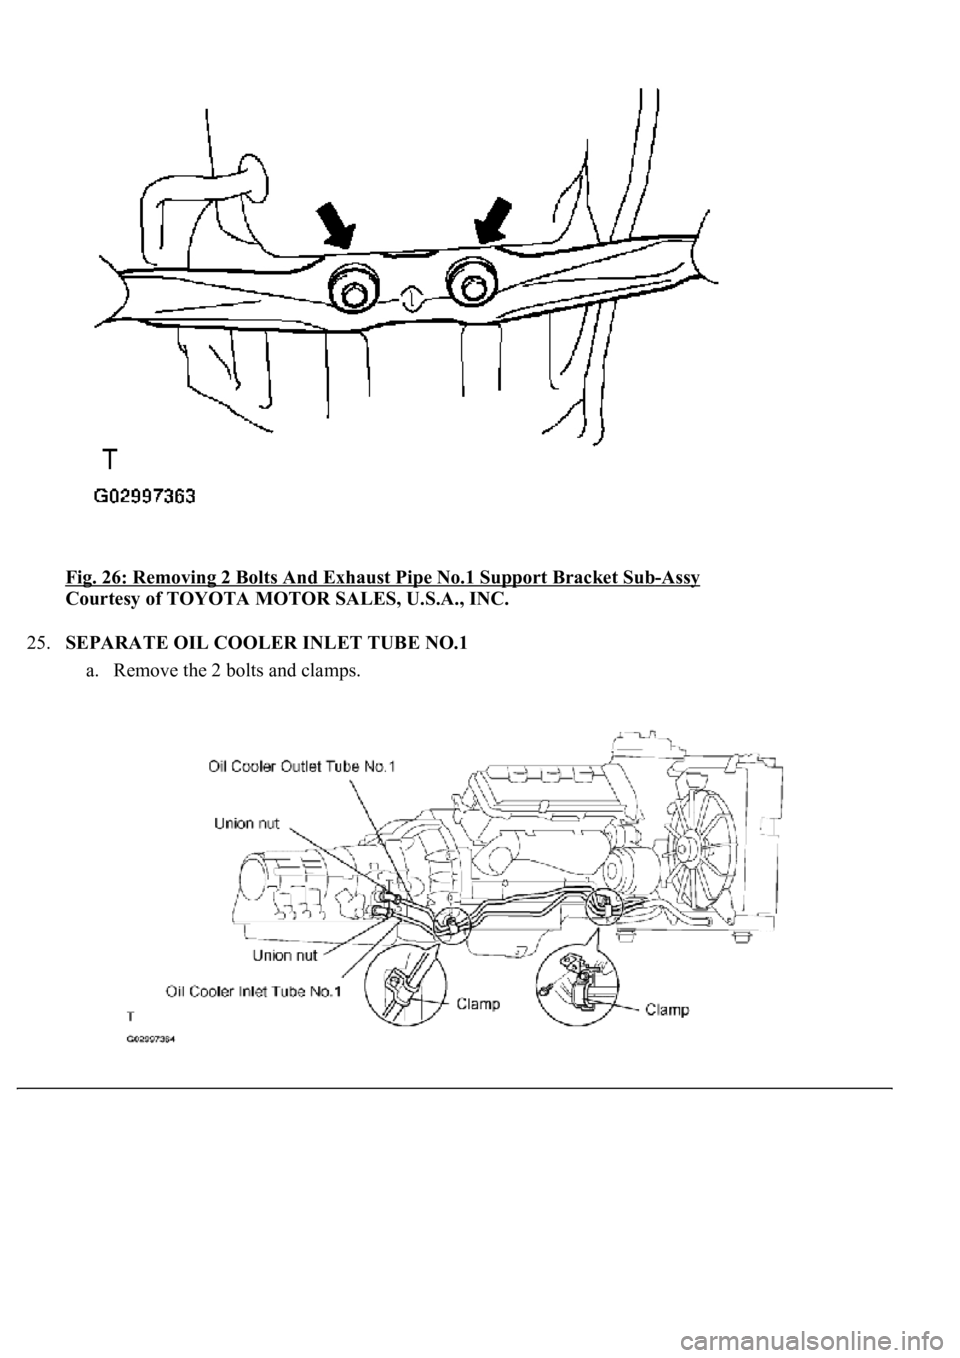
24.REMOVE EXHAUST PIPE NO.1 SUPPORT BRACKET SUB-ASSY
a. Remove the 2 bolts and exhaust pipe No.1 support bracket sub-ass
y.
Page 846 of 4500
Fig. 26: Removing 2 Bolts And Exhaust Pipe No.1 Support Bracket Sub-Assy
Courtesy of TOYOTA MOTOR SALES, U.S.A., INC.
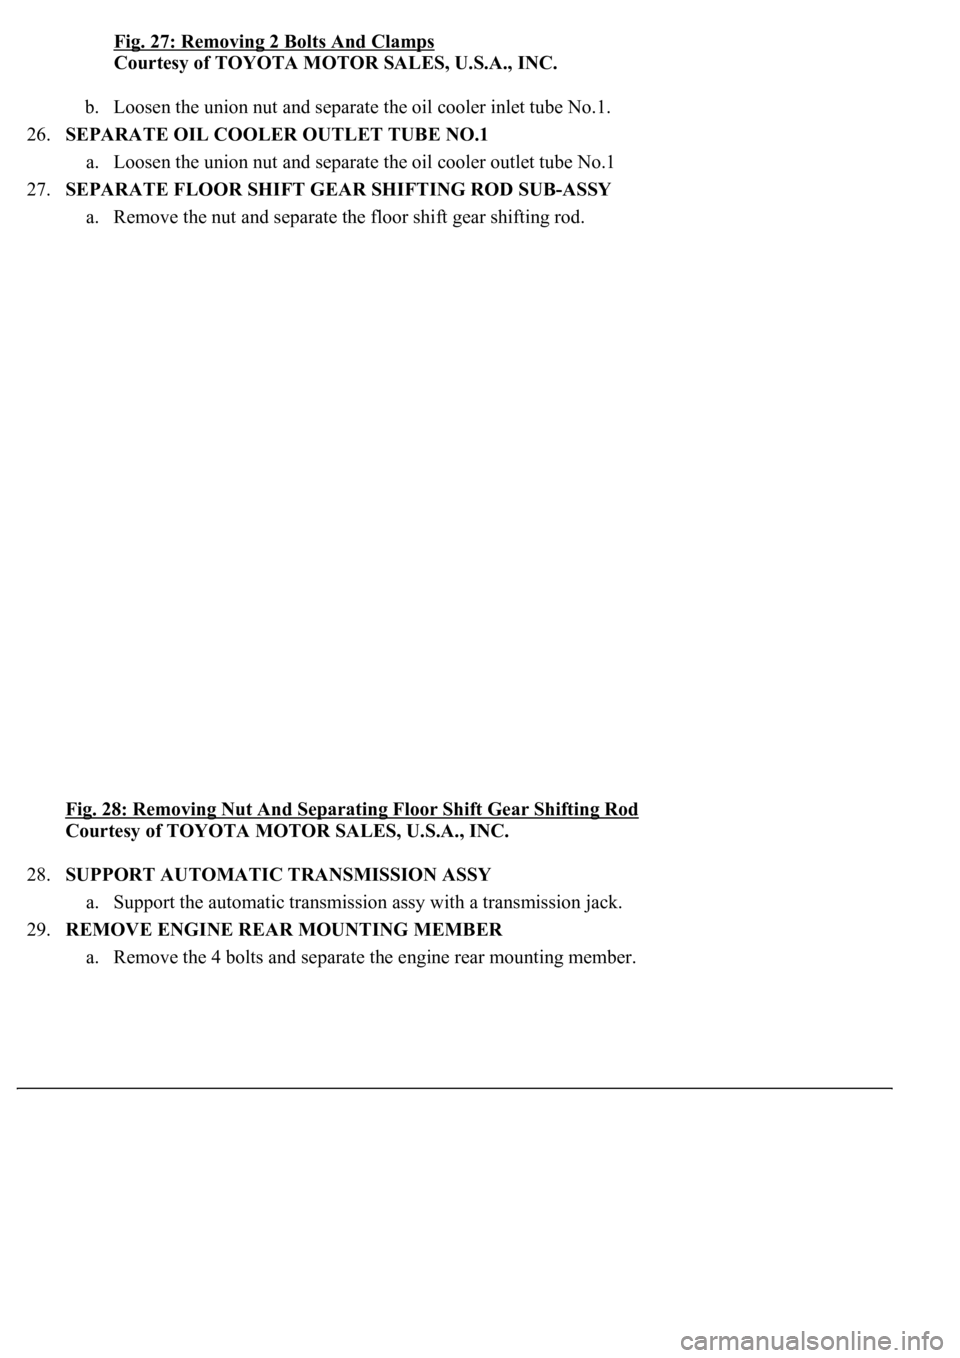
25.SEPARATE OIL COOLER INLET TUBE NO.1
a. Remove the 2 bolts and clamps.
Page 847 of 4500
Fig. 27: Removing 2 Bolts And Clamps
Courtesy of TOYOTA MOTOR SALES, U.S.A., INC.
b. Loosen the union nut and separate the oil cooler inlet tube No.1.
26.SEPARATE OIL COOLER OUTLET TUBE NO.1
a. Loosen the union nut and separate the oil cooler outlet tube No.1
27.SEPARATE FLOOR SHIFT GEAR SHIFTING ROD SUB-ASSY
a. Remove the nut and separate the floor shift gear shifting rod.
Fig. 28: Removing Nut And Separating Floor Shift Gear Shifting Rod
Courtesy of TOYOTA MOTOR SALES, U.S.A., INC.
28.SUPPORT AUTOMATIC TRANSMISSION ASSY
a. Support the automatic transmission assy with a transmission jack.
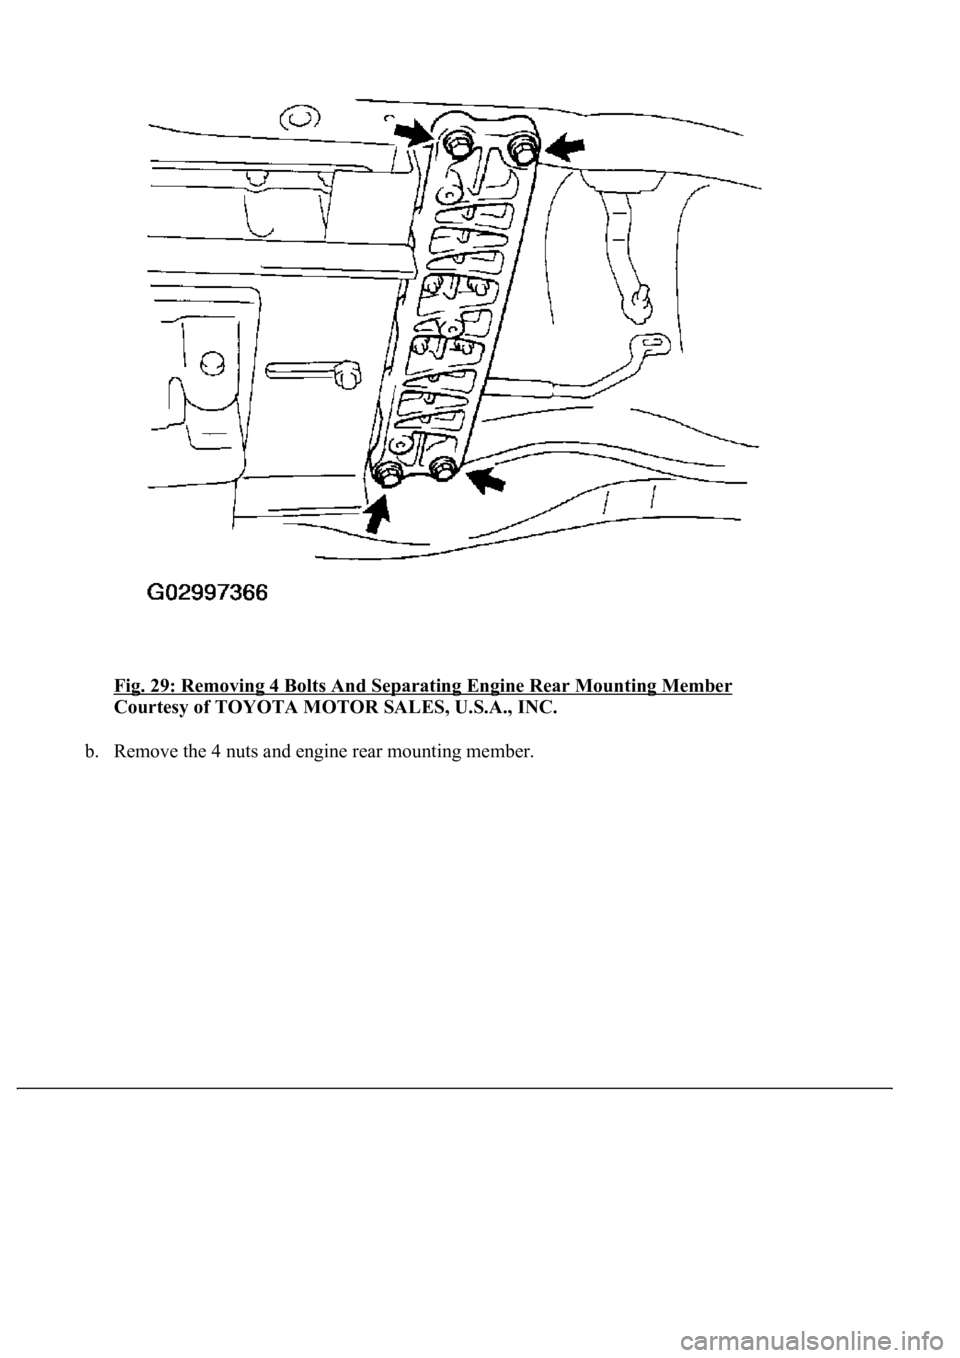
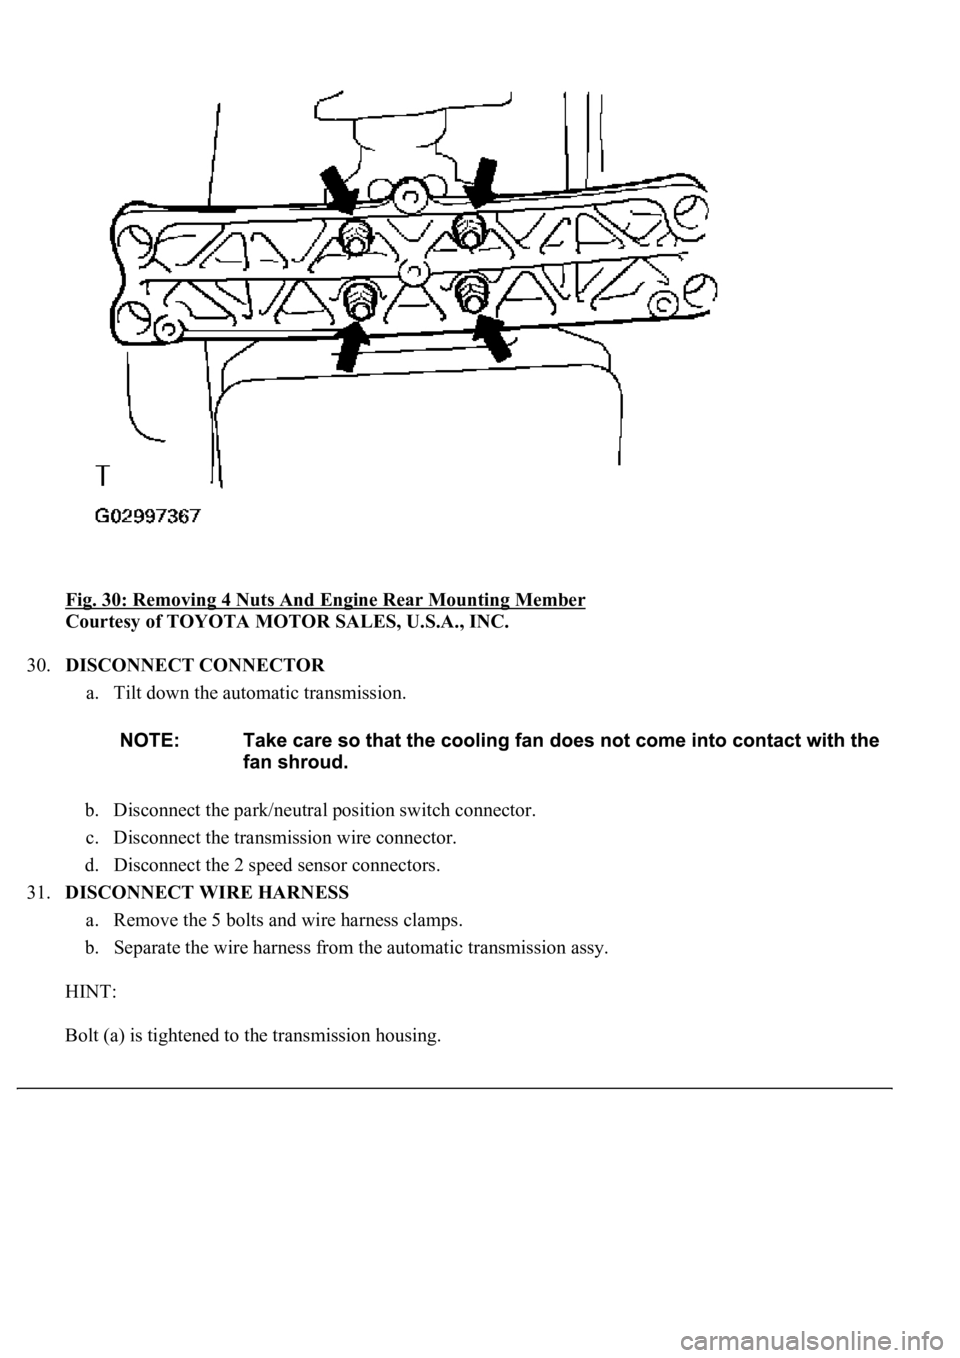
29.REMOVE ENGINE REAR MOUNTING MEMBER
a. Remove the 4 bolts and separate the engine rear mounting member.
Page 848 of 4500
Fig. 29: Removing 4 Bolts And Separating Engine Rear Mounting Member
Courtesy of TOYOTA MOTOR SALES, U.S.A., INC.
b. Remove the 4 nuts and engine rear mounting member.
Page 849 of 4500
Fig. 30: Removing 4 Nuts And Engine Rear Mounting Member
Courtesy of TOYOTA MOTOR SALES, U.S.A., INC.
30.DISCONNECT CONNECTOR
a. Tilt down the automatic transmission.
b. Disconnect the park/neutral position switch connector.
c. Disconnect the transmission wire connector.
d. Disconnect the 2 speed sensor connectors.
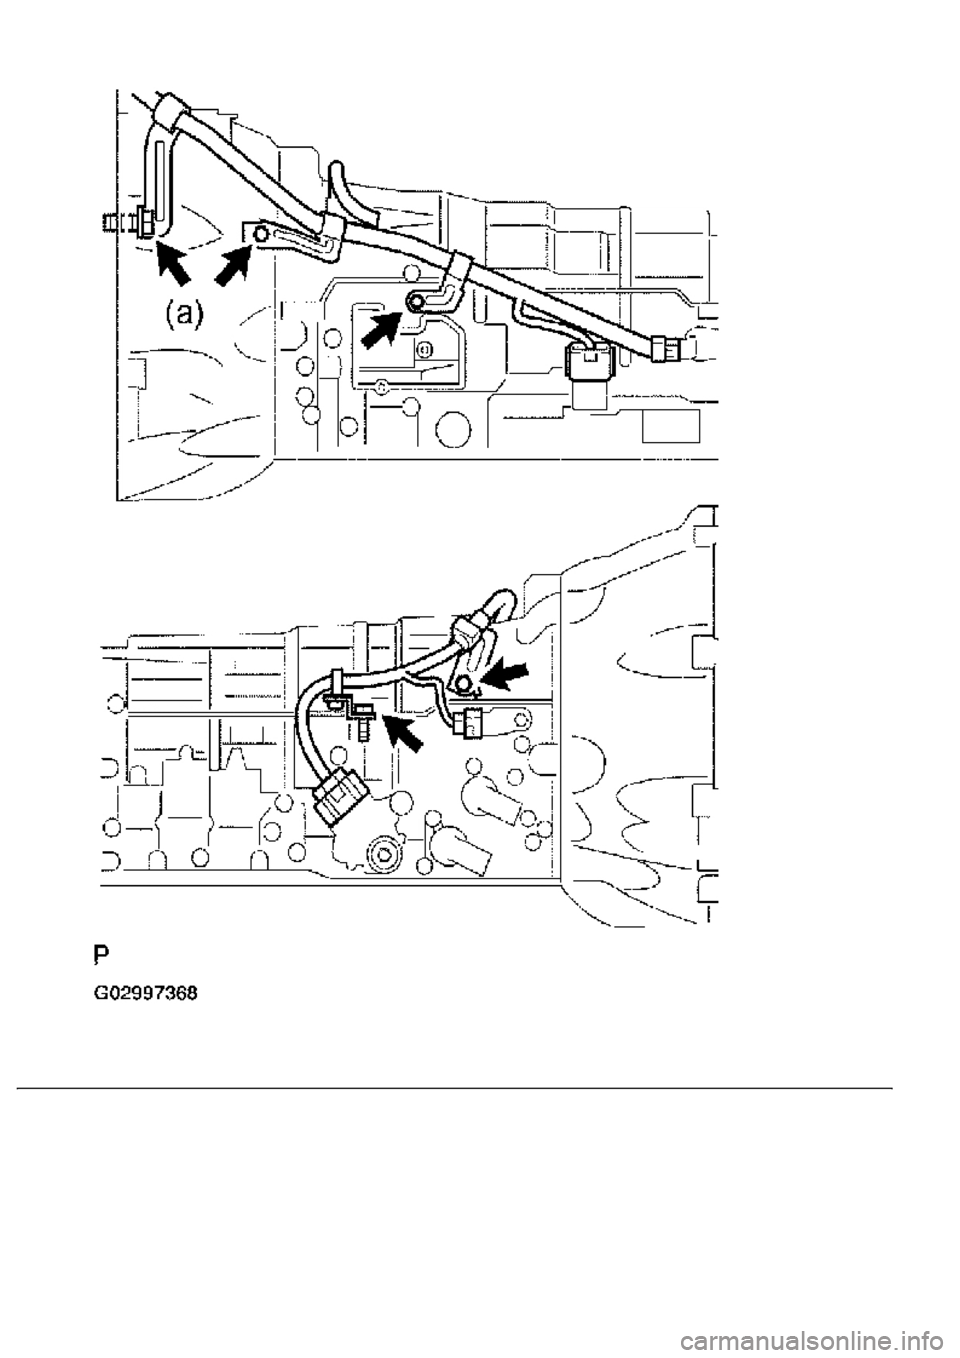
31.DISCONNECT WIRE HARNESS
a. Remove the 5 bolts and wire harness clamps.
b. Separate the wire harness from the automatic transmission assy.
HINT:
Bolt (a) is ti
ghtened to the transmission housing.
Page 850 of 4500
Trending: park, B2620, cooling, Signal compressor condition, compression ratio, Rear control Arm, Control actuator
