LEXUS LS430 2003 Factory Repair Manual
Manufacturer: LEXUS, Model Year: 2003,
Model line: LS430,
Model: LEXUS LS430 2003
Pages: 4500, PDF Size: 87.45 MB
LEXUS LS430 2003 Factory Repair Manual
LS430 2003
LEXUS
LEXUS
https://www.carmanualsonline.info/img/36/57050/w960_57050-0.png
LEXUS LS430 2003 Factory Repair Manual
Trending: airbag off, Rear suspension, vacuum switching valve, seats, oil type, tail light replacement, compressor pressure
Page 851 of 4500
Fig. 31: Removing 5 Bolts And Wire Harness Clamps
Courtesy of TOYOTA MOTOR SALES, U.S.A., INC.
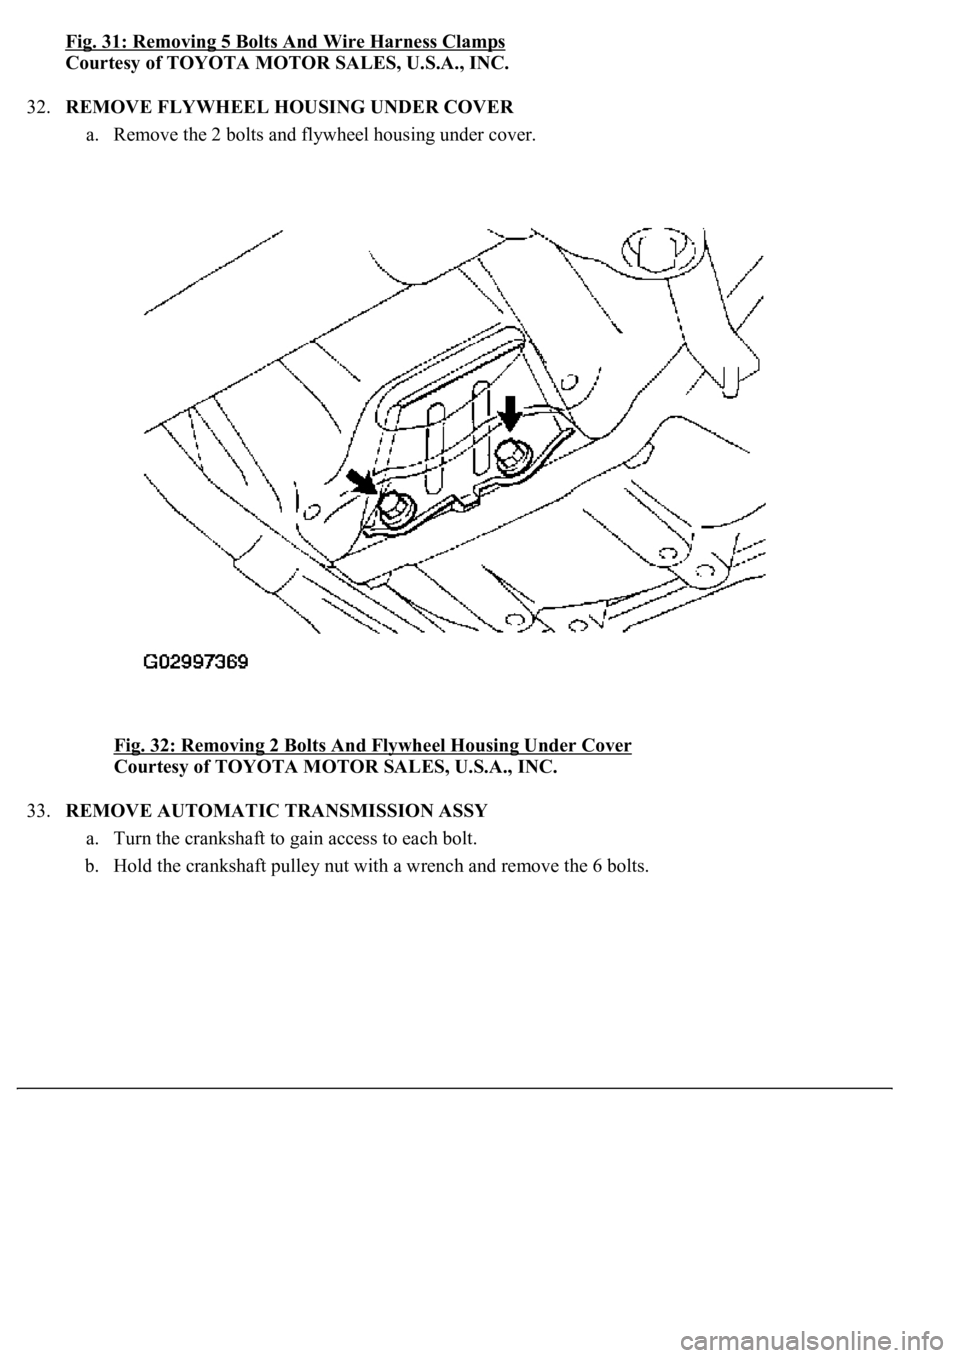
32.REMOVE FLYWHEEL HOUSING UNDER COVER
a. Remove the 2 bolts and flywheel housing under cover.
Fig. 32: Removing 2 Bolts And Flywheel Housing Under Cover
Courtesy of TOYOTA MOTOR SALES, U.S.A., INC.
33.REMOVE AUTOMATIC TRANSMISSION ASSY
a. Turn the crankshaft to gain access to each bolt.
b. Hold the crankshaft pulley nut with a wrench and remove the 6 bolts.
Page 852 of 4500
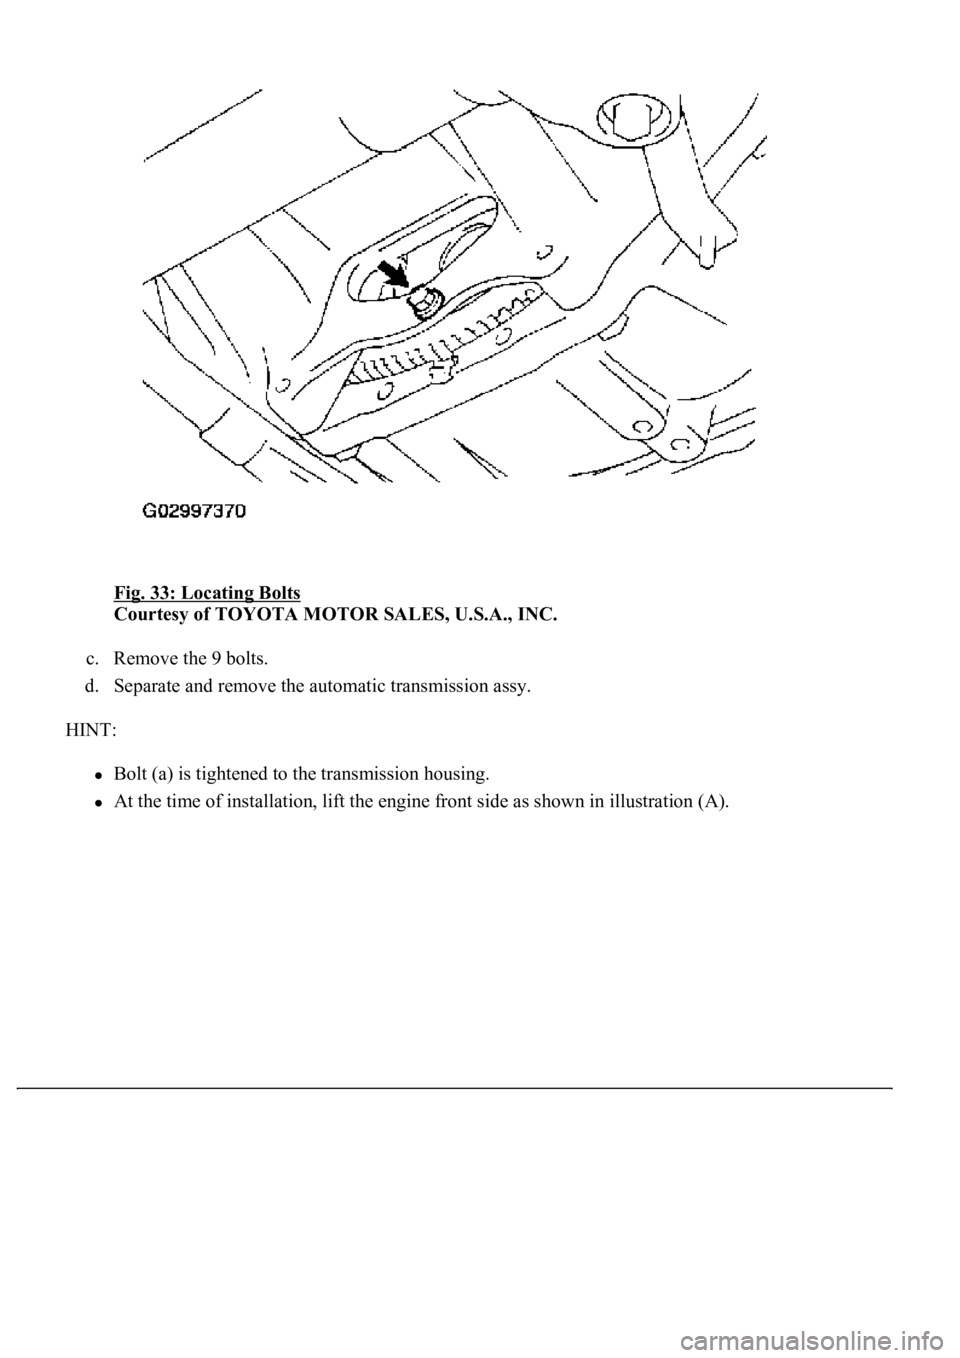
Fig. 33: Locating Bolts
Courtesy of TOYOTA MOTOR SALES, U.S.A., INC.
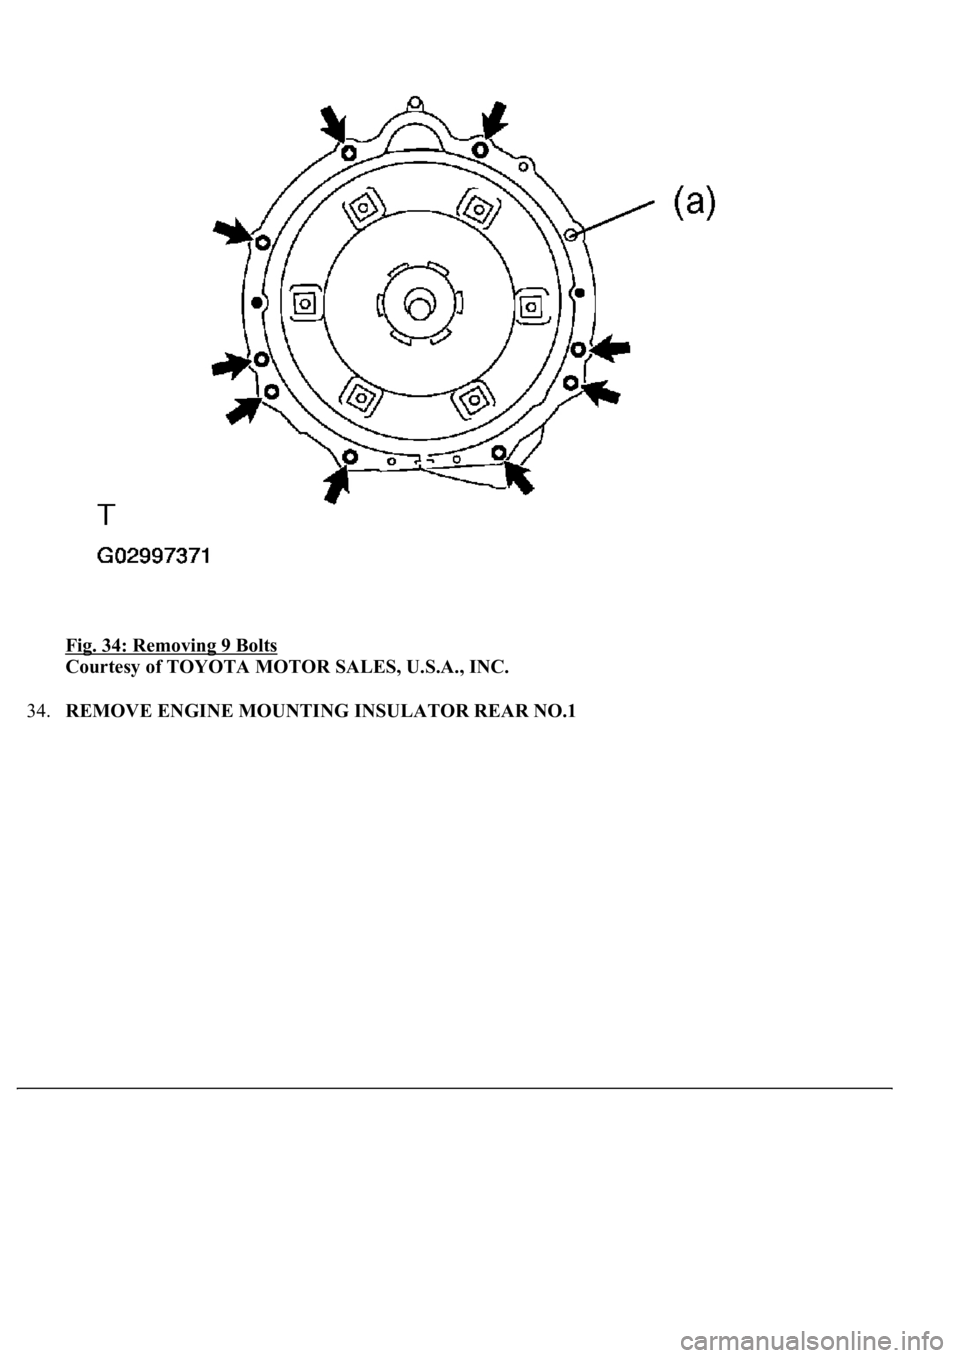
c. Remove the 9 bolts.
d. Separate and remove the automatic transmission assy.
HINT:
Bolt (a) is tightened to the transmission housing.
At the time of installation, lift the engine front side as shown in illustration (A).
Page 853 of 4500
Fig. 34: Removing 9 Bolts
Courtesy of TOYOTA MOTOR SALES, U.S.A., INC.
34.REMOVE ENGINE MOUNTING INSULATOR REAR NO.1
Page 854 of 4500
Fig. 35: Lifting Engine Front Side
Courtesy of TOYOTA MOTOR SALES, U.S.A., INC.
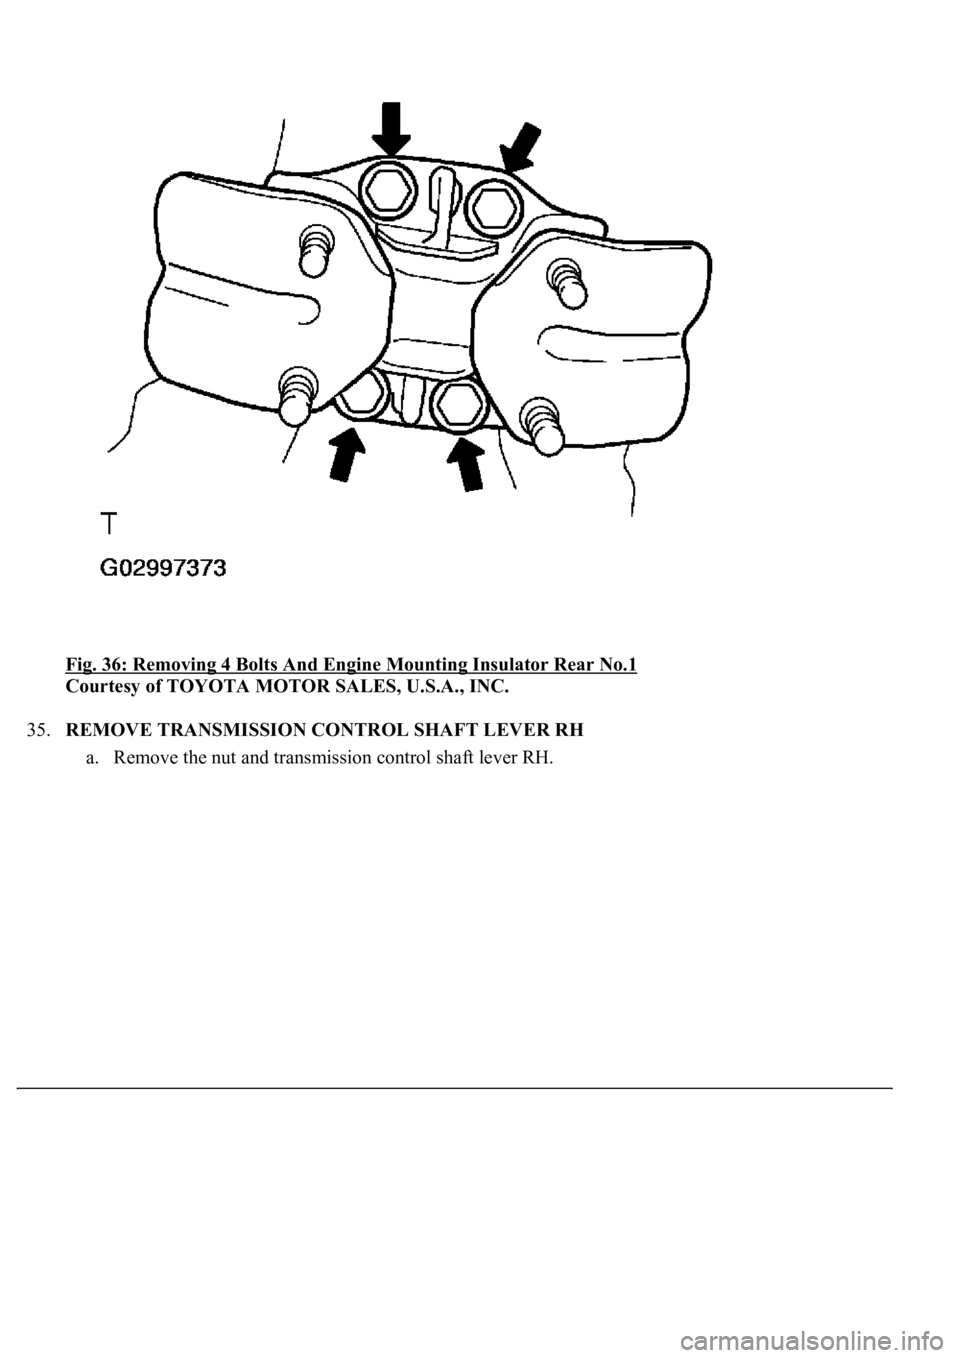
a. Remove the 4 bolts and engine mounting insulator rear No.1.
Page 855 of 4500
Fig. 36: Removing 4 Bolts And Engine Mounting Insulator Rear No.1
Courtesy of TOYOTA MOTOR SALES, U.S.A., INC.
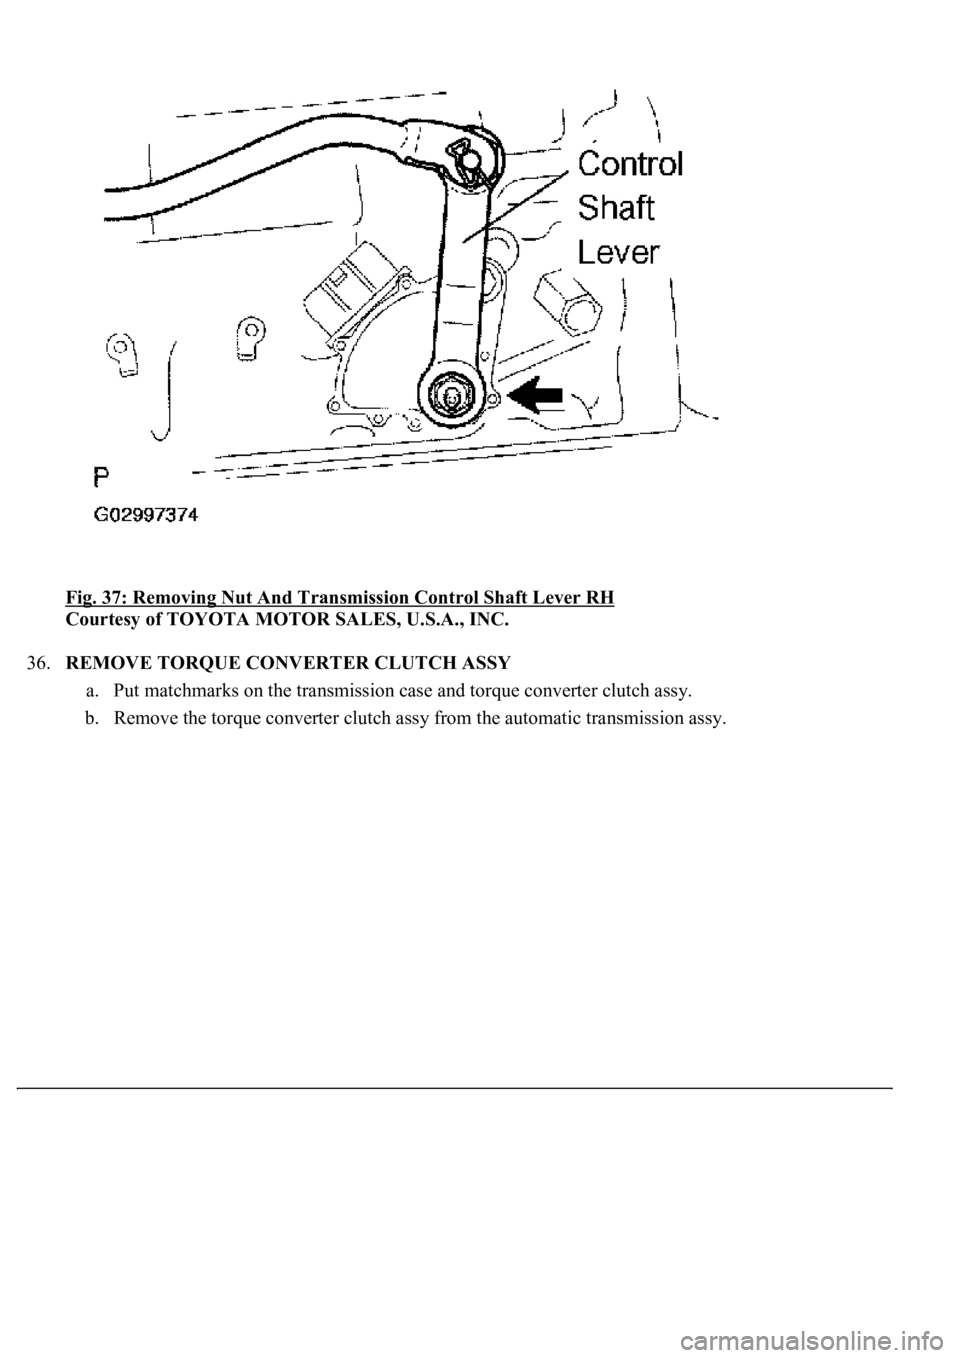
35.REMOVE TRANSMISSION CONTROL SHAFT LEVER RH
a. Remove the nut and transmission control shaft lever RH.
Page 856 of 4500
Fig. 37: Removing Nut And Transmission Control Shaft Lever RH
Courtesy of TOYOTA MOTOR SALES, U.S.A., INC.
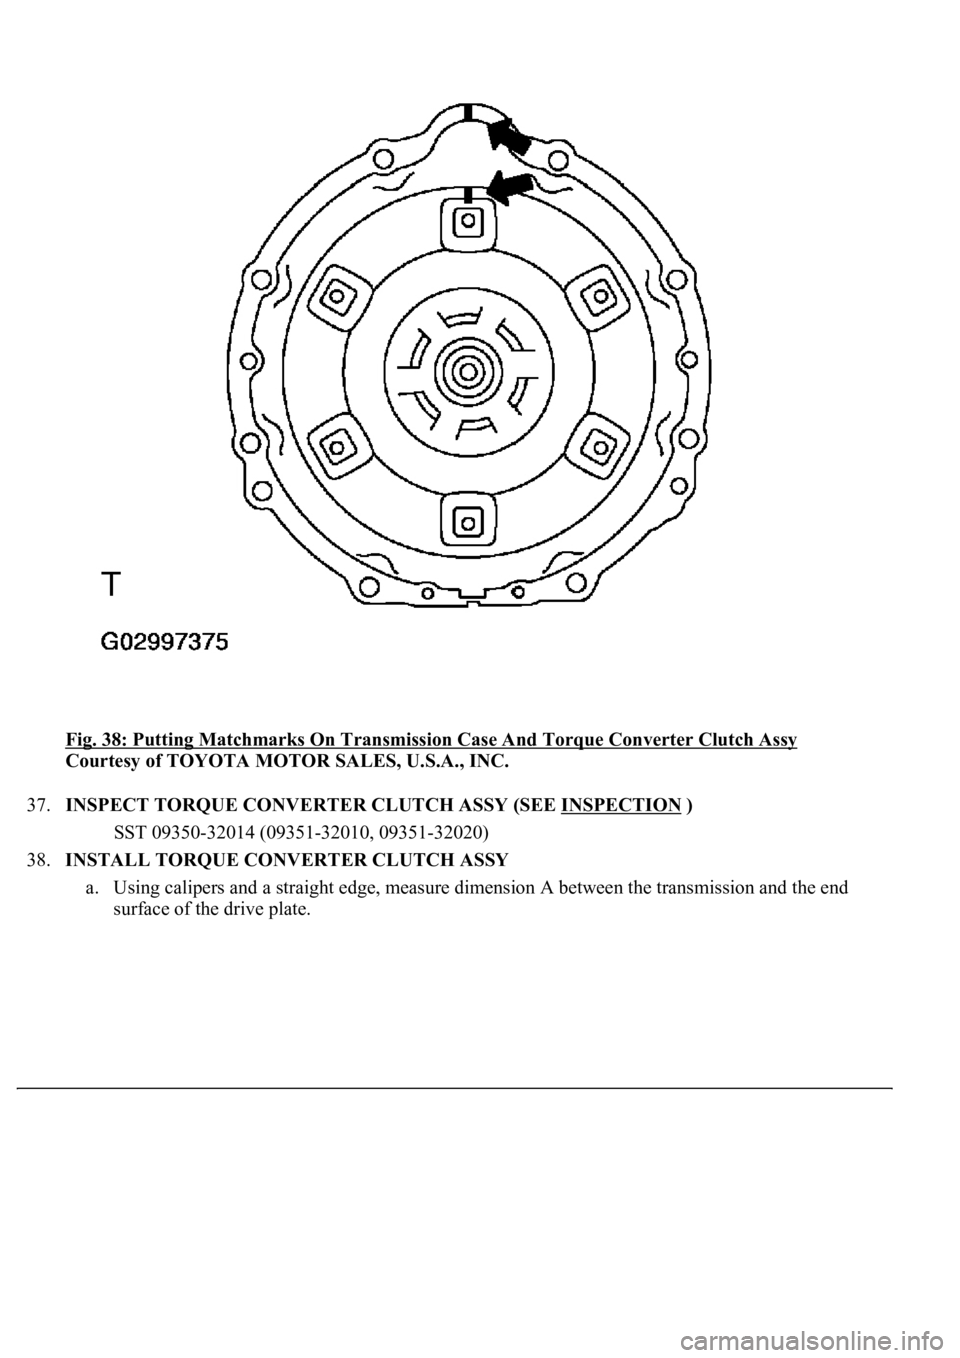
36.REMOVE TORQUE CONVERTER CLUTCH ASSY
a. Put matchmarks on the transmission case and torque converter clutch assy.
b. Remove the torque converter clutch assy from the automatic transmission assy.
Page 857 of 4500
Fig. 38: Putting Matchmarks On Transmission Case And Torque Converter Clutch Assy
Courtesy of TOYOTA MOTOR SALES, U.S.A., INC.
37.INSPECT TORQUE CONVERTER CLUTCH ASSY (SEE INSPECTION
)
SST 09350-32014 (09351-32010, 09351-32020)
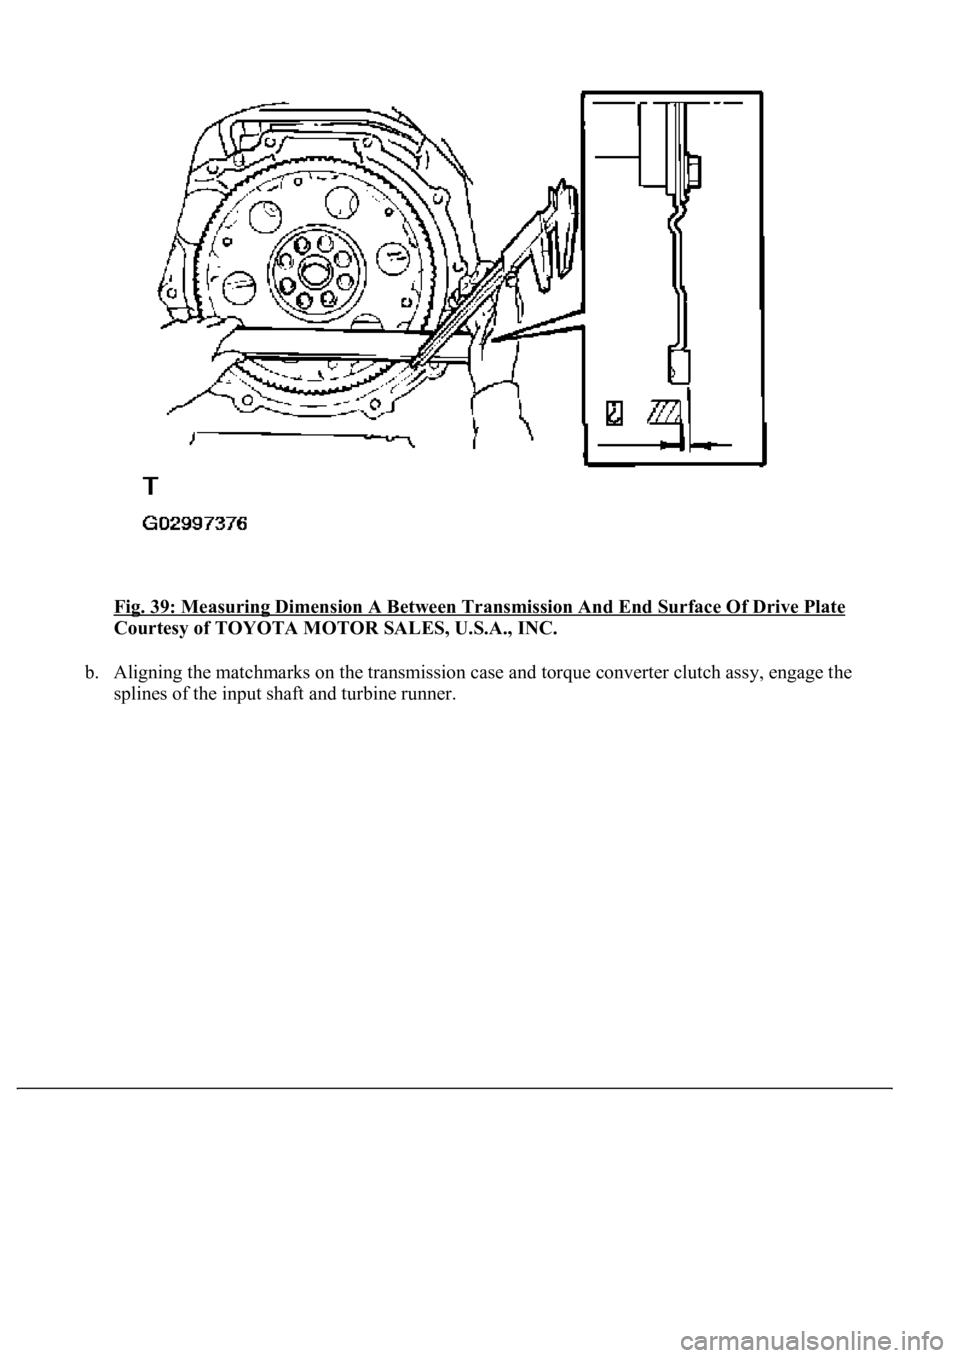
38.INSTALL TORQUE CONVERTER CLUTCH ASSY
a. Using calipers and a straight edge, measure dimension A between the transmission and the end
surface of the drive plate.
Page 858 of 4500
Fig. 39: Measuring Dimension A Between Transmission And End Surface Of Drive Plate
Courtesy of TOYOTA MOTOR SALES, U.S.A., INC.
b. Aligning the matchmarks on the transmission case and torque converter clutch assy, engage the
splines of the input shaft and turbine runner.
Page 859 of 4500
Fig. 40: Aligning Matchmarks On Transmission Case And Torque Converter Clutch Assy
Courtesy of TOYOTA MOTOR SALES, U.S.A., INC.
c. Engage the splines of the stator shaft and stator while turning the torque converter clutch assy.
HINT:
Turn the torque converter clutch assy approximately 180°.
Page 860 of 4500
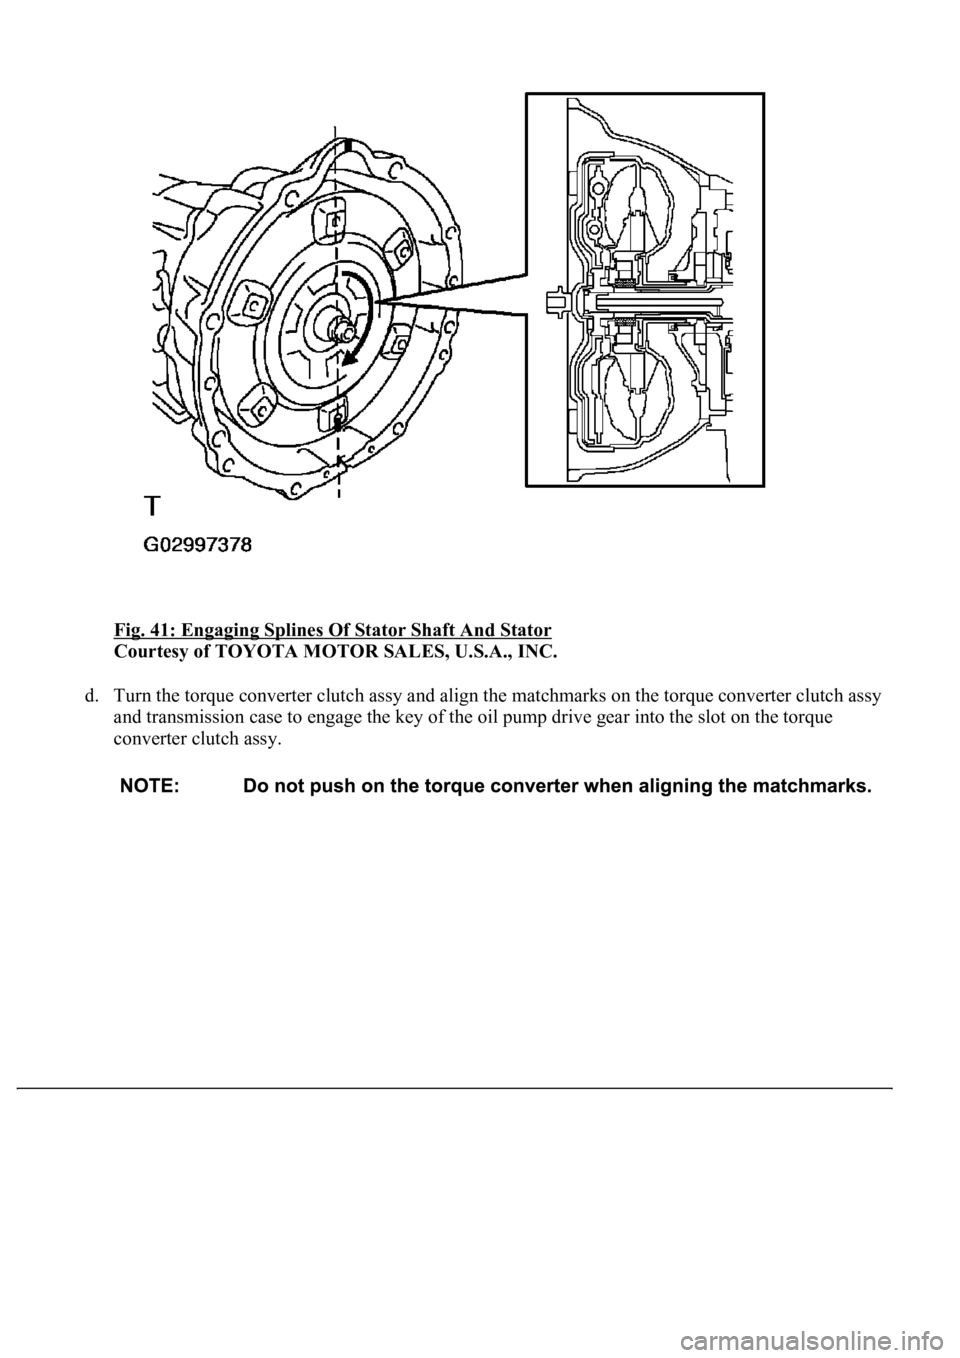
<0029004c004a0011000300170014001d000300280051004a0044004a004c0051004a000300360053004f004c005100480056000300320049000300360057004400570052005500030036004b00440049005700030024005100470003003600570044005700
520055[
Courtesy of TOYOTA MOTOR SALES, U.S.A., INC.
d. Turn the torque converter clutch assy and align the matchmarks on the torque converter clutch assy
and transmission case to engage the key of the oil pump drive gear into the slot on the torque
converter clutch assy.
Trending: battery, electronic modulated, tire size, evaporator, seat memory, Diagram ac amplifier, oil filter
