LINCOLN CONTINENTAL 1996 Customer Assistance Guide
Manufacturer: LINCOLN, Model Year: 1996, Model line: CONTINENTAL, Model: LINCOLN CONTINENTAL 1996Pages: 320, PDF Size: 1.8 MB
Page 131 of 320
Sun Visors
Using the Sun Visors
Your vehicle has special sun visors. Besides the
regular sun visor, you have a second visor. By
using both the regular sun visor and the second
visor, you shield the sun from both the front and the
side of the vehicle at the same time. You also have
a smaller center sun visor.
To block the sun, move the main visor sideways and
flip the second visor down.
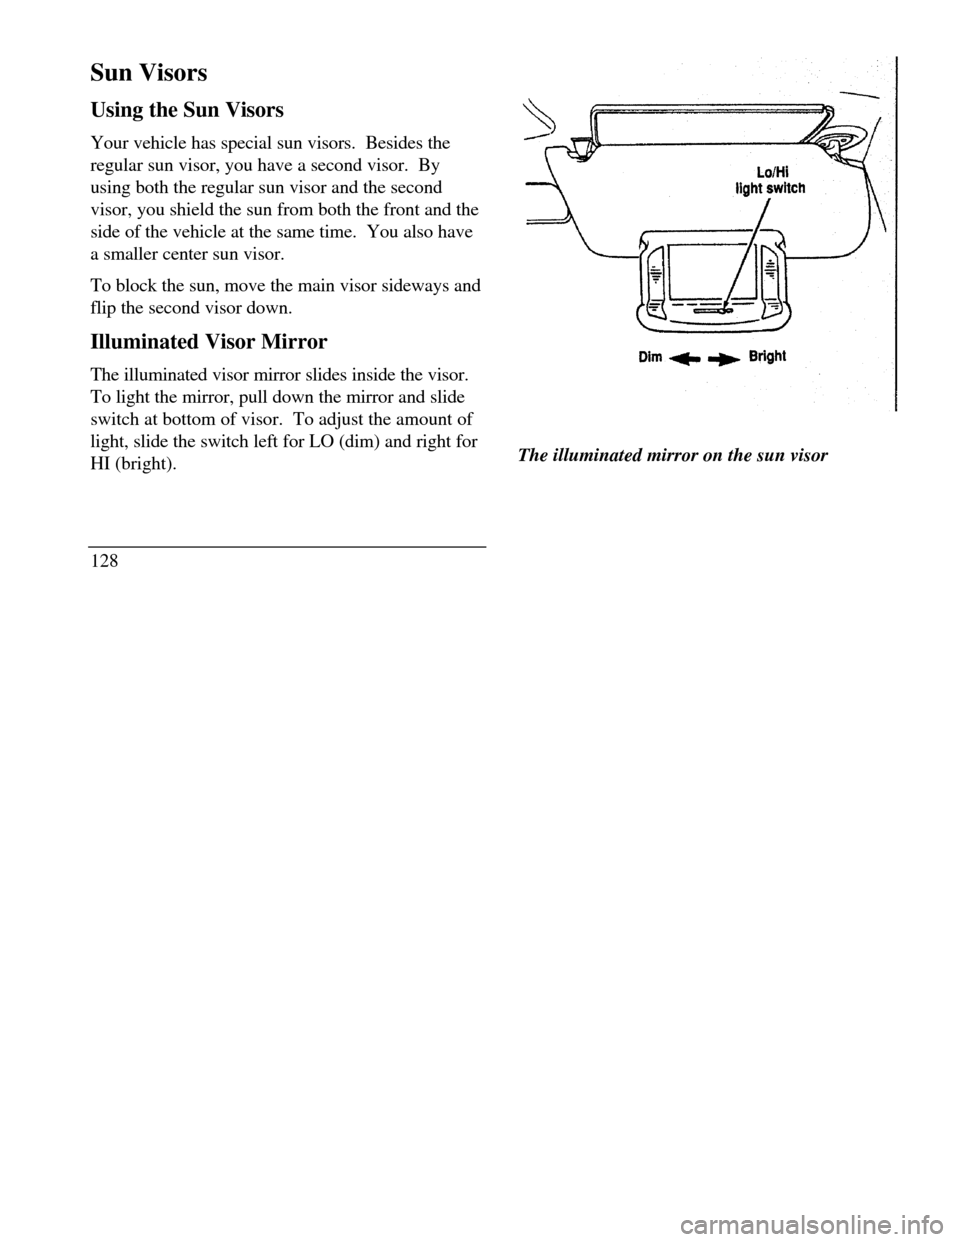
Illuminated Visor Mirror
The illuminated visor mirror slides inside the visor.
To light the mirror, pull down the mirror and slide
switch at bottom of visor. To adjust the amount of
light, slide the switch left for LO (dim) and right for
HI (bright).
128Lo/HI light switch Dim Bright
The illuminated mirror on the sun visor
Page 132 of 320
Garage Door Opener
If you own a garage door opener, the overhead
console of your Continental contains a bin to house
your hand held garage door transmitter. This
feature allows you to activate your garage door
opener with a push of the GARAGE button once
your transmitter has been installed inside the
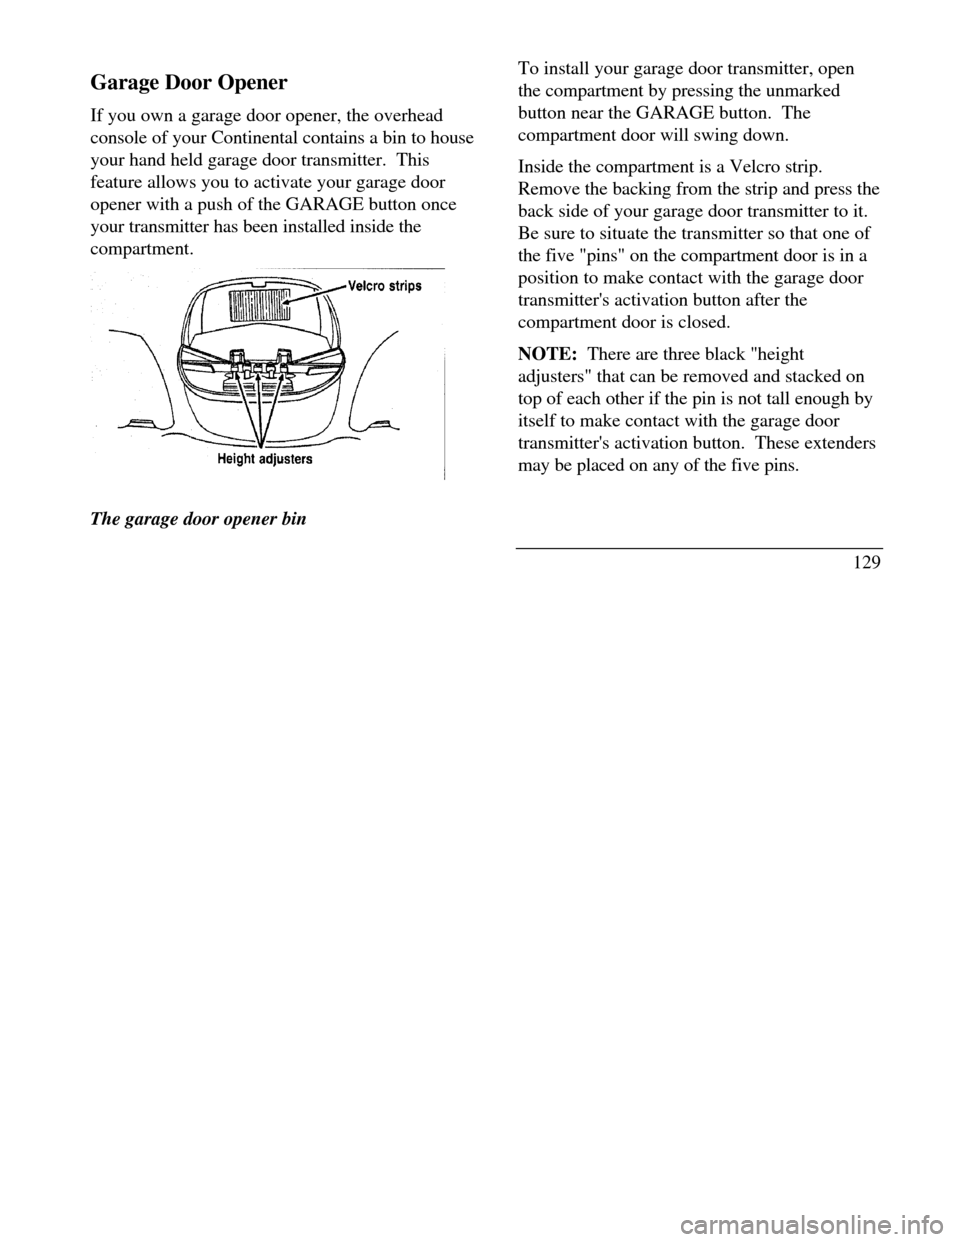
compartment.Height
adjusters Velcro strips
The garage door opener binTo install your garage door transmitter, open
the compartment by pressing the unmarked
button near the GARAGE button. The
compartment door will swing down.
Inside the compartment is a Velcro strip.
Remove the backing from the strip and press the
back side of your garage door transmitter to it.
Be sure to situate the transmitter so that one of
the five "pins" on the compartment door is in a
position to make contact with the garage door
transmitter's activation button after the
compartment door is closed.
NOTE: There are three black "height
adjusters" that can be removed and stacked on
top of each other if the pin is not tall enough by
itself to make contact with the garage door
transmitter's activation button. These extenders
may be placed on any of the five pins.
129
Page 133 of 320
Universal Transmitter
(If equipped)
The Universal Transmitter provides a convenient
way to consolidate the functions of up to three
individual hand-held transmitters into one built-in
device.
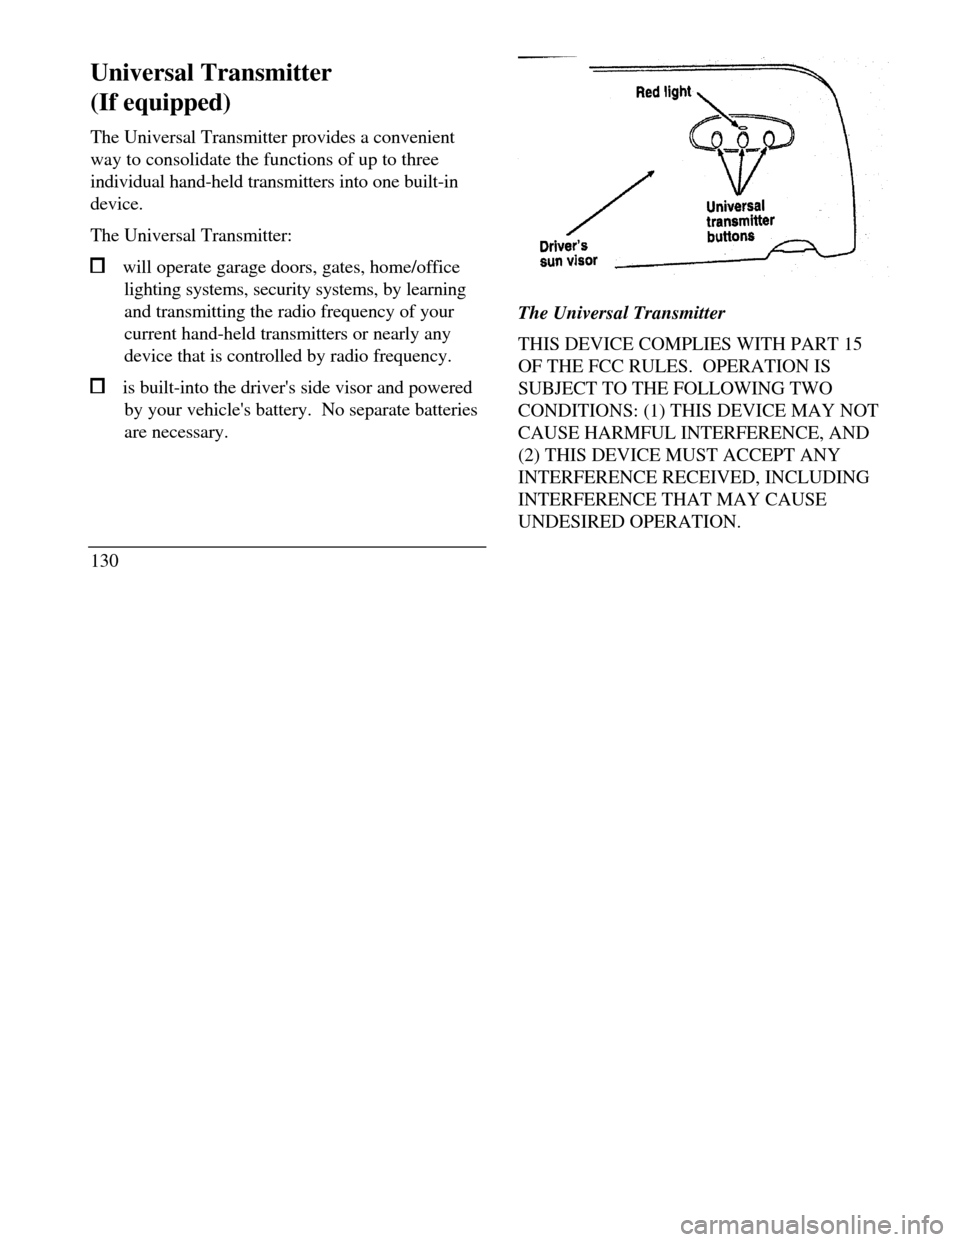
The Universal Transmitter: will operate garage doors, gates, home/office
lighting systems, security systems, by learning
and transmitting the radio frequency of your
current hand-held transmitters or nearly any
device that is controlled by radio frequency. is built-into the driver's side visor and powered
by your vehicle's battery. No separate batteries
are necessary.
130Red light Universal transmitter button Driver's sun visor
The Universal Transmitter
THIS DEVICE COMPLIES WITH PART 15
OF THE FCC RULES. OPERATION IS
SUBJECT TO THE FOLLOWING TWO
CONDITIONS: (1) THIS DEVICE MAY NOT
CAUSE HARMFUL INTERFERENCE, AND
(2) THIS DEVICE MUST ACCEPT ANY
INTERFERENCE RECEIVED, INCLUDING
INTERFERENCE THAT MAY CAUSE
UNDESIRED OPERATION.
Page 134 of 320
Programming the Universal Transmitter
NOTE: It is recommended that your hand-held
transmitter contain fresh batteries prior to
programming./!\ WARNINGMake sure that people or objects are clearof the garage door, gate, etc. while you areprogramming the system.To program the Universal Transmitter:
I.Make sure your vehicle's engine is off.
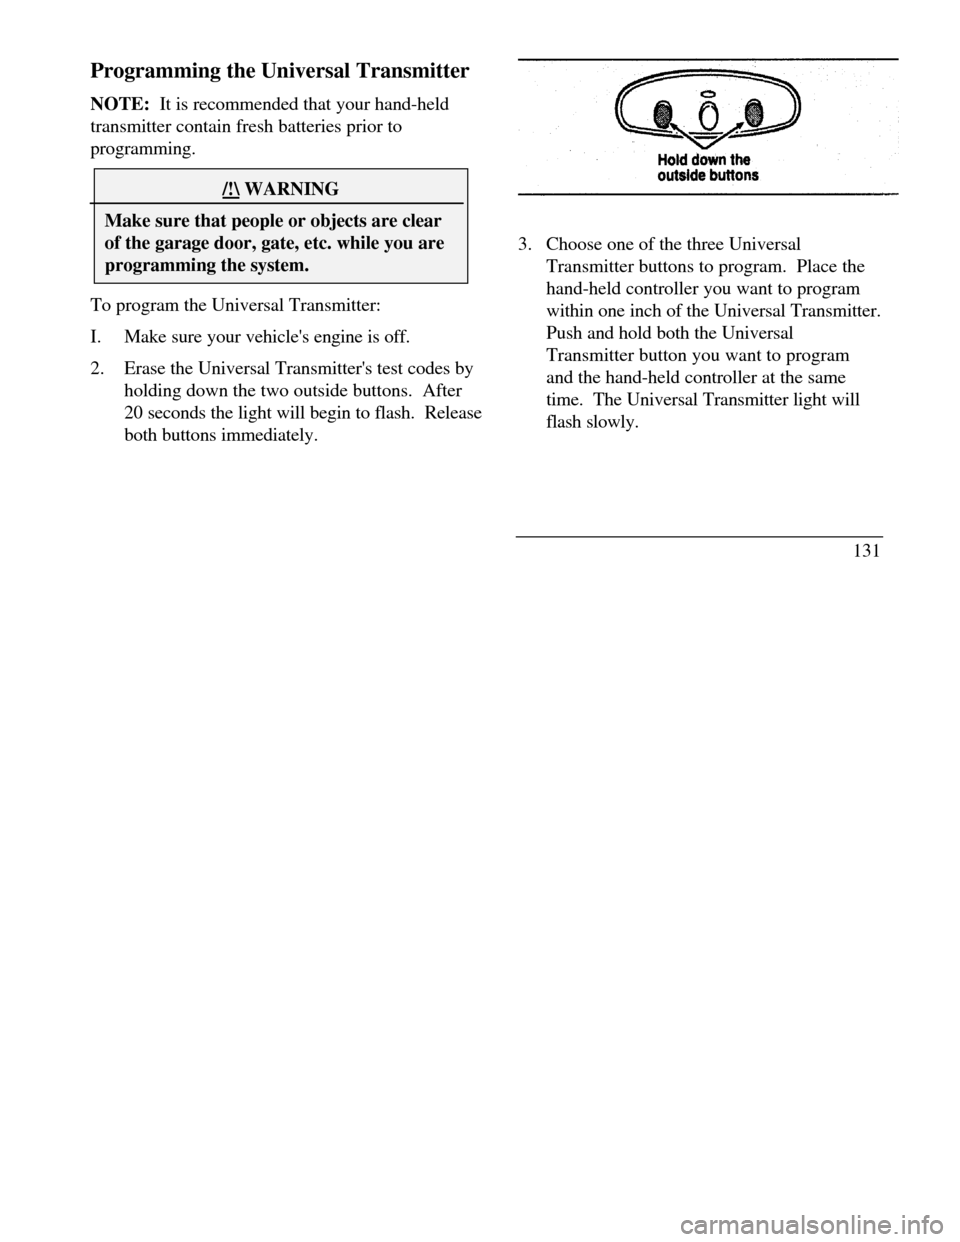
2.Erase the Universal Transmitter's test codes by
holding down the two outside buttons. After
20 seconds the light will begin to flash. Release
both buttons immediately.3. Choose one of the three Universal
Transmitter buttons to program. Place the
hand-held controller you want to program
within one inch of the Universal Transmitter.
Push and hold both the Universal
Transmitter button you want to program
and the hand-held controller at the same
time. The Universal Transmitter light will
flash slowly.
131
Page 135 of 320
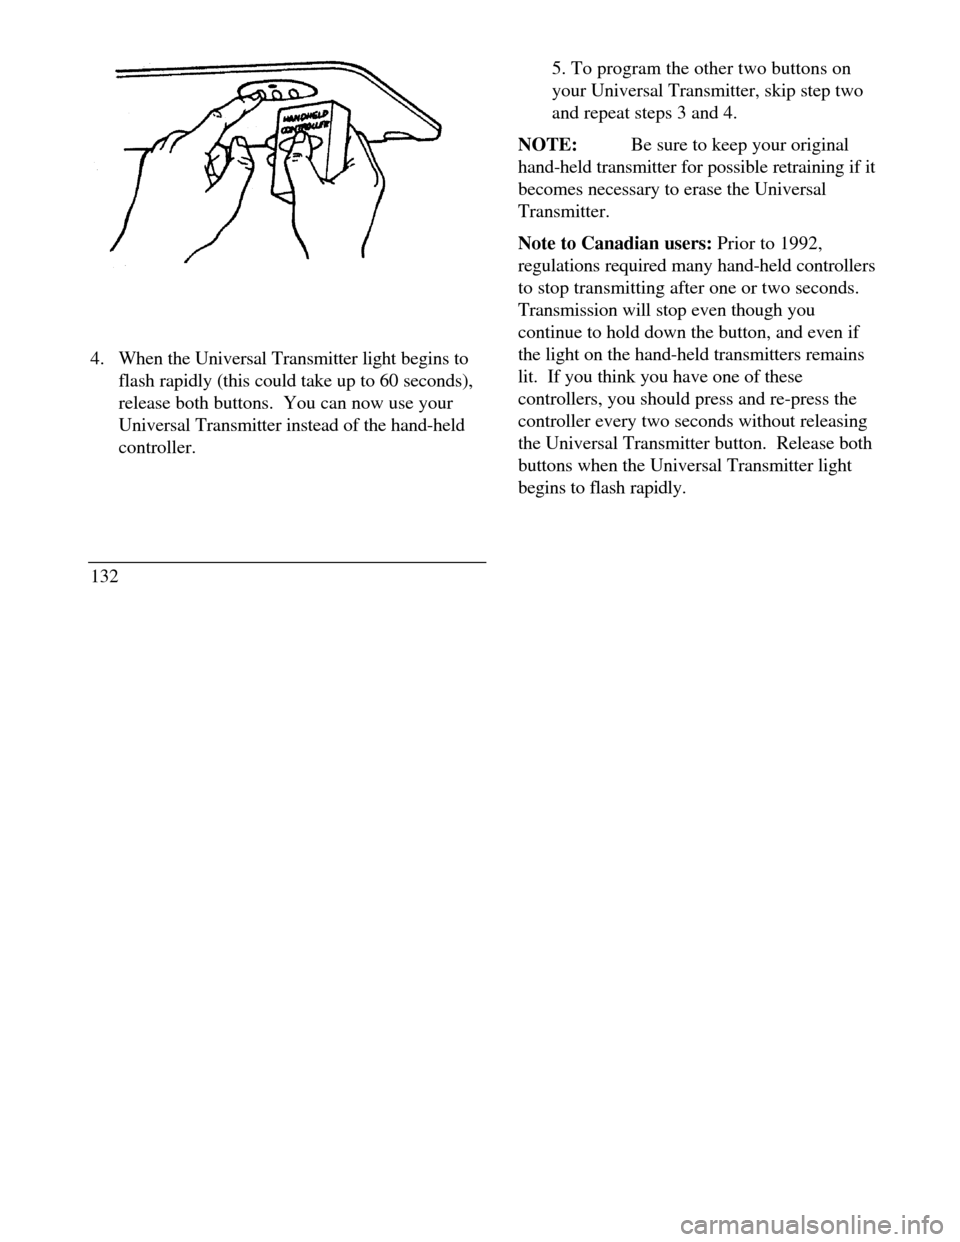
4. When the Universal Transmitter light begins to
flash rapidly (this could take up to 60 seconds),
release both buttons. You can now use your
Universal Transmitter instead of the hand-held
controller.
1325. To program the other two buttons on
your Universal Transmitter, skip step two
and repeat steps 3 and 4.
NOTE:Be sure to keep your original
hand-held transmitter for possible retraining if it
becomes necessary to erase the Universal
Transmitter.
Note to Canadian users: Prior to 1992,
regulations required many hand-held controllers
to stop transmitting after one or two seconds.
Transmission will stop even though you
continue to hold down the button, and even if
the light on the hand-held transmitters remains
lit. If you think you have one of these
controllers, you should press and re-press the
controller every two seconds without releasing
the Universal Transmitter button. Release both
buttons when the Universal Transmitter light
begins to flash rapidly.
Page 136 of 320
Operating the Universal Transmitter/!\ WARNINGDo not use the Universal Transmitter with anygarage door opener that lacks safety "stop"and "reverse" features as required by federalstandards.To operate, press the appropriate button on the
Universal Transmitter. The light will illuminate
while the signal is being transmitted.
NOTE:The effective transmission range of
the Universal Transmitter may differ from your
hand-held transmitter.Erasing the Universal Transmitter
Channels
To clear the Universal Transmitter of all three
previously stored frequencies, follow Step 2 of
the Programming the Universal Transmitter
section.
Console
Your vehicle may have a full console. The full
console has the following features:
133
Page 137 of 320
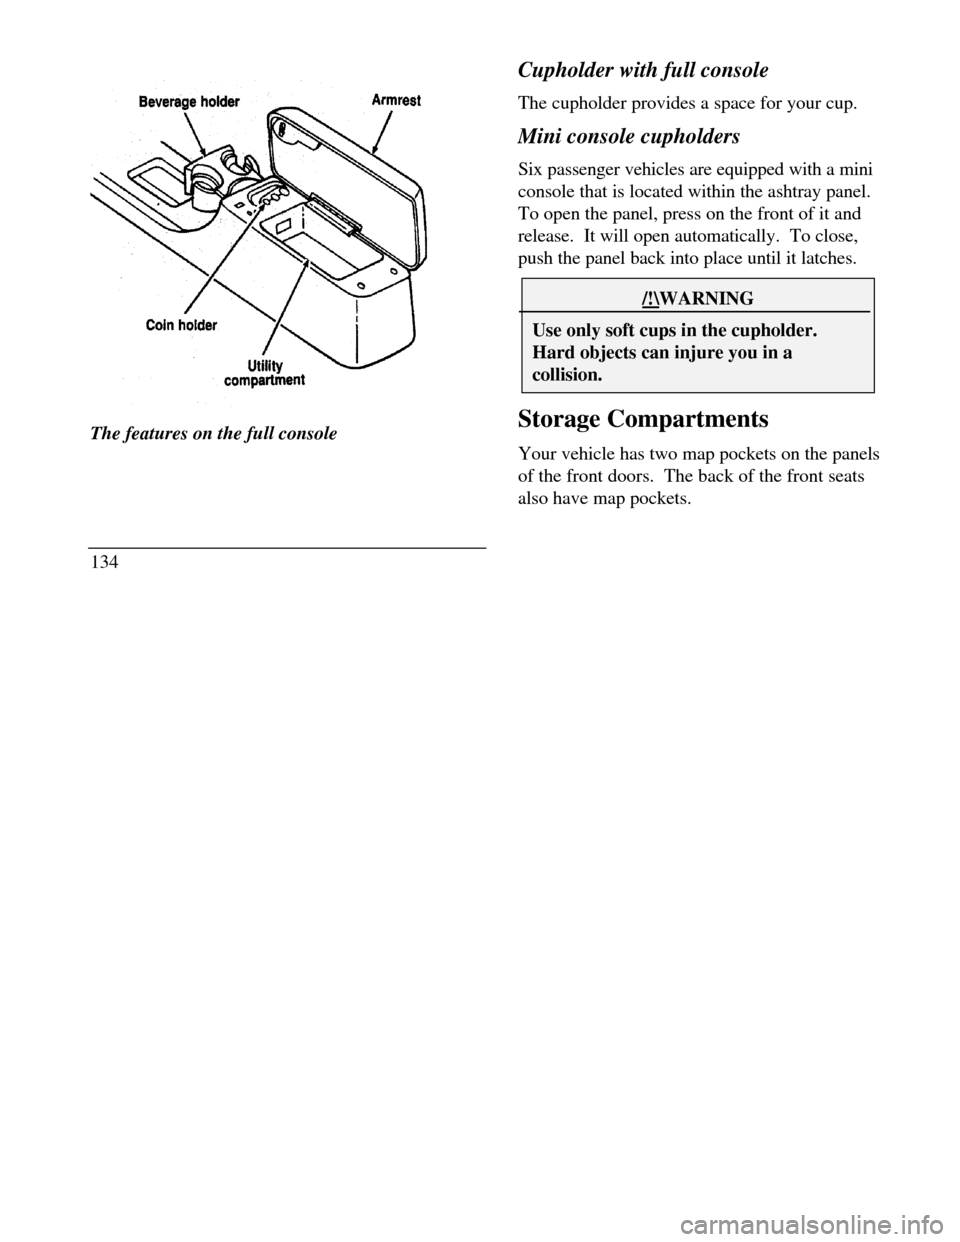
Utility compartment armrest utility compartment beverage holderThe features on the full console
134Cupholder with full console
The cupholder provides a space for your cup.
Mini console cupholders
Six passenger vehicles are equipped with a mini
console that is located within the ashtray panel.
To open the panel, press on the front of it and
release. It will open automatically. To close,
push the panel back into place until it latches./!\WARNINGUse only soft cups in the cupholder.Hard objects can injure you in acollision.Storage Compartments
Your vehicle has two map pockets on the panels
of the front doors. The back of the front seats
also have map pockets.
Page 138 of 320

Trunk
Opening the Trunk Manually
Locate the trunk lock in the rear reflector to the
right of the license plate to insert the key. Turn the
key to the right to open the trunk.The trunk lock cylinderUsing the Power Trunk Release
You can use your power trunk release feature in
three ways:
With your electric trunk release, you can open
the trunk from inside your vehicle by pressing
the TRUNK RELEASE button located on the
driver side door. The TRUNK RELEASE
button will only function when the vehicle is
traveling under three mph (five km/h).
To open your trunk with the keyless entry
system, press 5/6 on the keyless entry pad
within five seconds of entering the keyless code.
You can also open the trunk by pressing the
TRUNK button on the remote entry transmitter.
To prevent inadvertent activation, the trunk
button must be depressed twice within five (5)
seconds to open the trunk.
135
Page 139 of 320
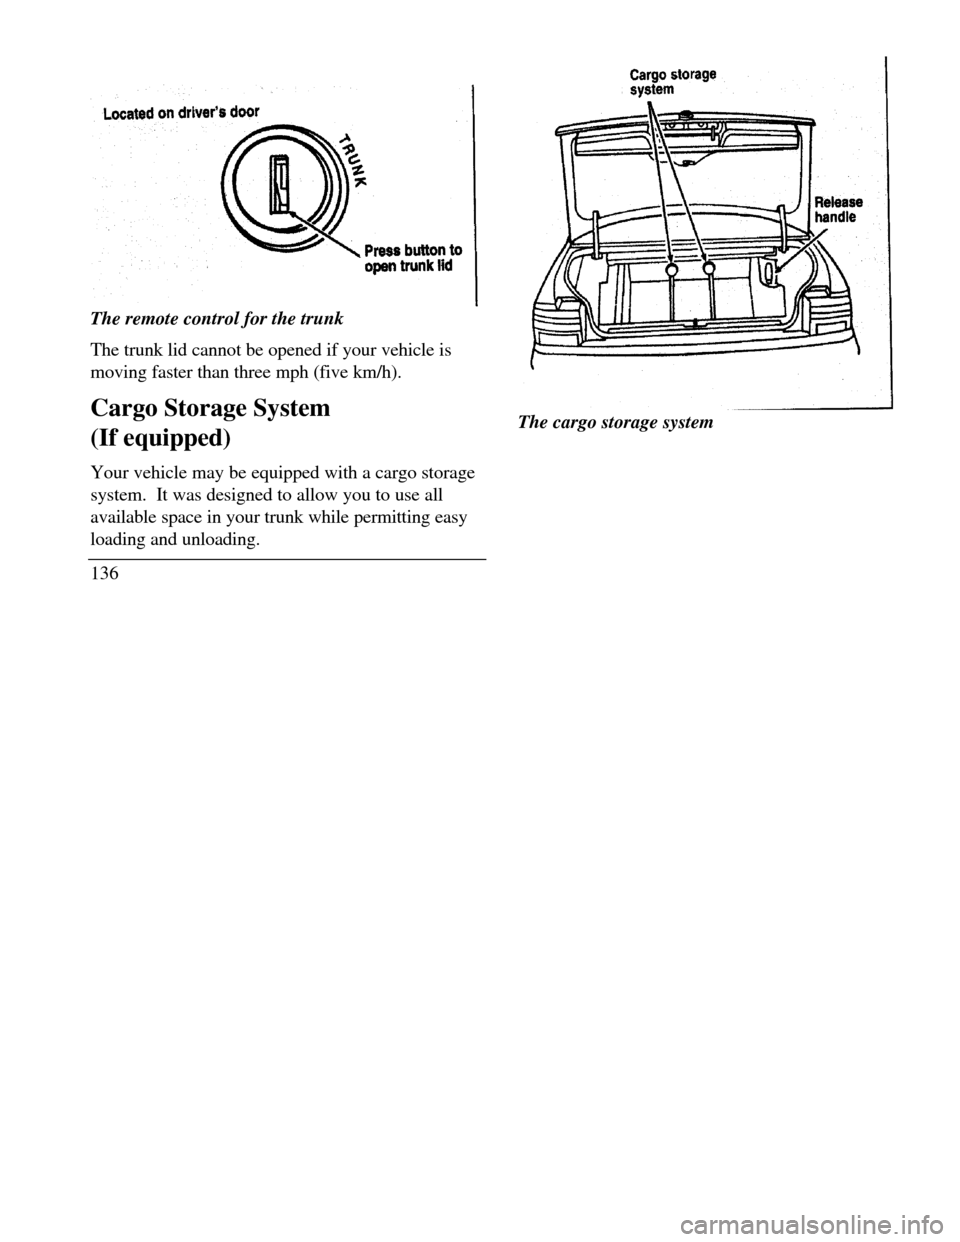
open trunk lidThe remote control for the trunk
The trunk lid cannot be opened if your vehicle is
moving faster than three mph (five km/h).
Cargo Storage System
(If equipped)
Your vehicle may be equipped with a cargo storage
system. It was designed to allow you to use all
available space in your trunk while permitting easy
loading and unloading.
136The cargo storage system
Release handle
Page 140 of 320
To operate:
Grasp and squeeze the release handle to move the
cargo storage system rearward.
Place groceries, packages, etc. in the cargo storage
system.
Grasp and squeeze the release handle to move the
cargo storage system forward untfl it locks into
place.
NOTE:The cargo storage system has three
locking positions. Make sure the storage system is
securely locked in place.
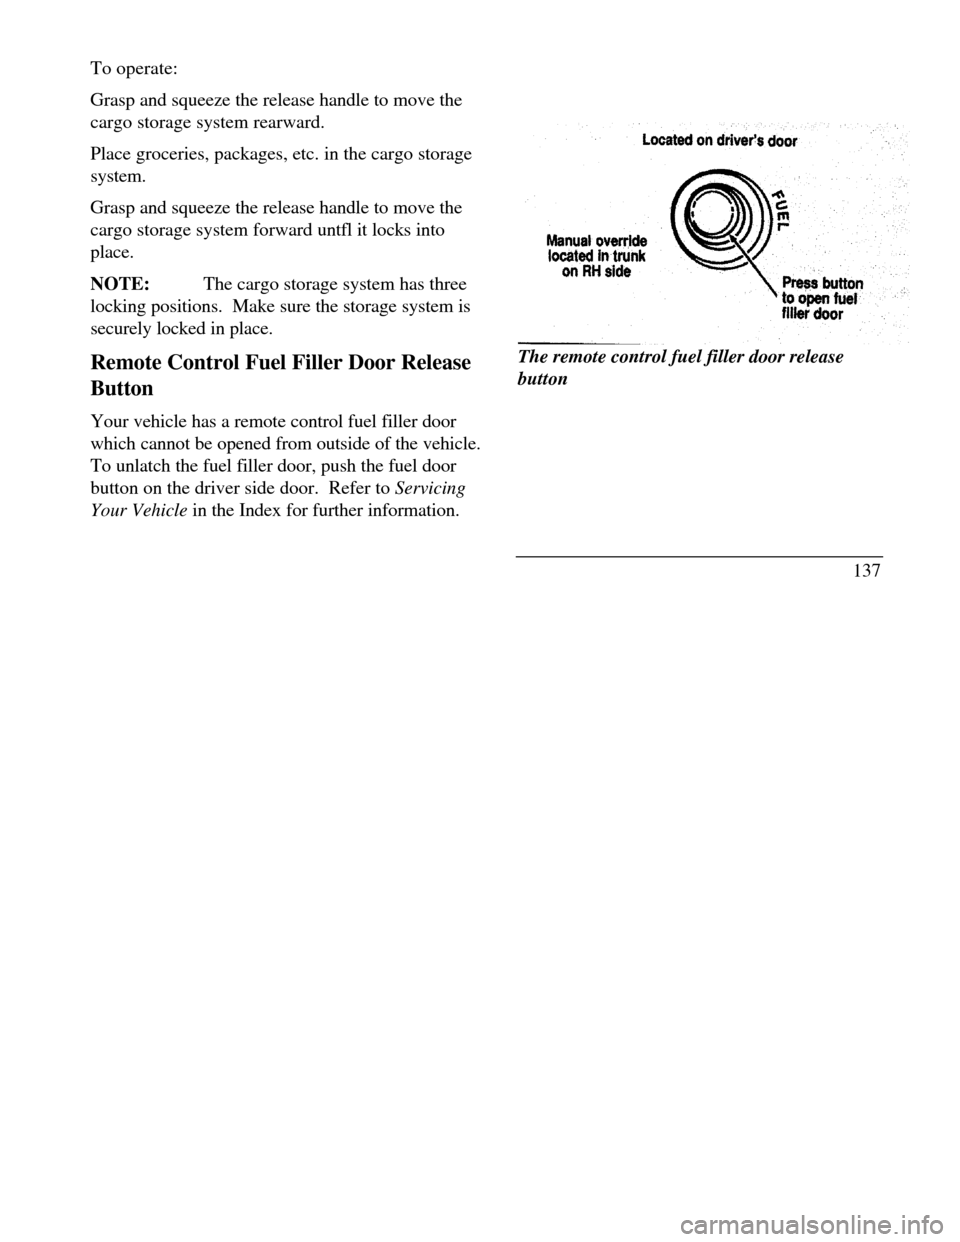
Remote Control Fuel Filler Door Release
Button
Your vehicle has a remote control fuel filler door
which cannot be opened from outside of the vehicle.
To unlatch the fuel filler door, push the fuel door
button on the driver side door. Refer to Servicing
Your Vehicle in the Index for further information.Located on driver's door Manual override
located in trunk on RH side
Press button to open fuel filler
doorThe remote control fuel filler door release
button
137