length MAZDA 626 1987 Workshop Manual
[x] Cancel search | Manufacturer: MAZDA, Model Year: 1987, Model line: 626, Model: MAZDA 626 1987Pages: 1865, PDF Size: 94.35 MB
Page 81 of 1865

INSPECTION AND REPAIR 1 A
Stem tip
Margin
thickness
Valve face
angle
45°
86U01X-078
76G01A-055
(
—SY/ in
76G01A-056
Valve guide
-Valve stem
Clearance
V
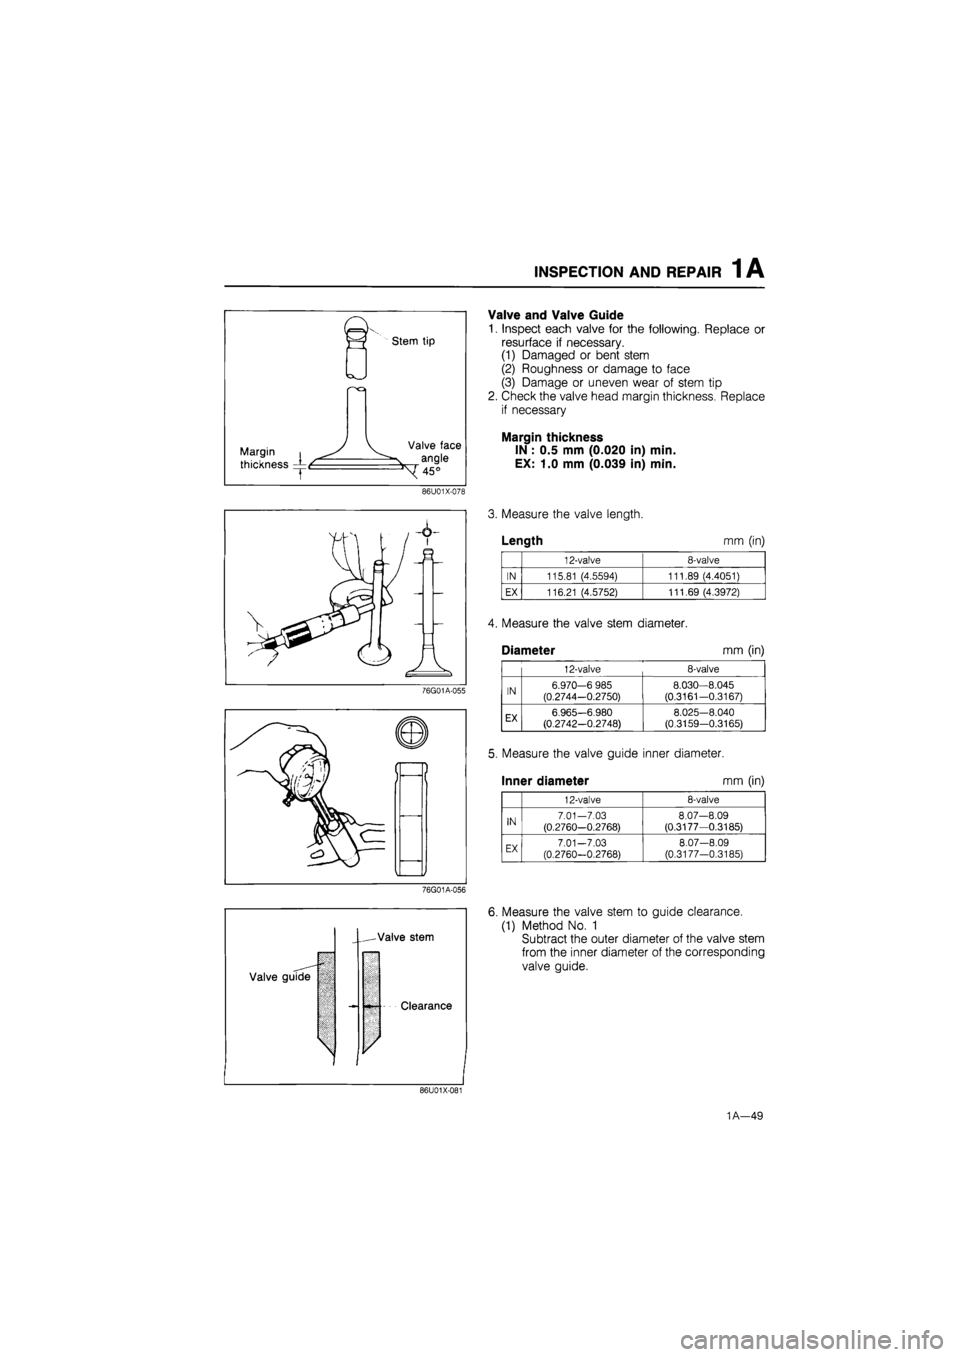
Valve and Valve Guide
1. Inspect each valve for the following. Replace or
resurface if necessary.
(1) Damaged or bent stem
(2) Roughness or damage to face
(3) Damage or uneven wear of stem tip
2. Check the valve head margin thickness. Replace
if necessary
Margin thickness
IN : 0.5 mm (0.020 in) min.
EX: 1.0 mm (0.039 in) min.
3. Measure the valve length.
Length mm (in)
12-valve 8-valve
IN 115.81 (4.5594) 111.89 (4.4051)
EX 116.21 (4.5752) 111.69 (4.3972)
Measure the valve stem diameter.
Diameter mm (in)
12-valve 8-valve
IN 6.970-6 985
(0.2744-0.2750)
8.030—8.045
(0.3161-0.3167)
EX 6.965-6.980 (0.2742-0.2748) 8.025-8.040 (0.3159-0.3165)
5. Measure the valve guide inner diameter.
Inner diameter mm (in)
12-valve 8-valve
IN 7.01-7.03 (0.2760—0.2768) 8.07—8.09
(0.3177—0.3185)
EX 7.01-7.03
(0.2760-0.2768)
8.07-8.09
(0.3177-0.3185)
6. Measure the valve stem to guide clearance.
(1) Method No. 1
Subtract the outer diameter of the valve stem
from the inner diameter of the corresponding
valve guide.
86U01X-117
1A—49
Page 84 of 1865

1A INSPECTION AND REPAIR
76G01A-128
86U01X-088
5. Check the seat contact width.
Width: 1.2—1.6 mm (0.047—0.063 in)
6. Check that the valve seating position is at the cen-
ter of the valve face.
(1) If the seating position is too high, correct the
valve seat with a 60° cutter and a 45° cutter.
(2) If the seating position is too low, correct the
valve seat with a 35° (IN) or 15° (EX) cutter
and a 45° cutter.
7. Seat the valve to the valve seat with a lapping
compound.
76G01A-060
8. Check the sinking of the valve seat.
Measure protruding length (dimension L) of each
valve stem.
Dimension L: 50.2 mm (1.976 in).... 12-valve
46.5 mm (1.831 in).... 8-valve
(1) If L is as below, it can be used as it is.
50.2—51.0 mm (1.976—2.008 in)..12-valve
46.5—48.0 mm (1.831—1.890 in).. 8-valve
(2) If L is as below, insert a spacer between the
spring seat and cylinder head to adjust.
51.0—51.7 mm (2.008—2.035 in)..12-valve
48.0—48.7 mm (1.890—1.917 in).. 8-valve
(3) If L is more than as below, replace the cylin-
der head.
51.7 mm (2.035 in) or more 12-valve
48.7 mm (1.917 in) or more 8-valve
1A—52
Page 85 of 1865

INSPECTION AND REPAIR 1 A
76G01A-062
86U01X-092
76G01A-063
A vl^k
L^-X
B As^
Valve Spring
1. Inspect each valve spring for cracks or damage.
2. Check the free length and angle. Replace if
necessary.
Free length mm (in)
Standard Minimum
12-valve IN 49.5 (1.949) 49.0 (1.929) 12-valve EX 50.4 (1.984) 48.7 (1.917)
I FE.Middle Outer 51.2 (2.016) 50.6 (1.992)
8-valve East General Inner 45.7 (1.799) 43.7 (1.720) 8-valve
Others Outer 52.0 (2.047) 51.5 (2.028) 8-valve
Others Inner 44.0 (1.732) 43.3 (1.705)
Angle: 1.8 mm (0.071 in) max.
Camshaft
1. Set the front and rear journals on V-blocks.
Check the camshaft runout. Replace if necessary.
Runout: 0.03 mm (0.0012 in) max.
2. Check the cam for wear or damage. Replace if
necessary.
3. Check the cam lobe height at the two points as
shown in the figure.
Height mm (in)
Standard Minimum
12-valve IN 41.340 (1.6276) 41.14 (1.620) 12-valve EX 41.847 (1.6476) 41.65 (1.640)
8-valve IN 38.157 (1.5022) 37.96 (1.494) 8-valve EX 38.160 (1.5024) 37.96 (1.494)
4. Measure wear of the journals in X and Y directions
at the two points as shown in the figure.
Diameter mm (in)
12-valve 8-valve
No. 1,5 31.940-31.965 (1.2575-1.2585) 31.940-32.035 (1.2575-1.2612)
No. 2,3,4 31.910-31.935 (1.2563-1.2573) 31.910-32.065 (1.2563—1.2624)
Out-of-round: 0.05 mm (0.002 in) max.
76G01A-129
1
A—53
Page 93 of 1865

INSPECTION AND REPAIR 1 A
Caution
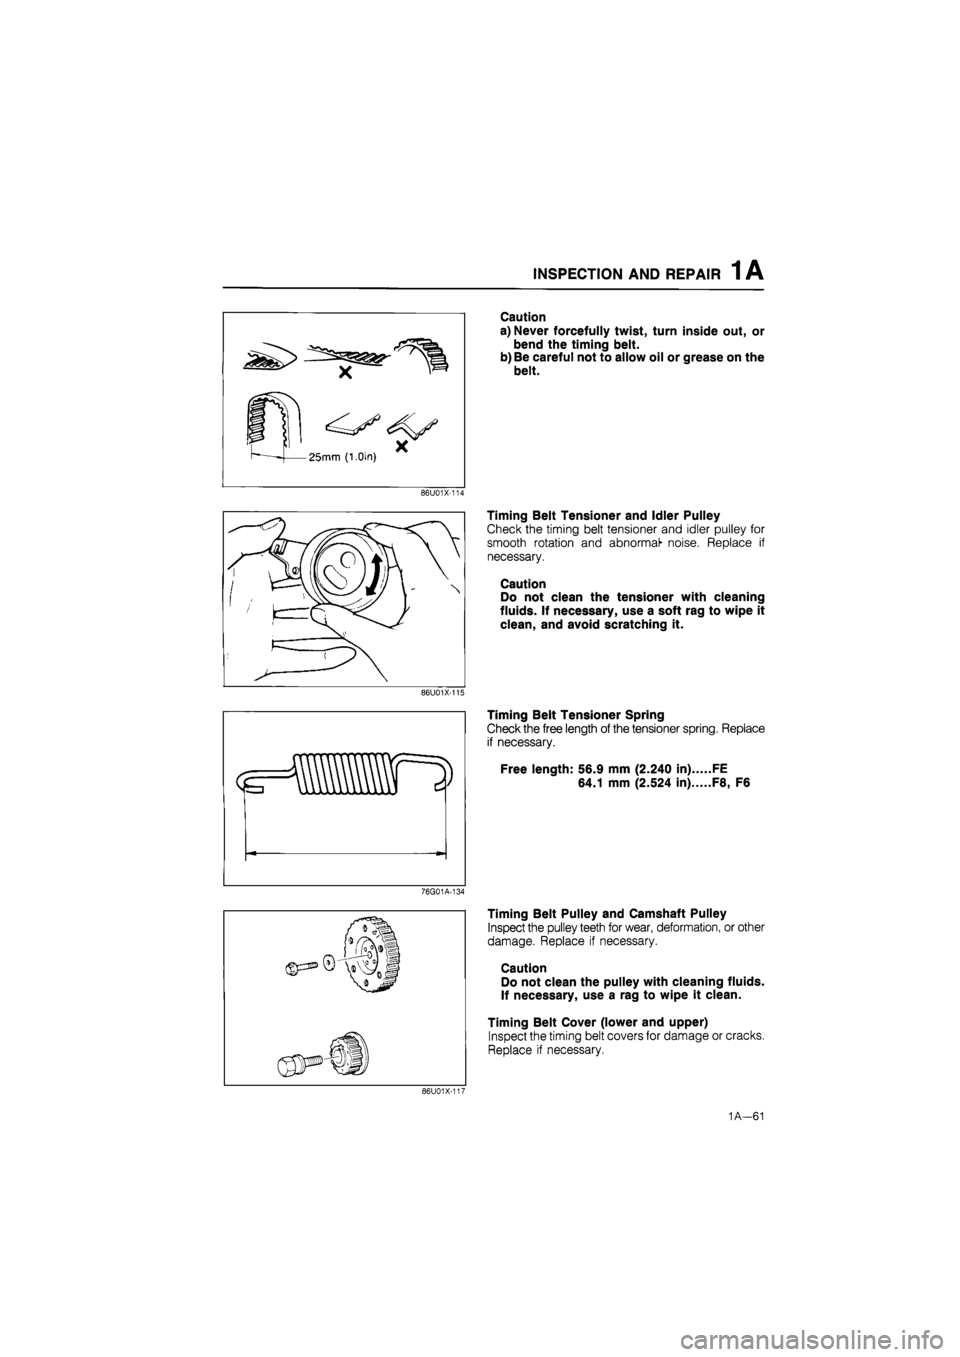
a) Never forcefully twist, turn inside out, or
bend the timing belt.
b) Be careful not to allow oil or grease on the
belt.
86U01X-114
Timing Belt Tensioner and Idler Pulley
Check the timing belt tensioner and idler pulley for
smooth rotation and abnormal- noise. Replace if
necessary.
Caution
Do not clean the tensioner with cleaning
fluids. If necessary, use a soft rag to wipe it
clean, and avoid scratching it.
86U01X-115
Timing Belt Tensioner Spring
Check the free length of the tensioner spring. Replace
if necessary.
Free length: 56.9 mm (2.240 in) FE
64.1 mm (2.524 in) F8, F6
76G01A-134
Timing Belt Pulley and Camshaft Pulley
Inspect the pulley teeth for wear, deformation, or other
damage. Replace if necessary.
Caution
Do not clean the pulley with cleaning fluids.
If necessary, use a rag to wipe it clean.
Timing Belt Cover (lower and upper)
Inspect the timing belt covers for damage or cracks.
Replace if necessary.
86U01X-117
1A—61
Page 166 of 1865

INSPECTION AND REPAIR 1 B
Stem tip
Margin i
thickness -f
Valve face
angle
45°
76G01B-120
76G01B-052
Valve and Valve Guide
1. Inspect each valve for the following. Replace or
resurface if necessary.
(1) Damaged or bent stem
(2) Roughness or damage to face
(3) Damage or uneven wear of stem tip
2. Check the valve head margin thickness. Replace
if necessary
Margin thickness
IN : 0.85 mm (0.033 in) min.
EX: 0.9 mm (0.035 in) min.
3. Measure the valve length.
Length
IN : 103.18 mm (4.0622 in)
EX: 103.94 mm (4.0921 in)
4. Measure the valve stem diameter.
Diameter
IN : 5.970—5.985 mm (0.2350—0.2356 in)
EX: 5.965—5.980 mm (0.2348—0.2354 in)
76G01B-053
5. Measure the valve guide inner diameter.
Inner diameter
IN : 6.01—6.03 mm (0.2366—0.2374 in)
EX: 6.01—6.03 mm (0.2366—0.2374 in)
76G01B-121
1B-35
Page 169 of 1865

INSPECTION AND REPAIR 1 B
76G01A-128
L 75° 75/ 60° 60
35°>
450 V EX '%50 IN
86U01X-088
76G01B-055
5. Check the seat contact width.
Width: 1.2—1.6 mm (0.047—0.063 in)
6. Check that the valve seating position is at the cen-
ter of the valve face.
(1) If the seating position is too high, correct the
valve seat with a 60° cutter and a 45° cutter.
(2) If the seating position is too low, correct the
valve seat with a 35° (IN) or 15° (EX) cutter
and a 45° cutter.
7. Seat the valve to the valve seat with a lapping
compound.
8. Check the sinking of the valve seat.
Measure protruding length (dimension L) of each
valve stem.
Dimension L: 36.8 mm (1.449 in)
(1) If L is as below, it can be used as it is.
36.8—37.6 mm (1.449—1.480 in)
(2) If L is as below, insert a spacer between the
spring seat and cylinder head to adjust.
37.6—38.3 mm (1.480—1.508 in)
(3) If L is more than as below, replace the cylin-
der head.
38.3 mm (1.508 in) or more
Valve Spring 1. Inspect each valve spring for cracks or damage.
2. Check the free length and angle. Replace if
necessary.
Free length
Outer Standard: 39.1 mm (1.539 in)
Minimum: 38.7 mm (1.524 in)
Inner Standard: 38.0 mm (1.496 in)
Minimum: 37.7 mm (1.484 in)
76G01B-059
1B-38
Page 178 of 1865

INSPECTION AND REPAIR 1 B
Caution
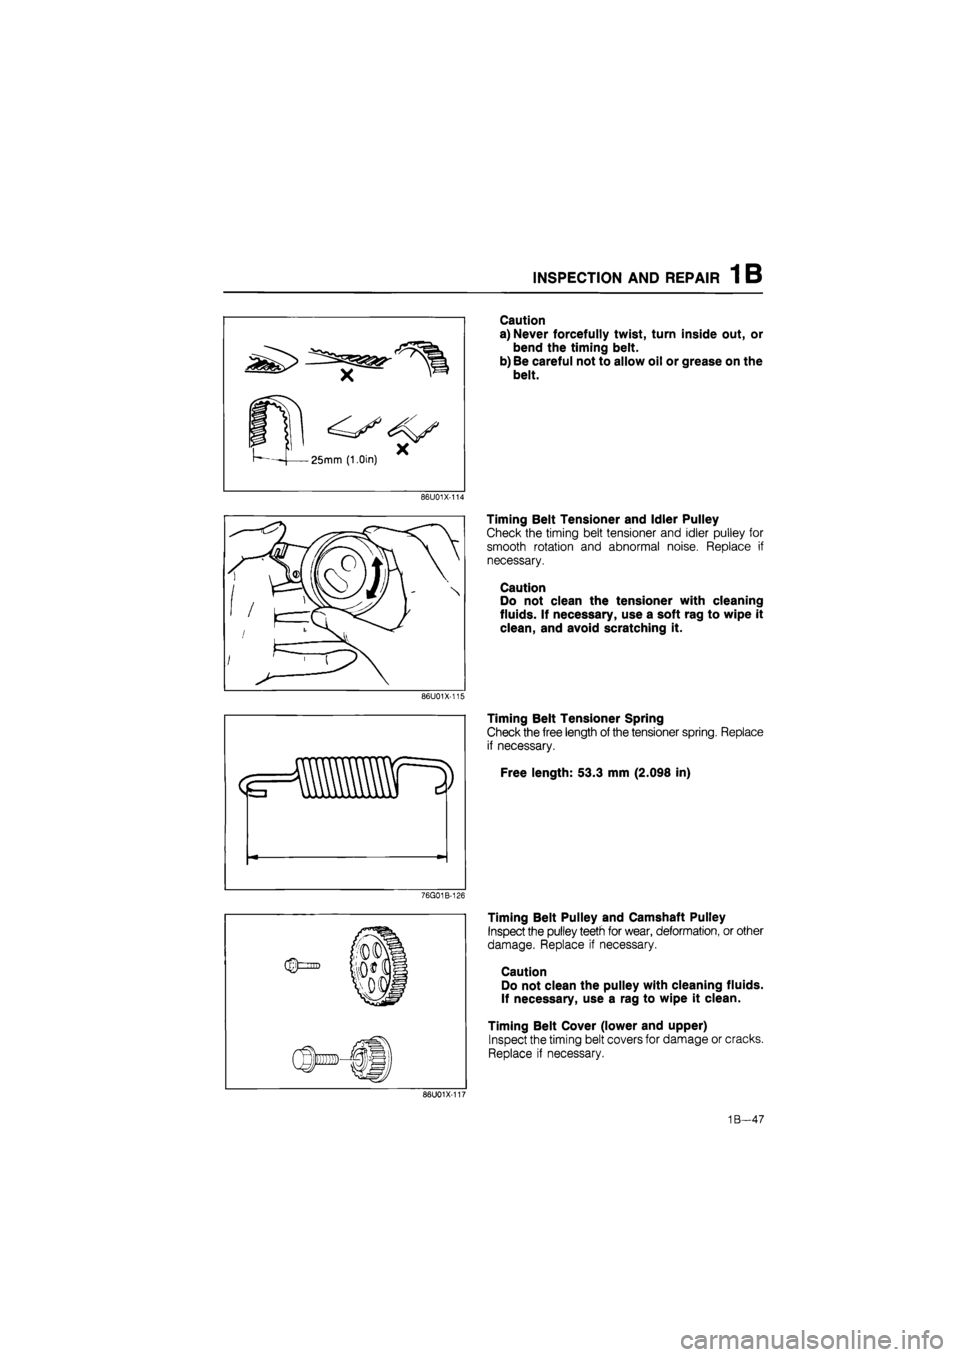
a) Never forcefully twist, turn inside out, or
bend the timing belt.
b) Be careful not to allow oil or grease on the
belt.
86U01X-114
Timing Belt Tensioner and Idler Pulley
Check the timing belt tensioner and idler pulley for
smooth rotation and abnormal noise. Replace if
necessary.
Caution
Do not clean the tensioner with cleaning
fluids. If necessary, use a soft rag to wipe it
clean, and avoid scratching it.
86U01X-115
Timing Belt Tensioner Spring
Check the free length of the tensioner spring. Replace
if necessary.
Free length: 53.3 mm (2.098 in)
76G01B-126
Timing Belt Pulley and Camshaft Pulley
Inspect the pulley teeth for wear, deformation, or other
damage. Replace if necessary.
Caution
Do not clean the pulley with cleaning fluids.
If necessary, use a rag to wipe it clean.
Timing Belt Cover (lower and upper)
Inspect the timing belt covers for damage or cracks.
Replace if necessary.
86U01X-101
1B—47
Page 230 of 1865

1 C ON-VEHICLE MAINTENANCE (CYLINDER HEAD)
76G01C-241
76G01C-035
69G01A-031
Injection pump pulley
1. Put two bolts of 35—40 mm (1.4—1.6 in) length
into the arms of the injection pump pulley and af-
fix them in the threaded hole of the injection pump
bracket.
2. Loosen the injection pump pulley lock bolt.
3. Separate the injection pump pulley from the injec-
tion pump shaft with the SST.
Cylinder head bolt
Loosen the cylinder head bolts in two or three steps,
and in the order shown in the figure.
Disassembly of Cylinder Head
Refer to page 1C—40.
Inspection of Cylinder Head
Refer to page 1C—47.
Assembly of Cylinder Head
Refer to page 1C—73.
76G01C-048
1C-18
Page 232 of 1865

ON-VEHICLE MAINTENANCE (CYLINDER HEAD) 1 C
76G01C-037
Apply engine oil
/
Cylinder head bolt
below head length
76G01C-038
(8) (4; D (5)
® ®
76G01C-039
3m-kg
(21.7ft-lb
Installation
Cylinder head
1. Throughly remove all dirt and grease from the top
of the cylinder block with a rag.
2. Place the new cylinder head gasket in position.
3. Remove any dirt and grease from the bottom sur-
face of the cylinder head.
4. Place the cylinder head in position.
5. Measure the length of the cylinder head bolt be-
low the head. If the length exceeds the maximum,
replace the bolt.
Length: 113.2—113.8 mm (4.457—4.480 in)
Maximum: 114.5 mm (4.508 in)
6. Apply engine oil to the threads and the seat face
of the cylinder head bolts.
7. Tighten the cylinder head bolts.
(1) Tighten the bolts to the specified torque, in the
order shown in the figure.
Tightening torque:
29 N-m (3.0 m-kg, 22 ft-lb)
(2) Make paint marks on the bolt heads, as shown
in the figure.
(3) With the paint marks as a reference point, turn
the cylinder head bolts another 90°
(90°—105°) in the tightening direction. Tight-
en them in the order.
(4) Then tighten them once again 90°
(90°—105°) in the tightening order.
Caution
Be absolutely sure that the bolts are tightened
in the proper order.
76G01C-044
1C—20
Page 250 of 1865

1 C DISASSEMBLY (TIMING BELT)
Injection pump pulley
1. Put two bolts of 35—40 mm (1.4—1.6 in) length
into the arms of the injection pump pulley and af-
fix them in the threaded hole of the injection pump
bracket.
2. Loosen the injection pump pulley lock bolt.
3. Separate the injection pump pulley from the injec-
tion pump shaft with the SST.
Camshaft pulley
1. Hold the camshaft with a wrench (29 mm, 1.14 in)
and loosen the camshaft pulley lock bolt.
Caution
Do not damage the cylinder head edge with
the wrench.
2. Separate the camshaft pulley from the camshaft
with the SST.
Caution
Do not hit the camshaft pulley with a hammer.
Rear camshaft pulley
Remove the rear camshaft pulley in the same man-
ner used for camshaft pulley.
4BG01B-087
76G01C-081
1C—38