MAZDA MX-5 1994 Workshop Manual
Manufacturer: MAZDA, Model Year: 1994,
Model line: MX-5,
Model: MAZDA MX-5 1994
Pages: 1708, PDF Size: 82.34 MB
MAZDA MX-5 1994 Workshop Manual
MX-5 1994
MAZDA
MAZDA
https://www.carmanualsonline.info/img/28/57072/w960_57072-0.png
MAZDA MX-5 1994 Workshop Manual
Trending: clock reset, change wheel, ABS, warning light, alternator belt, wheel bolts, airbag
Page 1301 of 1708
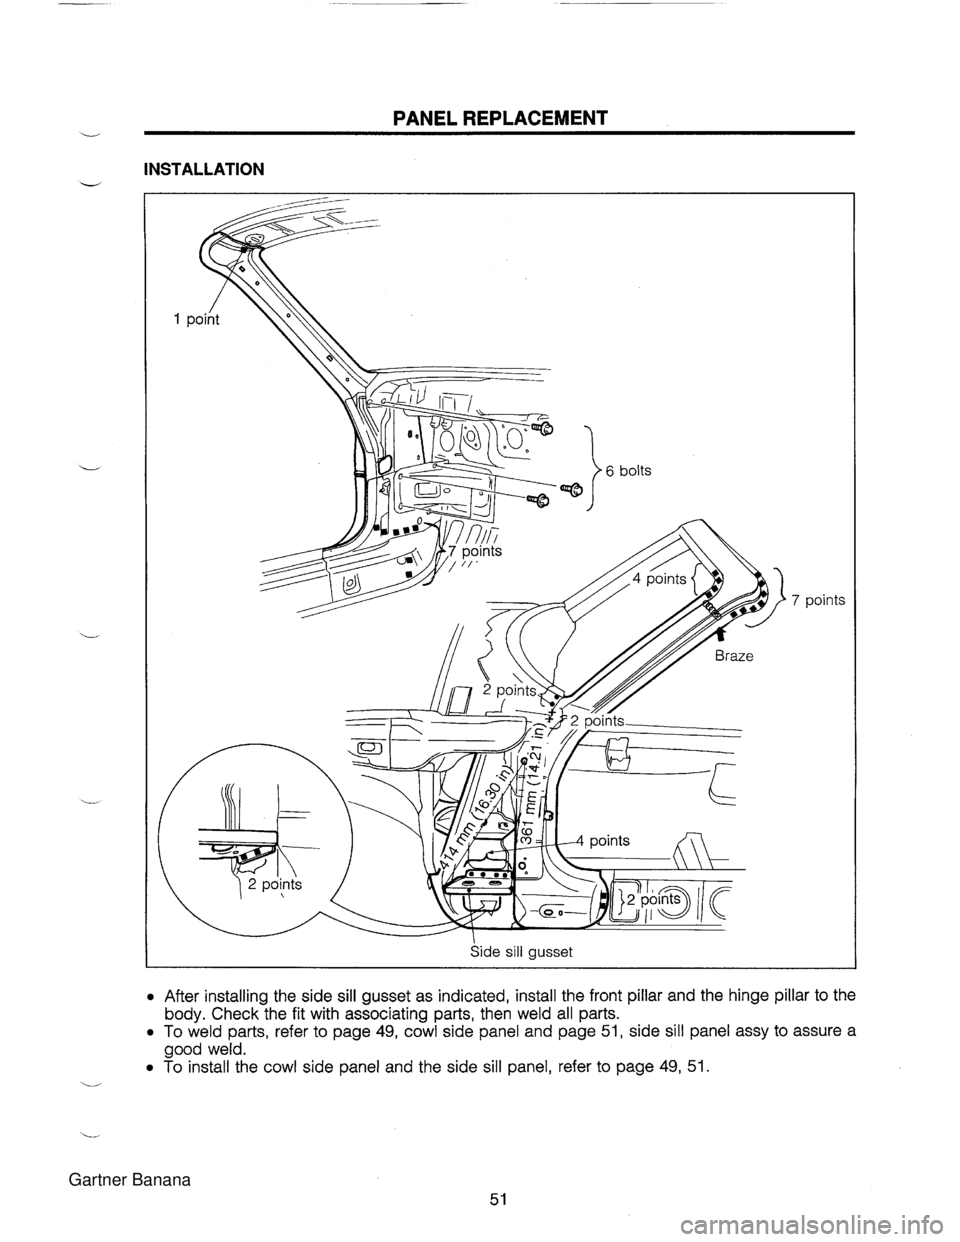
PANEL REPLACEMENT INSTALLATION 1 6 bolts Side sill gusset points After installing the side sill gusset as indicated, install the front pillar and the hinge pillar to the body. Check the fit with associating parts, then weld all parts. To weld parts, refer to page 49, cowl side panel and page 51, side sill panel assy to assure a good weld. To install the cowl side panel and the side sill panel, refer to page 49, 51. Gartner Banana
Page 1302 of 1708
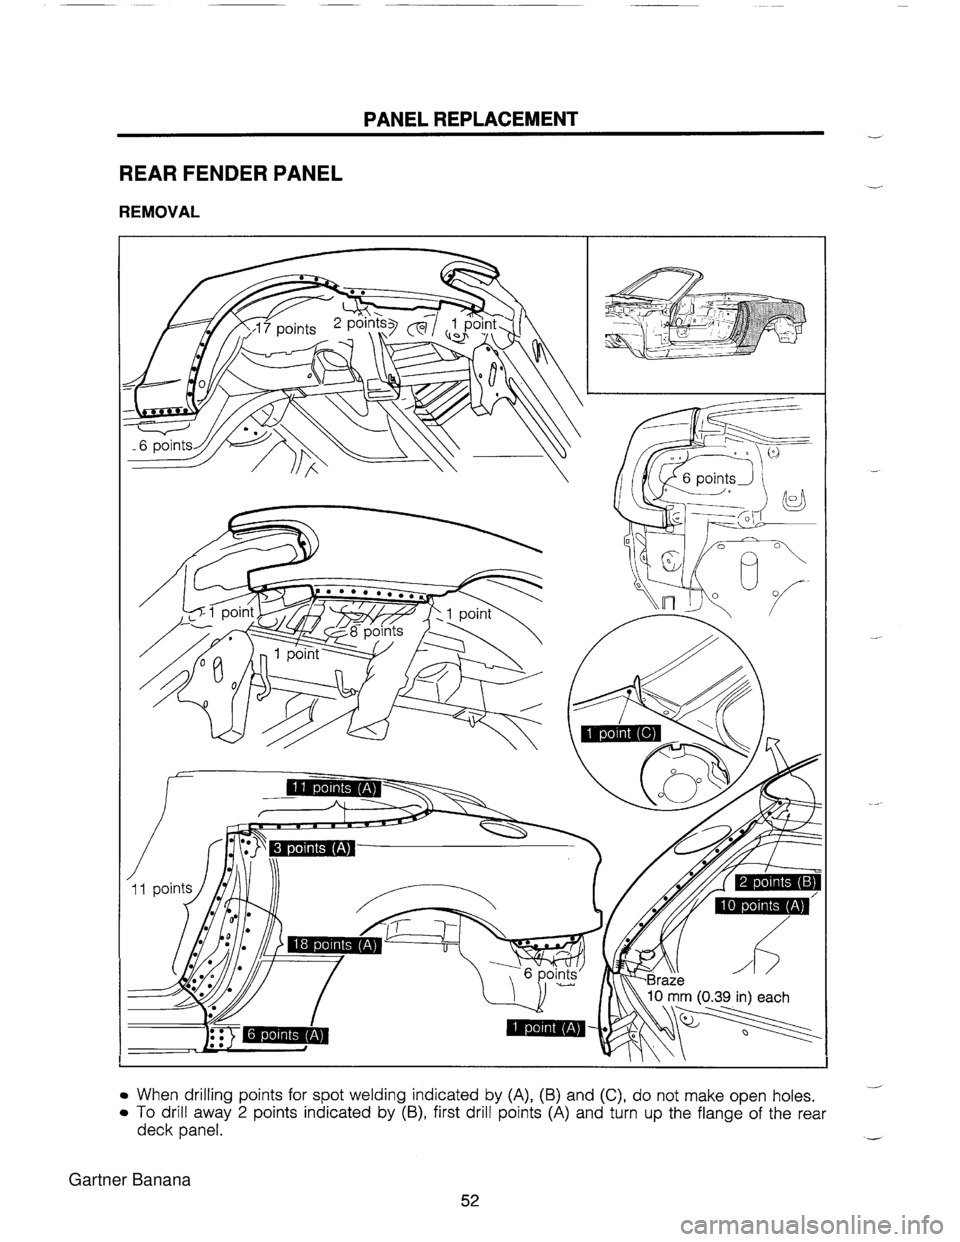
PANEL REPLACEMENT - REAR FENDER PANEL REMOVAL When drilling points for spot welding indicated by (A), (B) and (C), do not make open holes. To drill away 2 points indicated by (B), first drill points (A) and turn up the flange of the rear deck panel. Gartner Banana
Page 1303 of 1708
PANEL REPLACEMENT V INSTALLATION a Apply body sealer before installing new parts as shown in the illustration. \- a After temporary installation of new parts, check the fit with associating parts (door, trunk lid, rear combination lights, rear bumper, rear finisher etc.). L To plug weld 2 points indicated by (A), first spot weld point (B) and turn down the flange of the rear deck panel to the original position. Gartner Banana
Page 1304 of 1708
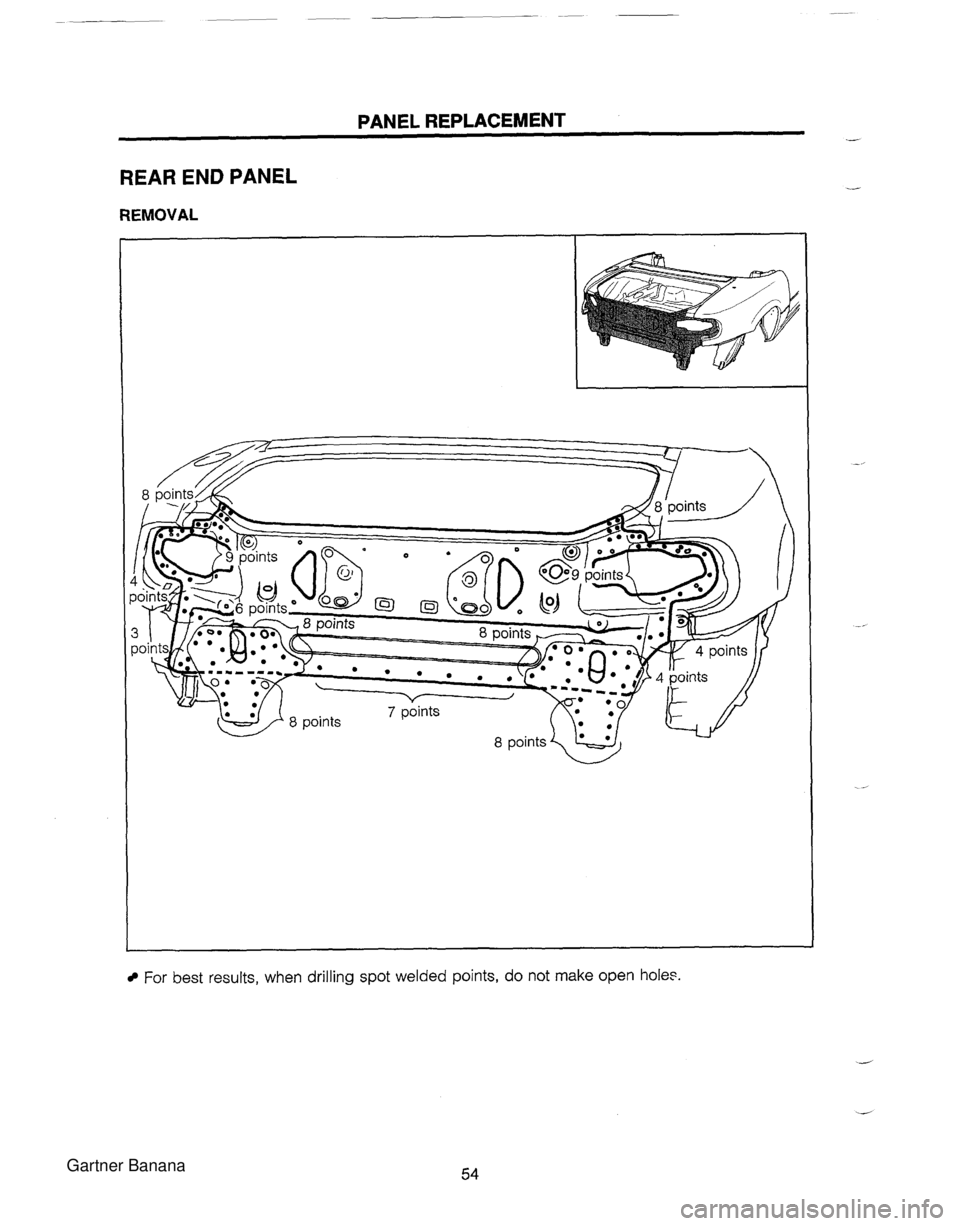
PANEL REPLACEMENT REAR END PANEL REMOVAL I For best results, when drilling spot welded points, do not make open hole?. Gartner Banana
Page 1305 of 1708
PANEL REPLACEMENT L INSTALLATION After temporary installation of new parts, measure the dimensions to verify that they are as specified. Check the fit with associating parts (trunk lid, rear combination lights, rear bumper, etc.). Spot welds on rear combination light side must be smooth. Gartner Banana
Page 1306 of 1708
PANEL REPLACEMENT - TRUNK FLOOR PAN, FLOOR SIDE PANEL REMOVAL to cut weld and I u Floor side panel (left) Trunk floor L / Floor side panel (right) Gartner Banana
Page 1307 of 1708
PANEL REPLACEMENT L REMOVAL (left) splas\h protect'or (right) Work should be performed after the rear end panel and the rear fender panel (left) are removed. The trunk floor is replaced by cut-and-join operation indicated on page 60. The cut-and-join operation is performed after turning up the tank floor as indicated by arrows in the illustration. When drilling points (A) for spot welding, do not make open holes. - When the rear fender panel (left) is replaced at the same time, the panel can be removed without cutting away the spot welded points indicated by (A). Do not damage the rear side frame when rough-cutting. L Gartner Banana
Page 1308 of 1708
PANEL REPLACEMENT TRUNK FLOOR PAN, FLOOR SIDE PANEL INSTALLATION Gartner Banana
Page 1309 of 1708
PANEL REPLACEMENT L INSTALLATION Before installing new parts, measure the rear side frame dimensions to verify that they are as specified. After installing new parts, check the fit with associating parts. Turn down the tank floor to the original position after welding the cut-and-join location of the trunk floor and flattening it with a disc grinder. - Plug-weld the trunk floor, tank floor, and crossmember (No. 4). Weld a washer (PART NO. 99952 2240A) at the rear crossmember installing bolt (two points). Gartner Banana
Page 1310 of 1708
Trending: overheating, rims, clock, wheel torque, ECU, engine overheat, oil temperature


