MAZDA MX-5 1994 Workshop Manual
Manufacturer: MAZDA, Model Year: 1994,
Model line: MX-5,
Model: MAZDA MX-5 1994
Pages: 1708, PDF Size: 82.34 MB
MAZDA MX-5 1994 Workshop Manual
MX-5 1994
MAZDA
MAZDA
https://www.carmanualsonline.info/img/28/57072/w960_57072-0.png
MAZDA MX-5 1994 Workshop Manual
Trending: service indicator, oil reset, glove box, set clock, change wheel, ad blue, ignition
Page 1291 of 1708
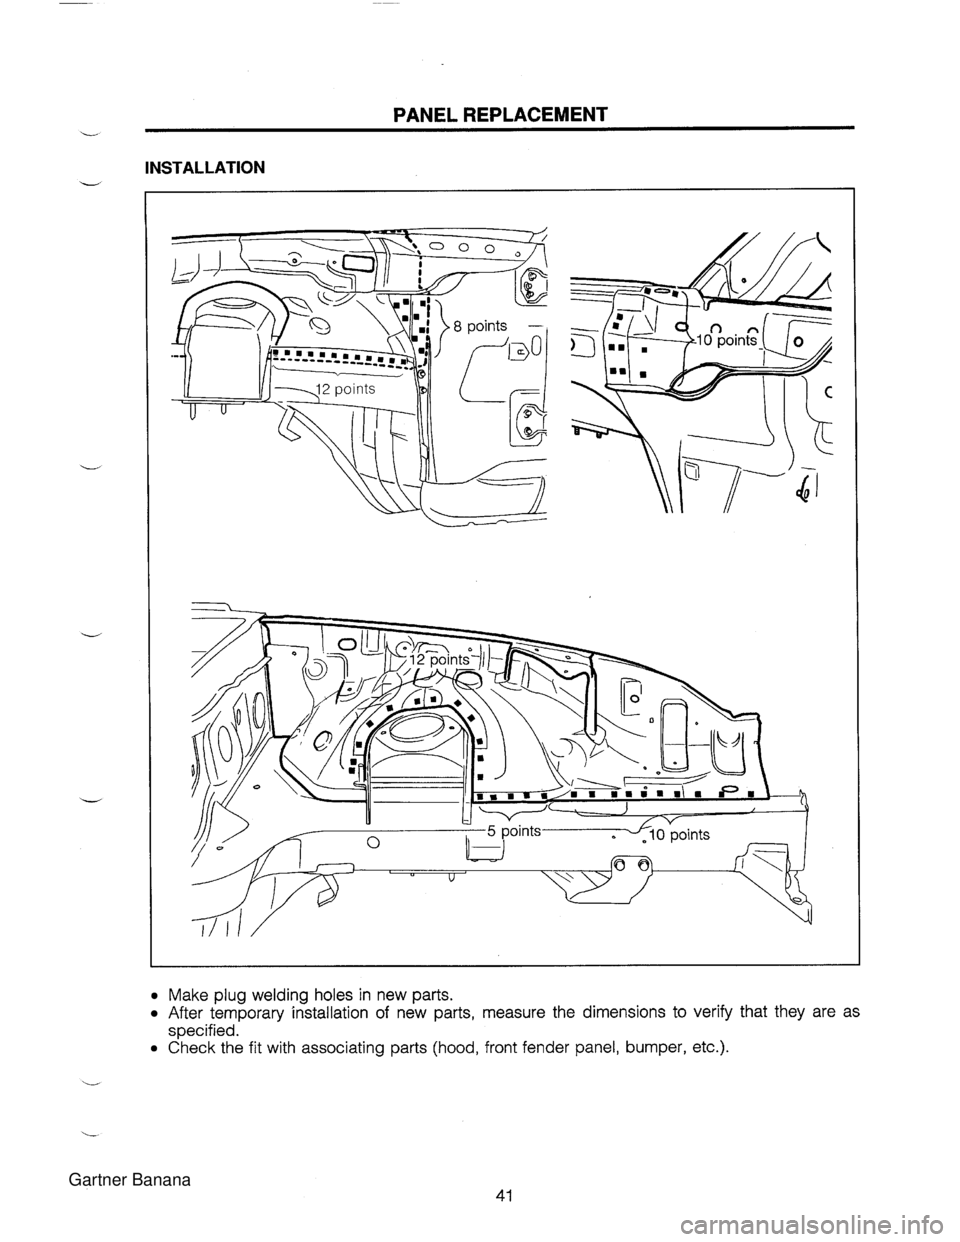
PANEL REPLACEMENT INSTALLATION Make plug welding holes in new parts. After temporary installation of new parts, measure the dimensions to verify that they are as specified. Check the fit with associating parts (hood, front fender panel, bumper, etc.). Gartner Banana
Page 1292 of 1708
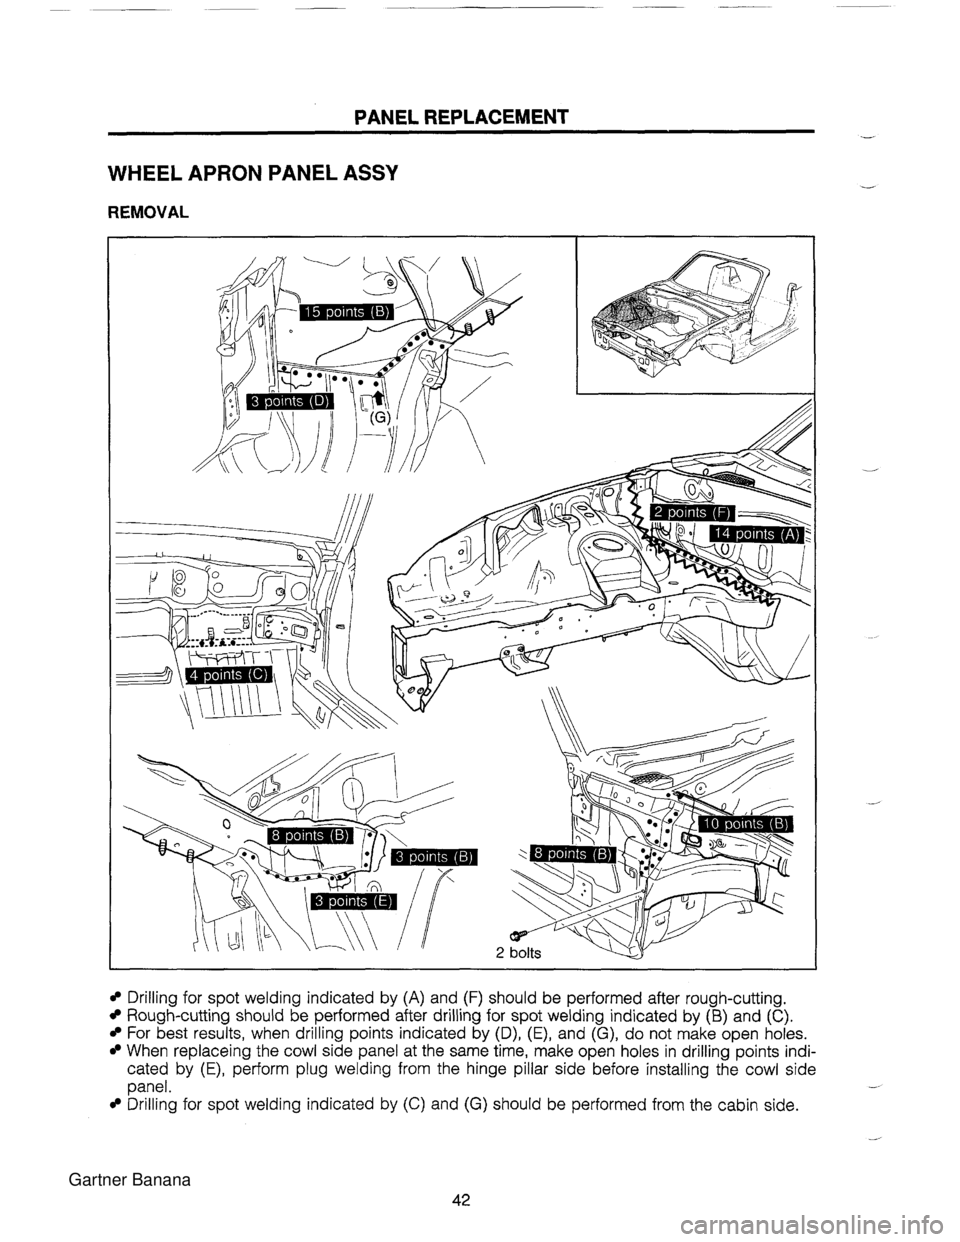
PANEL REPLACEMENT WHEEL APRON PANEL ASSY REMOVAL Drilling for spot welding indicated by (A) and (F) should be performed after rough-cutting. Rough-cutting should be performed after drilling for spot welding indicated by (B) and (C). For best results, when drilling points indicated by (D), (E), and (G), do not make open holes. When replaceing the cowl side panel at the same time, make open holes in drilling points indi- cated by (E), perform plug welding from the hinge pillar side before installing the cowl side panel. - Drilling for spot welding indicated by (C) and (G) should be performed from the cabin side. Gartner Banana
Page 1293 of 1708
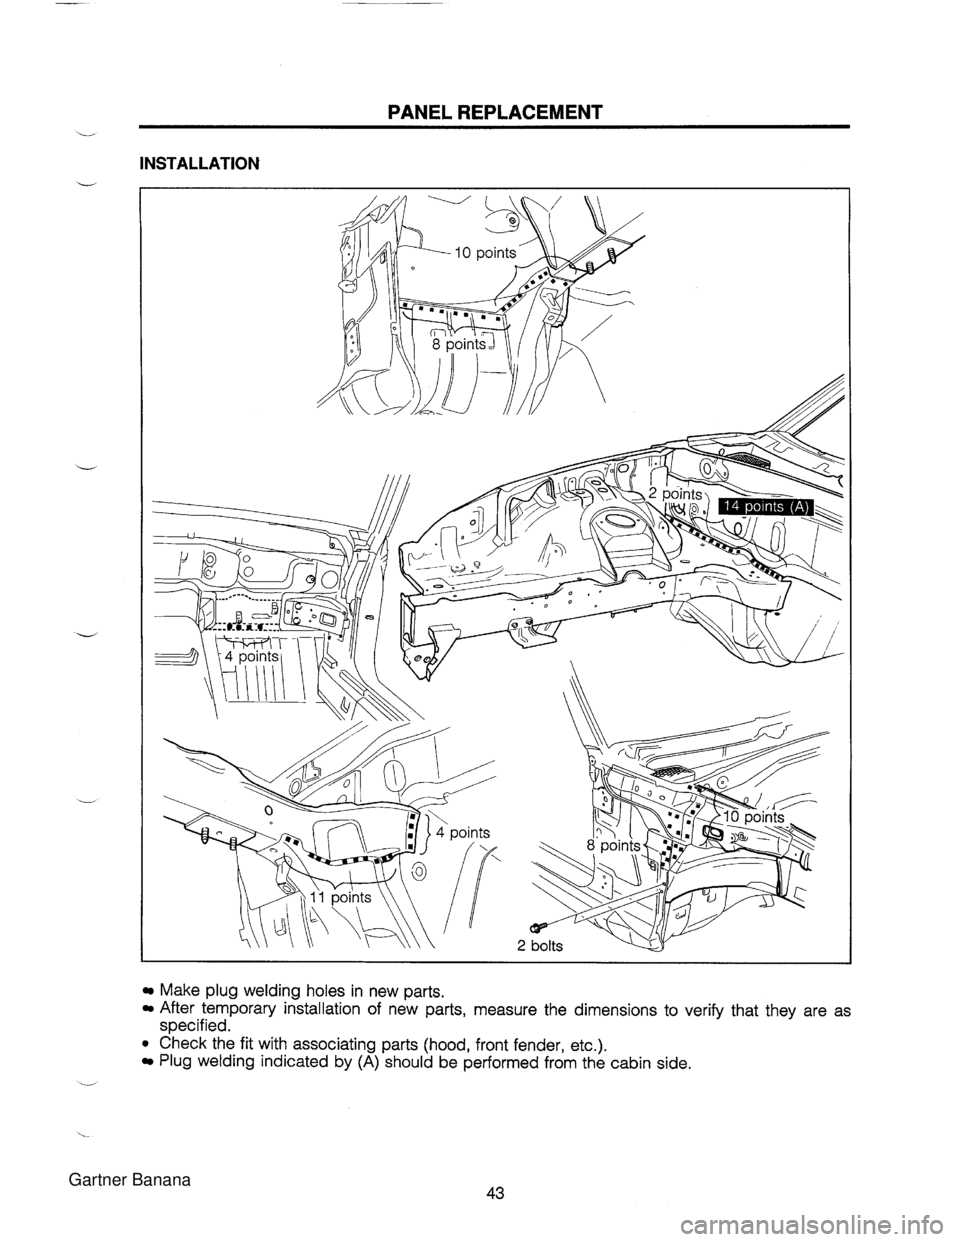
PANEL REPLACEMENT - INSTALLATION Make plug welding holes in new parts. After temporary installation of new parts, measure the dimensions to verify that they are as specified. Check the fit with associating parts (hood, front fender, etc.). Plug welding indicated by (A) should be performed from the cabin side. - Gartner Banana
Page 1294 of 1708
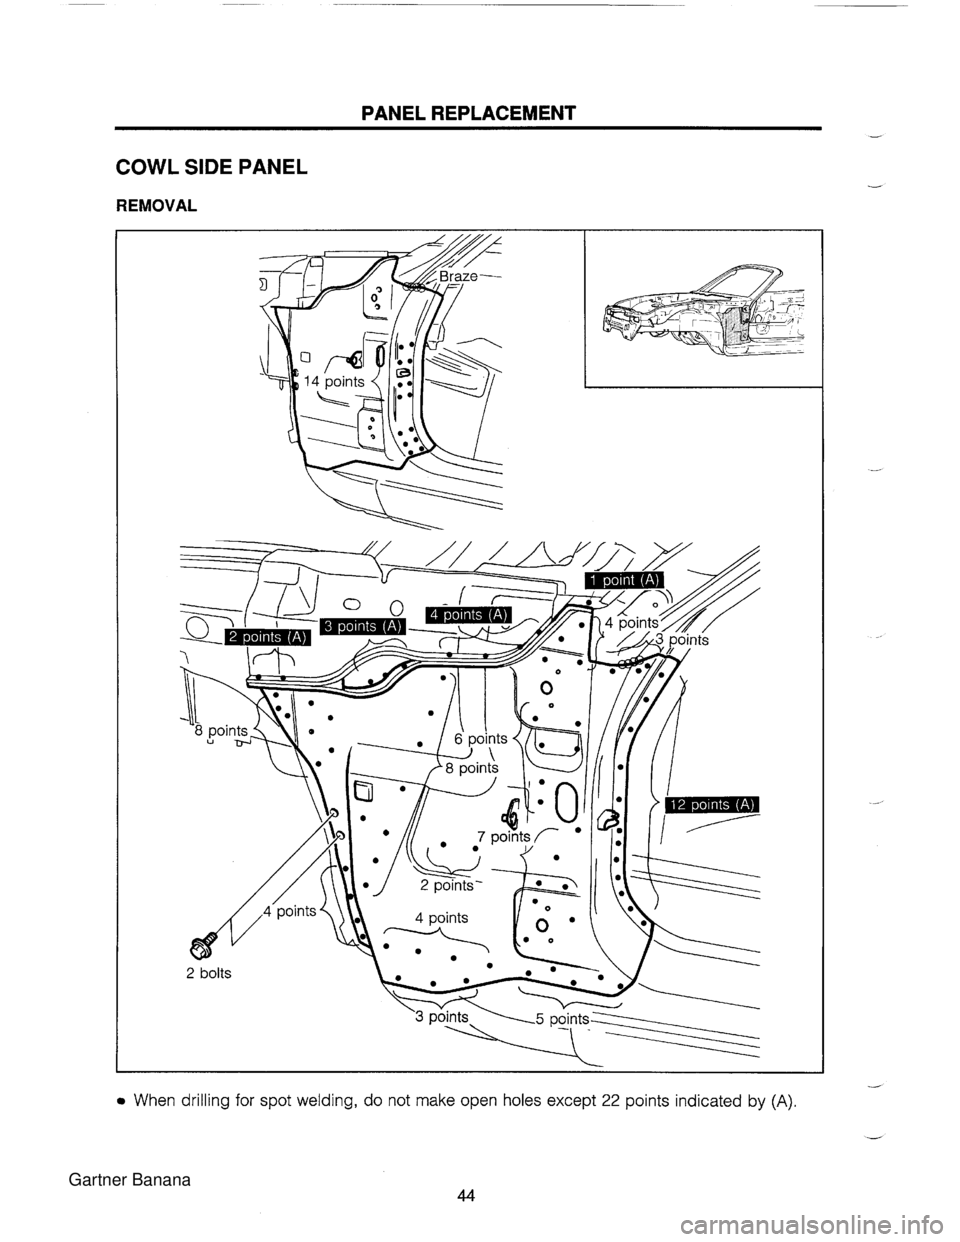
PANEL REPLACEMENT COWL SIDE PANEL REMOVAL When drilling for spot welding, do not make open holes except 22 points indicated by (A). 44 Gartner Banana
Page 1295 of 1708
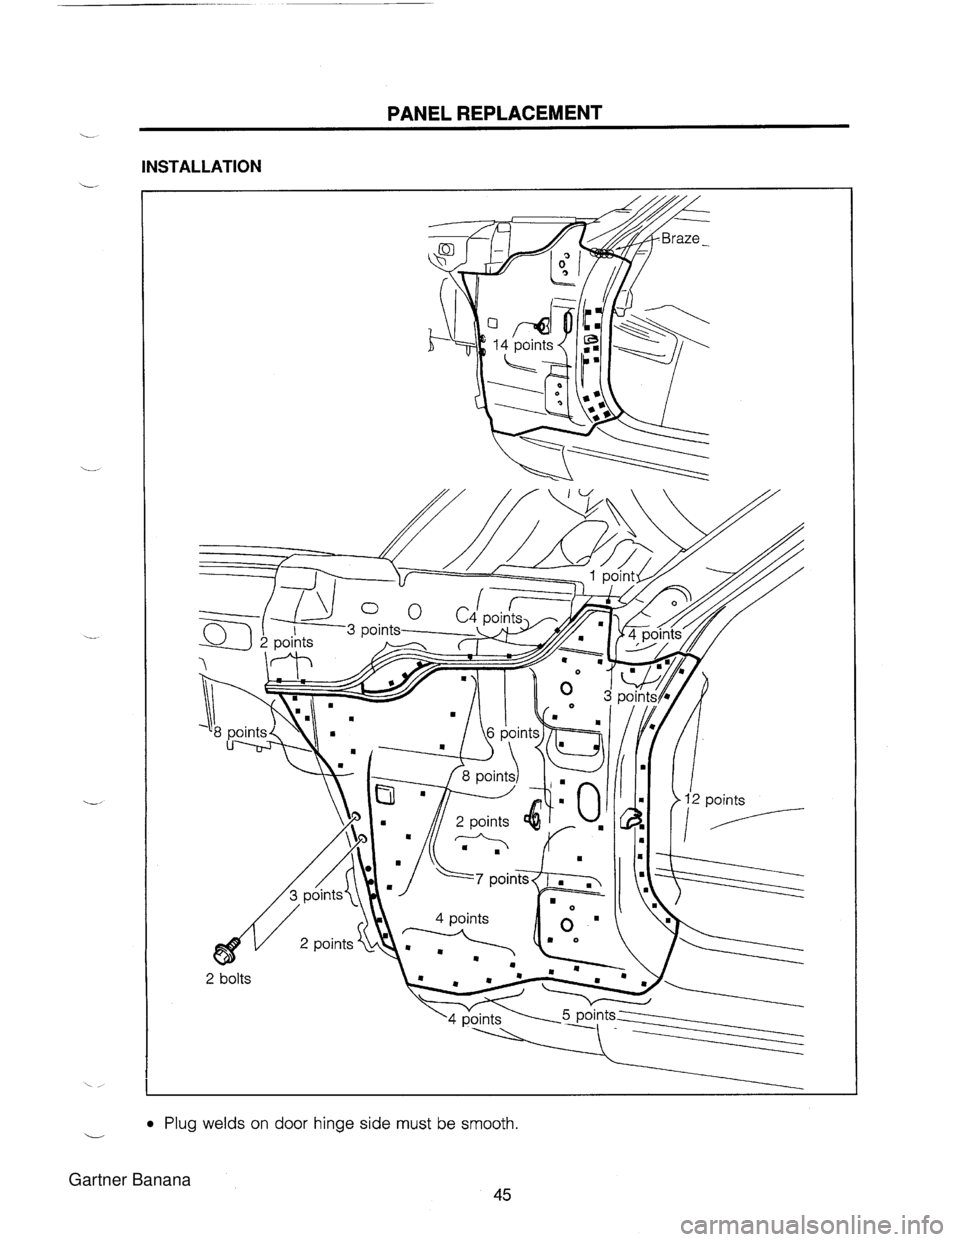
PANEL REPLACEMENT L INSTALLATION L Plug welds on door hinge side must be smooth. Gartner Banana
Page 1296 of 1708
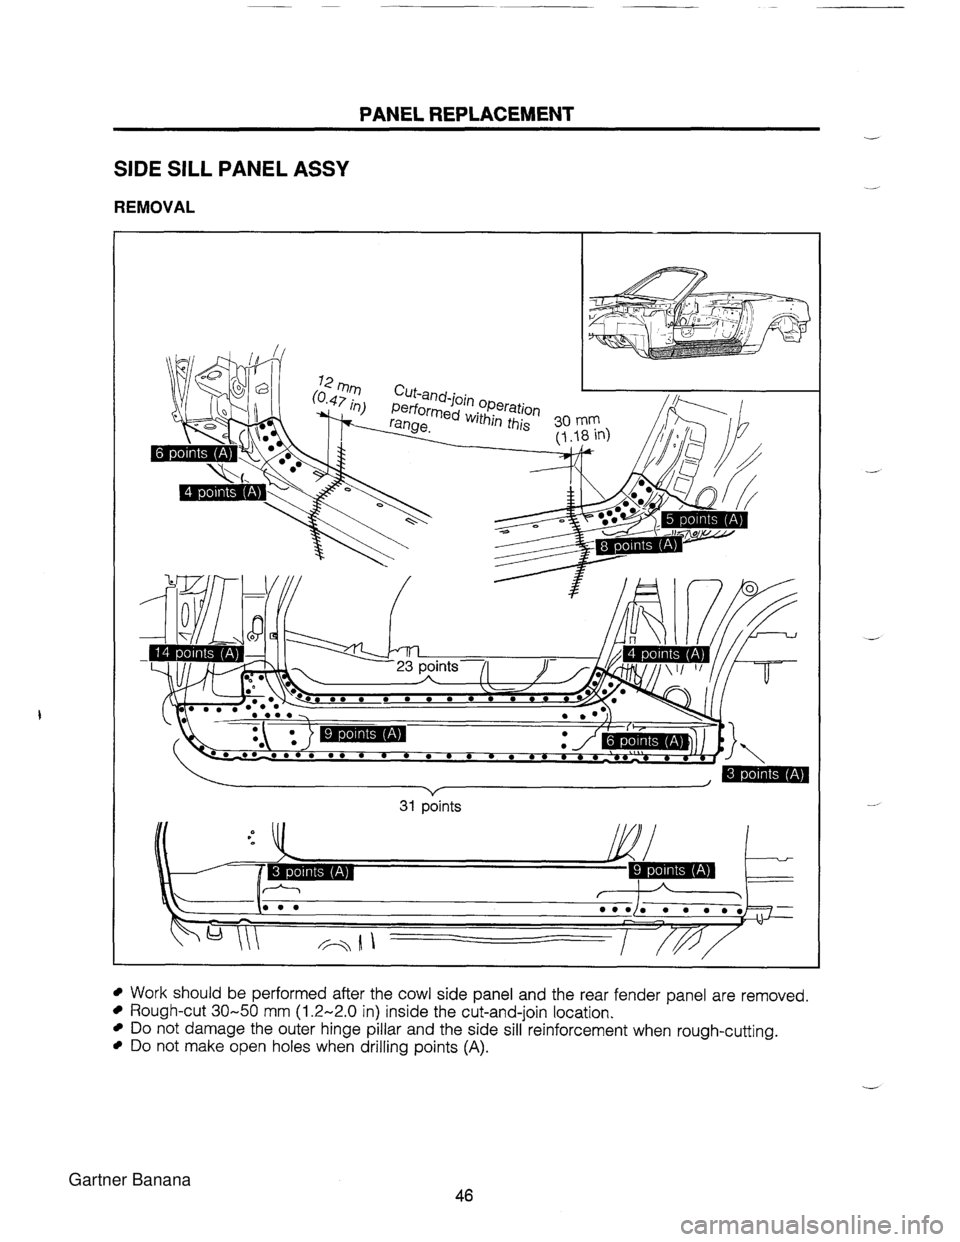
PANEL REPLACEMENT SIDE SILL PANEL ASSY REMOVAL I 31 points Work should be performed after the cowl side panel and the rear fender panel are removed. Rough-cut 30-50 mm (1.2-2.0 in) inside the cut-and-join location. Do not damage the outer hinge pillar and the side sill reinforcement when rough-cutting. Do not make open holes when drilling points (A). Gartner Banana
Page 1297 of 1708
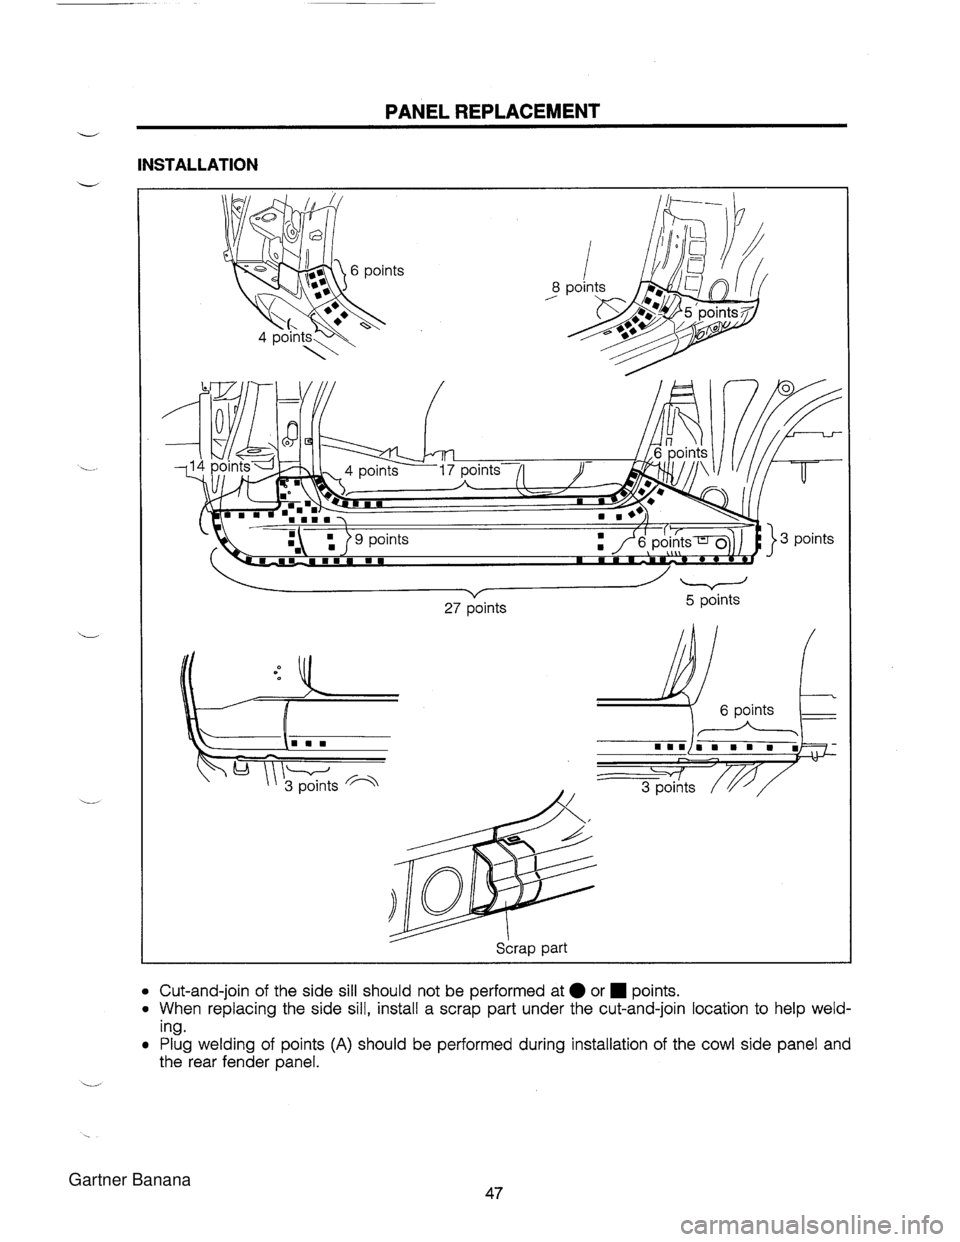
PANEL REPLACEMENT w INSTALLATION vz 27 points Cut-and-join of the side sill should not be performed at or. points. 0 When replacing the side sill, install a scrap part under the cut-and-join location to help weld- Ing. Plug welding of points (A) should be performed during installation of the cowl side panel and the rear fender panel. Gartner Banana
Page 1298 of 1708
PANEL REPLACEMENT FRONT PILLAR, OUTER COWL SlDE PANEL, HINGE PILLAR, INNER COWL SlDE PANEL AND SlDE SILL PANEL REMOVAL cut-and-join location I The following operations are performed when the inner and outer front pillars, cowl side panel, outer hinge pillar, inner cowl side panel, and outer side sill panel are replaced at the same time. Cut away the joint of the outer front pillar and the upper front header (shown by the broken line) with a saw. Rough-cut the outer side sill panel and drill away the spot welding of the hinge pillar and the side sill reinforcement. Do not make open holes when drilling. Cut away the other welded points shown in the illustration. Remove the bolts attached to the instrument panel bracket, the dash side junction, etc. Remove the parts to be replaced. -- Gartner Banana
Page 1299 of 1708
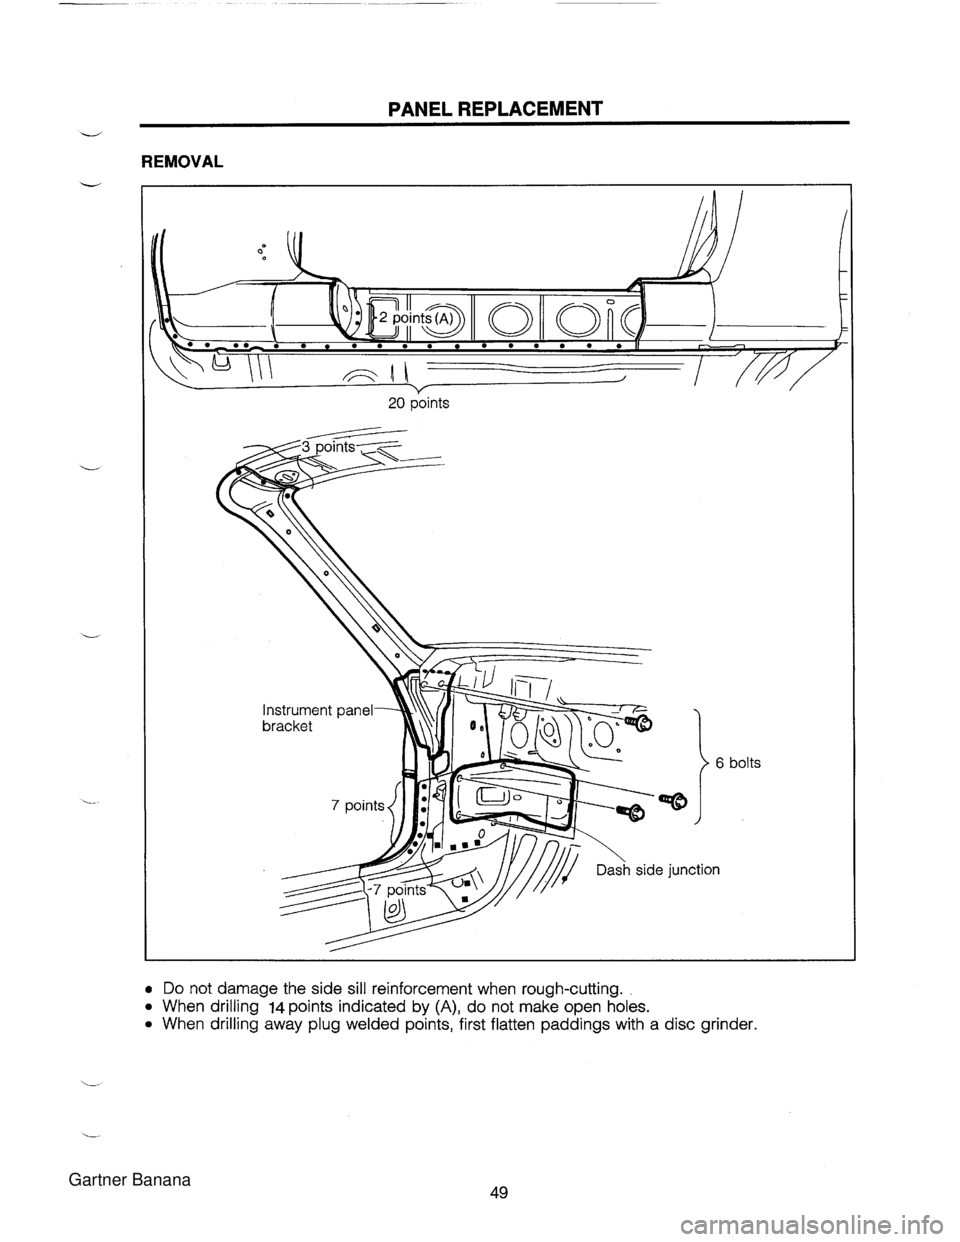
PANEL REPLACEMENT V REMOVAL =@ Dash side junction bolts Do not damage the side sill reinforcement when rough-cutting. When drilling 14 points indicated by (A), do not make open holes. When drilling away plug welded points, first flatten paddings with a disc grinder. Gartner Banana
Page 1300 of 1708
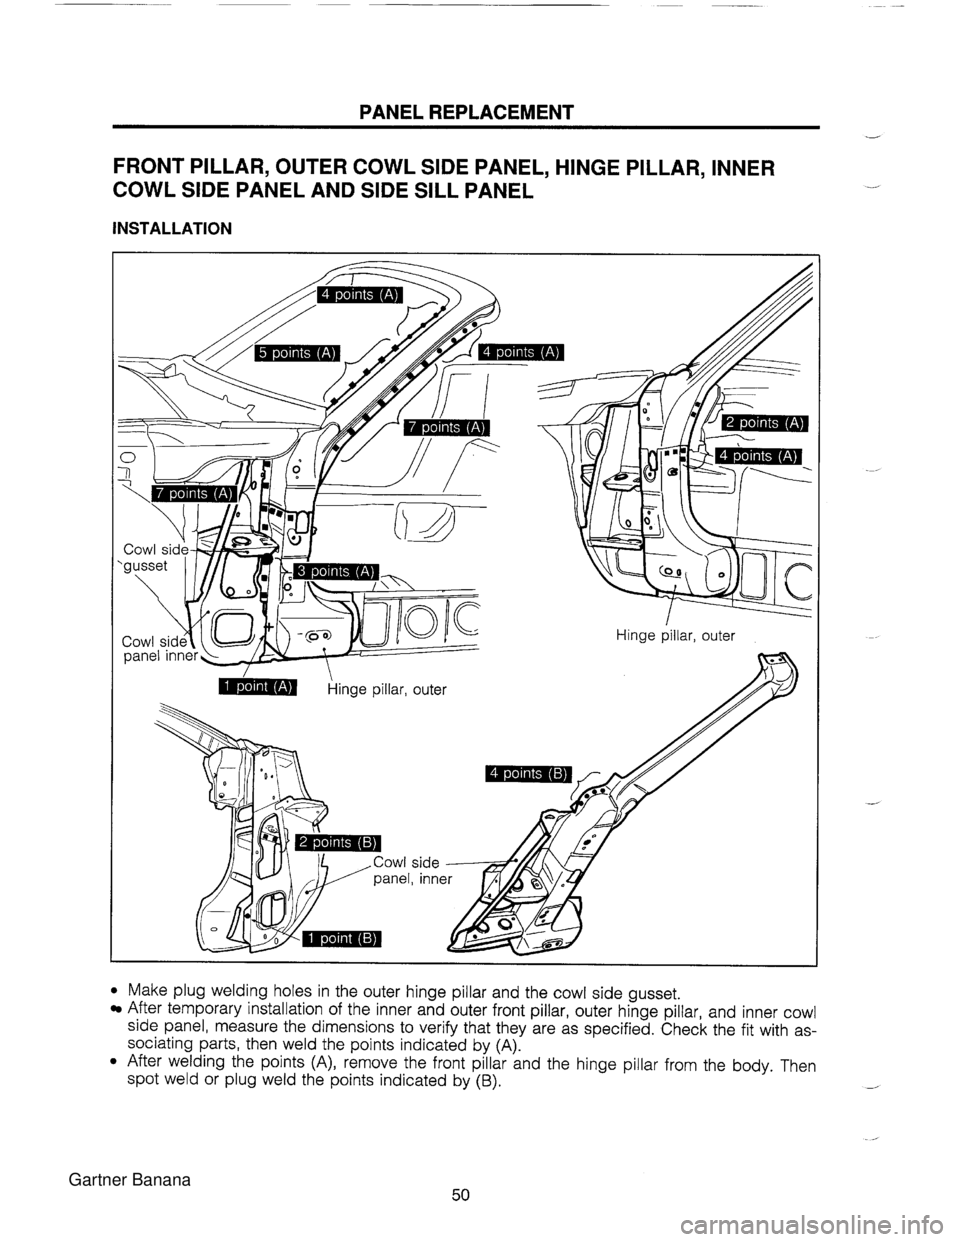
PANEL REPLACEMENT FRONT PILLAR, OUTER COWL SlDE PANEL, HINGE PILLAR, INNER COWL SlDE PANEL AND SlDE SILL PANEL INSTALLATION Make plug welding holes in the outer hinge pillar and the cowl side nusset. After temporary installation of the inner and outer front pillar, outer hinge pillar, and inner cowl side panel, measure the dimensions to verify that they are as specified. Check the fit with as- sociating parts, then weld the points indicated by (A). After welding the points (A), remove the front pillar and the hinge pillar from the body. Then spot weld or plug weld the points indicated by (B). A Gartner Banana
Trending: coolant capacity, wiring, AUX, fuel type, technical specifications, fuel, fuel fill door release
