MERCEDES-BENZ SL-Class 2016 R231 Owner's Manual
Manufacturer: MERCEDES-BENZ, Model Year: 2016, Model line: SL-Class, Model: MERCEDES-BENZ SL-Class 2016 R231Pages: 614, PDF Size: 15.67 MB
Page 401 of 614
COMAND. You can delete these call listsin
COMAND.
If you down load call lists from a Bluetooth
®
phone that supports the PBAP Bluetooth®
profile , you cannot delete them from
COMAND.
XSe lect Call Listsinthe telephone basic
menu byturning cVdthe COMAND con-
troller and press Wto confirm.
XSelect Delete Call Listsand press W
to confirm.
A prompt appears asking whether you wish
to delete all call lists.
XSe lect YesorNoand press Wto confirm.
If you select Yes
, the call lists are deleted.
If you select No
, the process will becan-
celed.
iIf you delete these call lists from the
mob ilephone (see the separate mobile
phone operating instructions), COMAND
updates the call list display the next time it
connects.
Using the speed dial list
Storing an entry
You can assign ten speed dial presets (0– 9)
to the speed dial list. There are two options
availab lefor th ispurpose.
Option 1:
XSearch for a phone book entry inthe phone
book (
Ypage 394).
XIf an entry has several phone numbers,
select the desired number byturning cVd
the COMAND controller.
XSe lect the list symbol to the right of the
entry by slidi ngVY the COMAND control-
ler and press Wto confirm.
A menu appears.
XSe lect Speed Dialbyturning cVdthe
COMAND controller and press Wto con-
firm.
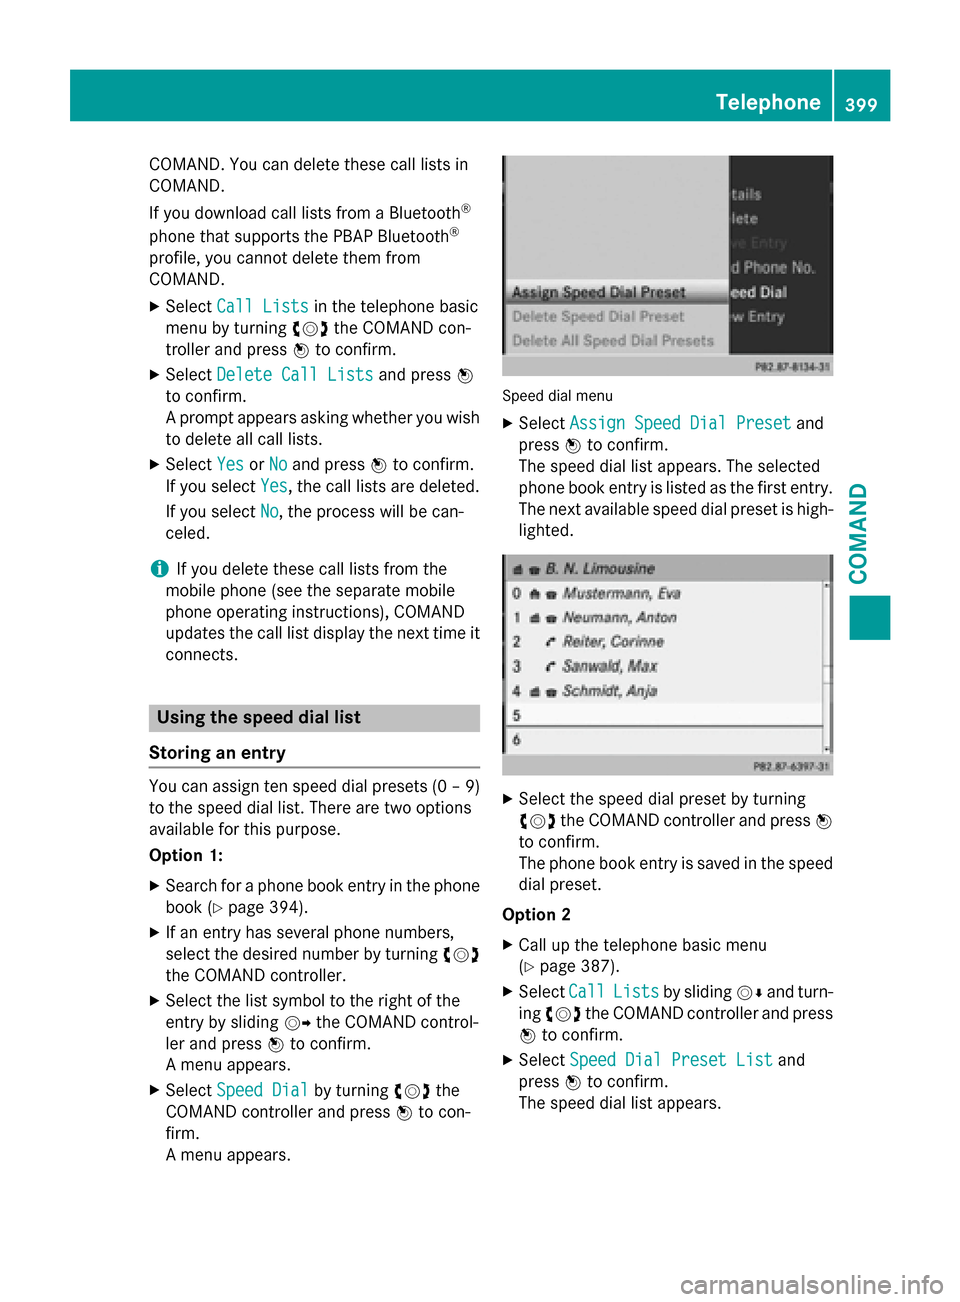
A menu appears.
Speed dial men u
XSelect Assign Speed Dial Presetand
press Wto confirm.
The speed diallist appears. The selected
phone book entry is listed as the first entry.
The next availab lespeed dialpreset ishigh-
lighted.
XSe lect the speed dial preset byturning
cVd the COMAND controller and press W
to confirm.
The phone book entry issaved inthe speed
dial preset.
Option 2
XCall up the te lephone basic menu
(
Ypage 387).
XSe lect CallListsbysliding VÆand turn-
ing cVd the COMAND controller and press
W to confirm.
XSelect Speed Dial Preset Listand
press Wto confirm.
The speed diallist appears.
Telephone399
COMAND
Z
Page 402 of 614
XSelect the list symbol to the right of the
entry by slidingVYthe COMAND control-
ler and press Wto confirm.
XSelect Assign Speed Dial Presetand
press Wto confirm.
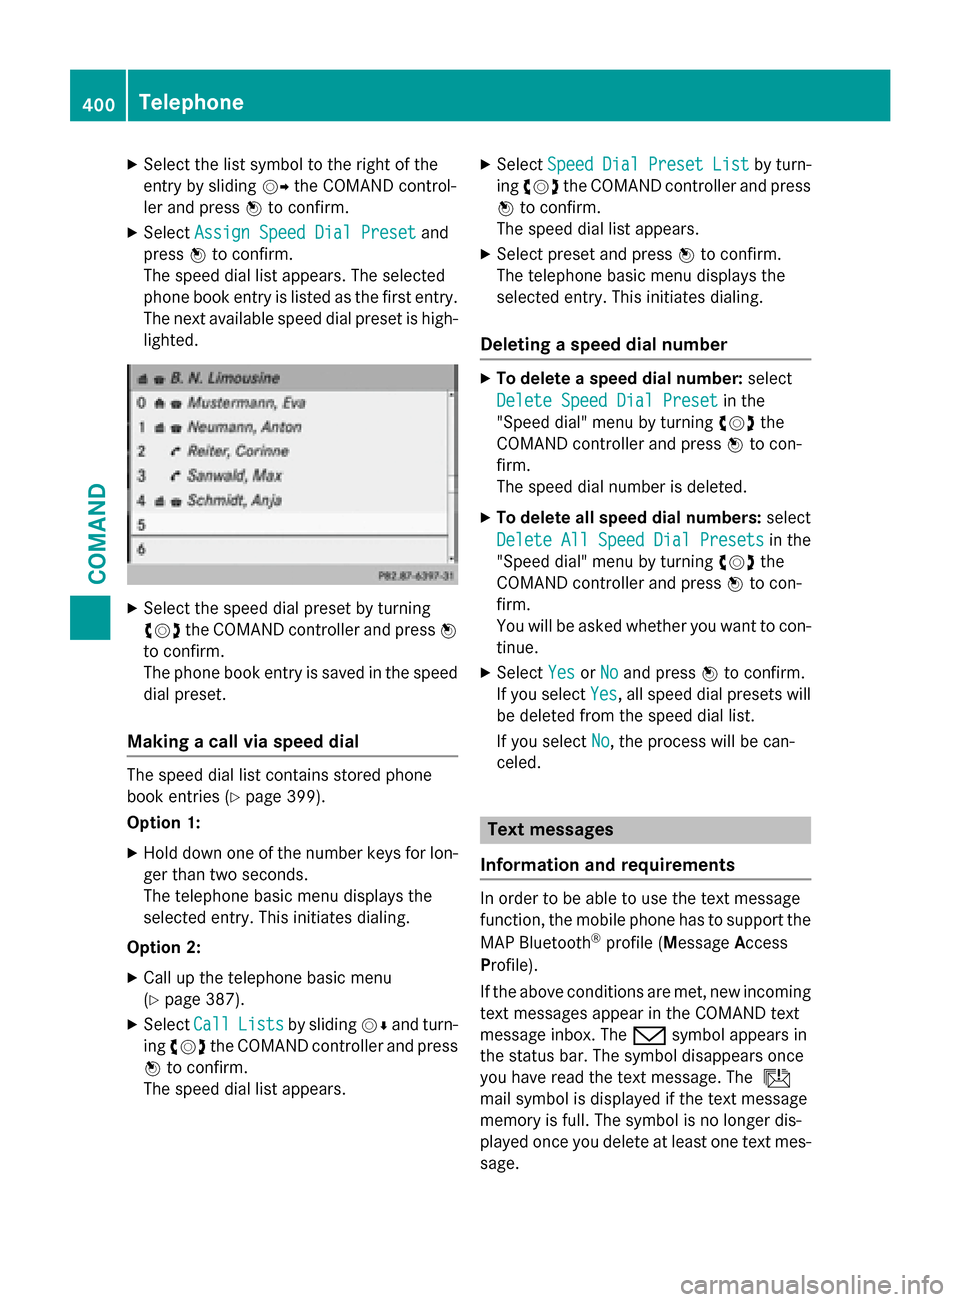
The speed dial list appears. The selected
phone book entry is listed as the first entry.
The next available speed dial preset is high-
lighted.
XSelect the speed dial preset by turning
cVd the COMAND controller and press W
to confirm.
The phone book entry is saved in the speed
dial preset.
Making a call via speed dial
The speed dial list contains stored phone
book entries (
Ypage 399).
Option 1:
XHold down one of the number keys for lon-
ger than two seconds.
The telephone basic menu displays the
selected entry. This initiates dialing.
Option 2:
XCall up the telephone basic menu
(
Ypage 387).
XSelect CallListsby sliding VÆand turn-
ing cVd the COMAND controller and press
W to confirm.
The speed dial list appears.
XSelect SpeedDialPresetListby turn-
ing cVd the COMAND controller and press
W to confirm.
The speed dial list appears.
XSelect preset and press Wto confirm.
The telephone basic menu displays the
selected entry. This initiates dialing.
Deleting a speed dial number
XTo delete a speed dial number: select
Delete Speed Dial Preset
in the
"Speed dial" menu by turning cVdthe
COMAND controller and press Wto con-
firm.
The speed dial number is deleted.
XTo delete all speed dial numbers: select
Delete All Speed Dial Presets
in the
"Speed dial" menu by turning cVdthe
COMAND controller and press Wto con-
firm.
You will be asked whether you want to con-
tinue.
XSelect YesorNoand press Wto confirm.
If you select Yes
, all speed dial presets will
be deleted from the speed dial list.
If you select No
, the process will be can-
celed.
Text messages
Information and requirements
In order to be able to use the text message
function, the mobile phone has to support the
MAP Bluetooth
®profile ( Message Access
Profile).
If the above conditions are met, new incoming
text messages appear in the COMAND text
message inbox. The /symbol appears in
the status bar. The symbol disappears once
you have read the text message. The ú
mail symbol is displayed if the text message
memory is full. The symbol is no longer dis-
played once you delete at least one text mes-
sage.
400Telephone
COMAND
Page 403 of 614
iCOMAND may not load all of the most
recent text messages:
This may occur inexceptional cases, for
example when using certain mobile
phones/brackets and ifthe mobile phone
inbox holds a large number of text mes-
sages.
Displaying the text message inbox
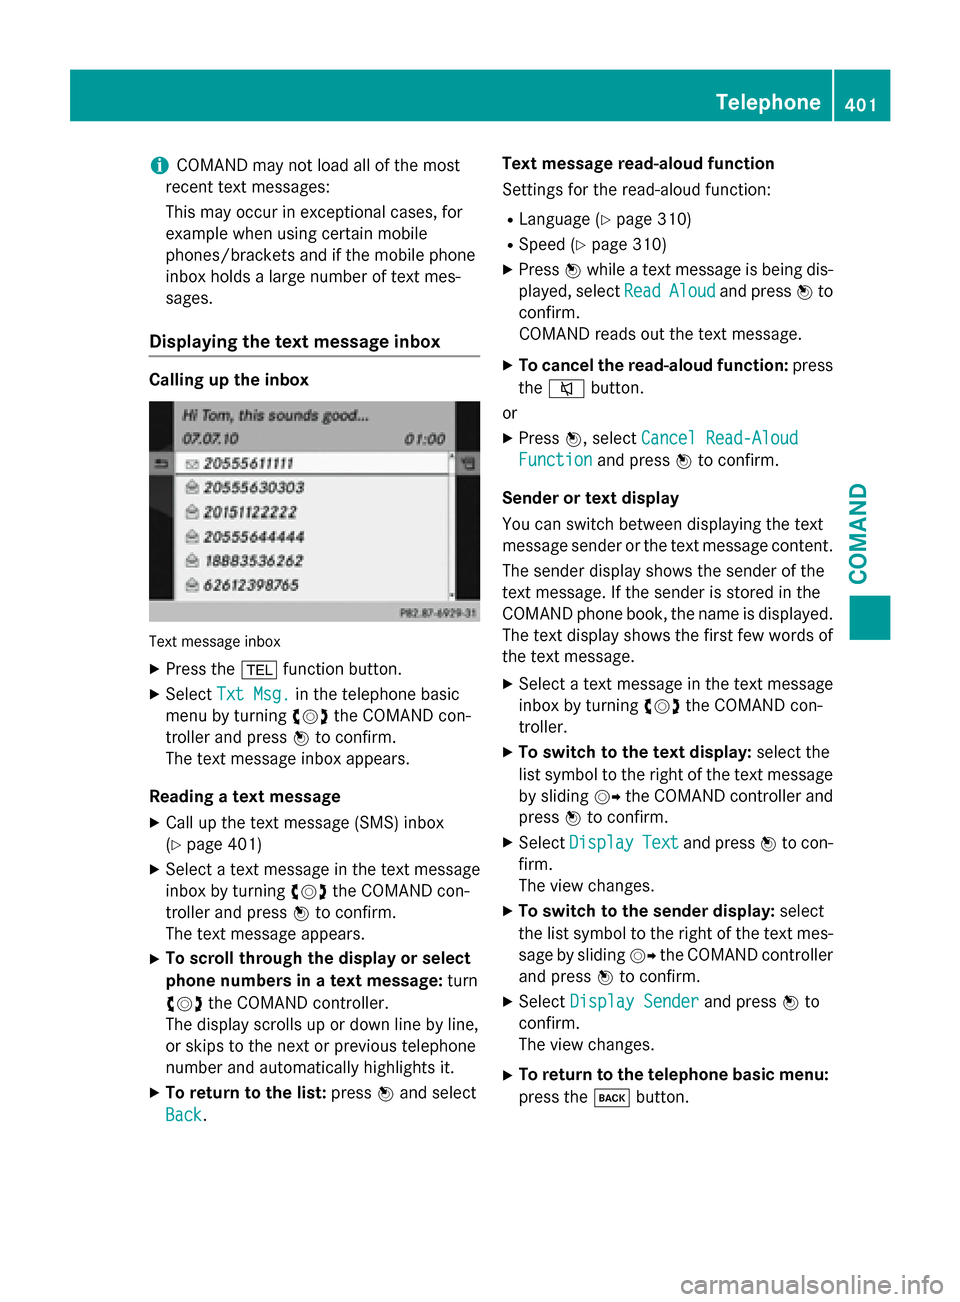
Calling up the inbox
Tex tmessage inbox
XPress the %function button.
XSelect Txt Msg.inthe telephone basic
menu byturning cVdthe COMAND con-
troller and press Wto confirm.
The text message inbox appears.
Reading a text message
XCall up the text message (SMS)inbox
(
Ypage 401)
XSe lect a text message inthe text message
inbox byturning cVdthe COMAND con-
troller and press Wto confirm.
The text message appears.
XTo scroll th roughthe display orselect
phone numbers in a text message: turn
cVd the COMAND controller.
The display scrolls up or downlinebyline,
or skips to the next or previous telephone
number and automatically highlights it.
XTo return to the list: pressWand select
Back
. Text message read-aloud function
Se
ttings for the read-aloud function:
RLanguage (Ypage 310)
RSpe ed (Ypage 310)
XPress Wwhile a text message is being dis-
played, select Read
Aloudand pressWto
confirm.
COMAND reads out the text message.
XTo cancel the read-aloud function: press
the 8 button.
or
XPress W, select Cancel Read-Aloud
Functionand press Wto confirm.
Sender ortext display
You can switch between displaying the text
message sender or the text message content. The sender display shows the sender of the
text message. Ifthe sender isstored inthe
COMAND phone book, the name isdisplayed.
The text display shows the first few words of
the text message.
XSe lect a text message inthe text message
inbox byturning cVdthe COMAND con-
troller.
XTo switch to the text display: select the
list symbol to the right of the text message
by sliding VYthe COMAND controller and
press Wto confirm.
XSelect DisplayTextand press Wto con-
firm.
The view changes.
XTo switch to the sender display: select
the list symbol to the right of the text mes-
sage bysliding VYthe COMAND controller
and press Wto confirm.
XSelect Display Senderand press Wto
confirm.
The view changes.
XTo return to the telephone basic menu:
press the kbutton.
Telephone401
COMAND
Z
Page 404 of 614
Displaying detailsand phone number s
COMAND can also sho w ashortened sender
display in full .
XSelect atext message in th etext message
inbox by turning cVdtheCOMAND con-
troller.
XSelec tth elist symbol to th eright of th etext
message by slidin gVY theCOMAND con-
trolle rand press Wto confirm .
XSelectDetail sand press Wto confirm .
The detailed vie wappears .
XTo close th edetailed view: slideXVY the
COMAND controller .
XTo return to thetelephone basic menu:
press th ek button.
Managing text messages
Calling atext message sender
XPress WtheCOMAND controller while th e
text message is bein gdisplayed.
XSelec tCal lSenderand press Wto con-
firm.
The telephon emakes th ecal lto th esender .
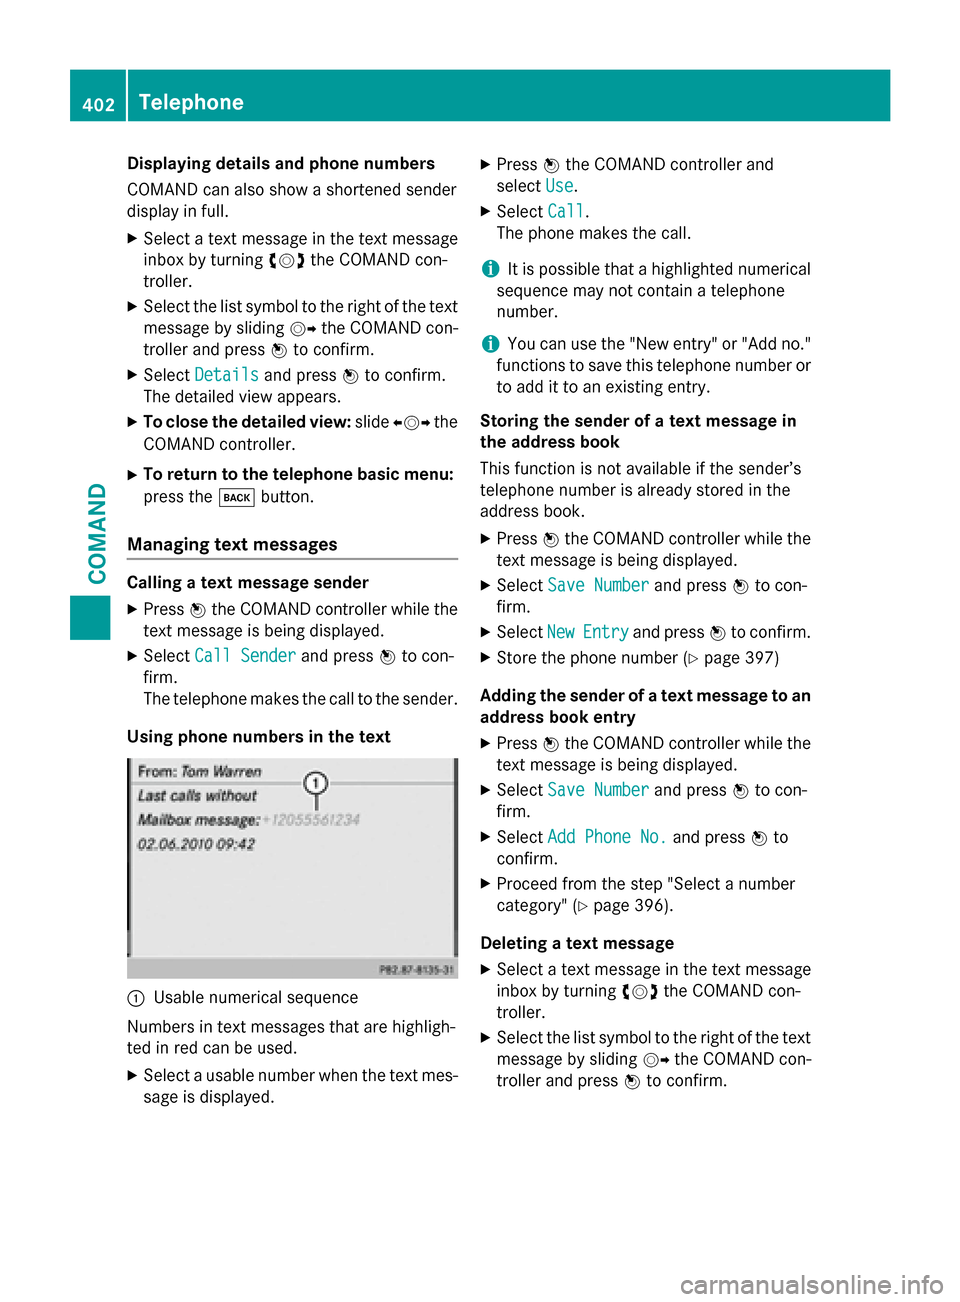
Usin gphone number sin th etext
:Usable numerical sequence
Number sin text message sthat are highligh -
te din red can be used .
XSelect ausabl enumber when th etext mes -
sage is displayed.
XPress WtheCOMAND controller and
select Use
.
XSelectCal l.
The phone makes th ecall.
iIt is possibl ethat ahighlighte dnumerical
sequence may no tcontain atelephon e
number .
iYou can use th e"New entry" or "Ad dno."
function sto sav ethis telephon enumber or
to add it to an existin gentry.
Storing th esender of atext message in
th eaddress book
This function is no tavailable if th esender’s
telephon enumber is already store din th e
address book.
XPress WtheCOMAND controller while th e
text message is bein gdisplayed.
XSelec tSav eNumberand press Wto con-
firm.
XSelec tNewEntryand press Wto confirm .
XStore thephone number (Ypage 397)
Adding th esender of atext message to an
address book entry
XPress WtheCOMAND controller while th e
text message is bein gdisplayed.
XSelec tSav eNumberand press Wto con-
firm.
XSelec tAdd Phone No.and press Wto
confirm .
XProceed from th estep "Selec t anumber
category" (
Ypage 396).
Deleting atext message
XSelec t atext message in th etext message
inbox by turning cVdtheCOMAND con-
troller.
XSelec tth elist symbol to th eright of th etext
message by slidin gVY theCOMAND con-
trolle rand press Wto confirm .
402Telephone
COMAND
Page 405 of 614
XSelectDeleteand press Wto confirm.
A deletion prompt appears.
XSelect YesorNoand press Wto confirm.
If you select Yes
, the text message is
deleted.
If you select No
, the process will be can-
celed.
iThis delete function is not supported by all
mobile phones. The Delete failed
mes-
sage appears.
Using the address book
Introduction
Always pay attention to traffic conditions.
Before starting the journey, familiarize your-
self with the address book functions.
Only use COMAND when the road and traffic
conditions permit. You could otherwise
become involved in an accident in which you
or others could be injured.
The address book organizes and stores
entries that are entered from different sour-
ces (mobile phone, memory card, USB device,
COMAND phone book, navigation system).
You can use these entries to make telephone
calls and for navigation.
iNumber of contacts in the address
book: the address book can store a total of
4000 contacts.
1500 entries each are reserved in the
address book for:
Rcontacts from the mobile phone
Rcontacts that you create in COMAND or
import from other sources
The remaining 1,000 entries are assigned
by COMAND as necessary.
iDisplay of mobile phone contacts: con-
tacts downloaded from the mobile phone
remain in the address book even if you dis-
connect the mobile phone from COMAND.
Contacts that have previously been availa-
ble can be displayed as soon as the mobile phone is reconnected. COMAND down-
loads the contacts again so that any new
contacts that have been added to the
mobile phone can be displayed.
As soon as you connect a new mobile
phone
to C
OMAND all the contacts from
the previous mobile phone are replaced by
those from the new phone's address book.
Address book entries remain stored when
the mobile phone is disconnected. For this
reason, delete your personal data using the
reset function before selling your vehicle,
for example (
Ypage 313).
Calling up the address book
Using the function button:
XPress the %function button.
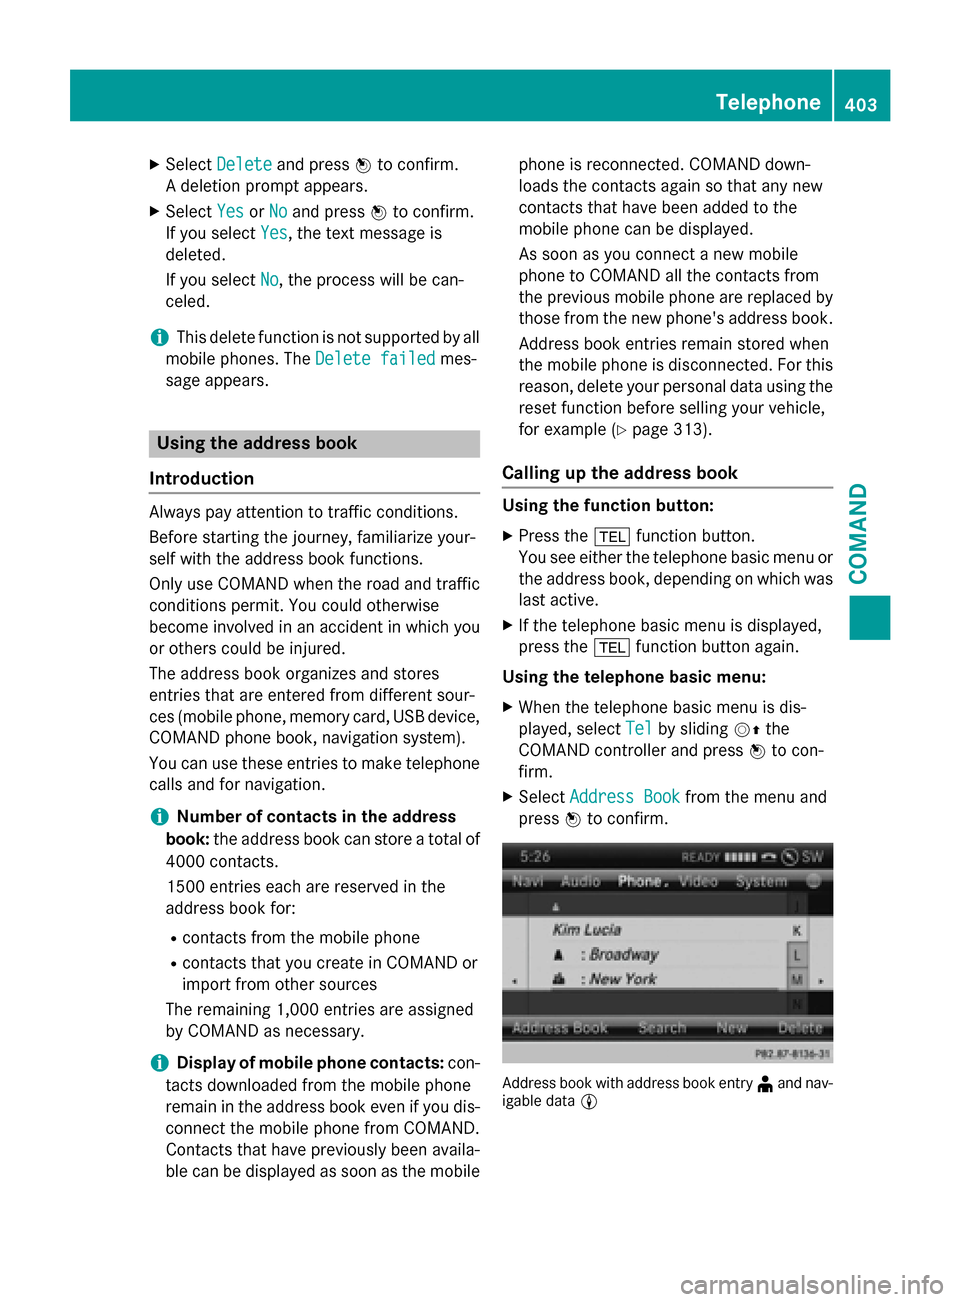
You see either the telephone basic menu or the address book, depending on which was
last active.
XIf the telephone basic menu is displayed,
press the %function button again.
Using the telephone basic menu:
XWhen the telephone basic menu is dis-
played, select Tel
by slidingVZthe
COMAND controller and press Wto con-
firm.
XSelect Address Bookfrom the menu and
press Wto confirm.
Address book with address book entry ¥and nav-
igable data L
Telephone403
COMAND
Z
Page 406 of 614
XTo browse in the address book:turn
cVd the COMAND controller.
XTo close the address book: press the
% button.
iAn address book entry can contain the
following information:
Rname
Rfirst name
Rcompany
Rtwo addresses
Rgeo-coordinates
Rup to five telephone numbers
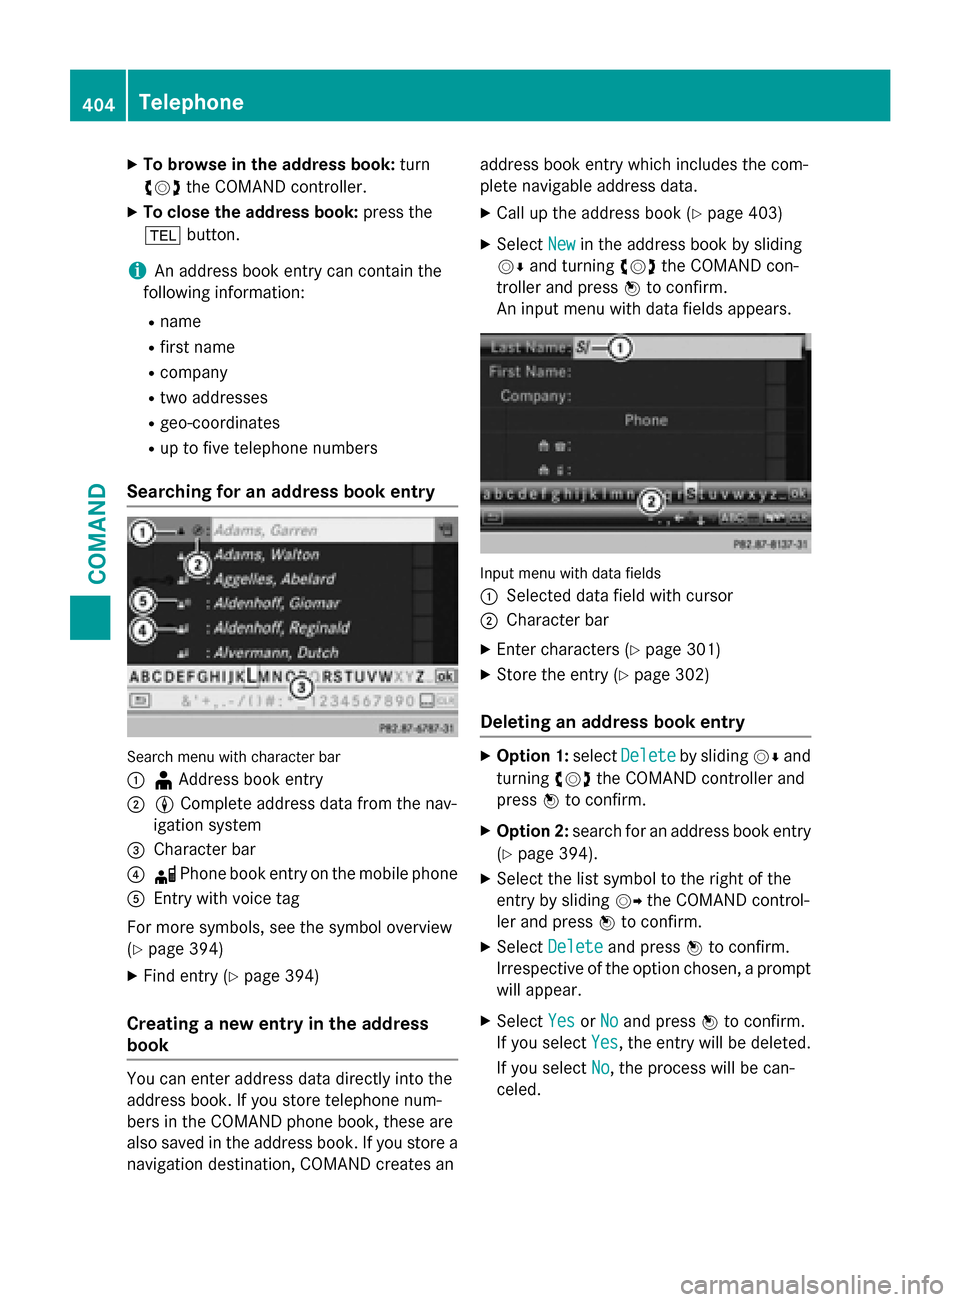
Searching for an address book entry
Search menu with character bar
:
¥ Address book entry
;L Complete address data from the nav-
igation system
=Character bar
?d Phone book entry on the mobile phone
AEntry with voice tag
For more symbols, see the symbol overview
(
Ypage 394)
XFind entry (Ypage 394)
Creating a new entry in the address
book
You can enter address data directly into the
address book. If you store telephone num-
bers in the COMAND phone book, these are
also saved in the address book. If you store a
navigation destination, COMAND creates an address book entry which includes the com-
plete navigable address data.
XCall up the address book (Ypage 403)
XSelect
Newin the address book by sliding
VÆ and turning cVdthe COMAND con-
troller and press Wto confirm.
An input menu with data fields appears.
Input menu with data fields
:
Selected data field with cursor
;Character bar
XEnter characters (Ypage 301)
XStore the entry (Ypage 302)
Deleting an address book entry
XOption 1: selectDeleteby sliding VÆand
turning cVdthe COMAND controller and
press Wto confirm.
XOption 2: search for an address book entry
(
Ypage 394).
XSelect the list symbol to the right of the
entry by sliding VYthe COMAND control-
ler and press Wto confirm.
XSelect Deleteand press Wto confirm.
Irrespective of the option chosen, a prompt
will appear.
XSelect YesorNoand press Wto confirm.
If you select Yes
, the entry will be deleted.
If you select No
, the process will be can-
celed.
404Telephone
COMAND
Page 407 of 614
Displaying thedetailed view for an
address book entry
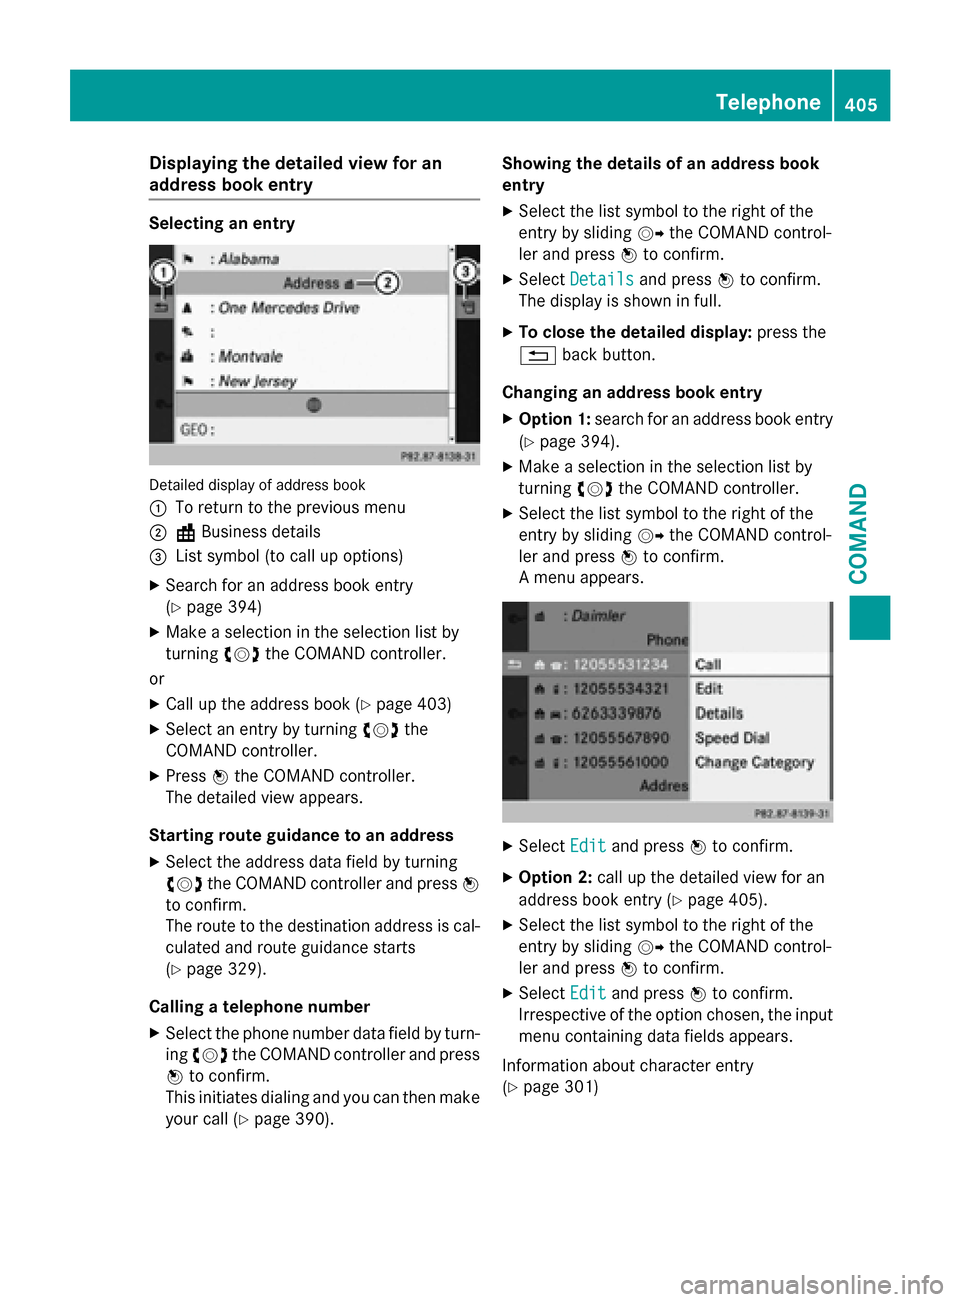
Selecting an entry
Detailed display of address boo k
:
To return to th eprevious men u
;\Business details
=Listsymbol (t ocal lup options)
XSearc hfo ran address boo kentr y
(
Ypage 394)
XMak e aselection in th eselection list by
turnin gcVd theCOMAN Dcontroller .
or
XCall up th eaddress boo k (Ypage 403)
XSelectan entr yby turnin gcVd the
COMAN Dcontroller .
XPressWtheCOMAN Dcontroller .
The detailed vie wappears .
Starting rout eguidance to an address
XSelec tth eaddress dat afield by turnin g
cVd theCOMAN Dcontroller and press W
to confirm .
The rout eto th edestination address is cal -
culated and rout eguidanc estart s
(
Ypage 329).
Calling atelephon enumber
XSelec tth ephone number dat afield by turn -
in gcVd theCOMAN Dcontroller and press
W to confirm .
Thi sinitiates dialing and you can then mak e
your cal l (
Ypage 390). Showing th
edetail sof an address book
entry
XSelec tth elist symbol to th eright of th e
entr yby slidin gVY theCOMAN Dcontrol-
ler and press Wto confirm .
XSelectDetail sand press Wto confirm .
The display is shown in full .
XTo close thedetailed display :press th e
% backbutton.
Changin gan address book entry
XOption 1: search foran address boo kentr y
(
Ypage 394).
XMak e aselection in th eselection list by
turnin gcVd theCOMAN Dcontroller .
XSelectth elist symbol to th eright of th e
entr yby slidin gVY theCOMAN Dcontrol-
ler and press Wto confirm .
A men uappears .
XSelectEdi tand press Wto confirm .
XOption 2: callup th edetailed vie wforan
address boo kentr y (
Ypage 405).
XSelec tth elist symbol to th eright of th e
entr yby slidin gVY theCOMAN Dcontrol-
ler and press Wto confirm .
XSelectEdi tand press Wto confirm .
Irrespective of th eoption chosen, th einput
men ucontainin gdat afields appears .
Information about characte rentr y
(
Ypage 301)
Telephone405
COMAND
Z
Page 408 of 614
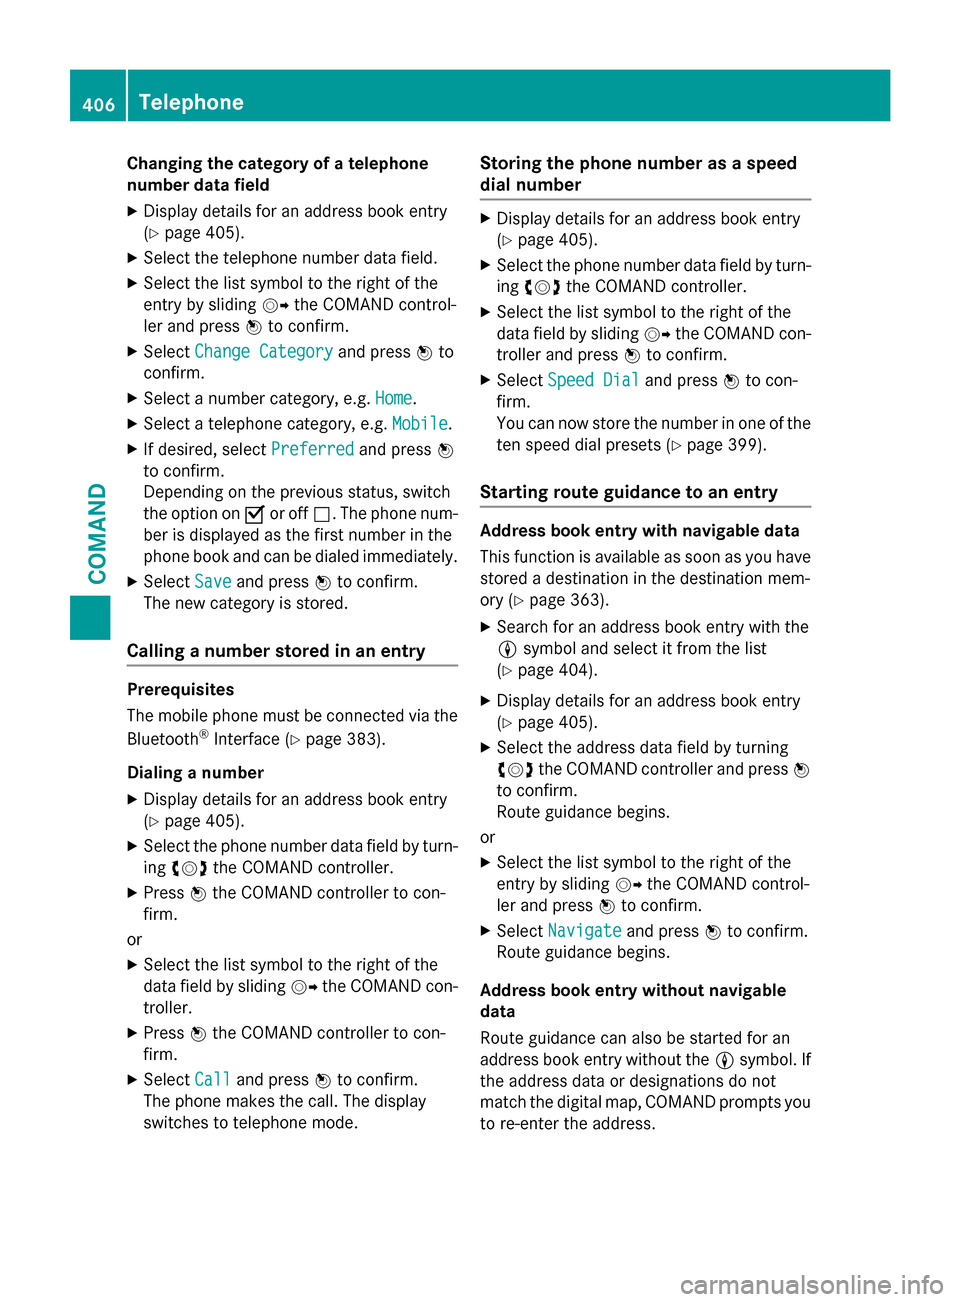
Changing the category of a telephone
number data field
XDisplay details for an address book entry
(
Ypage 405).
XSelect the telephone number data field.
XSelect the list symbol to the right of the
entry by slidingVYthe COMAND control-
ler and press Wto confirm.
XSelect Change Categoryand press Wto
confirm.
XSelect a number category, e.g. Home.
XSelect a telephone category, e.g. Mobile.
XIf desired, selectPreferredand pressW
to confirm.
Depending on the previous status, switch
the option on Oor off ª. The phone num-
ber is displayed as the first number in the
phone book and can be dialed immediately.
XSelect Saveand press Wto confirm.
The new category is stored.
Calling a number stored in an entry
Prerequisites
The mobile phone must be connected via the
Bluetooth
®Interface (Ypage 383).
Dialing a number
XDisplay details for an address book entry
(
Ypage 405).
XSelect the phone number data field by turn-
ing cVd the COMAND controller.
XPress Wthe COMAND controller to con-
firm.
or
XSelect the list symbol to the right of the
data field by sliding VYthe COMAND con-
troller.
XPress Wthe COMAND controller to con-
firm.
XSelect Calland press Wto confirm.
The phone makes the call. The display
switches to telephone mode.
Storing the phone number as a speed
dial number
XDisplay details for an address book entry
(
Ypage 405).
XSelect the phone number data field by turn-
ing cVd the COMAND controller.
XSelect the list symbol to the right of the
data field by sliding VYthe COMAND con-
troller and press Wto confirm.
XSelect Speed Dialand press Wto con-
firm.
You can now store the number in one of the
ten speed dial presets (
Ypage 399).
Starting route guidance to an entry
Address book entry with navigable data
This function is available as soon as you have
stored a destination in the destination mem-
ory (
Ypage 363).
XSearch for an address book entry with the
L symbol and select it from the list
(
Ypage 404).
XDisplay details for an address book entry
(
Ypage 405).
XSelect the address data field by turning
cVd the COMAND controller and press W
to confirm.
Route guidance begins.
or
XSelect the list symbol to the right of the
entry by sliding VYthe COMAND control-
ler and press Wto confirm.
XSelect Navigateand press Wto confirm.
Route guidance begins.
Address book entry without navigable
data
Route guidance can also be started for an
address book entry without the Lsymbol. If
the address data or designations do not
match the digital map, COMAND prompts you
to re-enter the address.
406Telephone
COMAND
Page 409 of 614
XEnter the destination address
(
Ypage 324)
XStart route guidance.
The navigable address is automatically
added to the address book entry.
iThis will provide you with an address book
entry that is suitable for navigation. The
next time the navigation is started, the
address data in the navigation, rather than
the postal address, is used if you have
changed address in the address entry
menu. Therefore, make sure that the des-
tination address is the desired destination
when starting navigation from the address
book.
Voice tags
Introduction
You can enter voice tags via the Voice Control
System (see the separate operating instruc-
tions). Once you have assigned a voice tag to
an address book entry, you can call up this
entry with a voice command and dial a phone
number, for example. You can add one voice
tag per address book entry.
Adding or changing a voice tag
XSearch for an address book entry with or
without a voice tag ( ¦) (
Ypage 404).
XSelect the list symbol to the right of the
entry by slidingVYthe COMAND control-
ler and press Wto confirm.
XSelect Voice Nameand press Wto con-
firm.
XSelect AddorChangeand press Wto con-
firm.
Subsequent operation is voice-controlled.
The Voice Control System guides you
through the dialogs. Deleting a voice tag
XSearch for an address book entry with a
voice tag (
Ypage 404).
XSelect the list symbol to the right of the
entry by sliding
VYthe COMAND control-
ler and press Wto confirm.
XSelect Voice Nameand press Wto con-
firm.
XSelect Deleteand press Wto confirm.
A deletion prompt appears.
XSelect YesorNoand press the 9button to
confirm.
If you select Yes
, COMAND deletes the
voice tag.
If you select No
, the process will be can-
celed.
Listening to a voice tag
XSearch for an address book entry with a
voice tag (
Ypage 404).
XSelect the list symbol to the right of the
entry by sliding VYthe COMAND control-
ler and press Wto confirm.
XSelect Voice Nameand press Wto con-
firm.
XSelect Listenand press Wto confirm.
You hear the voice tag.
Importing phone book entries
This function allows you to store phone book
entries from the mobile phone in the address
book.
The following can be used as a source:
Rthe mobile phone
Rthe memory card
Rthe USB device
Rthe Bluetooth®Interface
Imported phone book entries are indicated in
the phone book by different symbols
(
Ypage 394).
Telephone407
COMAND
Z
Page 410 of 614
XSearch for an entry in the phone book on
the mobile phoned(
Ypage 394).
XSelect the list symbol to the right of the
entry by sliding VYthe COMAND control-
ler and press Wto confirm.
XSelect Save Entryand press Wto con-
firm.
The Data saved
message appears. The
phone book entry is now saved as an
address book entry.
The dsymbol is replaced by the ¥sym-
bol.
Importing contacts
Information and requirements
You can import contacts (vCards) from the
memory card and a USB device into the
address book, or receive vCards via Blue-
tooth
®.
iUp to 2500 entries can be imported into
the address book. A message notifies you
when the maximum number is reached.
You then have to delete existing entries in
order to import new entries (
Ypage 404).
Depending on the source of the contact data,
different requirements apply:
SourcePrerequisites
Memory cardThe SD memory card is
inserted (
Ypage 447). It
contains importable con-
tact details.
USB deviceThe USB device is inserted
into the USB port
(
Ypage 447). It contains
importable contact details.
Requirements for receiving vCards via
Bluetooth®
You can receive vCards from devices (e.g.
from a PC) that support the sending of vCards
via Bluetooth
®. It is not necessary to authorize the device in
COMAND to do so.
Please bear the following in mind:
RBluetooth®must be activated in COMAND
and on the Bluetooth®device; see the oper-
ating instructions for the device.
Rthe Bluetooth®device must be able to send
vCards via Bluetooth®(see operating
instructions for the device).
Rthe Bluetooth®device in the vehicle must
be switched on.
Importing from the memory card or USB
device
Entries imported from the memory card or
from a USB device have the ¯symbol.
The following conditions must be fulfilled in
order to import vCards:
RvCards (vcf files) may be located in the main
directory or in folders. COMAND allows you
to select the relevant folders directly.
RvCards must have the file extension ".vcf".
iOne vcf file may contain several vCards.
COMAND supports vCards in versions 2.1
and 3.0.
XSelect Address Bookin the address book
or, if the telephone basic menu is shown,
select Phone
by sliding VÆand turning
cVd the COMAND controller and press W
to confirm.
XSelect Download Contactsand press W
to confirm.
A menu appears.
XSelect From The Memory CardorFrom
USB Devicein the menu by turning cVd
the COMAND controller and press Wto
confirm.
XSelect AddorOverwriteand press Wto
confirm.
Add
imports the entries from the memory
card or USB device into the address book.
Overwrite
imports the entries from the
memory card or USB device and overwrites
408Telephone
COMAND