MITSUBISHI ENDEAVOR 2004 Service Repair Manual
ENDEAVOR 2004
MITSUBISHI
MITSUBISHI
https://www.carmanualsonline.info/img/19/57105/w960_57105-0.png
MITSUBISHI ENDEAVOR 2004 Service Repair Manual
Trending: Anti-freeze, ignition, Starter solenoid, change wheel, towing capacity, jack points, catalytic converter
Page 1841 of 3870
NO: Go to Step 8 .
INSPECTION PROCEDURE 4: THE REMOTE CONTROL DOES NOT FUNCTION
DIAGNOSTIC PROCEDURE
STEP 1. Confirm the remote control battery.
Confirm that the remote control battery is normal.
Q: Is the check result normal?
YES: Go to Step 2.
NO: Replace the remote control battery.
STEP 2. Retest the system.
Confirm that the remote control functions normally.
Q: Is the check result normal?
YES: The trouble can be an intermittent malfunction (Refer to HOW TO
COPE WITH INTERMITTENT MALFUNCTIONS
).
NO: Replace the remote control.
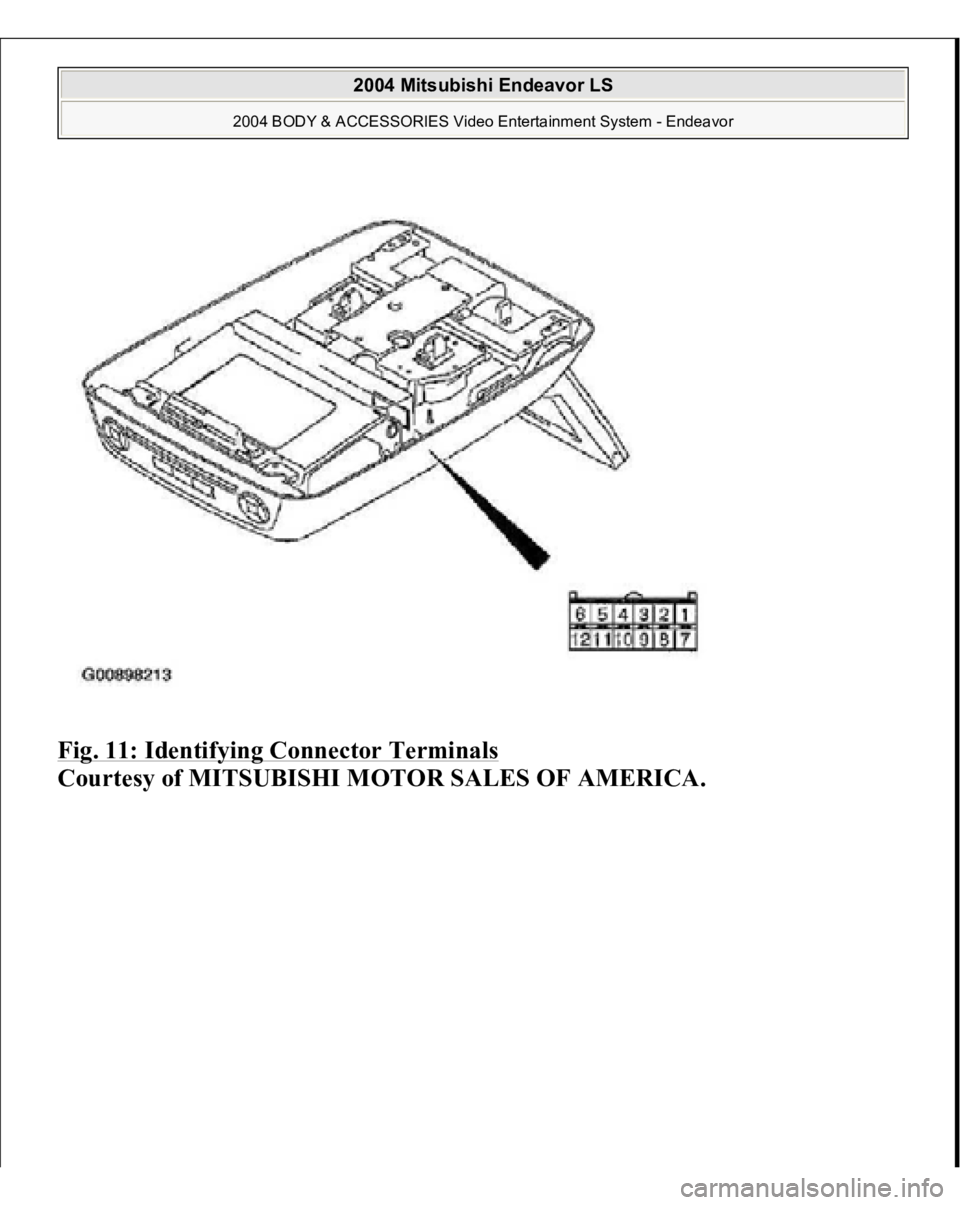
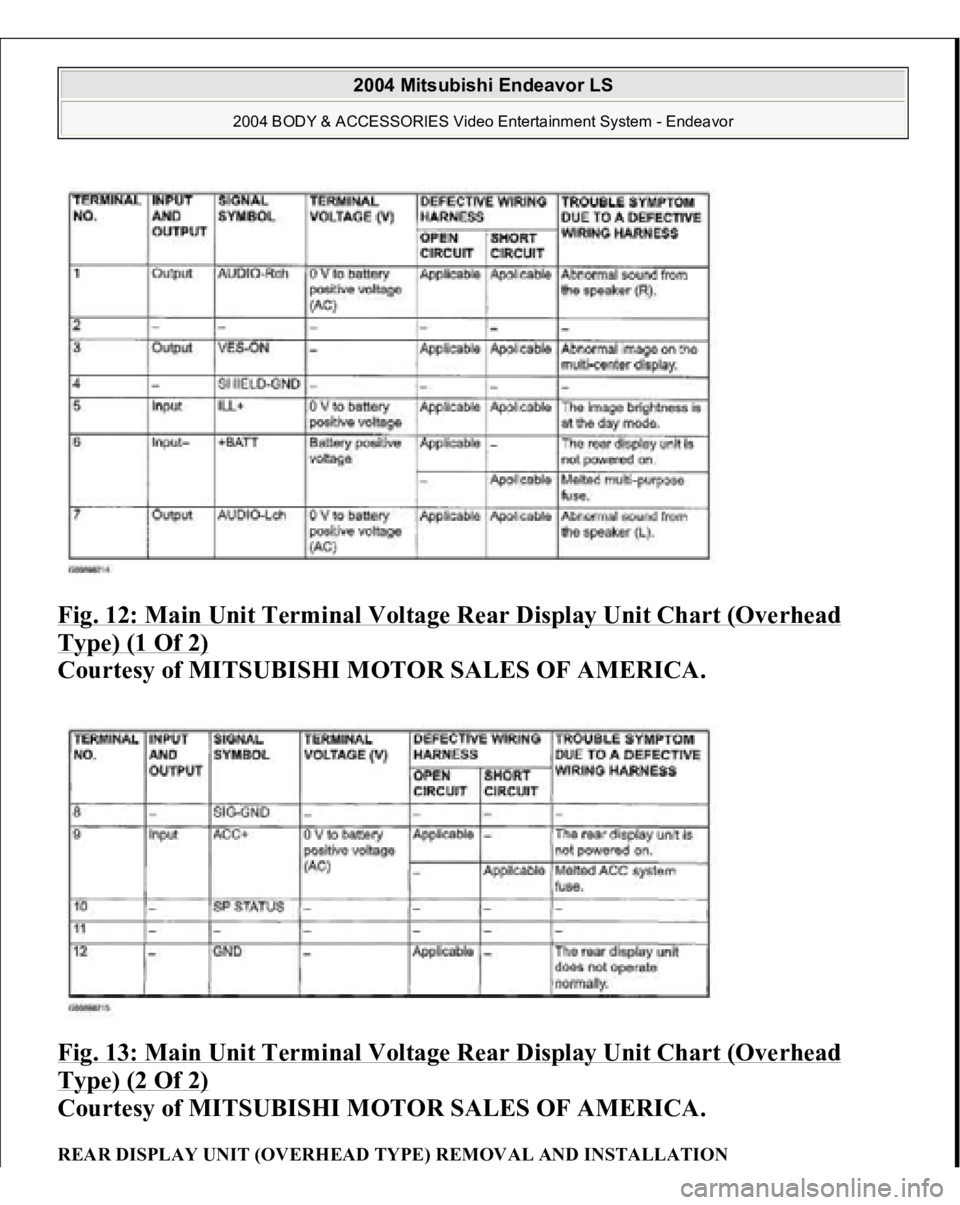
MAIN UNIT TERMINAL VOLTAGE REAR DISPLAY UNIT (OVERHEAD TYPE)
2004 Mitsubishi Endeavor LS
2004 BODY & ACCESSORIES Video Entertainment System - Endeavor
Page 1842 of 3870
Fig. 11: Identifying Connector Terminals
Courtesy of MITSUBISHI MOTOR SALES OF AMERICA.
2004 Mitsubishi Endeavor LS
2004 BODY & ACCESSORIES Video Entertainment System - Endeavor
Page 1843 of 3870
Fig. 12: Main Unit Terminal Voltage Rear Display Unit Chart (Overhead Type) (1 Of 2)
Courtesy of MITSUBISHI MOTOR SALES OF AMERICA.
Fig. 13: Main Unit Terminal Voltage Rear Display Unit Chart (Overhead
Type) (2 Of 2)
Courtesy of MITSUBISHI MOTOR SALES OF AMERICA.
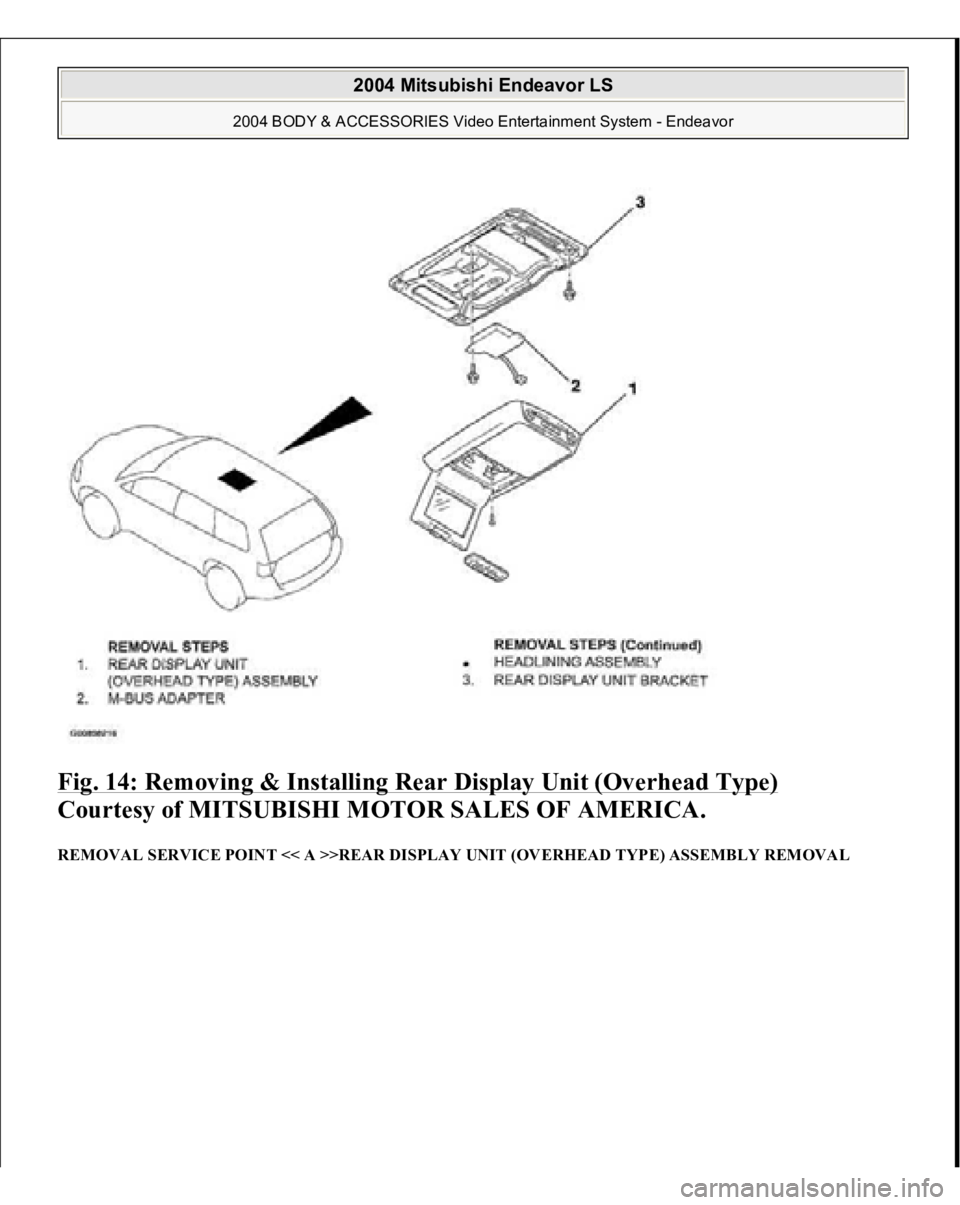
REAR DISPLAY UNIT (OVERHEAD TYPE) REMOVAL AND INSTALLATION
2004 Mitsubishi Endeavor LS
2004 BODY & ACCESSORIES Video Entertainment System - Endeavor
Page 1844 of 3870
Fig. 14: Removing & Installing Rear Display Unit (Overhead Type)
Courtesy of MITSUBISHI MOTOR SALES OF AMERICA.
REMOVAL SERVICE POINT << A >>REAR DISPLAY UNIT (OVERHEAD TYPE) ASSEMBLY REMOVAL
2004 Mitsubishi Endeavor LS
2004 BODY & ACCESSORIES Video Entertainment System - Endeavor
Page 1845 of 3870
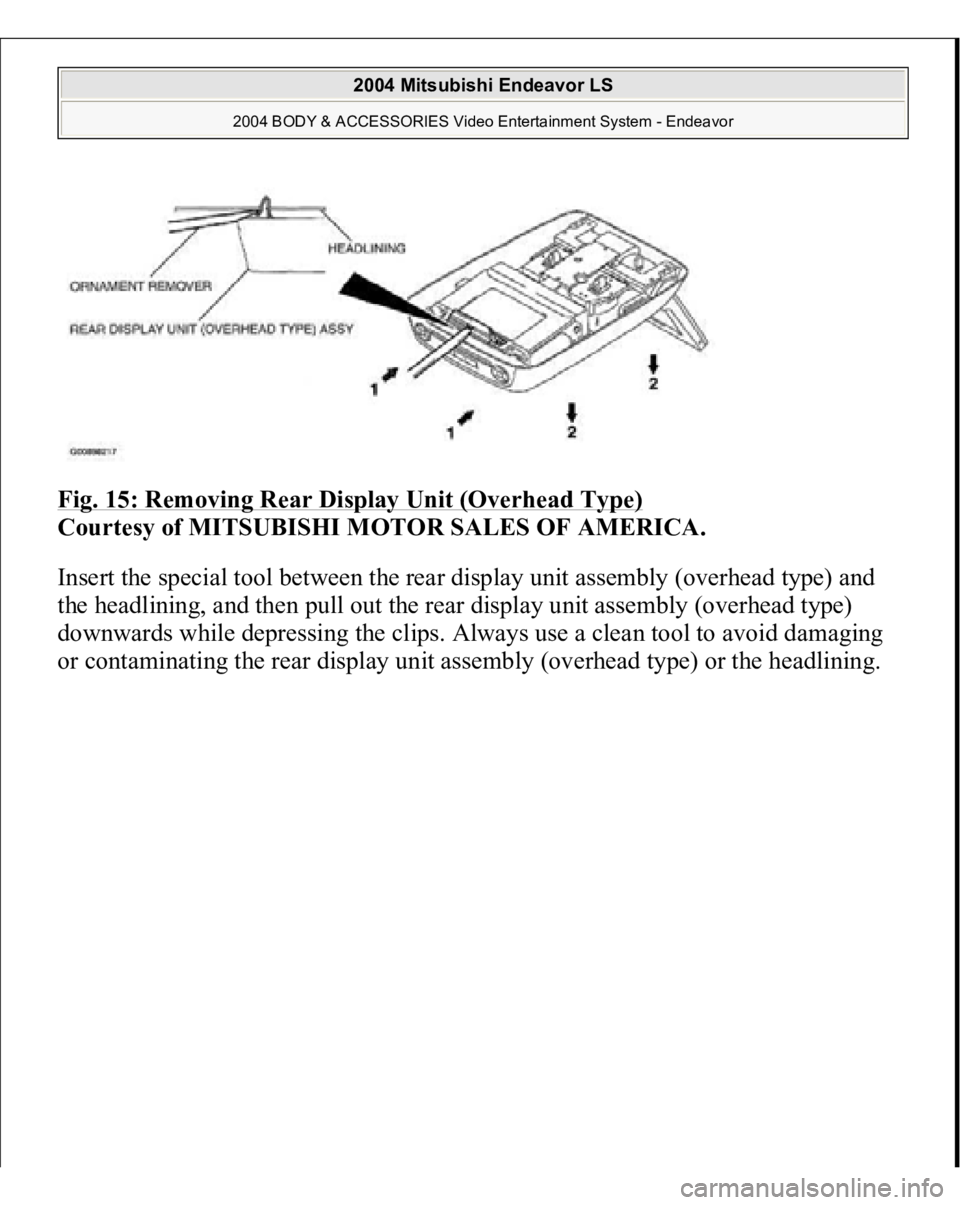
Fig. 15: Removing Rear Display Unit (Overhead Type)
Courtesy of MITSUBISHI MOTOR SALES OF AMERICA.
Insert the special tool between the rear display unit assembly (overhead type) and
the headlining, and then pull out the rear display unit assembly (overhead type)
downwards while depressing the clips. Always use a clean tool to avoid damaging
or contaminatin
g the rear dis
play unit assembl
y (overhead t
ype) or the headlinin
g.
2004 Mitsubishi Endeavor LS
2004 BODY & ACCESSORIES Video Entertainment System - Endeavor
Page 1846 of 3870
2004 BODY & ACCESSORIES
Floor Console Assembly - Endeavor
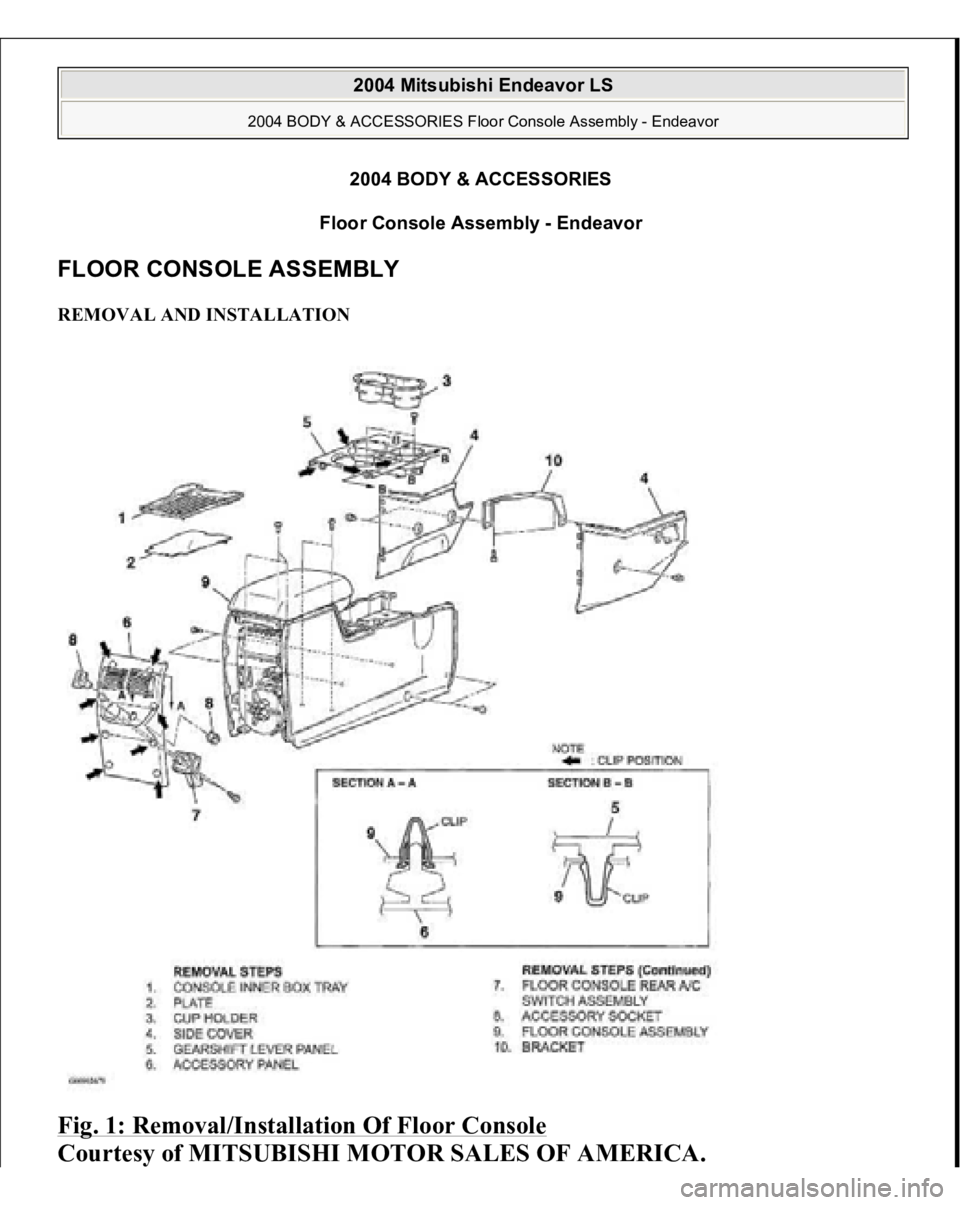
FLOOR CONSOLE ASSEMBLY REMOVAL AND INSTALLATION Fig. 1: Removal/Installation Of Floor Console
Courtesy of MITSUBISHI MOTOR SALES OF AMERICA.
2004 Mitsubishi Endeavor LS
2004 BODY & ACCESSORIES Floor Console Assembly - Endeavor
2004 Mitsubishi Endeavor LS
2004 BODY & ACCESSORIES Floor Console Assembly - Endeavor
Page 1847 of 3870
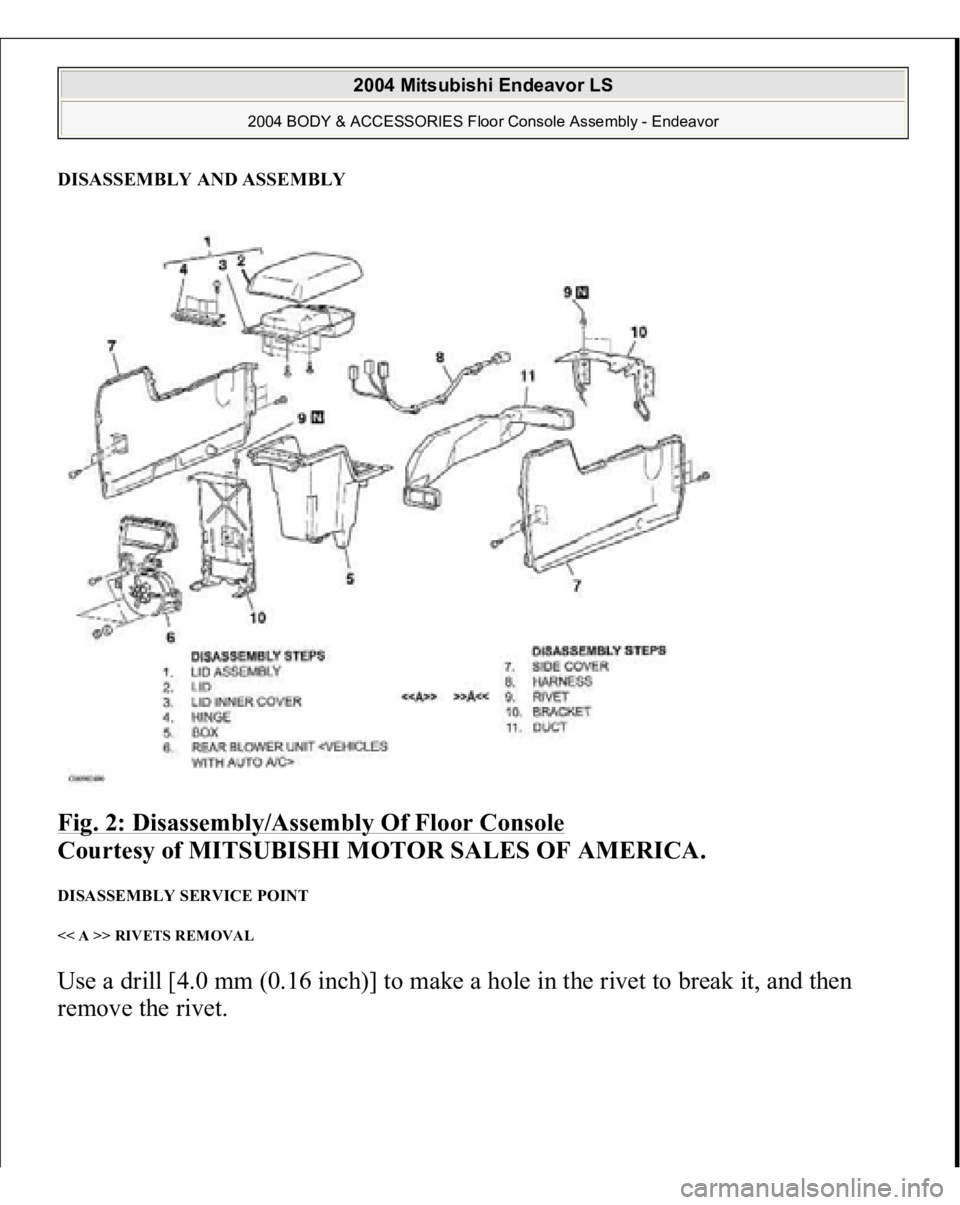
DISASSEMBLY AND ASSEMBLYFig. 2: Disassembly/Assembly Of Floor Console
Courtesy of MITSUBISHI MOTOR SALES OF AMERICA.
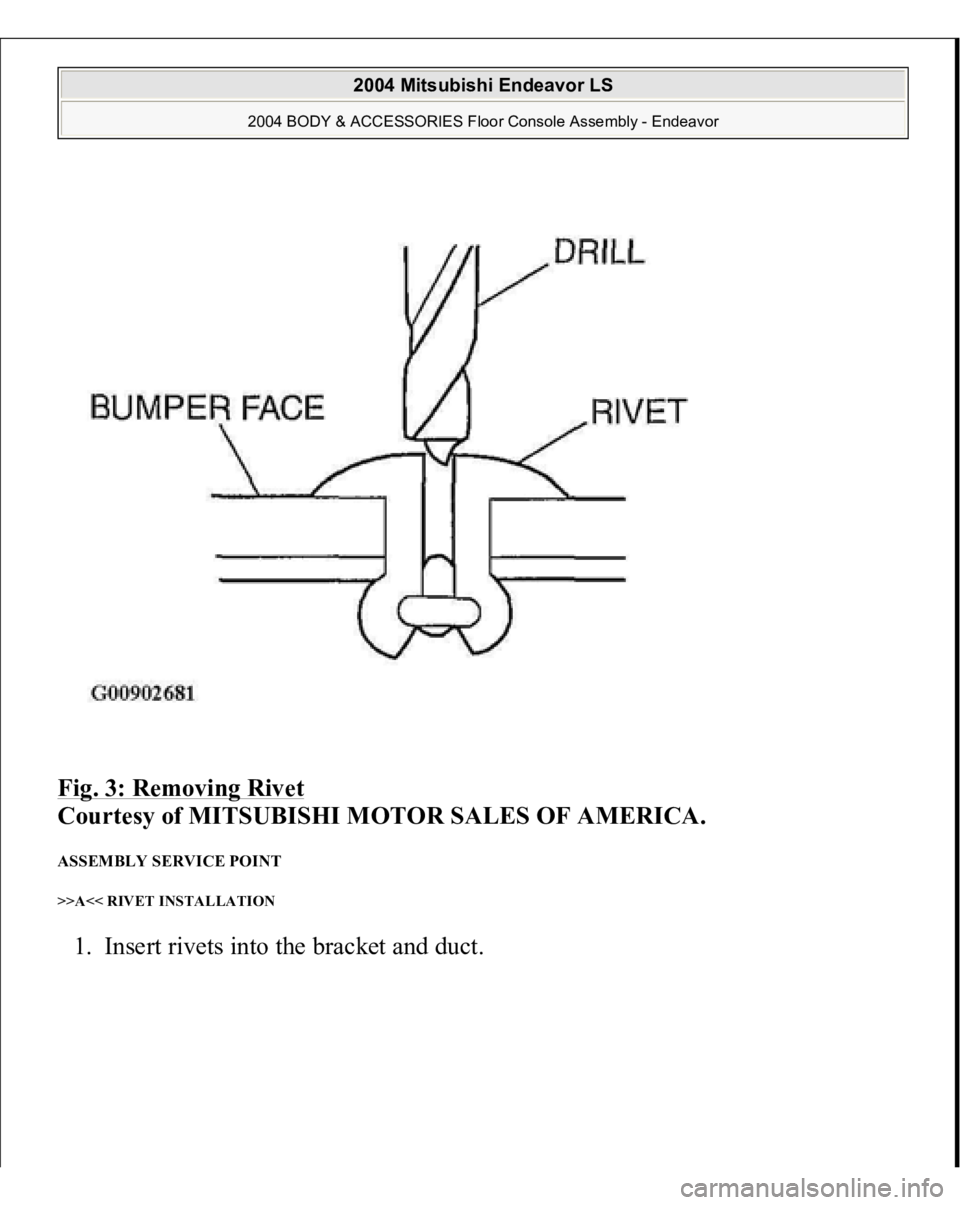
DISASSEMBLY SERVICE POINT << A >> RIVETS REMOVAL Use a drill [4.0 mm (0.16 inch)] to make a hole in the rivet to break it, and then
remove the rivet.
2004 Mitsubishi Endeavor LS
2004 BODY & ACCESSORIES Floor Console Assembly - Endeavor
Page 1848 of 3870
Fig. 3: Removing Rivet
Courtesy of MITSUBISHI MOTOR SALES OF AMERICA.
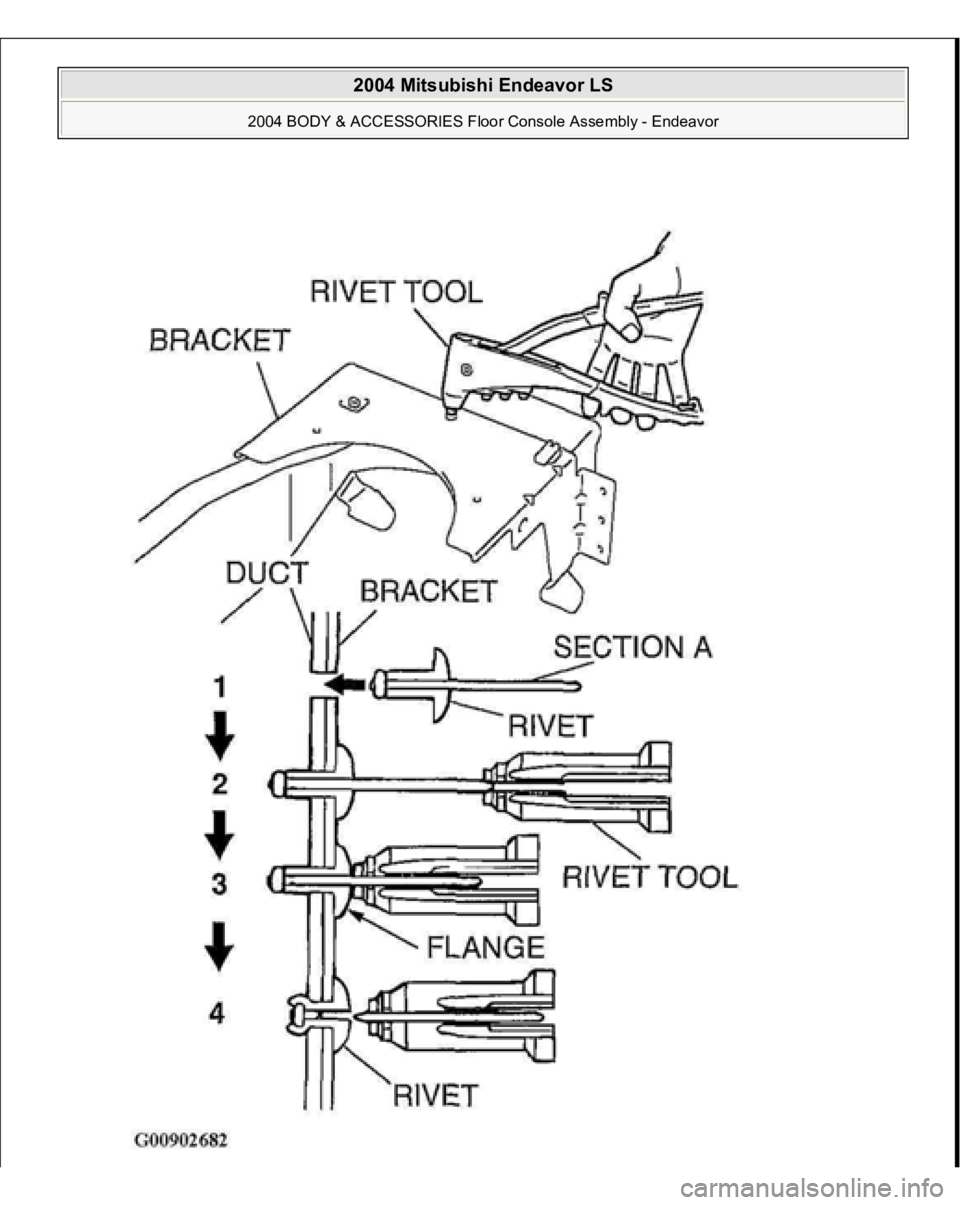
ASSEMBLY SERVICE POINT >>A<< RIVET INSTALLATION 1. Insert rivets into the bracket and duct.
2004 Mitsubishi Endeavor LS
2004 BODY & ACCESSORIES Floor Console Assembly - Endeavor
Page 1849 of 3870
2004 Mitsubishi Endeavor LS
2004 BODY & ACCESSORIES Floor Console Assembly - Endeavor
Page 1850 of 3870
Fig. 4: Installing Rive
t
Courtesy of MITSUBISHI MOTOR SALES OF AMERICA.
2. Insert section "A" of the rivet into the rivet tool.
3. Pressing the flange surface of the rivet, grip the handle of the rivet tool.
4. The thinnest
point of "A" is cut and the rivet is held in
position.
2004 Mitsubishi Endeavor LS
2004 BODY & ACCESSORIES Floor Console Assembly - Endeavor
Trending: pcm, Oxygen sensor, relay, accessory belt, Abs sensor, AUX, Rack and pinion
