MITSUBISHI ENDEAVOR 2004 Service Repair Manual
ENDEAVOR 2004
MITSUBISHI
MITSUBISHI
https://www.carmanualsonline.info/img/19/57105/w960_57105-0.png
MITSUBISHI ENDEAVOR 2004 Service Repair Manual
Trending: hood release, weight, compression ratio, adding oil, Power windows, four wheel drive, jump start terminals
Page 1821 of 3870
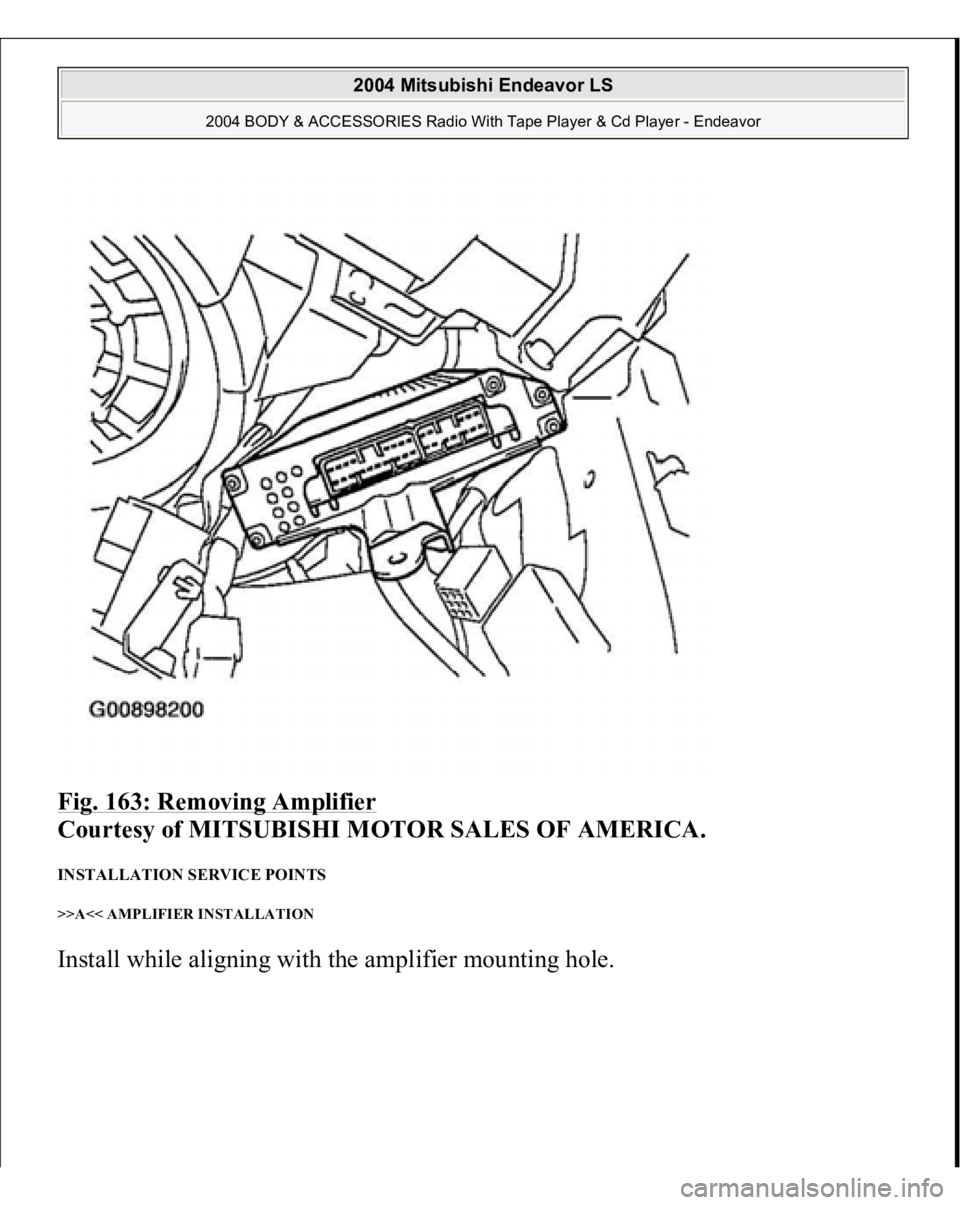
Fig. 163: Removing Amplifier
Courtesy of MITSUBISHI MOTOR SALES OF AMERICA.
INSTALLATION SERVICE POINTS >>A<< AMPLIFIER INSTALLATION Install while ali
gnin
g with the am
plifier mountin
g hole.
2004 Mitsubishi Endeavor LS
2004 BODY & ACCESSORIES Radio With Tape Player & Cd Player - Endeavor
Page 1822 of 3870
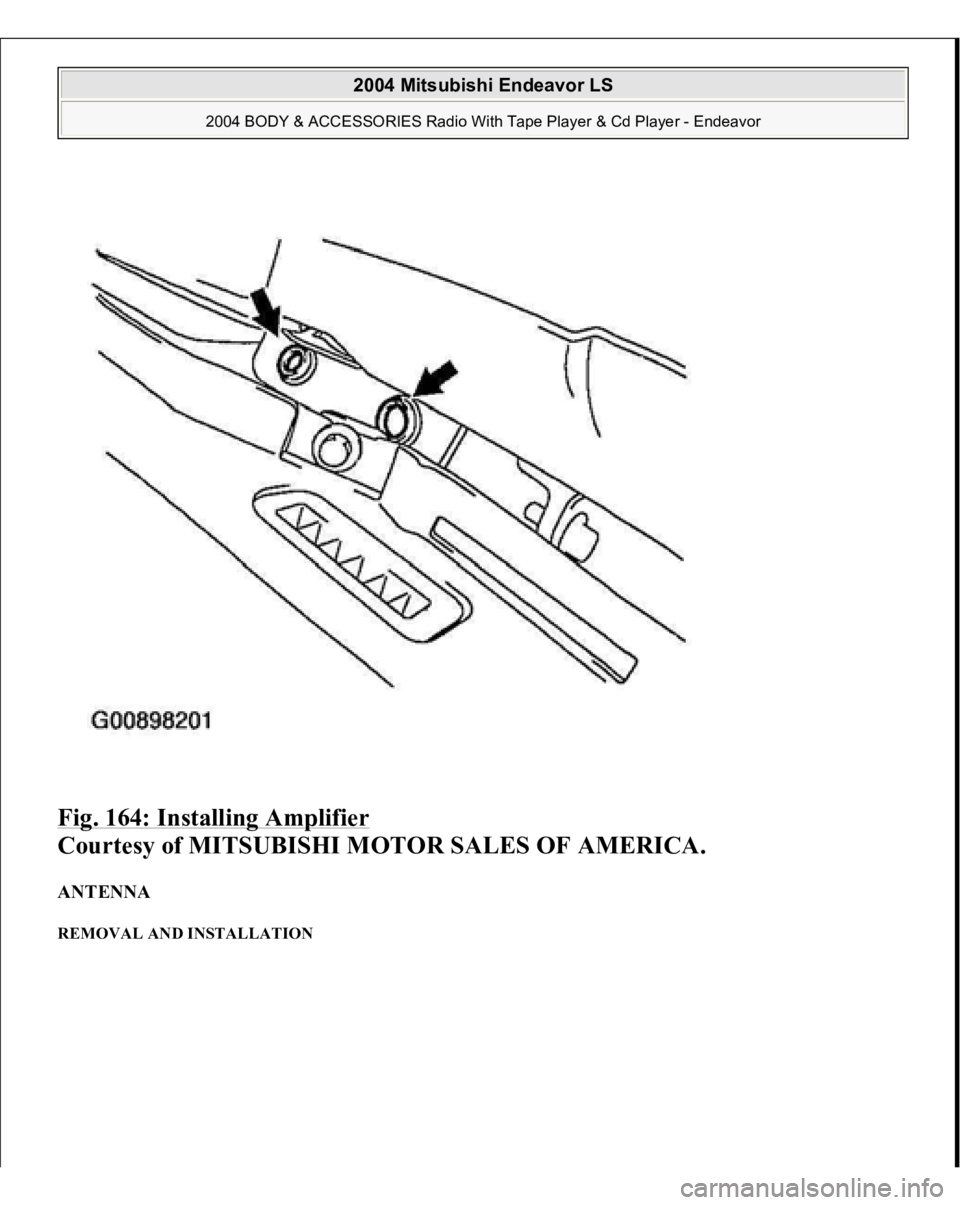
Fig. 164: Installing Amplifier
Courtesy of MITSUBISHI MOTOR SALES OF AMERICA.
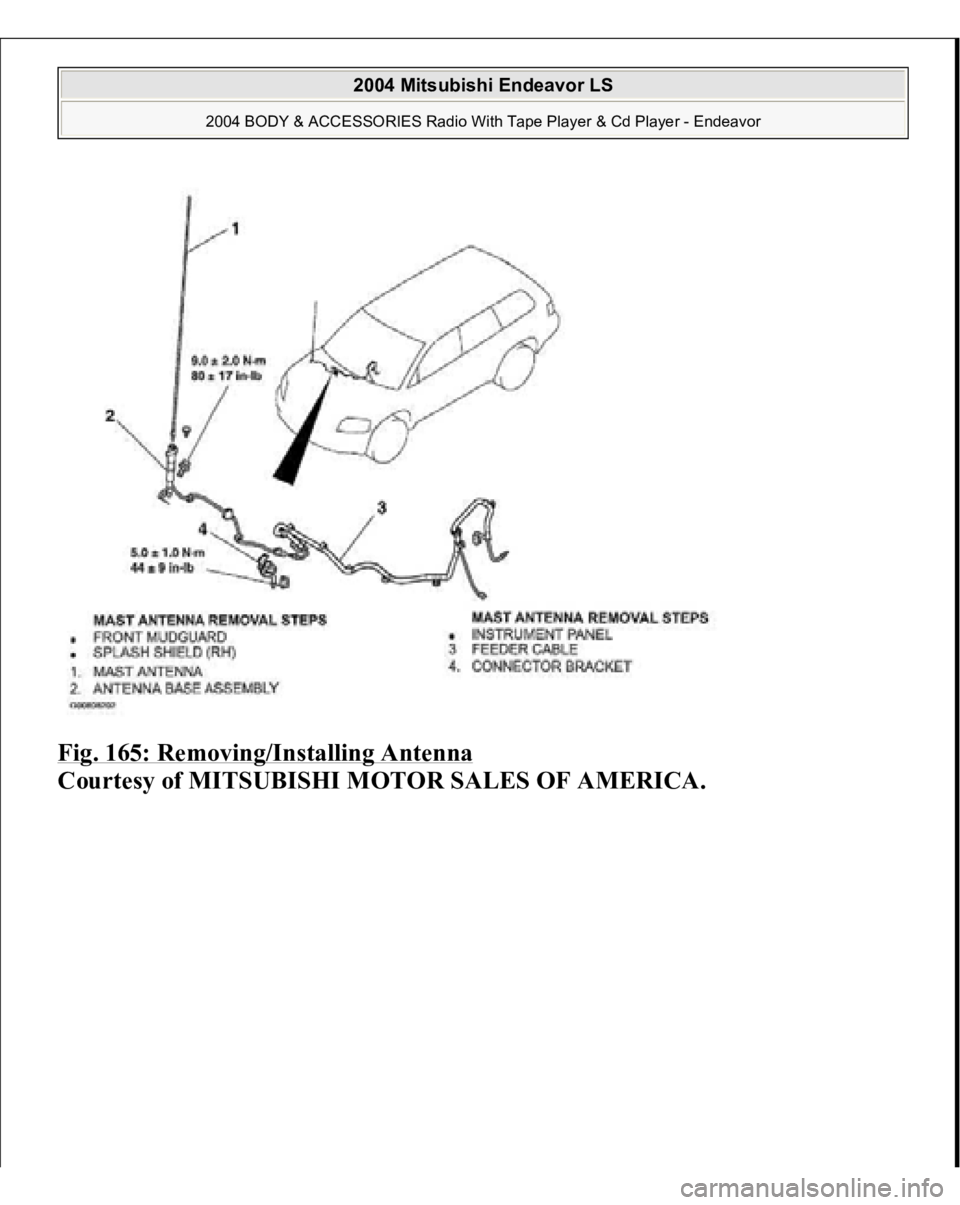
ANTENNA REMOVAL AND INSTALLATION
2004 Mitsubishi Endeavor LS
2004 BODY & ACCESSORIES Radio With Tape Player & Cd Player - Endeavor
Page 1823 of 3870
Fig. 165: Removing/Installing Antenna
Courtesy of MITSUBISHI MOTOR SALES OF AMERICA.
2004 Mitsubishi Endeavor LS
2004 BODY & ACCESSORIES Radio With Tape Player & Cd Player - Endeavor
Page 1824 of 3870
2004 BODY & ACCESSORIES
Video Entertainment System - Endeavor
VIDEO ENTERTAINMENT SYSTEM (VES) GENERAL DESCRIPTION The VES enables images from a DVD player to be watched on a rear-seat display.
It also other commercially available video equipment and game machines to be
connected. BASIC OPERATIONS This chapter describes basic operations for playing a disc in the DVD player and for
playback from an external device connected to the auxiliary input jacks. For other
operations, please refer to the relevant information.
DVD player Auxiliary input jacks (connecting a commercially available video device or
game machine)
SPECIAL TOOL
2004 Mitsubishi Endeavor LS
2004 BODY & ACCESSORIES Video Entertainment System - Endeavor
2004 Mitsubishi Endeavor LS
2004 BODY & ACCESSORIES Video Entertainment System - Endeavor
Page 1825 of 3870
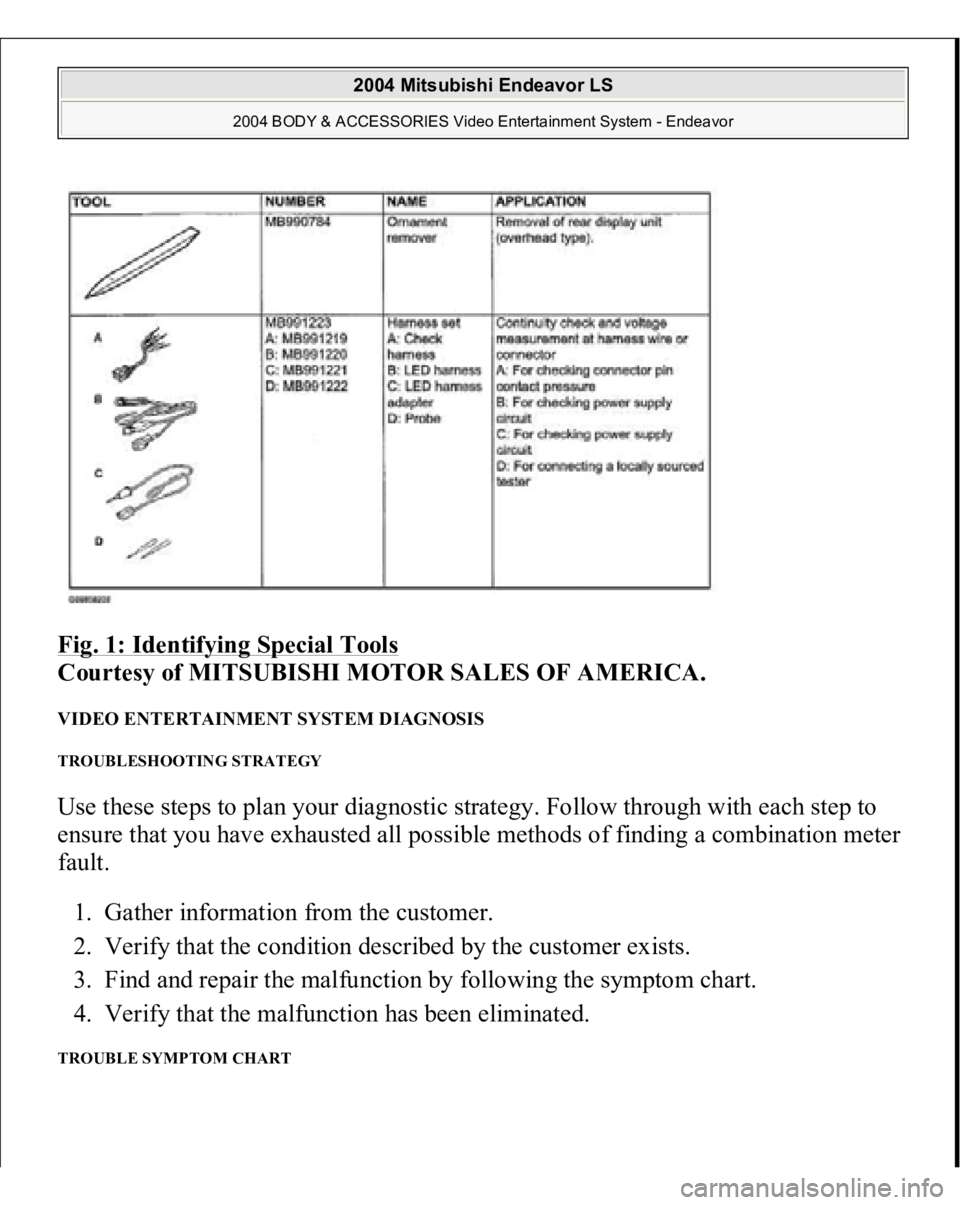
Fig. 1: Identifying Special Tools
Courtesy of MITSUBISHI MOTOR SALES OF AMERICA.
VIDEO ENTERTAINMENT SYSTEM DIAGNOSIS TROUBLESHOOTING STRATEGY Use these steps to plan your diagnostic strategy. Follow through with each step to
ensure that you have exhausted all possible methods of finding a combination meter
fault.
1. Gather information from the customer.
2. Verify that the condition described by the customer exists.
3. Find and repair the malfunction by following the symptom chart.
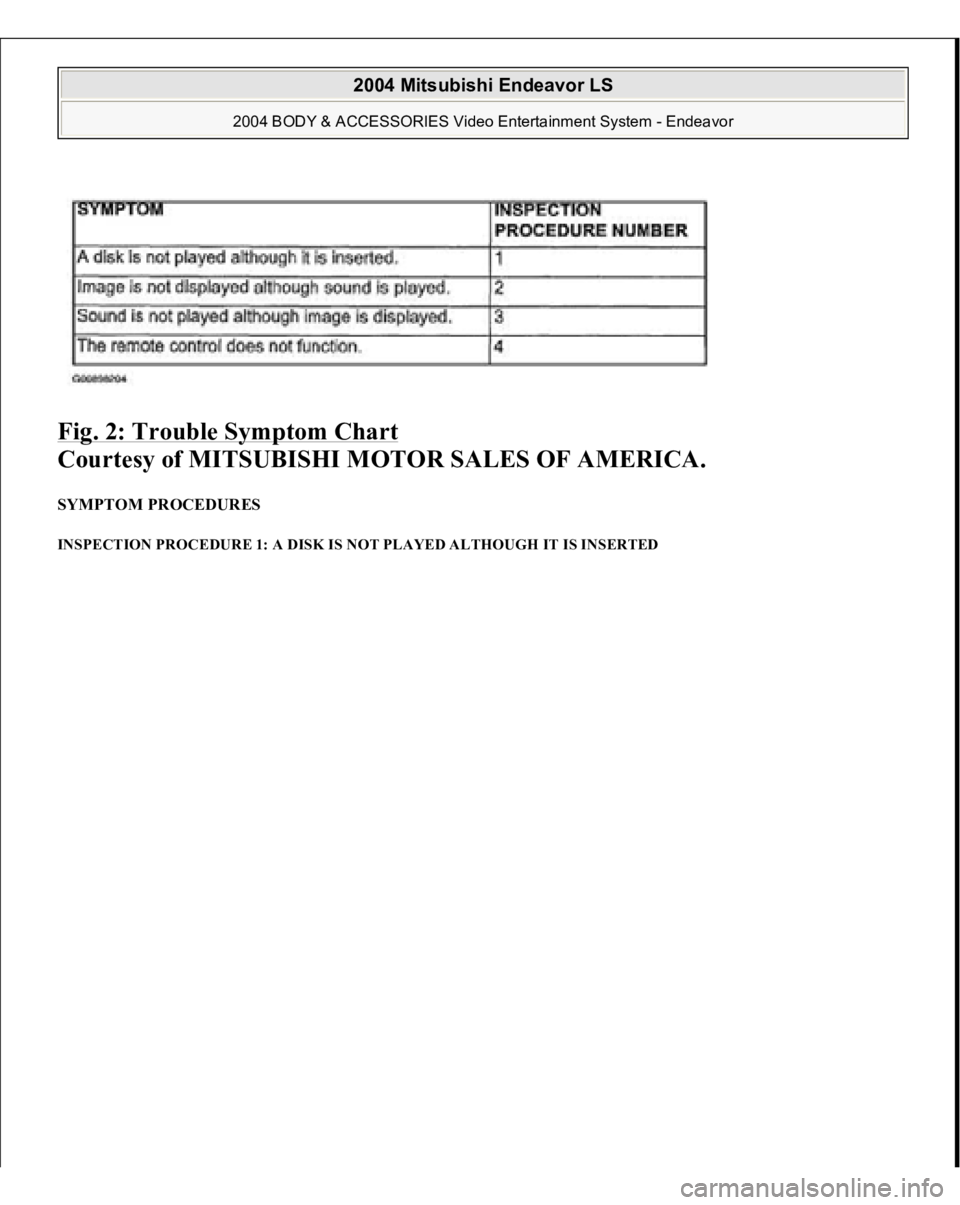
4. Verify that the malfunction has been eliminated. TROUBLE SYMPTOM CHART
2004 Mitsubishi Endeavor LS
2004 BODY & ACCESSORIES Video Entertainment System - Endeavor
Page 1826 of 3870
Fig. 2: Trouble Symptom Chart
Courtesy of MITSUBISHI MOTOR SALES OF AMERICA.
SYMPTOM PROCEDURES INSPECTION PROCEDURE 1: A DISK IS NOT PLAYED ALTHOUGH IT IS INSERTED
2004 Mitsubishi Endeavor LS
2004 BODY & ACCESSORIES Video Entertainment System - Endeavor
Page 1827 of 3870
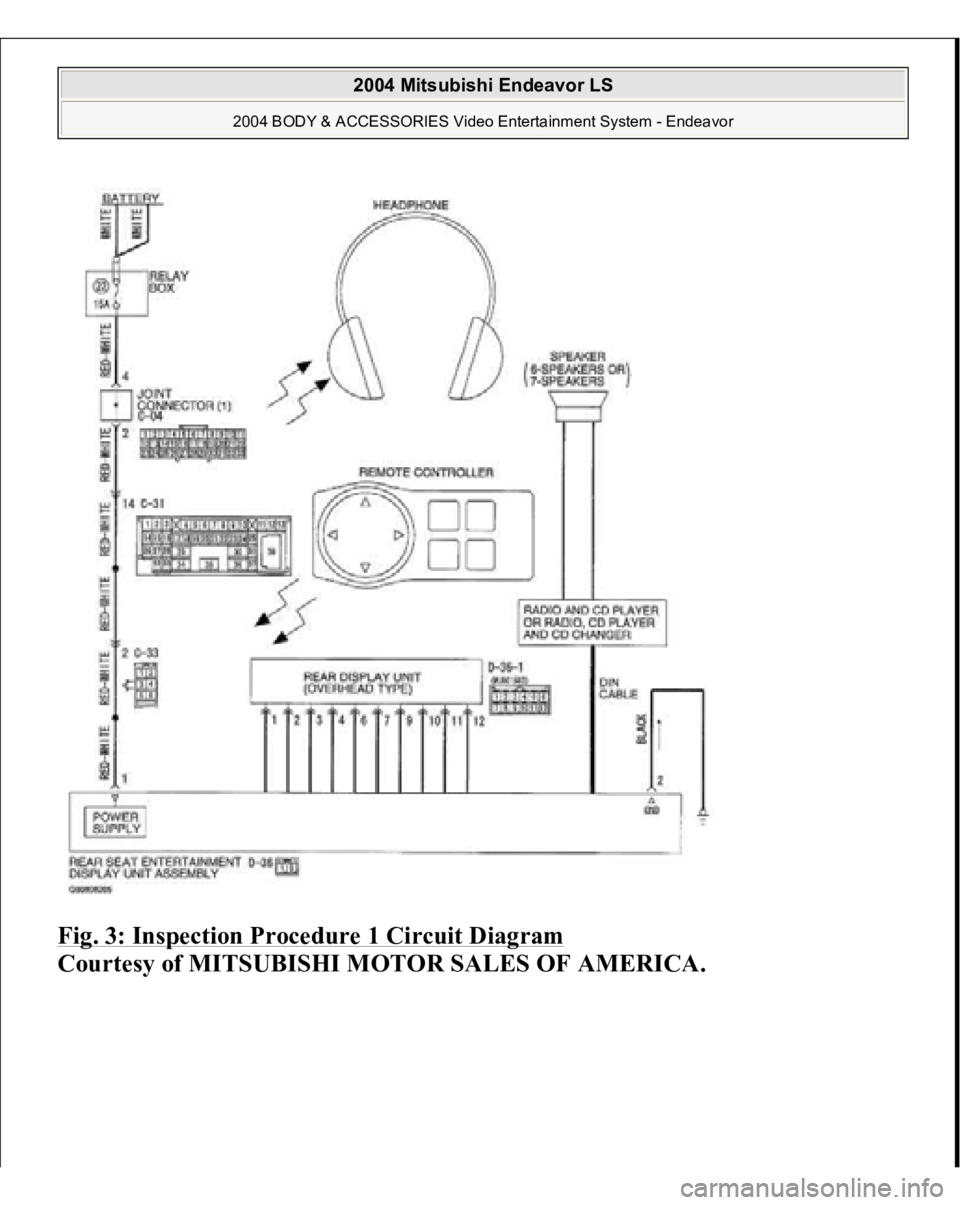
Fig. 3: Inspection Procedure 1 Circuit Diagram
Courtesy of MITSUBISHI MOTOR SALES OF AMERICA.
2004 Mitsubishi Endeavor LS
2004 BODY & ACCESSORIES Video Entertainment System - Endeavor
Page 1828 of 3870
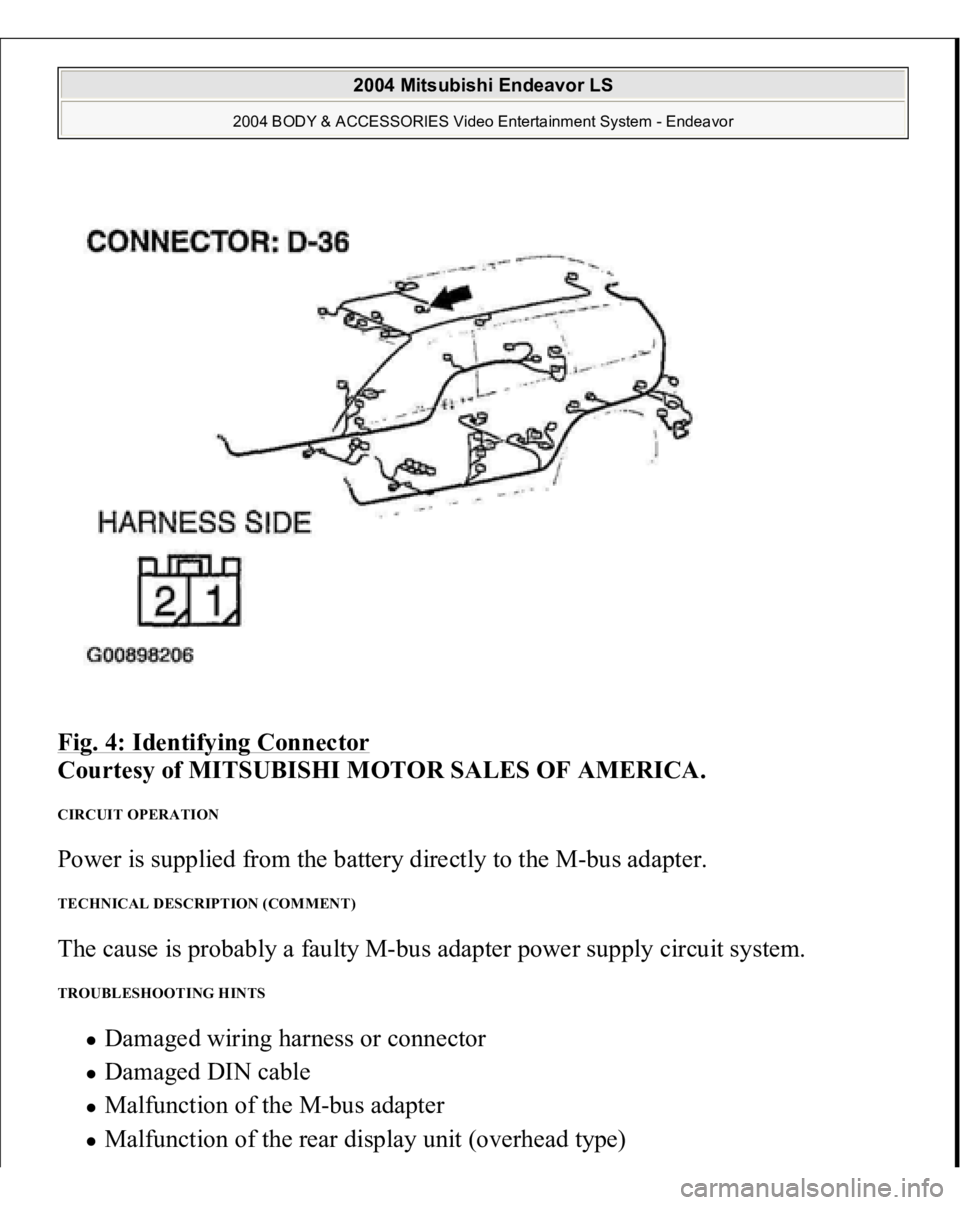
Fig. 4: Identifying Connector
Courtesy of MITSUBISHI MOTOR SALES OF AMERICA.
CIRCUIT OPERATION Power is supplied from the battery directly to the M-bus adapter. TECHNICAL DESCRIPTION (COMMENT) The cause is probably a faulty M-bus adapter power supply circuit system. TROUBLESHOOTING HINTS
Damaged wiring harness or connector Damaged DIN cable Malfunction of the M-bus adapter Malfunction of the rear display unit (overhead type)
2004 Mitsubishi Endeavor LS
2004 BODY & ACCESSORIES Video Entertainment System - Endeavor
Page 1829 of 3870
Malfunction of the radio/CD player
DIAGNOSTIC PROCEDURE
STEP 1. Confirm the disk.
Confirm that the disk complies with the market specifications.
Q: Is the check result normal?
YES: Go to Step 2.
NO: Use a disk, which complies with the market specifications.
STEP 2. Confirm that the disk is inserted with its correct side facing up.
Q: Is the check result normal?
YES: Go to Step 3.
NO: Confirm the disc face, and insert it again. (If the disc is single-sided,
its label should face up)
STEP 3. Confirm the disk.
Confirm that the disk is not contaminated or scratched.
Q: Is the check result normal?
YES: Go to Step 4.
NO: Clean the disk or use a clean disk.
STEP 4. Retest the system.
Check that the disk is played normally when it is inserted.
Q: Is the check result normal?
YES: The procedure is complete.
NO: Go to Step 5.
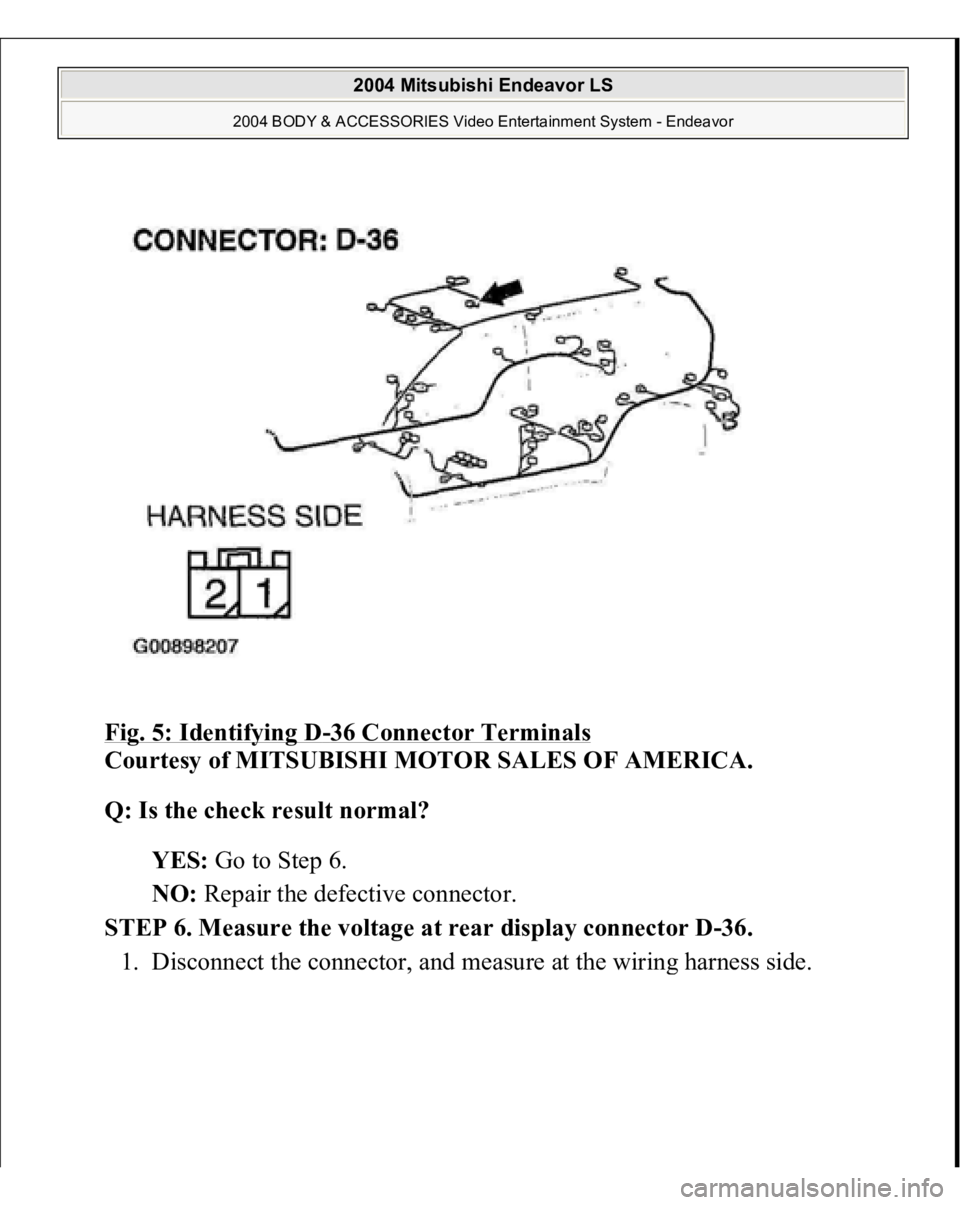
STEP 5. Connector check: D-36 rear disk play connector
2004 Mitsubishi Endeavor LS
2004 BODY & ACCESSORIES Video Entertainment System - Endeavor
Page 1830 of 3870
Fig. 5: Identifying D
-36 Connector Terminals
Courtesy of MITSUBISHI MOTOR SALES OF AMERICA.
Q: Is the check result normal?
YES: Go to Step 6.
NO: Repair the defective connector.
STEP 6. Measure the voltage at rear display connector D-36.
1. Disconnect the connector, and measure at the wirin
gharness side.
2004 Mitsubishi Endeavor LS
2004 BODY & ACCESSORIES Video Entertainment System - Endeavor
Trending: Oil filter, Windows, steering, Figure 37, Oxygen sensor bank 1, bolt tightening order, check oil
