MITSUBISHI SPYDER 1990 Service Repair Manual
SPYDER 1990
MITSUBISHI
MITSUBISHI
https://www.carmanualsonline.info/img/19/57345/w960_57345-0.png
MITSUBISHI SPYDER 1990 Service Repair Manual
Trending: sensor, washer fluid, cruise control, fuel consumption, parking sensors, turn signal, coolant level
Page 1341 of 2103
AUTOMATIC TRANSAXLE.
OVERHAUL Transaxle
59
I I I
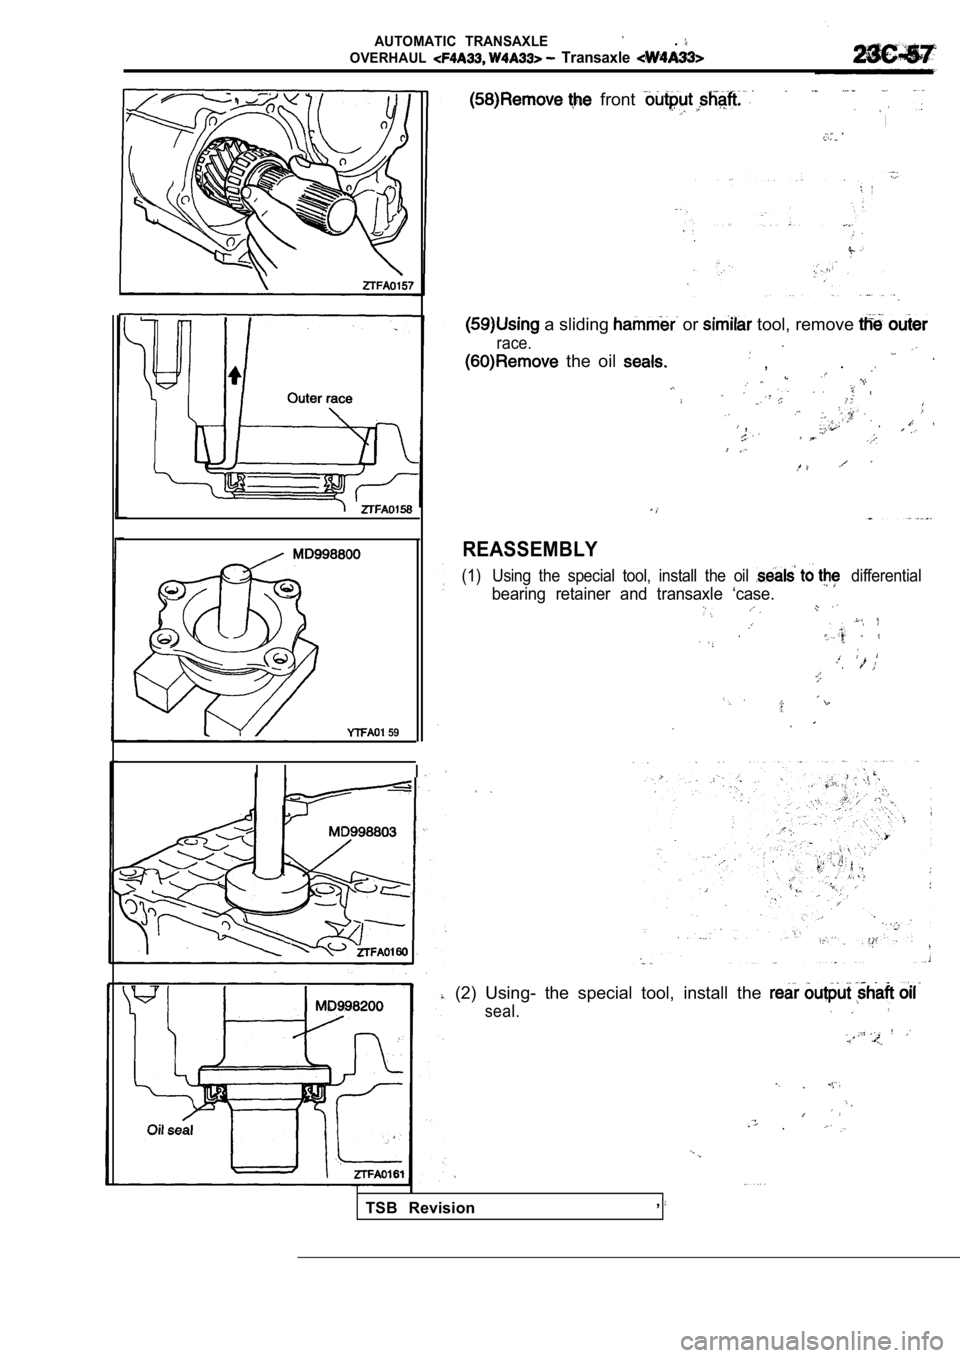
front
I
a sliding or tool, remove
race.
the oil , .
,
REASSEMBLY
(1) Using the special tool, install the oil differential
bearing retainer and transaxle ‘case.
.
(2) Using- the special tool, install the
seal.
TSB Revision,
Page 1342 of 2103
A U T O M A T I C T R A N S A X L E
OVERHAUL Transaxle
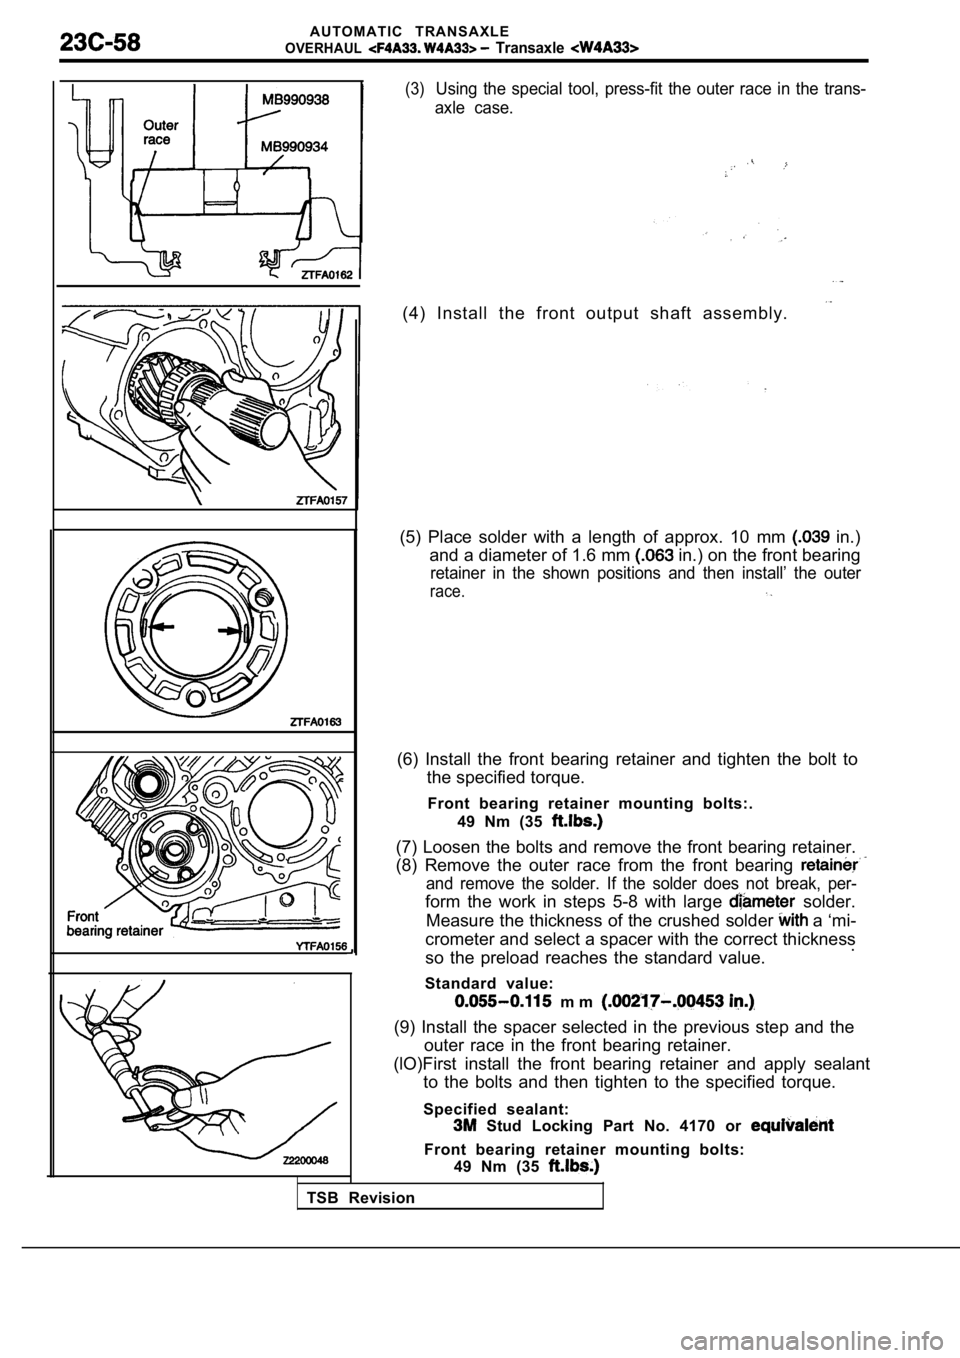
(3)Using the special tool, press-fit the outer race in the trans-
axle case.
(4) Install the front output shaft assembly.
(5) Place solder with a length of approx. 10 mm in.)
and a diameter of 1.6 mm
in.) on the front bearing
retainer in the shown positions and then install’ t he outer
race.
(6) Install the front bearing retainer and tighten the bolt to
the specified torque.
Front bearing retainer mounting bolts:. 49 Nm (35
(7) Loosen the bolts and remove the front bearing r etainer.
(8) Remove the outer race from the front bearing
and remove the solder. If the solder does not break , per-
form the work in steps 5-8 with large solder.
Measure the thickness of the crushed solder
a ‘mi-
crometer and select a spacer with the correct thick ness
so the preload reaches the standard value. .
Standard value:
m m
(9) Install the spacer selected in the previous ste p and the
outer race in the front bearing retainer.
(lO)First install the front bearing retainer and ap ply sealant
to the bolts and then tighten to the specified torq ue.
Specified sealant:
Stud Locking Part No. 4170 or
Front bearing retainer mounting bolts: 49 Nm (35
TSB Revision
Page 1343 of 2103
AUTOMATIC TRANSAXLE
OVERHAUL
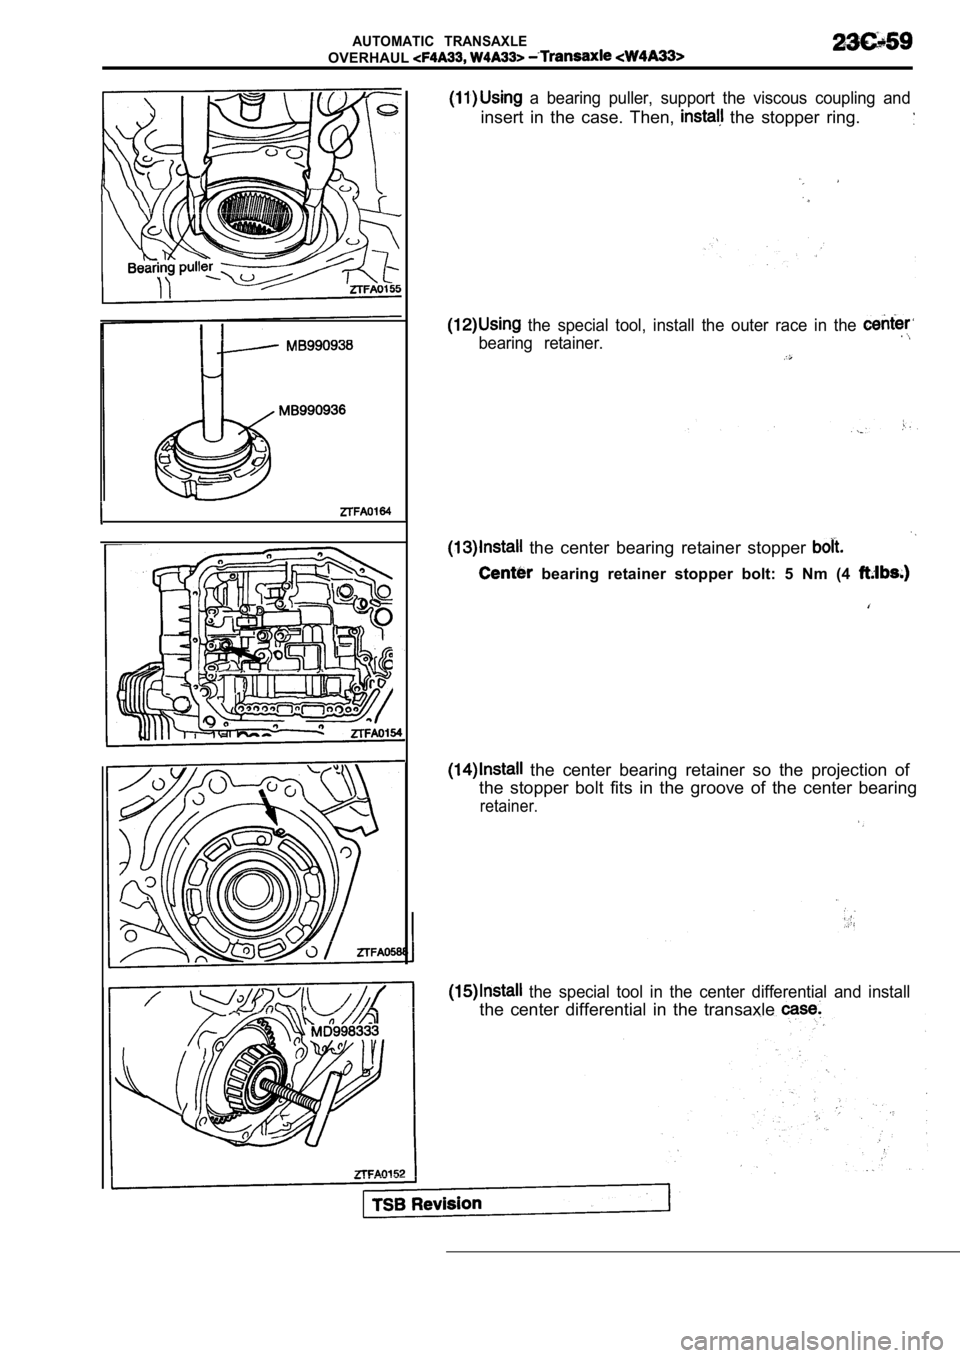
a bearing puller, support the viscous coupling and
insert in the case. Then, the stopper ring.
the special tool, install the outer race in the
bearing retainer..
the center bearing retainer stopper
bearing retainer stopper bolt: 5 Nm (4
the center bearing retainer so the projection of
the stopper bolt fits in the groove of the center b earing
retainer.
the special tool in the center differential and install
the center differential in the transaxle
Page 1344 of 2103
AUTOMATIC TRANSAXLE
OVERHAUL -Transaxle
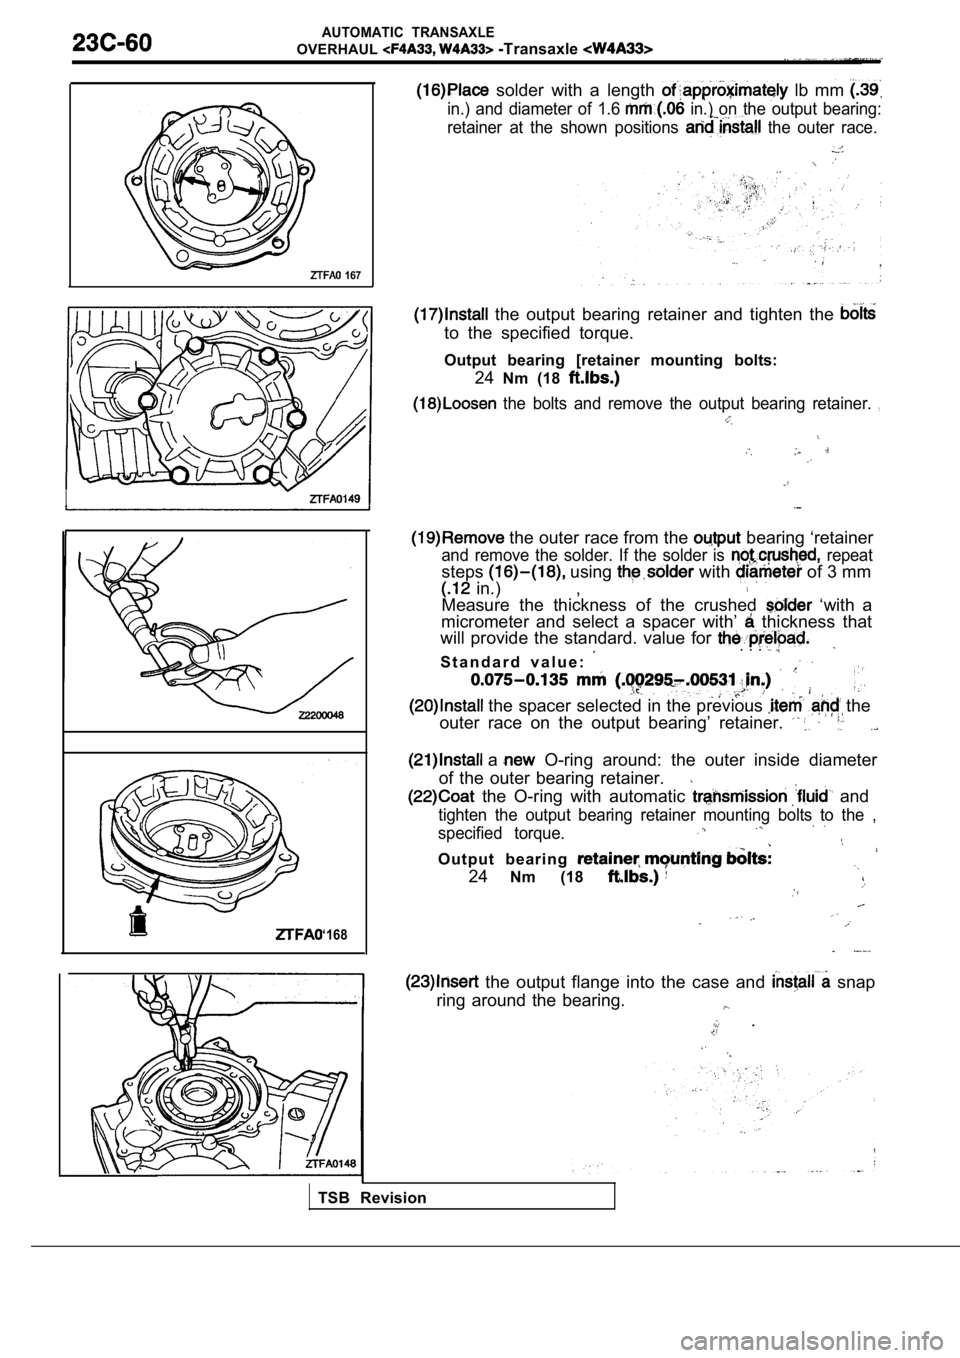
solder with a length lb mm
in.) and diameter of 1.6 in.) on the output bearing:
retainer at the shown positions
the outer race.
167
I
‘168
the output bearing retainer and tighten the
to the specified torque.
Output bearing [retainer mounting bolts: 24Nm (18
the bolts and remove the output bearing retainer.
the outer race from the bearing ‘retainer
and remove the solder. If the solder is repeat
steps using with of 3 mm
in.) ,
Measure the thickness of the crushed ‘with a
micrometer and select a spacer with’
thickness that
will provide the standard. value for
S t a n d a r d v a l u e :
. . .
the spacer selected in the previous the
outer race on the output bearing’ retainer.
a O-ring around: the outer inside diameter
of the outer bearing retainer.
the O-ring with automatic and
tighten the output bearing retainer mounting bolts to the ,
specified torque.
Output bearing
24 Nm (18
the output flange into the case and snap
ring around the bearing.
.
TSB Revision
Page 1345 of 2103
A U T O M A T I C T R A N S A X L E OVERHAUL ,
I
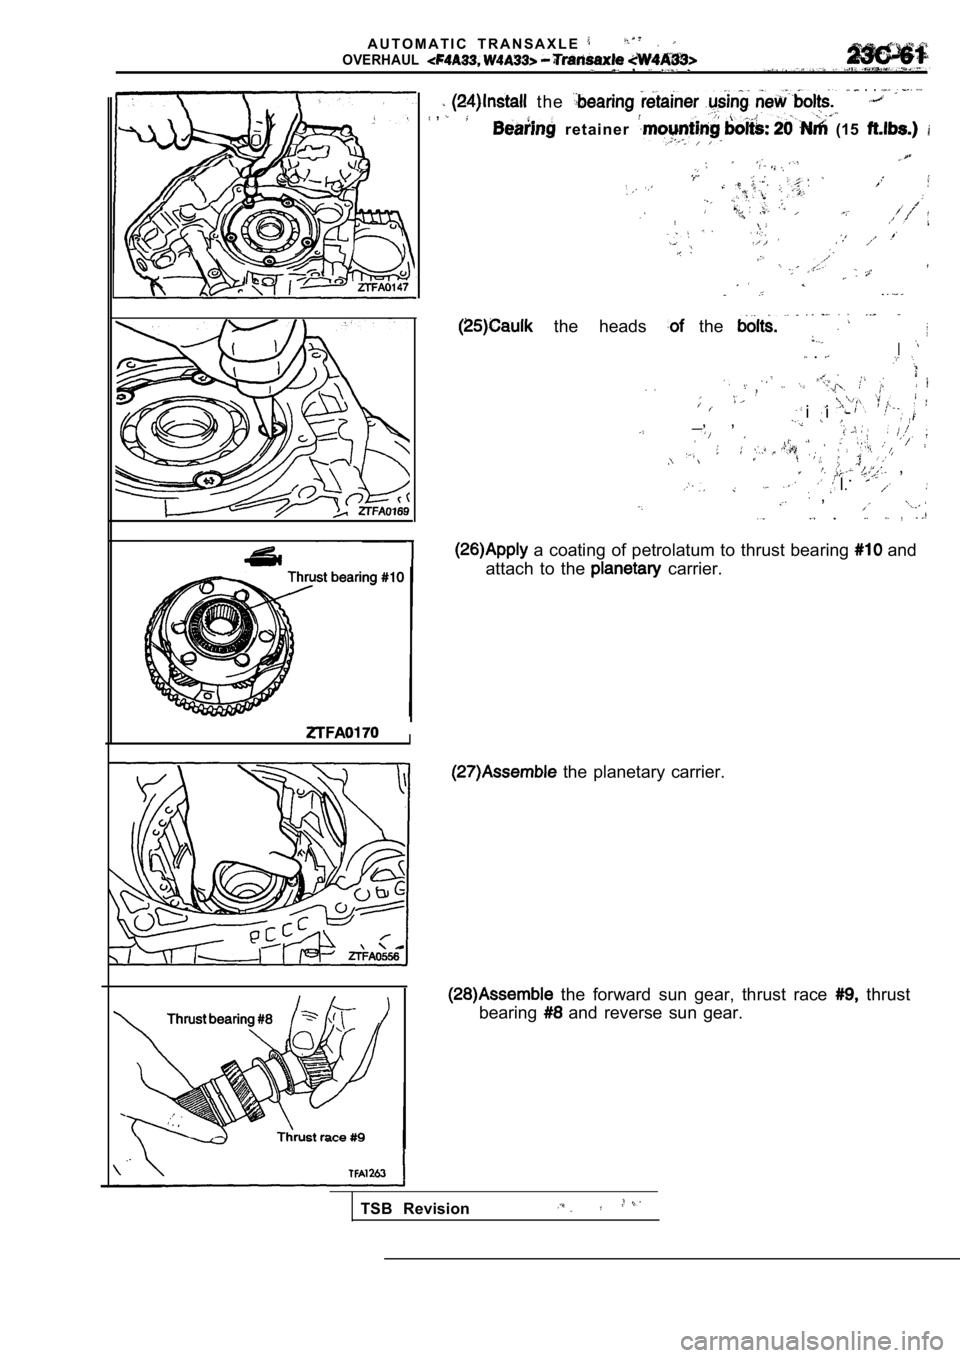
the
. .
,
r e t a i n e r (15
the heads the
I .
i i -
_, ,
, .
, I.
.,
a coating of petrolatum to thrust bearing and
attach to the
carrier.
the planetary carrier.
the forward sun gear, thrust race thrust
bearing
and reverse sun gear.
TSB Revision
Page 1346 of 2103
AUTOMATIC TRANSAXLE
OVERHAUL
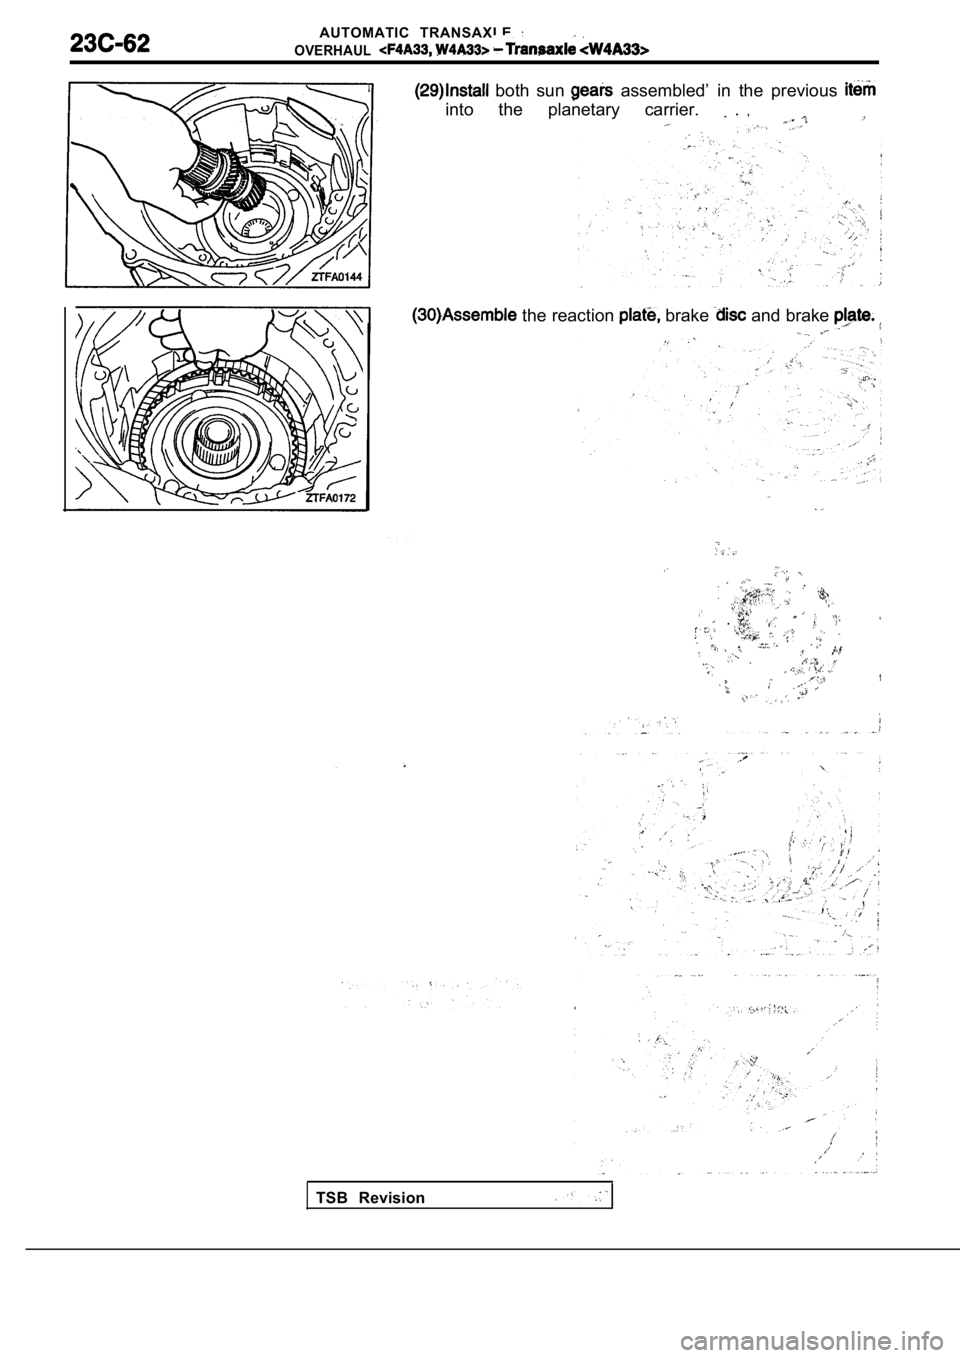
both sun assembled’ in the previous
into the planetary carrier. .
the reaction brake and brake
TSB Revision
Page 1347 of 2103
A U T O M A T I C T R A N S A X L E
OVERHAUL
-Transaxle
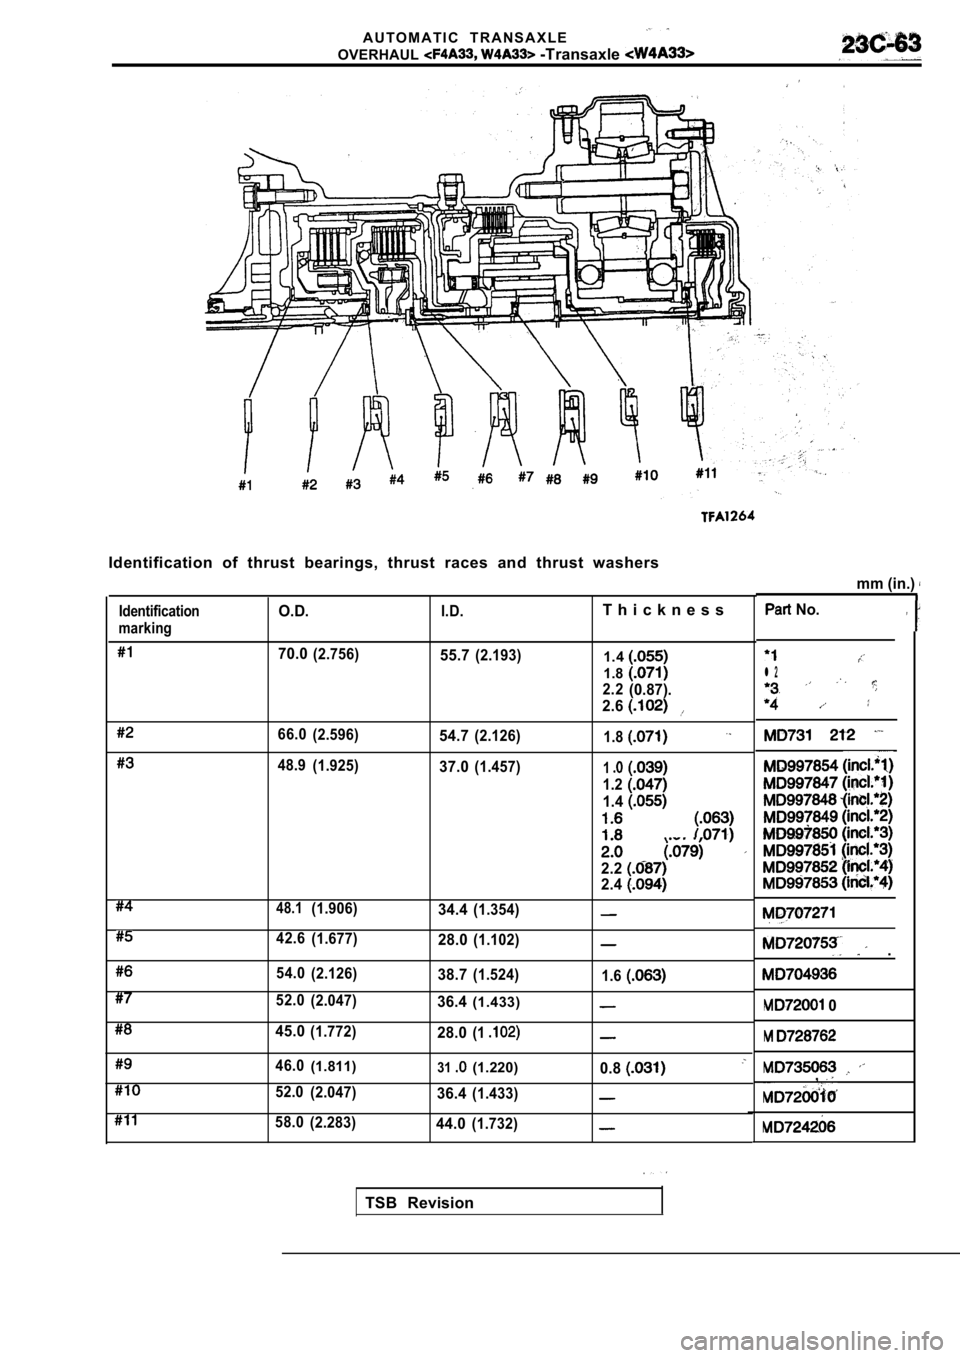
Identification
markingO.D.I.D.T h i c k n e s s
70.0(2.756)55.7(2.193)1.4
1.8
2.2(0.87).
2.6
66.0 (2.596)54.7(2.126)
1.8
48.9(1.925)37.0(1.457)1
1.2
1.4
2.22.4
48.1(1.906)34.4(1.354)
42.6 (1.677)28.0(1.102)
54.0(2.126)38.7(1.524)
1.6
52.0(2.047)36.4(1.433)
45.0(1.772)28.0(1
46.0(1.811)31(1.220)0.8
52.0(2.047)36.4(1.433)
58.0(2.283)44.0(1.732)
TSB Revision
Identification of thrust bearings, thrust races and thrust washers
mm (in.)
No.
l 2
.
0
,
Page 1348 of 2103
AUTOMATIC TRANSAXLE
OVERHAUL
Transaxle
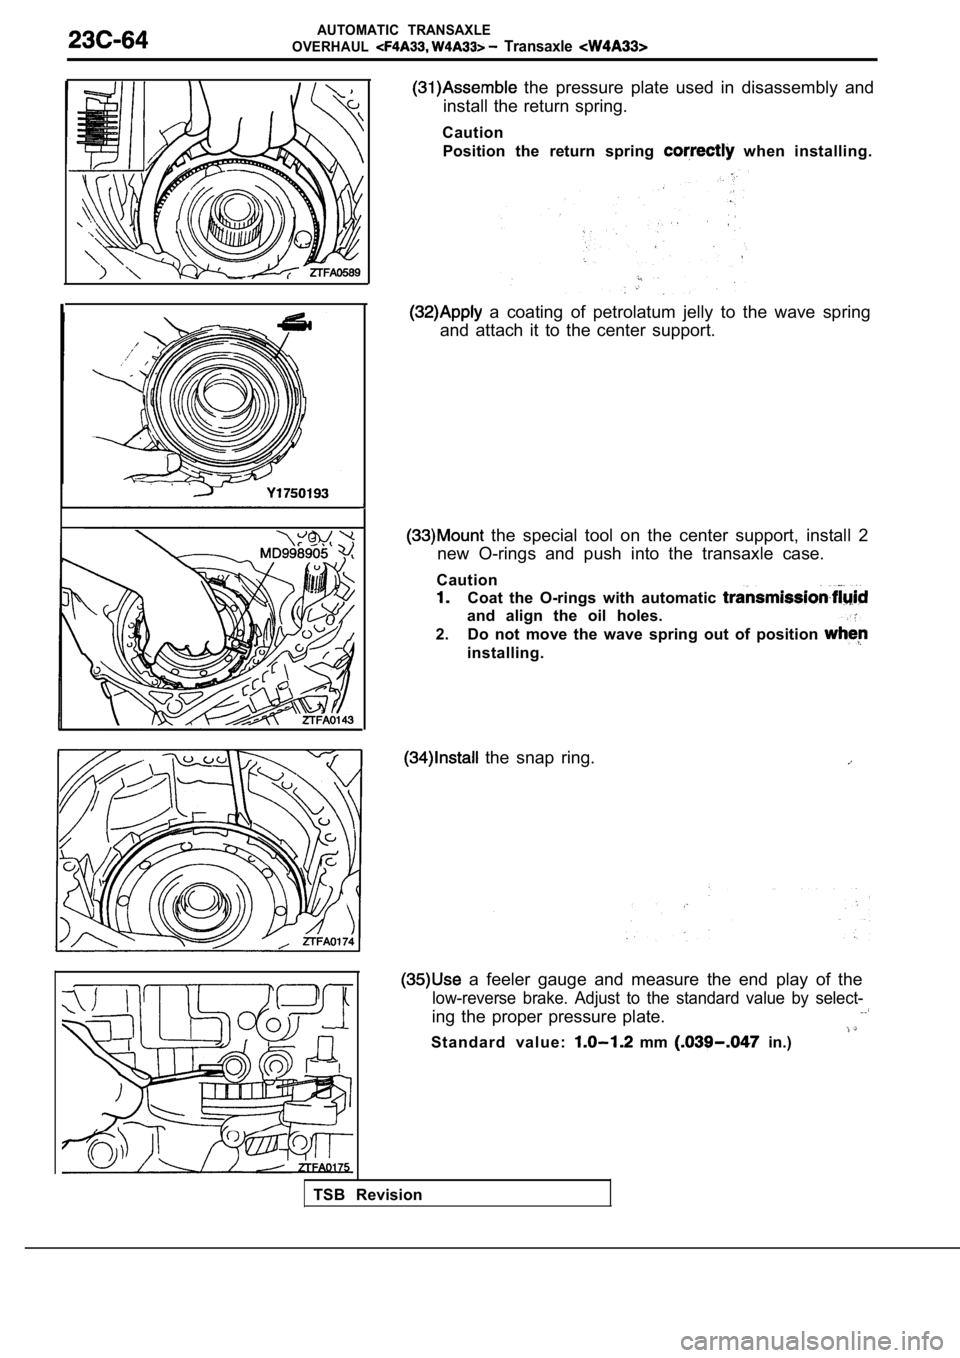
the pressure plate used in disassembly and
install the return spring.
Caution Position the return spring
when installing.
a coating of petrolatum jelly to the wave spring
and attach it to the center support.
the special tool on the center support, install 2
new O-rings and push into the transaxle case.
Caution
Coat the O-rings with automatic
and align the oil holes.
2. Do not move the wave spring out of position
installing.
the snap ring.
TSB Revision
a feeler gauge and measure the end play of the
low-reverse brake. Adjust to the standard value by select-
ing the proper pressure plate.
S t a n d a r d v a l u e : mm in.)
Page 1349 of 2103
AUTOMATIC TRANSAXLE
OVERHAUL
Transaxle
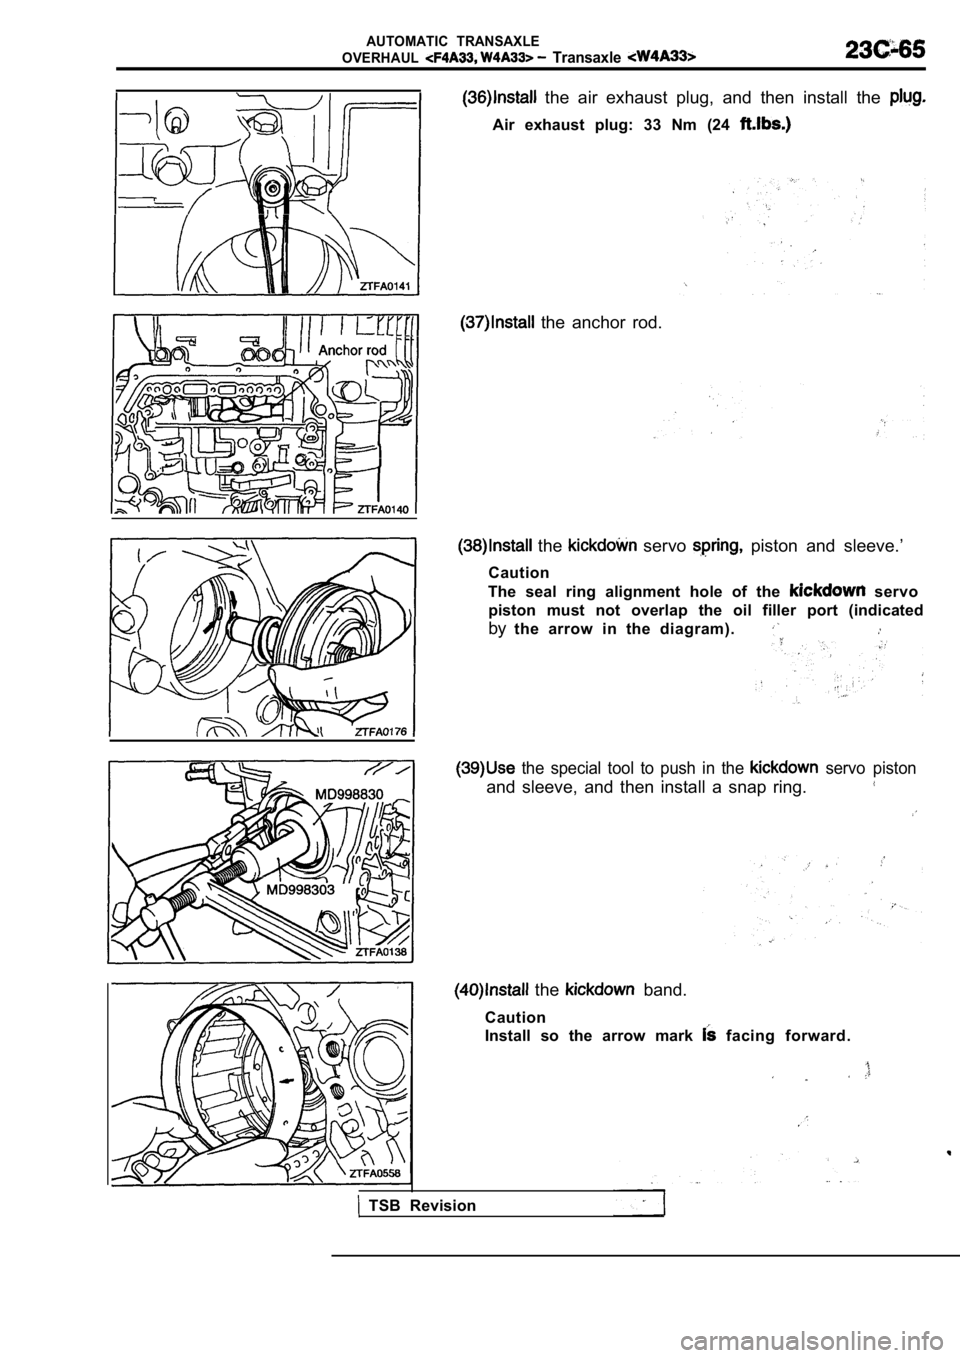
the air exhaust plug, and then install the
Air exhaust plug: 33 Nm (24
the anchor rod.
the servo piston and sleeve.’
Caution
The seal ring alignment hole of the
servo
piston must not overlap the oil filler port (indica ted
by the arrow in the diagram).
the special tool to push in the servo piston
and sleeve, and then install a snap ring.
the band.
Caution
Install so the arrow mark
facing forward.
TSB Revision
Page 1350 of 2103
AUTOMATIC TRANSAXLE
OVERHAUL -Transaxle
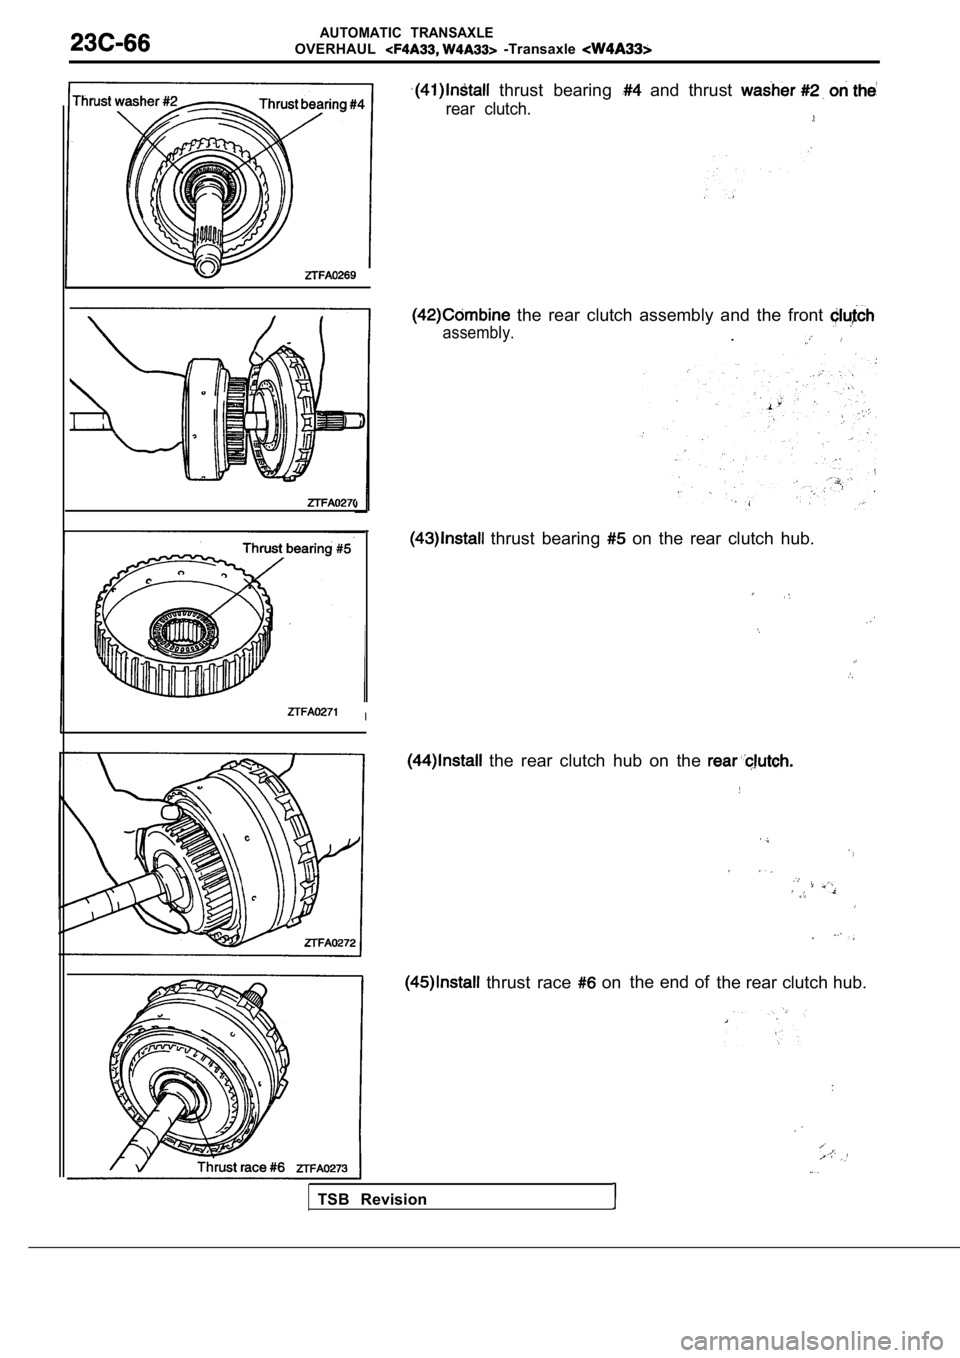
thrust bearing and thrust
rear clutch.
the rear clutch assembly and the front
assembly..
thrust bearing on the rear clutch hub.
I
the rear clutch hub on the
thrust race onthe end of
the rear clutch hub.
TSB Revision
Trending: trailer, fuel filter, instrument panel, timing belt, battery, fuse chart, ESP
