NISSAN ALMERA N16 2003 Electronic Repair Manual
Manufacturer: NISSAN, Model Year: 2003, Model line: ALMERA N16, Model: NISSAN ALMERA N16 2003Pages: 3189, PDF Size: 54.76 MB
Page 231 of 3189
JEM149G
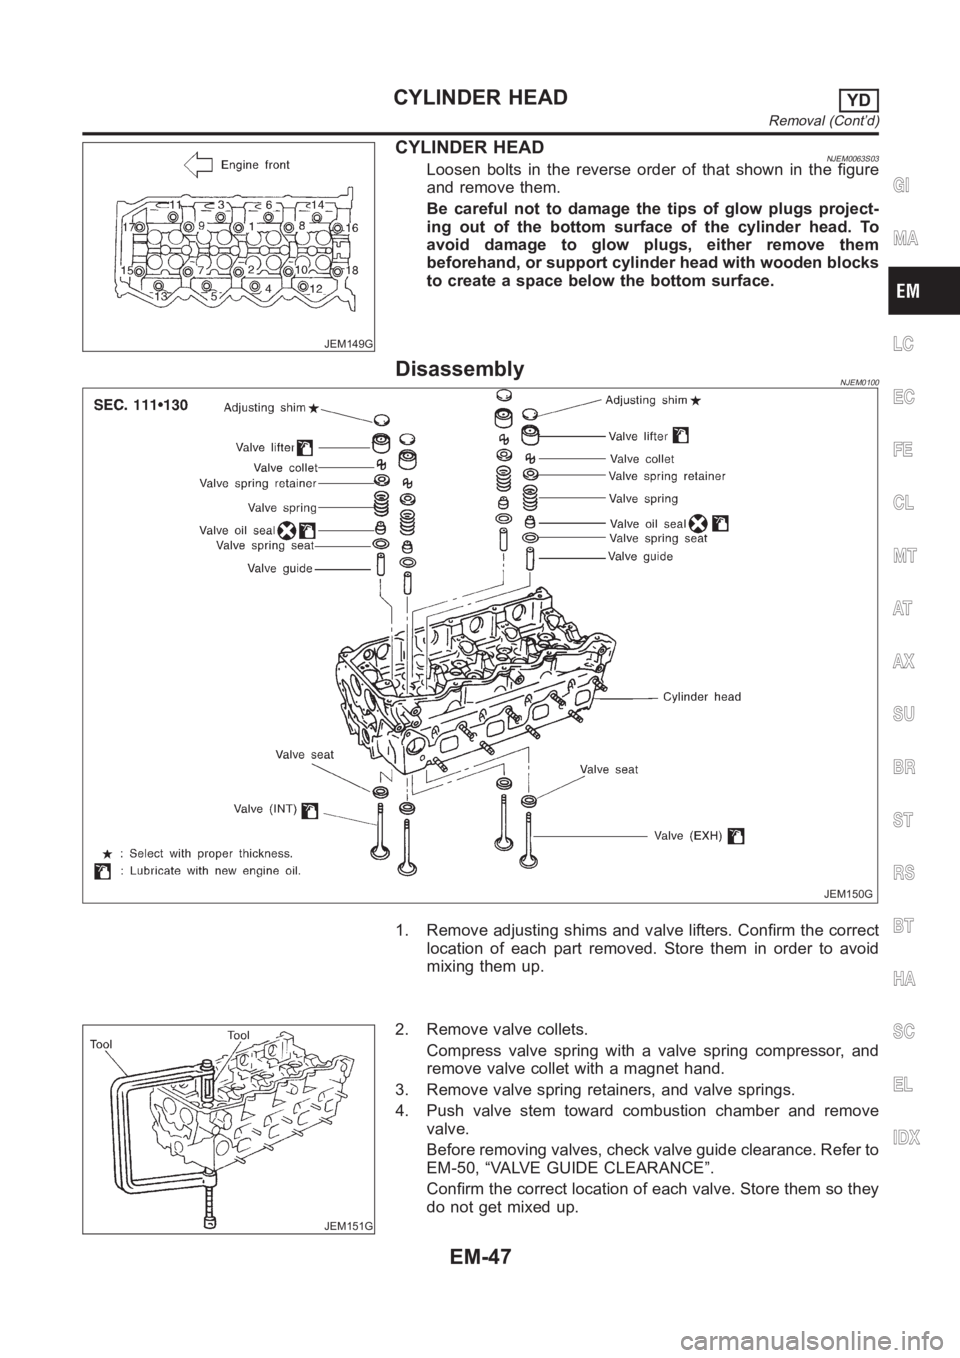
CYLINDER HEADNJEM0063S03Loosen bolts in the reverse order of that shown in the figure
and remove them.
Be careful not to damage the tips of glow plugs project-
ing out of the bottom surface of the cylinder head. To
avoid damage to glow plugs, either remove them
beforehand, or support cylinder head with wooden blocks
to create a space below the bottom surface.
DisassemblyNJEM0100
JEM150G
1. Remove adjusting shims and valve lifters. Confirm the correct
location of each part removed. Store them in order to avoid
mixing them up.
JEM151G
2. Remove valve collets.
Compress valve spring with a valve spring compressor, and
remove valve collet with a magnet hand.
3. Remove valve spring retainers, and valve springs.
4. Push valve stem toward combustion chamber and remove
valve.
Before removing valves, check valve guide clearance. Refer to
EM-50, “VALVE GUIDE CLEARANCE”.
Confirm the correct location of each valve. Store them so they
do not get mixed up.
GI
MA
LC
EC
FE
CL
MT
AT
AX
SU
BR
ST
RS
BT
HA
SC
EL
IDX
CYLINDER HEADYD
Removal (Cont’d)
EM-47
Page 232 of 3189
JEM152G
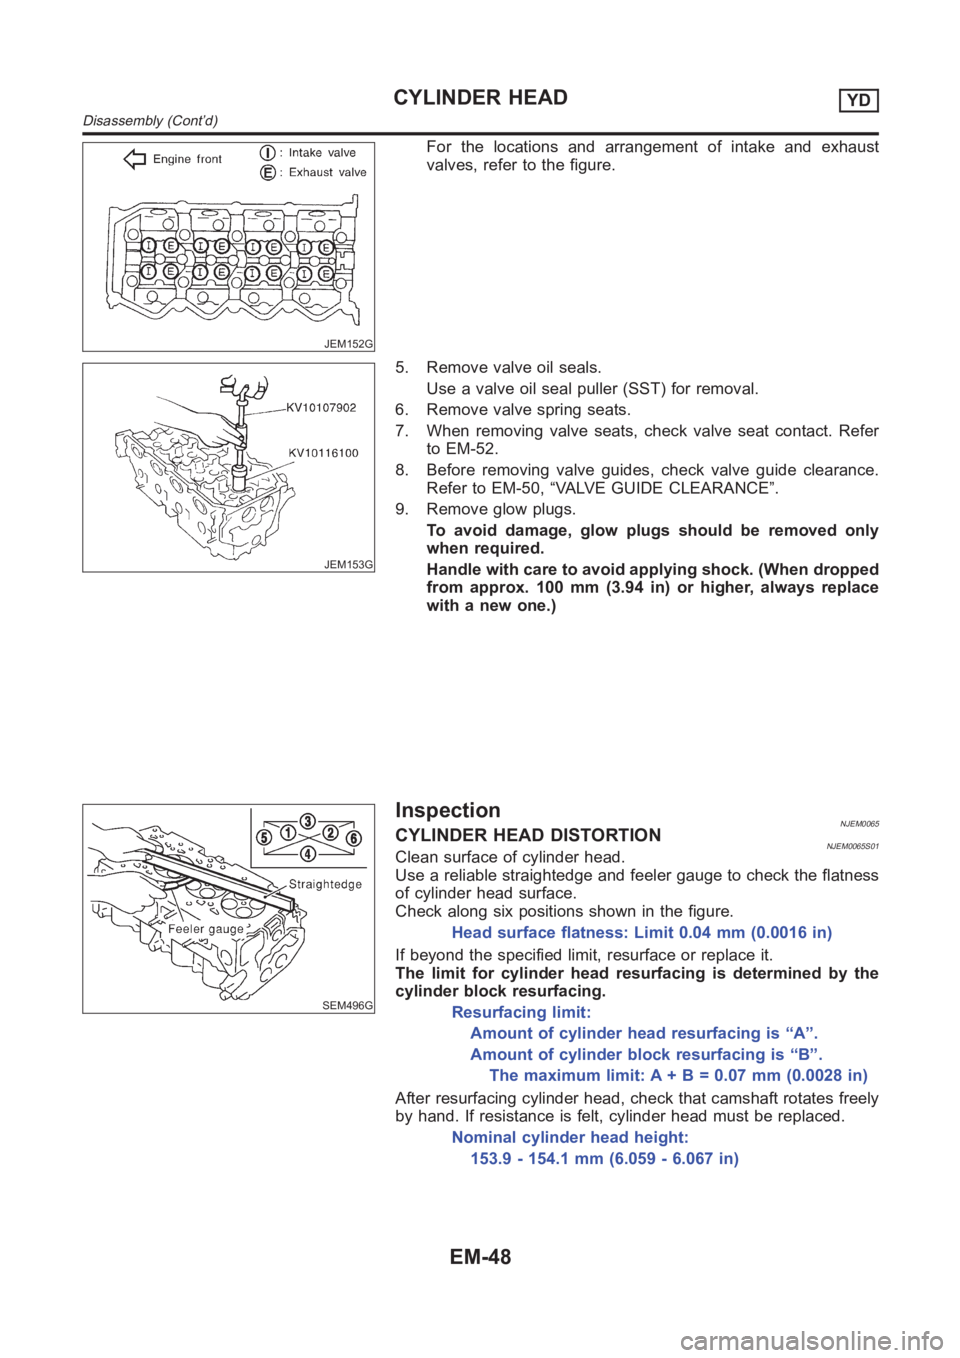
For the locations and arrangement of intake and exhaust
valves, refer to the figure.
JEM153G
5. Remove valve oil seals.
Use a valve oil seal puller (SST) for removal.
6. Remove valve spring seats.
7. When removing valve seats, check valve seat contact. Refer
to EM-52.
8. Before removing valve guides, check valve guide clearance.
Refer to EM-50, “VALVE GUIDE CLEARANCE”.
9. Remove glow plugs.
To avoid damage, glow plugs should be removed only
when required.
Handle with care to avoid applying shock. (When dropped
from approx. 100 mm (3.94 in) or higher, always replace
with a new one.)
SEM496G
InspectionNJEM0065CYLINDER HEAD DISTORTIONNJEM0065S01Clean surface of cylinder head.
Use a reliable straightedge and feeler gauge to check the flatness
of cylinder head surface.
Check along six positions shown in the figure.
Head surface flatness: Limit 0.04 mm (0.0016 in)
If beyond the specified limit, resurface or replace it.
The limit for cylinder head resurfacing is determined by the
cylinder block resurfacing.
Resurfacing limit:
Amount of cylinder head resurfacing is “A”.
Amount of cylinder block resurfacing is “B”.
The maximum limit: A + B = 0.07 mm (0.0028 in)
After resurfacing cylinder head, check that camshaft rotates freely
by hand. If resistance is felt, cylinder head must be replaced.
Nominal cylinder head height:
153.9 - 154.1 mm (6.059 - 6.067 in)
CYLINDER HEADYD
Disassembly (Cont’d)
EM-48
Page 233 of 3189
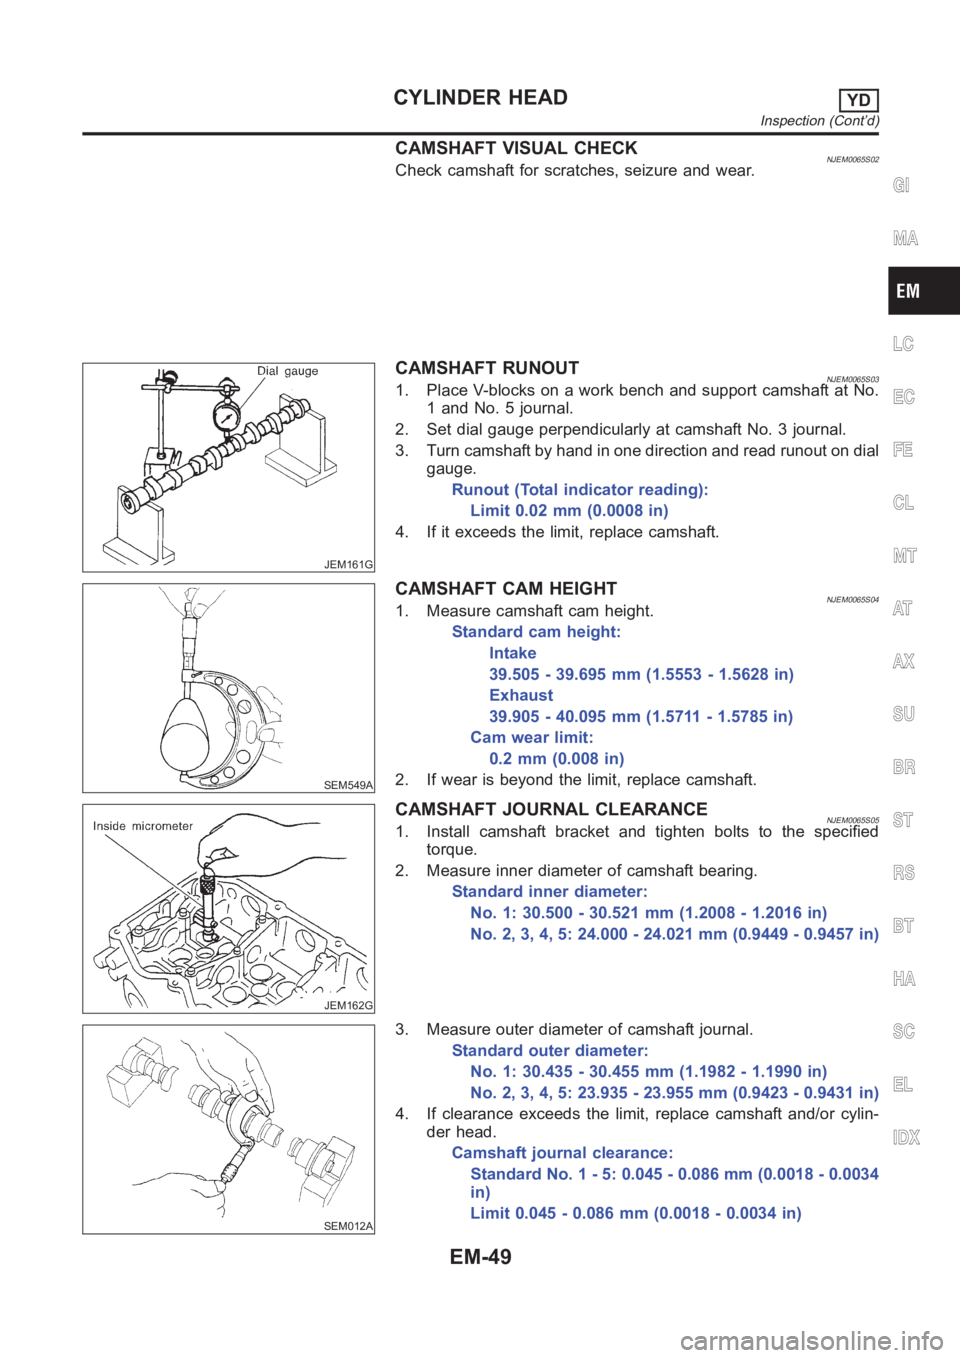
CAMSHAFT VISUAL CHECKNJEM0065S02Check camshaft for scratches, seizure and wear.
JEM161G
CAMSHAFT RUNOUTNJEM0065S031. Place V-blocks on a work bench and support camshaft at No.
1 and No. 5 journal.
2. Set dial gauge perpendicularly at camshaft No. 3 journal.
3. Turn camshaft by hand in one direction and read runout on dial
gauge.
Runout (Total indicator reading):
Limit 0.02 mm (0.0008 in)
4. If it exceeds the limit, replace camshaft.
SEM549A
CAMSHAFT CAM HEIGHTNJEM0065S041. Measure camshaft cam height.
Standard cam height:
Intake
39.505 - 39.695 mm (1.5553 - 1.5628 in)
Exhaust
39.905 - 40.095 mm (1.5711 - 1.5785 in)
Cam wear limit:
0.2mm(0.008in)
2. If wear is beyond the limit, replace camshaft.
JEM162G
CAMSHAFT JOURNAL CLEARANCENJEM0065S051. Install camshaft bracket and tighten bolts to the specified
torque.
2. Measure inner diameter of camshaft bearing.
Standard inner diameter:
No. 1: 30.500 - 30.521 mm (1.2008 - 1.2016 in)
No. 2, 3, 4, 5: 24.000 - 24.021 mm (0.9449 - 0.9457 in)
SEM012A
3. Measure outer diameter of camshaft journal.
Standard outer diameter:
No. 1: 30.435 - 30.455 mm (1.1982 - 1.1990 in)
No. 2, 3, 4, 5: 23.935 - 23.955 mm (0.9423 - 0.9431 in)
4. If clearance exceeds the limit, replace camshaft and/or cylin-
der head.
Camshaft journal clearance:
Standard No. 1 - 5: 0.045 - 0.086 mm (0.0018 - 0.0034
in)
Limit 0.045 - 0.086 mm (0.0018 - 0.0034 in)
GI
MA
LC
EC
FE
CL
MT
AT
AX
SU
BR
ST
RS
BT
HA
SC
EL
IDX
CYLINDER HEADYD
Inspection (Cont’d)
EM-49
Page 234 of 3189
JEM163G
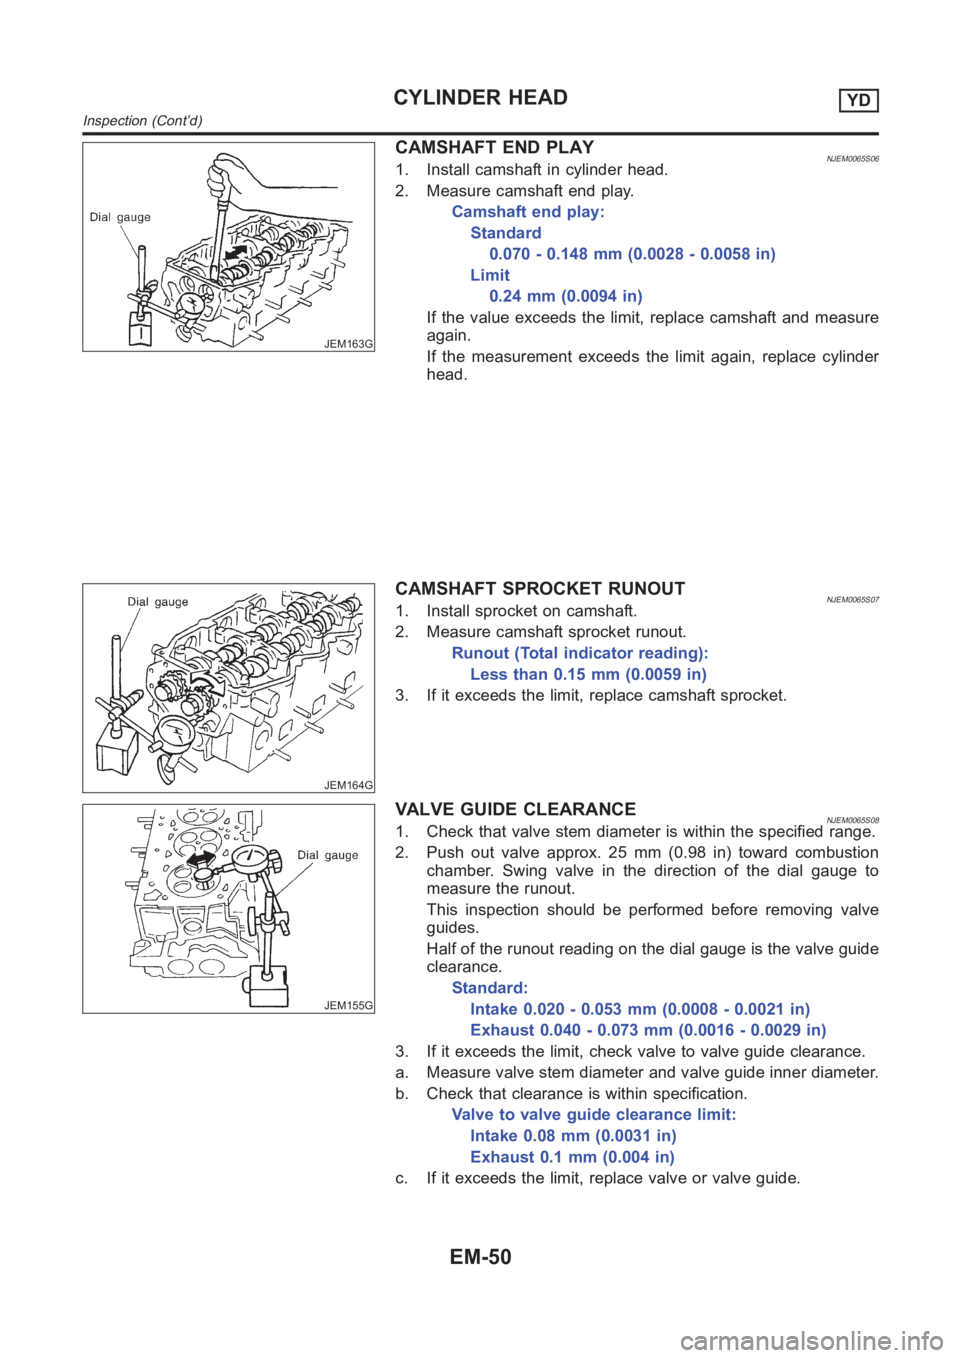
CAMSHAFT END PLAYNJEM0065S061. Install camshaft in cylinder head.
2. Measure camshaft end play.
Camshaft end play:
Standard
0.070 - 0.148 mm (0.0028 - 0.0058 in)
Limit
0.24 mm (0.0094 in)
If the value exceeds the limit, replace camshaft and measure
again.
If the measurement exceeds the limit again, replace cylinder
head.
JEM164G
CAMSHAFT SPROCKET RUNOUTNJEM0065S071. Install sprocket on camshaft.
2. Measure camshaft sprocket runout.
Runout (Total indicator reading):
Less than 0.15 mm (0.0059 in)
3. If it exceeds the limit, replace camshaft sprocket.
JEM155G
VALVE GUIDE CLEARANCENJEM0065S081. Check that valve stem diameter is within the specified range.
2. Push out valve approx. 25 mm (0.98 in) toward combustion
chamber. Swing valve in the direction of the dial gauge to
measure the runout.
This inspection should be performed before removing valve
guides.
Half of the runout reading on the dial gauge is the valve guide
clearance.
Standard:
Intake 0.020 - 0.053 mm (0.0008 - 0.0021 in)
Exhaust 0.040 - 0.073 mm (0.0016 - 0.0029 in)
3. If it exceeds the limit, check valve to valve guide clearance.
a. Measure valve stem diameter and valve guide inner diameter.
b. Check that clearance is within specification.
Valve to valve guide clearance limit:
Intake 0.08 mm (0.0031 in)
Exhaust 0.1 mm (0.004 in)
c. If it exceeds the limit, replace valve or valve guide.
CYLINDER HEADYD
Inspection (Cont’d)
EM-50
Page 235 of 3189
![NISSAN ALMERA N16 2003 Electronic Repair Manual SEM008A
VALVE GUIDE REPLACEMENTNJEM0065S09When a valve guide is removed, replace with an oversized [0.2
mm (0.008 in)] valve guide.
1. To remove valve guide, heat cylinder head to 110 to 130°C
(230 t NISSAN ALMERA N16 2003 Electronic Repair Manual SEM008A
VALVE GUIDE REPLACEMENTNJEM0065S09When a valve guide is removed, replace with an oversized [0.2
mm (0.008 in)] valve guide.
1. To remove valve guide, heat cylinder head to 110 to 130°C
(230 t](/img/5/57350/w960_57350-234.png)
SEM008A
VALVE GUIDE REPLACEMENTNJEM0065S09When a valve guide is removed, replace with an oversized [0.2
mm (0.008 in)] valve guide.
1. To remove valve guide, heat cylinder head to 110 to 130°C
(230 to 266°F) by soaking in heated oil.
SEM931C
2. Drive out valve guide with a press [under a 20 kN (2 ton, 2.2
US ton, 2.0 Imp ton) pressure] or hammer and suitable tool.
SEM932C
3. Ream cylinder head valve guide hole.
Valve guide hole diameter (for service parts):
10.175 - 10.196 mm (0.4006 - 0.4014 in)
JEM156G
4. Heat cylinder head to 110 to 130°C (230 to 266°F) and press
service valve guide onto cylinder head.
Projection “L”:
10.4 - 10.6 mm (0.409 - 0.417 in)
5. Ream valve guide.
Finished size:
6.000 - 6.018 mm (0.2362 - 0.2369 in)
GI
MA
LC
EC
FE
CL
MT
AT
AX
SU
BR
ST
RS
BT
HA
SC
EL
IDX
CYLINDER HEADYD
Inspection (Cont’d)
EM-51
Page 236 of 3189
SEM934C
JEM157G
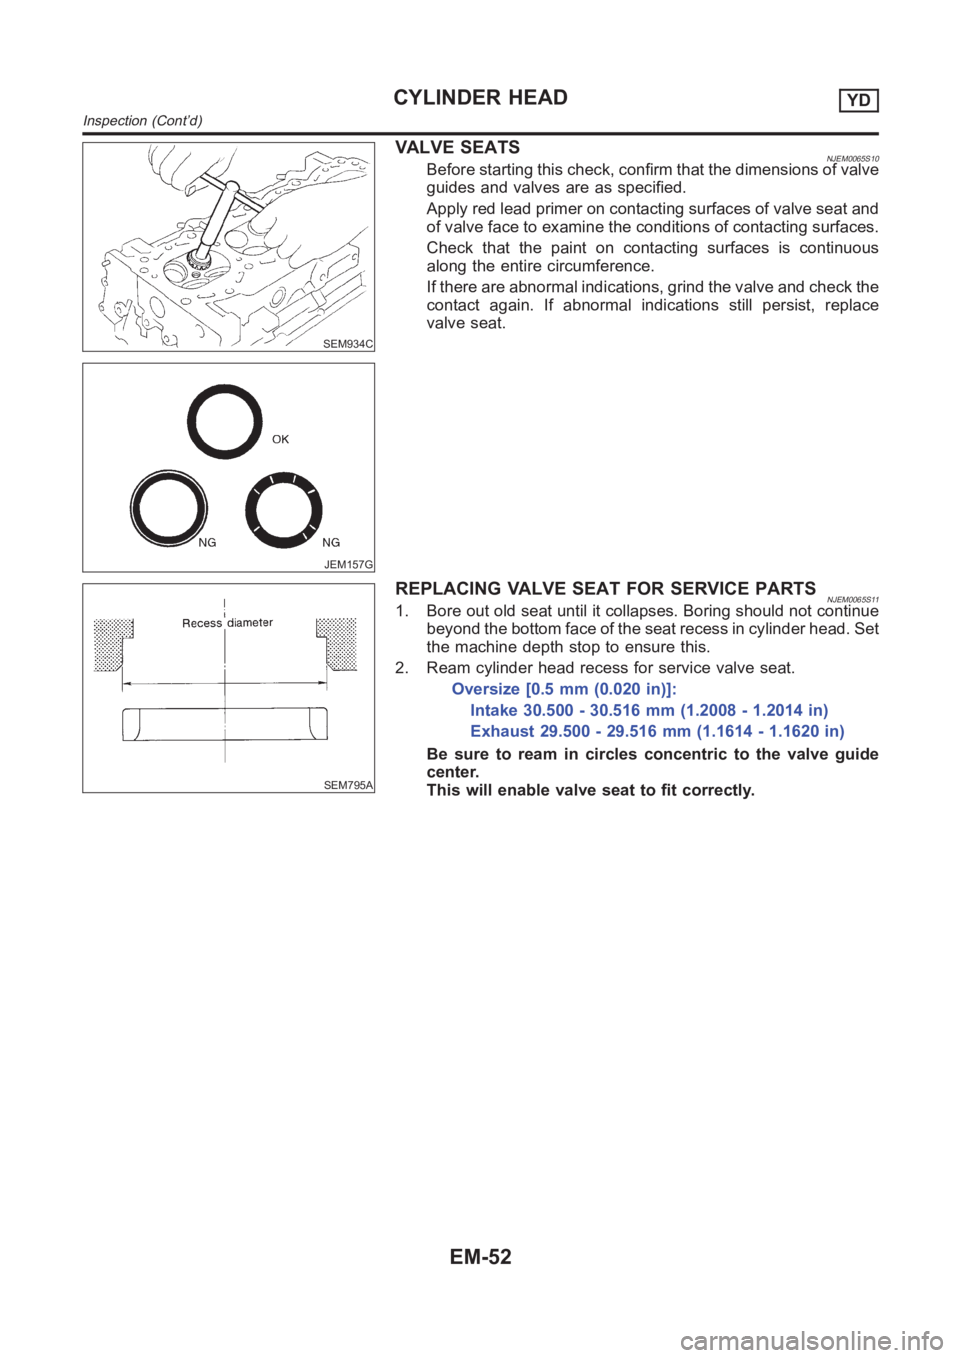
VALVE SEATSNJEM0065S10Before starting this check, confirm that the dimensions of valve
guides and valves are as specified.
Apply red lead primer on contacting surfaces of valve seat and
of valve face to examine the conditions of contacting surfaces.
Check that the paint on contacting surfaces is continuous
along the entire circumference.
If there are abnormal indications, grind the valve and check the
contact again. If abnormal indications still persist, replace
valve seat.
SEM795A
REPLACING VALVE SEAT FOR SERVICE PARTSNJEM0065S111. Bore out old seat until it collapses. Boring should not continue
beyond the bottom face of the seat recess in cylinder head. Set
the machine depth stop to ensure this.
2. Ream cylinder head recess for service valve seat.
Oversize [0.5 mm (0.020 in)]:
Intake 30.500 - 30.516 mm (1.2008 - 1.2014 in)
Exhaust 29.500 - 29.516 mm (1.1614 - 1.1620 in)
Be sure to ream in circles concentric to the valve guide
center.
This will enable valve seat to fit correctly.
CYLINDER HEADYD
Inspection (Cont’d)
EM-52
Page 237 of 3189
JEM158G
SEM301G
3. Heat cylinder head to 110 to 120°C (230 to 248°F) by soaking
in heated oil.
4. Sufficiently cool valve seat with dry ice. Force fit valve seat into
cylinder head.
WARNING:
Do not touch cold valve seat with your bare hands.
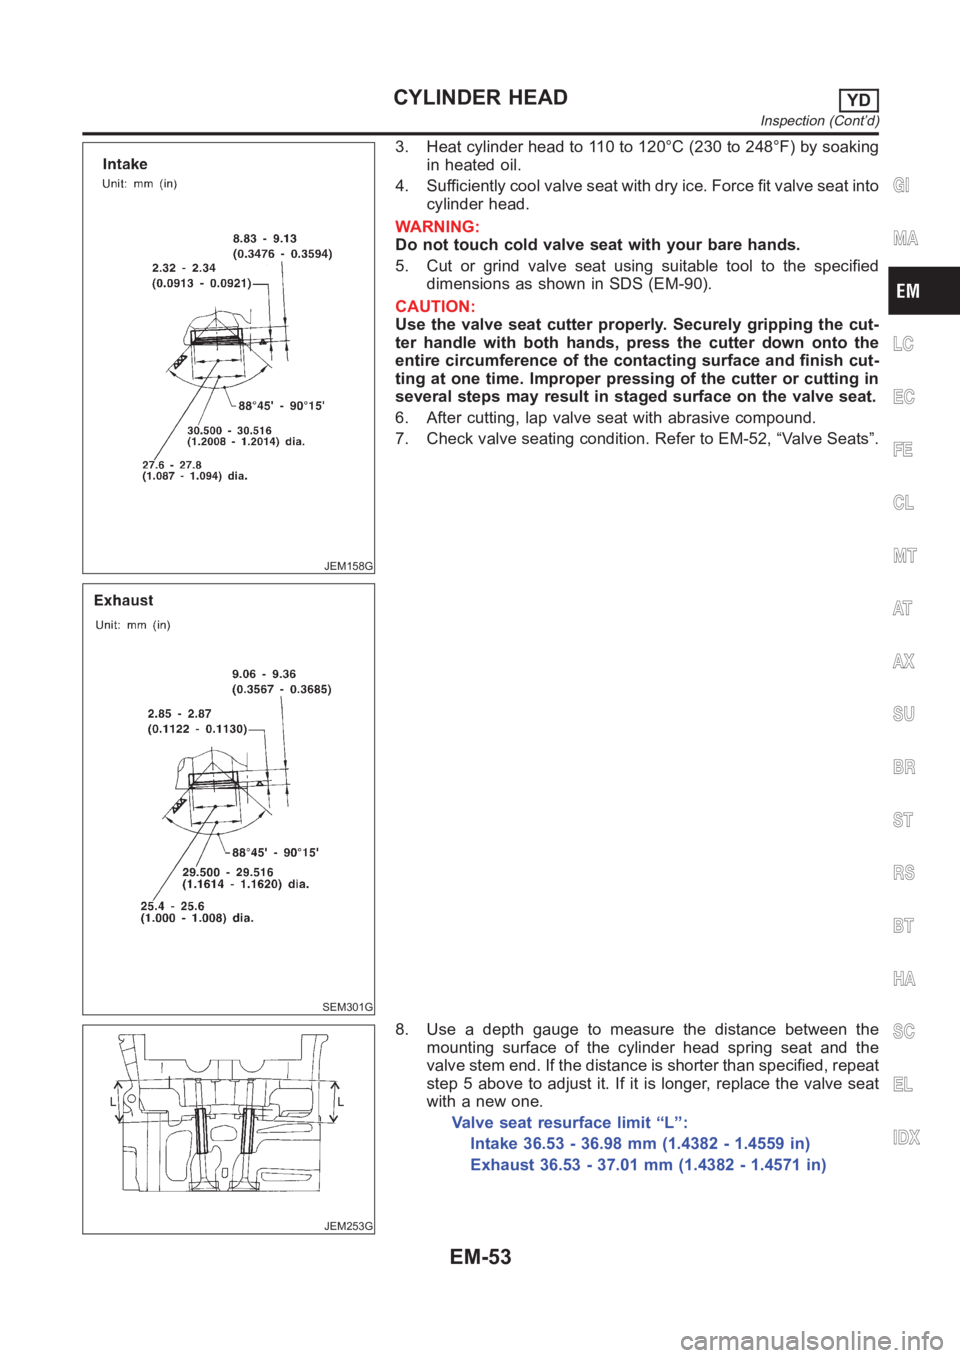
5. Cut or grind valve seat using suitable tool to the specified
dimensions as shown in SDS (EM-90).
CAUTION:
Use the valve seat cutter properly. Securely gripping the cut-
ter handle with both hands, press the cutter down onto the
entire circumference of the contacting surface and finish cut-
ting at one time. Improper pressing of the cutter or cutting in
several steps may result in staged surface on the valve seat.
6. After cutting, lap valve seat with abrasive compound.
7. Check valve seating condition. Refer to EM-52, “Valve Seats”.
JEM253G
8. Use a depth gauge to measure the distance between the
mounting surface of the cylinder head spring seat and the
valve stem end. If the distance is shorter than specified, repeat
step 5 above to adjust it. If it is longer, replace the valve seat
with a new one.
Valve seat resurface limit “L”:
Intake 36.53 - 36.98 mm (1.4382 - 1.4559 in)
Exhaust 36.53 - 37.01 mm (1.4382 - 1.4571 in)
GI
MA
LC
EC
FE
CL
MT
AT
AX
SU
BR
ST
RS
BT
HA
SC
EL
IDX
CYLINDER HEADYD
Inspection (Cont’d)
EM-53
Page 238 of 3189
SEM188A
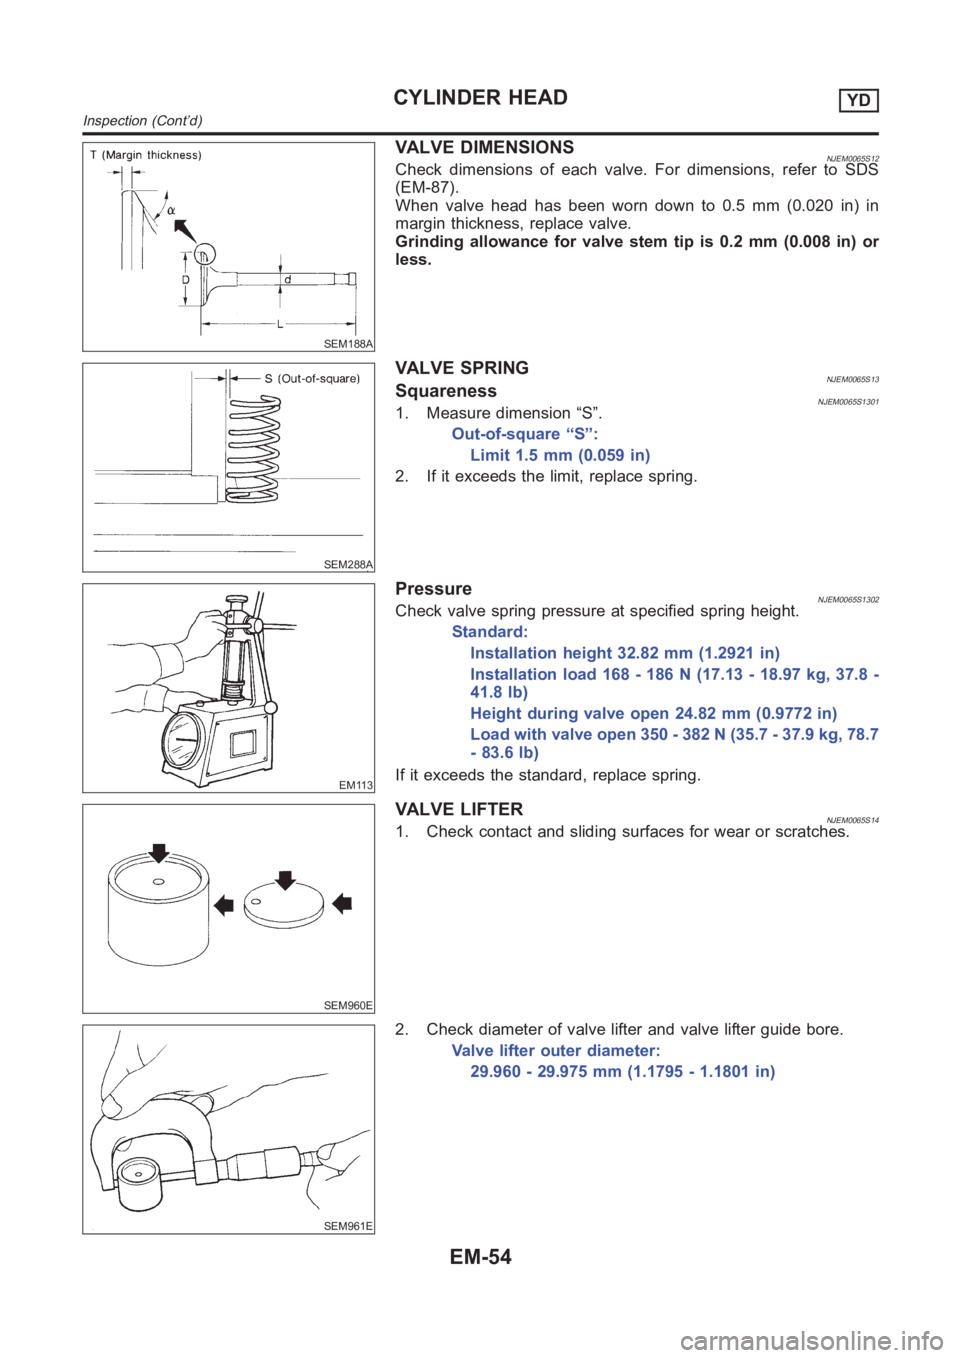
VALVE DIMENSIONSNJEM0065S12Check dimensions of each valve. For dimensions, refer to SDS
(EM-87).
When valve head has been worn down to 0.5 mm (0.020 in) in
margin thickness, replace valve.
Grinding allowance for valve stem tip is 0.2 mm (0.008 in) or
less.
SEM288A
VALVE SPRINGNJEM0065S13SquarenessNJEM0065S13011. Measure dimension “S”.
Out-of-square “S”:
Limit 1.5 mm (0.059 in)
2. If it exceeds the limit, replace spring.
EM113
PressureNJEM0065S1302Check valve spring pressure at specified spring height.
Standard:
Installation height 32.82 mm (1.2921 in)
Installation load 168 - 186 N (17.13 - 18.97 kg, 37.8 -
41.8 lb)
Height during valve open 24.82 mm (0.9772 in)
Load with valve open 350 - 382 N (35.7 - 37.9 kg, 78.7
- 83.6 lb)
If it exceeds the standard, replace spring.
SEM960E
VALVE LIFTERNJEM0065S141. Check contact and sliding surfaces for wear or scratches.
SEM961E
2. Check diameter of valve lifter and valve lifter guide bore.
Valve lifter outer diameter:
29.960 - 29.975 mm (1.1795 - 1.1801 in)
CYLINDER HEADYD
Inspection (Cont’d)
EM-54
Page 239 of 3189
SEM867E
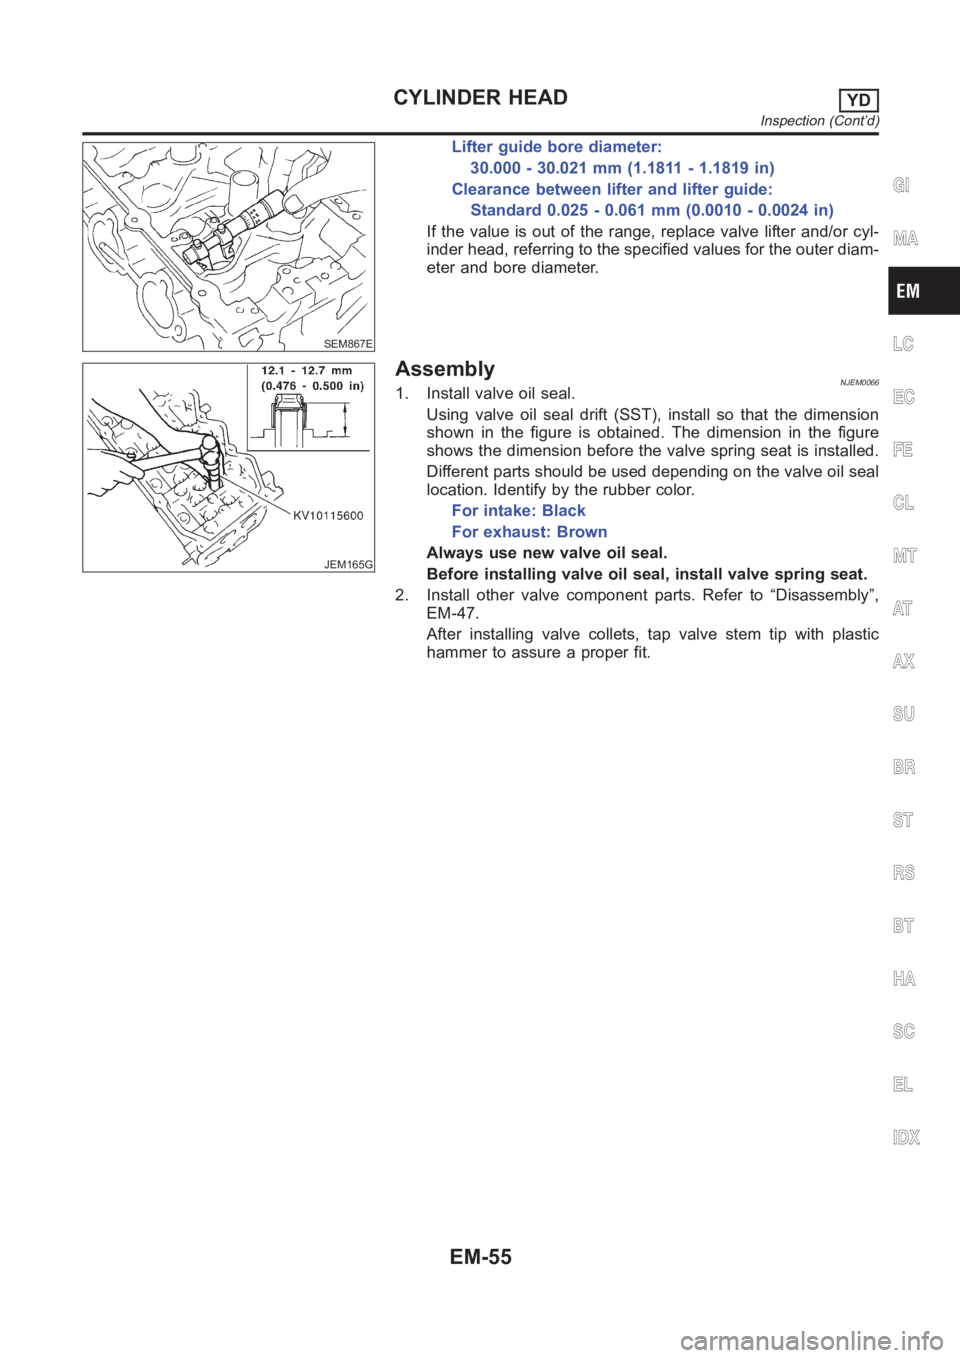
Lifter guide bore diameter:
30.000 - 30.021 mm (1.1811 - 1.1819 in)
Clearance between lifter and lifter guide:
Standard 0.025 - 0.061 mm (0.0010 - 0.0024 in)
If the value is out of the range, replace valve lifter and/or cyl-
inder head, referring to the specified values for the outer diam-
eter and bore diameter.
JEM165G
AssemblyNJEM00661. Install valve oil seal.
Using valve oil seal drift (SST), install so that the dimension
shown in the figure is obtained. The dimension in the figure
shows the dimension before the valve spring seat is installed.
Different parts should be used depending on the valve oil seal
location. Identify by the rubber color.
For intake: Black
For exhaust: Brown
Always use new valve oil seal.
Before installing valve oil seal, install valve spring seat.
2. Install other valve component parts. Refer to “Disassembly”,
EM-47.
After installing valve collets, tap valve stem tip with plastic
hammer to assure a proper fit.
GI
MA
LC
EC
FE
CL
MT
AT
AX
SU
BR
ST
RS
BT
HA
SC
EL
IDX
CYLINDER HEADYD
Inspection (Cont’d)
EM-55
Page 240 of 3189
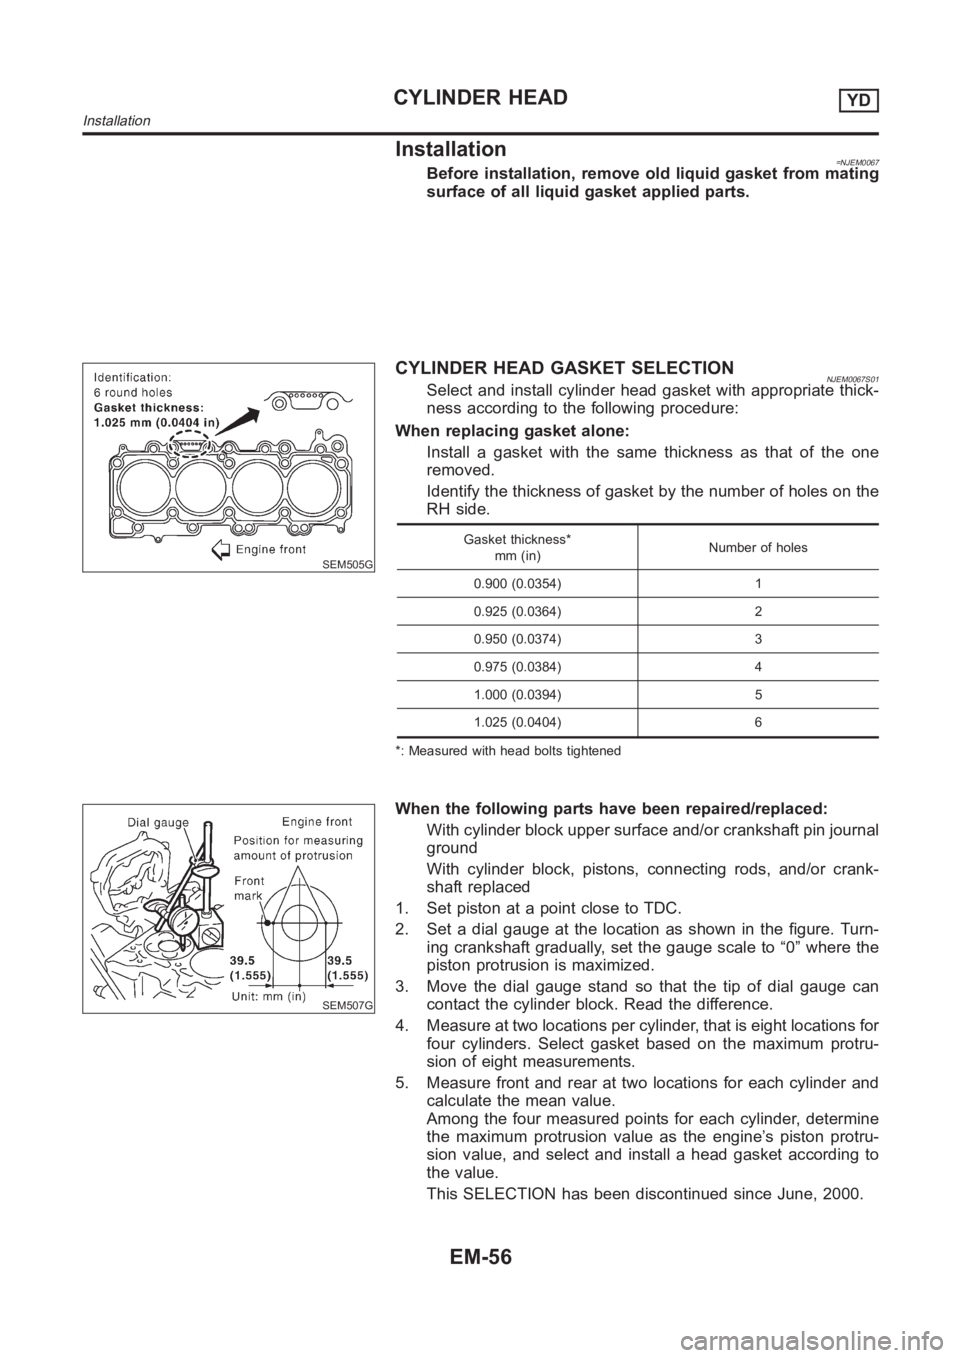
Installation=NJEM0067Before installation, remove old liquid gasket from mating
surface of all liquid gasket applied parts.
SEM505G
CYLINDER HEAD GASKET SELECTIONNJEM0067S01Select and install cylinder head gasket with appropriate thick-
ness according to the following procedure:
When replacing gasket alone:
Install a gasket with the same thickness as that of the one
removed.
Identify the thickness of gasket by the number of holes on the
RH side.
Gasket thickness*
mm (in)Number of holes
0.900 (0.0354) 1
0.925 (0.0364) 2
0.950 (0.0374) 3
0.975 (0.0384) 4
1.000 (0.0394) 5
1.025 (0.0404) 6
*: Measured with head bolts tightened
SEM507G
When the following parts have been repaired/replaced:
With cylinder block upper surface and/or crankshaft pin journal
ground
With cylinder block, pistons, connecting rods, and/or crank-
shaft replaced
1. Set piston at a point close to TDC.
2. Set a dial gauge at the location as shown in the figure. Turn-
ing crankshaft gradually, set the gauge scale to “0” where the
piston protrusion is maximized.
3. Move the dial gauge stand so that the tip of dial gauge can
contact the cylinder block. Read the difference.
4. Measure at two locations per cylinder, that is eight locations for
four cylinders. Select gasket based on the maximum protru-
sion of eight measurements.
5. Measure front and rear at two locations for each cylinder and
calculate the mean value.
Among the four measured points for each cylinder, determine
the maximum protrusion value as the engine’s piston protru-
sion value, and select and install a head gasket according to
the value.
This SELECTION has been discontinued since June, 2000.
CYLINDER HEADYD
Installation
EM-56