NISSAN PRIMERA 1999 Electronic Repair Manual
Manufacturer: NISSAN, Model Year: 1999, Model line: PRIMERA, Model: NISSAN PRIMERA 1999Pages: 2267, PDF Size: 35.74 MB
Page 981 of 2267
DTC Confirmation ProcedureNCEC0148CAUTION:
Always drive vehicle at a safe speed.
NOTE:
If ªDTC Confirmation Procedureº has been previously conducted,
always turn ignition switch ªOFFº and wait at least 9 seconds
before conducting the next test.
TESTING CONDITION:
IAlways perform at a temperature above þ10ÉC (14ÉF).
INever stop engine during this procedure. If the engine is
stopped, retry this procedure from step 2.
With CONSULT-II
NOTE:
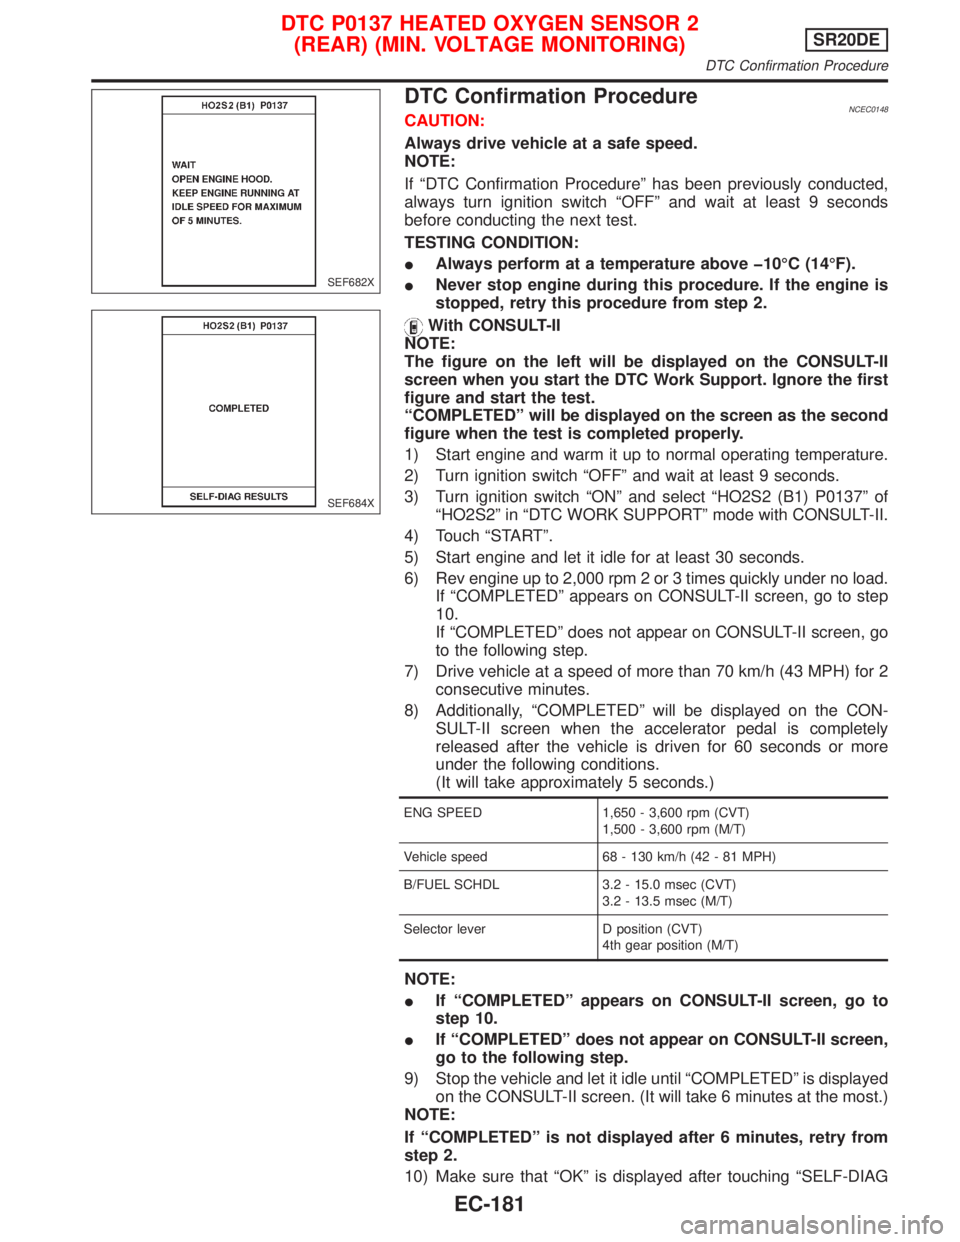
The figure on the left will be displayed on the CONSULT-II
screen when you start the DTC Work Support. Ignore the first
figure and start the test.
ªCOMPLETEDº will be displayed on the screen as the second
figure when the test is completed properly.
1) Start engine and warm it up to normal operating temperature.
2) Turn ignition switch ªOFFº and wait at least 9 seconds.
3) Turn ignition switch ªONº and select ªHO2S2 (B1) P0137º of
ªHO2S2º in ªDTC WORK SUPPORTº mode with CONSULT-II.
4) Touch ªSTARTº.
5) Start engine and let it idle for at least 30 seconds.
6) Rev engine up to 2,000 rpm 2 or 3 times quickly under no load.
If ªCOMPLETEDº appears on CONSULT-II screen, go to step
10.
If ªCOMPLETEDº does not appear on CONSULT-II screen, go
to the following step.
7) Drive vehicle at a speed of more than 70 km/h (43 MPH) for 2
consecutive minutes.
8) Additionally, ªCOMPLETEDº will be displayed on the CON-
SULT-II screen when the accelerator pedal is completely
released after the vehicle is driven for 60 seconds or more
under the following conditions.
(It will take approximately 5 seconds.)
ENG SPEED 1,650 - 3,600 rpm (CVT)
1,500 - 3,600 rpm (M/T)
Vehicle speed 68 - 130 km/h (42 - 81 MPH)
B/FUEL SCHDL 3.2 - 15.0 msec (CVT)
3.2 - 13.5 msec (M/T)
Selector lever D position (CVT)
4th gear position (M/T)
NOTE:
IIf ªCOMPLETEDº appears on CONSULT-II screen, go to
step 10.
IIf ªCOMPLETEDº does not appear on CONSULT-II screen,
go to the following step.
9) Stop the vehicle and let it idle until ªCOMPLETEDº is displayed
on the CONSULT-II screen. (It will take 6 minutes at the most.)
NOTE:
If ªCOMPLETEDº is not displayed after 6 minutes, retry from
step 2.
10) Make sure that ªOKº is displayed after touching ªSELF-DIAG
SEF682X
SEF684X
DTC P0137 HEATED OXYGEN SENSOR 2
(REAR) (MIN. VOLTAGE MONITORING)SR20DE
DTC Confirmation Procedure
EC-181
Page 982 of 2267
RESULTSº. If ªNGº is displayed, refer to ªDiagnostic
Procedureº, EC-SR-184.
Overall Function CheckNCEC0149Use this procedure to check the overall function of the heated oxy-
gen sensor 2 (rear) circuit. During this check, a 1st trip DTC might
not be confirmed.
Without CONSULT-II
1) Start engine and drive vehicle at a speed of more than 70 km/h
(43 MPH) for 2 consecutive minutes.
2) Stop vehicle with engine running.
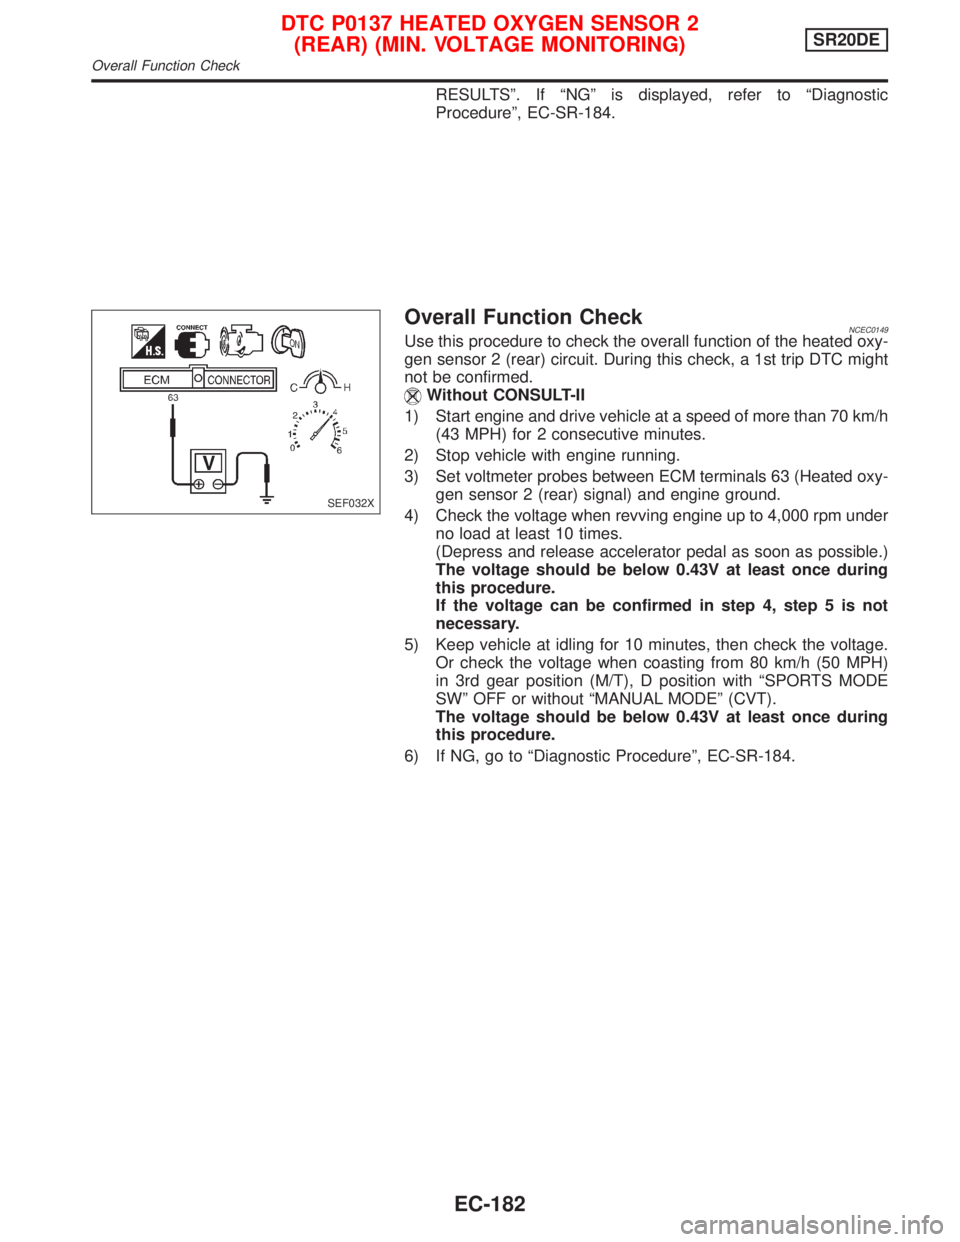
3) Set voltmeter probes between ECM terminals 63 (Heated oxy-
gen sensor 2 (rear) signal) and engine ground.
4) Check the voltage when revving engine up to 4,000 rpm under
no load at least 10 times.
(Depress and release accelerator pedal as soon as possible.)
The voltage should be below 0.43V at least once during
this procedure.
If the voltage can be confirmed in step 4, step 5 is not
necessary.
5) Keep vehicle at idling for 10 minutes, then check the voltage.
Or check the voltage when coasting from 80 km/h (50 MPH)
in 3rd gear position (M/T), D position with ªSPORTS MODE
SWº OFF or without ªMANUAL MODEº (CVT).
The voltage should be below 0.43V at least once during
this procedure.
6) If NG, go to ªDiagnostic Procedureº, EC-SR-184.
SEF032X
DTC P0137 HEATED OXYGEN SENSOR 2
(REAR) (MIN. VOLTAGE MONITORING)SR20DE
Overall Function Check
EC-182
Page 983 of 2267

Wiring DiagramNCEC0150
YEC086A
DTC P0137 HEATED OXYGEN SENSOR 2
(REAR) (MIN. VOLTAGE MONITORING)SR20DE
Wiring Diagram
EC-183
Page 984 of 2267
Diagnostic ProcedureNCEC0151
1 RETIGHTEN GROUND SCREWS
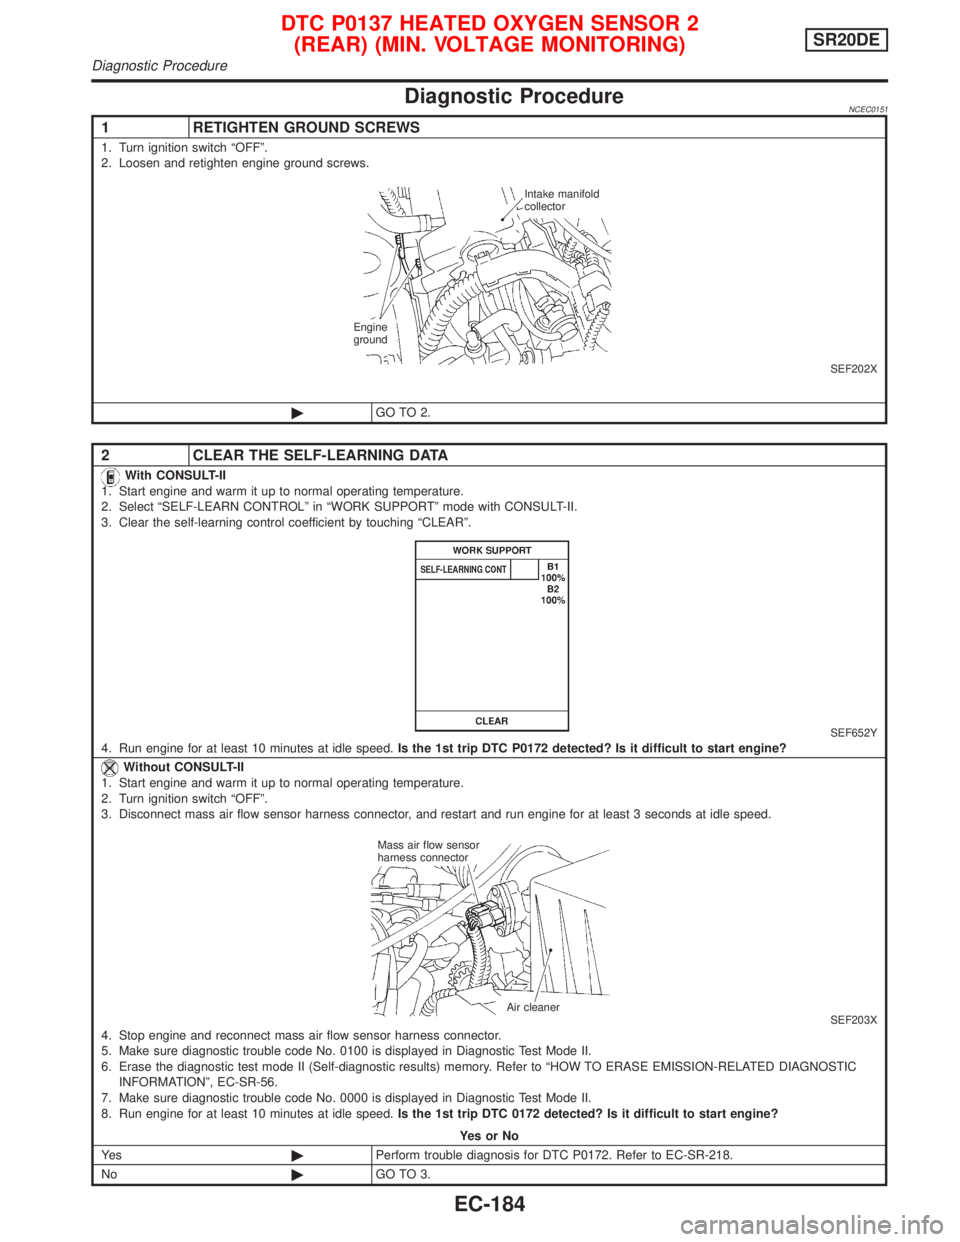
1. Turn ignition switch ªOFFº.
2. Loosen and retighten engine ground screws.
SEF202X
©GO TO 2.
2 CLEAR THE SELF-LEARNING DATA
With CONSULT-II
1. Start engine and warm it up to normal operating temperature.
2. Select ªSELF-LEARN CONTROLº in ªWORK SUPPORTº mode with CONSULT-II.
3. Clear the self-learning control coefficient by touching ªCLEARº.
SEF652Y4. Run engine for at least 10 minutes at idle speed.Is the 1st trip DTC P0172 detected? Is it difficult to start engine?
Without CONSULT-II
1. Start engine and warm it up to normal operating temperature.
2. Turn ignition switch ªOFFº.
3. Disconnect mass air flow sensor harness connector, and restart and run engine for at least 3 seconds at idle speed.
SEF203X4. Stop engine and reconnect mass air flow sensor harness connector.
5. Make sure diagnostic trouble code No. 0100 is displayed in Diagnostic Test Mode II.
6. Erase the diagnostic test mode II (Self-diagnostic results) memory. Refer to ªHOW TO ERASE EMISSION-RELATED DIAGNOSTIC
INFORMATIONº, EC-SR-56.
7. Make sure diagnostic trouble code No. 0000 is displayed in Diagnostic Test Mode II.
8. Run engine for at least 10 minutes at idle speed.Is the 1st trip DTC 0172 detected? Is it difficult to start engine?
YesorNo
Ye s©Perform trouble diagnosis for DTC P0172. Refer to EC-SR-218.
No©GO TO 3.
Intake manifold
collector
Engine
ground
Mass air flow sensor
harness connector
Air cleaner
DTC P0137 HEATED OXYGEN SENSOR 2
(REAR) (MIN. VOLTAGE MONITORING)SR20DE
Diagnostic Procedure
EC-184
Page 985 of 2267
3 CHECK INPUT SIGNAL CIRCUIT
1. Turn ignition switch ªOFFº.
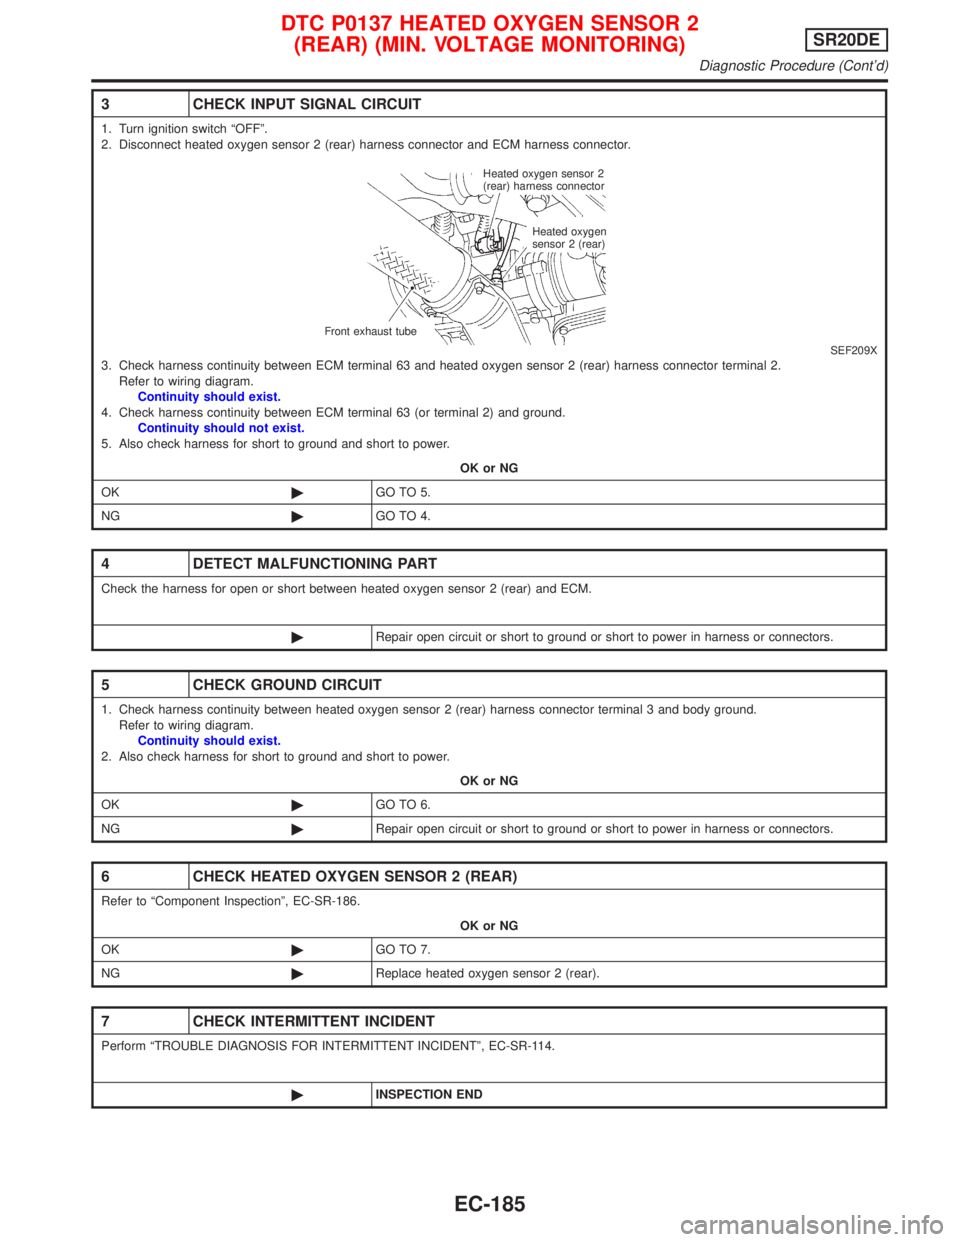
2. Disconnect heated oxygen sensor 2 (rear) harness connector and ECM harness connector.
SEF209X3. Check harness continuity between ECM terminal 63 and heated oxygen sensor 2 (rear) harness connector terminal 2.
Refer to wiring diagram.
Continuity should exist.
4. Check harness continuity between ECM terminal 63 (or terminal 2) and ground.
Continuity should not exist.
5. Also check harness for short to ground and short to power.
OK or NG
OK©GO TO 5.
NG©GO TO 4.
4 DETECT MALFUNCTIONING PART
Check the harness for open or short between heated oxygen sensor 2 (rear) and ECM.
©Repair open circuit or short to ground or short to power in harness or connectors.
5 CHECK GROUND CIRCUIT
1. Check harness continuity between heated oxygen sensor 2 (rear) harness connector terminal 3 and body ground.
Refer to wiring diagram.
Continuity should exist.
2. Also check harness for short to ground and short to power.
OK or NG
OK©GO TO 6.
NG©Repair open circuit or short to ground or short to power in harness or connectors.
6 CHECK HEATED OXYGEN SENSOR 2 (REAR)
Refer to ªComponent Inspectionº, EC-SR-186.
OK or NG
OK©GO TO 7.
NG©Replace heated oxygen sensor 2 (rear).
7 CHECK INTERMITTENT INCIDENT
Perform ªTROUBLE DIAGNOSIS FOR INTERMITTENT INCIDENTº, EC-SR-114.
©INSPECTION END
Heated oxygen sensor 2
(rear) harness connector
Heated oxygen
sensor 2 (rear)
Front exhaust tube
DTC P0137 HEATED OXYGEN SENSOR 2
(REAR) (MIN. VOLTAGE MONITORING)SR20DE
Diagnostic Procedure (Cont'd)
EC-185
Page 986 of 2267
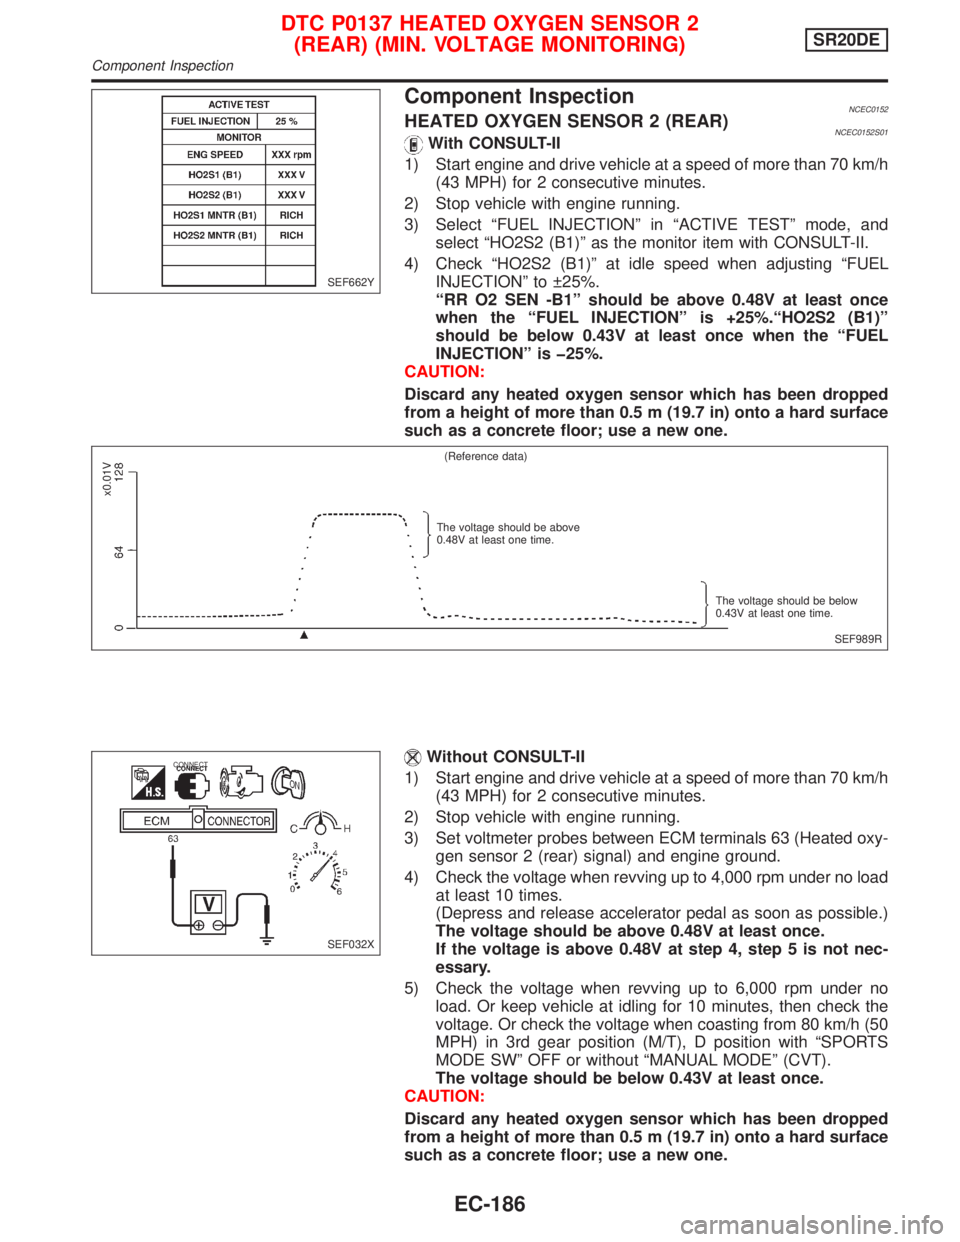
Component InspectionNCEC0152HEATED OXYGEN SENSOR 2 (REAR)NCEC0152S01With CONSULT-II
1) Start engine and drive vehicle at a speed of more than 70 km/h
(43 MPH) for 2 consecutive minutes.
2) Stop vehicle with engine running.
3) Select ªFUEL INJECTIONº in ªACTIVE TESTº mode, and
select ªHO2S2 (B1)º as the monitor item with CONSULT-II.
4) Check ªHO2S2 (B1)º at idle speed when adjusting ªFUEL
INJECTIONº to 25%.
ªRR O2 SEN -B1º should be above 0.48V at least once
when the ªFUEL INJECTIONº is +25%.ªHO2S2 (B1)º
should be below 0.43V at least once when the ªFUEL
INJECTIONº is þ25%.
CAUTION:
Discard any heated oxygen sensor which has been dropped
from a height of more than 0.5 m (19.7 in) onto a hard surface
such as a concrete floor; use a new one.
Without CONSULT-II
1) Start engine and drive vehicle at a speed of more than 70 km/h
(43 MPH) for 2 consecutive minutes.
2) Stop vehicle with engine running.
3) Set voltmeter probes between ECM terminals 63 (Heated oxy-
gen sensor 2 (rear) signal) and engine ground.
4) Check the voltage when revving up to 4,000 rpm under no load
at least 10 times.
(Depress and release accelerator pedal as soon as possible.)
The voltage should be above 0.48V at least once.
If the voltage is above 0.48V at step 4, step 5 is not nec-
essary.
5) Check the voltage when revving up to 6,000 rpm under no
load. Or keep vehicle at idling for 10 minutes, then check the
voltage. Or check the voltage when coasting from 80 km/h (50
MPH) in 3rd gear position (M/T), D position with ªSPORTS
MODE SWº OFF or without ªMANUAL MODEº (CVT).
The voltage should be below 0.43V at least once.
CAUTION:
Discard any heated oxygen sensor which has been dropped
from a height of more than 0.5 m (19.7 in) onto a hard surface
such as a concrete floor; use a new one.
SEF662Y
SEF989R (Reference data)
The voltage should be above
0.48V at least one time.
The voltage should be below
0.43V at least one time.
x0.01V
SEF032X
CONNECT
DTC P0137 HEATED OXYGEN SENSOR 2
(REAR) (MIN. VOLTAGE MONITORING)SR20DE
Component Inspection
EC-186
Page 987 of 2267
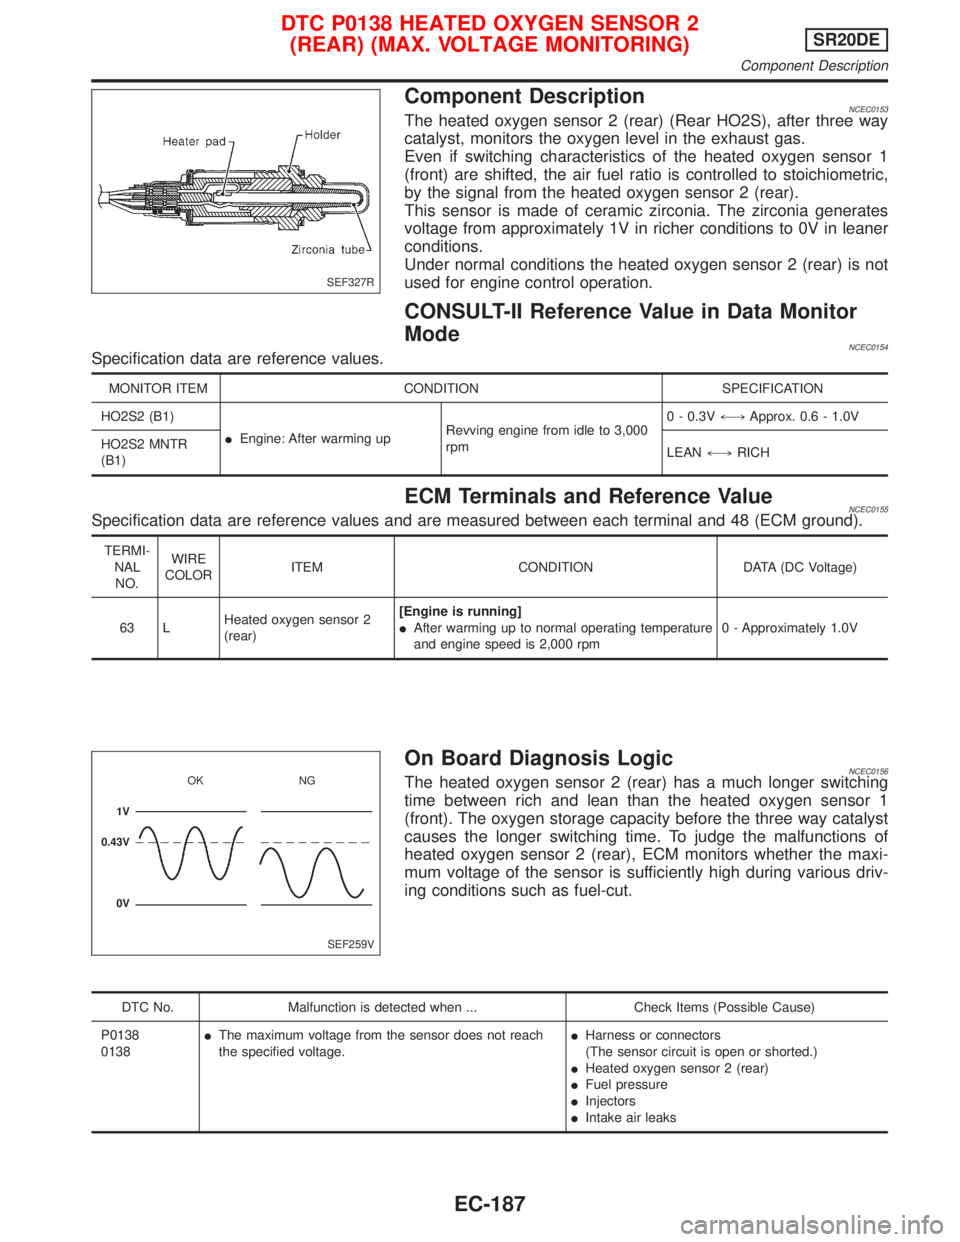
Component DescriptionNCEC0153The heated oxygen sensor 2 (rear) (Rear HO2S), after three way
catalyst, monitors the oxygen level in the exhaust gas.
Even if switching characteristics of the heated oxygen sensor 1
(front) are shifted, the air fuel ratio is controlled to stoichiometric,
by the signal from the heated oxygen sensor 2 (rear).
This sensor is made of ceramic zirconia. The zirconia generates
voltage from approximately 1V in richer conditions to 0V in leaner
conditions.
Under normal conditions the heated oxygen sensor 2 (rear) is not
used for engine control operation.
CONSULT-II Reference Value in Data Monitor
Mode
NCEC0154Specification data are reference values.
MONITOR ITEM CONDITION SPECIFICATION
HO2S2 (B1)
IEngine: After warming upRevving engine from idle to 3,000
rpm0 - 0.3V+,Approx. 0.6 - 1.0V
HO2S2 MNTR
(B1)LEAN+,RICH
ECM Terminals and Reference ValueNCEC0155Specification data are reference values and are measured between each terminal and 48 (ECM ground).
TERMI-
NAL
NO.WIRE
COLORITEM CONDITION DATA (DC Voltage)
63 LHeated oxygen sensor 2
(rear)[Engine is running]
IAfter warming up to normal operating temperature
and engine speed is 2,000 rpm0 - Approximately 1.0V
On Board Diagnosis LogicNCEC0156The heated oxygen sensor 2 (rear) has a much longer switching
time between rich and lean than the heated oxygen sensor 1
(front). The oxygen storage capacity before the three way catalyst
causes the longer switching time. To judge the malfunctions of
heated oxygen sensor 2 (rear), ECM monitors whether the maxi-
mum voltage of the sensor is sufficiently high during various driv-
ing conditions such as fuel-cut.
DTC No. Malfunction is detected when ... Check Items (Possible Cause)
P0138
0138IThe maximum voltage from the sensor does not reach
the specified voltage.IHarness or connectors
(The sensor circuit is open or shorted.)
IHeated oxygen sensor 2 (rear)
IFuel pressure
IInjectors
IIntake air leaks
SEF327R
SEF259V OK NG
1V
0.43V
0V
DTC P0138 HEATED OXYGEN SENSOR 2
(REAR) (MAX. VOLTAGE MONITORING)SR20DE
Component Description
EC-187
Page 988 of 2267
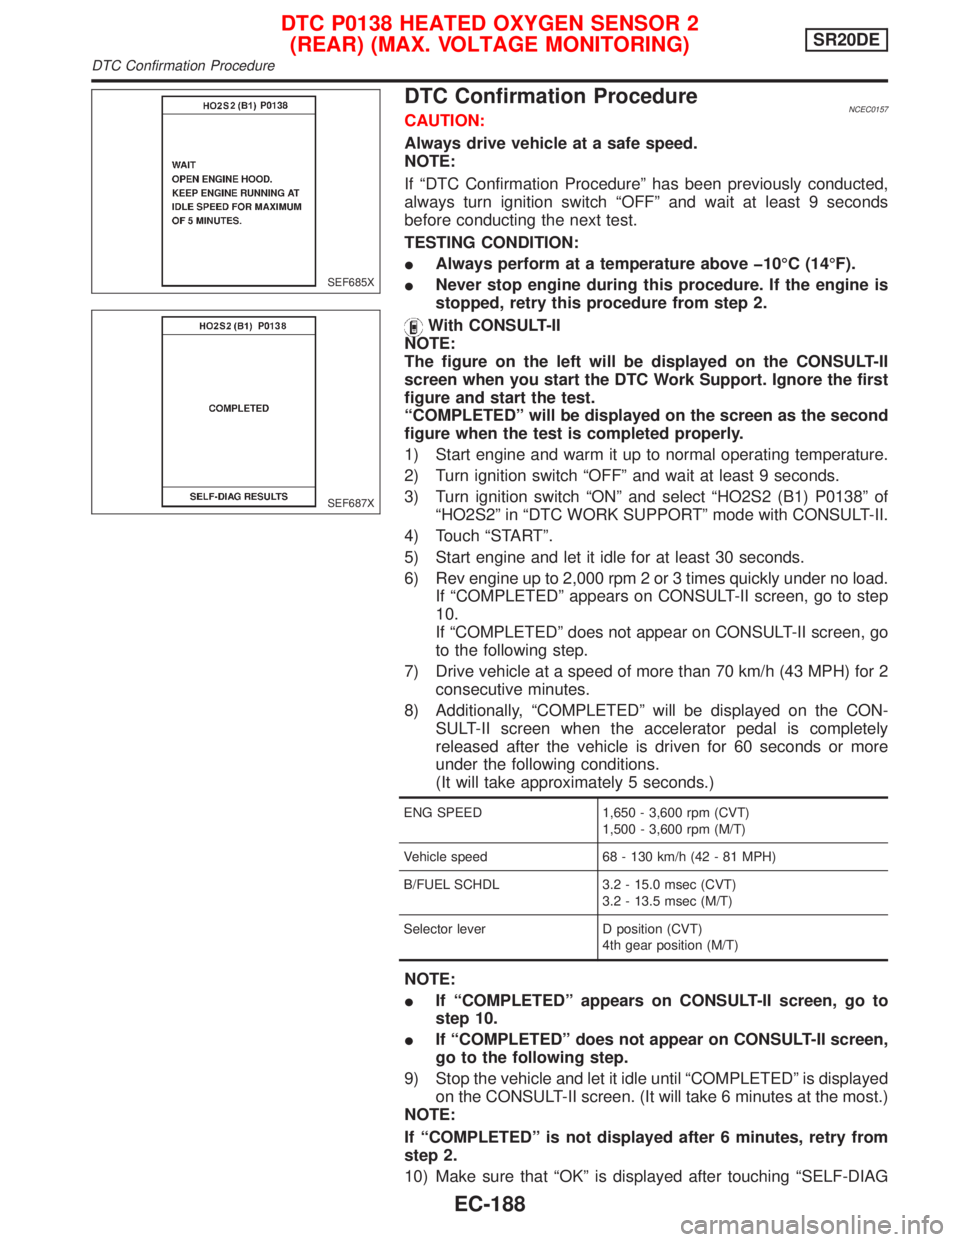
DTC Confirmation ProcedureNCEC0157CAUTION:
Always drive vehicle at a safe speed.
NOTE:
If ªDTC Confirmation Procedureº has been previously conducted,
always turn ignition switch ªOFFº and wait at least 9 seconds
before conducting the next test.
TESTING CONDITION:
IAlways perform at a temperature above þ10ÉC (14ÉF).
INever stop engine during this procedure. If the engine is
stopped, retry this procedure from step 2.
With CONSULT-II
NOTE:
The figure on the left will be displayed on the CONSULT-II
screen when you start the DTC Work Support. Ignore the first
figure and start the test.
ªCOMPLETEDº will be displayed on the screen as the second
figure when the test is completed properly.
1) Start engine and warm it up to normal operating temperature.
2) Turn ignition switch ªOFFº and wait at least 9 seconds.
3) Turn ignition switch ªONº and select ªHO2S2 (B1) P0138º of
ªHO2S2º in ªDTC WORK SUPPORTº mode with CONSULT-II.
4) Touch ªSTARTº.
5) Start engine and let it idle for at least 30 seconds.
6) Rev engine up to 2,000 rpm 2 or 3 times quickly under no load.
If ªCOMPLETEDº appears on CONSULT-II screen, go to step
10.
If ªCOMPLETEDº does not appear on CONSULT-II screen, go
to the following step.
7) Drive vehicle at a speed of more than 70 km/h (43 MPH) for 2
consecutive minutes.
8) Additionally, ªCOMPLETEDº will be displayed on the CON-
SULT-II screen when the accelerator pedal is completely
released after the vehicle is driven for 60 seconds or more
under the following conditions.
(It will take approximately 5 seconds.)
ENG SPEED 1,650 - 3,600 rpm (CVT)
1,500 - 3,600 rpm (M/T)
Vehicle speed 68 - 130 km/h (42 - 81 MPH)
B/FUEL SCHDL 3.2 - 15.0 msec (CVT)
3.2 - 13.5 msec (M/T)
Selector lever D position (CVT)
4th gear position (M/T)
NOTE:
IIf ªCOMPLETEDº appears on CONSULT-II screen, go to
step 10.
IIf ªCOMPLETEDº does not appear on CONSULT-II screen,
go to the following step.
9) Stop the vehicle and let it idle until ªCOMPLETEDº is displayed
on the CONSULT-II screen. (It will take 6 minutes at the most.)
NOTE:
If ªCOMPLETEDº is not displayed after 6 minutes, retry from
step 2.
10) Make sure that ªOKº is displayed after touching ªSELF-DIAG
SEF685X
SEF687X
DTC P0138 HEATED OXYGEN SENSOR 2
(REAR) (MAX. VOLTAGE MONITORING)SR20DE
DTC Confirmation Procedure
EC-188
Page 989 of 2267
RESULTSº. If ªNGº is displayed, refer to ªDiagnostic
Procedureº, EC-SR-191.
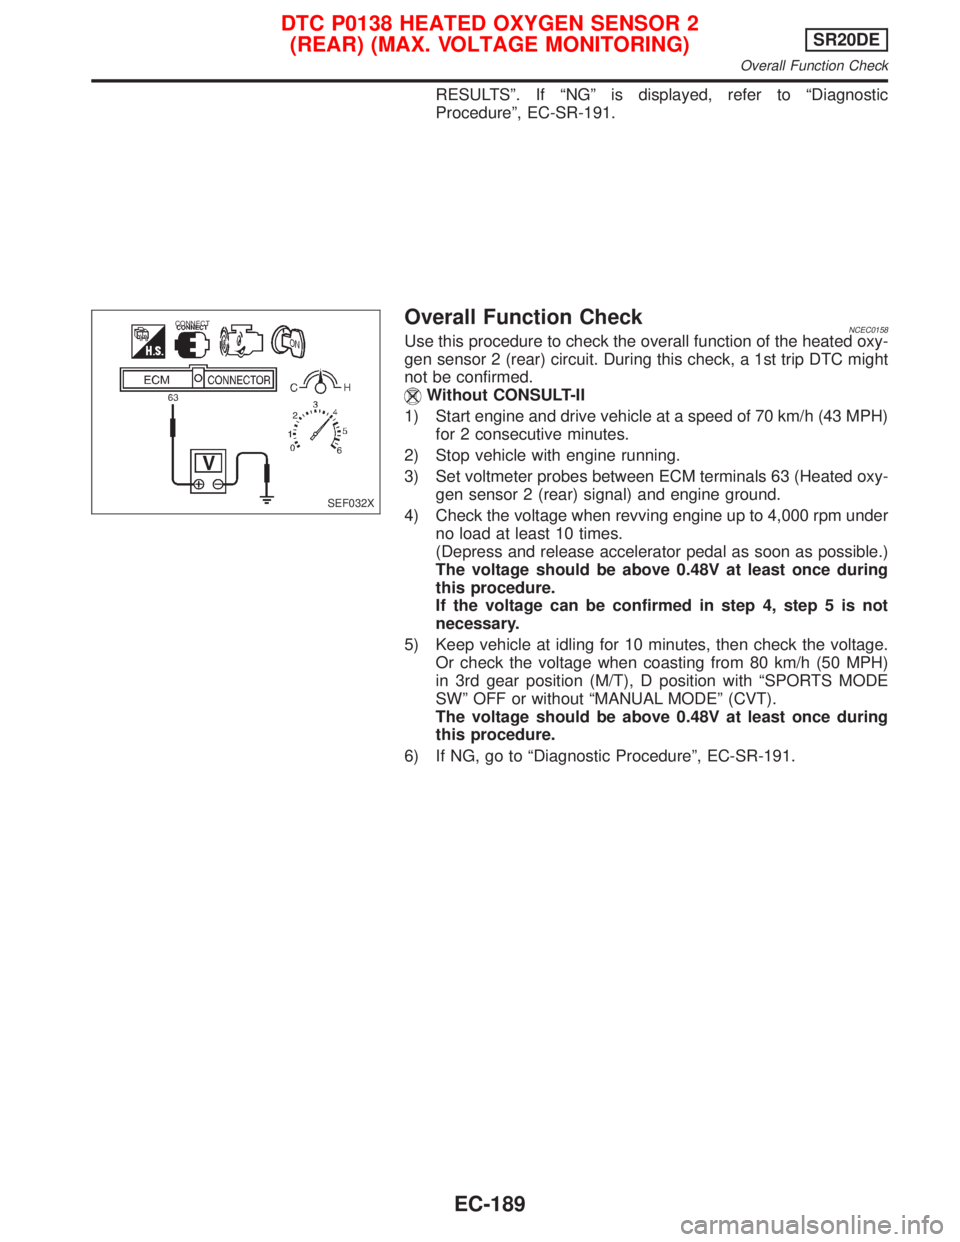
Overall Function CheckNCEC0158Use this procedure to check the overall function of the heated oxy-
gen sensor 2 (rear) circuit. During this check, a 1st trip DTC might
not be confirmed.
Without CONSULT-II
1) Start engine and drive vehicle at a speed of 70 km/h (43 MPH)
for 2 consecutive minutes.
2) Stop vehicle with engine running.
3) Set voltmeter probes between ECM terminals 63 (Heated oxy-
gen sensor 2 (rear) signal) and engine ground.
4) Check the voltage when revving engine up to 4,000 rpm under
no load at least 10 times.
(Depress and release accelerator pedal as soon as possible.)
The voltage should be above 0.48V at least once during
this procedure.
If the voltage can be confirmed in step 4, step 5 is not
necessary.
5) Keep vehicle at idling for 10 minutes, then check the voltage.
Or check the voltage when coasting from 80 km/h (50 MPH)
in 3rd gear position (M/T), D position with ªSPORTS MODE
SWº OFF or without ªMANUAL MODEº (CVT).
The voltage should be above 0.48V at least once during
this procedure.
6) If NG, go to ªDiagnostic Procedureº, EC-SR-191.
SEF032X
CONNECT
DTC P0138 HEATED OXYGEN SENSOR 2
(REAR) (MAX. VOLTAGE MONITORING)SR20DE
Overall Function Check
EC-189
Page 990 of 2267

Wiring DiagramNCEC0159
YEC086A
DTC P0138 HEATED OXYGEN SENSOR 2
(REAR) (MAX. VOLTAGE MONITORING)SR20DE
Wiring Diagram
EC-190