NISSAN TERRANO 2004 Service Repair Manual
TERRANO 2004
NISSAN
NISSAN
https://www.carmanualsonline.info/img/5/57394/w960_57394-0.png
NISSAN TERRANO 2004 Service Repair Manual
Trending: interior lights, Door unlock, seats, sensor, wheelbase, air bleeding, ABS
Page 1541 of 1833
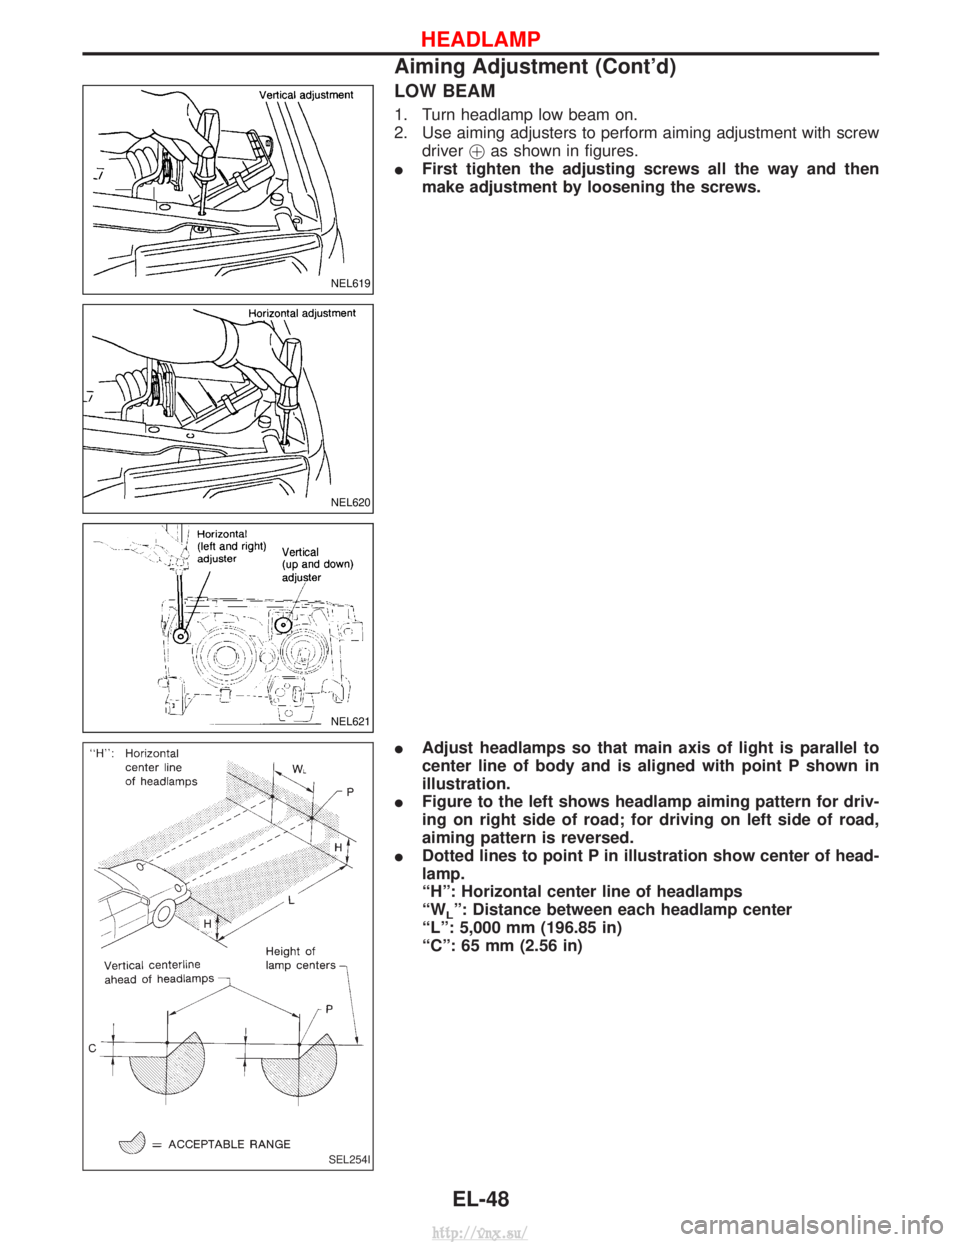
LOW BEAM
1. Turn headlamp low beam on.
2. Use aiming adjusters to perform aiming adjustment with screwdriver !as shown in figures.
I First tighten the adjusting screws all the way and then
make adjustment by loosening the screws.
I Adjust headlamps so that main axis of light is parallel to
center line of body and is aligned with point P shown in
illustration.
I Figure to the left shows headlamp aiming pattern for driv-
ing on right side of road; for driving on left side of road,
aiming pattern is reversed.
I Dotted lines to point P in illustration show center of head-
lamp.
ªHº: Horizontal center line of headlamps
ªW
Lº: Distance between each headlamp center
ªLº: 5,000 mm (196.85 in)
ªCº: 65 mm (2.56 in)
NEL619
NEL620
NEL621
SEL254I
HEADLAMP
Aiming Adjustment (Cont'd)
EL-48
http://vnx.su/
Page 1542 of 1833
Wiring Diagram Ð TAIL/L Ð
LHD MODELS
YEL071D
EXTERIOR LAMP
EL-49
http://vnx.su/
Page 1543 of 1833
RHD MODELS
YEL072D
EXTERIOR LAMP
Wiring Diagram Ð TAIL/L Ð (Cont'd)EL-50
http://vnx.su/
Page 1544 of 1833
YEL073D
EXTERIOR LAMP
Wiring Diagram Ð TAIL/L Ð (Cont'd)EL-51
http://vnx.su/
Page 1545 of 1833
Wiring Diagram Ð STOP/L Ð
YEL074D
EXTERIOR LAMP
EL-52
http://vnx.su/
Page 1546 of 1833
Wiring Diagram Ð BACK/L Ð
LHD MODELS
YEL075D
EXTERIOR LAMP
EL-53
http://vnx.su/
Page 1547 of 1833
RHD MODELS
YEL076D
EXTERIOR LAMP
Wiring Diagram Ð BACK/L Ð (Cont'd)EL-54
http://vnx.su/
Page 1548 of 1833
Wiring Diagram Ð F/FOG Ð
LHD MODELS
YEL735E
EXTERIOR LAMP
EL-55
http://vnx.su/
Page 1549 of 1833
RHD MODELS
YEL736E
EXTERIOR LAMP
Wiring Diagram Ð F/FOG Ð (Cont'd)EL-56
http://vnx.su/
Page 1550 of 1833

Front Fog Lamp Aiming Adjustment
When performing fog lamp aiming adjustment, use an aiming
machine, aiming wall screen or headlamp tester. The aimer should
be in good operational condition, calibrated and used according to
the relevant operation manuals supplied with the unit.
If an aimer is not available, aiming adjustment can be done as fol-
lows:
For details, refer to the regulations in your own country.
CAUTION:
IKeep all tires inflated to correct pressures.
I Place vehicle and tester on one and the same flat surface.
I Ensure that there is no-load in the vehicle other than
coolant, engine oil (filled up to correct level), full fuel tank
and the driver (or equivalent weight placed in driver's posi-
tion).
For details of front fog lamp aiming adjustment, refer to ªAiming
Adjustmentº, EL-47.
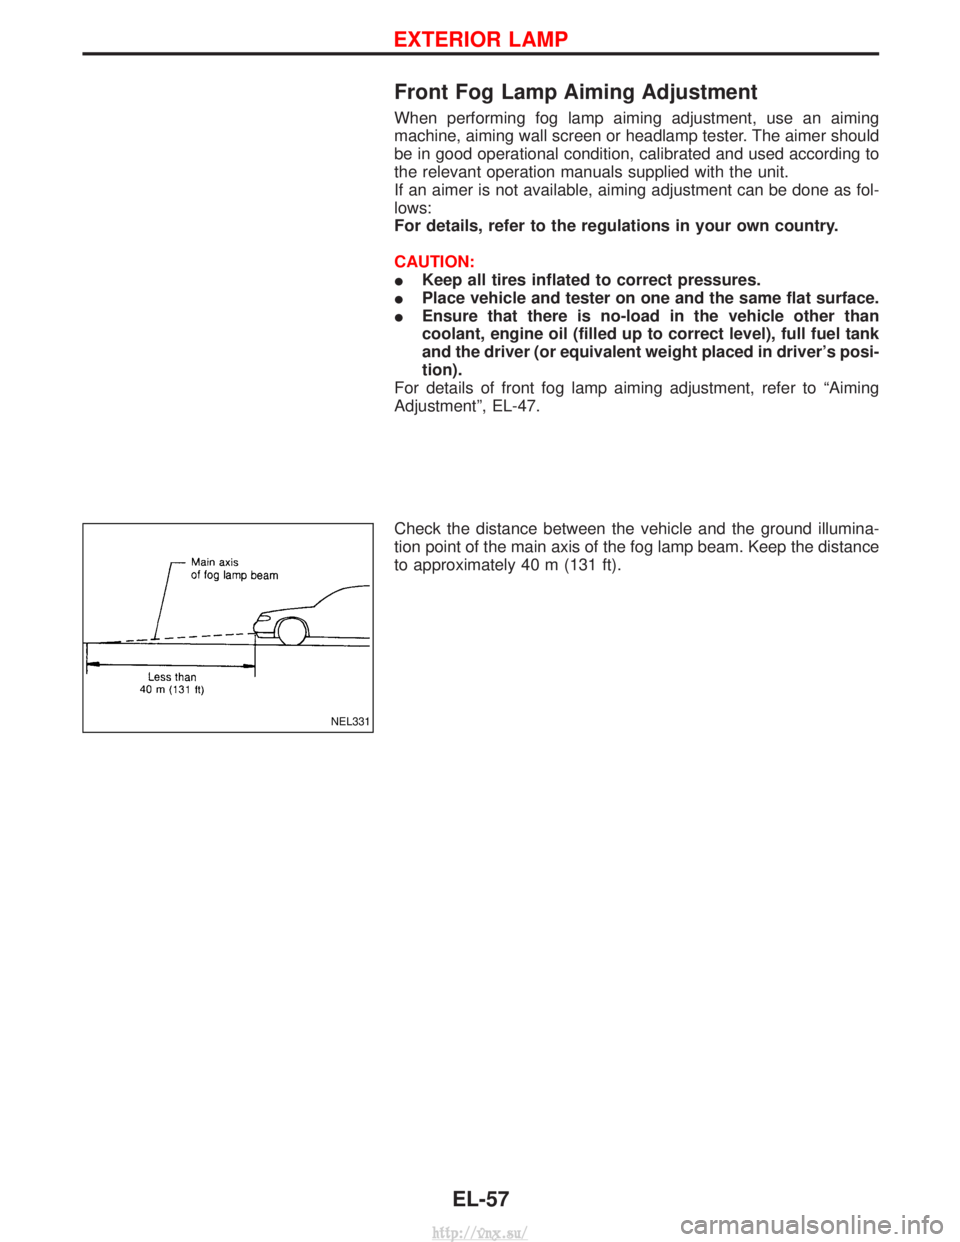
Check the distance between the vehicle and the ground illumina-
tion point of the main axis of the fog lamp beam. Keep the distance
to approximately 40 m (131 ft).
NEL331
EXTERIOR LAMP
EL-57
http://vnx.su/
Trending: dimensions, compression ratio, Ignition, transmission, brake fluid, ABS, oil level


