OPEL ANTARA 2009 Owners Manual
Manufacturer: OPEL, Model Year: 2009, Model line: ANTARA, Model: OPEL ANTARA 2009Pages: 234, PDF Size: 3.01 MB
Page 191 of 234

Self-help, vehicle care191
Centre high-mounted stop lamp,
instrument panel and glove compartment
illumination
We recommend having bulb replacements
carried out by a workshop.
Opel genuine parts and
accessories
We recommend the use of “Opel genuine
parts and accessories” and conversion
parts released expressly for your vehicle
type. These parts have undergone special
tests to establish their reliability, safety and
specific suitability for your vehicle. Despite
continuous market monitoring, we cannot
assess or guarantee these attributes for
other products, even if they have been
granted approval by the relevant
authorities or in some other form.
“Opel genuine parts and accessories” and
conversion parts approved by Opel can be
obtained from your Op el Partner, who can
provide comprehensive advice about
permitted technical changes and ensure
that the part is installed correctly.
A note on safety
To avoid the possibility of injury, only carry
out engine compartment checks (e.g.
checking the brake fluid level or the engine
oil level) when the igni tion is switched off. Never carry out any re
pairs or adjustment
and maintenance work on the vehicle
yourself. This especially applies to the
engine, chassis and safety parts. You may,
out of ignorance, infringe the provisions of
the law and, by not performing the work
properly, you may endanger yourself and
other road users.
Checking and topping up fluids
To aid identification, the engine oil filler
cap, the coolant filler cap, the lid of the
fluid container for the windscreen washer
system and the handle of the engine oil
gauge (dipstick) may be coloured yellow.
9 Warning
The cooling fan may be operated by a
thermoswitch and can therefore start to
operate unexpectedly, even when the
ignition is switched off; risk of injury.
Electronic ignition systems generate very
high voltages. Do not touch the ignition
system; high voltage can be fatal.
Page 192 of 234

Self-help, vehicle care192
Engine oil
Information on engine oils - see page 213.
Engine oil level and consumption
It is normal for every engine to consume
some oil, and it is sometimes necessary to
check and top up the engine oil level
between oil changes.
For this reason, the engine oil level should
be checked every 500 km (300 miles) or
before starting a long trip. The illustrations show checking and
replenishing the engine oil in the Z 24, Z 32
petrol engines and the
Z 20 diesel engines
respectively.
To check the level, remove dipstick from
the dipstick tube, wipe it clean and re-insert
it as far as it will go. After pulling the
dipstick out again, check the oil level,
ensuring it is between the lower and upper
(or MIN and MAX) marks. Engine oil level check and topping up
The engine oil level must be checked with
the vehicle horizontal and with the engine
(which must be at operating temperature)
switched off. Wait a few minutes before
checking the level to allow the normal oil
accumulation in the engine to drain back
into the oil pan.
9 Warning
Do not allow the engine oil level to drop
below the minimum level.
Page 193 of 234
Self-help, vehicle care193
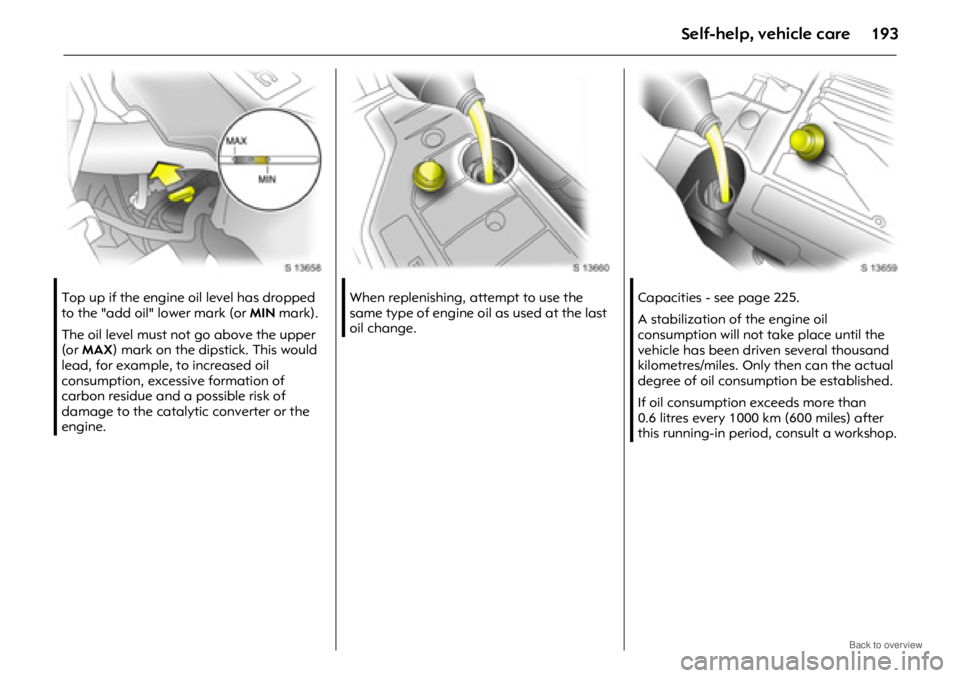
Top up if the engine oil level has dropped
to the "add oil" lower mark (or MIN mark).
The oil level must not go above the upper
(or MAX ) mark on the dipstick. This would
lead, for example, to increased oil
consumption, excessive formation of
carbon residue and a possible risk of
damage to the catalytic converter or the
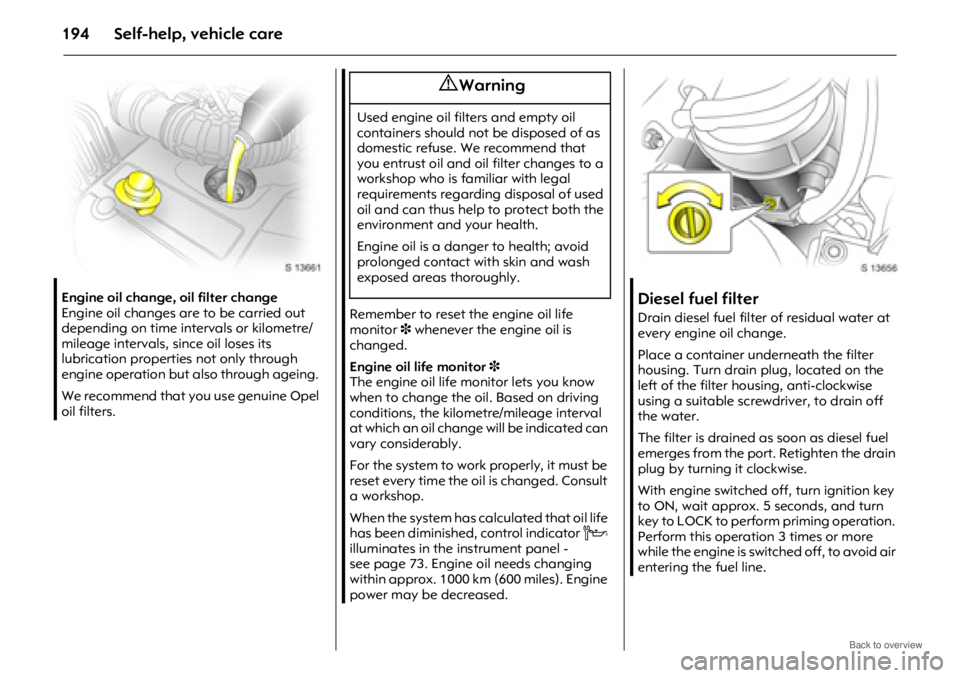
engine. When replenishing, attempt to use the
same type of engine oil as used at the last
oil change.
Capacities - see page 225.
A stabilization of the engine oil
consumption will not take place until the
vehicle has been driven several thousand
kilometres/miles. Only then can the actual
degree of oil consumption be established.
If oil consumption exceeds more than
0.6 litres every 1000 km (600 miles) after
this running-in period
, consult a workshop.
Page 194 of 234
Self-help, vehicle care194
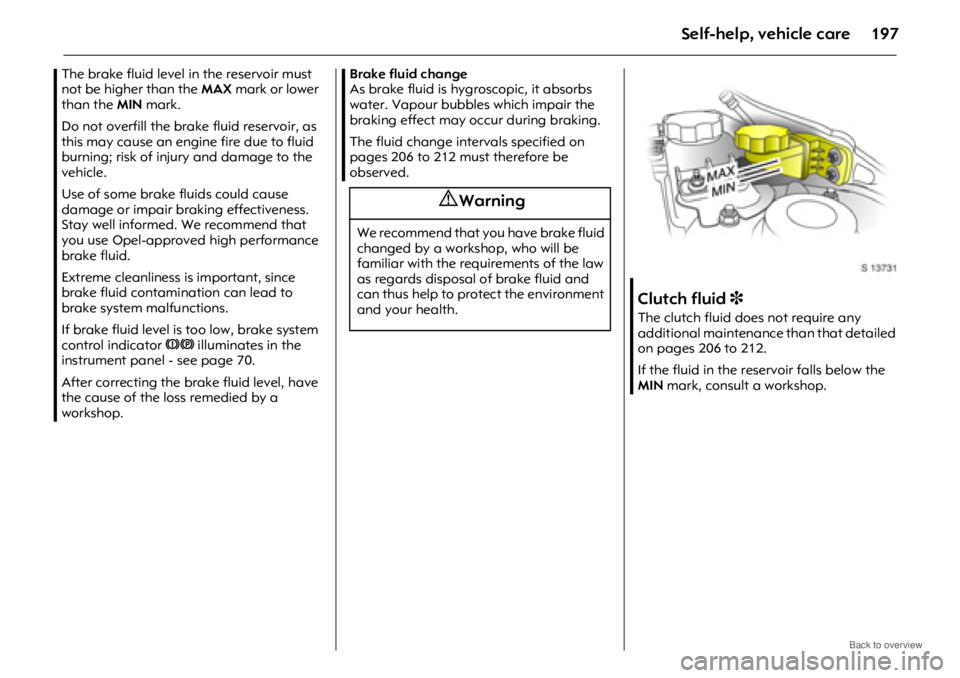
Engine oil change, oil filter change
Engine oil changes are to be carried out
depending on time intervals or kilometre/
mileage intervals, since oil loses its
lubrication properties not only through
engine operation but also through ageing.
We recommend that you use genuine Opel
oil filters.
Remember to reset the engine oil life
monitor 3 whenever the engine oil is
changed.
Engine oil life monitor 3
The engine oil life monitor lets you know
when to change the oil. Based on driving
conditions, the kilometre/mileage interval
at which an oil change will be indicated can
vary considerably.
For the system to work properly, it must be
reset every time the oil is changed. Consult
a workshop.
When the system has calculated that oil life
has been diminished, control indicator C
illuminates in the instrument panel -
see page 73. Engine oil needs changing
within approx. 1000 km (600 miles). Engine
power may be decreased.Diesel fuel filter
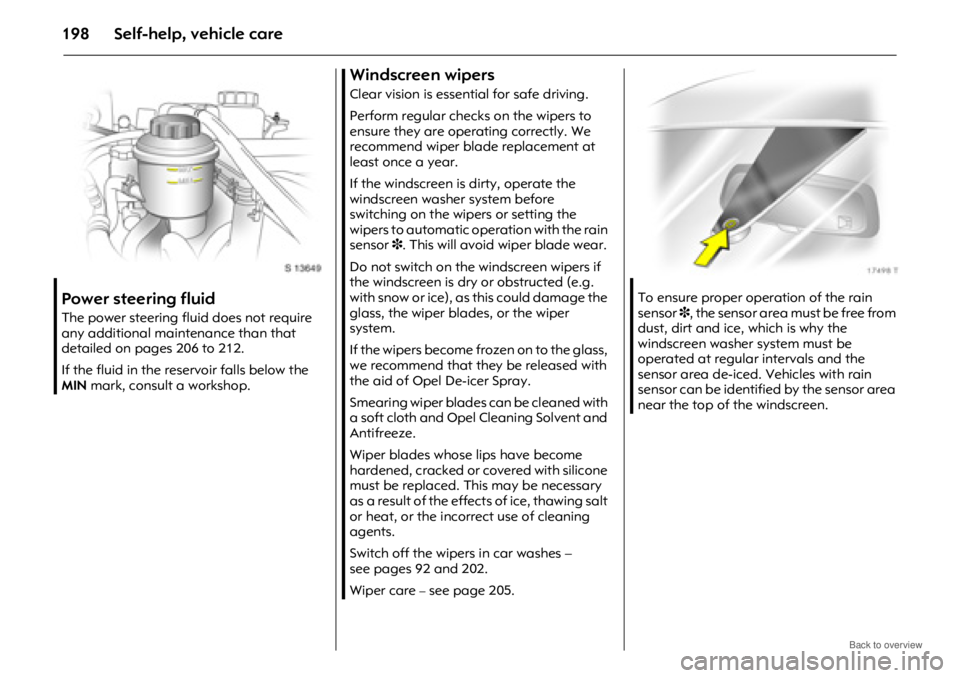
Drain diesel fuel filter of residual water at
every engine oil change.
Place a container underneath the filter
housing. Turn drain plug, located on the
left of the filter housing, anti-clockwise
using a suitable screwdriver, to drain off
the water.
The filter is drained as soon as diesel fuel
emerges from the port. Retighten the drain
plug by turning it clockwise.
With engine switched off, turn ignition key
to ON, wait approx. 5 seconds, and turn
key to LOCK to perform priming operation.
Perform this operation 3 times or more
while the engine is switched off, to avoid air
entering the fuel line.
9 Warning
Used engine oil filters and empty oil
containers should not be disposed of as
domestic refuse. We recommend that
you entrust oil and oil filter changes to a
workshop who is familiar with legal
requirements regarding disposal of used
oil and can thus help to protect both the
environment and your health.
Engine oil is a danger to health; avoid
prolonged contact with skin and wash
exposed areas thoroughly.
Page 195 of 234

Self-help, vehicle care195
Check diesel fuel filter at shorter intervals if
the vehicle is subjected to extreme
operating conditions such as high humidity
(primarily in coastal areas), extremely high
or low outside temperatures and
substantially varying daytime and night-
time temperatures.
If there is water in the diesel fuel filter,
control indicator
N illuminates in the
instrument panel - see page 73. Drain the
water immediately.
Coolant
During operation, the system is
pressurized. The temperature may
therefore rise to over 100 °C.
The antifreeze provides excellent corrosion
protection for the cooling and heating
system, as well as freeze protection down
to -28 °C.
Certain types of antifreeze can lead to
engine damage. We therefore strongly
recommend the use of antifreeze that has
been approved by Opel.
Antifreeze and corrosion protection
Before the start of the cold weather season,
have the coolant checked for correct
concentration by a workshop. The amount
of antifreeze must provide protection down
to approx. –28 °C. If the antifreeze
concentration is too low, this reduces
protection from fr eezing and corrosion.
Top up antifreeze if necessary.
If coolant loss is topped up with
demineralised water, have antifreeze
concentration checked and more
antifreeze added as necessary. Coolant level
Hardly any losses occur since the cooling
system is sealed and it is thus rarely
necessary to top up the coolant.
The coolant level in the expansion tank
should be between the
MIN and MAX
marks when the system is cold.
9 Warning
Antifreeze is a danger to health: it must
therefore be kept in the original container
and out of the reach of children.
Page 196 of 234

Self-help, vehicle care196
When the engine is at operating
temperature, coolant level rises. It falls
again when the system cools. If it falls
below the MIN mark when the system is
cold, the coolant must be replenished.
Top up antifreeze. If no antifreeze is
available, top up with clean tap water.
If tap water is unavailable, distilled water
can be used.
When you top up with tap water or distilled
water, add concentrated antifreeze and
possibly mix in antifreeze as well. Have the
cause of the coolant loss eliminated by a
workshop.
Too low a coolant level can cause engine
damage.
When closing, tighten coolant filler cap as
far as it will go. Coolant temperature
Control indicator
W illuminates when
coolant temperature is too high. Check
coolant level:
z Coolant level low:
Top up coolant. Pay attention to the
instructions given under "Antifreeze and
corrosion protecti on" and "Coolant
level". Have the cause of the coolant loss
remedied by a workshop.
z Coolant level OK:
Have the cause of increased coolant
temperature remedied by a workshop.
Brake fluid
Brake fluid level
9 Warning
Allow engine to cool down before
removing coolant filler cap. If steam is
visible, move away from the vehicle until
the engine is cool.
Remove coolant filler cap carefully so
that pressure can escape slowly,
otherwise there is a risk of scalding.
9 Warning
Caution - brake fluid is poisonous and
corrosive. Do not allow it to contact eyes,
skin, fabrics or painted surfaces; direct
contact may cause injuries and damage.
Page 197 of 234
Self-help, vehicle care197
The brake fluid level in the reservoir must
not be higher than the MAX mark or lower
than the MIN mark.
Do not overfill the brak e fluid reservoir, as
this may cause an engine fire due to fluid
burning; risk of injury and damage to the
vehicle.
Use of some brake fluids could cause
damage or impair br aking effectiveness.
Stay well informed. We recommend that
you use Opel-approve d high performance
brake fluid.
Extreme cleanliness is important, since
brake fluid contamination can lead to
brake system malfunctions.
If brake fluid level is too low, brake system
control indicator 4 illuminates in the
instrument panel - see page 70.
After correcting the brake fluid level, have
the cause of the loss remedied by a
workshop. Brake fluid change
As brake fluid is hygroscopic, it absorbs
water. Vapour bubbles which impair the
braking effect may occur during braking.
The fluid change intervals specified on
pages 206 to 212 must therefore be
observed.
Clutch fluid
3
The clutch fluid does not require any
additional maintenanc e than that detailed
on pages 206 to 212.
If the fluid in the reservoir falls below the
MIN mark, consult a workshop.
9 Warning
We recommend that you have brake fluid
changed by a workshop, who will be
familiar with the requ irements of the law
as regards disposal of brake fluid and
can thus help to protect the environment
and your health.
Page 198 of 234
Self-help, vehicle care198
Power steering fluid
The power steering fluid does not require
any additional maintenance than that
detailed on pages 206 to 212.
If the fluid in the reservoir falls below the
MIN mark, consult a workshop.
Windscreen wipers
Clear vision is essential for safe driving.
Perform regular checks on the wipers to
ensure they are oper ating correctly. We
recommend wiper blade replacement at
least once a year.
If the windscreen is dirty, operate the
windscreen washer system before
switching on the wipers or setting the
wipers to automatic operation with the rain
sensor 3. This will avoid wiper blade wear.
Do not switch on the windscreen wipers if
the windscreen is dry or obstructed (e.g.
with snow or ice), as this could damage the
glass, the wiper blades, or the wiper
system.
If the wipers become frozen on to the glass,
we recommend that they be released with
the aid of Opel De-icer Spray.
Smearing wiper blades can be cleaned with
a soft cloth and Opel Cleaning Solvent and
Antifreeze.
Wiper blades whose lips have become
hardened, cracked or covered with silicone
must be replaced. This may be necessary
as a result of the effect s of ice, thawing salt
or heat, or the incorrect use of cleaning
agents.
Switch off the wipers in car washes –
see pages 92 and 202.
Wiper care
– see page 205. To ensure proper operation of the rain
sensor
3, the sensor area must be free from
dust, dirt and ice, which is why the
windscreen washer system must be
operated at regular intervals and the
sensor area de-iced. Vehicles with rain
sensor can be identified by the sensor area
near the top of the windscreen.
Page 199 of 234
Self-help, vehicle care199
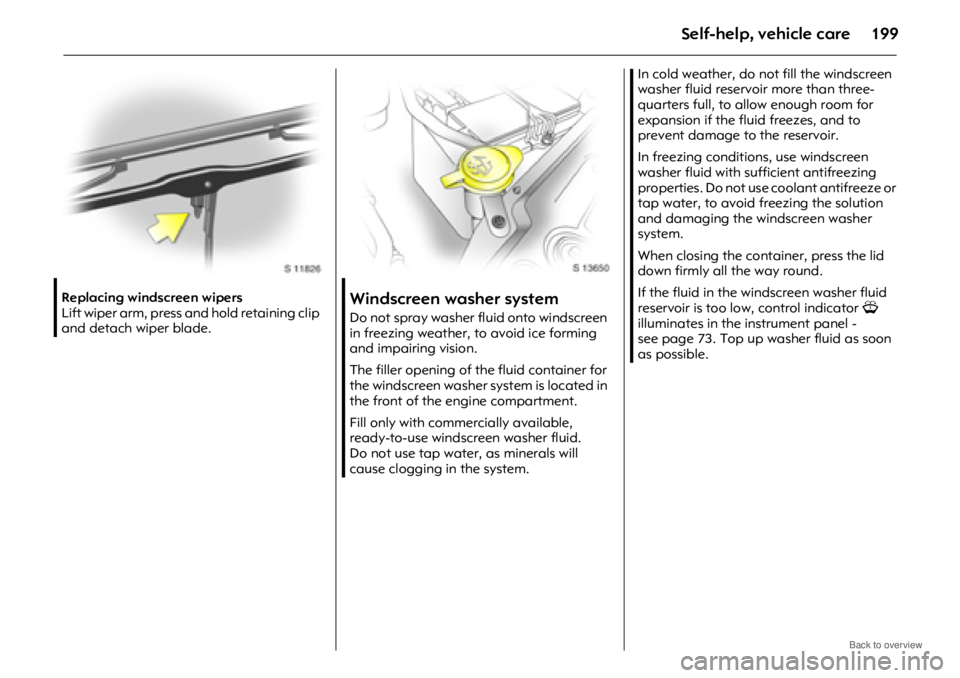
Replacing windscreen wipers
Lift wiper arm, press and hold retaining clip
and detach wiper blade.Windscreen washer system
Do not spray washer fluid onto windscreen
in freezing weather, to avoid ice forming
and impairing vision.
The filler opening of the fluid container for
the windscreen washer system is located in
the front of the engine compartment.
Fill only with commercially available,
ready-to-use windscreen washer fluid.
Do not use tap water, as minerals will
cause clogging in the system.In cold weather, do no
t fill the windscreen
washer fluid reservoir more than three-
quarters full, to allow enough room for
expansion if the fluid freezes, and to
prevent damage to the reservoir.
In freezing conditions, use windscreen
washer fluid with sufficient antifreezing
properties. Do not use coolant antifreeze or
tap water, to avoid freezing the solution
and damaging the windscreen washer
system.
When closing the cont ainer, press the lid
down firmly all the way round.
If the fluid in the windscreen washer fluid
reservoir is too low, control indicator G
illuminates in the instrument panel -
see page 73. Top up washer fluid as soon
as possible.
Page 200 of 234
Self-help, vehicle care200
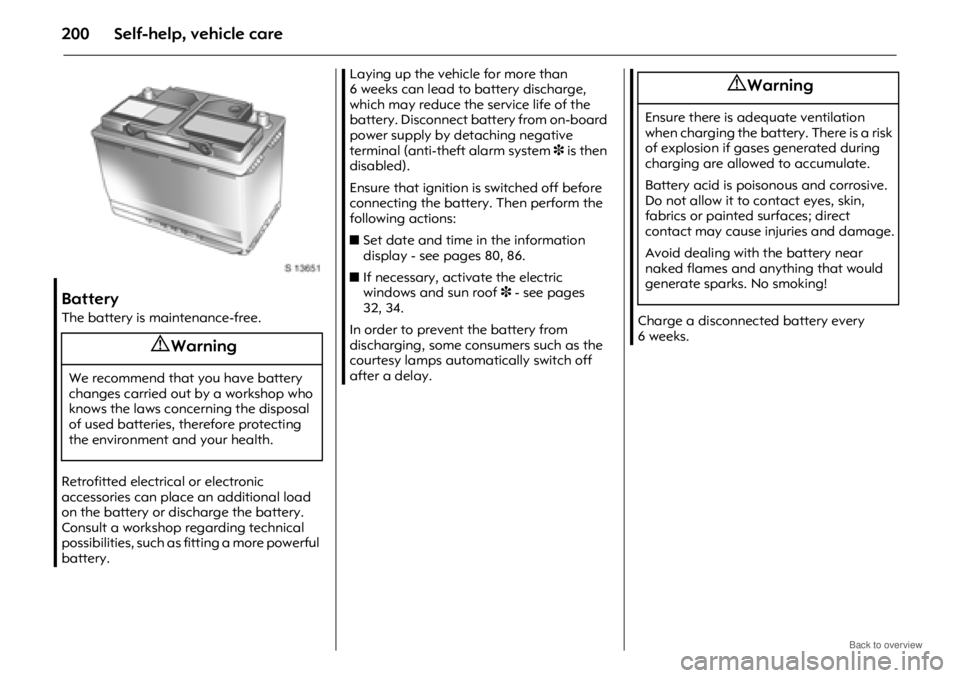
Battery
The battery is maintenance-free.
Retrofitted electrical or electronic
accessories can place an additional load
on the battery or discharge the battery.
Consult a workshop regarding technical
possibilities, such as fitting a more powerful
battery.Laying up the vehicle for more than
6 weeks can lead to battery discharge,
which may reduce the service life of the
battery. Disconnect battery from on-board
power supply by detaching negative
terminal (anti-theft alarm system
3 is then
disabled).
Ensure that ignition is switched off before
connecting the battery. Then perform the
following actions:
z Set date and time in the information
display - see pages 80, 86.
z If necessary, activate the electric
windows and sun roof 3 - see pages
32, 34.
In order to prevent the battery from
discharging, some consumers such as the
courtesy lamps automatically switch off
after a delay. Charge a disconnected battery every
6 weeks.
9 Warning
We recommend that you have battery
changes carried out by a workshop who
knows the laws concerning the disposal
of used batteries, therefore protecting
the environment and your health.
9 Warning
Ensure there is adequate ventilation
when charging the batt
ery. There is a risk
of explosion if gases generated during
charging are allowed to accumulate.
Battery acid is poisonous and corrosive.
Do not allow it to contact eyes, skin,
fabrics or painted surfaces; direct
contact may cause injuries and damage.
Avoid dealing with the battery near
naked flames and anything that would
generate sparks. No smoking!