Peugeot 208 2015 Owner's Manual - RHD (UK, Australia)
Manufacturer: PEUGEOT, Model Year: 2015, Model line: 208, Model: Peugeot 208 2015Pages: 341, PDF Size: 38.75 MB
Page 201 of 341
199
208_en_Chap08_Informations-pratiques_ed01-2015
Triangle
Before getting out of your vehicle to
assemble the triangle and place it on
the road, put on your high visibility vest.
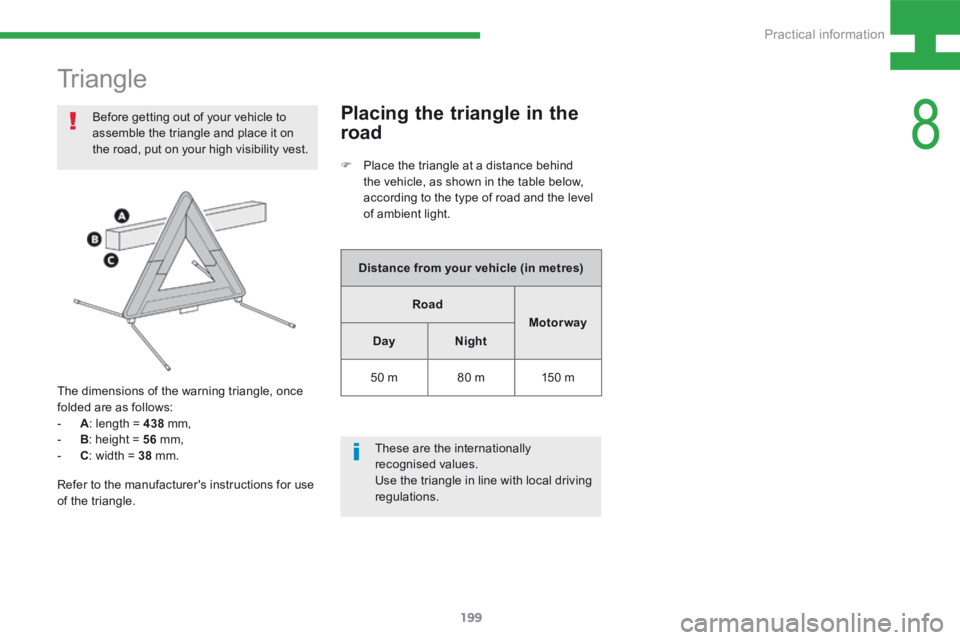
The dimensions of the warning triangle, once
folded are as follows:
- A: length = 438 mm,
- B: height = 56 mm,
- C: width = 38 mm. These are the internationally
recognised values.
Use the triangle in line with local driving
regulations.
Refer to the manufacturer's instructions for use
of the triangle.Placing the triangle in the
road
F
Place the triangle at a distance behind
the vehicle, as shown in the table below,
according to the type of road and the level
of ambient light.
Distance from your vehicle (in metres) Road Motor way
Day Night
50 m 80 m150 m
8
Practical information
Page 202 of 341
200
208_en_Chap08_Informations-pratiques_ed01-2015
Under-inflation
The under-inflation detection system
does not replace the need for vigilance
on the part of the driver.
This system does not avoid the need to
check the tyre pressures (including the
spare wheel) every month as well as
before a long journey.
Driving with under-inflated tyres impairs
road holding, extends braking distances
and causes premature tyre wear,
particularly under arduous condition
(high loading, high speed, long journey).The inflation pressures defined for
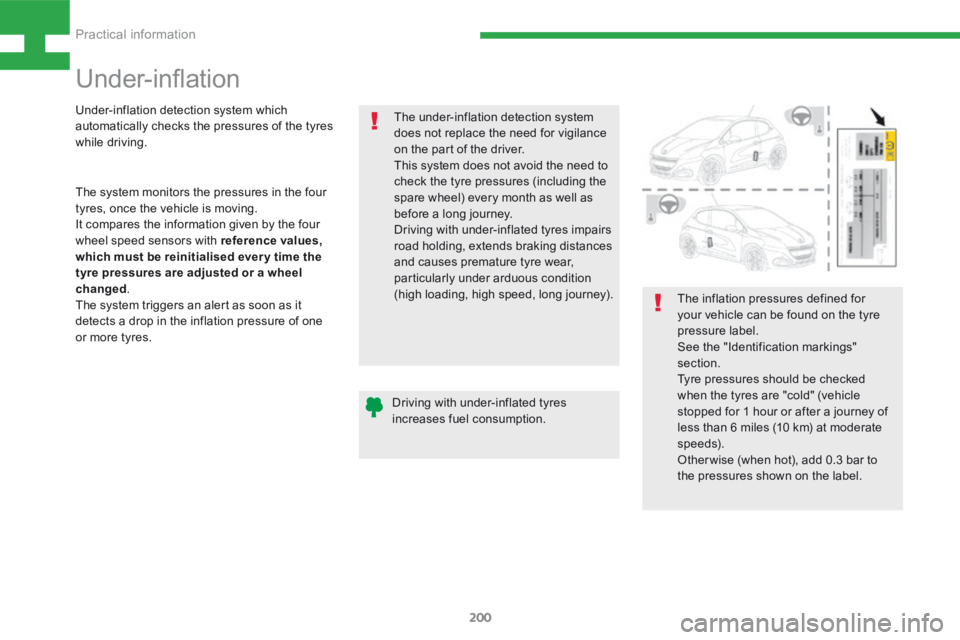
your vehicle can be found on the tyre
pressure label.
See the "Identification markings"
section.
Tyre pressures should be checked
when the tyres are "cold" (vehicle
stopped for 1 hour or after a journey of
less than 6 miles (10 km) at moderate
speeds).
Other wise (when hot), add 0.3 bar to
the pressures shown on the label.
Driving with under-inflated tyres
increases fuel consumption.
Under-inflation detection system which
automatically checks the pressures of the tyres
while driving.
The system monitors the pressures in the four
tyres, once the vehicle is moving.
It compares the information given by the four
wheel speed sensors with reference values,
which must be reinitialised ever y time the
tyre pressures are adjusted or a wheel
changed
.
The system triggers an alert as soon as it
detects a drop in the inflation pressure of one
or more tyres.
Practical information
Page 203 of 341
201
208_en_Chap08_Informations-pratiques_ed01-2015
Under-inflation alert
The loss of pressure detected does not
always cause visible bulging of the tyre.
Do not satisfy yourself with just a visual
check.This is given by fixed illumination of
this warning lamp, accompanied by
an audible signal and, depending on
equipment, the display of a message.
F Reduce speed immediately, avoid
excessive steering movements and sudden
braking
F Stop the vehicle as soon as it is safe
to do so. F
In the event of a puncture, use the
temporary puncture repair kit or the spare
wheel (depending on equipment),
or
F if you have a compressor, such as the one
in the temporary puncture repair kit, check
the pressures of the four tyres when cold,
or
F if it is not possible to make this check
immediately, drive carefully at reduced
speed. The alert is maintained until the system
is reinitialised.
The under-inflation alert is only
dependable if the system has been
reinitialised with all four tyres inflated to
the correct pressures.
Snow chains
The system does not have to be
reinitialised after fitting or removing
snow chains.
8
Practical information
Page 204 of 341
202
208_en_Chap08_Informations-pratiques_ed01-2015
Reinitialising
It is necessary to reinitialise the system every
time one or more tyre pressure is adjusted, and
after changing one or more wheels.
A label attached to the middle pillar, driver's
side, gives a reminder of this.Before reinitialising the system, ensure
that the pressures of the four tyres are
correct for the use of the vehicle and in
line with the recommendations on the
tyre pressure label.
The under-inflation detection system
does not give a warning if a pressure is
incorrect at the time of reinitialisation. F
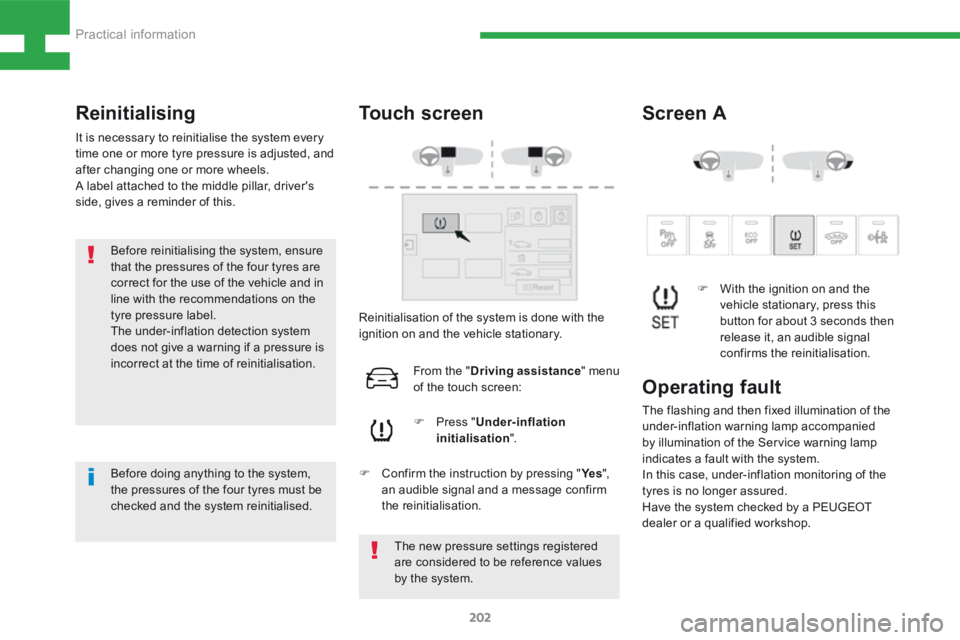
With the ignition on and the
vehicle stationary, press this
button for about 3 seconds then
release it, an audible signal
confirms the reinitialisation.
The new pressure settings registered
are considered to be reference values
by the system.
Reinitialisation of the system is done with the
ignition on and the vehicle stationary.
F Press " Under-inflation
initialisation ".
From the "
Driving assistance " menu
of the touch screen:
F Confirm the instruction by pressing " Ye s",
an audible signal and a message confirm
the reinitialisation.
Operating fault
The flashing and then fixed illumination of the
under-inflation warning lamp accompanied
by illumination of the Service warning lamp
indicates a fault with the system.
In this case, under-inflation monitoring of the
tyres is no longer assured.
Have the system checked by a PEUGEOT
dealer or a qualified workshop.
Touch screen Screen A
Before doing anything to the system,
the pressures of the four tyres must be
checked and the system reinitialised.
Practical information
Page 205 of 341
203
208_en_Chap08_Informations-pratiques_ed01-2015
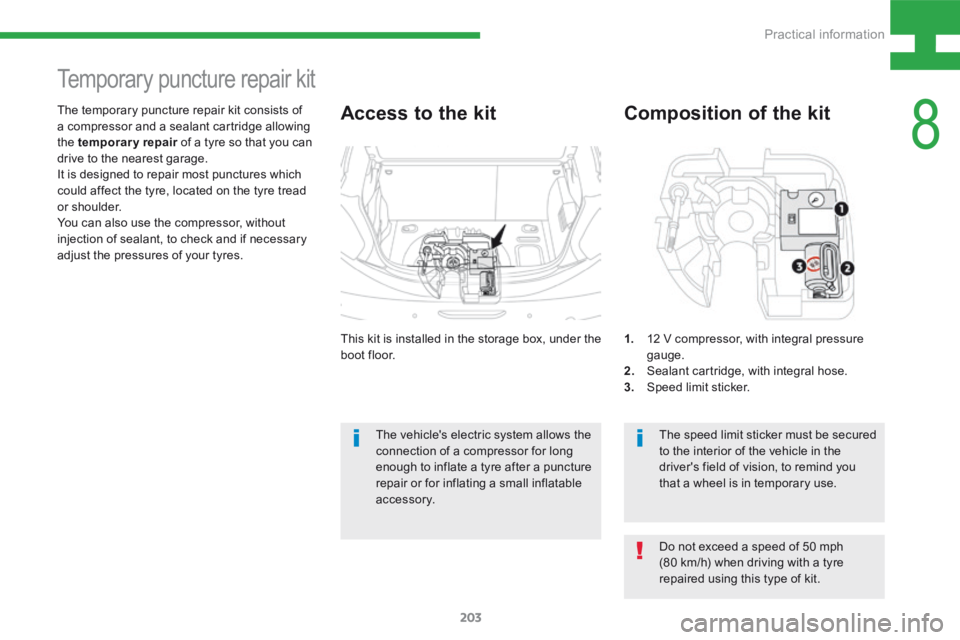
This kit is installed in the storage box, under the
boot floor.
The temporary puncture repair kit consists of
a compressor and a sealant cartridge allowing
the temporary repair
of a tyre so that you can
drive to the nearest garage.
It is designed to repair most punctures which
could affect the tyre, located on the tyre tread
or shoulder.
You can also use the compressor, without
injection of sealant, to check and if necessary
adjust the pressures of your tyres.
Temporary puncture repair kit
Access to the kit
1. 12 V compressor, with integral pressure
gauge.
2. Sealant cartridge, with integral hose.
3. Speed limit sticker.
The speed limit sticker must be secured
to the interior of the vehicle in the
driver's field of vision, to remind you
that a wheel is in temporary use.
The vehicle's electric system allows the
connection of a compressor for long
enough to inflate a tyre after a puncture
repair or for inflating a small inflatable
accessory.
Composition of the kit
Do not exceed a speed of 50 mph
(80 km/h) when driving with a tyre
repaired using this type of kit.
8
Practical information
Page 206 of 341
204
208_en_Chap08_Informations-pratiques_ed01-2015
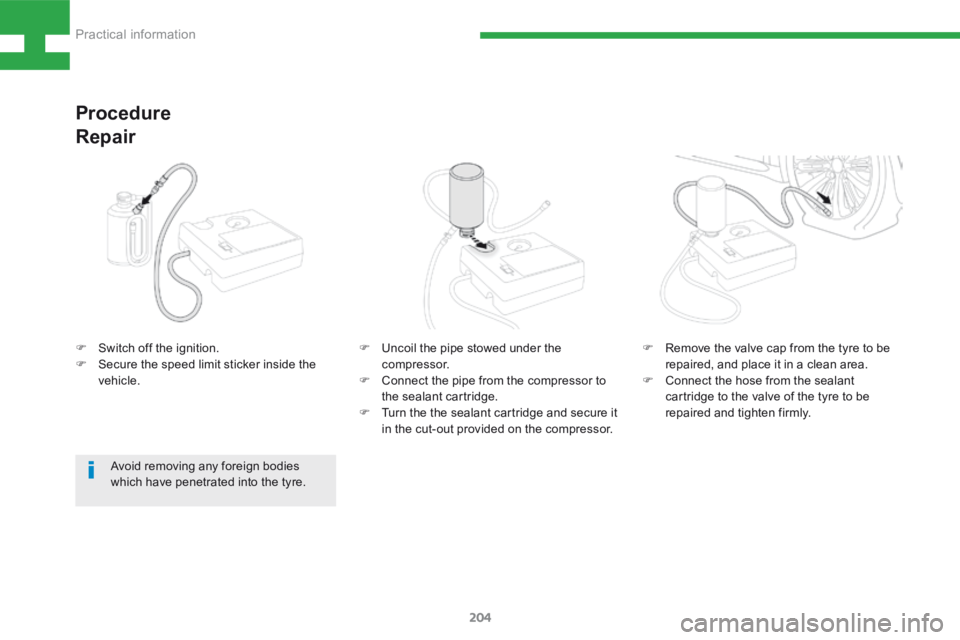
F Switch off the ignition.
F Secure the speed limit sticker inside the
vehicle.
Procedure
Repair
F Uncoil the pipe stowed under the
compressor.
F Connect the pipe from the compressor to
the sealant cartridge.
F Turn the the sealant cartridge and secure it
in the cut-out provided on the compressor.
Avoid removing any foreign bodies
which have penetrated into the tyre. F
Remove the valve cap from the tyre to be
repaired, and place it in a clean area.
F Connect the hose from the sealant
cartridge to the valve of the tyre to be
repaired and tighten firmly.
Practical information
Page 207 of 341
205
208_en_Chap08_Informations-pratiques_ed01-2015
Take care, the sealant product
is harmful (e.g. ethylene-glycol,
colophony...) if swallowed and causes
irritation to the eyes.
Keep this product out of the reach of
children.
The use-by date is marked on the
cartridge.
After use, do not discard the
cartridge by the roadside, take it to a
PEUGEOT dealer or an authorised
waste disposal site.
Don't forget to obtain a new sealant
cartridge, available from a PEUGEOT
dealer or a qualified workshop. If after around 5 to 7 minutes the
pressure is not attained, this indicates
that the tyre is not repairable; contact
a PEUGEOT dealer or a qualified
workshop for assistance.
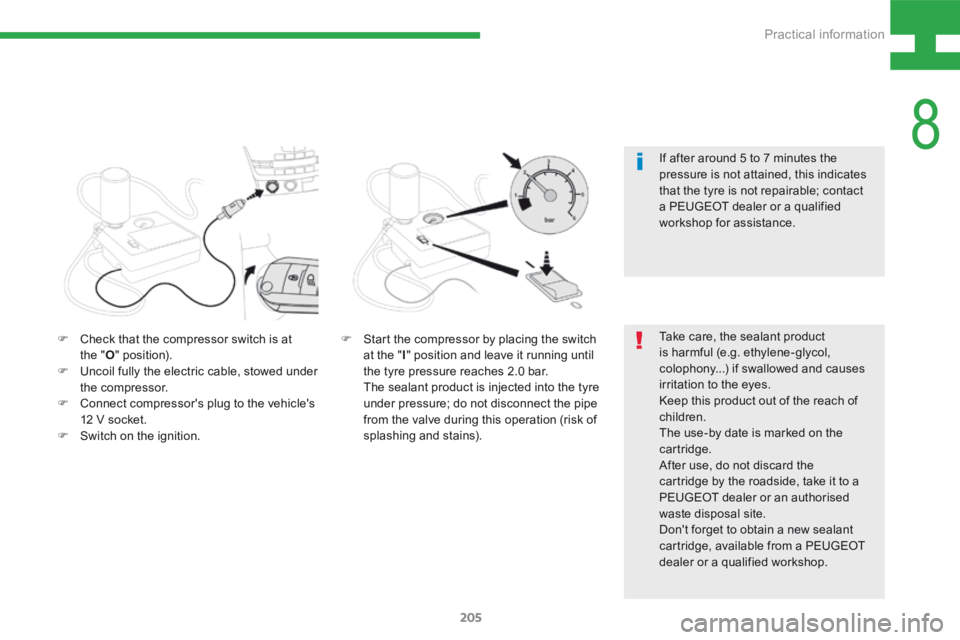
F Check that the compressor switch is at
the " O" position).
F Uncoil fully the electric cable, stowed under
the compressor.
F Connect compressor's plug to the vehicle's
12 V socket.
F Switch on the ignition. F
Start the compressor by placing the switch
at the " I" position and leave it running until
the tyre pressure reaches 2.0 bar.
The sealant product is injected into the tyre
under pressure; do not disconnect the pipe
from the valve during this operation (risk of
splashing and stains).
8
Practical information
Page 208 of 341
206
208_en_Chap08_Informations-pratiques_ed01-2015
Checking and inflating
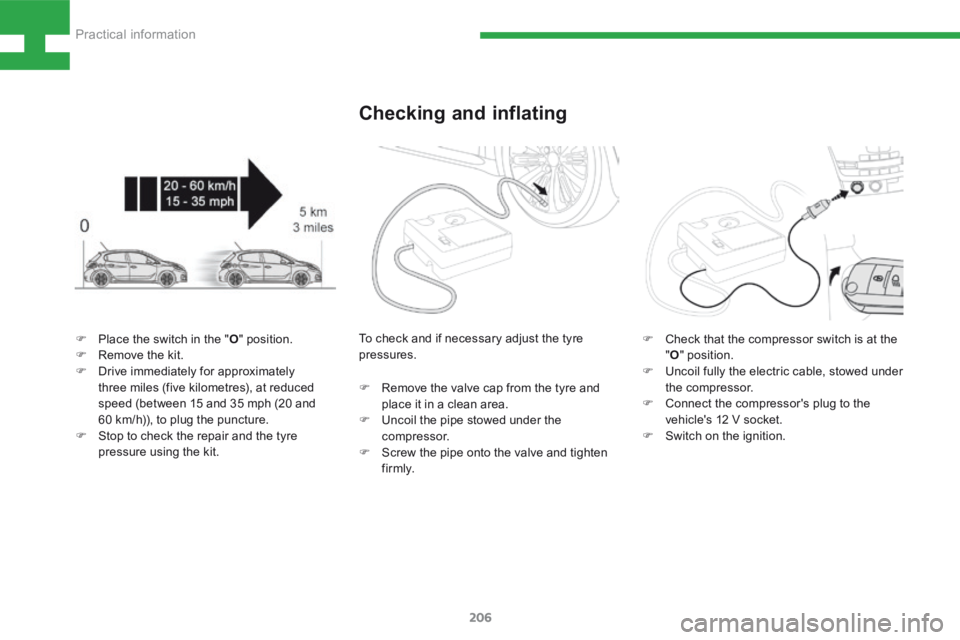
F Place the switch in the " O" position.
F Remove the kit.
F Drive immediately for approximately
three miles (five kilometres), at reduced
speed (between 15 and 35 mph (20 and
60 km/h)), to plug the puncture.
F Stop to check the repair and the tyre
pressure using the kit. To check and if necessary adjust the tyre
pressures.
F
Remove the valve cap from the tyre and
place it in a clean area.
F Uncoil the pipe stowed under the
compressor.
F Screw the pipe onto the valve and tighten
f i r m l y. F
Check that the compressor switch is at the
"O " position.
F Uncoil fully the electric cable, stowed under
the compressor.
F Connect the compressor's plug to the
vehicle's 12 V socket.
F Switch on the ignition.
Practical information
Page 209 of 341
207
208_en_Chap08_Informations-pratiques_ed01-2015
After using the kit, refer to the previous
pages to check the tyre pressures
and reinitialise the "Under-inflation
detection" function.
F
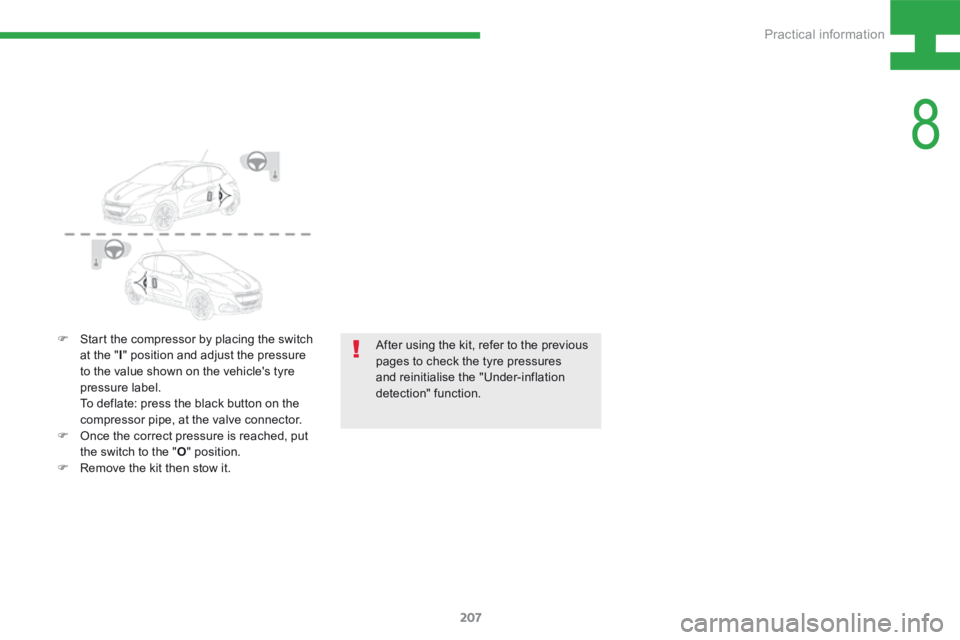
Start the compressor by placing the switch
at the " I" position and adjust the pressure
to the value shown on the vehicle's tyre
pressure label.
To deflate: press the black button on the
compressor pipe, at the valve connector.
F Once the correct pressure is reached, put
the switch to the " O" position.
F Remove the kit then stow it.
8
Practical information
Page 210 of 341
208
208_en_Chap08_Informations-pratiques_ed01-2015
Spare wheel
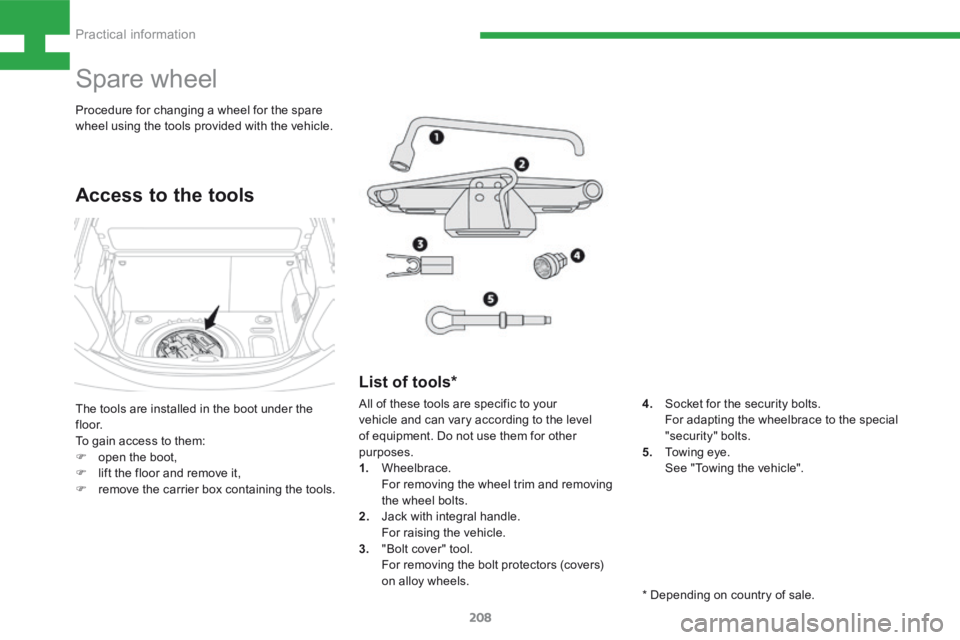
The tools are installed in the boot under the
f l o o r.
To gain access to them:
F open the boot,
F lift the floor and remove it,
F remove the carrier box containing the tools.
Access to the tools
List of tools*
4. Socket for the security bolts.
For adapting the wheelbrace to the special
"security" bolts.
5. Towing eye.
See "Towing the vehicle".
Procedure for changing a wheel for the spare
wheel using the tools provided with the vehicle.
All of these tools are specific to your
vehicle and can vary according to the level
of equipment. Do not use them for other
purposes.
1. Wheelbrace.
For removing the wheel trim and removing
the wheel bolts.
2. Jack with integral handle.
For raising the vehicle.
3. "Bolt cover" tool.
For removing the bolt protectors (covers)
on alloy wheels.
* Depending on country of sale.
Practical information