Peugeot 406 2002 Manual Online
Manufacturer: PEUGEOT, Model Year: 2002, Model line: 406, Model: Peugeot 406 2002Pages: 166, PDF Size: 1.89 MB
Page 81 of 166
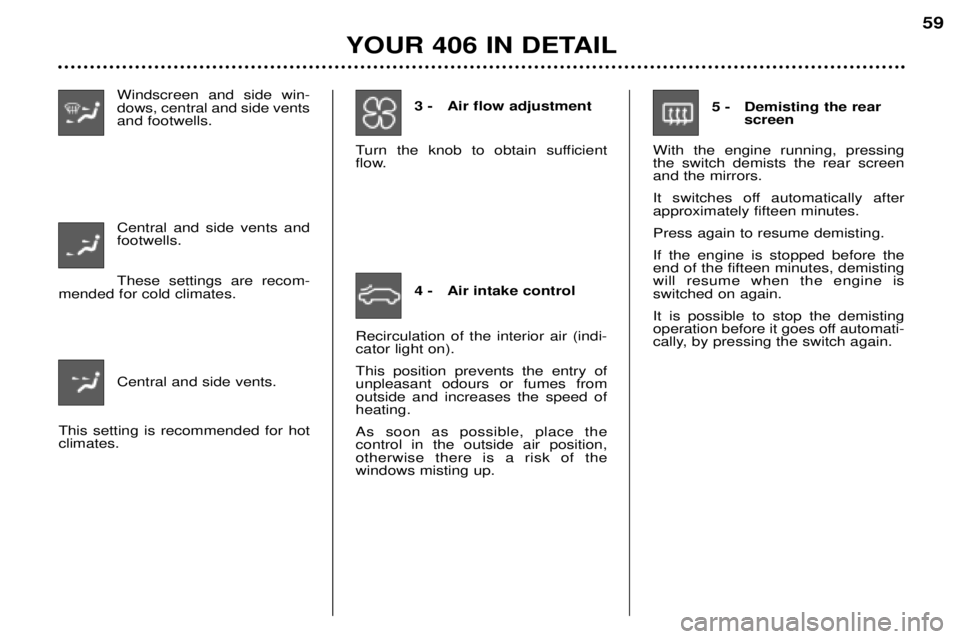
Windscreen and side win- dows, central and side ventsand footwells. Central and side vents and footwells. These settings are recom-
mended for cold climates.
Central and side vents.
This setting is recommended for hot climates. 3 - Air flow adjustment
Turn the knob to obtain sufficient
flow.
4 - Air intake control
Recirculation of the interior air (indi-cator light on). This position prevents the entry of unpleasant odours or fumes fromoutside and increases the speed ofheating. As soon as possible, place the control in the outside air position,otherwise there is a risk of thewindows misting up. 5 - Demisting the rear
screen
With the engine running, pressingthe switch demists the rear screenand the mirrors.
It switches off automatically after approximately fifteen minutes. Press again to resume demisting.If the engine is stopped before the end of the fifteen minutes, demistingwill resume when the engine isswitched on again. It is possible to stop the demisting
operation before it goes off automati-
cally, by pressing the switch again.
YOUR 406 IN DETAIL 59
Page 82 of 166
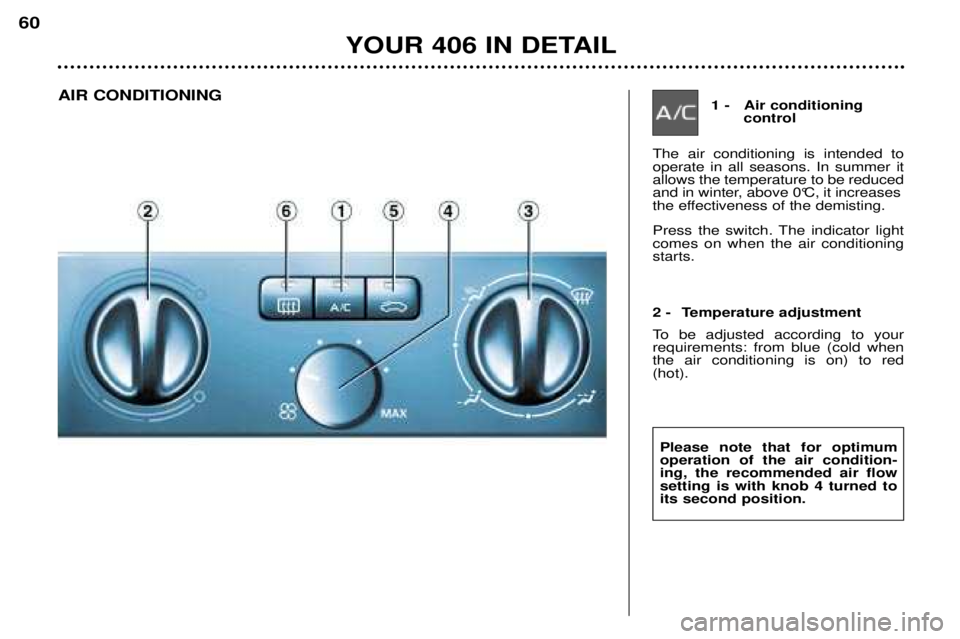
Press the switch. The indicator light comes on when the air conditioningstarts.
1 - Air conditioning control
The air conditioning is intended to operate in all seasons. In summer itallows the temperature to be reduced
and in winter, above 0°C, it increases
the effectiveness of the demisting.
2 - Temperature adjustment
To be adjusted according to your requirements: from blue (cold whenthe air conditioning is on) to red(hot).
AIR CONDITIONING
YOUR 406 IN DETAIL
60
Please note that for optimum operation of the air condition-ing, the recommended air flowsetting is with knob 4 turned toits second position.
Page 83 of 166
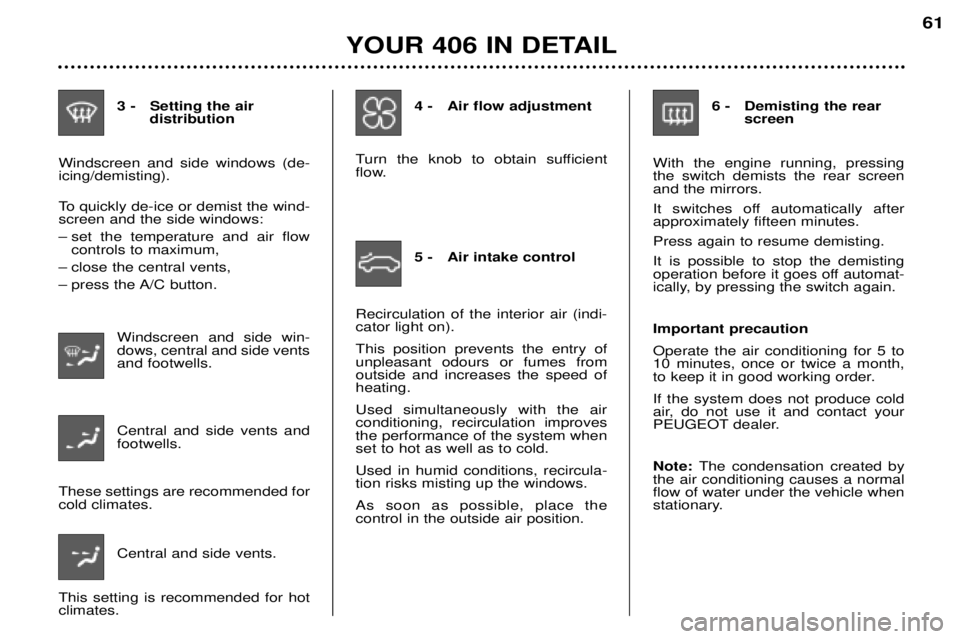
3 - Setting the air distribution
Windscreen and side windows (de- icing/demisting).
To quickly de-ice or demist the wind- screen and the side windows:
–set the temperature and air flow controls to maximum,
–close the central vents,
–press the A/C button.
Windscreen and side win- dows, central and side ventsand footwells. Central and side vents and footwells.
These settings are recommended forcold climates.
Central and side vents.
This setting is recommended for hotclimates. 4 - Air flow adjustment
Turn the knob to obtain sufficient
flow.
5 - Air intake control
Recirculation of the interior air (indi-cator light on). This position prevents the entry of unpleasant odours or fumes fromoutside and increases the speed ofheating. Used simultaneously with the air conditioning, recirculation improvesthe performance of the system whenset to hot as well as to cold. Used in humid conditions, recircula- tion risks misting up the windows. As soon as possible, place the control in the outside air position. 6 - Demisting the rear
screen
With the engine running, pressingthe switch demists the rear screenand the mirrors.
It switches off automatically after approximately fifteen minutes. Press again to resume demisting. It is possible to stop the demisting
operation before it goes off automat-
ically, by pressing the switch again. Important precaution Operate the air conditioning for 5 to 10 minutes, once or twice a month,
to keep it in good working order. If the system does not produce cold
air, do not use it and contact your
PEUGEOT dealer. Note: The condensation created by
the air conditioning causes a normal flow of water under the vehicle when
stationary.
YOUR 406 IN DETAIL 61
Page 84 of 166
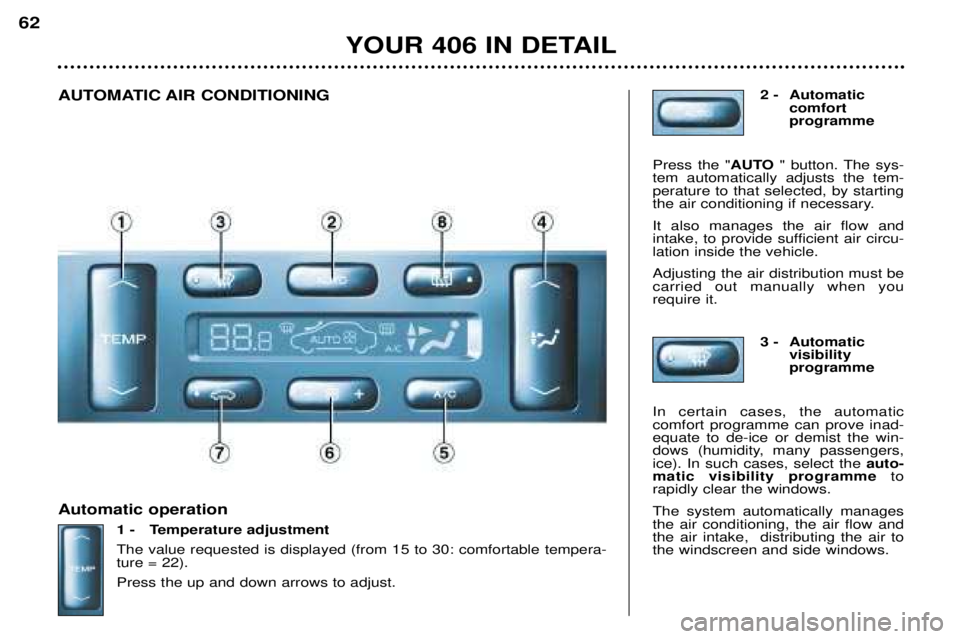
Automatic operation1 - Temperature adjustment The value requested is displayed (from 15 to 30: comfortable tempera- ture = 22). Press the up and down arrows to adjust. 2 - Automatic
comfort programme
Press the " AUTO" button. The sys-
tem automatically adjusts the tem-perature to that selected, by starting
the air conditioning if necessary. It also manages the air flow and
intake, to provide sufficient air circu-lation inside the vehicle. Adjusting the air distribution must be carried out manually when yourequire it.
3 - Automatic visibility programme
In certain cases, the automaticcomfort programme can prove inad-equate to de-ice or demist the win-
dows (humidity, many passengers,ice). In such cases, select the auto-
matic visibility programme to
rapidly clear the windows. The system automatically manages the air conditioning, the air flow andthe air intake, distributing the air tothe windscreen and side windows.
AUTOMATIC AIR CONDITIONING
YOUR 406 IN DETAIL
62
Page 85 of 166
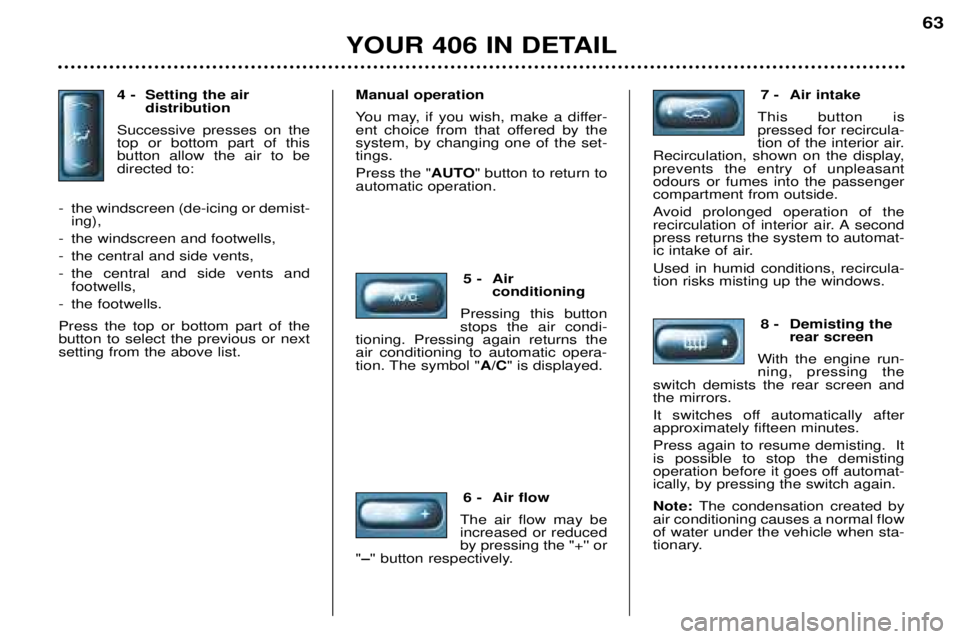
4 - Setting the air distribution
Successive presses on the top or bottom part of thisbutton allow the air to bedirected to:
-the windscreen (de-icing or demist- ing),
-the windscreen and footwells,
-the central and side vents,
-the central and side vents and footwells,
-the footwells.
Press the top or bottom part of the button to select the previous or nextsetting from the above list. Manual operation
You may, if you wish, make a differ-
ent choice from that offered by thesystem, by changing one of the set-tings. Press the "
AUTO" button to return to
automatic operation.
5 - Air conditioning
Pressing this button stops the air condi-
tioning. Pressing again returns theair conditioning to automatic opera-
tion. The symbol " A/C" is displayed.
6 - Air flow
The air flow may beincreased or reducedby pressing the "+'' or
" – '' button respectively. 7 - Air intake
This button ispressed for recircula-
tion of the interior air.
Recirculation, shown on the display,prevents the entry of unpleasantodours or fumes into the passengercompartment from outside.
Avoid prolonged operation of the
recirculation of interior air. A secondpress returns the system to automat-
ic intake of air. Used in humid conditions, recircula- tion risks misting up the windows.
8 - Demisting therear screen
With the engine run-ning, pressing the
switch demists the rear screen andthe mirrors.
It switches off automatically after approximately fifteen minutes. Press again to resume demisting. It is possible to stop the demisting
operation before it goes off automat-
ically, by pressing the switch again. Note: The condensation created by
air conditioning causes a normal flow of water under the vehicle when sta-
tionary.
YOUR 406 IN DETAIL 63
Page 86 of 166
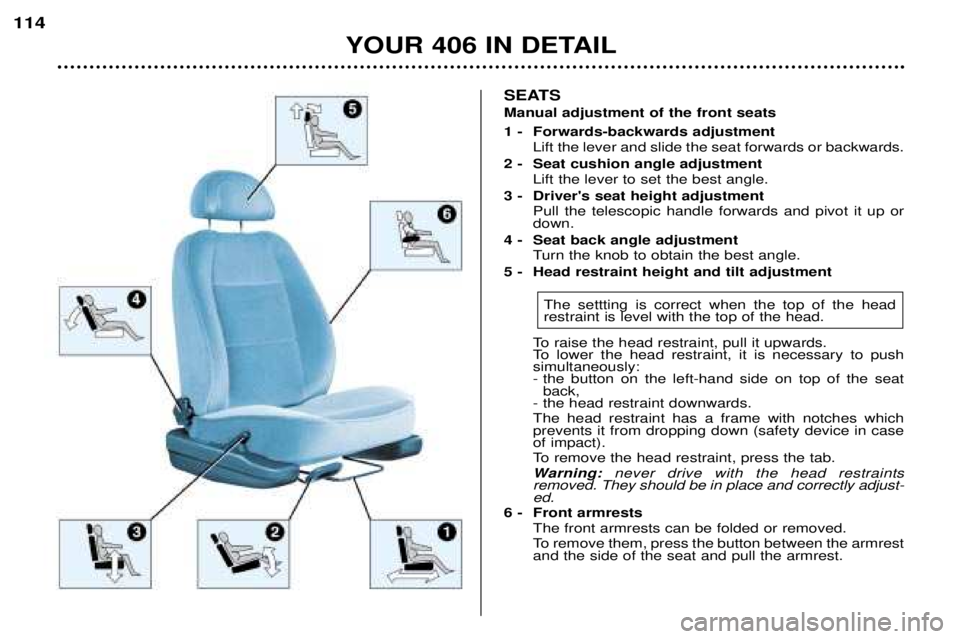
SEATS Manual adjustment of the front seats
1 - Forwards-backwards adjustmentLift the lever and slide the seat forwards or backwards.
2 - Seat cushion angle adjustment Lift the lever to set the best angle.
3 - Driver's seat height adjustment Pull the telescopic handle forwards and pivot it up or down.
4 - Seat back angle adjustment Turn the knob to obtain the best angle.
5 - Head restraint height and tilt adjustment
The settting is correct when the top of the headrestraint is level with the top of the head.
To raise the head restraint, pull it upwards.
To lower the head restraint, it is necessary to pushsimultaneously:
- the button on the left-hand side on top of the seat back,
- the head restraint downwards. The head restraint has a frame with notches which prevents it from dropping down (safety device in caseof impact).
To remove the head restraint, press the tab.
Warning: never drive with the head restraints
removed. They should be in place and correctly adjust- ed.
6 - Front armrests The front armrests can be folded or removed.
To remove them, press the button between the armrest and the side of the seat and pull the armrest.
YOUR 406 IN DETAIL
114
Page 87 of 166
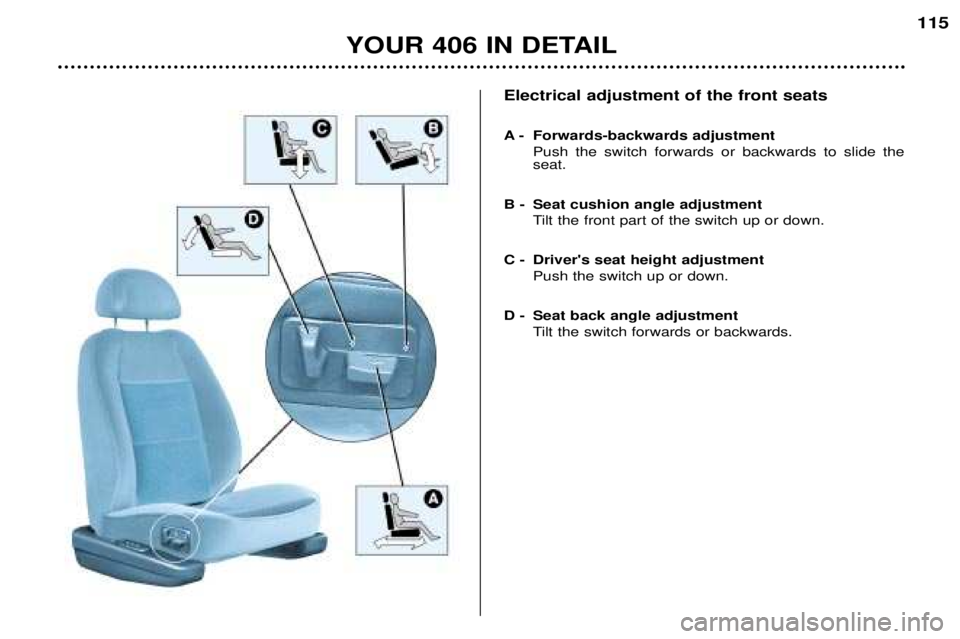
Electrical adjustment of the front seats
A - Forwards-backwards adjustmentPush the switch forwards or backwards to slide the seat.
B - Seat cushion angle adjustment Tilt the front part of the switch up or down.
C - Driver's seat height adjustment Push the switch up or down.
D - Seat back angle adjustment Tilt the switch forwards or backwards.
YOUR 406 IN DETAIL 115
Page 88 of 166
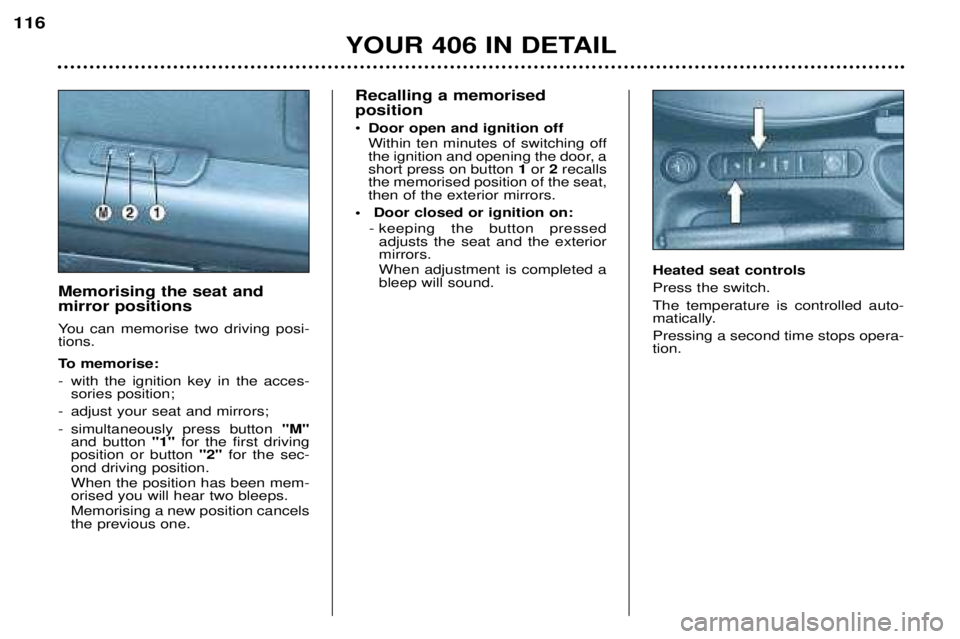
Recalling a memorised position
Page 89 of 166
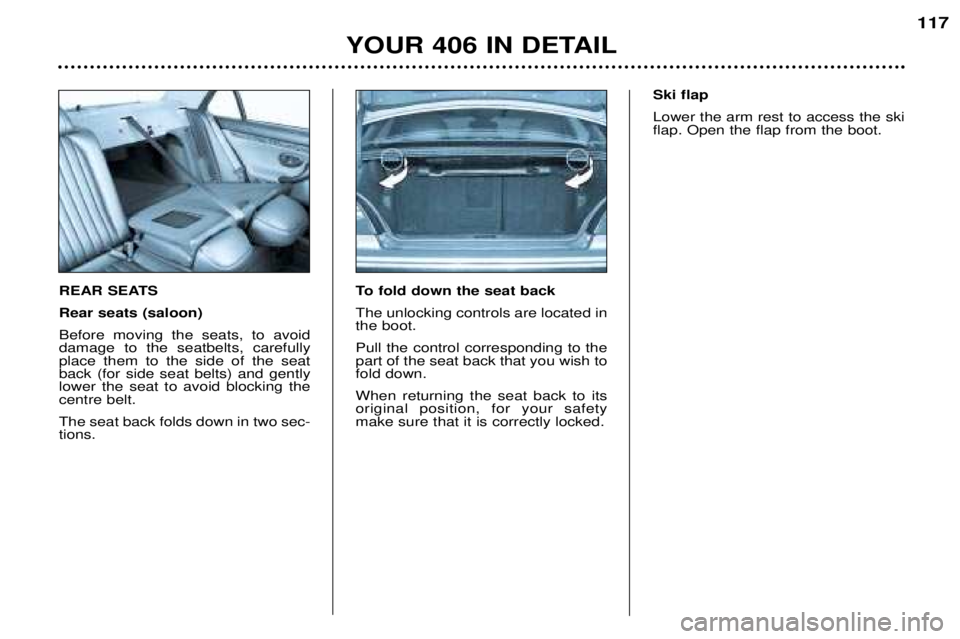
REAR SEATS Rear seats (saloon)Before moving the seats, to avoid damage to the seatbelts, carefullyplace them to the side of the seatback (for side seat belts) and gentlylower the seat to avoid blocking thecentre belt. The seat back folds down in two sec- tions.To fold down the seat back The unlocking controls are located in the boot. Pull the control corresponding to the part of the seat back that you wish tofold down. When returning the seat back to its original position, for your safetymake sure that it is correctly locked. Ski flap Lower the arm rest to access the ski flap. Open the flap from the boot.
YOUR 406 IN DETAIL
117
Page 90 of 166
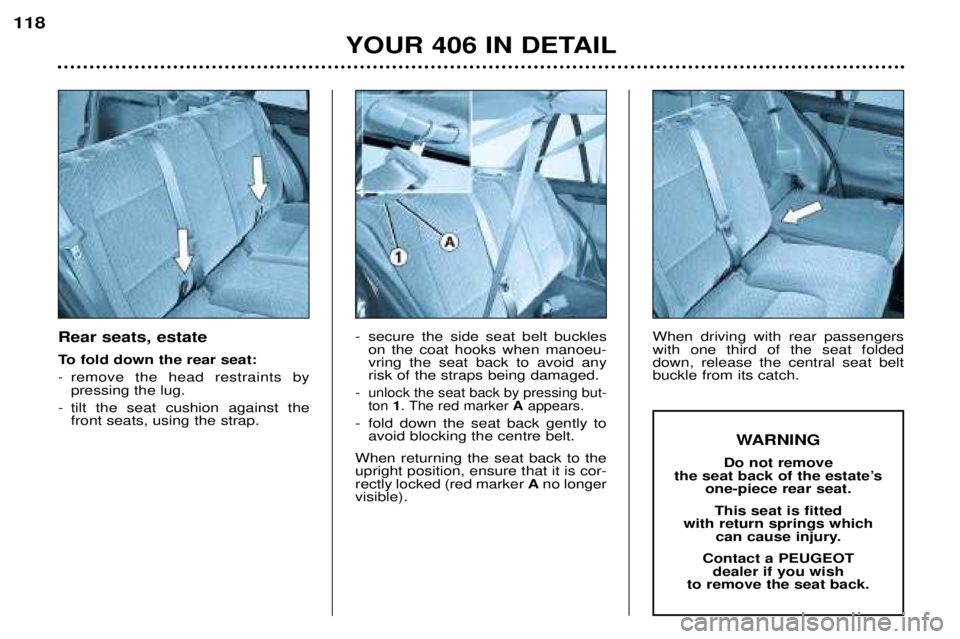
Rear seats, estate
To fold down the rear seat:
- remove the head restraints by pressing the lug.
- tilt the seat cushion against the front seats, using the strap. - secure the side seat belt buckles
on the coat hooks when manoeu-vring the seat back to avoid anyrisk of the straps being damaged.
-unlock the seat back by pressing but-ton 1. The red marker Aappears.
- fold down the seat back gently to
avoid blocking the centre belt.
When returning the seat back to theupright position, ensure that it is cor-rectly locked (red marker Ano longer
visible). When driving with rear passengerswith one third of the seat foldeddown, release the central seat beltbuckle from its catch.
YOUR 406 IN DETAIL
118
WARNING
Do not remove
the seat back of the estate’s one-piece rear seat.
This seat is fitted
with return springs which can cause injury.
Contact a PEUGEOT dealer if you wish
to remove the seat back.