display Peugeot Boxer 2002.5 Owner's Manual
[x] Cancel search | Manufacturer: PEUGEOT, Model Year: 2002.5, Model line: Boxer, Model: Peugeot Boxer 2002.5Pages: 182, PDF Size: 2.81 MB
Page 16 of 182
16-09-2002
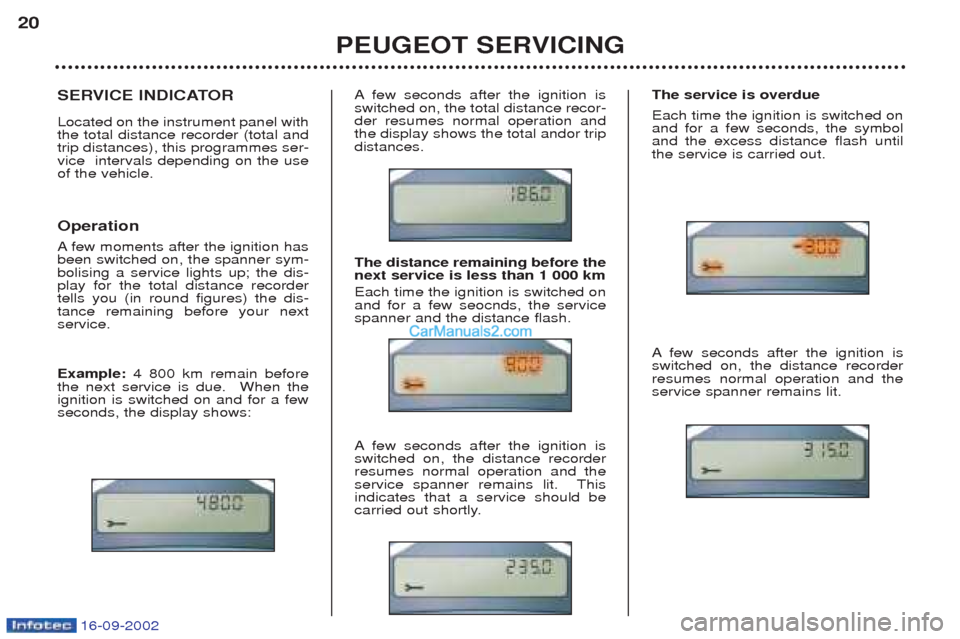
SERVICE INDICATOR Located on the instrument panel with the total distance recorder (total andtrip distances), this programmes ser-vice intervals depending on the useof the vehicle. Operation Afew moments after the ignition has
been switched on, the spanner sym- bolising a service lights up; the dis-play for the total distance recordertells you (in round figures) the dis-tance remaining before your nextservice. Example: 4 800 km remain before
the next service is due. When the ignition is switched on and for a fewseconds, the display shows: A
few seconds after the ignition is
switched on, the total distance recor-der resumes normal operation andthe display shows the total andor tripdistances. The distance remaining before the next service is less than 1 000 km Each time the ignition is switched on and for a few seocnds, the servicespanner and the distance flash. A few seconds after the ignition is
switched on, the distance recorder resumes normal operation and the
service spanner remains lit. Thisindicates that a service should be
carried out shortly. The service is overdue Each time the ignition is switched on and for a few seconds, the symboland the excess distance flash untilthe service is carried out. A
few seconds after the ignition is
switched on, the distance recorder resumes normal operation and theservice spanner remains lit.
PEUGEOT SERVICING
20
Page 17 of 182
16-09-2002
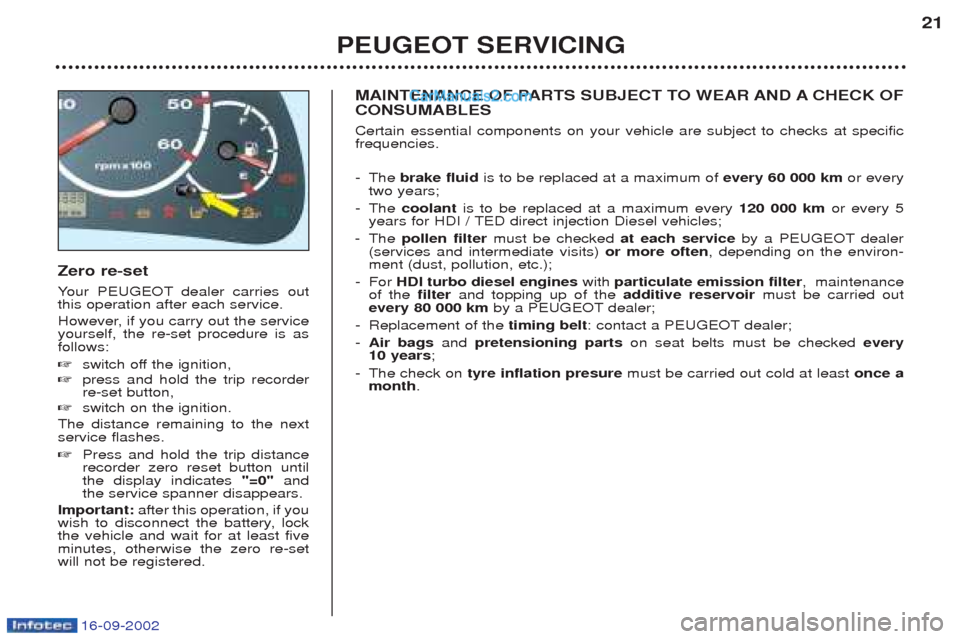
Zero re-set Your PEUGEOT dealer carries out
this operation after each service.
However, if you carry out the service yourself, the re-set procedure is asfollows: ☞ switch off the ignition,
☞ press and hold the trip recorder re-set button,
☞ switch on the ignition.
The distance remaining to the nextservice flashes. ☞ Press and hold the trip distance recorder zero reset button untilthe display indicates "=0"and
the service spanner disappears.
Important: after this operation, if you
wish to disconnect the battery, lockthe vehicle and wait for at least fiveminutes, otherwise the zero re-setwill not be registered. MAINTENANCE OF PARTS SUBJECT TO WEAR AND A CHECK OF CONSUMABLES Certain essential components on your vehicle are subject to checks at specific frequencies. -
The brake fluid is to be replaced at a maximum of every 60 000 kmor every
two years;
- The coolant is to be replaced at a maximum every 120 000 kmor every 5
years for HDI / TED direct injection Diesel vehicles;
- The pollen filter must be checked at each serviceby a PEUGEOT dealer
(services and intermediate visits) or more often, depending on the environ-
ment (dust, pollution, etc.);
- For HDI turbo diesel engines with particulate emission filter , maintenance
of the filterand topping up of the additive reservoirmust be carried out
every 80 000 km by a PEUGEOT dealer;
- Replacement of the timing belt: contact a PEUGEOT dealer;
- Air bags and pretensioning parts on seat belts must be checked every
10 years ;
- The check on tyre inflation presure must be carried out cold at least once a
month .
PEUGEOT SERVICING 21
Page 26 of 182
16-09-2002
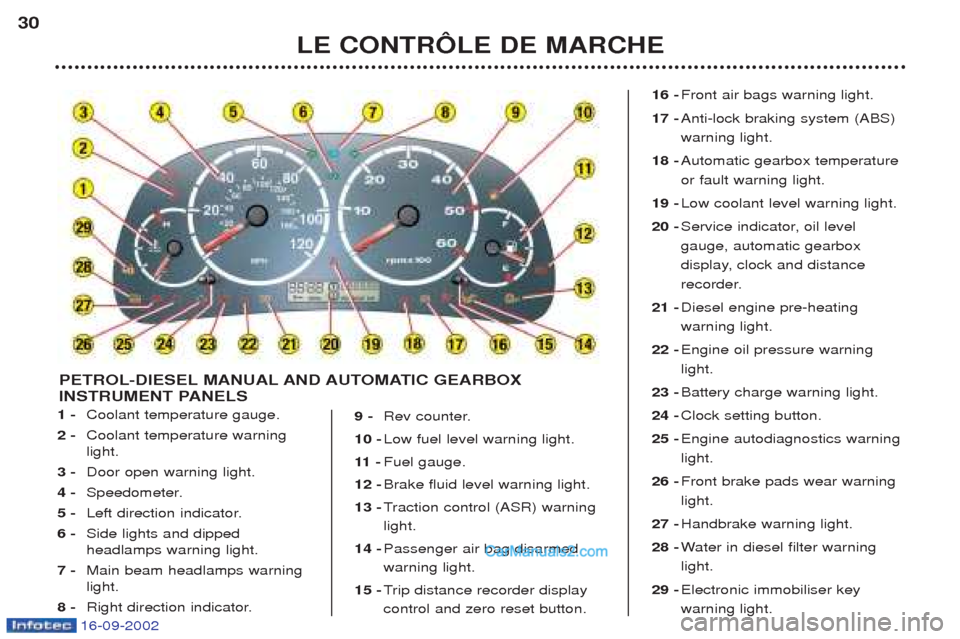
1 -Coolant temperature gauge.
2 - Coolant temperature warning light.
3 - Door open warning light.
4 - Speedometer.
5 - Left direction indicator.
6 - Side lights and dippedheadlamps warning light.
7 - Main beam headlamps warning light.
8 - Right direction indicator. 9 -
Rev counter.
10 - Low fuel level warning light.
11 - Fuel gauge.
12 - Brake fluid level warning light.
13 - Traction control (ASR) warning
light.
14 - Passenger air bag disarmed warning light.
15 - Trip distance recorder display
control and zero reset button. 16 -
Front air bags warning light.
17 - Anti-lock braking system (ABS) warning light.
18 - Automatic gearbox temperatureor fault warning light.
19 - Low coolant level warning light.
20 - Service indicator, oil levelgauge, automatic gearbox
display, clock and distance
recorder.
21 - Diesel engine pre-heatingwarning light.
22 - Engine oil pressure warninglight.
23 - Battery charge warning light.
24 - Clock setting button.
25 - Engine autodiagnostics warninglight.
26 - Front brake pads wear warninglight.
27 - Handbrake warning light.
28 - Water in diesel filter warning
light.
29 - Electronic immobiliser keywarning light.
LE CONTRÔLE DE MARCHE
30
PETROL-DIESEL MANUAL AND AUTOMATIC GEARBOX
INSTRUMENT PANELS
Page 32 of 182
16-09-2002
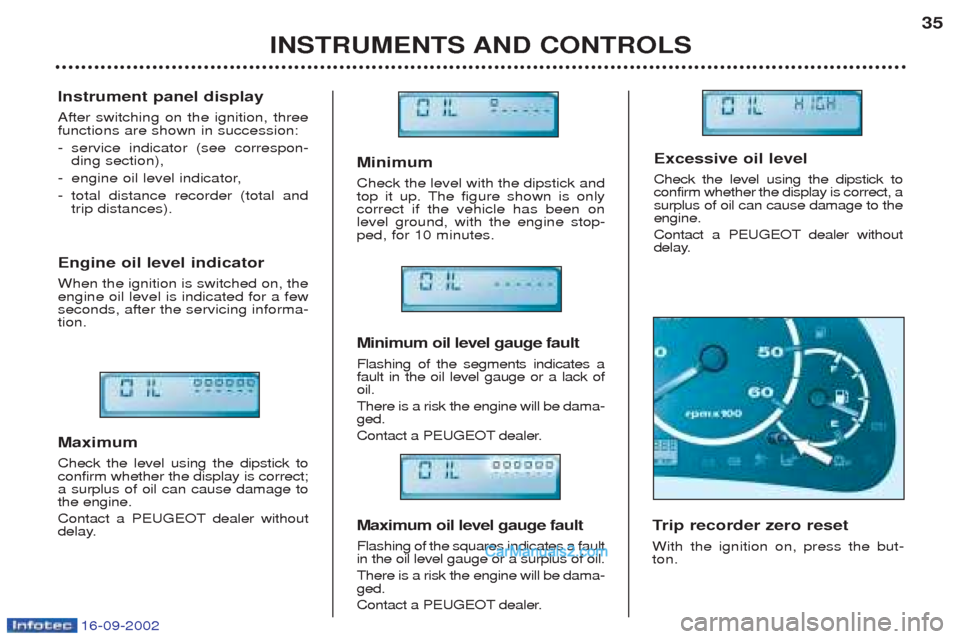
Minimum Check the level with the dipstick and
top it up. The figure shown is onlycorrect if the vehicle has been onlevel ground, with the engine stop-ped, for 10 minutes. Minimum oil level gauge fault Flashing of the segments indicates a fault in the oil level gauge or a lack ofoil. There is a risk the engine will be dama- ged.
Contact a PEUGEOT dealer. Maximum oil level gauge fault Flashing of the squares indicates a fault in the oil level gauge or a surplus of oil. There is a risk the engine will be dama- ged.
Contact a PEUGEOT dealer.
INSTRUMENTS AND CONTROLS35
Instrument panel display After switching on the ignition, three functions are shown in succession: -
service indicator (see correspon- ding section),
- engine oil level indicator,
- total distance recorder (total andtrip distances).
Engine oil level indicator When the ignition is switched on, the engine oil level is indicated for a fewseconds, after the servicing informa-tion. Maximum Check the level using the dipstick to confirm whether the display is correct;a surplus of oil can cause damage tothe engine.
Contact a PEUGEOT dealer without
delay. T
rip recorder zero reset
With the ignition on, press the but-ton. Excessive oil level Check the level using the dipstick to confirm whether the display is correct, asurplus of oil can cause damage to theengine.
Contact a PEUGEOT dealer without
delay.
Page 33 of 182
16-09-2002
Superimposed display In certain cases, when a function
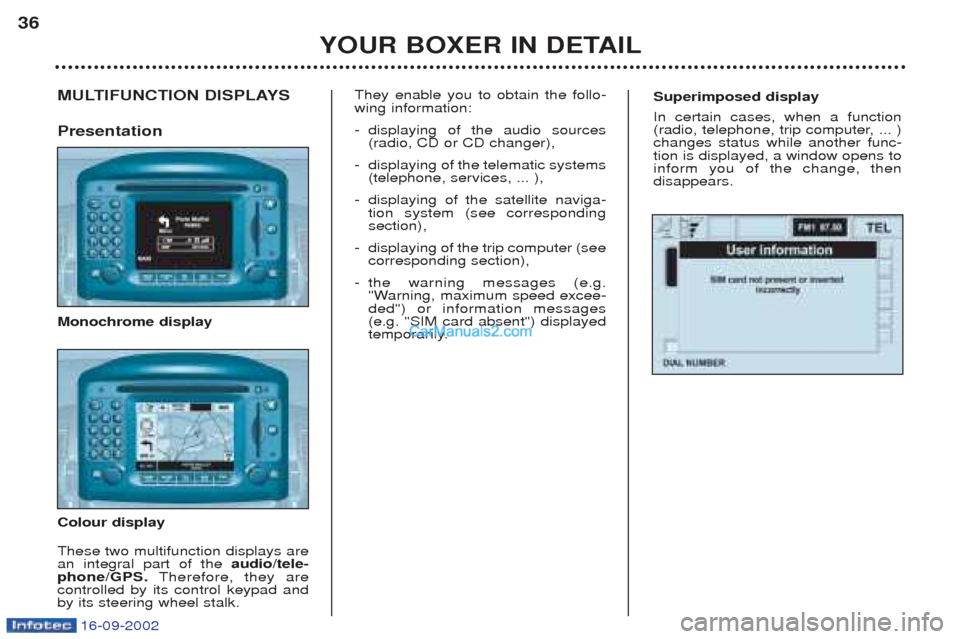
(radio, telephone, trip computer, ... )changes status while another func-tion is displayed, a window opens toinform you of the change, thendisappears.MULTIFUNCTION DISPLAYS Presentation Monochrome display Colour display These two multifunction displays are an integral part of theaudio/tele-
phone/GPS. Therefore, they are
controlled by its control keypad andby its steering wheel stalk. They enable you to obtain the follo-wing information: -
displaying of the audio sources (radio, CD or CD changer),
- displaying of the telematic systems(telephone, services, ... ),
- displaying of the satellite naviga-tion system (see correspondingsection),
- displaying of the trip computer (seecorresponding section),
- the warning messages (e.g.
"Warning, maximum speed excee-ded") or information messages(e.g. "SIM card absent") displayed
temporarily.
YOUR BOXER IN DETAIL
36
Page 34 of 182
16-09-2002
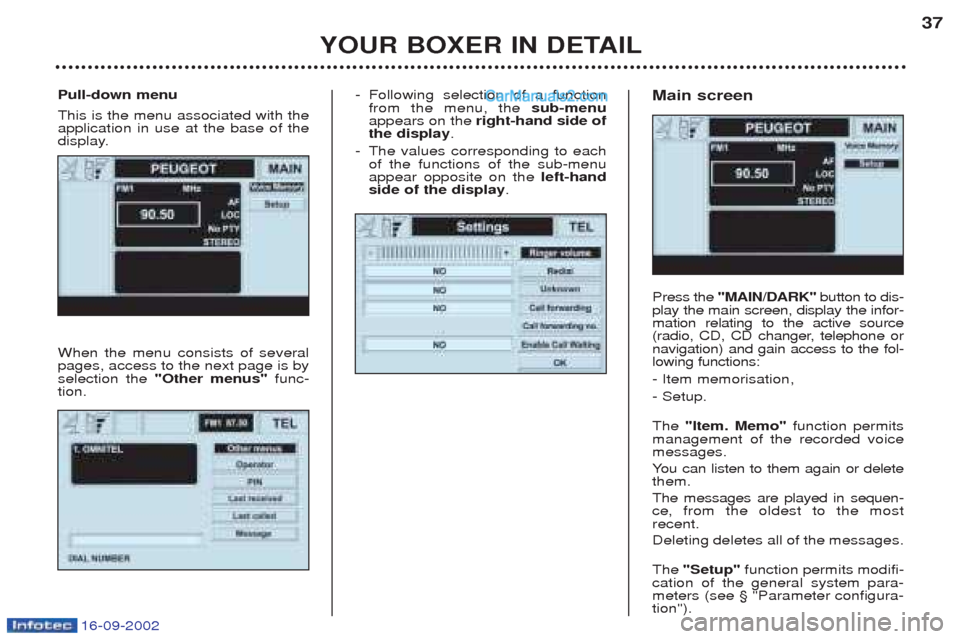
-Following selection of a function from the menu, the sub-menu
appears on the right-hand side of
the display .
- The values corresponding to eachof the functions of the sub-menuappear opposite on the left-hand
side of the display . Main screen Press the
"MAIN/DARK" button to dis-
play the main screen, display the infor- mation relating to the active source
(radio, CD, CD changer, telephone ornavigation) and gain access to the fol-lowing functions: - Item memorisation,- Setup. The "Item. Memo" function permits
management of the recorded voice messages. Y ou can listen to them again or delete
them.The messages are played in sequen- ce, from the oldest to the most
recent. Deleting deletes all of the messages. The "Setup" function permits modifi-
cation of the general system para- meters (see ¤ "Parameter configura-tion").
YOUR BOXER IN DETAIL 37
Pull-down menu This is the menu associated with the application in use at the base of the
display. When the menu consists of several pages, access to the next page is byselection the "Other menus" func-
tion.
Page 35 of 182
16-09-2002
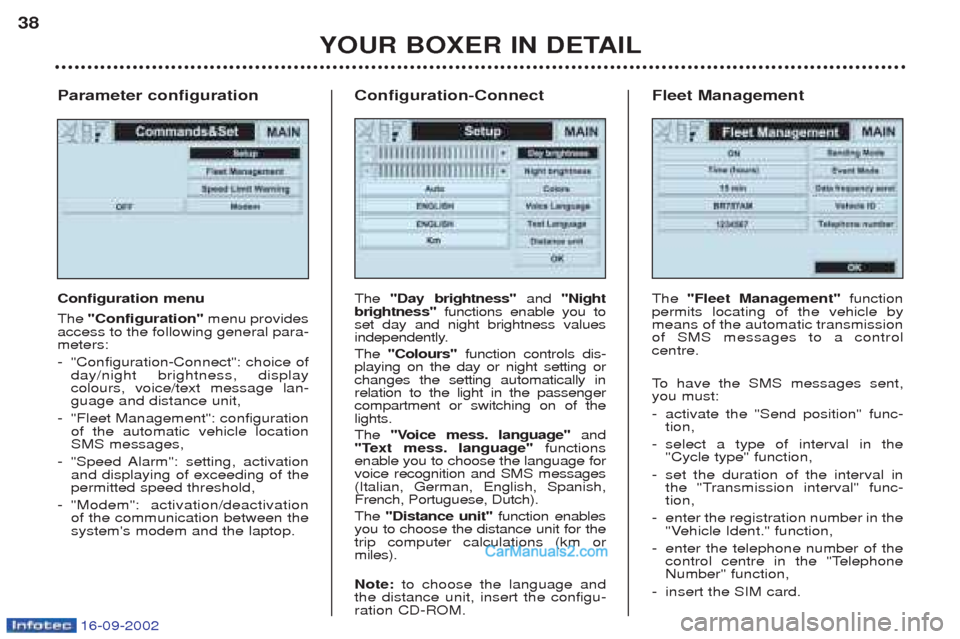
Parameter configuration Configuration menu The"Configuration" menu provides
access to the following general para- meters: - "Configuration-Connect": choice of day/night brightness, displaycolours, voice/text message lan-guage and distance unit,
- "Fleet Management": configurationof the automatic vehicle locationSMS messages,
- "Speed Alarm": setting, activationand displaying of exceeding of thepermitted speed threshold,
- "Modem": activation/deactivationof the communication between thesystem's modem and the laptop.
YOUR BOXER IN DETAIL
38
Configuration-Connect The "Day brightness" and "Night
brightness" functions enable you to
set day and night brightness values
independently. The "Colours" function controls dis-
playing on the day or night setting or changes the setting automatically inrelation to the light in the passengercompartment or switching on of thelights. The "Voice mess. language" and
"Text mess. language" functions
enable you to choose the language for voice recognition and SMS messages(Italian, German, English, Spanish,French, Portuguese, Dutch). The "Distance unit" function enables
you to choose the distance unit for the trip computer calculations (km ormiles). Note: to choose the language and
the distance unit, insert the configu- ration CD-ROM. Fleet Management The
"Fleet Management" function
permits locating of the vehicle by means of the automatic transmissionof SMS messages to a controlcentre.
To have the SMS messages sent,
you must: - activate the "Send position" func- tion,
- select a type of interval in the"Cycle type" function,
- set the duration of the interval in
the "Transmission interval" func-tion,
- enter the registration number in the
"Vehicle Ident." function,
- enter the telephone number of the
control centre in the "TelephoneNumber" function,
- insert the SIM card.
Page 36 of 182
16-09-2002
YOUR BOXER IN DETAIL39
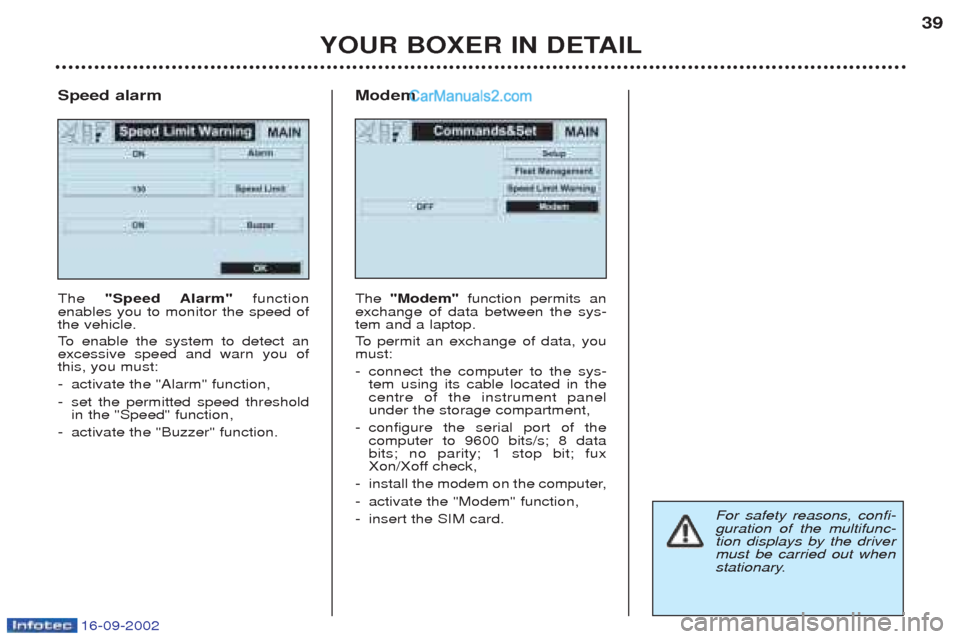
Speed alarm The "Speed Alarm" function
enables you to monitor the speed of the vehicle.
To enable the system to detect an
excessive speed and warn you of this, you must: - activate the "Alarm" function,
- set the permitted speed threshold in the "Speed" function,
- activate the "Buzzer" function. Modem The
"Modem" function permits an
exchange of data between the sys- tem and a laptop.
To permit an exchange of data, you
must: - connect the computer to the sys- tem using its cable located in thecentre of the instrument panelunder the storage compartment,
- configure the serial port of thecomputer to 9600 bits/s; 8 databits; no parity; 1 stop bit; fux
Xon/Xoff check,
- install the modem on the computer,
- activate the "Modem" function,
- insert the SIM card.
For safety reasons, confi- guration of the multifunc-tion displays by the drivermust be carried out when
stationary.
Page 37 of 182
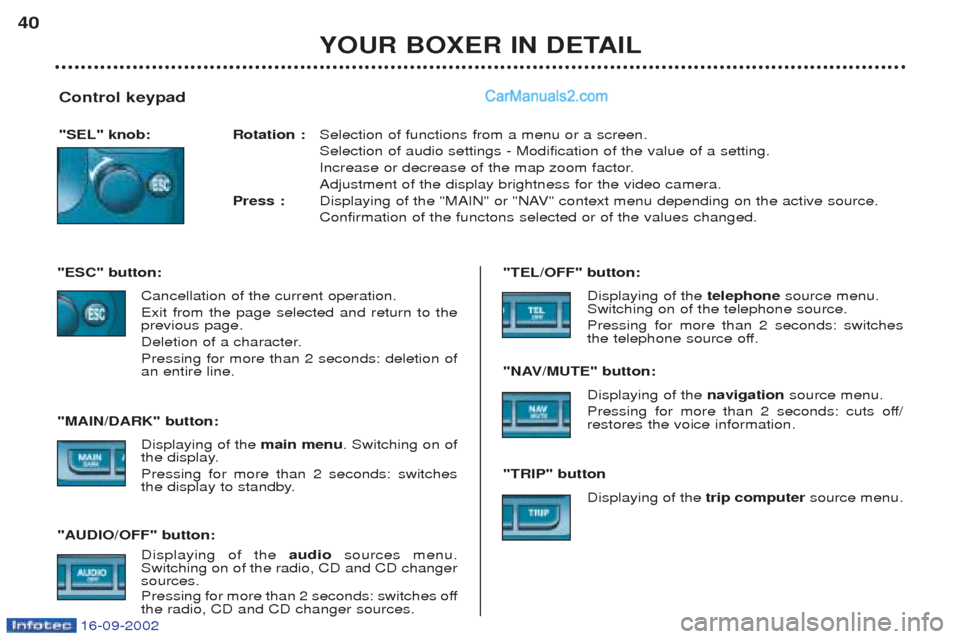
Control keypad
"SEL" knob: Rotation :Selection of functions from a menu or a screen. Selection of audio settings - Modification of the value of a setting.
Increase or decrease of the map zoom factor.Adjustment of the display brightness for the video camera.
Press : Displaying of the "MAIN" or "NAV" context menu depending on the active source.Confirmation of the functons selected or of the values changed.
"ESC" button: Cancellation of the current operation.Exit from the page selected and return to the previous page.
Deletion of a character.Pressing for more than 2 seconds: deletion of an entire line.
"MAIN/DARK" button: Displaying of the main menu. Switching on of
the display. Pressing for more than 2 seconds: switches
the display to standby.
"AUDIO/OFF" button: Displaying of the audiosources menu.
Switching on of the radio, CD and CD changersources.
Pressing for more than 2 seconds: switches off the radio, CD and CD changer sources. "TEL/OFF" button:
Displaying of the telephonesource menu.
Switching on of the telephone source. Pressing for more than 2 seconds: switches
the telephone source off.
"NAV/MUTE" button: Displaying of the navigationsource menu.
Pressing for more than 2 seconds: cuts off/restores the voice information.
"TRIP" button Displaying of the trip computersource menu.
YOUR BOXER IN DETAIL
40
16-09-2002
Page 41 of 182
16-09-2002
YOUR BOXER IN DETAIL47
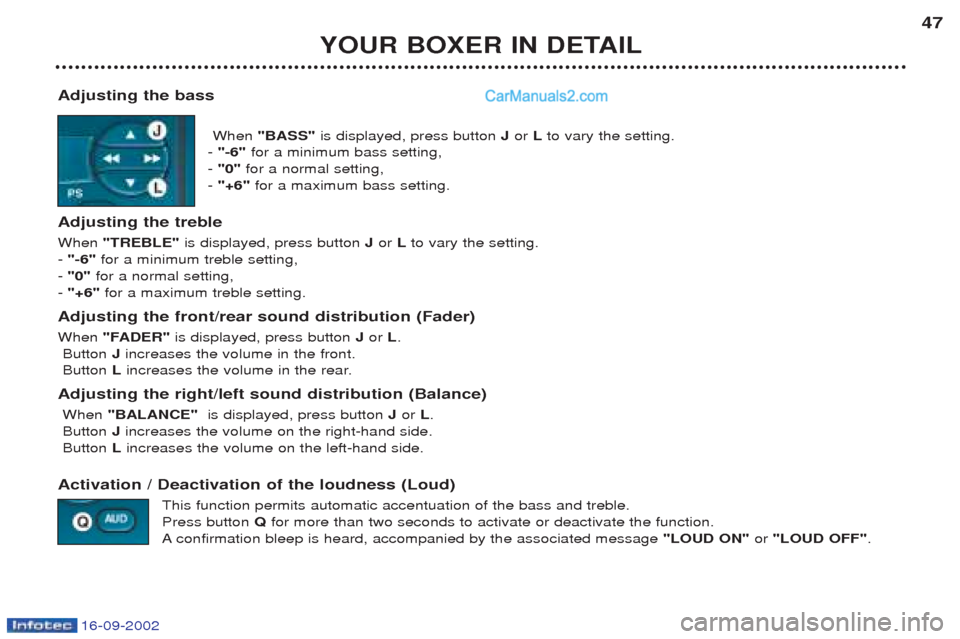
Adjusting the bass When "BASS" is displayed, press button Jor Lto vary the setting.
- "-6" for a minimum bass setting,
- "0" for a normal setting,
- "+6" for a maximum bass setting.
Adjusting the treble When "TREBLE" is displayed, press button Jor Lto vary the setting.
- "-6" for a minimum treble setting,
- "0" for a normal setting,
- "+6" for a maximum treble setting.
Adjusting the front/rear sound distribution (Fader)When "FADER" is displayed, press button Jor L.
Button Jincreases the volume in the front.
Button Lincreases the volume in the rear.
Adjusting the right/left sound distribution (Balance) When "BALANCE" is displayed, press button Jor L.
Button Jincreases the volume on the right-hand side.
Button Lincreases the volume on the left-hand side.
Activation / Deactivation of the loudness (Loud) This function permits automatic accentuation of the bass and treble. Press button Qfor more than two seconds to activate or deactivate the function.
A confirmation bleep is heard, accompanied by the associated message "LOUD ON"or "LOUD OFF" .