RENAULT SCENIC 2010 J95 / 3.G Petrol Injection S3000 Injection Workshop Manual
Manufacturer: RENAULT, Model Year: 2010, Model line: SCENIC, Model: RENAULT SCENIC 2010 J95 / 3.GPages: 230, PDF Size: 0.92 MB
Page 171 of 230
PETROL INJECTION
Fault finding - Interpretation of statuses
17B
17B - 171
PETROL INJECTION
Fault finding - Interpretation of statuses
17B
17B - 171V9 MR-372-J84-17B050$611.mif
S3000 Injection
Program No.: AD
Vdiag No.: 4C / 54
ET042
(CONTINUED 1)
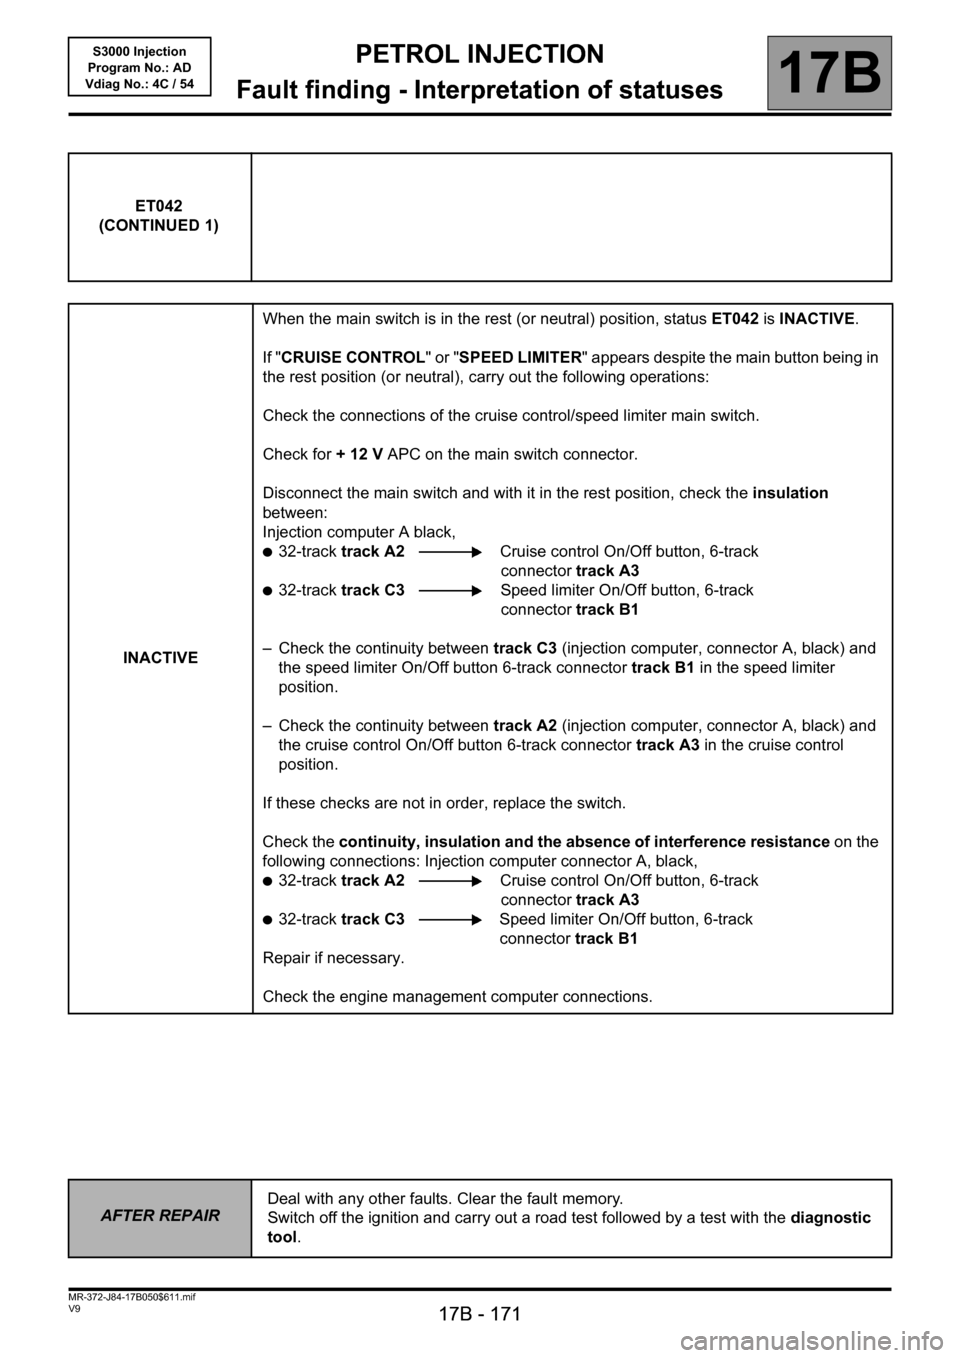
INACTIVEWhen the main switch is in the rest (or neutral) position, status ET042 is INACTIVE.
If "CRUISE CONTROL" or "SPEED LIMITER" appears despite the main button being in
the rest position (or neutral), carry out the following operations:
Check the connections of the cruise control/speed limiter main switch.
Check for + 12 V APC on the main switch connector.
Disconnect the main switch and with it in the rest position, check the insulation
between:
Injection computer A black,
●32-track track A2 Cruise control On/Off button, 6-track
connector track A3
●32-track track C3 Speed limiter On/Off button, 6-track
connector track B1
– Check the continuity between track C3 (injection computer, connector A, black) and
the speed limiter On/Off button 6-track connector track B1 in the speed limiter
position.
– Check the continuity between track A2 (injection computer, connector A, black) and
the cruise control On/Off button 6-track connector track A3 in the cruise control
position.
If these checks are not in order, replace the switch.
Check the continuity, insulation and the absence of interference resistance on the
following connections: Injection computer connector A, black,
●32-track track A2 Cruise control On/Off button, 6-track
connector track A3
●32-track track C3 Speed limiter On/Off button, 6-track
connector track B1
Repair if necessary.
Check the engine management computer connections.
AFTER REPAIRDeal with any other faults. Clear the fault memory.
Switch off the ignition and carry out a road test followed by a test with the diagnostic
tool.
Page 172 of 230
PETROL INJECTION
Fault finding - Interpretation of statuses
17B
17B - 172
PETROL INJECTION
Fault finding - Interpretation of statuses
17B
17B - 172V9 MR-372-J84-17B050$611.mif
S3000 Injection
Program No.: AD
Vdiag No.: 4C / 54
ET042
(CONTINUED 2)
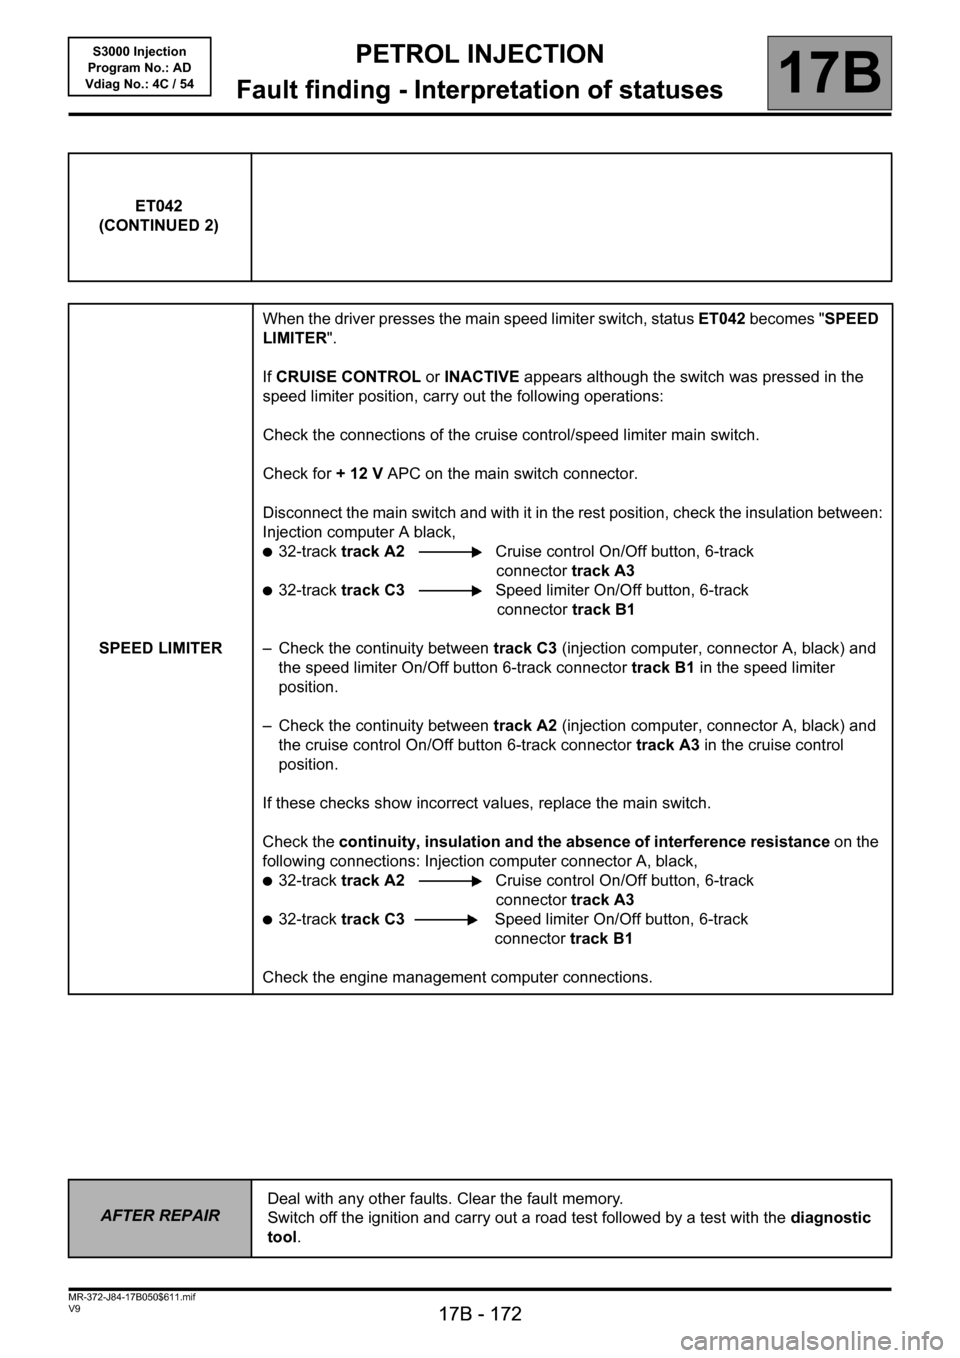
SPEED LIMITERWhen the driver presses the main speed limiter switch, status ET042 becomes "SPEED
LIMITER".
If CRUISE CONTROL or INACTIVE appears although the switch was pressed in the
speed limiter position, carry out the following operations:
Check the connections of the cruise control/speed limiter main switch.
Check for + 12 V APC on the main switch connector.
Disconnect the main switch and with it in the rest position, check the insulation between:
Injection computer A black,
●32-track track A2 Cruise control On/Off button, 6-track
connector track A3
●32-track track C3 Speed limiter On/Off button, 6-track
connector track B1
– Check the continuity between track C3 (injection computer, connector A, black) and
the speed limiter On/Off button 6-track connector track B1 in the speed limiter
position.
– Check the continuity between track A2 (injection computer, connector A, black) and
the cruise control On/Off button 6-track connector track A3 in the cruise control
position.
If these checks show incorrect values, replace the main switch.
Check the continuity, insulation and the absence of interference resistance on the
following connections: Injection computer connector A, black,
●32-track track A2 Cruise control On/Off button, 6-track
connector track A3
●32-track track C3Speed limiter On/Off button, 6-track
connector track B1
Check the engine management computer connections.
AFTER REPAIRDeal with any other faults. Clear the fault memory.
Switch off the ignition and carry out a road test followed by a test with the diagnostic
tool.
Page 173 of 230
PETROL INJECTION
Fault finding - Interpretation of statuses
17B
17B - 173
PETROL INJECTION
Fault finding - Interpretation of statuses
17B
17B - 173V9 MR-372-J84-17B050$611.mif
S3000 Injection
Program No.: AD
Vdiag No.: 4C / 54
ET042
(CONTINUED 3)
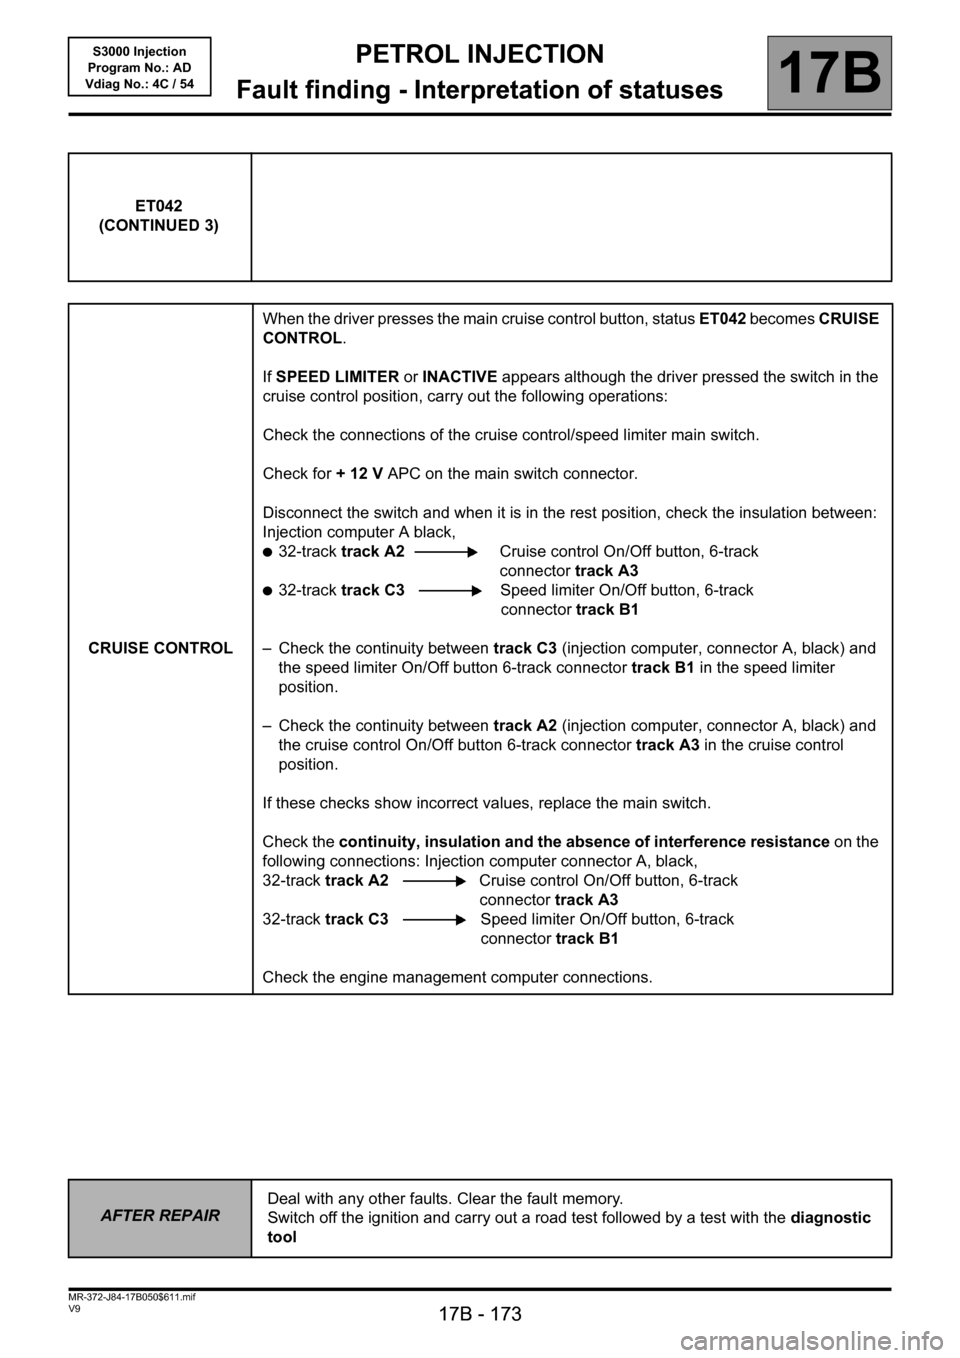
CRUISE CONTROLWhen the driver presses the main cruise control button, status ET042 becomes CRUISE
CONTROL.
If SPEED LIMITER or INACTIVE appears although the driver pressed the switch in the
cruise control position, carry out the following operations:
Check the connections of the cruise control/speed limiter main switch.
Check for + 12 V APC on the main switch connector.
Disconnect the switch and when it is in the rest position, check the insulation between:
Injection computer A black,
●32-track track A2 Cruise control On/Off button, 6-track
connector track A3
●32-track track C3 Speed limiter On/Off button, 6-track
connector track B1
– Check the continuity between track C3 (injection computer, connector A, black) and
the speed limiter On/Off button 6-track connector track B1 in the speed limiter
position.
– Check the continuity between track A2 (injection computer, connector A, black) and
the cruise control On/Off button 6-track connector track A3 in the cruise control
position.
If these checks show incorrect values, replace the main switch.
Check the continuity, insulation and the absence of interference resistance on the
following connections: Injection computer connector A, black,
32-track track A2 Cruise control On/Off button, 6-track
connector track A3
32-track track C3 Speed limiter On/Off button, 6-track
connector track B1
Check the engine management computer connections.
AFTER REPAIRDeal with any other faults. Clear the fault memory.
Switch off the ignition and carry out a road test followed by a test with the diagnostic
tool
Page 174 of 230
PETROL INJECTION
Fault finding - Interpretation of statuses
17B
17B - 174
PETROL INJECTION
Fault finding - Interpretation of statuses
17B
17B - 174V9 MR-372-J84-17B050$611.mif
S3000 Injection
Program No.: AD
Vdiag No.: 4C / 54
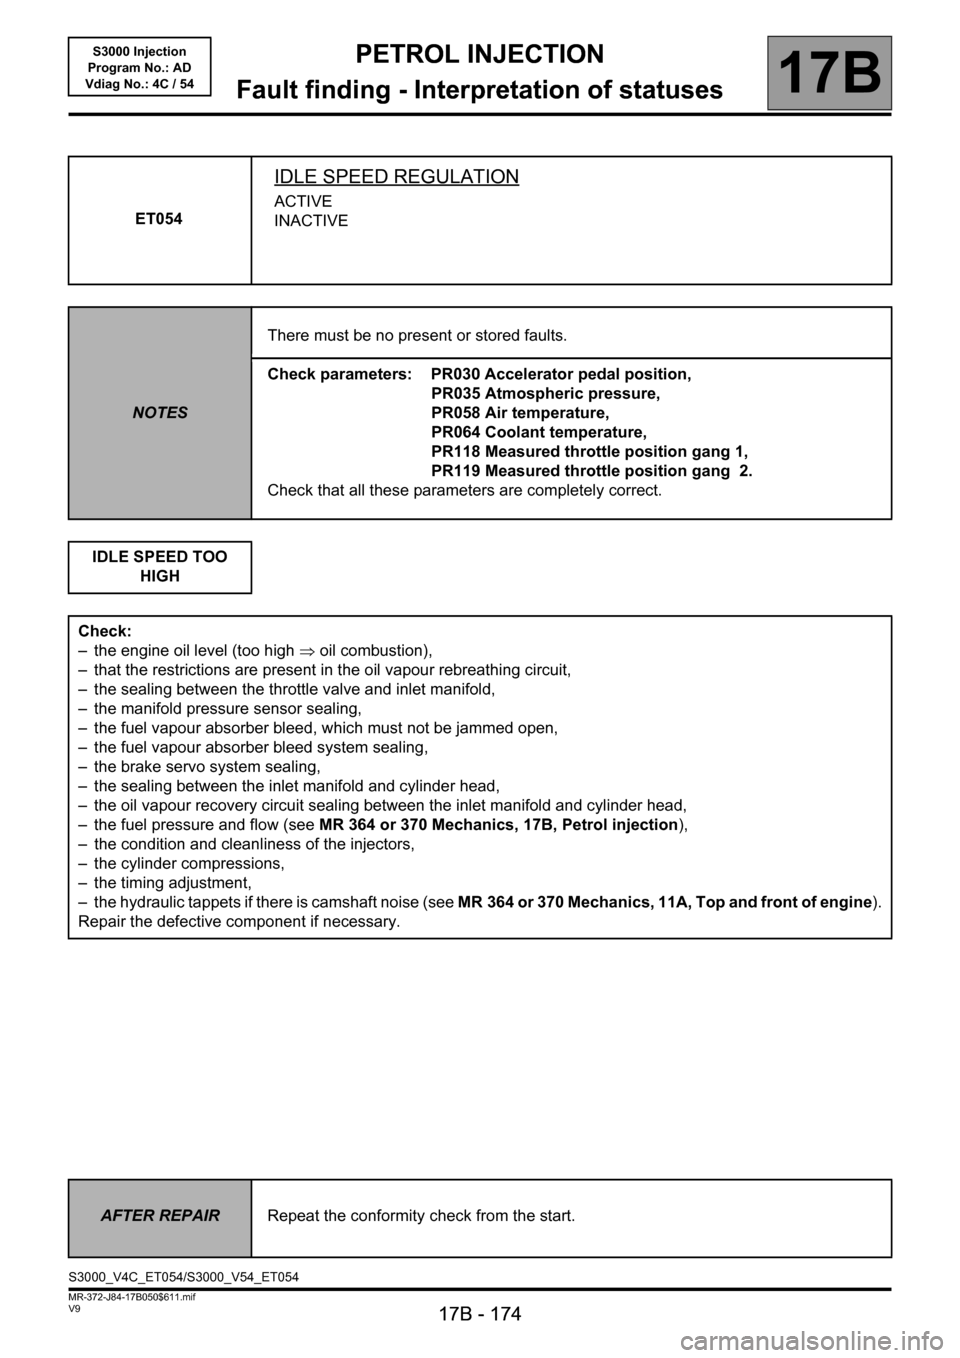
ET054
IDLE SPEED REGULATION
ACTIVE
INACTIVE
NOTESThere must be no present or stored faults.
Check parameters: PR030 Accelerator pedal position,
PR035 Atmospheric pressure,
PR058 Air temperature,
PR064 Coolant temperature,
PR118 Measured throttle position gang 1,
PR119 Measured throttle position gang 2.
Check that all these parameters are completely correct.
IDLE SPEED TOO
HIGH
Check:
– the engine oil level (too high ⇒ oil combustion),
– that the restrictions are present in the oil vapour rebreathing circuit,
– the sealing between the throttle valve and inlet manifold,
– the manifold pressure sensor sealing,
– the fuel vapour absorber bleed, which must not be jammed open,
– the fuel vapour absorber bleed system sealing,
– the brake servo system sealing,
– the sealing between the inlet manifold and cylinder head,
– the oil vapour recovery circuit sealing between the inlet manifold and cylinder head,
– the fuel pressure and flow (see MR 364 or 370 Mechanics, 17B, Petrol injection),
– the condition and cleanliness of the injectors,
– the cylinder compressions,
– the timing adjustment,
– the hydraulic tappets if there is camshaft noise (see MR 364 or 370 Mechanics, 11A, Top and front of engine).
Repair the defective component if necessary.
AFTER REPAIRRepeat the conformity check from the start.
S3000_V4C_ET054/S3000_V54_ET054
Page 175 of 230
PETROL INJECTION
Fault finding - Interpretation of statuses
17B
17B - 175
PETROL INJECTION
Fault finding - Interpretation of statuses
17B
17B - 175V9 MR-372-J84-17B050$611.mif
S3000 Injection
Program No.: AD
Vdiag No.: 4C / 54
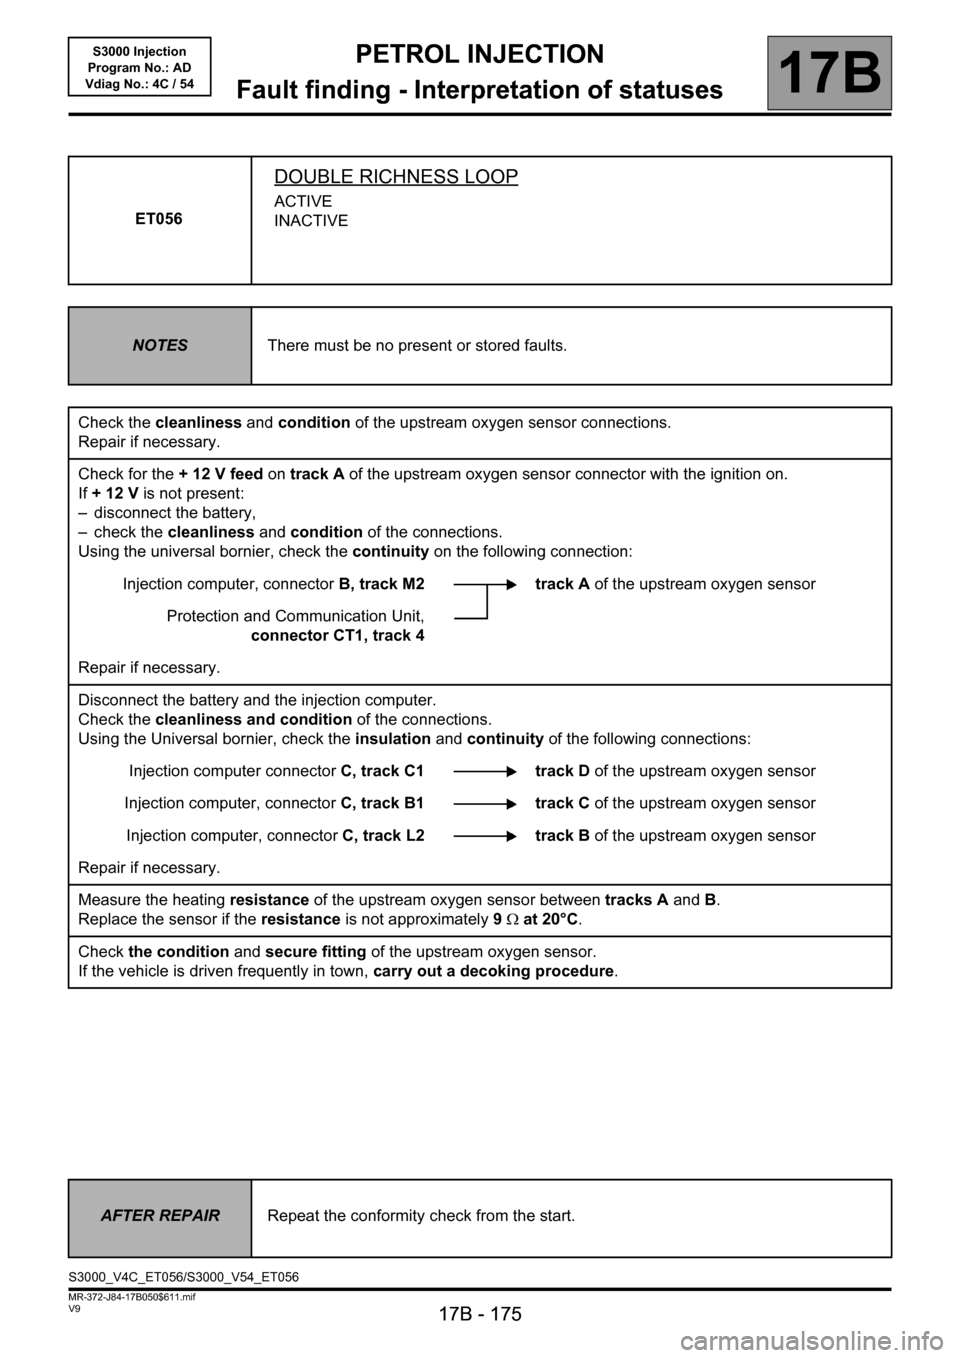
ET056
DOUBLE RICHNESS LOOP
ACTIVE
INACTIVE
NOTESThere must be no present or stored faults.
Check the cleanliness and condition of the upstream oxygen sensor connections.
Repair if necessary.
Check for the + 12 V feed on track A of the upstream oxygen sensor connector with the ignition on.
If +12V is not present:
– disconnect the battery,
– check the cleanliness and condition of the connections.
Using the universal bornier, check the continuity on the following connection:
Injection computer, connectorB, track M2 track A of the upstream oxygen sensor
Protection and Communication Unit,
connector CT1, track 4
Repair if necessary.
Disconnect the battery and the injection computer.
Check the cleanliness and condition of the connections.
Using the Universal bornier, check the insulation and continuity of the following connections:
Injection computer connectorC, track C1 track D of the upstream oxygen sensor
Injection computer, connectorC, track B1 track C of the upstream oxygen sensor
Injection computer, connectorC, track L2 track B of the upstream oxygen sensor
Repair if necessary.
Measure the heating resistance of the upstream oxygen sensor between tracks A and B.
Replace the sensor if the resistance is not approximately 9Ω at 20°C.
Check the condition and secure fitting of the upstream oxygen sensor.
If the vehicle is driven frequently in town, carry out a decoking procedure.
AFTER REPAIRRepeat the conformity check from the start.
S3000_V4C_ET056/S3000_V54_ET056
Page 176 of 230
PETROL INJECTION
Fault finding - Interpretation of statuses
17B
17B - 176
PETROL INJECTION
Fault finding - Interpretation of statuses
17B
17B - 176V9 MR-372-J84-17B050$611.mif
S3000 Injection
Program No.: AD
Vdiag No.: 4C / 54
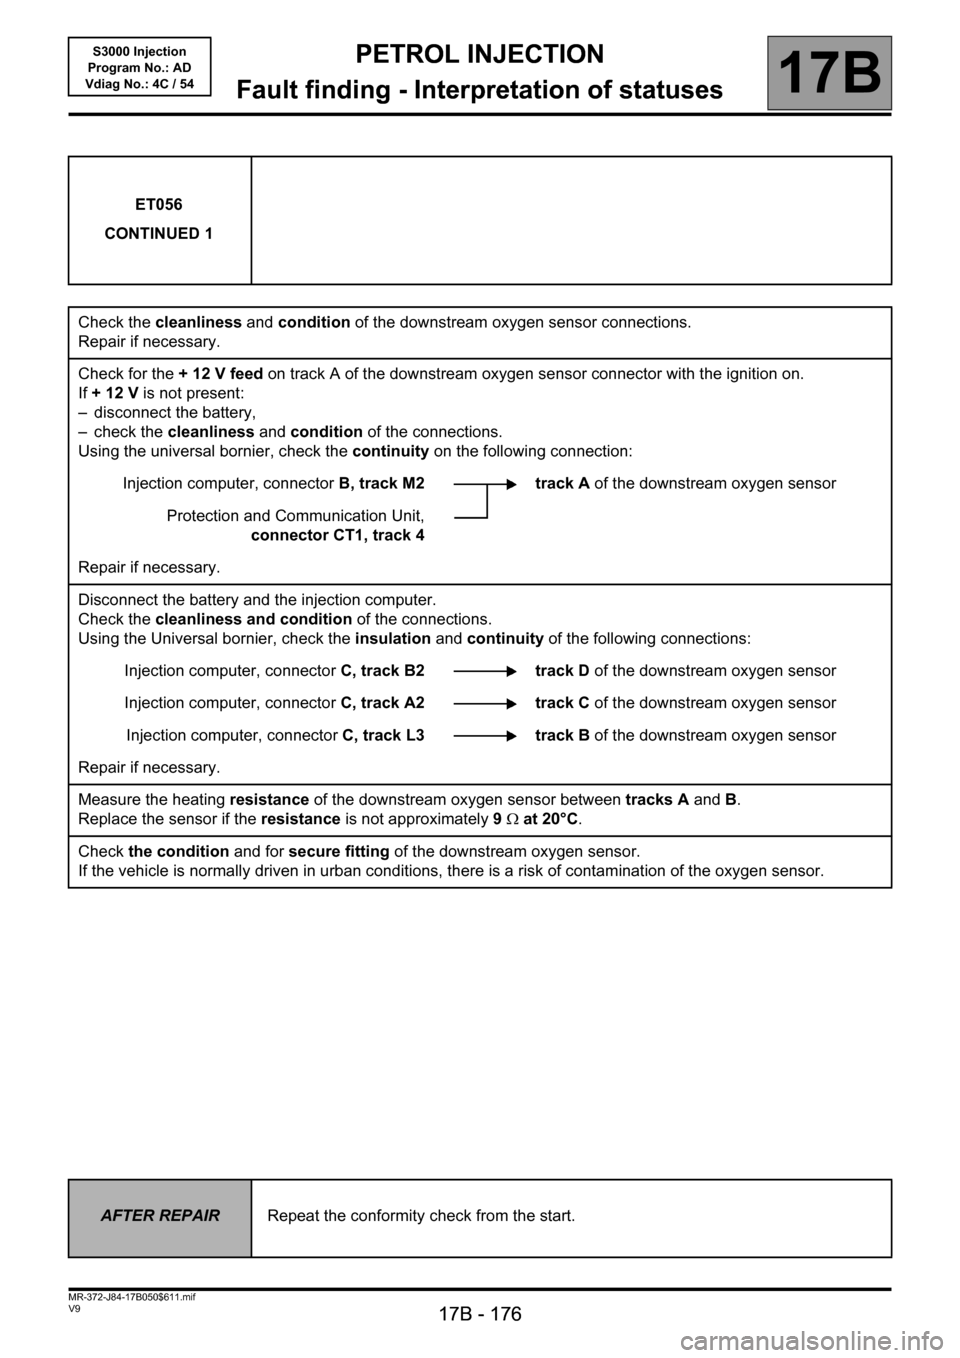
ET056
CONTINUED 1
Check the cleanliness and condition of the downstream oxygen sensor connections.
Repair if necessary.
Check for the + 12 V feed on track A of the downstream oxygen sensor connector with the ignition on.
If +12V is not present:
– disconnect the battery,
– check the cleanliness and condition of the connections.
Using the universal bornier, check the continuity on the following connection:
Injection computer, connectorB, track M2 track A of the downstream oxygen sensor
Protection and Communication Unit,
connector CT1, track 4
Repair if necessary.
Disconnect the battery and the injection computer.
Check the cleanliness and condition of the connections.
Using the Universal bornier, check the insulation and continuity of the following connections:
Injection computer, connectorC, track B2 track D of the downstream oxygen sensor
Injection computer, connectorC, track A2 track C of the downstream oxygen sensor
Injection computer, connectorC, track L3 track B of the downstream oxygen sensor
Repair if necessary.
Measure the heating resistance of the downstream oxygen sensor between tracks A and B.
Replace the sensor if the resistance is not approximately 9Ω at 20°C.
Check the condition and for secure fitting of the downstream oxygen sensor.
If the vehicle is normally driven in urban conditions, there is a risk of contamination of the oxygen sensor.
AFTER REPAIRRepeat the conformity check from the start.
Page 177 of 230

PETROL INJECTION
Fault finding - Interpretation of statuses
17B
17B - 177
PETROL INJECTION
Fault finding - Interpretation of statuses
17B
17B - 177V9 MR-372-J84-17B050$611.mif
S3000 Injection
Program No.: AD
Vdiag No.: 4C / 54
ET056
CONTINUED 2
Check:
– the condition of the air filter,
– that the air inlet circuit is not blocked,
– the condition and conformity of the spark plugs,
– the sealing between the throttle valve and inlet manifold,
– the manifold pressure sensor sealing,
– the fuel vapour absorber bleed, which must not be jammed open,
– the fuel vapour absorber bleed system sealing,
– the brake servo system sealing,
– the cylinder head oil vapour recovery system sealing,
– the sealing between the inlet manifold and cylinder head,
– the exhaust pipe sealing between the cylinder head and catalytic converter.
– the fuel flow rate and pressure.
If the idle speed is not stable, check:
– the timing adjustment,
– the hydraulic tappets if there is camshaft noise (see MR 364 or 370 Mechanics, 11A, Top and front of engine),
– the cylinder compressions.
Drive the vehicle to check the repair.
Repair the defective components.
AFTER REPAIRRepeat the conformity check from the start.
Page 178 of 230
PETROL INJECTION
Fault finding - Interpretation of statuses
17B
17B - 178
PETROL INJECTION
Fault finding - Interpretation of statuses
17B
17B - 178V9 MR-372-J84-17B050$611.mif
S3000 Injection
Program No.: AD
Vdiag No.: 4C / 54
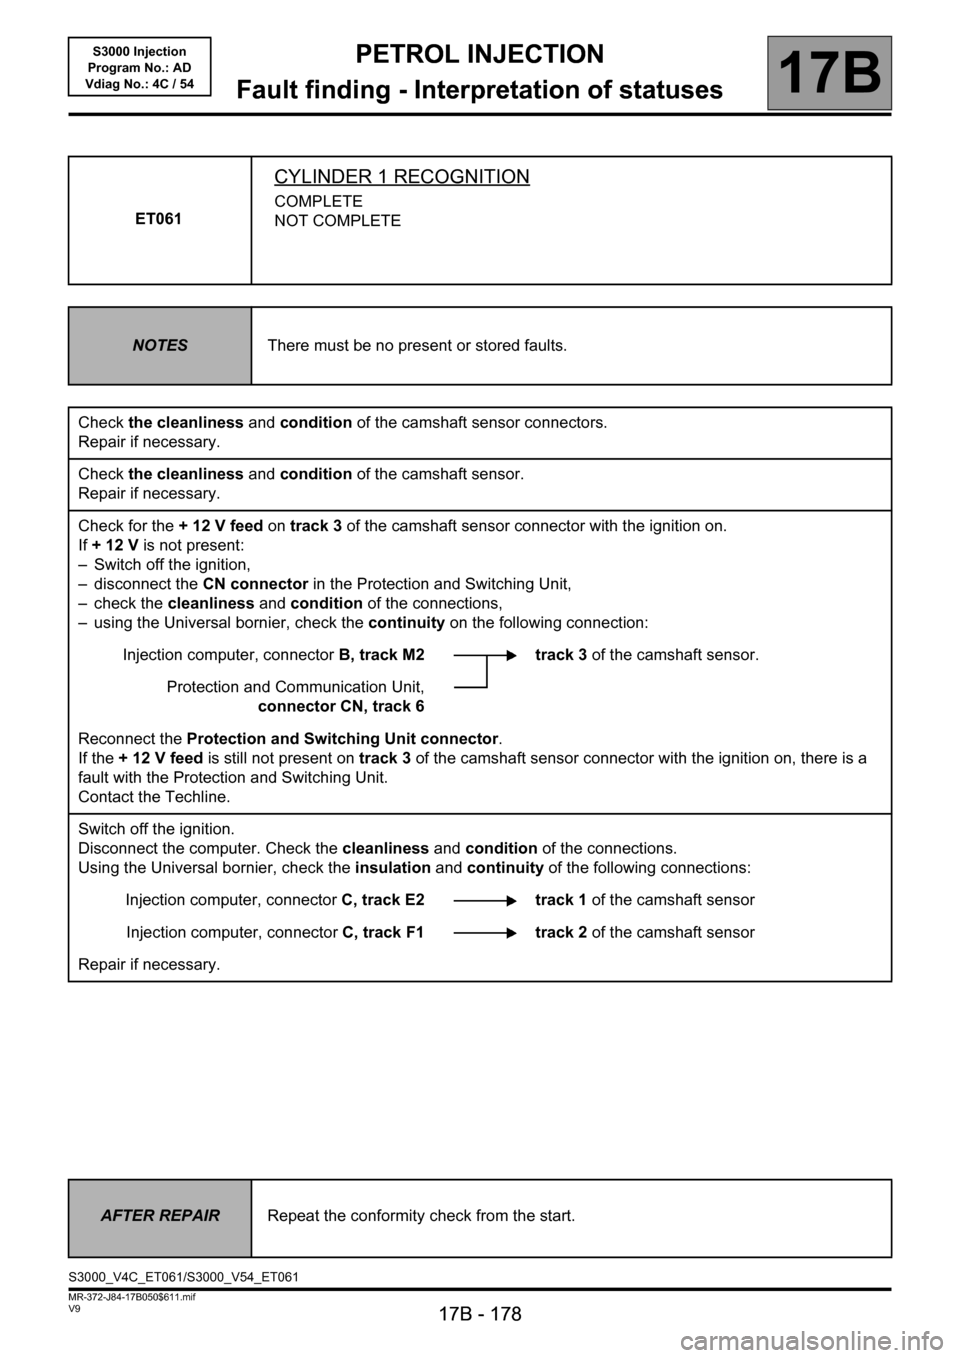
ET061
CYLINDER 1 RECOGNITION
COMPLETE
NOT COMPLETE
NOTESThere must be no present or stored faults.
Check the cleanliness and condition of the camshaft sensor connectors.
Repair if necessary.
Check the cleanliness and condition of the camshaft sensor.
Repair if necessary.
Check for the + 12 V feed on track 3 of the camshaft sensor connector with the ignition on.
If +12V is not present:
– Switch off the ignition,
– disconnect the CN connector in the Protection and Switching Unit,
– check the cleanliness and condition of the connections,
– using the Universal bornier, check the continuity on the following connection:
Injection computer, connectorB, track M2 track 3 of the camshaft sensor.
Protection and Communication Unit,
connector CN, track 6
Reconnect the Protection and Switching Unit connector.
If the + 12 V feed is still not present on track 3 of the camshaft sensor connector with the ignition on, there is a
fault with the Protection and Switching Unit.
Contact the Techline.
Switch off the ignition.
Disconnect the computer. Check the cleanliness and condition of the connections.
Using the Universal bornier, check the insulation and continuity of the following connections:
Injection computer, connectorC, track E2 track 1 of the camshaft sensor
Injection computer, connectorC, track F1 track 2 of the camshaft sensor
Repair if necessary.
AFTER REPAIRRepeat the conformity check from the start.
S3000_V4C_ET061/S3000_V54_ET061
Page 179 of 230
PETROL INJECTION
Fault finding - Interpretation of statuses
17B
17B - 179
PETROL INJECTION
Fault finding - Interpretation of statuses
17B
17B - 179V9 MR-372-J84-17B050$611.mif
S3000 Injection
Program No.: AD
Vdiag No.: 4C / 54
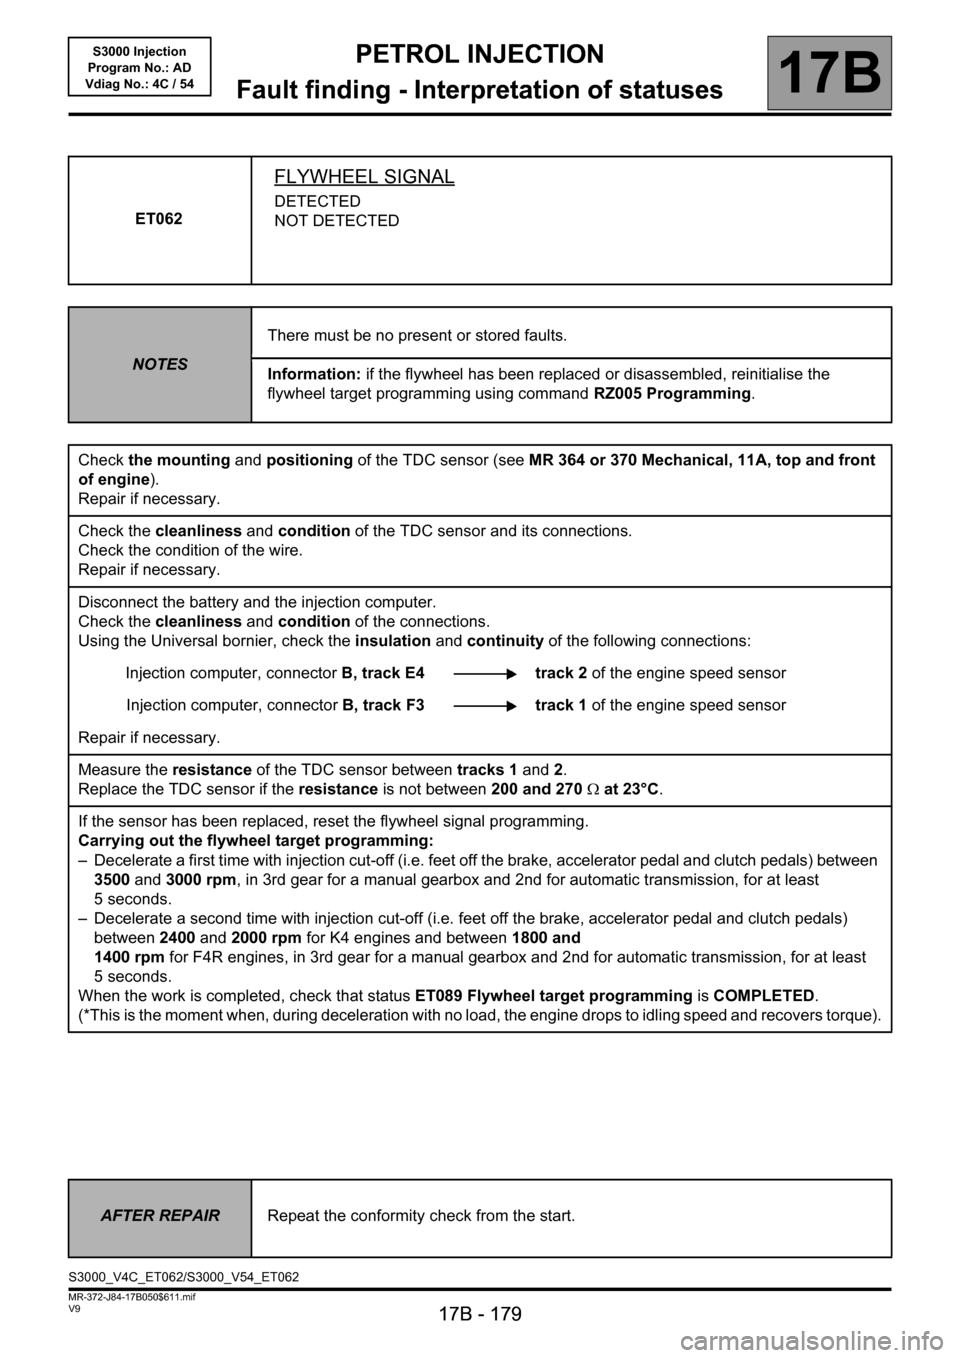
ET062
FLYWHEEL SIGNAL
DETECTED
NOT DETECTED
NOTESThere must be no present or stored faults.
Information: if the flywheel has been replaced or disassembled, reinitialise the
flywheel target programming using command RZ005 Programming.
Check the mounting and positioning of the TDC sensor (see MR 364 or 370 Mechanical, 11A, top and front
of engine).
Repair if necessary.
Check the cleanliness and condition of the TDC sensor and its connections.
Check the condition of the wire.
Repair if necessary.
Disconnect the battery and the injection computer.
Check the cleanliness and condition of the connections.
Using the Universal bornier, check the insulation and continuity of the following connections:
Injection computer, connectorB, track E4 track 2 of the engine speed sensor
Injection computer, connectorB, track F3 track 1 of the engine speed sensor
Repair if necessary.
Measure the resistance of the TDC sensor between tracks 1 and 2.
Replace the TDC sensor if the resistance is not between 200 and 270Ω at 23°C.
If the sensor has been replaced, reset the flywheel signal programming.
Carrying out the flywheel target programming:
– Decelerate a first time with injection cut-off (i.e. feet off the brake, accelerator pedal and clutch pedals) between
3500 and 3000 rpm, in 3rd gear for a manual gearbox and 2nd for automatic transmission, for at least
5 seconds.
– Decelerate a second time with injection cut-off (i.e. feet off the brake, accelerator pedal and clutch pedals)
between 2400 and 2000 rpm for K4 engines and between 1800 and
1400 rpm for F4R engines, in 3rd gear for a manual gearbox and 2nd for automatic transmission, for at least
5 seconds.
When the work is completed, check that status ET089 Flywheel target programming is COMPLETED.
(*This is the moment when, during deceleration with no load, the engine drops to idling speed and recovers torque).
AFTER REPAIRRepeat the conformity check from the start.
S3000_V4C_ET062/S3000_V54_ET062
Page 180 of 230
PETROL INJECTION
Fault finding - Interpretation of statuses
17B
17B - 180
PETROL INJECTION
Fault finding - Interpretation of statuses
17B
17B - 180V9 MR-372-J84-17B050$611.mif
S3000 Injection
Program No.: AD
Vdiag No.: 4C / 54
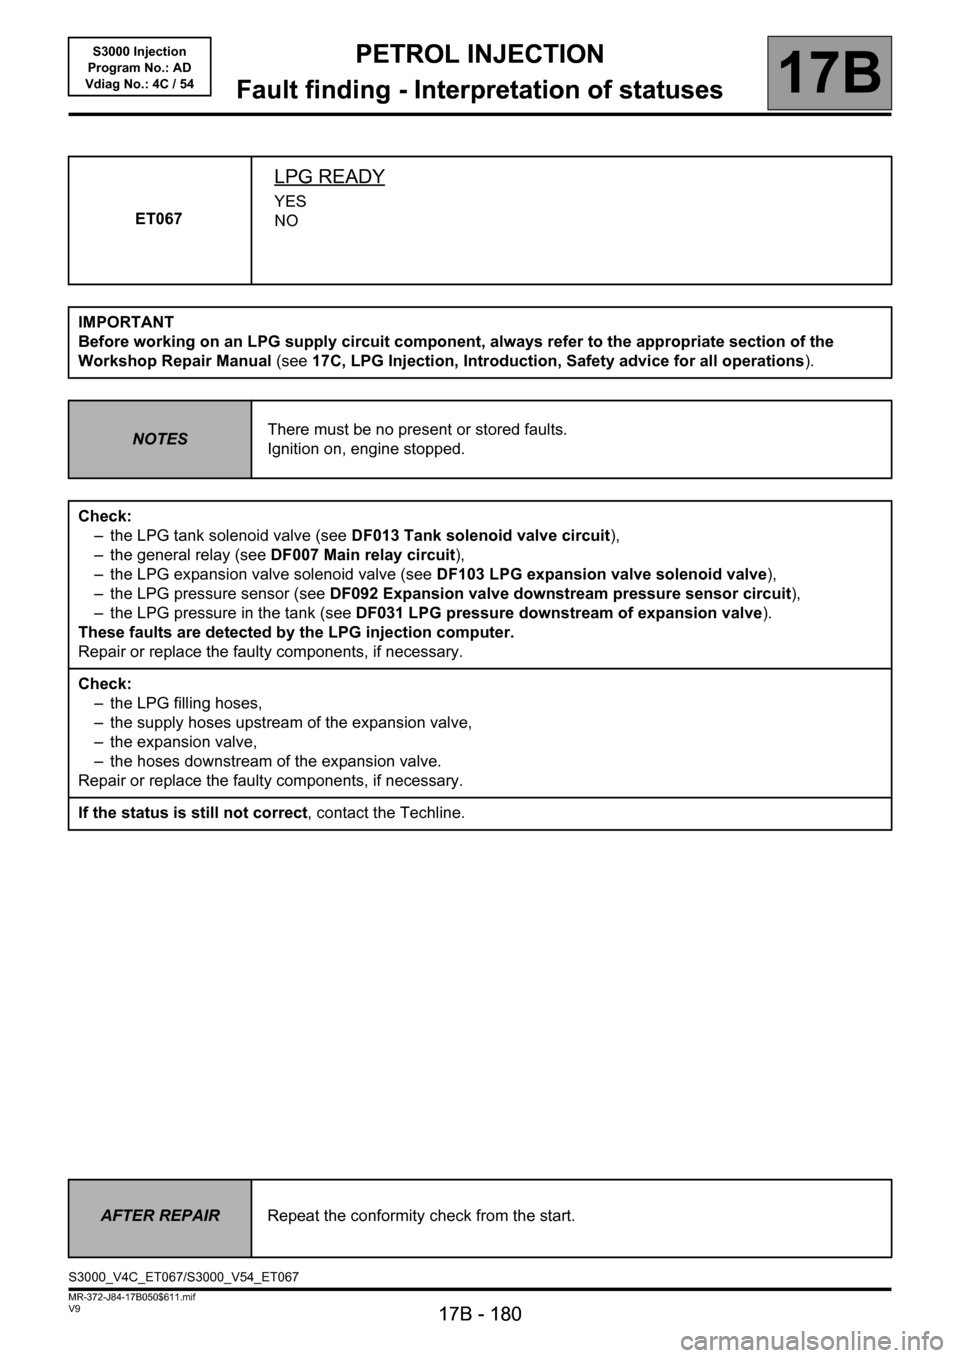
ET067
LPG READY
YES
NO
IMPORTANT
Before working on an LPG supply circuit component, always refer to the appropriate section of the
Workshop Repair Manual (see17C, LPG Injection, Introduction, Safety advice for all operations).
NOTESThere must be no present or stored faults.
Ignition on, engine stopped.
Check:
– the LPG tank solenoid valve (see DF013 Tank solenoid valve circuit),
– the general relay (see DF007 Main relay circuit),
– the LPG expansion valve solenoid valve (see DF103 LPG expansion valve solenoid valve),
– the LPG pressure sensor (see DF092 Expansion valve downstream pressure sensor circuit),
– the LPG pressure in the tank (see DF031 LPG pressure downstream of expansion valve).
These faults are detected by the LPG injection computer.
Repair or replace the faulty components, if necessary.
Check:
– the LPG filling hoses,
– the supply hoses upstream of the expansion valve,
– the expansion valve,
– the hoses downstream of the expansion valve.
Repair or replace the faulty components, if necessary.
If the status is still not correct, contact the Techline.
AFTER REPAIRRepeat the conformity check from the start.
S3000_V4C_ET067/S3000_V54_ET067