Seat Toledo 2008 MEDIA SYSTEM 2.0
Manufacturer: SEAT, Model Year: 2008, Model line: Toledo, Model: Seat Toledo 2008Pages: 96, PDF Size: 3.72 MB
Page 81 of 96
NAV (navigation system) function selection button
80
ŌĆō Mark the first route section of the stretch of route you wish to exclude by turning the setting knob ŌćÆpage 3, fig. 1 .
ŌĆō Press the function button. Th e symbol next to the item
is marked as excluded and the function button changes to .
ŌĆō Mark the final route section of the stretch of route you wish to exclude.
ŌĆō Press the function button.
ŌĆō The route will be recalculated and the function button changes to .
ŌĆō Press in the information window to cancel an exclusion and include the route sections concerned in the route calculation
again.If you only wish to exclude part of a route section, proceed as described
below ŌćÆpage 85, ŌĆ£Entering route exclusions (congestion ahead)ŌĆØ.
Excluded route sections and traffic congestion are displayed on the map
ŌćÆ page 81, ŌĆ£Representation of traf fic congestion on the mapŌĆØ.
You can open the information window from any navigation menu except the
Navigation settings menu by pressing the button at the top right of the unit
ŌćÆ page 69.
During active route guidance, the final destination is displayed at the top of
the information window ŌćÆpage 79, fig. 71 . If you have also entered a stop-
over destination, this will be displayed above the final destination
ŌćÆ page 73.
Dynamic route guidance with TMC (Traffic Message Channel)
During dynamic navigation, traf fic information from the TMC
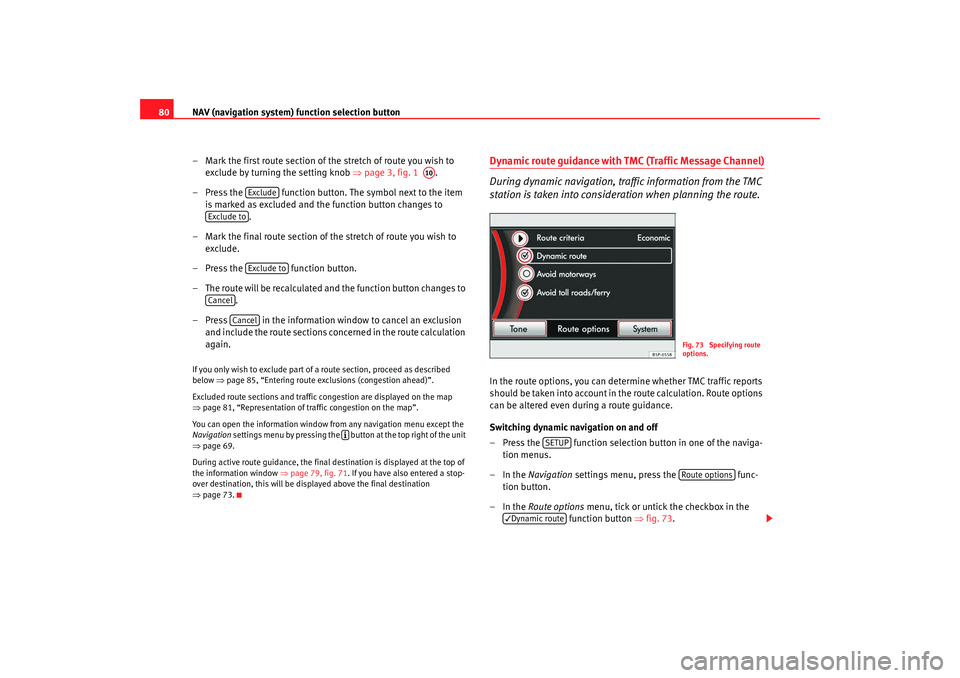
station is taken into consider ation when planning the route.In the route options, you can determine whether TMC traffic reports
should be taken into account in the route calculation. Route options
can be altered even during a route guidance.
Switching dynamic navigation on and off
ŌĆō Press the function selection button in one of the naviga-
tion menus.
ŌĆōIn the Navigation settings menu, press the func-
tion button.
ŌĆōIn the Route options menu, tick or untick the checkbox in the
function button ŌćÆfig. 73 .
A10
Exclude
Exclude to
Exclude to
Cancel
Cancel
’āŚ
Fig. 73 Specifying route
options.
SETUP
Route options
’éźDynamic route
media_system_ingles.book Seite 80 Donnerstag, 5. Februar 2009 3:31 15
Page 82 of 96
NAV (navigation system) function selection button 81
The current TMC traffic reports can be displayed in a list ŌćÆpage 84, ŌĆ£TRAF
function selection buttonŌĆØ.
Representation of traffic congestion on the map
Traffic problems received via TMC that affect your route will be displayed on
the map with a colour symbol. Traffic congestion that is not on the route is
shown on the map by a grey symbol.
Generally understood symbols are used to indicate the type of traffic conges-
tion (e.g. an ŌĆ£overturned vehicleŌĆØ for accident). The positioning of the TMC
symbol indicates which direction is affected by the congestion.
If there is reported congestion on the route, the affected route section is
coloured red. If the reported congestion is not on the route, the affected
section of road is coloured grey. If r oute guidance is not active, all traffic
congestion will be coloured grey.
Dynamic navigation
When dynamic navigation is switched on, you will be automatically diverted
during route guidance to avoid reported traffic congestion on your route if it
is calculated that the diversion will save time ŌćÆpage 81, ŌĆ£Conditions for
dynamic navigationŌĆØ.
Once a traffic report that is relevant for your route has been received, a
spoken announcement will be made to inform you that the route is being
recalculated to take traffic reports into account.
A similar announcement is also given if any traffic congestion that was taken
into account in the original route calc ulation has disappeared and it has now
become possible to take a more favourable route.
Conditions for dynamic navigation
TMC (Traffic Message Channel) is a digital radio data system for the constant
transmission of traffic reports.
The unit is constantly supplied with TMC traffic reports in the background,
provided that a TMC station can be received at the current location. The quality of the traffic reports sent depends on the radio station broad-
casting them. The reception of TMC traffic reports cannot be switched on or
off.
You do not have to listen to the TMC station.
The radio-navigation system can only process and store TMC traffic reports if
the unit has access to navigation data for the area you are currently travelling
through
ŌćÆpage 49.
The current TMC traffic reports can be viewed by pressing the function
selection button ŌćÆpage 84.
Note
ŌĆó
In some situations, you may find that a diversion based on the TMC infor-
mation does not save you time as th e alternative route is also congested.
ŌĆó
You can also exclude an upcoming section of the route manually if traffic
congestion ahead has not yet been recorded by TMC traffic reports
ŌćÆ page 79.
TRAF
media_system_ingles.book Seite 81 Donnerstag, 5. Februar 2009 3:31 15
Page 83 of 96
NAV (navigation system) function selection button
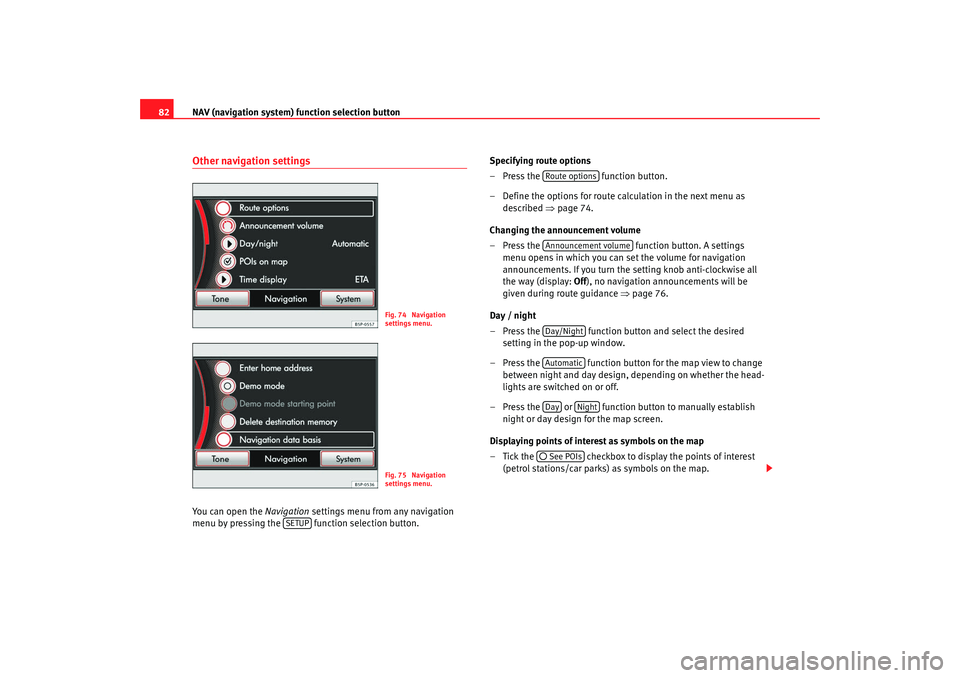
82Other navigation settingsYou can open the Navigation settings menu from any navigation
menu by pressing the function selection button. Specifying route options
ŌĆō Press the
function button.
ŌĆō Define the options for route calculation in the next menu as described ŌćÆpage 74.
Changing the announcement volume
ŌĆō Press the function button. A settings
menu opens in which you can set the volume for navigation
announcements. If you turn the setting knob anti-clockwise all
the way (display: Off), no navigation announcements will be
given during route guidance ŌćÆpage 76.
Day / night
ŌĆō Press the function button and select the desired setting in the pop-up window.
ŌĆō Press the function button for the map view to change between night and day design, depending on whether the head-
lights are switched on or off.
ŌĆō Press the or function button to manually establish night or day design for the map screen.
Displaying points of interest as symbols on the map
ŌĆō Tick the checkbox to display the points of interest (petrol stations/car parks) as symbols on the map.
Fig. 74 Navigation
settings menu.Fig. 75 Navigation
settings menu.
SETUP
Route optionsAnnouncement volumeDay/NightAutomaticDay
Night
’āźSee POIs
media_system_ingles.book Seite 82 Donnerstag, 5. Februar 2009 3:31 15
Page 84 of 96
NAV (navigation system) function selection button 83
Changing the time display
ŌĆō Press the function button and press an option to
select or in the pop-up window. During route
guidance, the selected time information is shown in the map
view ŌćÆpage 76, fig. 68 .
Defining or changing the home address
ŌĆō Press the function button ŌćÆpage 71,
ŌĆ£Storing or editing the home addressŌĆØ.
Starting a demonstration journey (Demo mode)
ŌĆō To switch demo mode on or off, press the function
button to tick or untick the checkbox ŌćÆpage 83, ŌĆ£Demo modeŌĆØ.
ŌĆō If demo mode is enabled, you can select a fictitious location when the vehicle is stationary by pressing the function button.
ŌĆō After pressing , proceed as described
for ŌĆ£normalŌĆØ entry of a destination ŌćÆpage 58.
ŌĆō If you have not selected a fictitious location, virtual route guid- ance will be started from the ve hicle's last determined position.
ŌĆō Once route guidance is activated, you must select by pressing it to start virtual route guidance.
Deleting the destination memory
ŌĆō Press the function button and then
select whether to delete the entire destination memory or just
the last destinations list ŌćÆpage 70. Setting the database for navigation
ŌĆō Press the
function button to view informa-
tion on the data medium being used for navigation or to copy
data from a navigation CD onto a memory card ŌćÆpage 49.
If the vehicle is moved and the unit can determine its current location by GPS
positioning, any manually entered location will be overwritten with the
current vehicle location.
Demo mode
In demo mode you may begin a virtual route guidance. The virtual route guid-
ance will be repeated upon reaching the fictitious destination. You can stop
virtual route guidance in the same wa y as ŌĆ£normalŌĆØ route guidance. To start
a ŌĆ£realŌĆØ route guidance, deactivate the demo mode or select when
starting route guidance.
If you selected a fictitious starting point for the virtual route guidance, it may
take a while for the unit to determine your real location again, depending on
the number of satellites currently available. The unit first has to reorient itself.
Drive a few yards.
Time display
ETA
Travel time
Enter home address
’āź Demo mode
Demo mode starting point
Demo mode starting point
Demo
Delete destination memory
Navigation database
Normal
media_system_ingles.book Seite 83 Donnerstag, 5. Februar 2009 3:31 15
Page 85 of 96
TRAF function selection button
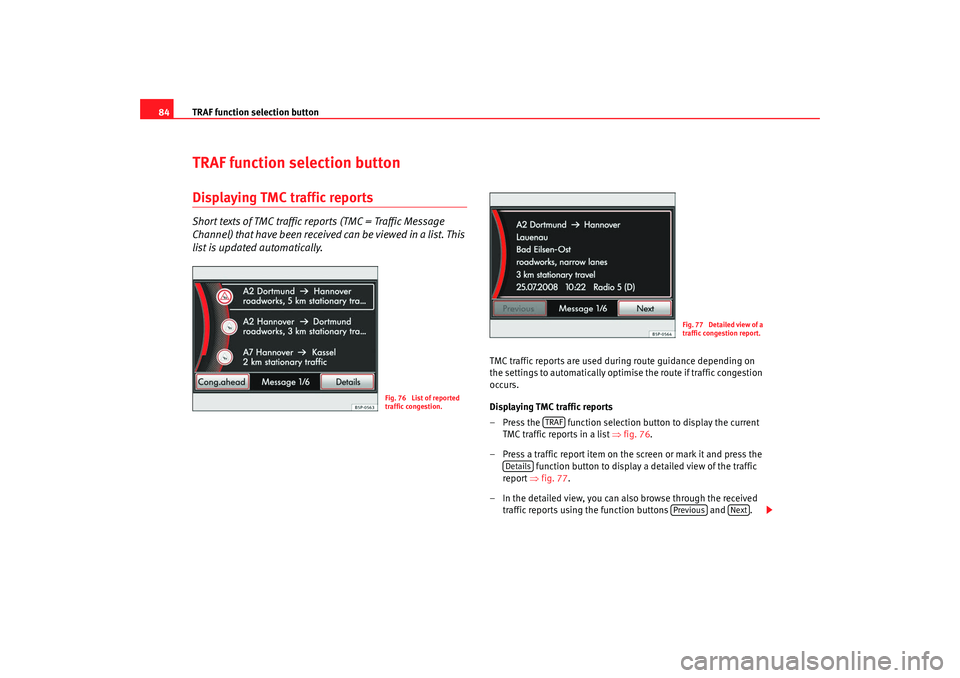
84TRAF function selection buttonDisplaying TMC traffic reportsShort texts of TMC traffic reports (TMC = Traffic Message
Channel) that have been received can be viewed in a list. This
list is updated automatically.
TMC traffic reports are used during route guidance depending on
the settings to automatically optimise the route if traffic congestion
occurs.
Displaying TMC traffic reports
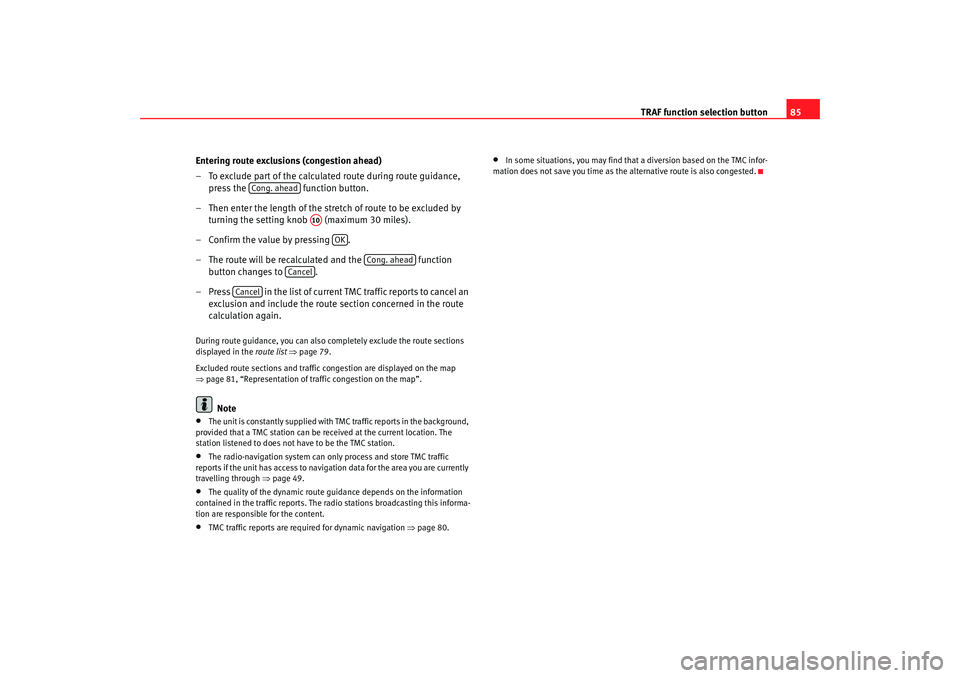
ŌĆō Press the function selection button to display the current
TMC traffic reports in a list ŌćÆ fig. 76.
ŌĆō Press a traffic report item on the screen or mark it and press the function button to display a detailed view of the traffic
report ŌćÆfig. 77 .
ŌĆō In the detailed view, you can also browse through the received traffic reports using the function buttons and .
Fig. 76 List of reported
traffic congestion.
Fig. 77 Detailed view of a
traffic congestion report.
TRAF
Details
Previous
Next
media_system_ingles.book Seite 84 Donnerstag, 5. Februar 2009 3:31 15
Page 86 of 96
TRAF function selection button85
Entering route exclusions (congestion ahead)
ŌĆō To exclude part of the calculated route during route guidance, press the function button.
ŌĆō Then enter the length of the stretch of route to be excluded by turning the setting knob (maximum 30 miles).
ŌĆō Confirm the value by pressing .
ŌĆō The route will be recalculated and the function
button changes to .
ŌĆō Press in the list of current TMC traffic reports to cancel an exclusion and include the route section concerned in the route
calculation again.
During route guidance, you can also co mpletely exclude the route sections
displayed in the route list ŌćÆ page 79.
Excluded route sections and traffic congestion are displayed on the map
ŌćÆ page 81, ŌĆ£Representation of traffic congestion on the mapŌĆØ.
Note
ŌĆó
The unit is constantly supplied with TMC traffic reports in the background,
provided that a TMC station can be received at the current location. The
station listened to does not have to be the TMC station.
ŌĆó
The radio-navigation system can only process and store TMC traffic
reports if the unit has access to navigation data for the area you are currently
travelling through ŌćÆpage 49.
ŌĆó
The quality of the dynamic route guidance depends on the information
contained in the traffic reports. The radio stations broadcasting this informa-
tion are responsible for the content.
ŌĆó
TMC traffic reports are required for dynamic navigation ŌćÆpage 80.
ŌĆó
In some situations, you may find that a diversion based on the TMC infor-
mation does not save you time as th e alternative route is also congested.
Cong. ahead
A10
OK
Cong. ahead
Cancel
Cancel
media_system_ingles.book Seite 85 Donnerstag, 5. Februar 2009 3:31 15
Page 87 of 96
System settings
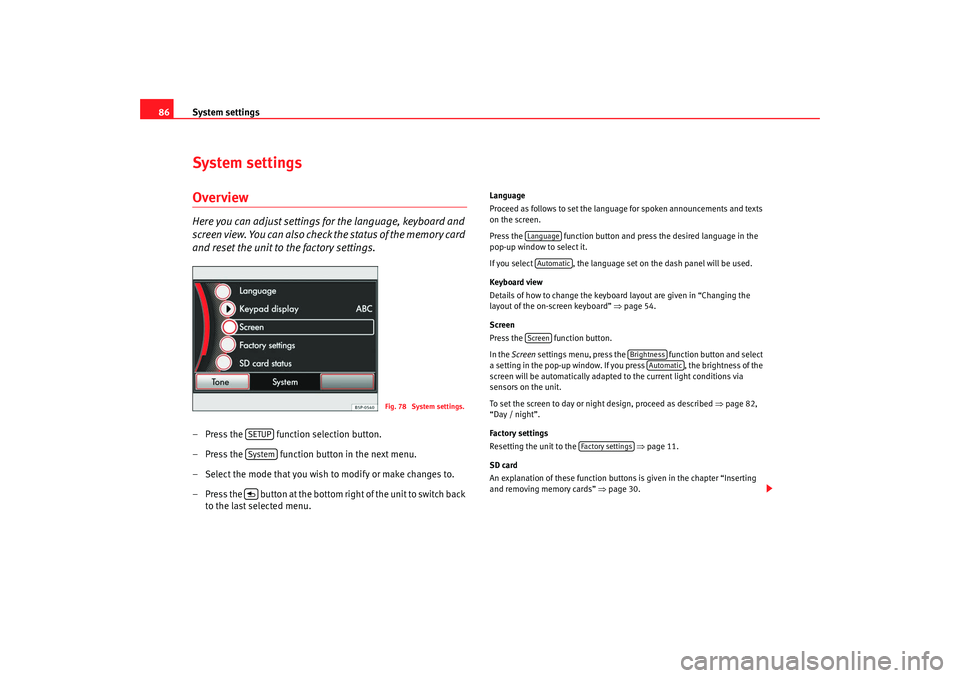
86System settingsOverviewHere you can adjust settings for the language, keyboard and
screen view. You can also check the status of the memory card
and reset the unit to the factory settings.ŌĆō Press the function selection button.
ŌĆō Press the function button in the next menu.
ŌĆō Select the mode that you wish to modify or make changes to.
ŌĆō Press the button at the bottom ri ght of the unit to switch back
to the last selected menu.
Language
Proceed as follows to set the language for spoken announcements and texts
on the screen.
Press the function button and pr ess the desired language in the
pop-up window to select it.
If you select , the language set on the dash panel will be used.
Keyboard view
Details of how to change the keyboard layout are given in ŌĆ£Changing the
layout of the on-screen keyboardŌĆØ ŌćÆpage 54.
Screen
Press the function button.
In the Screen settings menu, press the function button and select
a setting in the pop-up window. If you press , the brightness of the
screen will be automatically adapted to the current light conditions via
sensors on the unit.
To set the screen to day or night design, proceed as described ŌćÆpage 82,
ŌĆ£Day / nightŌĆØ.
Factory settings
Resetting the unit to the ŌćÆ page 11.
SD card
An explanation of these function buttons is given in the chapter ŌĆ£Inserting
and removing memory cardsŌĆØ ŌćÆpage 30.
Fig. 78 System settings.
SETUPSystem’é┐
LanguageAutomaticScreen
Brightness
Automatic
Factory settings
media_system_ingles.book Seite 86 Donnerstag, 5. Februar 2009 3:31 15
Page 88 of 96
System settings87
Note
The system of units used in the navigation menu (metric or imperial) is deter-
mined by the instrument panel. Follow the instructions given in the vehicle
wallet to change the system on units on the instrument panel.
media_system_ingles.book Seite 87 Donnerstag, 5. Februar 2009 3:31 15
Page 89 of 96
Anti-theft coding
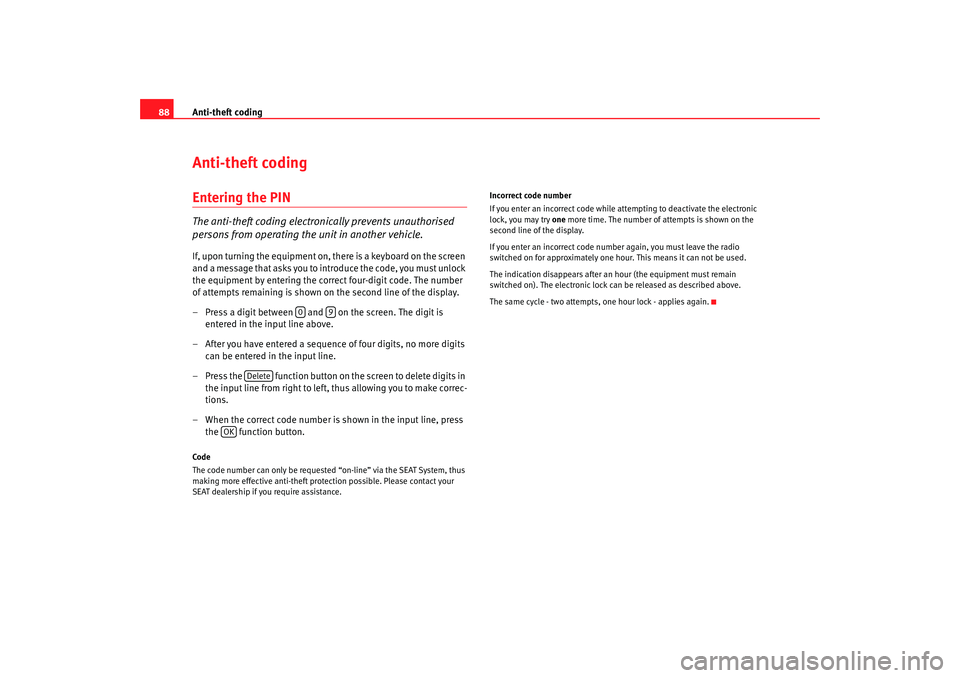
88Anti-theft codingEntering the PINThe anti-theft coding electronically prevents unauthorised
persons from operating the unit in another vehicle.If, upon turning the equipment on, there is a keyboard on the screen
and a message that asks you to introduce the code, you must unlock
the equipment by entering the correct four-digit code. The number
of attempts remaining is shown on the second line of the display.
ŌĆō Press a digit between and on the screen. The digit is entered in the input line above.
ŌĆō After you have entered a sequence of four digits, no more digits can be entered in the input line.
ŌĆō Press the function button on the screen to delete digits in the input line from right to left, thus allowing you to make correc-
tions.
ŌĆō When the correct code number is shown in the input line, press the function button.Code
The code number can only be requested ŌĆ£on-lineŌĆØ via the SEAT System, thus
making more effective anti-theft protection possible. Please contact your
SEAT dealership if you require assistance. Incorrect code number
If you enter an incorrect code while attempting to deactivate the electronic
lock, you may try
one more time. The number of attempts is shown on the
second line of the display.
If you enter an incorrect code numb er again, you must leave the radio
switched on for approximately one hour. This means it can not be used.
The indication disappears after an hour (the equipment must remain
switched on). The electr onic lock can be released as described above.
The same cycle - two attempts, one hour lock - applies again.
0
9
Delete
OK
media_system_ingles.book Seite 88 Donnerstag, 5. Februar 2009 3:31 15
Page 90 of 96
Index89
Index
AAddress entry . . . . . . . . . . . . . . . . . . . . . . . . . . . . 58
AM . . . . . . . . . . . . . . . . . . . . . . . . . . . . . . . . . . . . . 14
medium wave frequency band . . . . . . . . . . . 14
Anti-theft coding . . . . . . . . . . . . . . . . . . . . . . . . . 88
Audible navigation indications settings . . . . . . . . . . . . . . . . . . . . . . . . . . . . . 77
AUX additional AUX-IN socket . . . . . . . . . . . . . . . 45
adjusting . . . . . . . . . . . . . . . . . . . . . . . . . . . . 33
AUX2 socket . . . . . . . . . . . . . . . . . . . . . . . . . . 45
AUX-IN socket . . . . . . . . . . . . . . . . . . . . . . . . 32
Connecting to an audio source . . . . . . . . . . . 32
input volume . . . . . . . . . . . . . . . . . . . . . . . . . 33
output volume . . . . . . . . . . . . . . . . . . . . . . . . 33
Avoiding congestion with TMC automatic . . . . . . . . . . . . . . . . . . . . . . . . . . . . 81BBalance . . . . . . . . . . . . . . . . . . . . . . . . . . . . . . . . . 12
Bass . . . . . . . . . . . . . . . . . . . . . . . . . . . . . . . . . . . 12
Buttons . . . . . . . . . . . . . . . . . . . . . . . . . . . . . . . . . . 7CCar parkstart route guidance . . . . . . . . . . . . . . . . . . . 62 CD
CD-R . . . . . . . . . . . . . . . . . . . . . . . . . . . . . . . . 46
CD-RW . . . . . . . . . . . . . . . . . . . . . . . . . . . . . . . 46
cleaning . . . . . . . . . . . . . . . . . . . . . . . . . . . . . 45
Dual Disc . . . . . . . . . . . . . . . . . . . . . . . . . . . . 45
DVD-Plus . . . . . . . . . . . . . . . . . . . . . . . . . . . . 45
Flip Disc . . . . . . . . . . . . . . . . . . . . . . . . . . . . . 45
CD Mode requirements . . . . . . . . . . . . . . . . . . . . . . . . . 25
CD mode CD text . . . . . . . . . . . . . . . . . . . . . . . . . . . . . . 25
ejecting a CD . . . . . . . . . . . . . . . . . . . . . . . . . 29
inserting a CD . . . . . . . . . . . . . . . . . . . . . . . . 29
MP3 file requirements . . . . . . . . . . . . . . . . . . 26
MP3 playlist requirements . . . . . . . . . . . . . . 26
safety precautions . . . . . . . . . . . . . . . . . . . . . 45
CD player information for operating . . . . . . . . . . . . . . . 45
CD text . . . . . . . . . . . . . . . . . . . . . . . . . . . . . . . . . 25
Checkboxes . . . . . . . . . . . . . . . . . . . . . . . . . . . . . . 8
Cleaning a CD . . . . . . . . . . . . . . . . . . . . . . . . . . . . 45
Climate control display screen . . . . . . . . . . . . . . . . . . . . . . . . . . . . . . . . 8
Control elements . . . . . . . . . . . . . . . . . . . . . . . . . . 3
Convenience radio coding . . . . . . . . . . . . . . . . . . 6
Coordinates . . . . . . . . . . . . . . . . . . . . . . . . . . . . . 70
Copyright . . . . . . . . . . . . . . . . . . . . . . . . . . . . . . . 25 Cursor
entering characters . . . . . . . . . . . . . . . . . . . . 56
DData media . . . . . . . . . . . . . . . . . . . . . . . . . . . . . . 25
Demo modeNavigation . . . . . . . . . . . . . . . . . . . . . . . . . . . 83
Destination editing . . . . . . . . . . . . . . . . . . . . . . . . . . . . . . 65
entry . . . . . . . . . . . . . . . . . . . . . . . . . . . . . . . . 58
Destination address window . . . . . . . . . . . . . . . 59
Destination memory . . . . . . . . . . . . . . . . . . . . . . 65 deleting . . . . . . . . . . . . . . . . . . . . . . . . . . . . . 70
editing . . . . . . . . . . . . . . . . . . . . . . . . . . . . . . 67
Destination window . . . . . . . . . . . . . . . . . . . . . . . 59
Displaying altitude . . . . . . . . . . . . . . . . . . . . . . . 70
Driver assistance systems on-screen display . . . . . . . . . . . . . . . . . . . . . . 8
Dynamic navigation . . . . . . . . . . . . . . . . . . . . . . . 80EEntering a stopover destination . . . . . . . . . . . . . 73
Entering the PIN . . . . . . . . . . . . . . . . . . . . . . . . . . 88
EON (Enhanced Other Network) . . . . . . . . . . . . . 24
External audio source AUX-IN . . . . . . . . . . . . . . . . . . . . . . . . . . . . . . 32
media_system_ingles.book Seite 89 Donnerstag, 5. Februar 2009 3:31 15