torque SSANGYONG KORANDO 1997 Service Repair Manual
[x] Cancel search | Manufacturer: SSANGYONG, Model Year: 1997, Model line: KORANDO, Model: SSANGYONG KORANDO 1997Pages: 2053, PDF Size: 88.33 MB
Page 934 of 2053

SSAMGYONG MY2002
4A-14 HYDRAULIC BRAKES
KAA4A120
KAA4A130
KAA4A140
STOPLAMP SWITCH
Removal and Installation Procedure
1. Remove the stoplamp switch connector.
2. Remove the stoplamp switch.
3. Installation should follow the removal procedure
in the reverse order.
BRAKE PEDAL
Removal and Installation Procedure
1. Remove the stoplamp switch connector.
2. Remove the clevis pin and disconnect the brake
booster pushrod.
Installation Notice:
Install in the upper hole.
Install the snap pin fully in the hole of clevis
pin.
Apply the grease around the hold of clevis pin.
3. Remove the brake pedal mounting nut and remove
the brake pedal assembly.
Installation Notice
Tightening Torque 13 Nm (10 lb-ft)
4. Installation should follow the removal procedure
in the reverse order.
KAA4A070
3. Remove the rear bleeder valve from the caliper as
sembly.
Installation Notice
Tightening Torque 10 Nm (89 lb-ft)
Bleed the brake system. Refer to “Manual
Bleeding the Brakes” in this section.
Check the brake system for leaks.
4. Installation should follow the removal procedure in
the reverse order.
Page 938 of 2053

SSANGYONG MY2002
4B-2 MASTER CYLINDER
DESCRIPTION AND OPERATION
GENERAL DESCRIPTION
The master cylinder is designed for use in a parallel
split system. One front and one parallel to rear brakes
are served by the primary piston. The opposite front
and rear brakes are served by the secondary piston.
The master cylinder incorporates the functions of the
standard dual master cylinder, plus a low fluid level
indicator. The brake fluid level switch is attached under
the body of the plastic brake master cylinder reservoir.
Notice: Do not use lubricated shop air on the brake
parts, because oil will damage the rubber components.Important:•Replace all the components included in the repair
kits used to service the master cylinder.
Lubricate the rubber parts with clean brake fluid to
ease assembly.
If any hydraulic component is removed or discon-
nected, it may be necessary to bleed all or part of
the brake system. Refer to Section 4F, Antilock
Brake System and Traction Control System.
The torque values specified are for dry, unlubricated
fasteners.
Perform all service operations on a clean bench,
free from all traces of mineral oil.
Page 942 of 2053

SSANGYONG MY2002
4B-6 MASTER CYLINDER
YAD4A370
Remove the 1st piston and 2nd piston assembly
from the master cylinder assembly.
YAD4A380
YAD4A390
YAD4A400
Check the cylinder for excessive wear.
Notice:
Replace the cylinder assembly when there
occurs any damage or wear in the cylinder.
Clean the contaminated oil of the assembly.
Install the 1st piston and 2nd piston assembly
from the master cylinder assembly.
Installation Procedure
1. Install the retainer ring using the snap ring plier.
2. Install the master cylinder into the booster.
Installation Notice
Tightening Torque8 - 12 Nm
(71 - 106 lb-in)
Page 948 of 2053

POWER BOOSTER 4C-5
SSANGYONG MY2002
REPAIR INSTRUCTIONS
KAA4C030
KAA4A040
KAA4C050
ON-VEHICLE SERVICE
POWER BOOSTER ASSEMBLY
Removal and Installation Procedure
1. Remove the master cylinder. Refer to Section 4B,
Master Cylinder.
2. Remove the vacuum hose from the booster.
3. Remove the clevis pin and disconnect the pedal
and brake booster push rod.
Installation Notice:
•Apply the grease around the hole of clevis pin.
4. Remove the power booster mounting nuts and re-
move the booster from the dash panel.
Installation Notice
Tightening Torque 17 Nm (13 lb-ft)
Install the new gasket.
5. Installation should follow the removal procedure
in the reverse order.
Page 949 of 2053

SSANGYONG MY2002
4C-6 POWER BOOSTER
3. Remove the vacuum hose from the booster.
4. Installation should follow the removal procedure in
the reverse order.
VACUUM HOSE
Removal and Installation Procedure
1. Remove the vacuum hose connection bolt to the
intake manifold.
Installation Notice
2. Remove the vacuum hose retaining bolt located
on the intake manifold.
Installation Notice
KAA4C060
KAA4C070
KAA4C030
Tightening Torque 40 Nm (30 lb-ft)
Tightening Torque 13 Nm (10 lb-ft)
Page 952 of 2053

SSANGYONG MY2002
4D-2 FRONT BRAKES
DESCRIPTION AND OPERATION
GENERAL DESCRIPTION
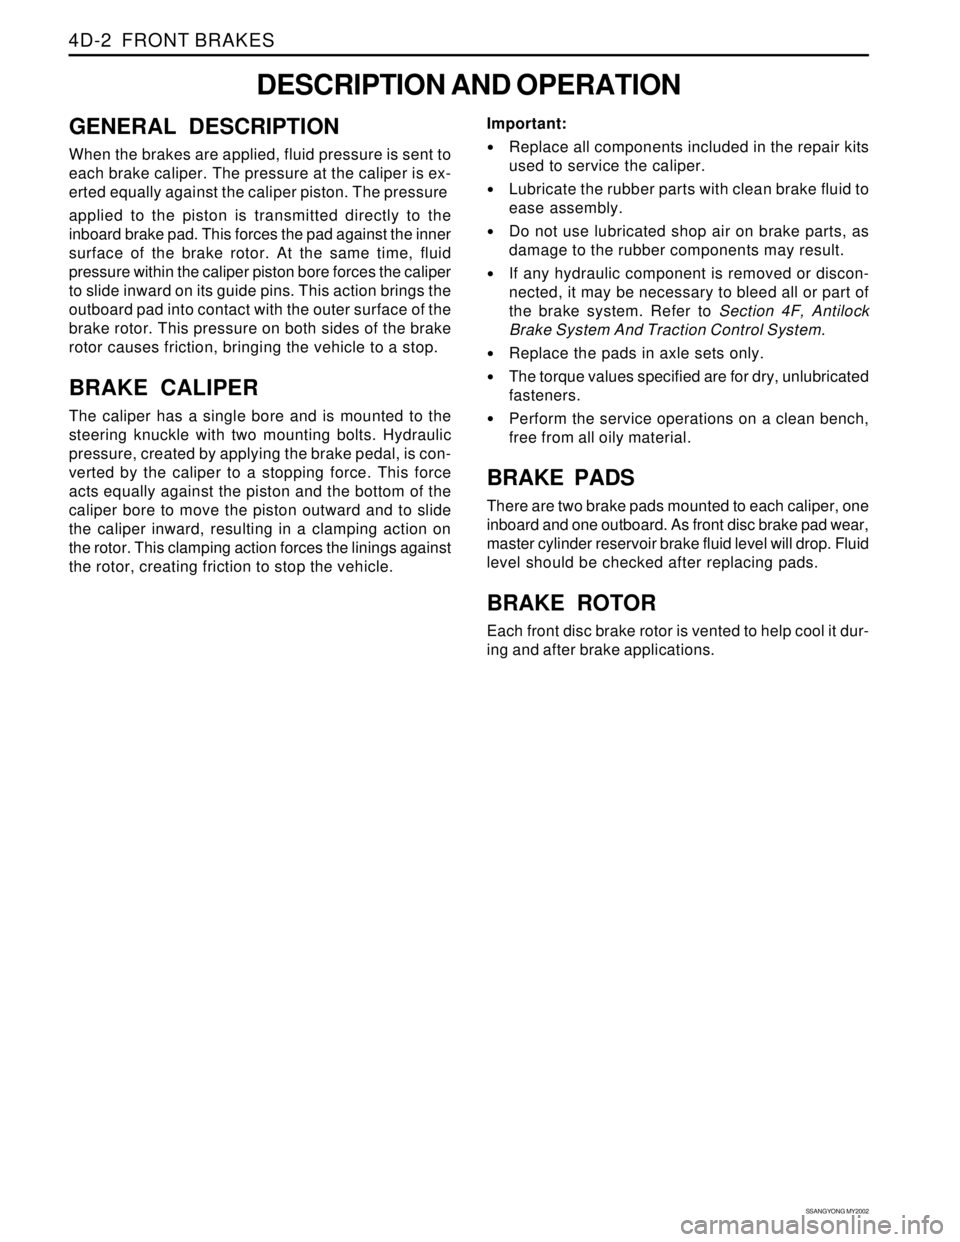
When the brakes are applied, fluid pressure is sent to
each brake caliper. The pressure at the caliper is ex-
erted equally against the caliper piston. The pressure
applied to the piston is transmitted directly to the
inboard brake pad. This forces the pad against the inner
surface of the brake rotor. At the same time, fluid
pressure within the caliper piston bore forces the caliper
to slide inward on its guide pins. This action brings the
outboard pad into contact with the outer surface of the
brake rotor. This pressure on both sides of the brake
rotor causes friction, bringing the vehicle to a stop.
BRAKE CALIPER
The caliper has a single bore and is mounted to the
steering knuckle with two mounting bolts. Hydraulic
pressure, created by applying the brake pedal, is con-
verted by the caliper to a stopping force. This force
acts equally against the piston and the bottom of the
caliper bore to move the piston outward and to slide
the caliper inward, resulting in a clamping action on
the rotor. This clamping action forces the linings against
the rotor, creating friction to stop the vehicle.Important:
•Replace all components included in the repair kits
used to service the caliper.
Lubricate the rubber parts with clean brake fluid to
ease assembly.
Do not use lubricated shop air on brake parts, as
damage to the rubber components may result.
If any hydraulic component is removed or discon-
nected, it may be necessary to bleed all or part of
the brake system. Refer to Section 4F, Antilock
Brake System And Traction Control System.
Replace the pads in axle sets only.
The torque values specified are for dry, unlubricated
fasteners.
Perform the service operations on a clean bench,
free from all oily material.
BRAKE PADS
There are two brake pads mounted to each caliper, one
inboard and one outboard. As front disc brake pad wear,
master cylinder reservoir brake fluid level will drop. Fluid
level should be checked after replacing pads.
BRAKE ROTOR
Each front disc brake rotor is vented to help cool it dur-
ing and after brake applications.
Page 956 of 2053

SSANGYONG MY2002
4D-6 FRONT BRAKES
KAA4D080
FRONT DISC BRAKE ROTOR
Removal and Installation Procedure
1. Raise and suitably support the vehicle.
2. Remove the front wheels. Refer to Section 2E,
Tires and Wheels.
3. Remove the hub bearing assembly. Refer to
Section 2C, Front Suspension.
4. Remove the front disc brake rotor.
5. Installation should follow the removal procedure in
the reverse order.
KAA4D040
REPAIR INSTRUCTIONS
ON-VEHICLE SERVICE
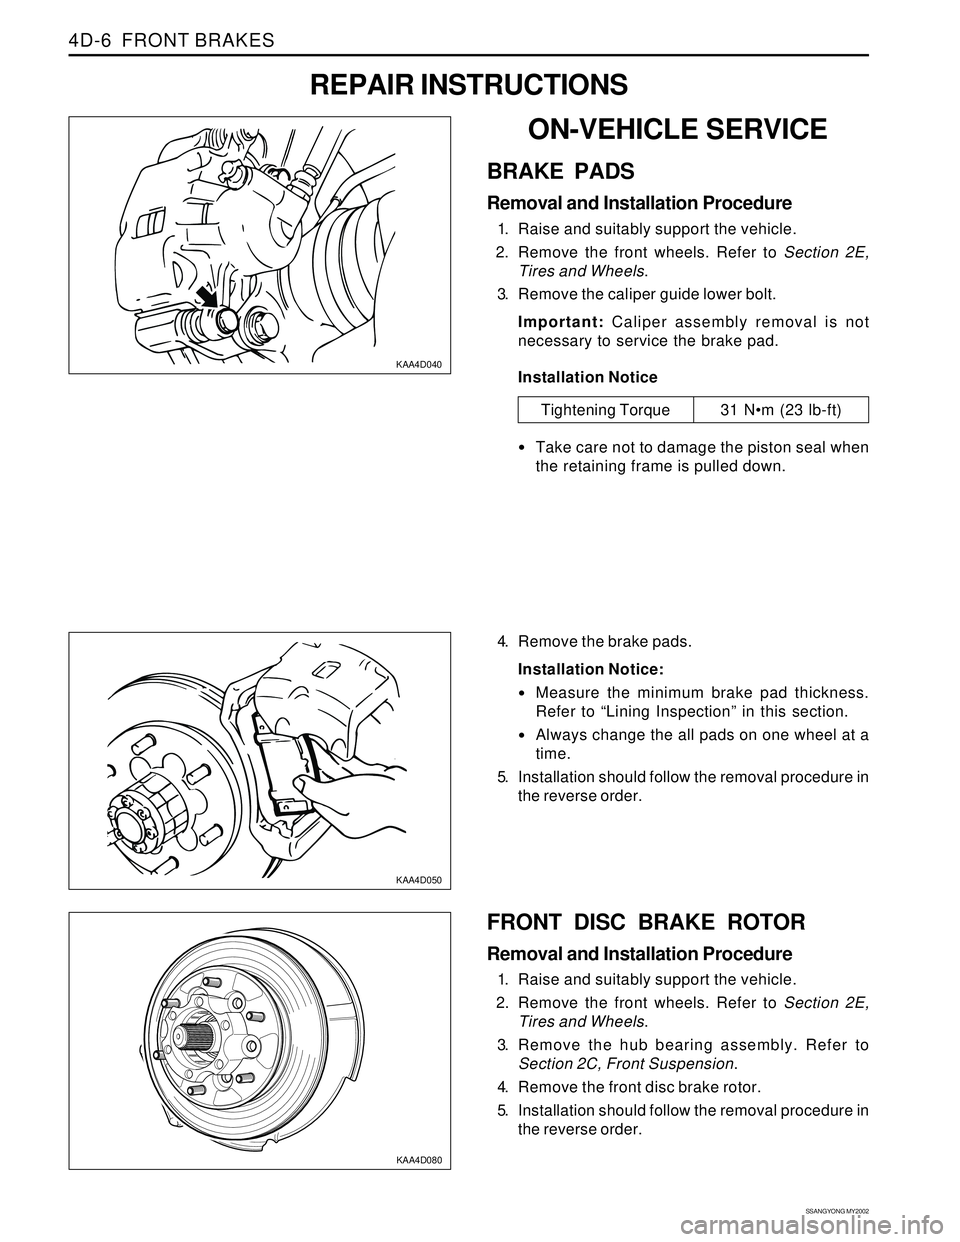
BRAKE PADS
Removal and Installation Procedure
1. Raise and suitably support the vehicle.
2. Remove the front wheels. Refer to Section 2E,
Tires and Wheels.
3. Remove the caliper guide lower bolt.
Important: Caliper assembly removal is not
necessary to service the brake pad.
Installation Notice
Take care not to damage the piston seal when
the retaining frame is pulled down.
Tightening Torque 31 Nm (23 lb-ft)
KAA4D050
4. Remove the brake pads.
Installation Notice:
Measure the minimum brake pad thickness.
Refer to “Lining Inspection” in this section.
Always change the all pads on one wheel at a
time.
5. Installation should follow the removal procedure in
the reverse order.
Page 957 of 2053

FRONT BRAKES 4D-7
SSANGYONG MY2002
KAA4D060
KAA4D070
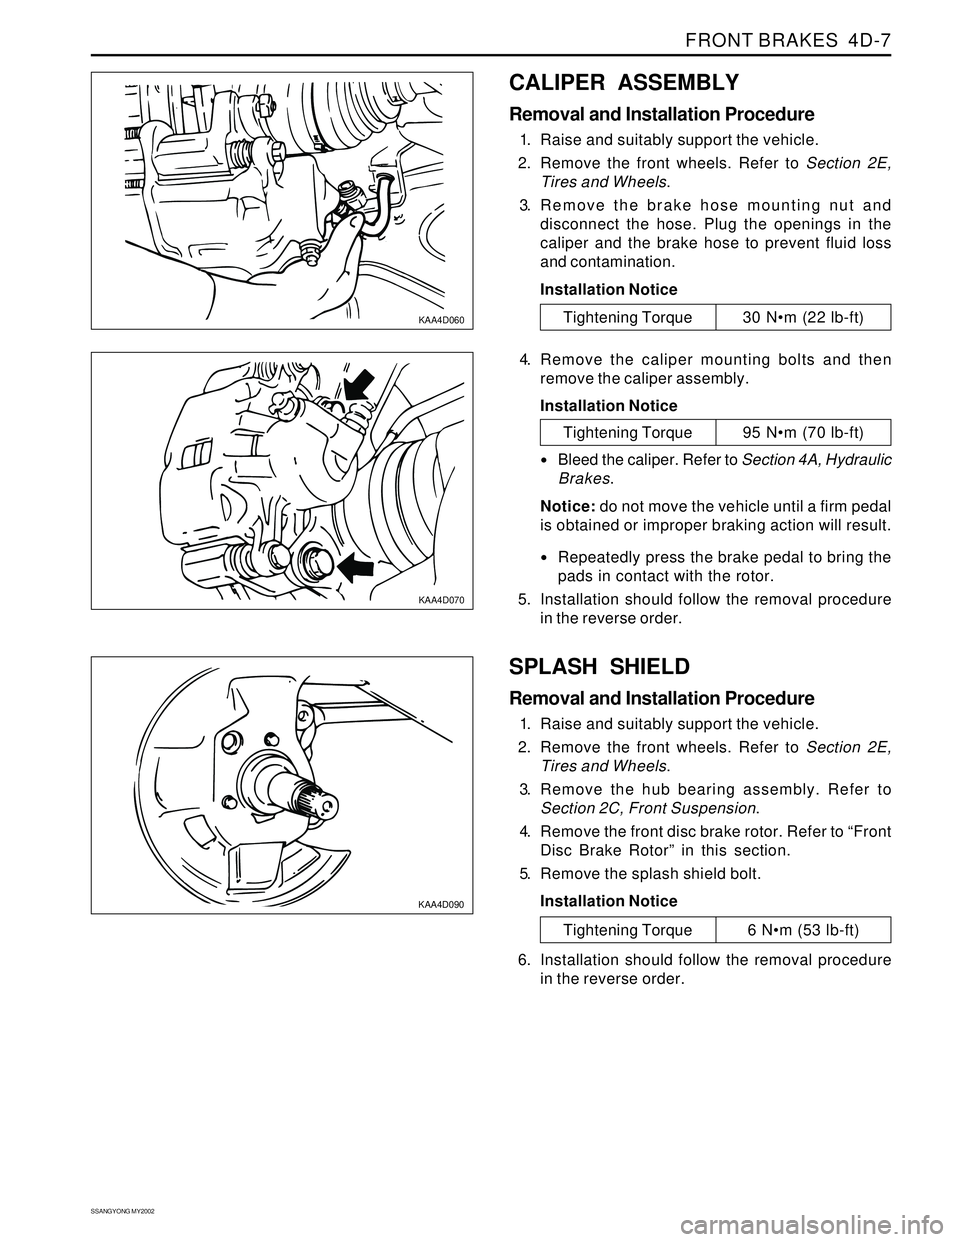
CALIPER ASSEMBLY
Removal and Installation Procedure
1. Raise and suitably support the vehicle.
2. Remove the front wheels. Refer to Section 2E,
Tires and Wheels.
3. Remove the brake hose mounting nut and
disconnect the hose. Plug the openings in the
caliper and the brake hose to prevent fluid loss
and contamination.
Installation Notice
Tightening Torque 30 Nm (22 lb-ft)
4. Remove the caliper mounting bolts and then
remove the caliper assembly.
Installation Notice
Tightening Torque 95 Nm (70 lb-ft)
Bleed the caliper. Refer to Section 4A, Hydraulic
Brakes.
Notice: do not move the vehicle until a firm pedal
is obtained or improper braking action will result.
Repeatedly press the brake pedal to bring the
pads in contact with the rotor.
5. Installation should follow the removal procedure
in the reverse order.
SPLASH SHIELD
Removal and Installation Procedure
1. Raise and suitably support the vehicle.
2. Remove the front wheels. Refer to Section 2E,
Tires and Wheels.
3. Remove the hub bearing assembly. Refer to
Section 2C, Front Suspension.
4. Remove the front disc brake rotor. Refer to “Front
Disc Brake Rotor” in this section.
5. Remove the splash shield bolt.
Installation Notice
KAA4D090
Tightening Torque 6 Nm (53 lb-ft)
6. Installation should follow the removal procedure
in the reverse order.
Page 959 of 2053

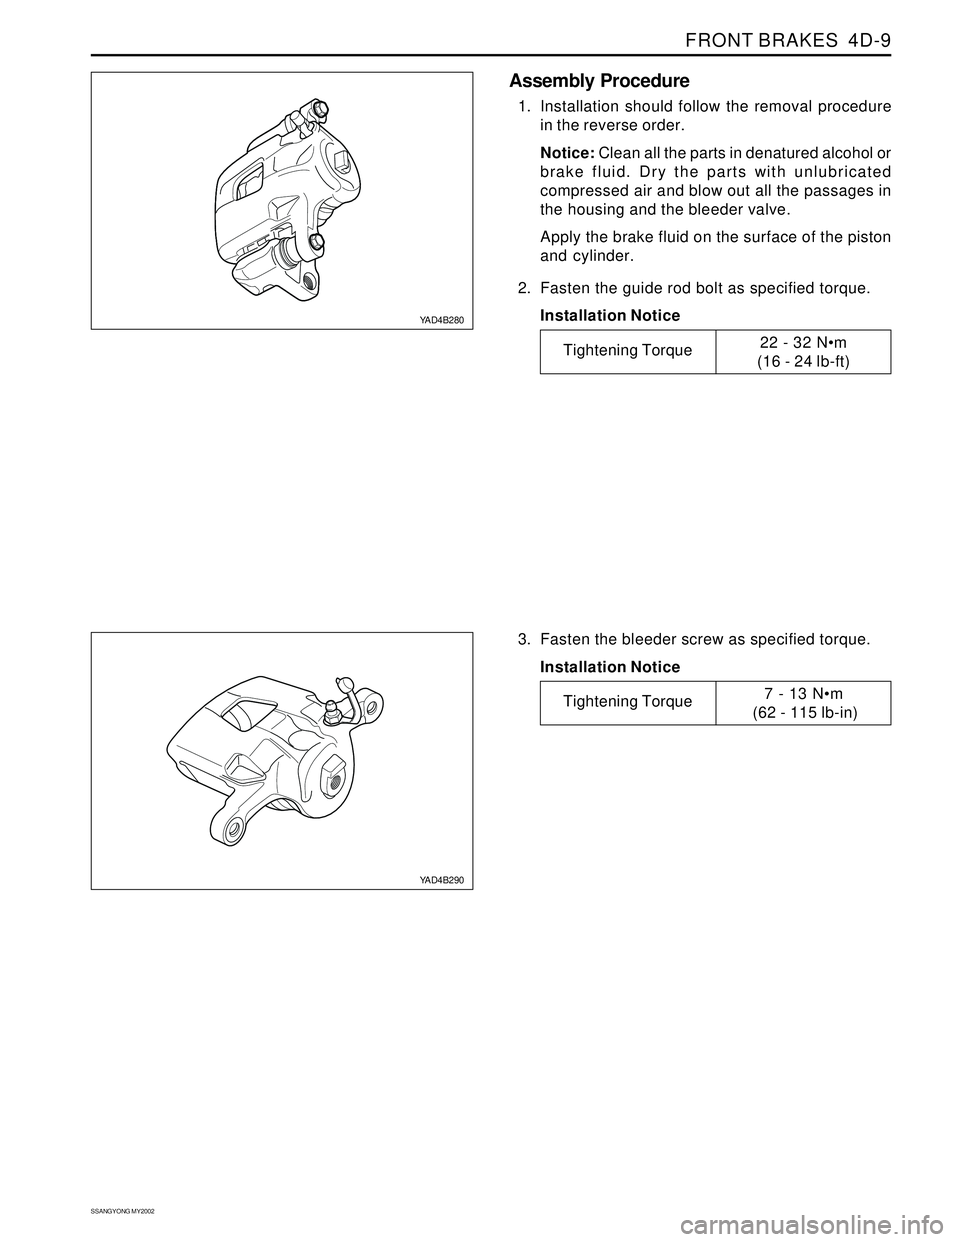
FRONT BRAKES 4D-9
SSANGYONG MY2002
YAD4B280
YAD4B290
3. Fasten the bleeder screw as specified torque.
Installation Notice
Assembly Procedure
1. Installation should follow the removal procedure
in the reverse order.
Notice: Clean all the parts in denatured alcohol or
brake fluid. Dry the parts with unlubricated
compressed air and blow out all the passages in
the housing and the bleeder valve.
Apply the brake fluid on the surface of the piston
and cylinder.
2. Fasten the guide rod bolt as specified torque.
Installation Notice
Tightening Torque7 - 13 Nm
(62 - 115 lb-in)
Tightening Torque22 - 32 Nm
(16 - 24 lb-ft)
Page 975 of 2053

REAR BRAKES 4E-15
SSANGYONG MY2002
4. Install the caliper cylinder assembly and tighten
the retaining bolt.
Installation Procedure
1. Install the brake lining between the backing plate
and the flange.
Installation Notice
Tightening Torque4 - 8 Nm
(35 - 71 lb-in)
Notice: Apply a certain amount of grease on the
parking brake lining surface.
2. Install the brake disc and connect the parking
brake cable to the lever.
3. Install the caliper to the brake disc.
Installation Notice
Tightening Torque4 - 8 Nm
(35 - 71 lb-in)
YAD4C230
YAD4C240
YAD4C250
YAD4C260