SUBARU TRIBECA 2009 1.G Service Workshop Manual
TRIBECA 2009 1.G
SUBARU
SUBARU
https://www.carmanualsonline.info/img/17/7322/w960_7322-0.png
SUBARU TRIBECA 2009 1.G Service Workshop Manual
Trending: 2nd Row Seats, audio, check engine light, er ss displayed, open hood, lights, air duct
Page 551 of 2453
LI-18
Front Fog Light Bulb
LIGHTING SYSTEM
16.Front Fog Light Bulb
A: REMOVAL
1) Disconnect the ground cable from battery.
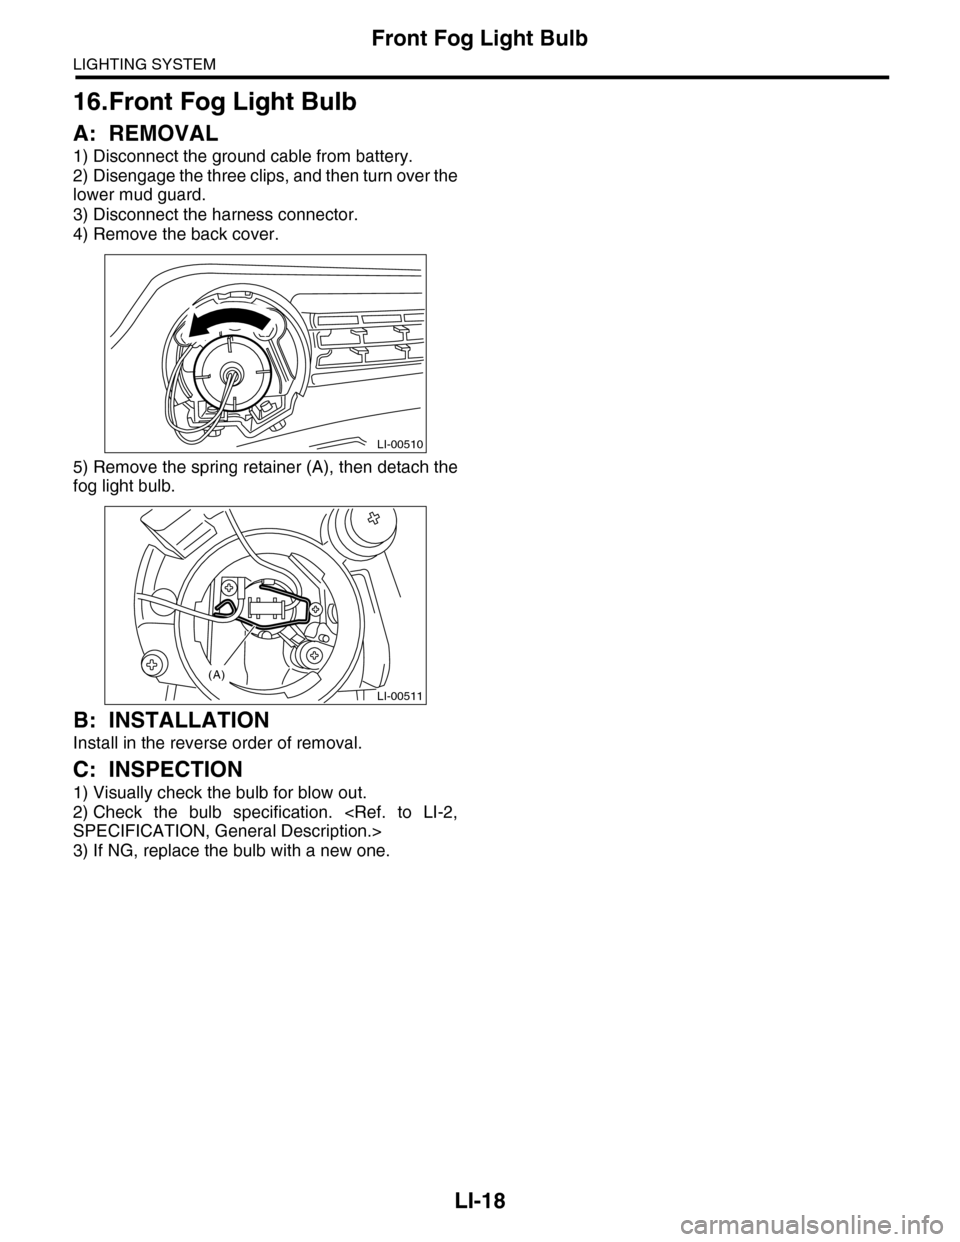
2) Disengage the three clips, and then turn over the
lower mud guard.
3) Disconnect the harness connector.
4) Remove the back cover.
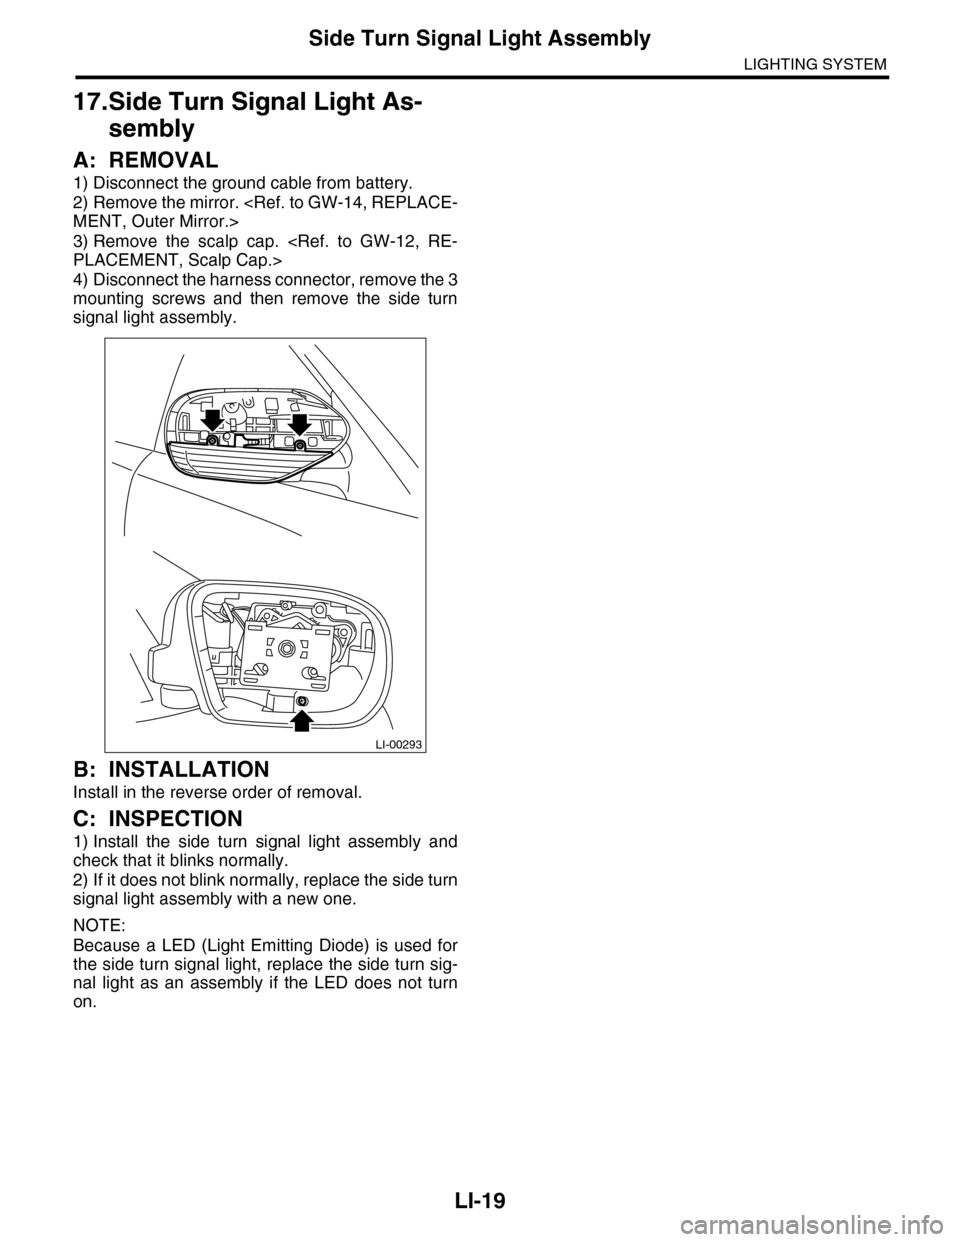
5) Remove the spring retainer (A), then detach the
fog light bulb.
B: INSTALLATION
Install in the reverse order of removal.
C: INSPECTION
1) Visually check the bulb for blow out.
2) Check the bulb specification.
SPECIFICATION, General Description.>
3) If NG, replace the bulb with a new one.
LI-00510
LI-00511
(A)
Page 552 of 2453
LI-19
Side Turn Signal Light Assembly
LIGHTING SYSTEM
17.Side Turn Signal Light As-
sembly
A: REMOVAL
1) Disconnect the ground cable from battery.
2) Remove the mirror.
MENT, Outer Mirror.>
3) Remove the scalp cap.
PLACEMENT, Scalp Cap.>
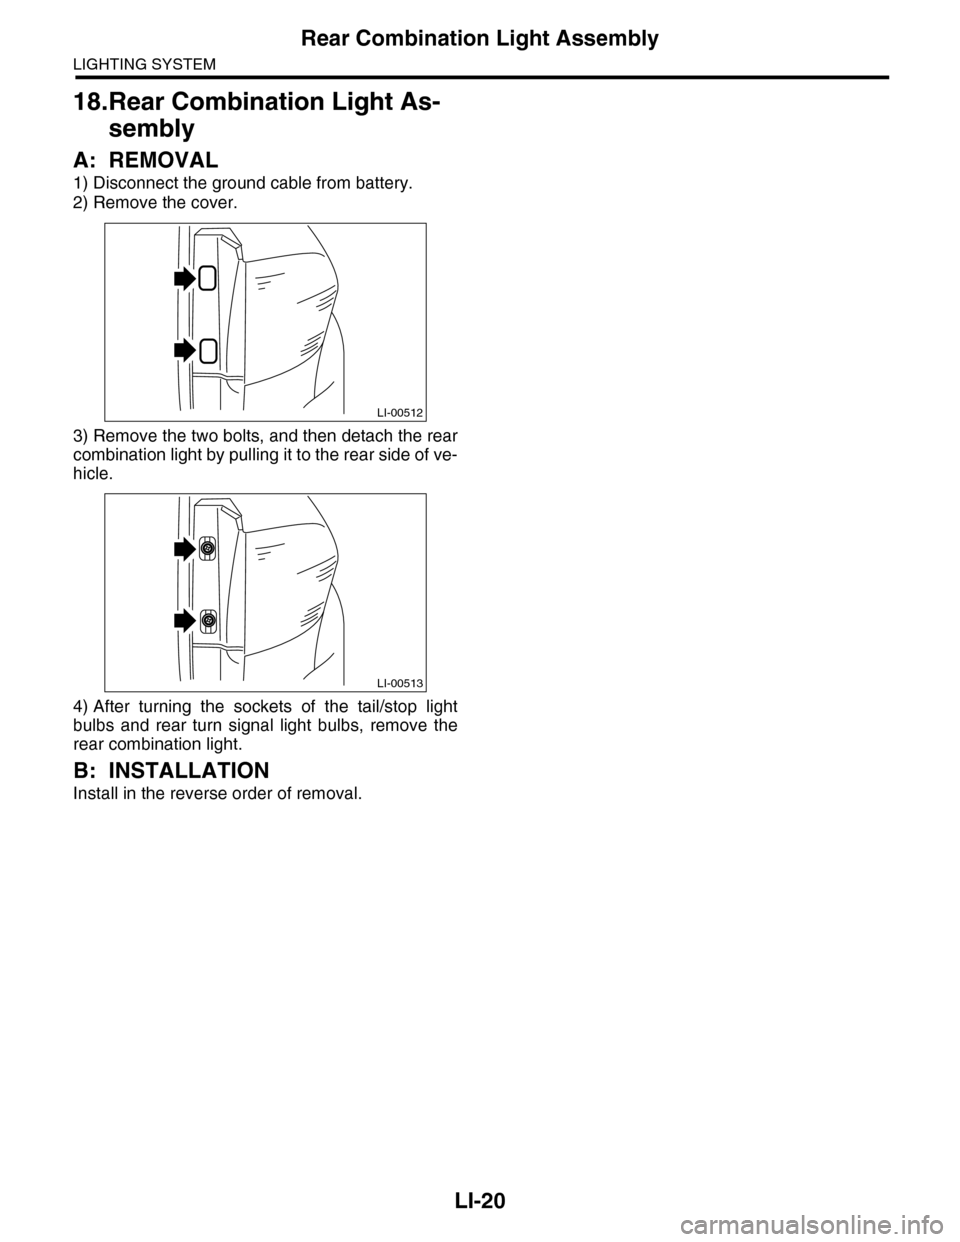
4) Disconnect the harness connector, remove the 3
mounting screws and then remove the side turn
signal light assembly.
B: INSTALLATION
Install in the reverse order of removal.
C: INSPECTION
1) Install the side turn signal light assembly and
check that it blinks normally.
2) If it does not blink normally, replace the side turn
signal light assembly with a new one.
NOTE:
Because a LED (Light Emitting Diode) is used for
the side turn signal light, replace the side turn sig-
nal light as an assembly if the LED does not turn
on.
LI-00293
Page 553 of 2453
LI-20
Rear Combination Light Assembly
LIGHTING SYSTEM
18.Rear Combination Light As-
sembly
A: REMOVAL
1) Disconnect the ground cable from battery.
2) Remove the cover.
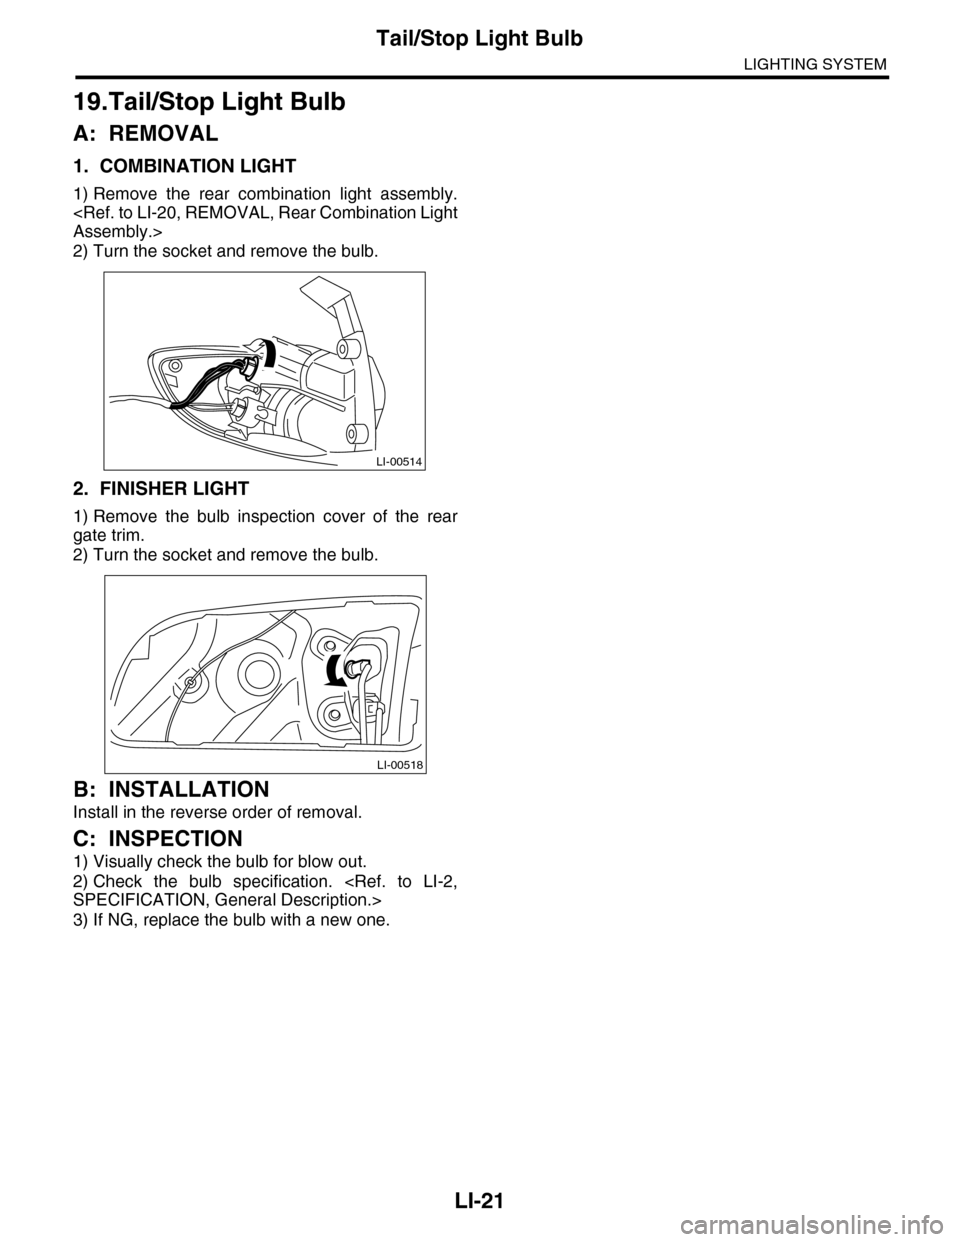
3) Remove the two bolts, and then detach the rear
combination light by pulling it to the rear side of ve-
hicle.
4) After turning the sockets of the tail/stop light
bulbs and rear turn signal light bulbs, remove the
rear combination light.
B: INSTALLATION
Install in the reverse order of removal.
LI-00512
LI-00513
Page 554 of 2453
LI-21
Tail/Stop Light Bulb
LIGHTING SYSTEM
19.Tail/Stop Light Bulb
A: REMOVAL
1. COMBINATION LIGHT
1) Remove the rear combination light assembly.
Assembly.>
2) Turn the socket and remove the bulb.
2. FINISHER LIGHT
1) Remove the bulb inspection cover of the rear
gate trim.
2) Turn the socket and remove the bulb.
B: INSTALLATION
Install in the reverse order of removal.
C: INSPECTION
1) Visually check the bulb for blow out.
2) Check the bulb specification.
SPECIFICATION, General Description.>
3) If NG, replace the bulb with a new one.
LI-00514
LI-00518
Page 555 of 2453
LI-22
Rear Turn Signal Light Bulb
LIGHTING SYSTEM
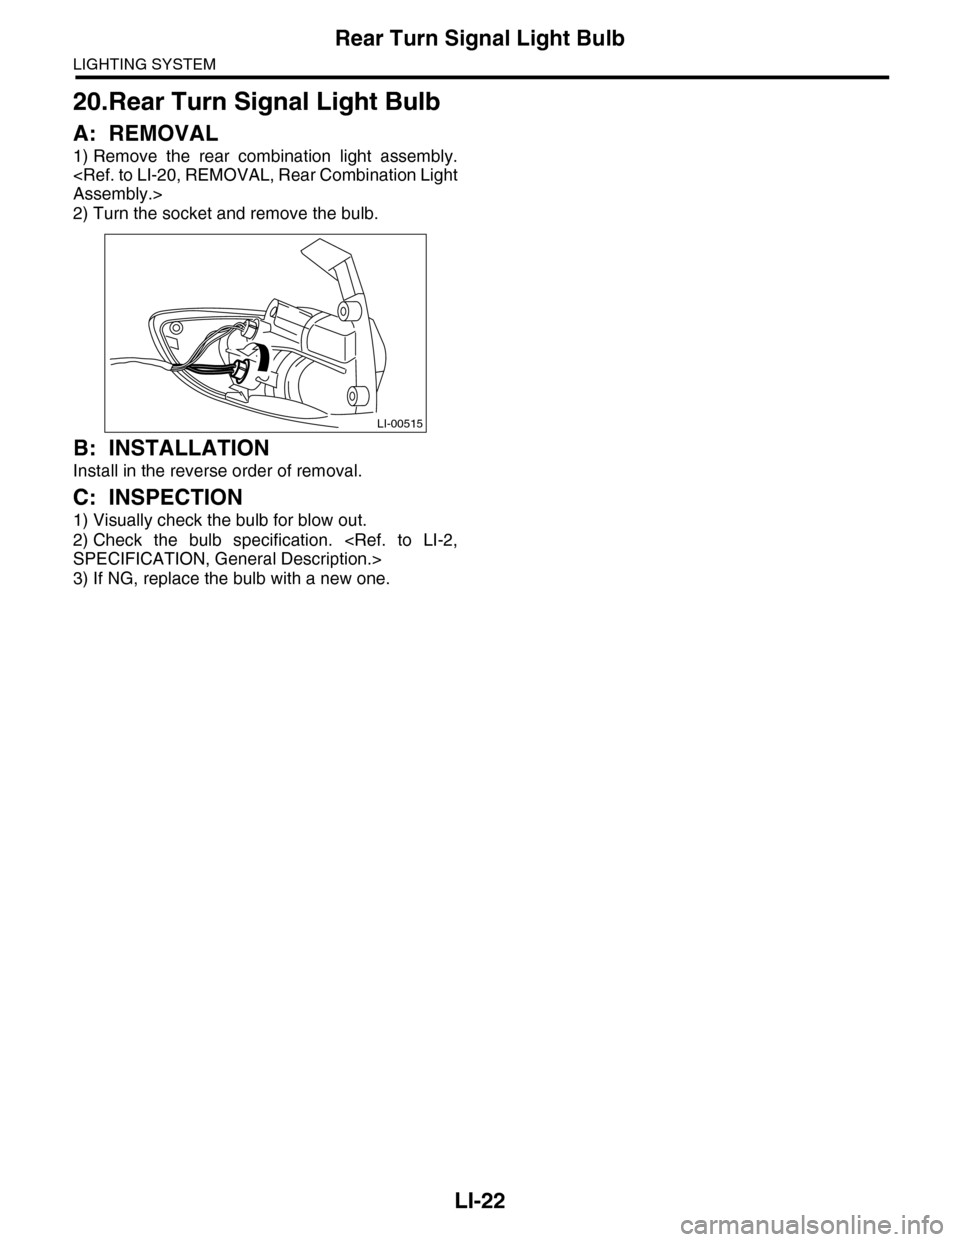
20.Rear Turn Signal Light Bulb
A: REMOVAL
1) Remove the rear combination light assembly.
Assembly.>
2) Turn the socket and remove the bulb.
B: INSTALLATION
Install in the reverse order of removal.
C: INSPECTION
1) Visually check the bulb for blow out.
2) Check the bulb specification.
SPECIFICATION, General Description.>
3) If NG, replace the bulb with a new one.
LI-00515
Page 556 of 2453
LI-23
Rear Side Marker Light Bulb
LIGHTING SYSTEM
21.Rear Side Marker Light Bulb
A: SPECIFICATION
The rear side marker light bulb is integrated into the
tail/stop light as a single unit; therefore, refer to the
section on tail/stop light bulbs for the removal pro-
cedures.
Bulb.>
Page 557 of 2453
LI-24
Rear Finisher Light Assembly
LIGHTING SYSTEM
22.Rear Finisher Light Assembly
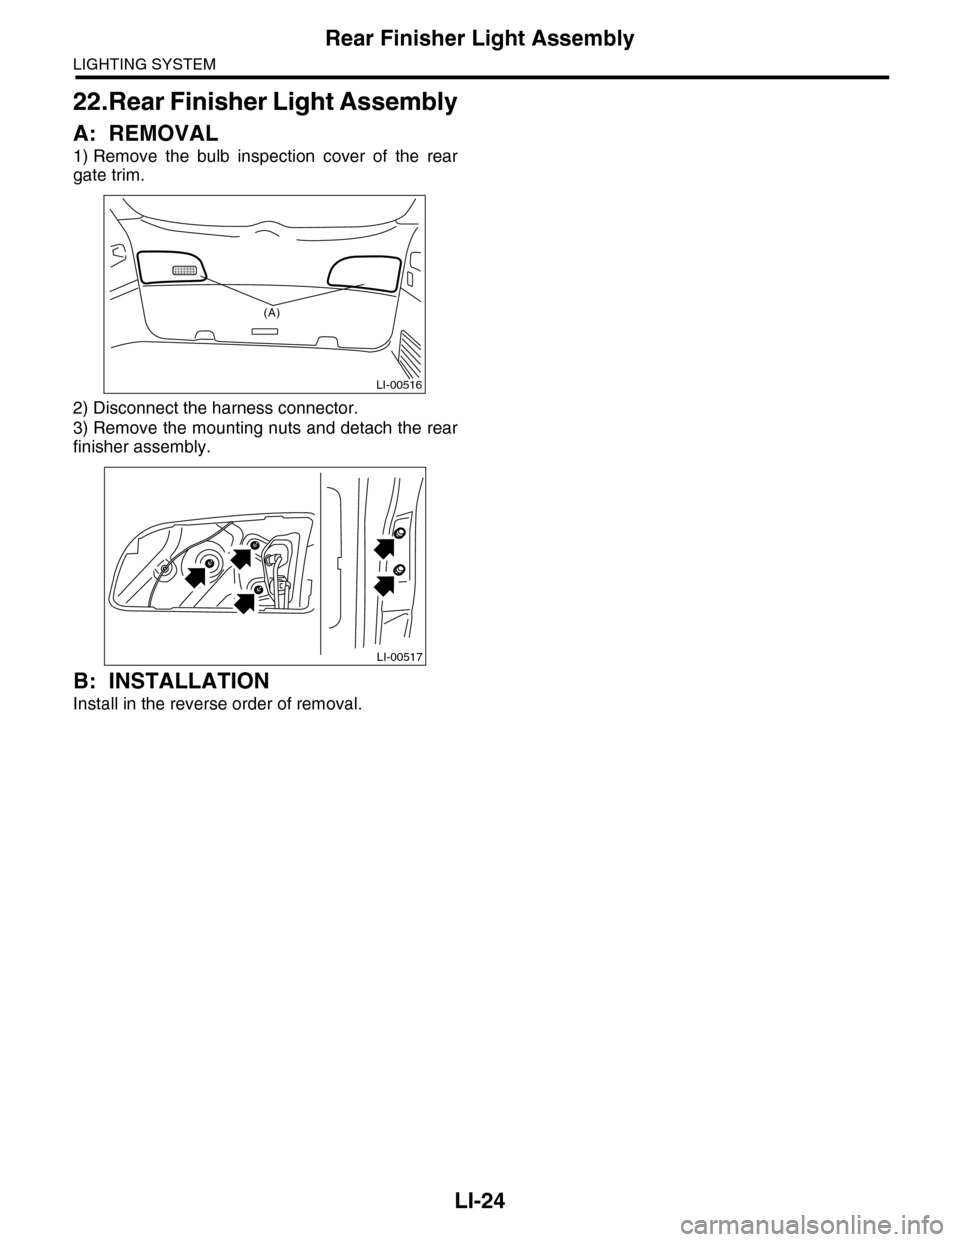
A: REMOVAL
1) Remove the bulb inspection cover of the rear
gate trim.
2) Disconnect the harness connector.
3) Remove the mounting nuts and detach the rear
finisher assembly.
B: INSTALLATION
Install in the reverse order of removal.
LI-00516
(A)
LI-00517
Page 558 of 2453
LI-25
Back-up Light Bulb
LIGHTING SYSTEM
23.Back-up Light Bulb
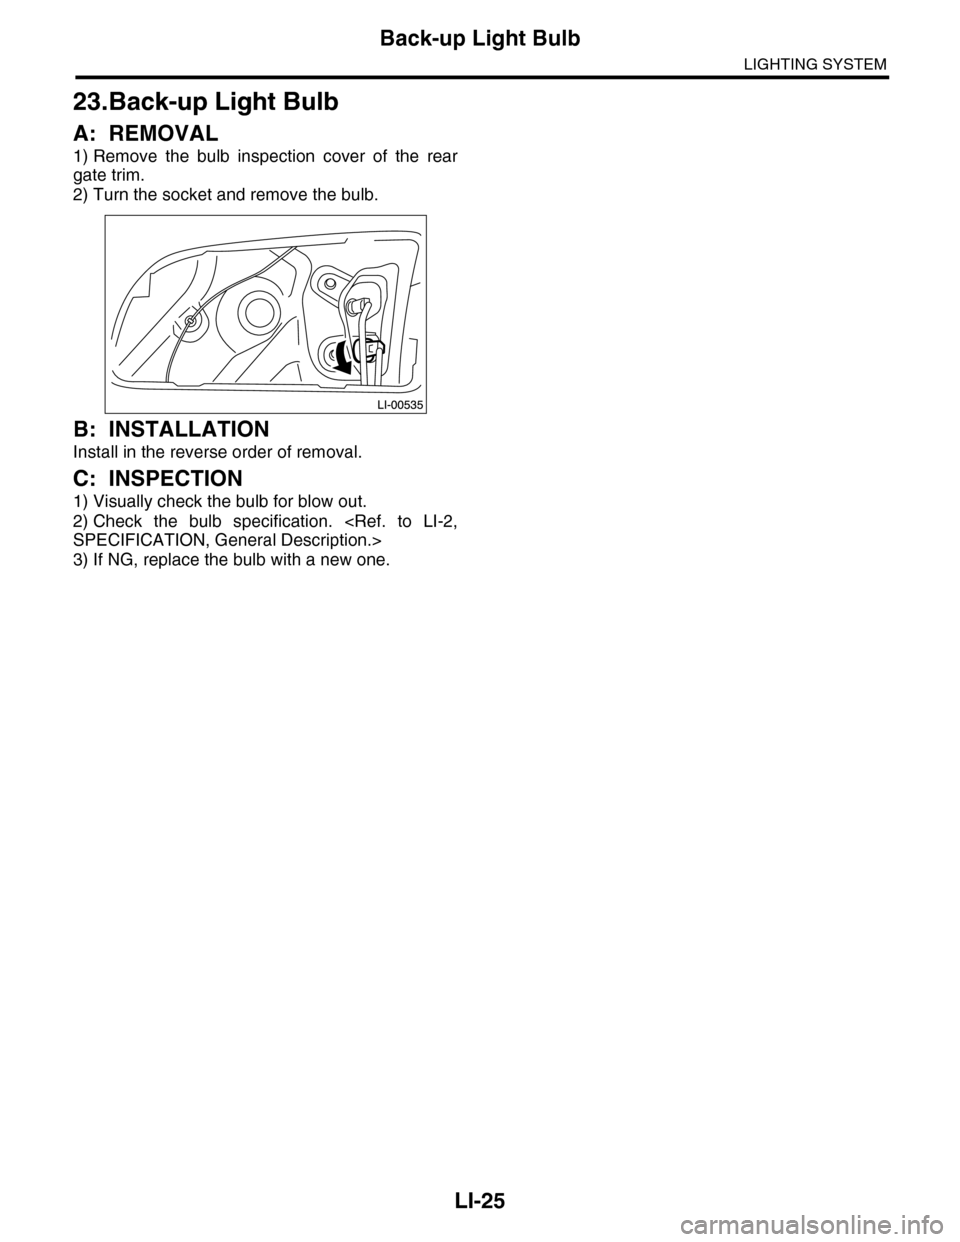
A: REMOVAL
1) Remove the bulb inspection cover of the rear
gate trim.
2) Turn the socket and remove the bulb.
B: INSTALLATION
Install in the reverse order of removal.
C: INSPECTION
1) Visually check the bulb for blow out.
2) Check the bulb specification.
SPECIFICATION, General Description.>
3) If NG, replace the bulb with a new one.
Page 559 of 2453
LI-26
License Plate Light Assembly
LIGHTING SYSTEM
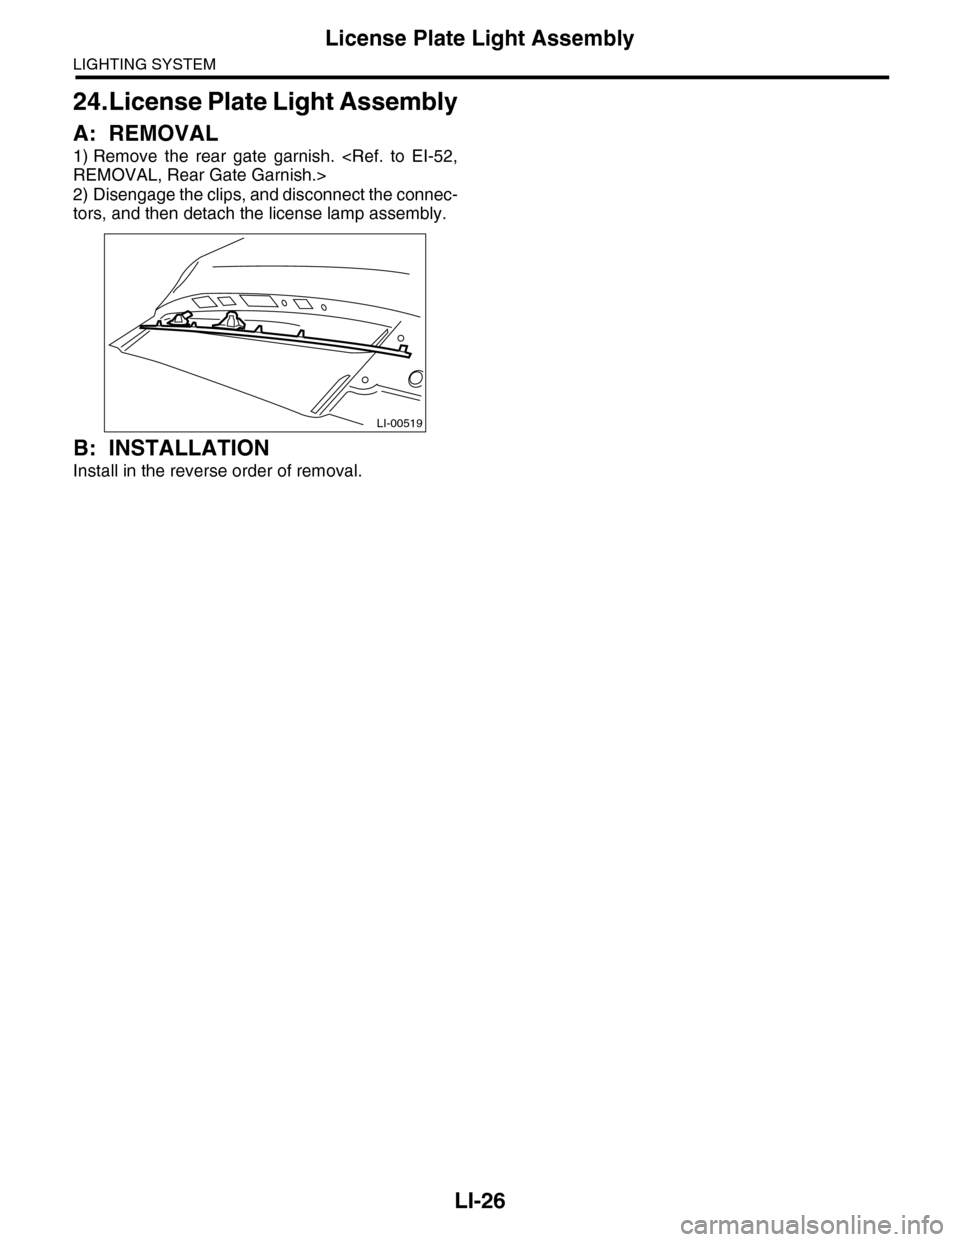
24.License Plate Light Assembly
A: REMOVAL
1) Remove the rear gate garnish.
REMOVAL, Rear Gate Garnish.>
2) Disengage the clips, and disconnect the connec-
tors, and then detach the license lamp assembly.
B: INSTALLATION
Install in the reverse order of removal.
LI-00519
Page 560 of 2453
LI-27
License Plate Light
LIGHTING SYSTEM
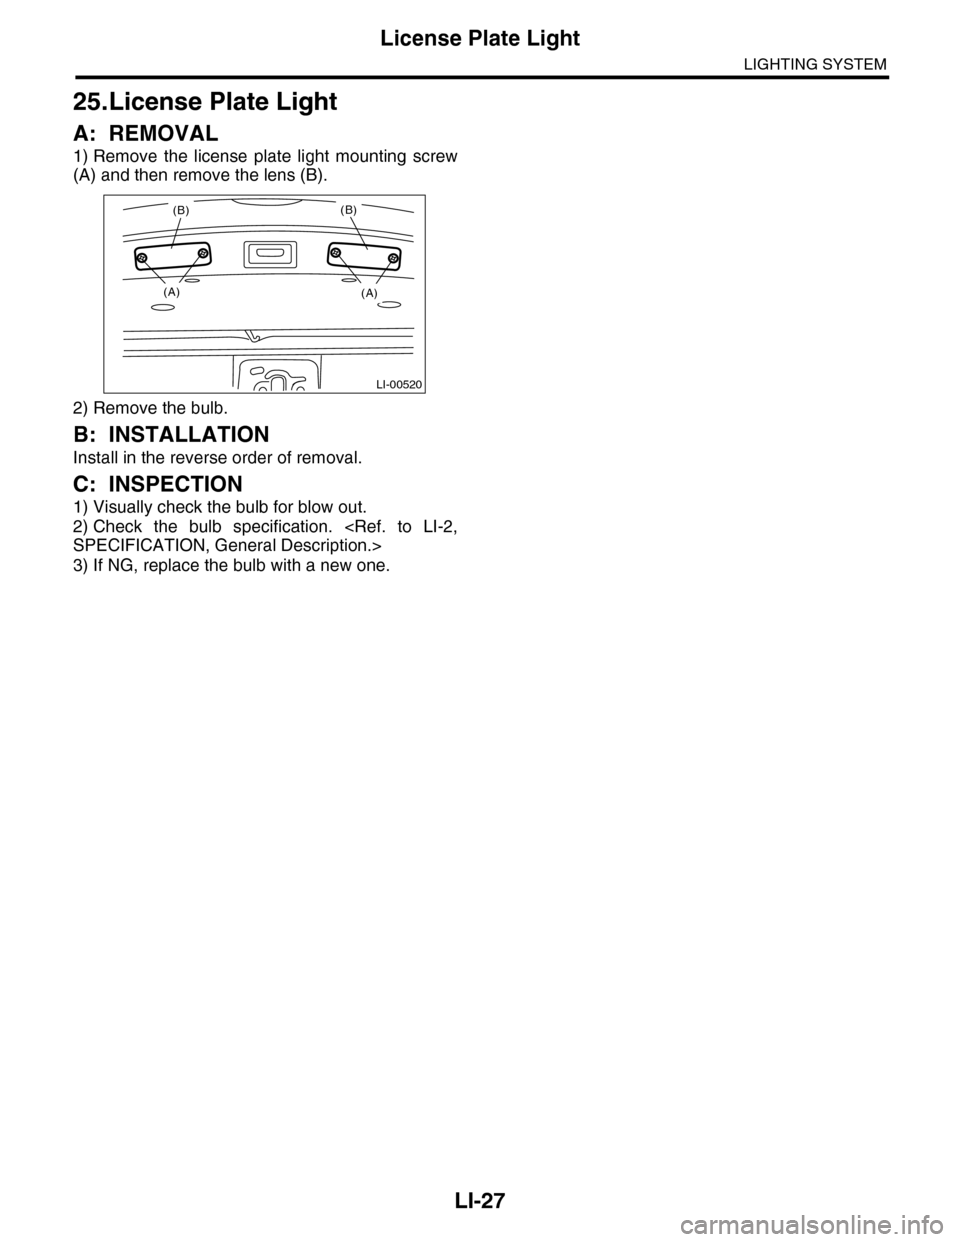
25.License Plate Light
A: REMOVAL
1) Remove the license plate light mounting screw
(A) and then remove the lens (B).
2) Remove the bulb.
B: INSTALLATION
Install in the reverse order of removal.
C: INSPECTION
1) Visually check the bulb for blow out.
2) Check the bulb specification.
SPECIFICATION, General Description.>
3) If NG, replace the bulb with a new one.
LI-00520
(A)
(B)(B)
(A)
Trending: ignition, Control arm, key, Belt, Room light, oil level, C0057
