TOYOTA BZ4X 2022 Owners Manual (in English)
Manufacturer: TOYOTA, Model Year: 2022, Model line: BZ4X, Model: TOYOTA BZ4X 2022Pages: 674, PDF Size: 120.02 MB
Page 131 of 674
129
2
Owners Manual_Europe_M42D76_en
2-2. Charging
Electric Vehicle system
P. 1 1 8
1 Unlock charging port lid by
unlocking the doors. ( P.185)
2 Open the charging port lid.
( P. 9 6 )
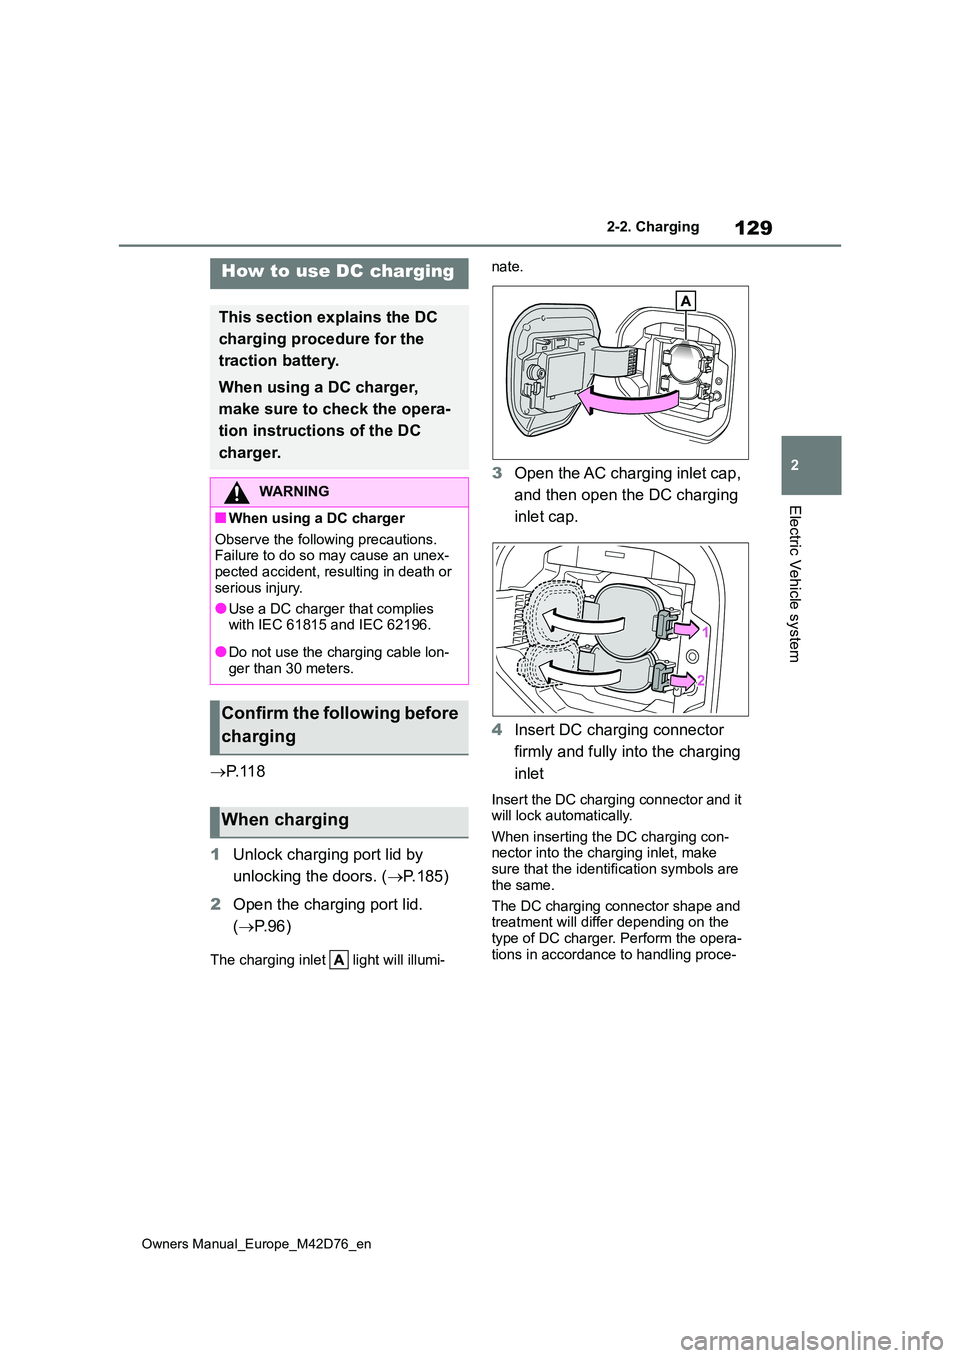
The charging inlet light will illumi-
nate.
3 Open the AC charging inlet cap,
and then open the DC charging
inlet cap.
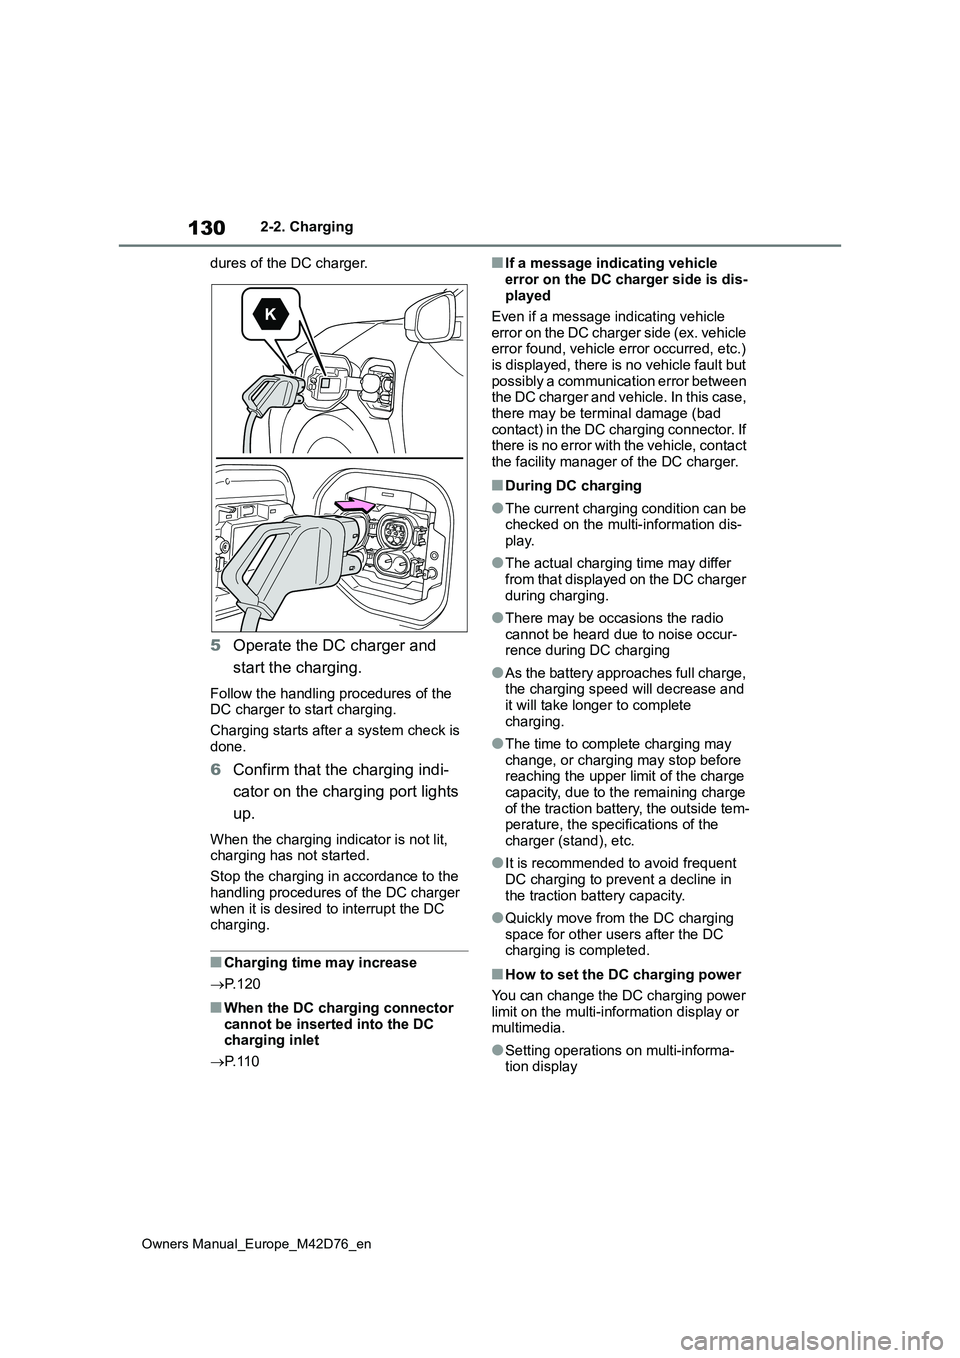
4 Insert DC charging connector
firmly and fully into the charging
inlet
Insert the DC charging connector and it will lock automatically.
When inserting the DC charging con- nector into the charging inlet, make sure that the identification symbols are
the same.
The DC charging connector shape and treatment will differ depending on the
type of DC charger. Perform the opera- tions in accordance to handling proce-
How to use DC charging
This section explains the DC
charging procedure for the
traction battery.
When using a DC charger,
make sure to check the opera-
tion instructions of the DC
charger.
WARNING
■When using a DC charger
Observe the following precautions. Failure to do so may cause an unex-pected accident, resulting in death or
serious injury.
●Use a DC charger that complies with IEC 61815 and IEC 62196.
●Do not use the charging cable lon-ger than 30 meters.
Confirm the following before
charging
When charging
Page 132 of 674
130
Owners Manual_Europe_M42D76_en
2-2. Charging
dures of the DC charger.
5 Operate the DC charger and
start the charging.
Follow the handling procedures of the DC charger to start charging.
Charging starts after a system check is
done.
6 Confirm that the charging indi-
cator on the charging port lights
up.
When the charging indicator is not lit, charging has not started.
Stop the charging in accordance to the
handling procedures of the DC charger when it is desired to interrupt the DC charging.
■Charging time may increase
P. 1 2 0
■When the DC charging connector cannot be inserted into the DC charging inlet
P. 1 1 0
■If a message indicating vehicle
error on the DC charger side is dis- played
Even if a message indicating vehicle
error on the DC charger side (ex. vehicle error found, vehicle error occurred, etc.) is displayed, there is no vehicle fault but
possibly a communication error between the DC charger and vehicle. In this case, there may be terminal damage (bad
contact) in the DC charging connector. If there is no error with the vehicle, contact the facility manager of the DC charger.
■During DC charging
●The current charging condition can be checked on the multi-information dis-
play.
●The actual charging time may differ
from that displayed on the DC charger during charging.
●There may be occasions the radio cannot be heard due to noise occur-rence during DC charging
●As the battery approaches full charge, the charging speed will decrease and
it will take longer to complete charging.
●The time to complete charging may change, or charging may stop before reaching the upper limit of the charge
capacity, due to the remaining charge of the traction battery, the outside tem-perature, the specifications of the
charger (stand), etc.
●It is recommended to avoid frequent
DC charging to prevent a decline in the traction battery capacity.
●Quickly move from the DC charging space for other users after the DC charging is completed.
■How to set the DC charging power
You can change the DC charging power limit on the multi-information display or multimedia.
●Setting operations on multi-informa-tion display
Page 133 of 674
131
2
Owners Manual_Europe_M42D76_en
2-2. Charging
Electric Vehicle system
1Press or of the meter control
switches to select .
2 Press or of the meter control
switches to select “Vehicle Settings”,
and then press and hold .
3 Press or of the meter control
switches to select “Charging Set-
tings”, and then press .
The “Charging Settings” screen will be displayed.
4 Press or of the meter control
switches to select “DC charging
power”, and then press .
The “DC charging power” screen will be displayed.
5 Press or of the meter control
switches to select the charging
power from “MAX”, “125kW”,
“100kW”, “75kW”, “50kW” and then
press .
*The maximum power when charging is
limited to the selected power or less.
If “MAX” is selected, the vehicle will be charged with the maximum power that
can be charged.
●Setting operations on multimedia
1 Select .
2 Select “Vehicle customize”.
3 Select “Charging”.
4 Select “DC charging power”.
5 Select from “MAX”, “125kW”,
“100kW”, “75kW”, “50kW”.
*The maximum power when charging is limited to the selected power or less.
If “MAX” is selected, the vehicle will be charged with the maximum power that can be charged.
■Changing the “Charging Limit” set-
tings
P. 1 2 4
■If “Check Charging System Close Charging Port Lid See Owner’s
Manual” is displayed on the multi- information display
If the system check after DC charging is
not completed successfully, the EV sys- tem will not start even if the power switch is pressed while depressing the
brake pedal.
Perform a system check with the follow- ing procedures.
1 Be sure to engage the parking brake
and then turn the power switch off.
2 Close the charging inlet cap, close the charging port lid.
3 Check if “Checking Charging Sys- tem” is displayed on the multi-infor-
mation display when the power switch is turned to ON.
Do not open the charging port lid while
the charging system is checking.
When the system check is completed, the power switch automatically turns off.
4 Press the power switch while
depressing the brake pedal. The “READY” indicator turns on.
Contact any authorized Toyota retailer
or Toyota authorized repairer, or any reli- able repairer if the charging system check is done and the message on the
multi-information display does not go off.
Page 134 of 674
132
Owners Manual_Europe_M42D76_en
2-2. Charging
WARNING
■Warnings for DC charging
Be sure to observe the following when
using DC charging.
Failure to do so may cause an acci- dent that could lead to death or seri-
ous injury.
●Check that the DC charger and DC charging inlet are not damaged. If
there is any damage to the DC charging inlet, do not perform a DC charge and have it inspected imme-
diately at any authorized Toyota retailer or Toyota authorized repairer, or any reliable repairer.
●Do not touch the terminals of the DC charging connector or inlet with
metallic sharp tips (wires and nee- dles), or allow a short circuit to occur with foreign objects.
●Do not insert anything other than the DC charging connector into the
DC charging inlet.
●Check that the DC charging cable is
not coiled up or pinned underneath heavy objects.
●Be sure the DC charging inlet makes direct contact with the DC charging connector.
Do not connect conversion adapt- ers, extension cords, etc., between the DC charging connector and DC
charging inlet.
●When DC charging is interrupted,
follow the handling procedures of the DC charger. Immediately stop the DC charging when there is an
outbreak of heat, smoke, strange noises or smells, etc., during charging.
●Check that the DC charging con-nector and DC charging inlet do not have foreign objects or snow or ice
attached to it. If anything is attached to the inlet, be sure to completely remove the material
before connecting the DC charging connector.
●Do not charge the vehicle when there is a possibility of lightning. If you notice lightning while charging
the vehicle, do not touch the vehicle and the DC charging cable.
●Do not get the DC charging inlet terminals wet.
●Close the hood when using DC charging. The cooling fan may sud-denly start to run. Keep hands and
clothing (especially a tie, a scarf or a muffler) away from the fan. Fail-ure to do so may cause the hands
or clothing to be caught, resulting in serious injury.
■When connecting the DC charging connector
●Follow the handling procedures of
the DC charger to connect the DC charging connector. If the connector is not connected properly, the sys-
tem cannot recognize the connec- tion, and it may be possible to start the EV system.
After charging is completed, make sure to remove the DC charging con-
nector from the DC charging inlet before starting the EV system.
If the vehicle is started off with the
connector still connected, it could lead to an accident, possibly resulting in death or serious injury.
●Do not remove the DC charging connector from the DC charging
inlet during DC charging. After operating the DC charger to stop charging, remove the DC charging
connector from the DC charging inlet.
Page 135 of 674
133
2
Owners Manual_Europe_M42D76_en
2-2. Charging
Electric Vehicle system
1Operate the DC charger to stop
the charging.
DC charging connector will be unlocked automatically when charging is com-
pleted.
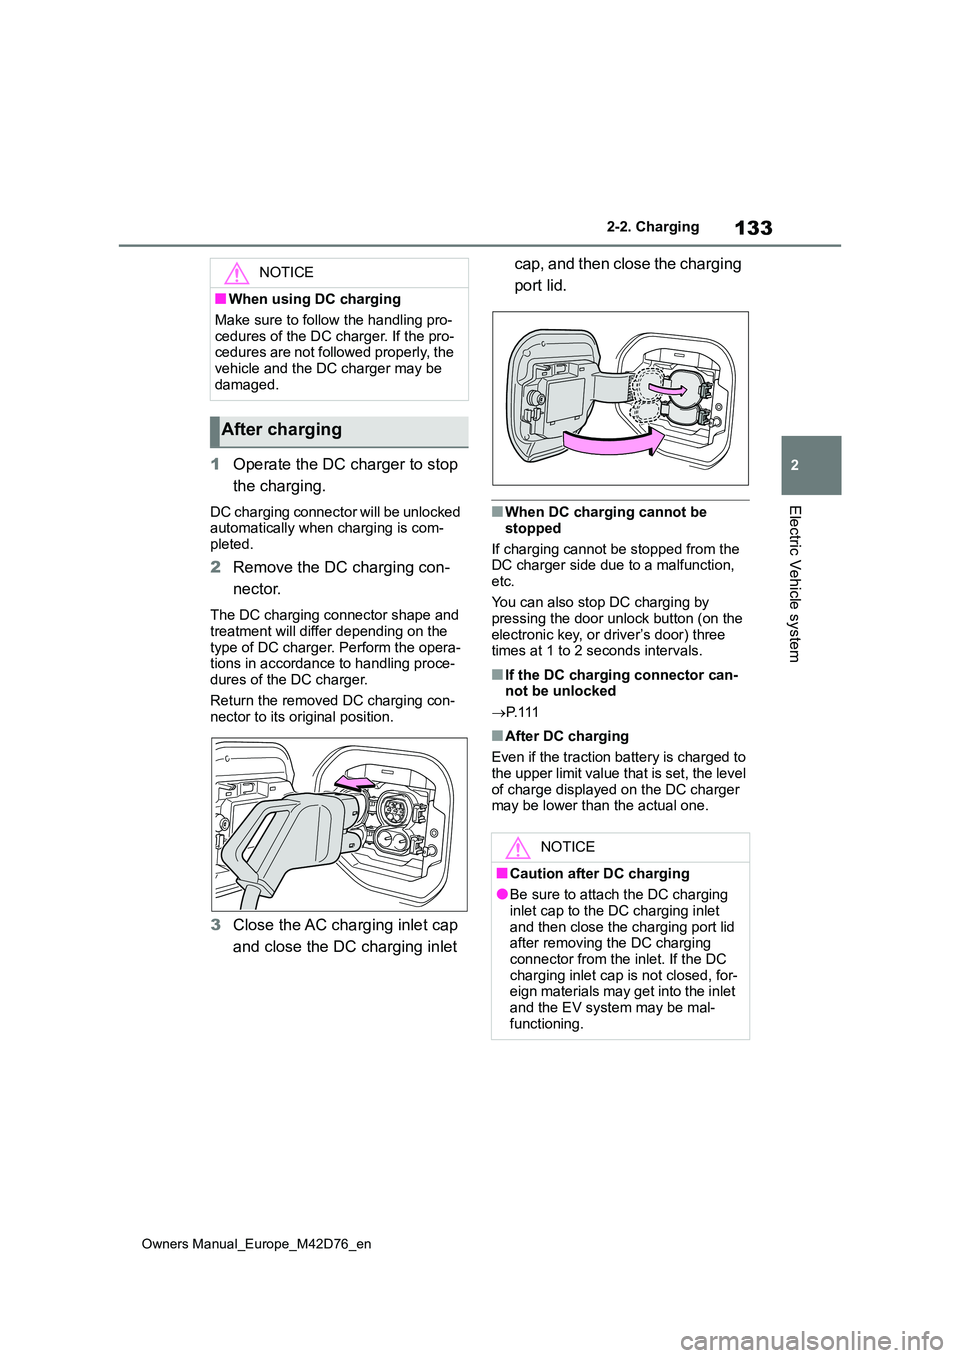
2 Remove the DC charging con-
nector.
The DC charging connector shape and
treatment will differ depending on the type of DC charger. Perform the opera-tions in accordance to handling proce-
dures of the DC charger.
Return the removed DC charging con- nector to its original position.
3 Close the AC charging inlet cap
and close the DC charging inlet
cap, and then close the charging
port lid.
■When DC charging cannot be
stopped
If charging cannot be stopped from the DC charger side due to a malfunction,
etc.
You can also stop DC charging by pressing the door unlock button (on the
electronic key, or driver’s door) three times at 1 to 2 seconds intervals.
■If the DC charging connector can-not be unlocked
P. 1 1 1
■After DC charging
Even if the traction battery is charged to the upper limit value that is set, the level
of charge displayed on the DC charger may be lower than the actual one.
NOTICE
■When using DC charging
Make sure to follow the handling pro-
cedures of the DC charger. If the pro- cedures are not followed properly, the vehicle and the DC charger may be
damaged.
After charging
NOTICE
■Caution after DC charging
●Be sure to attach the DC charging inlet cap to the DC charging inlet
and then close the charging port lid after removing the DC charging connector from the inlet. If the DC
charging inlet cap is not closed, for- eign materials may get into the inlet and the EV system may be mal-
functioning.
Page 136 of 674
134
Owners Manual_Europe_M42D76_en
2-2. Charging
■Calendar settings
Charging schedule is performed accord- ing to the date and time shown on the multi-information display. Refer to the
“Settings display” ( P.178)
If the calendar settings check screen is displayed when an attempt was made to
register a charge schedule, check that the correct date is set. If it is incorrect, be sure to correct it.
If the calendar information is wrong, the charging schedule function will not oper-ate normally.
When registering the charging
schedule, the following settings can
be changed.
■Select the charging mode
One of the two following charging
modes can be selected.
“Start”
Starts charging at the set time* and
finishes charging when fully
charged.
“Start-Stop”
AC charging is performed accord-
ing to the set start time and stop
time.*
*: There might be a slight error in the
timing when charging starts due to
the state of the traction battery.
■Repeated setting
The periodic charging schedule can
be set by selecting your desired
day of the week. Select one or
more day of the week to do the
charging schedule.
■Turning “Charge Now” on and
off
To start charging without changing
the charging schedule setting, turn
“Charge Now” on to temporarily
cancel the charging schedule and
enable charging after connecting
the AC charging connector.*
*: If the charging connector is removed
during charging while the charging
schedule is registered and “Charge
Now” is on, “Charge Now” turns off.
■“Next Event”
Of the registered charging sched-
ules, the closest charging schedule
after the current time is called the
“Next Event”.
For charging schedule, AC
charging will be performed accord-
ing to the Next Event.
The charging schedule can be reg-
istered on the multi-information dis-
play or multimedia.
Multi-information display opera-
tion: P. 1 3 6
Using the charging
schedule function
AC charging can be carried out
at the desired time by register-
ing the charging schedule.
Settings of the charging
schedule function
Registering the charging
schedule
Page 137 of 674
135
2
Owners Manual_Europe_M42D76_en
2-2. Charging
Electric Vehicle system
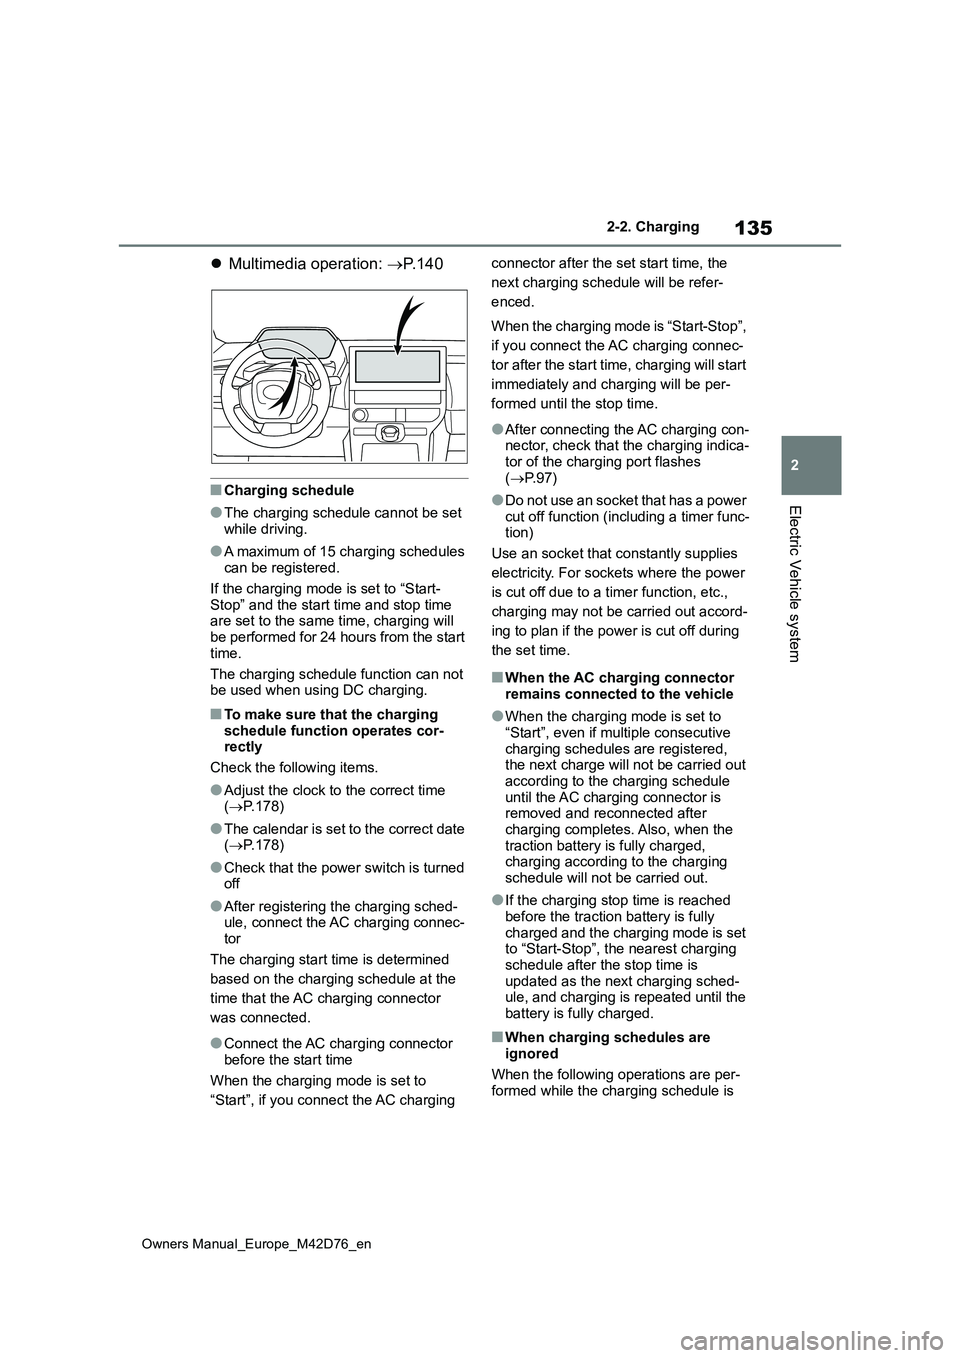
Multimedia operation: P. 1 4 0
■Charging schedule
●The charging schedule cannot be set while driving.
●A maximum of 15 charging schedules can be registered.
If the charging mode is set to “Start-
Stop” and the start time and stop time are set to the same time, charging will be performed for 24 hours from the start
time.
The charging schedule function can not be used when using DC charging.
■To make sure that the charging
schedule function operates cor- rectly
Check the following items.
●Adjust the clock to the correct time ( P.178)
●The calendar is set to the correct date ( P.178)
●Check that the power switch is turned off
●After registering the charging sched-ule, connect the AC charging connec-
tor
The charging start time is determined
based on the charging schedule at the
time that the AC charging connector
was connected.
●Connect the AC charging connector
before the start time
When the charging mode is set to
“Start”, if you connect the AC charging
connector after the set start time, the
next charging schedule will be refer-
enced.
When the charging mode is “Start-Stop”,
if you connect the AC charging connec-
tor after the start time, charging will start
immediately and charging will be per-
formed until the stop time.
●After connecting the AC charging con- nector, check that the charging indica-tor of the charging port flashes
( P. 9 7 )
●Do not use an socket that has a power
cut off function (including a timer func- tion)
Use an socket that constantly supplies
electricity. For sockets where the power
is cut off due to a timer function, etc.,
charging may not be carried out accord-
ing to plan if the power is cut off during
the set time.
■When the AC charging connector remains connected to the vehicle
●When the charging mode is set to “Start”, even if multiple consecutive
charging schedules are registered, the next charge will not be carried out according to the charging schedule
until the AC charging connector is removed and reconnected after charging completes. Also, when the
traction battery is fully charged, charging according to the charging schedule will not be carried out.
●If the charging stop time is reached before the traction battery is fully
charged and the charging mode is set to “Start-Stop”, the nearest charging schedule after the stop time is
updated as the next charging sched- ule, and charging is repeated until the battery is fully charged.
■When charging schedules are
ignored
When the following operations are per- formed while the charging schedule is
Page 138 of 674
136
Owners Manual_Europe_M42D76_en
2-2. Charging
on standby, charging schedule is tempo-
rarily canceled and charging is started.
●When the Remote Air Conditioning
System ( P.427) is operated
●When turning “My Room Mode” on
( P.145)
●When turning “Charge Now” on
( P.139, 144)
●When an operation that temporarily
cancel charging using the charging schedule ( P.123)
■Battery heater (P.114)/“Battery Cooler” ( P. 1 1 5 )
Depending on the temperature of the traction battery, the traction battery heater or traction battery cooler may be
activated and the charging indicator may light up while the timer is waiting for charging.
When operating charging schedule,
use the meter control switches.
Meter control switches ( P.176)
Multi-information display
■Registering the charging
schedule
1 Press or of the meter
control switches to select .
2 Press or of the meter
control switches to select “Vehi-
cle Settings”, and then press
and hold .
3 Press or of the meter
control switches to select
“Charging Settings”, and then
press .
The “Charging Settings” screen will be displayed.
4 Press or of the meter
control switches to select
“Charging Schedule”, and then
press .
The “Charging Schedule” screen will be displayed.
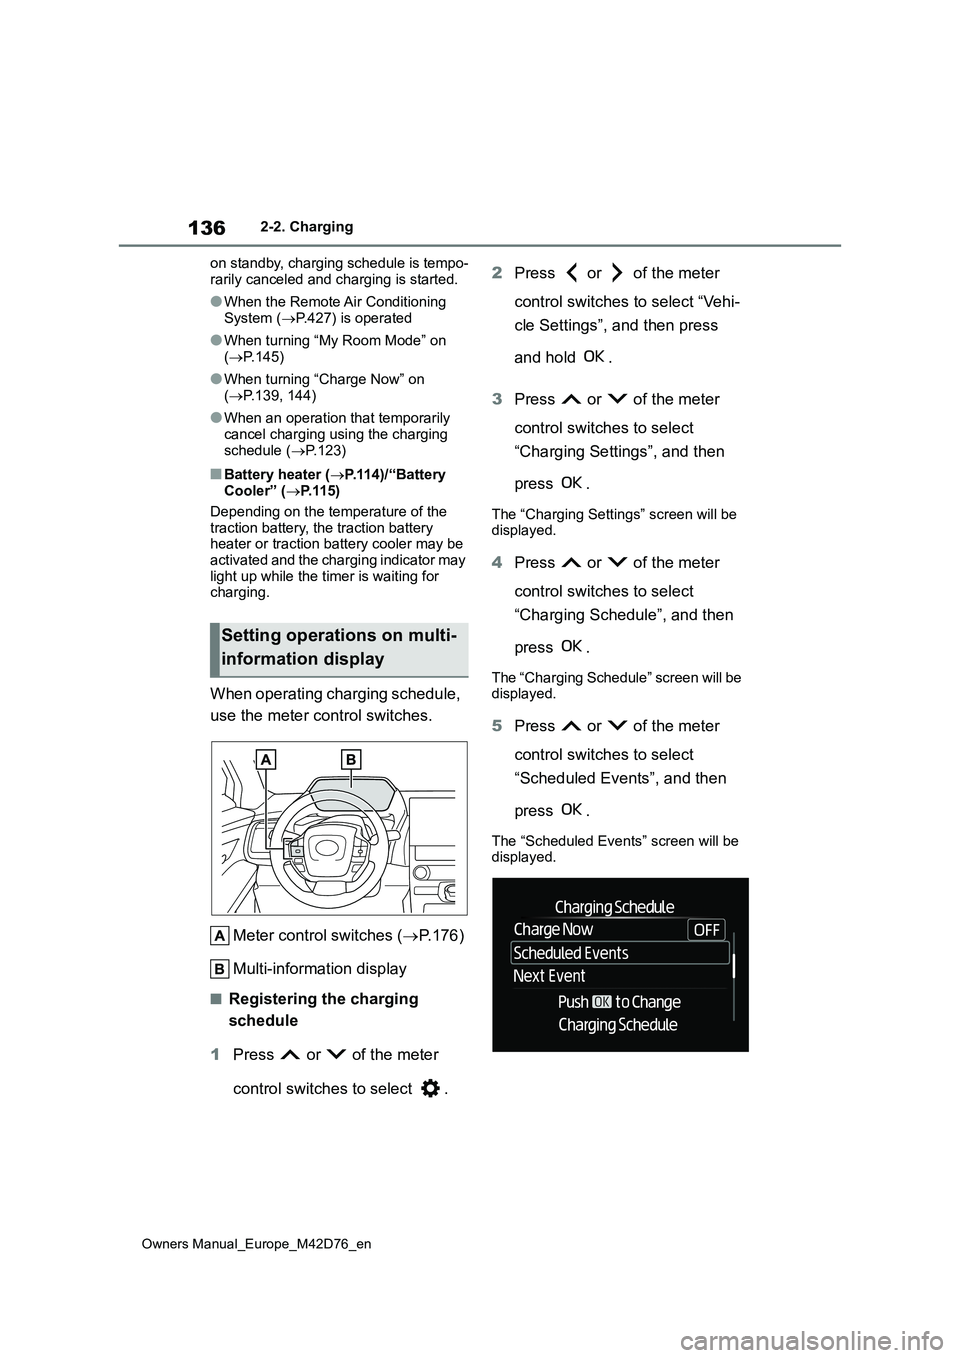
5 Press or of the meter
control switches to select
“Scheduled Events”, and then
press .
The “Scheduled Events” screen will be displayed.
Setting operations on multi-
information display
Page 139 of 674
137
2
Owners Manual_Europe_M42D76_en
2-2. Charging
Electric Vehicle system
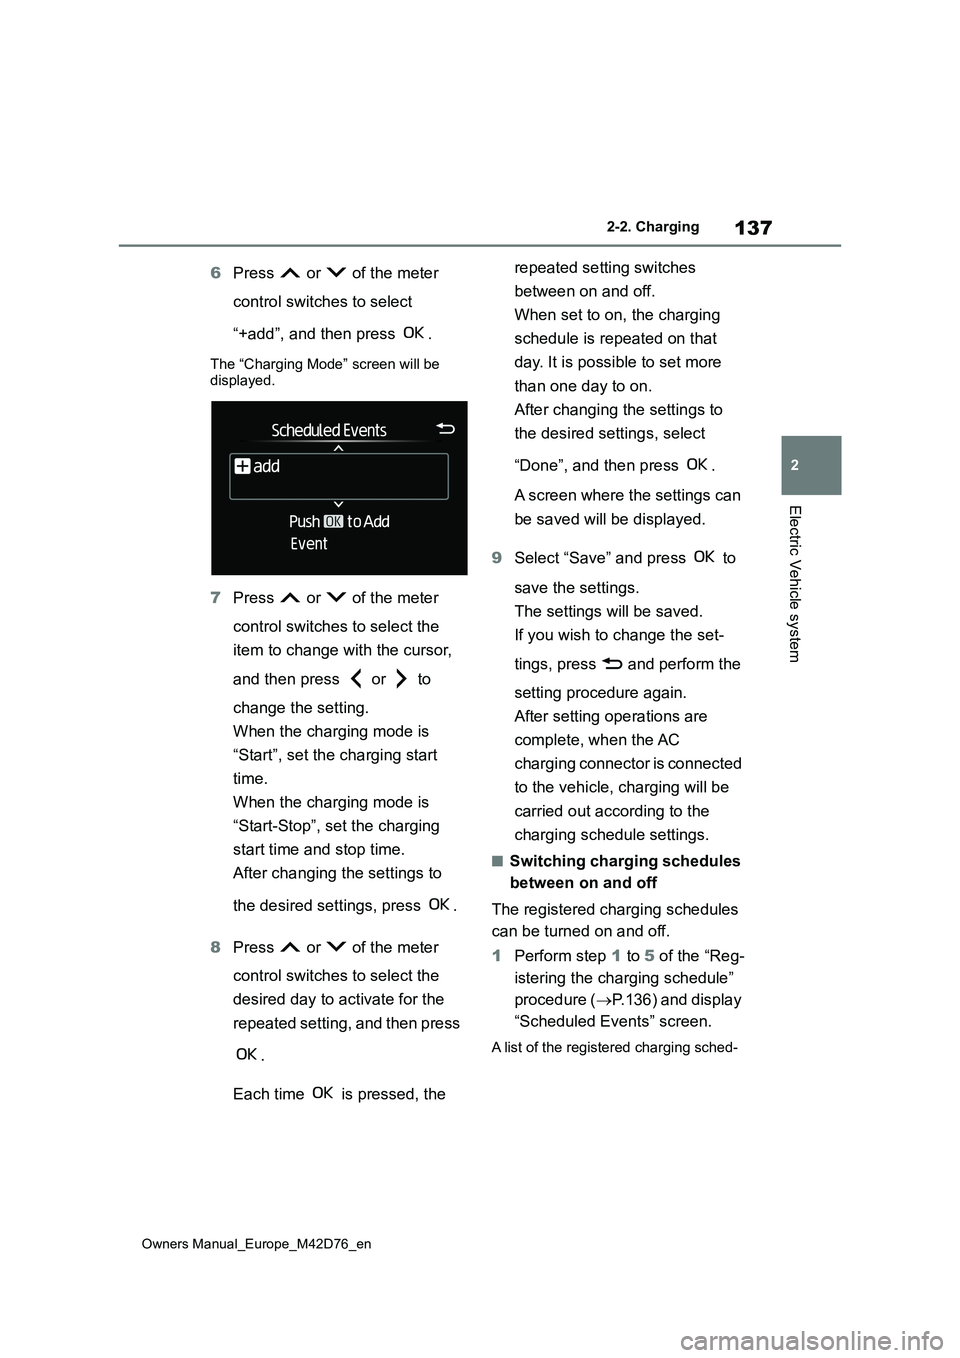
6Press or of the meter
control switches to select
“+add”, and then press .
The “Charging Mode” screen will be displayed.
7 Press or of the meter
control switches to select the
item to change with the cursor,
and then press or to
change the setting.
When the charging mode is
“Start”, set the charging start
time.
When the charging mode is
“Start-Stop”, set the charging
start time and stop time.
After changing the settings to
the desired settings, press .
8 Press or of the meter
control switches to select the
desired day to activate for the
repeated setting, and then press
.
Each time is pressed, the
repeated setting switches
between on and off.
When set to on, the charging
schedule is repeated on that
day. It is possible to set more
than one day to on.
After changing the settings to
the desired settings, select
“Done”, and then press .
A screen where the settings can
be saved will be displayed.
9 Select “Save” and press to
save the settings.
The settings will be saved.
If you wish to change the set-
tings, press and perform the
setting procedure again.
After setting operations are
complete, when the AC
charging connector is connected
to the vehicle, charging will be
carried out according to the
charging schedule settings.
■Switching charging schedules
between on and off
The registered charging schedules
can be turned on and off.
1 Perform step 1 to 5 of the “Reg-
istering the charging schedule”
procedure ( P.136) and display
“Scheduled Events” screen.
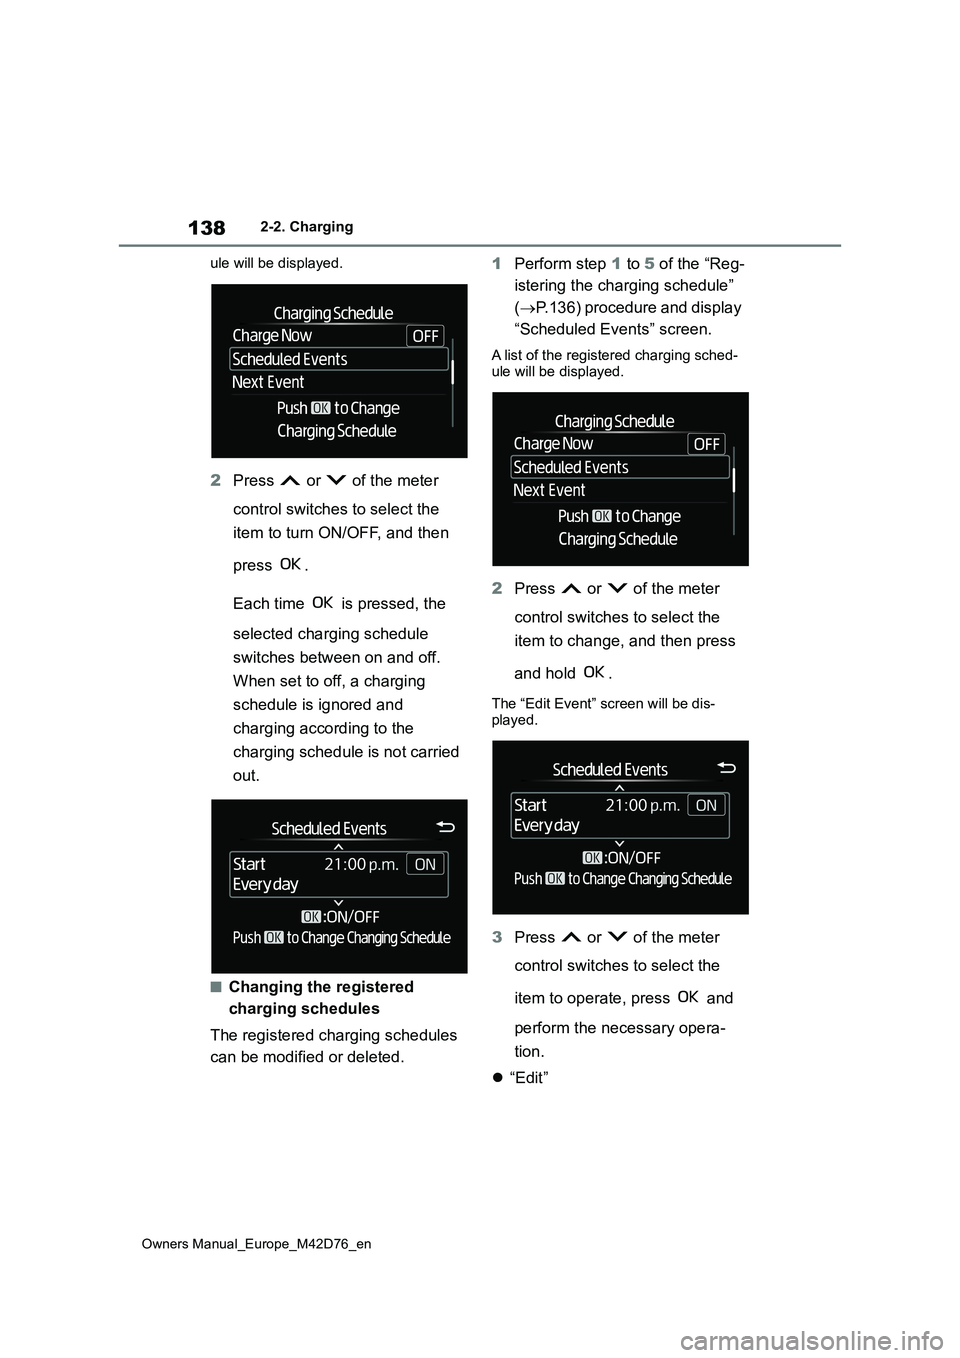
A list of the registered charging sched-
Page 140 of 674
138
Owners Manual_Europe_M42D76_en
2-2. Charging
ule will be displayed.
2 Press or of the meter
control switches to select the
item to turn ON/OFF, and then
press .
Each time is pressed, the
selected charging schedule
switches between on and off.
When set to off, a charging
schedule is ignored and
charging according to the
charging schedule is not carried
out.
■Changing the registered
charging schedules
The registered charging schedules
can be modified or deleted.
1 Perform step 1 to 5 of the “Reg-
istering the charging schedule”
( P.136) procedure and display
“Scheduled Events” screen.
A list of the registered charging sched-
ule will be displayed.
2 Press or of the meter
control switches to select the
item to change, and then press
and hold .
The “Edit Event” screen will be dis-
played.
3 Press or of the meter
control switches to select the
item to operate, press and
perform the necessary opera-
tion.
“Edit”