display TOYOTA GT86 2019 Accessories, Audio & Navigation (in English)
[x] Cancel search | Manufacturer: TOYOTA, Model Year: 2019, Model line: GT86, Model: TOYOTA GT86 2019Pages: 144, PDF Size: 4.66 MB
Page 62 of 144
62
2. AUDIO SYSTEM
Highlander_Navi_MXS
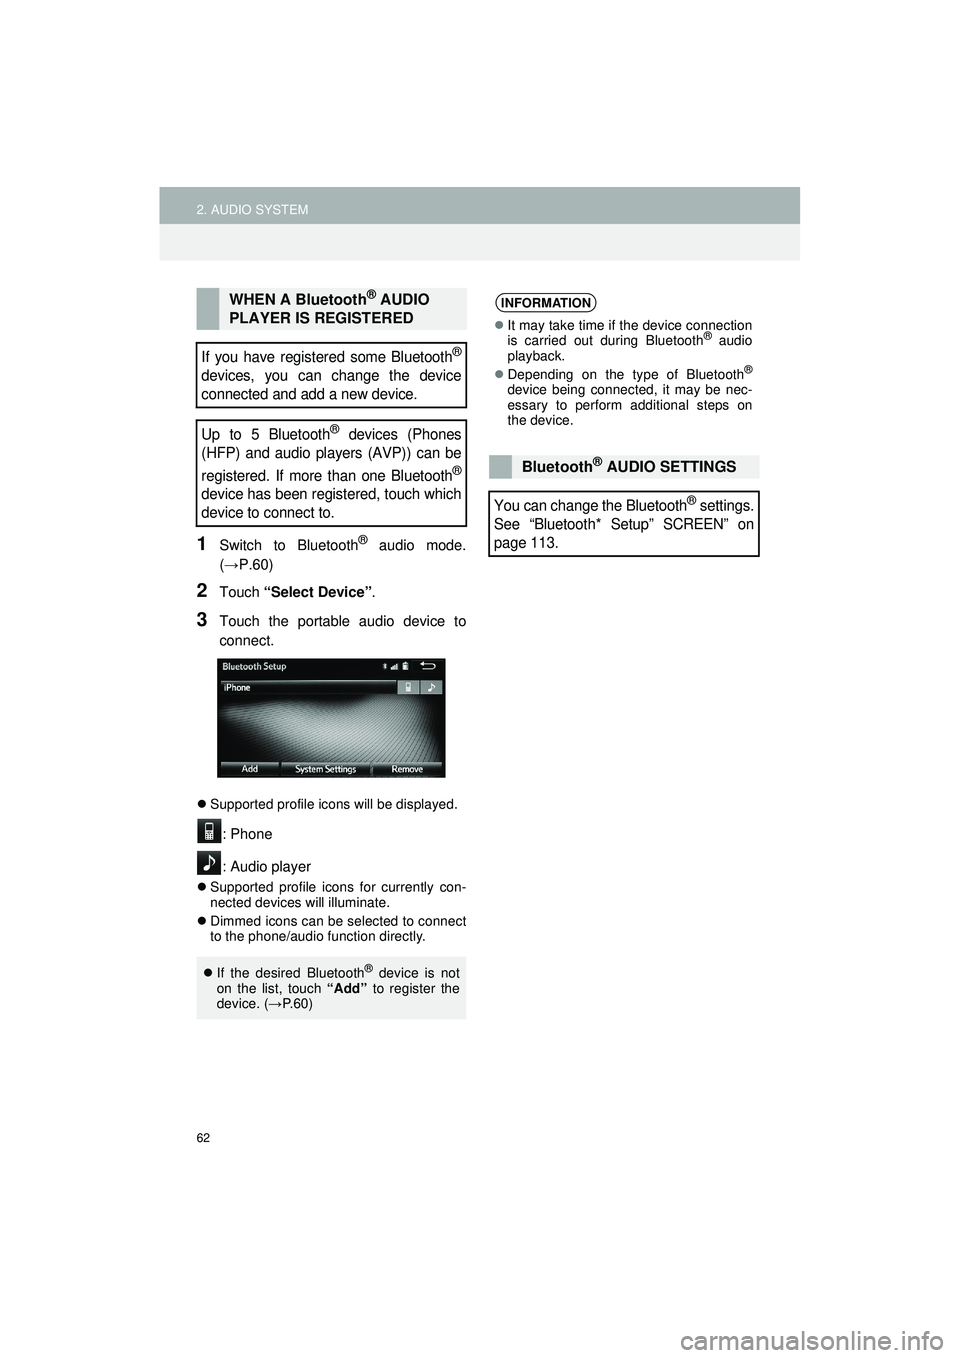
1Switch to Bluetooth® audio mode.
(→P.60)
2Touch “Select Device”.
3Touch the portable audio device to
connect.
Supported profile icons will be displayed.
: Phone
: Audio player
Supported profile icons for currently con-
nected devices will illuminate.
Dimmed icons can be selected to connect
to the phone/audio function directly.
WHEN A Bluetooth® AUDIO
PLAYER IS REGISTERED
If you have register ed some Bluetooth®
devices, you can change the device
connected and add a new device.
Up to 5 Bluetooth
® devices (Phones
(HFP) and audio players (AVP)) can be
registered. If more than one Bluetooth
®
device has been registered, touch which
device to connect to.
If the desired Bluetooth® device is not
on the list, touch “Add” to register the
device. ( →P. 6 0 )
INFORMATION
It may take time if the device connection
is carried out during Bluetooth® audio
playback.
Depending on the type of Bluetooth
®
device being connected, it may be nec-
essary to perform additional steps on
the device.
Bluetooth® AUDIO SETTINGS
You can change the Bluetooth® settings.
See “Bluetooth* Setup” SCREEN” on
page 113.
Page 63 of 144
63
2. AUDIO SYSTEM
Highlander_Navi_MXS
2
AUDIO SYSTEM
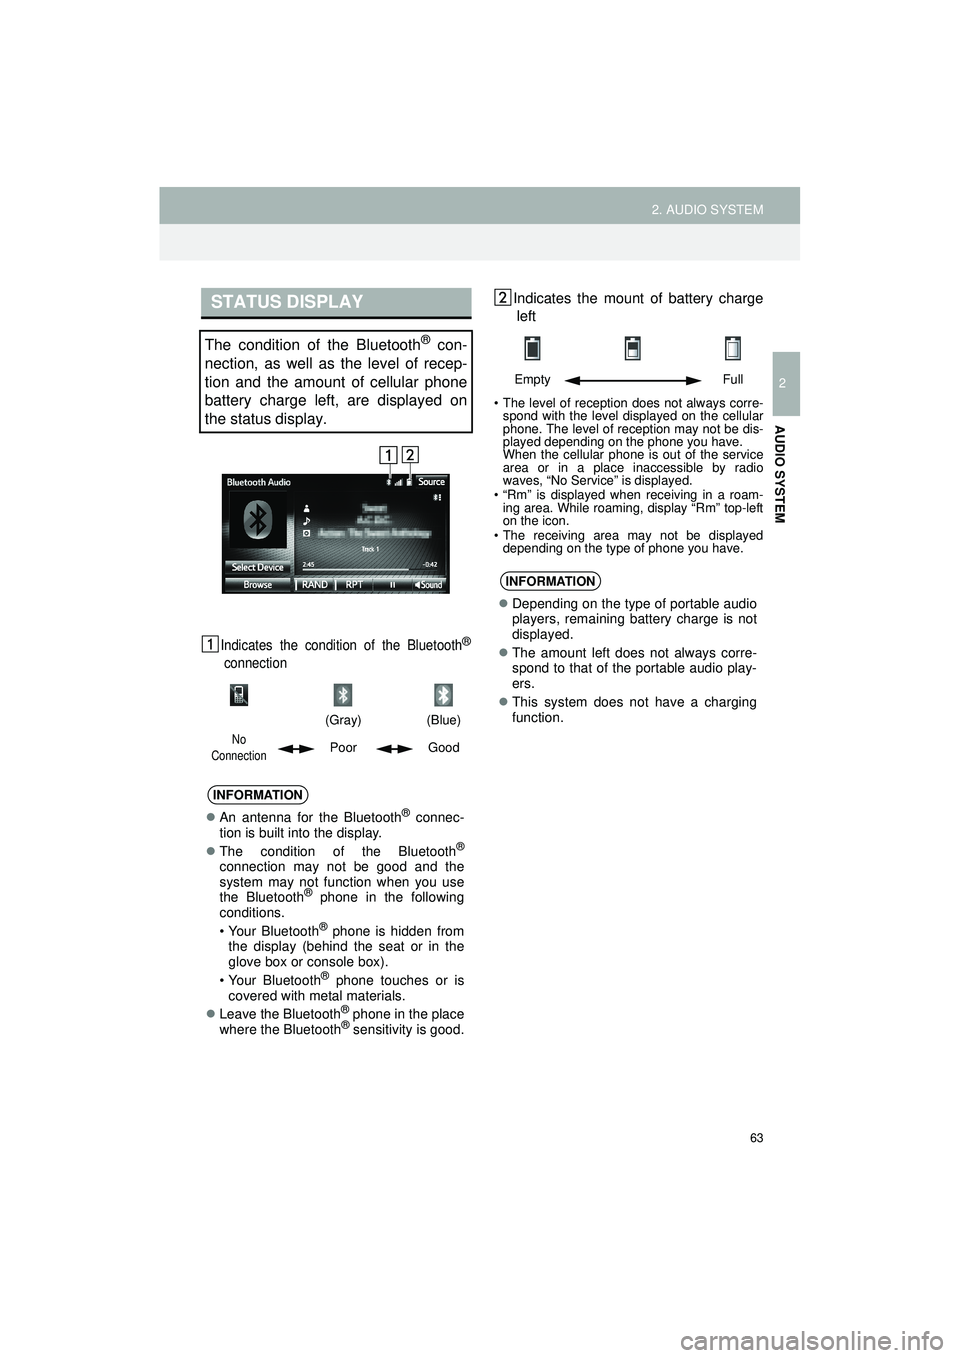
Indicates the condition of the Bluetooth®
connection
Indicates the mount of battery chargeleft
• The level of reception does not always corre- spond with the level displayed on the cellular
phone. The level of reception may not be dis-
played depending on the phone you have.
When the cellular phone is out of the service
area or in a place inaccessible by radio
waves, “No Service” is displayed.
• “Rm” is displayed when receiving in a roam- ing area. While roaming, display “Rm” top-left
on the icon.
• The receiving area may not be displayed depending on the type of phone you have.
STATUS DISPLAY
The condition of the Bluetooth® con-
nection, as well as the level of recep-
tion and the amount of cellular phone
battery charge left, are displayed on
the status display.
(Gray)
(Blue)
No
ConnectionPoor Good
INFORMATION
An antenna for the Bluetooth® connec-
tion is built into the display.
The condition of the Bluetooth
®
connection may not be good and the
system may not function when you use
the Bluetooth
® phone in the following
conditions.
• Your Bluetooth
® phone is hidden from
the display (behind the seat or in the
glove box or console box).
• Your Bluetooth
® phone touches or is
covered with metal materials.
Leave the Bluetooth
® phone in the place
where the Bluetooth® sensitivity is good.
Empty Full
INFORMATION
Depending on the type of portable audio
players, remaining battery charge is not
displayed.
The amount left does not always corre-
spond to that of the portable audio play-
ers.
This system does not have a charging
function.
Page 64 of 144
64
2. AUDIO SYSTEM
Highlander_Navi_MXS
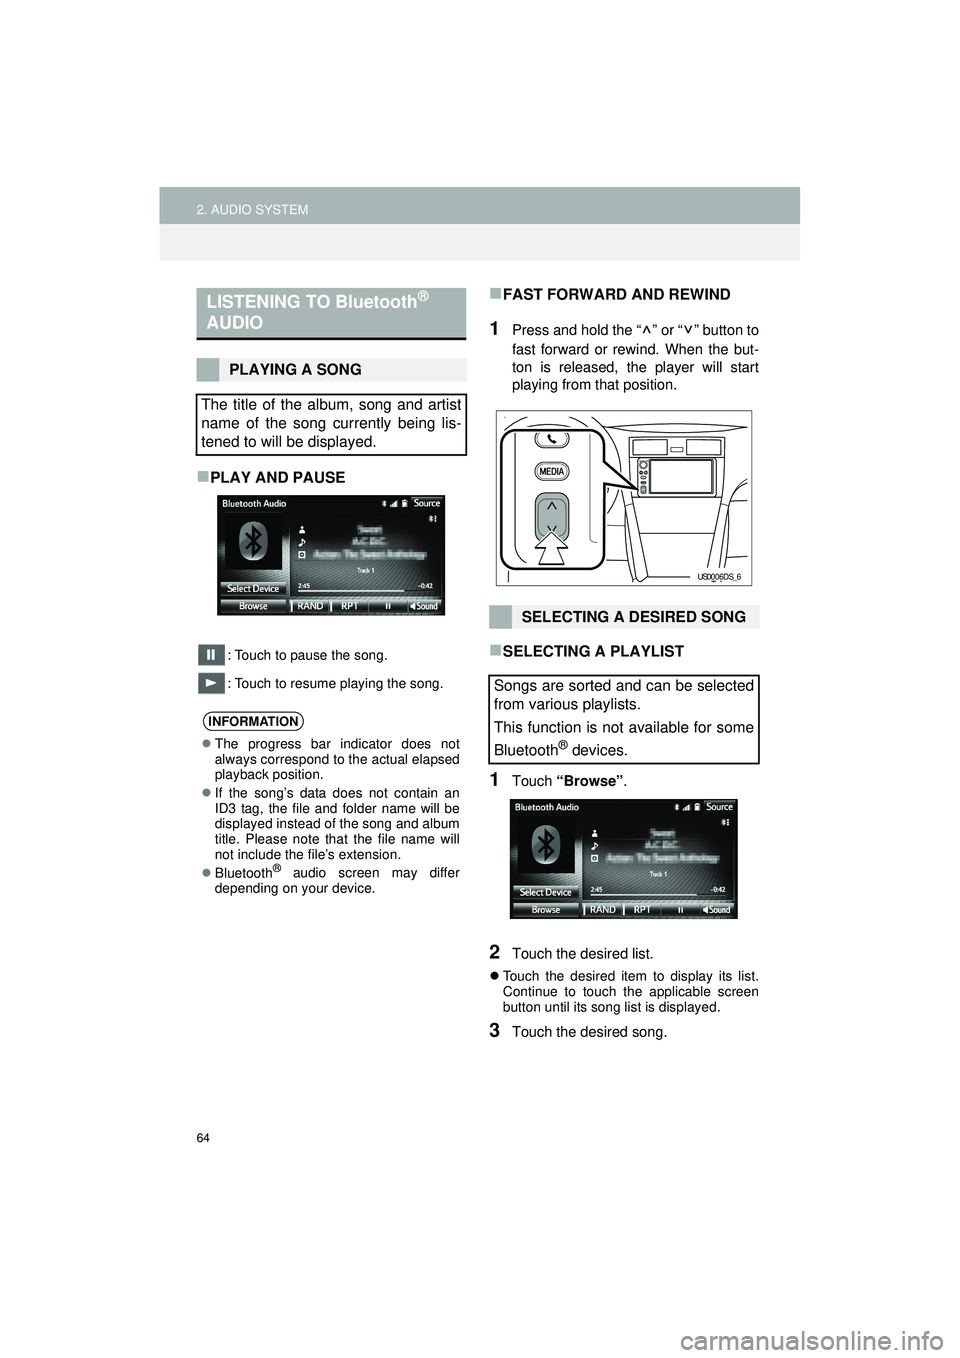
PLAY AND PAUSE
: Touch to pause the song.
: Touch to resume playing the song.
FAST FORWARD AND REWIND
1Press and hold the “ ” or “ ” button to
fast forward or rewind. When the but-
ton is released, the player will start
playing from that position.
SELECTING A PLAYLIST
1Touch “Browse” .
2Touch the desired list.
Touch the desired item to display its list.
Continue to touch the applicable screen
button until its song list is displayed.
3Touch the desired song.
LISTENING TO Bluetooth®
AUDIO
PLAYING A SONG
The title of the album, song and artist
name of the song currently being lis-
tened to will be displayed.
INFORMATION
The progress bar indicator does not
always correspond to the actual elapsed
playback position.
If the song’s data does not contain an
ID3 tag, the file and folder name will be
displayed instead of the song and album
title. Please note that the file name will
not include the file’s extension.
Bluetooth
® audio screen may differ
depending on your device.
SELECTING A DESIRED SONG
Songs are sorted and can be selected
from various playlists.
This function is not available for some
Bluetooth
® devices.
US0006DS_6
Page 67 of 144
67
2. AUDIO SYSTEM
Highlander_Navi_MXS
2
AUDIO SYSTEM
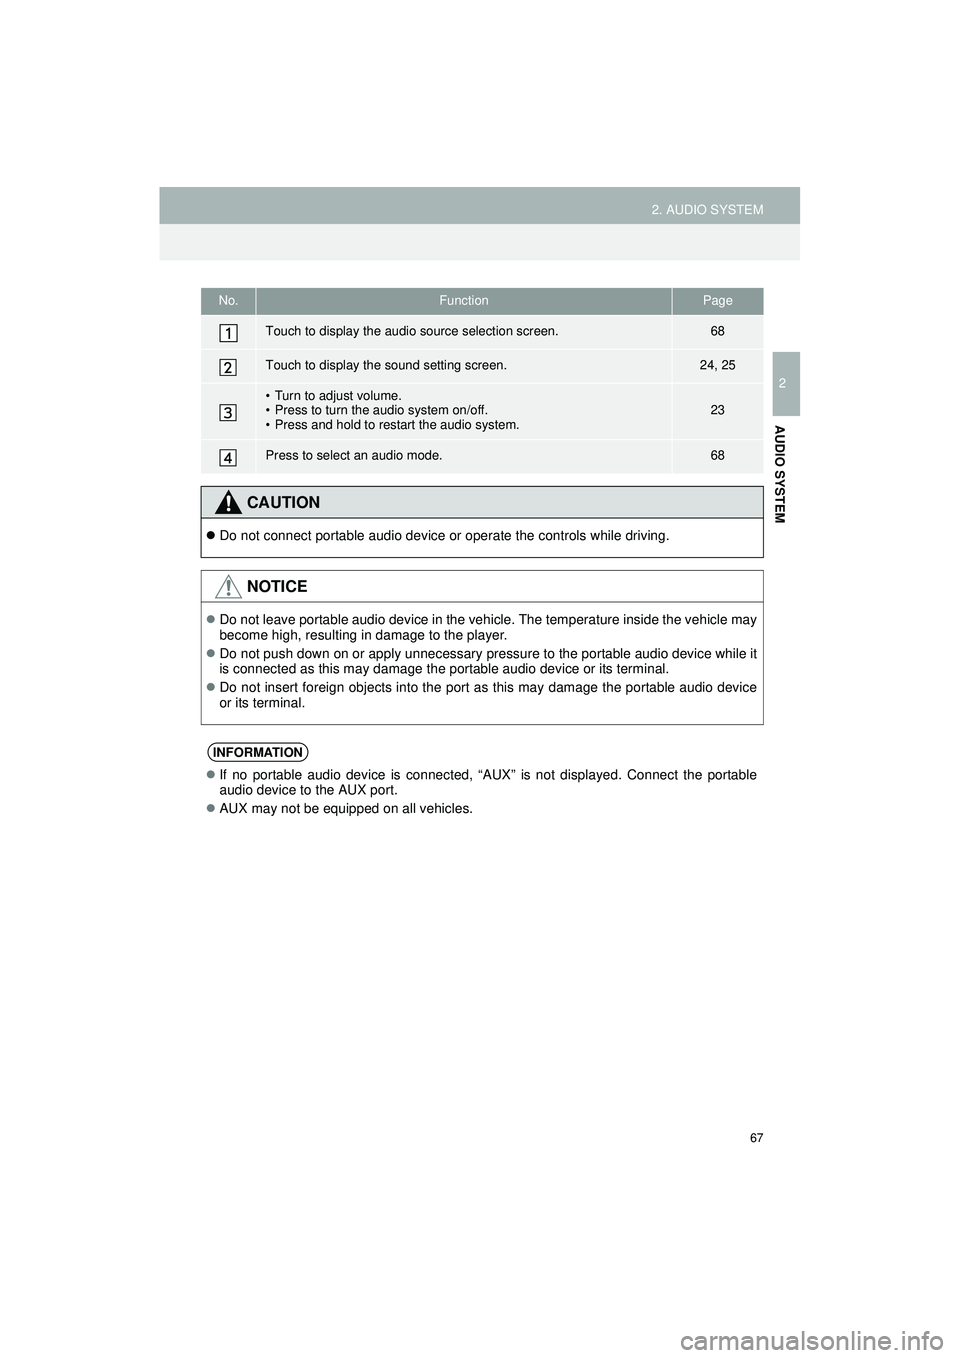
No.FunctionPage
Touch to display the audio source selection screen.68
Touch to display the sound setting screen.24, 25
• Turn to adjust volume.
• Press to turn the audio system on/off.
• Press and hold to restart the audio system.23
Press to select an audio mode.68
CAUTION
Do not connect portable audio device or operate the controls while driving.
NOTICE
Do not leave portable audio device in the vehicle. The temperature inside the vehicle may
become high, resulting in damage to the player.
Do not push down on or apply unnecessary pressure to the portable audio device while it
is connected as this may damage the portable audio device or its terminal.
Do not insert foreign objects into the port as this may damage the portable audio device
or its terminal.
INFORMATION
If no portable audio device is connected, “AUX” is not displayed. Connect the portable
audio device to the AUX port.
AUX may not be equipped on all vehicles.
Page 68 of 144
68
2. AUDIO SYSTEM
Highlander_Navi_MXS
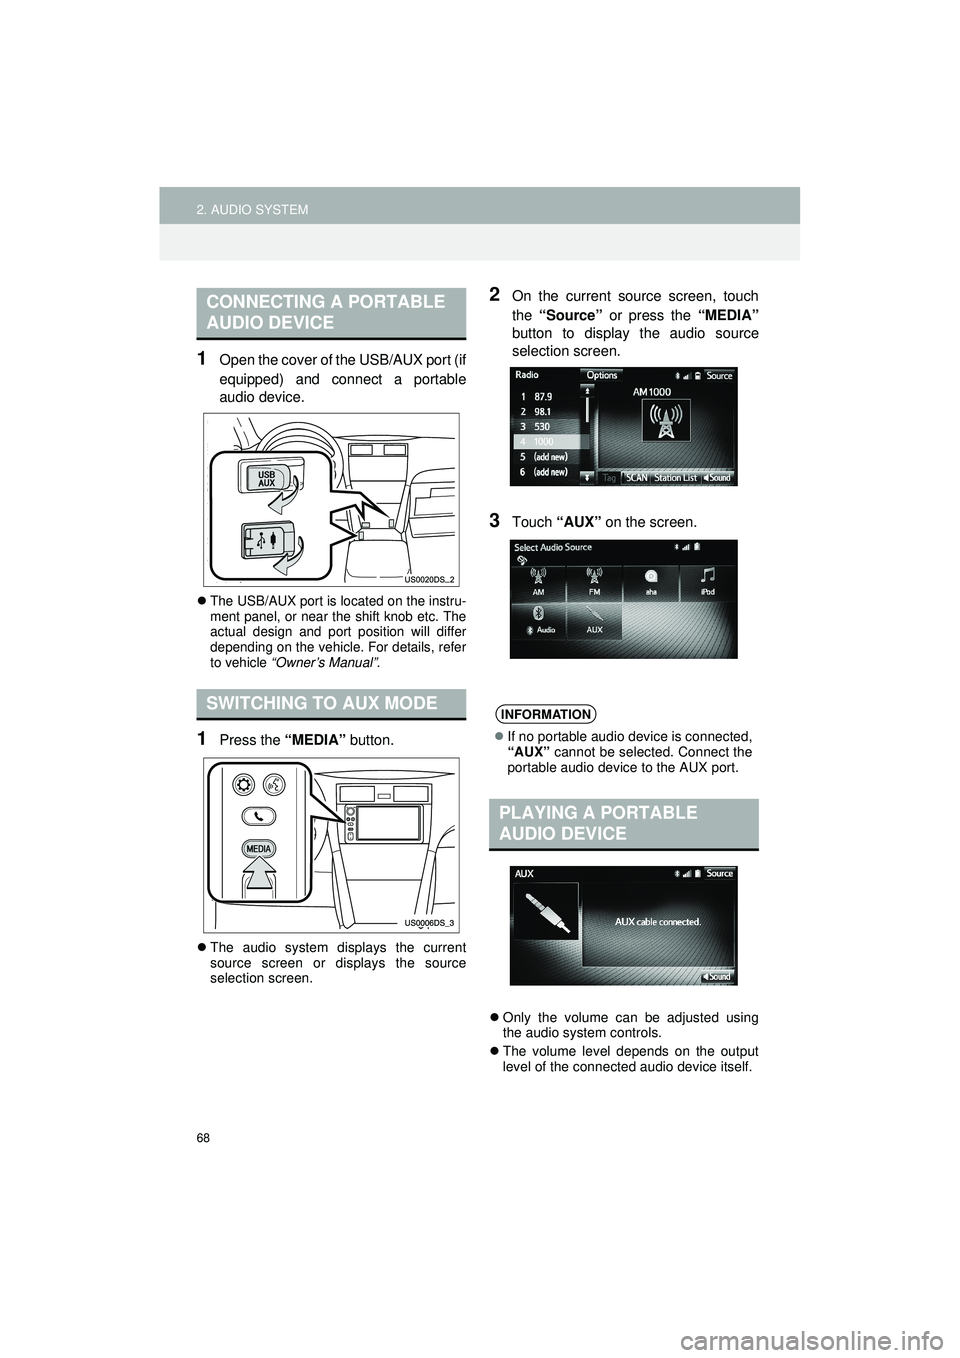
1Open the cover of the USB/AUX port (if
equipped) and connect a portable
audio device.
The USB/AUX port is located on the instru-
ment panel, or near the shift knob etc. The
actual design and port position will differ
depending on the vehicle. For details, refer
to vehicle “Owner’s Manual” .
1Press the “MEDIA” button.
The audio system displays the current
source screen or displays the source
selection screen.
2On the current source screen, touch
the “Source” or press the “MEDIA”
button to display the audio source
selection screen.
3Touch “AUX” on the screen.
Only the volume can be adjusted using
the audio system controls.
The volume level depends on the output
level of the connected audio device itself.
CONNECTING A PORTABLE
AUDIO DEVICE
SWITCHING TO AUX MODEINFORMATION
If no portable audio device is connected,
“AUX” cannot be selected. Connect the
portable audio device to the AUX port.
PLAYING A PORTABLE
AUDIO DEVICE
Page 72 of 144
72
2. AUDIO SYSTEM
Highlander_Navi_MXS
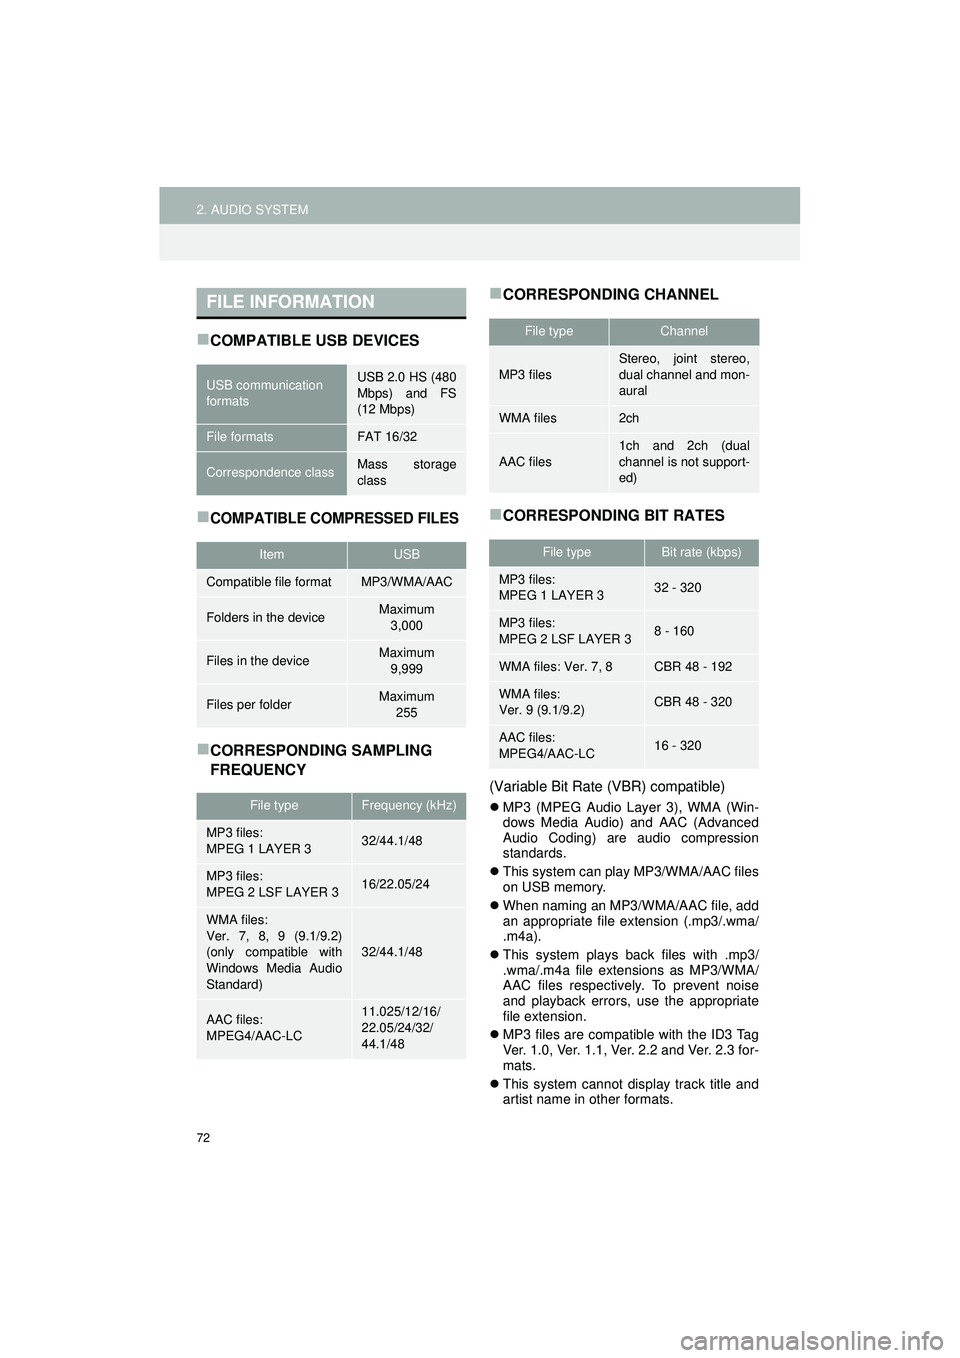
COMPATIBLE USB DEVICES
COMPATIBLE COMPRESSED FILES
CORRESPONDING SAMPLING
FREQUENCY
CORRESPONDING CHANNEL
CORRESPONDING BIT RATES
(Variable Bit Rate (VBR) compatible)
MP3 (MPEG Audio Layer 3), WMA (Win-
dows Media Audio) and AAC (Advanced
Audio Coding) are audio compression
standards.
This system can play MP3/WMA/AAC files
on USB memory.
When naming an MP3/WMA/AAC file, add
an appropriate file extension (.mp3/.wma/
.m4a).
This system plays back files with .mp3/
.wma/.m4a file extensions as MP3/WMA/
AAC files respectively. To prevent noise
and playback errors, use the appropriate
file extension.
MP3 files are compatible with the ID3 Tag
Ver. 1.0, Ver. 1.1, Ver. 2.2 and Ver. 2.3 for-
mats.
This system cannot display track title and
artist name in other formats.
FILE INFORMATION
USB communication
formatsUSB 2.0 HS (480
Mbps) and FS
(12 Mbps)
File formatsFAT 16/32
Correspondence classMass storage
class
ItemUSB
Compatible file formatMP3/WMA/AAC
Folders in the deviceMaximum
3,000
Files in the deviceMaximum 9,999
Files per folderMaximum 255
File typeFrequency (kHz)
MP3 files:
MPEG 1 LAYER 332/44.1/48
MP3 files:
MPEG 2 LSF LAYER 316/22.05/24
WMA files:
Ver. 7, 8, 9 (9.1/9.2)
(only compatible with
Windows Media Audio
Standard)
32/44.1/48
AAC files:
MPEG4/AAC-LC11.025/12/16/
22.05/24/32/
44.1/48
File typeChannel
MP3 files
Stereo, joint stereo,
dual channel and mon-
aural
WMA files2ch
AAC files
1ch and 2ch (dual
channel is not support-
ed)
File typeBit rate (kbps)
MP3 files:
MPEG 1 LAYER 332 - 320
MP3 files:
MPEG 2 LSF LAYER 38 - 160
WMA files: Ver. 7, 8CBR 48 - 192
WMA files:
Ver. 9 (9.1/9.2)CBR 48 - 320
AAC files:
MPEG4/AAC-LC16 - 320
Page 73 of 144
73
2. AUDIO SYSTEM
Highlander_Navi_MXS
2
AUDIO SYSTEM
WMA/AAC files can contain a WMA/AAC
tag that is used in the same way as an ID3
tag. WMA/AAC tags carry information
such as track title and artist name.
This system can play back AAC files
encoded by iTunes.
The sound quality of MP3/WMA files gen-
erally improves with higher bit rates. In
order to achieve a reasonable level of
sound quality, the files with a bit rate of at
least 128 kbps are recommended.
M3u playlists are not compatible with the
audio player.
MP3i (MP3 interactive) and MP3PRO for-
mats are not compatible with the audio
player.
The player is compatible with VBR (Vari-
able Bit Rate).
When playing back files recorded as VBR
(Variable Bit Rate) files, the play time will
not be correctly displayed if the fast for-
ward or rewind operations are used.
It is not possible to check folders that do
not include MP3/WMA/AAC files.
The order changes depending on the per-
sonal computer and MP3/WMA/AAC
encoding software you use.
AAC is short for Advanced Audio Coding
and refers to an audio compression tech-
nology standard used with MPEG2 and
MPEG4.
This is a method of embedding track-
related information in an MP3 file. This
embedded information can include the
track number, track title, the artist’s name,
the album title, the music genre, the year
of production, comments, cover art and
other data. The contents can be freely
edited using software with ID3 tag editing
functions. Although the tags are restricted
to a number of characters, the information
can be viewed when the track is played
back.
Playlists created using “WINAMP” soft-
ware have a playlist file extension (.m3u).
MP3 is an audio compression standard
determined by a working group (MPEG) of
the ISO (International Standard Organiza-
tion). MP3 compresses audio data to
about 1/10 the size of that on conventional
discs.TERMS
AAC
ID3 TAG
m3u
MP3
Page 79 of 144
79
3. VOICE COMMAND SYSTEM
Highlander_Navi_MXS
3
VOICE COMMAND SYSTEM
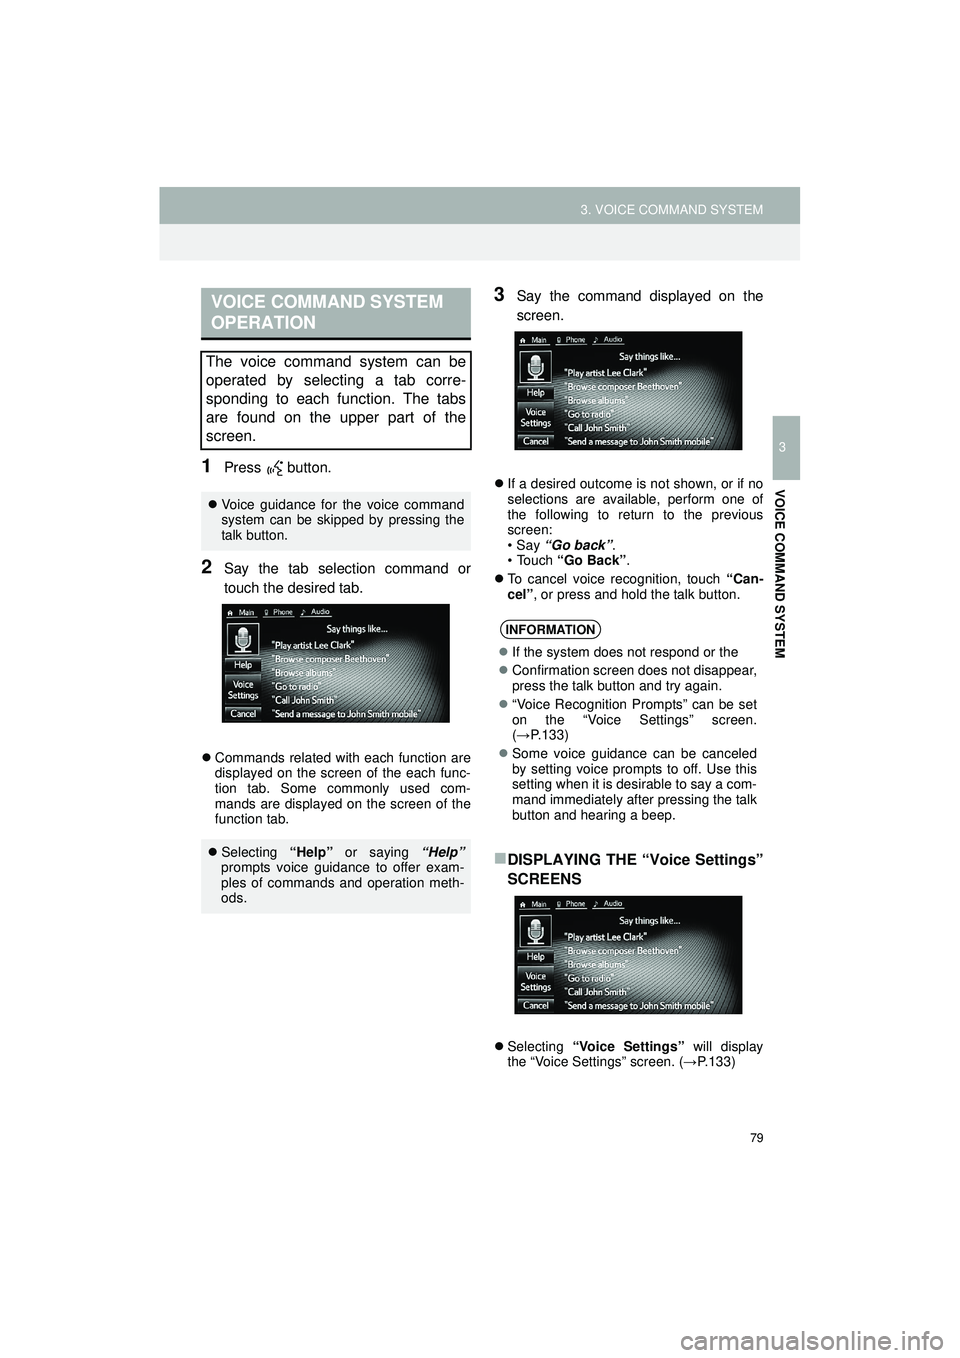
1Press button.
2Say the tab selection command or
touch the desired tab.
Commands related with each function are
displayed on the screen of the each func-
tion tab. Some commonly used com-
mands are displayed on the screen of the
function tab.
3Say the command displayed on the
screen.
If a desired outcome is not shown, or if no
selections are available, perform one of
the following to return to the previous
screen:
•Say “Go back” .
•Touch “Go Back” .
To cancel voice recognition, touch “Can-
cel”, or press and hold the talk button.
DISPLAYING THE “Voice Settings”
SCREENS
Selecting “Voice Settings” will display
the “Voice Settings” screen. (→ P.133)
VOICE COMMAND SYSTEM
OPERATION
The voice command system can be
operated by selecting a tab corre-
sponding to each function. The tabs
are found on the upper part of the
screen.
Voice guidance for the voice command
system can be skipped by pressing the
talk button.
Selecting “Help” or saying “Help”
prompts voice guidance to offer exam-
ples of commands and operation meth-
ods.
INFORMATION
If the system does not respond or the
Confirmation screen does not disappear,
press the talk button and try again.
“Voice Recognition Prompts” can be set
on the “Voice Settings” screen.
(→ P.133)
Some voice guidance can be canceled
by setting voice prompts to off. Use this
setting when it is desirable to say a com-
mand immediately after pressing the talk
button and hearing a beep.
Page 80 of 144
80
3. VOICE COMMAND SYSTEM
Highlander_Navi_MXS
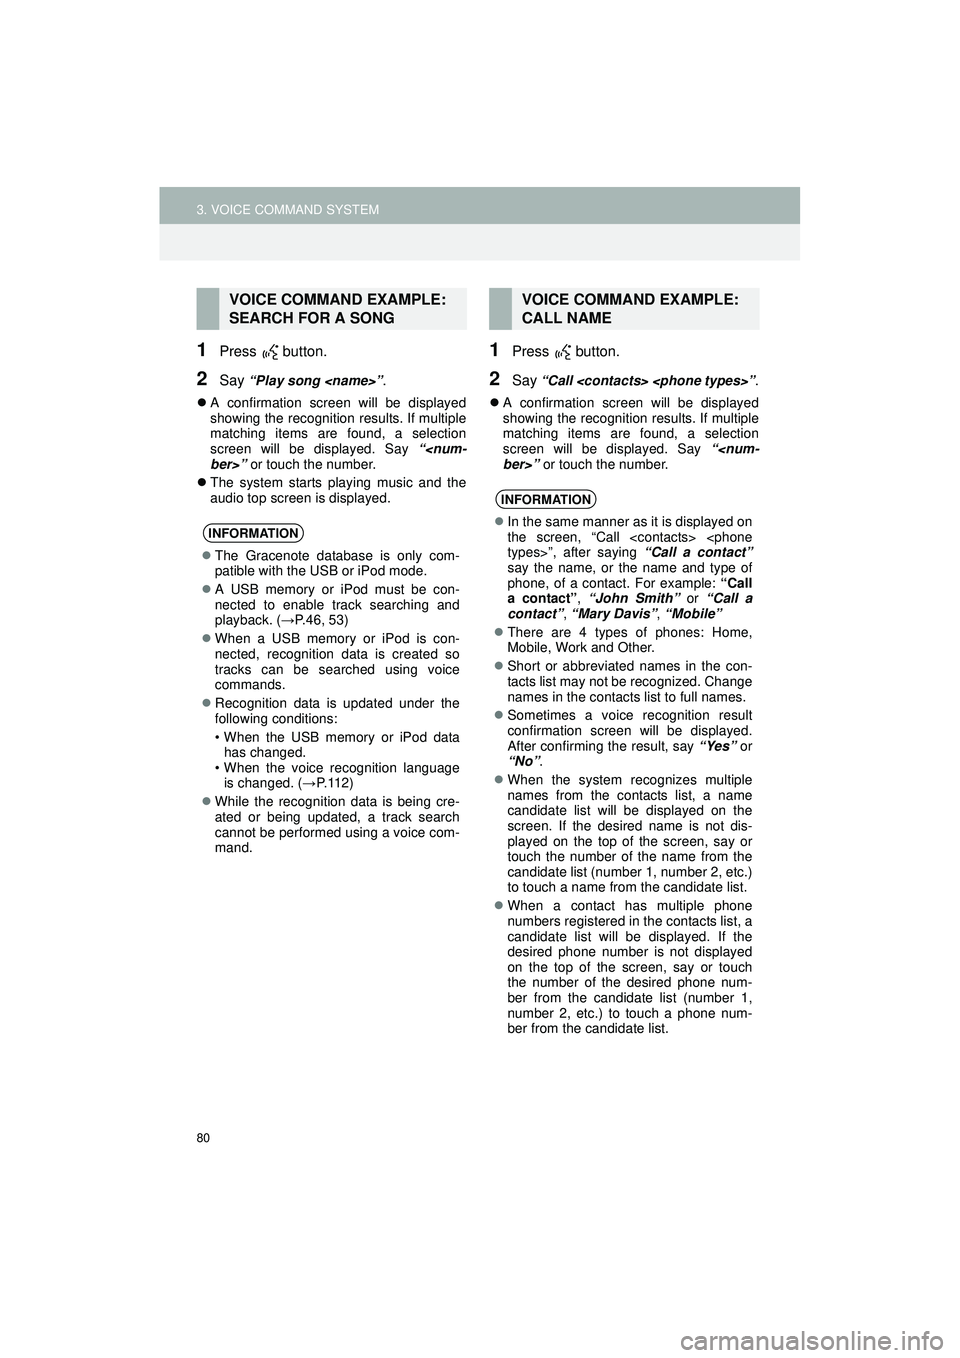
1Press button.
2Say “Play song
A confirmation screen will be displayed
showing the recognition results. If multiple
matching items are found, a selection
screen will be displayed. Say “
The system starts playing music and the
audio top screen is displayed.
1Press button.
2Say “Call
A confirmation screen will be displayed
showing the recognition results. If multiple
matching items are found, a selection
screen will be displayed. Say “
VOICE COMMAND EXAMPLE:
SEARCH FOR A SONG
INFORMATION
The Gracenote database is only com-
patible with the USB or iPod mode.
A USB memory or iPod must be con-
nected to enable track searching and
playback. ( →P.46, 53)
When a USB memory or iPod is con-
nected, recognition data is created so
tracks can be searched using voice
commands.
Recognition data is updated under the
following conditions:
• When the USB memory or iPod data
has changed.
• When the voice recognition language is changed. ( →P. 1 1 2 )
While the recognition data is being cre-
ated or being updated, a track search
cannot be performed using a voice com-
mand.
VOICE COMMAND EXAMPLE:
CALL NAME
INFORMATION
In the same manner as it is displayed on
the screen, “Call
say the name, or the name and type of
phone, of a contact. For example: “Call
a contact” , “John Smith” or “Call a
contact” , “Mary Davis” , “Mobile”
There are 4 types of phones: Home,
Mobile, Work and Other.
Short or abbreviated names in the con-
tacts list may not be recognized. Change
names in the contacts list to full names.
Sometimes a voice recognition result
confirmation screen will be displayed.
After confirming the result, say “Yes” or
“No” .
When the system recognizes multiple
names from the contacts list, a name
candidate list will be displayed on the
screen. If the desired name is not dis-
played on the top of the screen, say or
touch the number of the name from the
candidate list (number 1, number 2, etc.)
to touch a name from the candidate list.
When a contact has multiple phone
numbers registered in the contacts list, a
candidate list will be displayed. If the
desired phone number is not displayed
on the top of the screen, say or touch
the number of the desired phone num-
ber from the candidate list (number 1,
number 2, etc.) to touch a phone num-
ber from the candidate list.
Page 81 of 144
81
3. VOICE COMMAND SYSTEM
Highlander_Navi_MXS
3
VOICE COMMAND SYSTEM
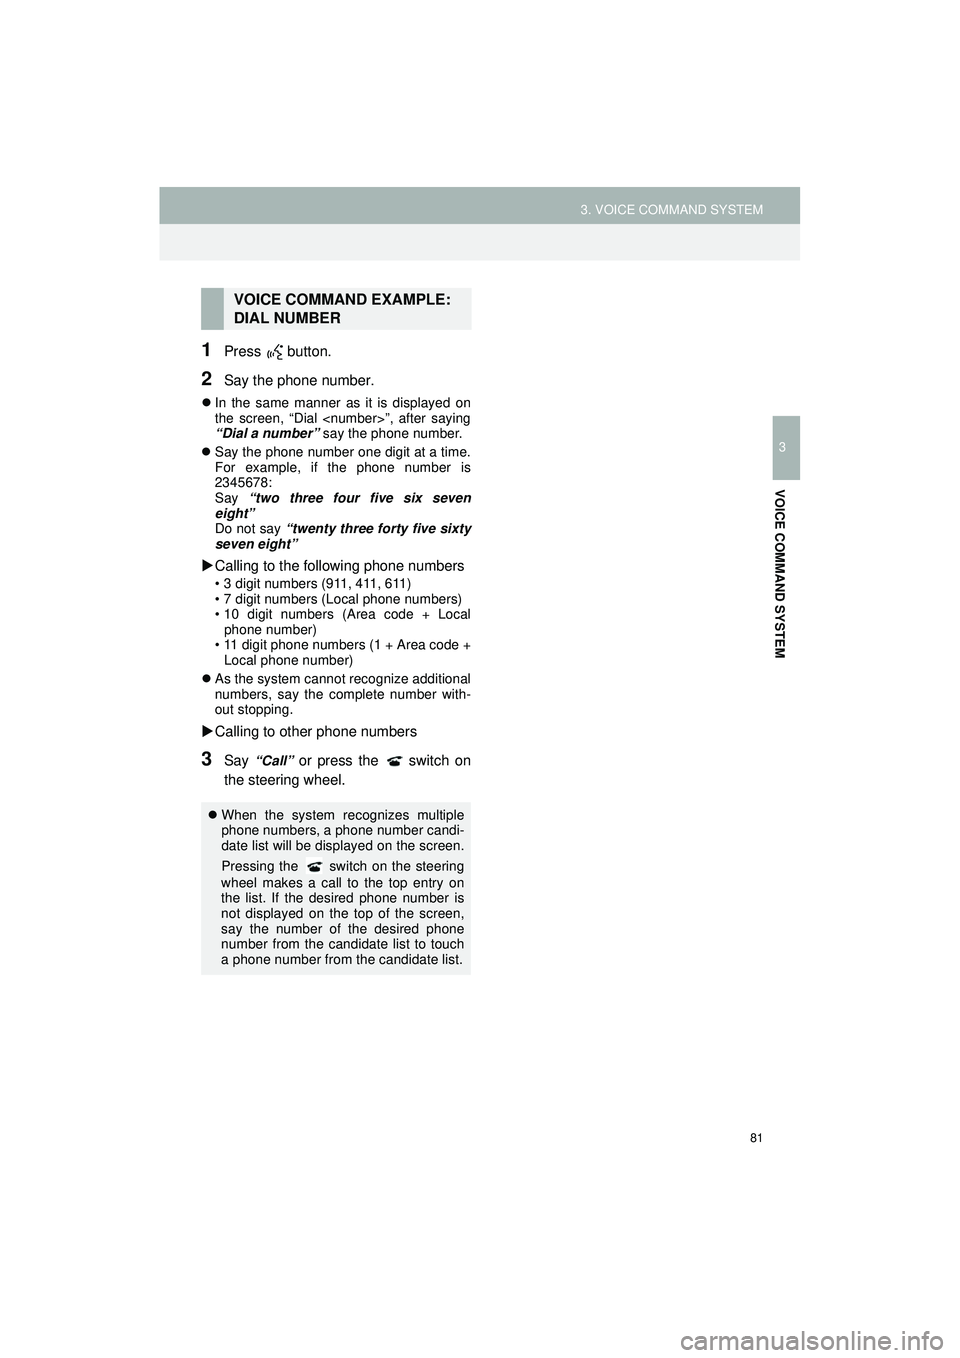
1Press button.
2Say the phone number.
In the same manner as it is displayed on
the screen, “Dial
“Dial a number” say the phone number.
Say the phone number one digit at a time.
For example, if the phone number is
2345678:
Say “two three four five six seven
eight”
Do not say “twenty three forty five sixty
seven eight”
Calling to the following phone numbers
• 3 digit numbers (911, 411, 611)
• 7 digit numbers (Local phone numbers)
• 10 digit numbers (Area code + Local
phone number)
• 11 digit phone numbers (1 + Area code + Local phone number)
As the system cannot recognize additional
numbers, say the complete number with-
out stopping.
Calling to other phone numbers
3Say “Call” or press the switch on
the steering wheel.
VOICE COMMAND EXAMPLE:
DIAL NUMBER
When the system recognizes multiple
phone numbers, a phone number candi-
date list will be displayed on the screen.
Pressing the
switch on the steering
wheel makes a call to the top entry on
the list. If the desired phone number is
not displayed on the top of the screen,
say the number of the desired phone
number from the candidate list to touch
a phone number from the candidate list.