light TOYOTA RAV4 HYBRID 2020 Owners Manual (in English)
[x] Cancel search | Manufacturer: TOYOTA, Model Year: 2020, Model line: RAV4 HYBRID, Model: TOYOTA RAV4 HYBRID 2020Pages: 744, PDF Size: 31.43 MB
Page 566 of 744
5667-1. Maintenance and care
Remove dirt and dust using a
vacuum cleaner.
Wipe off any excess dirt and
dust with a soft cloth damp-
ened with diluted detergent.
Use a diluted water solution of
approximately 5% neutral wool
detergent.
Wring out any excess water
from the cloth and thoroughly
wipe off all remaining traces
of detergent.
NOTICE
■Cleaning detergents
●Do not use the f ollowing types
of detergent, as they may dis-
color the vehicle interior or
cause streaks or damage to
painted surfaces:
• Non-seat portions: Organic sub- stances such as benzene or
gasoline, alkaline or acidic solu-
tions, dye, and bleach
• Seats: Alkaline or acidic solu- tions, such as thinner, benzene,
and alcohol
●Do not use a polish wax or pol-
ish cleaner. The instrument
panel’s or other interior part’s
painted surface may be dam-
aged.
■Preventing damage to leather
surfaces
Observe the following precautions
to avoid damage to and deteriora-
tion of leather surfaces:
●Remove any dust or dirt from
leather surfaces immediately.
●Do not expose the vehicle to
direct sunlight for extended peri-
ods of time. Park the vehicle in
the shade, especially during
summer.
●Do not place items made of
vinyl, plastic, or containing wax
on the upholstery, as they may
stick to the leather surface if the
vehicle interior heats up signifi-
cantly.
■Water on the floor
Do not wash the v ehicle floor with
water.
Vehicle systems such as the
audio system may be damaged if
water comes into contact with
electrical components such as the
audio system abov e or under the
floor of the vehicle. Water may
also cause the body to rust.
■When cleaning the inside of
the windshield
Do not allow glass cleaner to con-
tact the lens. Also, do not touch
the lens. ( P.243)
■Cleaning the inside of the rear
window
●Do not use a gla ss cleaner to
clean the rear window, as this
may cause damage to the rear
window defogger heater wires.
Use a cloth dampened with
lukewarm water to gently wipe
the window clean. Wipe the win-
dow in strokes running parallel
to the heater wires.
●Be careful not to scratch or
damage the heater wires.
Cleaning the leather areas
Page 569 of 744
5697-2. Maintenance
7
Maintenance and care
■Resetting the message indicat-
ing maintenance is required
After the required maintenance is
performed according to the mainte-
nance schedule, please reset the
reminder light or message.
To reset the remin der light or mes-
sage, follow the procedure
described below:
1 Press or of the meter
control switches and select
on the multi-information display.
2 Press or of the meter
control switches and select
“Vehicle Settings”. Then press
.
3 Press or of the meter
control switches and select
“Scheduled Maintenance”. Then
press .
4 Select “Yes” and press .
You can perform some mainte-
nance procedures by yourself.
Please be aware that do-it-your-
self maintenance may affect
warranty coverage.
The use of Toyota Repair Manuals
is recommended.
For details about warranty cover-
age, refer to the separate “Owner’s
Warranty Information Booklet” or
“Owner’s Manual Supplement”.
Do-it-yourself mainte-
nance
General maintenance
Listed below are the general
maintenance items that
should be performed at the
intervals specified in the
“Owner’s Warranty Informa-
tion Booklet” or “Owner’s
Manual Supplement/Sched-
uled Maintenance Guide”. It
is recommended that any
problem you notice should
be brought to the attention
of your Toyota dealer or
qualified service shop for
advice.
WA R N I N G
■If the hybrid system is run-
ning
Turn the hybrid system off and
ensure that there is adequate
ventilation before performing
maintenance checks.
Engine compartment
ItemsCheck points
Brake fluid
Is the brake fluid at
the correct level?
( P.582)
Engine/power
control unit
coolant
Is the
engine/power con-
trol unit coolant at
the correct level?
( P.580)
Engine oil
Is the engine oil at
the correct level?
( P.578)
Page 570 of 744
5707-2. Maintenance
Exhaust sys-
temThere should not
be any fumes or
strange sounds.
Radiator/con-
denser
The radiator and
condenser should
be free from for-
eign objects.
( P.581)
Washer fluid
Is there sufficient
washer fluid?
( P.583)
Luggage compartment
ItemsCheck points
12-volt batteryCheck the connec-
tions. ( P.584)
Vehicle interior
ItemsCheck points
Accelerator
pedal
• The accelerator
pedal should
move smoothly
(without uneven
pedal effort or
catching).
Hybrid trans-
mission “Park”
mechanism
• When parked on a slope and the
shift position is in
P, is the vehicle
securely
stopped?
ItemsCheck points
Brake pedal
• Does the brake pedal move
smoothly?
• Does the brake pedal have
appropriate
clearance from
the floor?
• Does the brake pedal have the
correct amount
of free play?
Brakes
• The vehicle should not pull to
one side when
the brakes are
applied.
• The brakes should work
effectively.
• The brake pedal should not feel
spongy.
• The brake pedal should not get
too close to the
floor when the
brakes are
applied.
Head
restraints
• Do the head restraints move
smoothly and
lock securely?
Indica-
tors/buzzers
• Do the indica-tors and buzzers
function prop-
erly?
Lights• Do all the lights come on?
ItemsCheck points
Page 574 of 744
5747-3. Do-it-yourself maintenance
Hybrid bat-
tery (traction
battery) air
intake vent
( P.606)• Vacuum cleaner,
etc,
• Phillips screw- driver
Light bulbs
( P.618)
• Bulb with same
number and watt-
age rating as origi-
nal
• Phillips-head screwdriver
• Flathead screw- driver
•Wrench
Radiator and
condenser
( P.581)
Tire inflation
pressure
( P.600)• Tire pressure
gauge
• Compressed air source
Washer fluid
( P.583)
• Water or washer
fluid containing
antifreeze (for win-
ter use)
• Funnel (used only for adding water or
washer fluid)
WA R N I N G
The engine compartment contains
many mechanisms and fluids that
may move suddenly, become hot,
or become electrically energized.
To avoid death or serious injury,
observe the following precautions.
ItemsParts and tools■When working on the engine
compartment
●Make sure that “IGNITION ON”
on the multi-information display
and the “READY” indicator are
both off.
●Keep hands, clothing and tools
away from the moving fan.
●Be careful not to touch the
engine, power control unit, radi-
ator, exhaust manifold, etc. right
after driving as they may be hot.
Oil and other fluids may also be
hot.
●Do not leave anything that may
burn easily, such as paper and
rags, in the engine compart-
ment.
●Do not smoke, c ause sparks or
expose an open flame to fuel or
the battery. Fuel and battery
fumes are flammable.
●Be extremely cautious when
working on the battery. It con-
tains poisonous and corrosive
sulfuric acid.
■When working near the elec-
tric cooling fan or radiator
grille
Be sure the power switch is OFF.
With the power switch in ON, the
electric cooling fa n may automati-
cally start to run if the air condi-
tioning is on and/or the coolant
temperature is high. ( P.581)
■Safety glasses
Wear safety glasses to prevent
flying or falling material, fluid
spray, etc., from getting in your
eyes.
Page 575 of 744
5757-3. Do-it-yourself maintenance
7
Maintenance and care
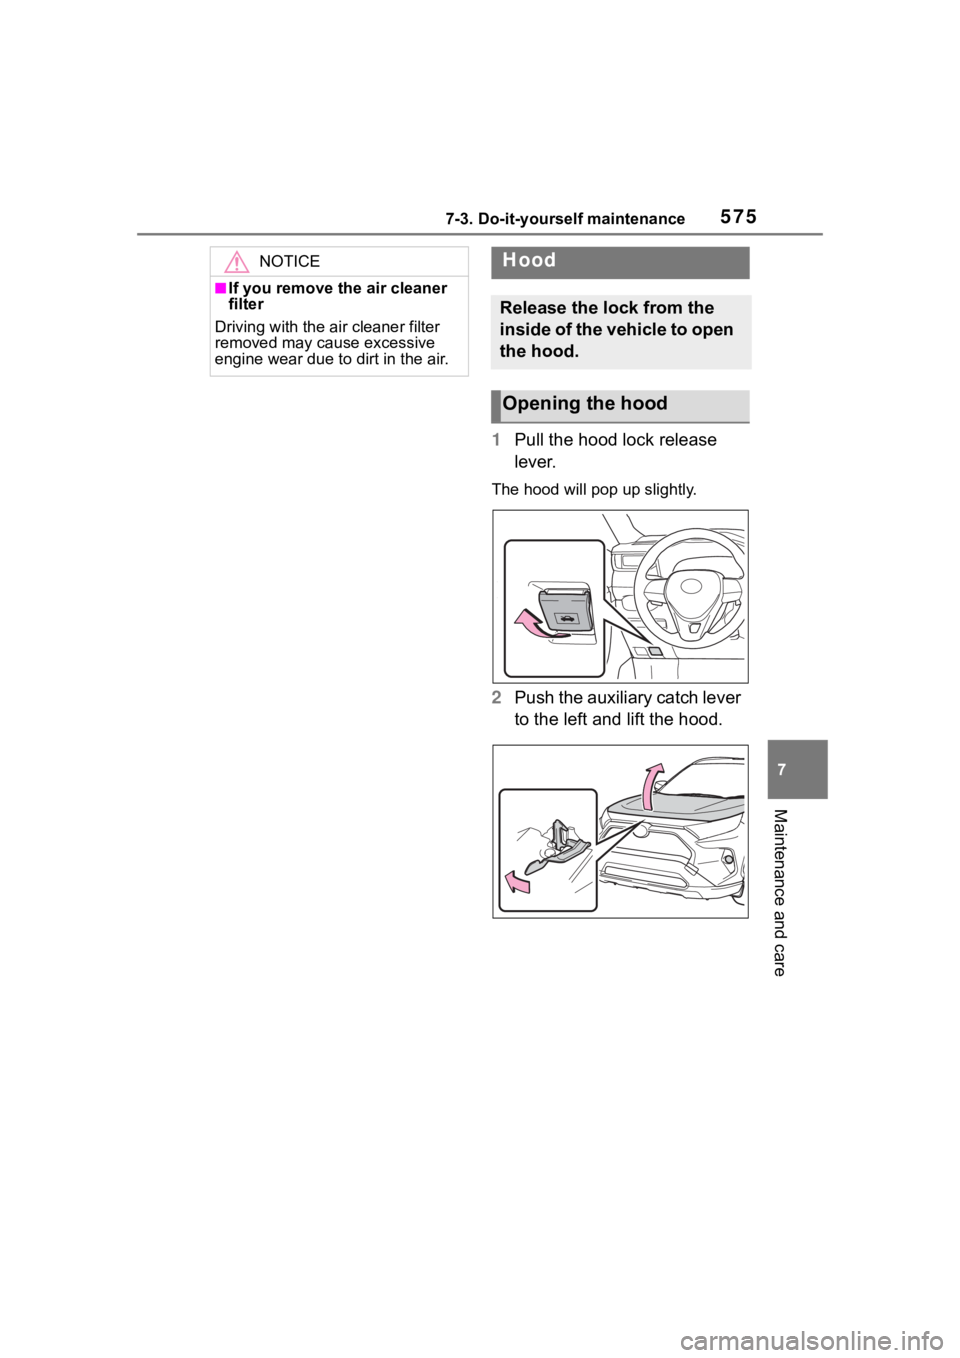
1Pull the hood lock release
lever.
The hood will pop up slightly.
2Push the auxiliary catch lever
to the left and lift the hood.
NOTICE
■If you remove th e air cleaner
filter
Driving with the a ir cleaner filter
removed may cause excessive
engine wear due to dirt in the air.
Hood
Release the lock from the
inside of the vehicle to open
the hood.
Opening the hood
Page 583 of 744
5837-3. Do-it-yourself maintenance
7
Maintenance and care
■Brake fluid can absorb moisture
from the air
Excess moisture in the brake fluid
can cause a dangerous loss of brak-
ing efficiency. Use only newly
opened brake fluid.
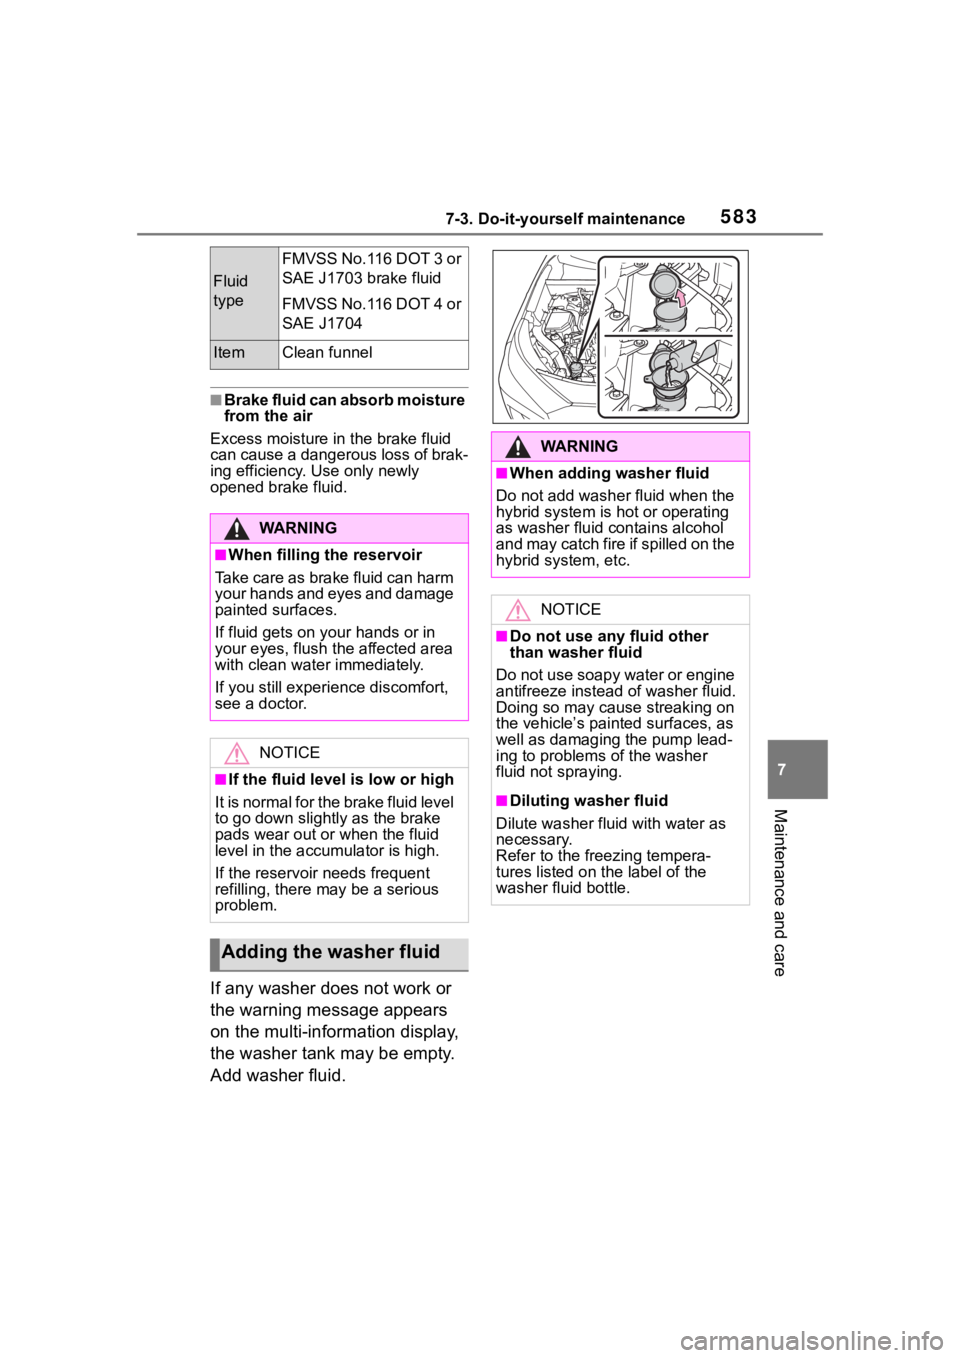
If any washer does not work or
the warning message appears
on the multi-information display,
the washer tank may be empty.
Add washer fluid.
Fluid
type
FMVSS No.116 DOT 3 or
SAE J1703 brake fluid
FMVSS No.116 DOT 4 or
SAE J1704
ItemClean funnel
WA R N I N G
■When filling the reservoir
Take care as brake fluid can harm
your hands and eyes and damage
painted surfaces.
If fluid gets on your hands or in
your eyes, flush t he affected area
with clean water immediately.
If you still experien ce discomfort,
see a doctor.
NOTICE
■If the fluid level is low or high
It is normal for the brake fluid level
to go down slightly as the brake
pads wear out or when the fluid
level in the accumulator is high.
If the reservoir needs frequent
refilling, there ma y be a serious
problem.
Adding the washer fluid
WA R N I N G
■When adding washer fluid
Do not add washer fluid when the
hybrid system is hot or operating
as washer fluid contains alcohol
and may catch fire if spilled on the
hybrid system, etc.
NOTICE
■Do not use any fluid other
than washer fluid
Do not use soapy water or engine
antifreeze instead of washer fluid.
Doing so may cause streaking on
the vehicle’s painted surfaces, as
well as damaging the pump lead-
ing to problems of the washer
fluid not spraying.
■Diluting washer fluid
Dilute washer fluid with water as
necessary.
Refer to the freezing tempera-
tures listed on the label of the
washer fluid bottle.
Page 584 of 744
5847-3. Do-it-yourself maintenance
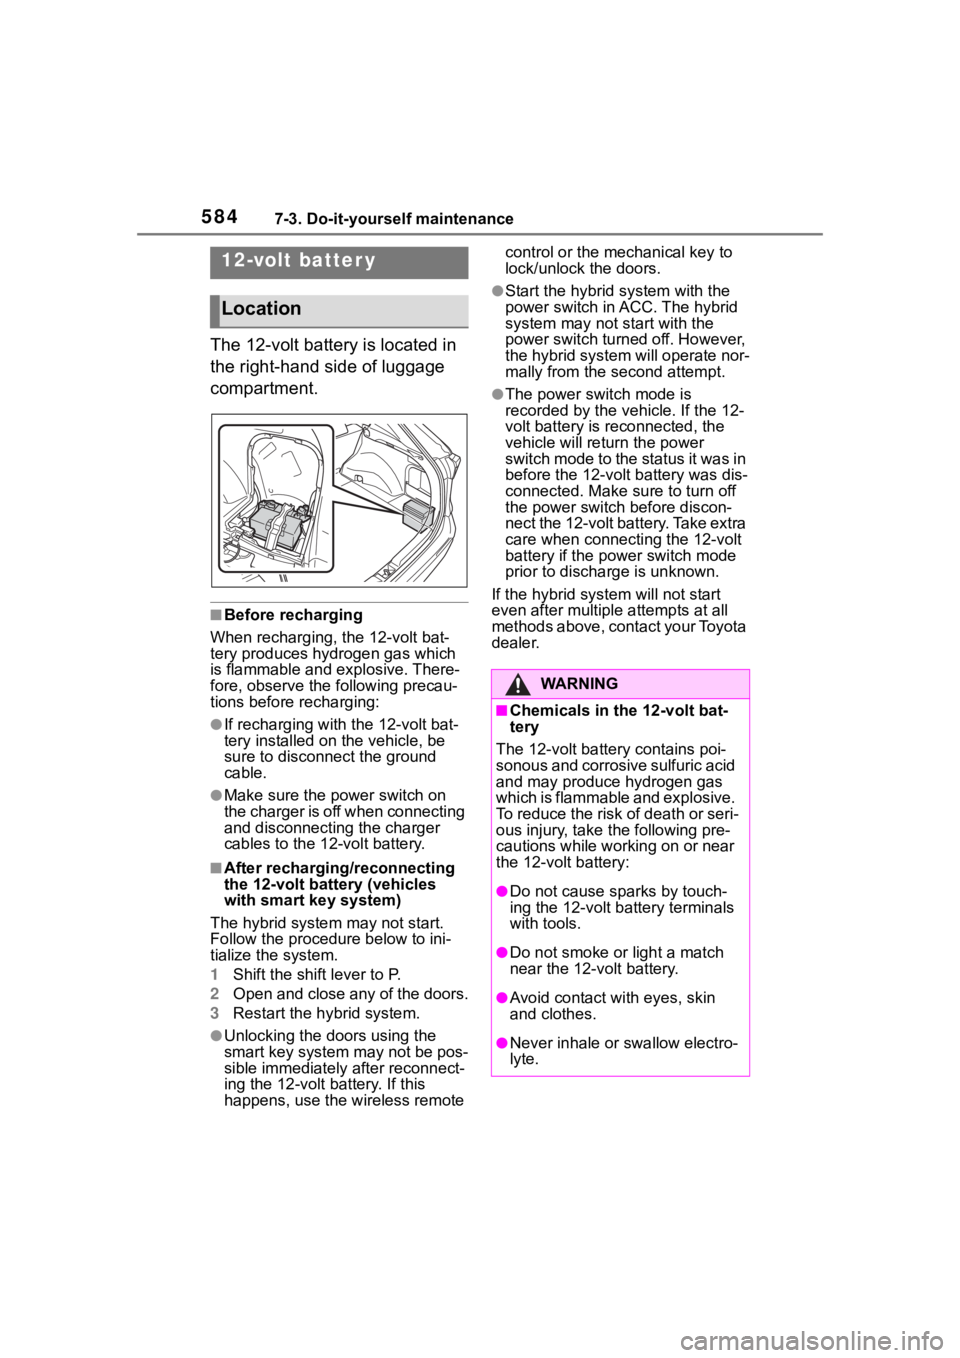
The 12-volt battery is located in
the right-hand side of luggage
compartment.
■Before recharging
When recharging, the 12-volt bat-
tery produces hydrogen gas which
is flammable and explosive. There-
fore, observe the following precau-
tions before recharging:
●If recharging with the 12-volt bat-
tery installed on the vehicle, be
sure to disconnect the ground
cable.
●Make sure the power switch on
the charger is off when connecting
and disconnecting the charger
cables to the 12-volt battery.
■After recharging/reconnecting
the 12-volt battery (vehicles
with smart key system)
The hybrid system may not start.
Follow the procedure below to ini-
tialize the system.
1 Shift the shift lever to P.
2 Open and close any of the doors.
3 Restart the hybrid system.
●Unlocking the doors using the
smart key system may not be pos-
sible immediately after reconnect-
ing the 12-volt battery. If this
happens, use the wireless remote control or the mechanical key to
lock/unlock the doors.
●Start the hybrid system with the
power switch in
ACC. The hybrid
system may not start with the
power switch turned off. However,
the hybrid system will operate nor-
mally from the second attempt.
●The power switch mode is
recorded by the vehicle. If the 12-
volt battery is reconnected, the
vehicle will return the power
switch mode to the status it was in
before the 1 2-volt battery was dis-
connected. Make sure to turn off
the power switch before discon-
nect the 12-volt battery. Take extra
care when connecting the 12-volt
battery if the power switch mode
prior to discharge is unknown.
If the hybrid sys tem will not start
even after multiple attempts at all
methods above, contact your Toyota
dealer.
12-volt batter y
Location
WA R N I N G
■Chemicals in the 12-volt bat-
tery
The 12-volt battery contains poi-
sonous and corrosive sulfuric acid
and may produce hydrogen gas
which is flammable and explosive.
To reduce the risk of death or seri-
ous injury, take the following pre-
cautions while working on or near
the 12-volt battery:
●Do not cause sparks by touch-
ing the 12-volt battery terminals
with tools.
●Do not smoke or light a match
near the 12-volt battery.
●Avoid contact with eyes, skin
and clothes.
●Never inhale or swallow electro-
lyte.
Page 589 of 744
5897-3. Do-it-yourself maintenance
7
Maintenance and care
Your vehicle is equipped with a
tire pressure warning system
that uses tire pressure warning
valves and transmitters to detect
low tire inflation pressure before
serious problems arise.
If the tire pressure drops
below a predetermined level,
the driver is warned a screen
display
* and by a warning
light. ( P.642)
*: Vehicles with tire inflation pres-
sure display function only
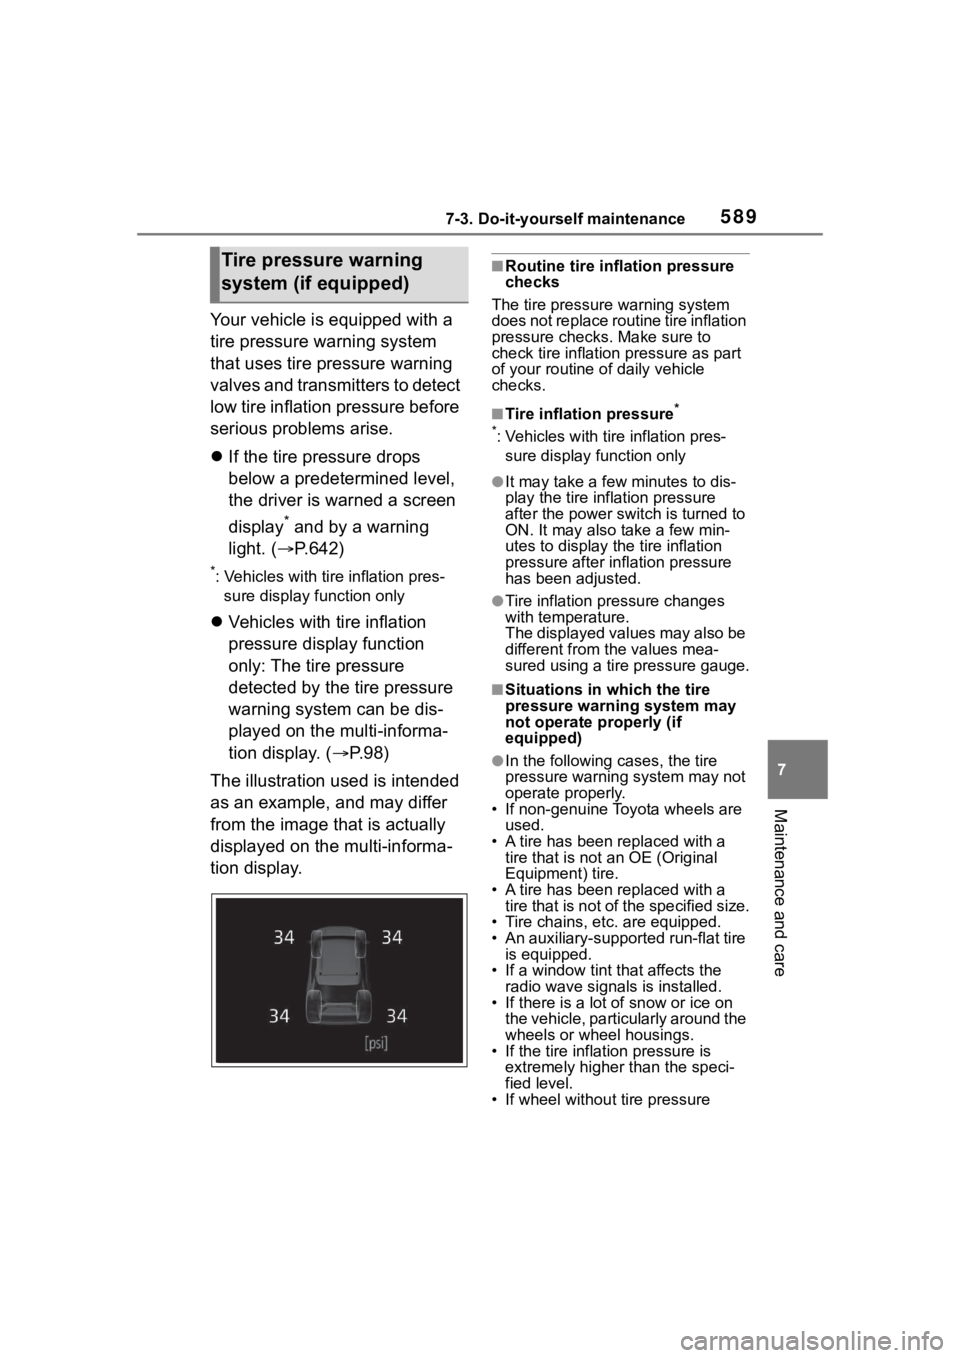
Vehicles with tire inflation
pressure display function
only: The tire pressure
detected by the tire pressure
warning system can be dis-
played on the multi-informa-
tion display. ( P. 9 8 )
The illustration used is intended
as an example, and may differ
from the image that is actually
displayed on the multi-informa-
tion display.
■Routine tire inflation pressure
checks
The tire pressure warning system
does not replace routine tire inflation
pressure checks . Make sure to
check tire inflation pressure as part
of your routine o f daily vehicle
checks.
■Tire inflation pressure*
*
: Vehicles with tire inflation pres- sure display function only
●It may take a few minutes to dis-
play the tire inflation pressure
after the power switch is turned to
ON. It may also take a few min-
utes to display the tire inflation
pressure after infl ation pressure
has been adjusted.
●Tire inflation pressure changes
with temperature.
The displayed values may also be
different from the values mea-
sured using a tire pressure gauge.
■Situations in which the tire
pressure warning system may
not operate properly (if
equipped)
●In the following cases, the tire
pressure warning system may not
operate properly.
• If non-genuine Toyota wheels are used.
• A tire has been replaced with a
tire that is not an OE (Original
Equipment) tire.
• A tire has been replaced with a
tire that is not of the specified size.
• Tire chains, etc. are equipped.
• An auxiliary-support ed run-flat tire
is equipped.
• If a window tint that affects the radio wave signals is installed.
• If there is a lot of snow or ice on the vehicle, particularly around the
wheels or wheel housings.
• If the tire inflation pressure is extremely higher than the speci-
fied level.
• If wheel withou t tire pressure
Tire pressure warning
system (if equipped)
Page 594 of 744
5947-3. Do-it-yourself maintenance
*1: Vehicles with tire pressure warn-
ing system only
When replacing tires or wheels,
tire pressure warning valves and
transmitters must also be
installed.
Except for models made in
Japan
*2 without tire inflation
pressure display function
When new tire pressure warning
valves and transmitters are
installed, new ID codes must be
registered in the tire pressure
warning computer and the tire
pressure warning system must
be initialized. ( P.598)
*2: The country of production is writ-
ten on the Certification Regula-
tion label. ( P.676)
For models made in Japan*2
without tire inflation pressure
display function
When new tire pressure warning
valves and transmitters are
installed, new ID codes must be
registered in the tire pressure
warning computer and the tire
pressure warning system must
be initialized. Have tire pressure
warning valve and transmitter ID
codes registered by your Toyota
dealer.
*2: The country of production is writ- ten on the Certification Regula- tion label. (
P.676)
■When replacing the tires and
wheels (vehicles with tire pres-
sure warning system)
If the ID code of the tire pressure
warning valve and tr ansmitter is not
registered, the tire pressure warning
system will not work properly. After
driving for about 20 minutes, the tire
pressure warning light blinks for 1
minute and stays on to indicate a
system malfunction.
Installing tire pressure
warning valves and trans-
mitters
*1
NOTICE
■Repairing or replacing tires,
wheels, tire pressure warn-
ing valves, transmitters and
tire valve caps (vehicles with
tire pressure warning system)
●When removing or fitting the
wheels, tires or the tire pressure
warning valves and transmit-
ters, contact your Toyota dealer
as the tire pressure warning
valves and transmitters may be
damaged if not handled cor-
rectly.
●Make sure to install the tire
valve caps. If the tire valve caps
are not installed, water could
enter the tire pressure warning
valves and the tire pressure
warning valves could be bound.
●When replacing tire valve caps,
do not use tire valve caps other
than those specified.
The cap may become stuck.
Page 595 of 744
5957-3. Do-it-yourself maintenance
7
Maintenance and care
■The tire pressure warning
system must be initialized
in the following circum-
stances:
When rotating the tires.
When changing the tire.
After registering the ID codes.
( P.598)
When the tire pressure warning
system is initialized, the current
tire inflation pressure is set as
the benchmark pressure.
■How to initialize the tire
pressure warning system
Vehicles without tire inflation
pressure display function
1 Park the vehicle in a safe
place and stop the hybrid
system.
Initialization cannot be performed
while the vehicle is moving.
2Adjust the tire inflation pres-
sure to the specified cold tire
inflation pressure level.
( P.681)
Make sure to adjust the tire pres-
sure to the specifie d cold tire infla-
tion pressure level. The tire
pressure warning system will oper-
ate based on this pressure level.
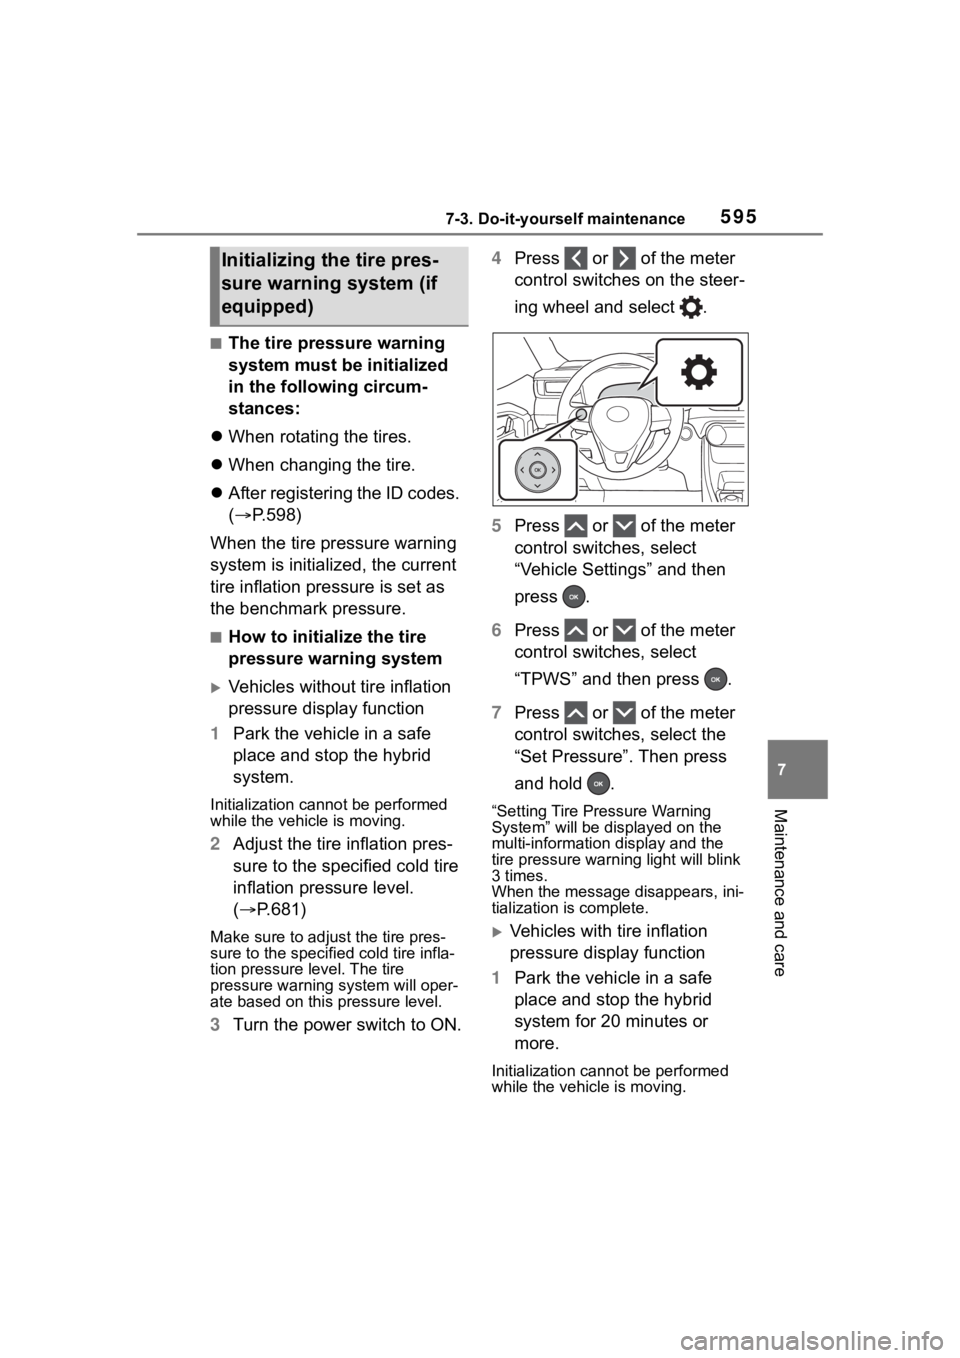
3 Turn the power switch to ON. 4
Press or of the meter
control switches on the steer-
ing wheel and select .
5 Press or of the meter
control switches, select
“Vehicle Settings” and then
press .
6 Press or of the meter
control switches, select
“TPWS” and then press .
7 Press or of the meter
control switches, select the
“Set Pressure”. Then press
and hold .
“Setting Tire Pressure Warning
System” will be displayed on the
multi-information display and the
tire pressure warn ing light will blink
3 times.
When the message disappears, ini-
tialization is complete.
Vehicles with tire inflation
pressure display function
1 Park the vehicle in a safe
place and stop the hybrid
system for 20 minutes or
more.
Initialization cannot be performed
while the vehicle is moving.
Initializing the tire pres-
sure warning system (if
equipped)