TOYOTA SIENNA 2007 Service Repair Manual
Manufacturer: TOYOTA, Model Year: 2007, Model line: SIENNA, Model: TOYOTA SIENNA 2007Pages: 3000, PDF Size: 52.26 MB
Page 1811 of 3000
AX–128U151F AUTOMATIC TRANSAXLE – PARK / NEUTRAL POSITION SWITCH
AX
INSTALLATION
1. INSTALL PARK/NEUTRAL POSITION SWITCH
ASSEMBLY
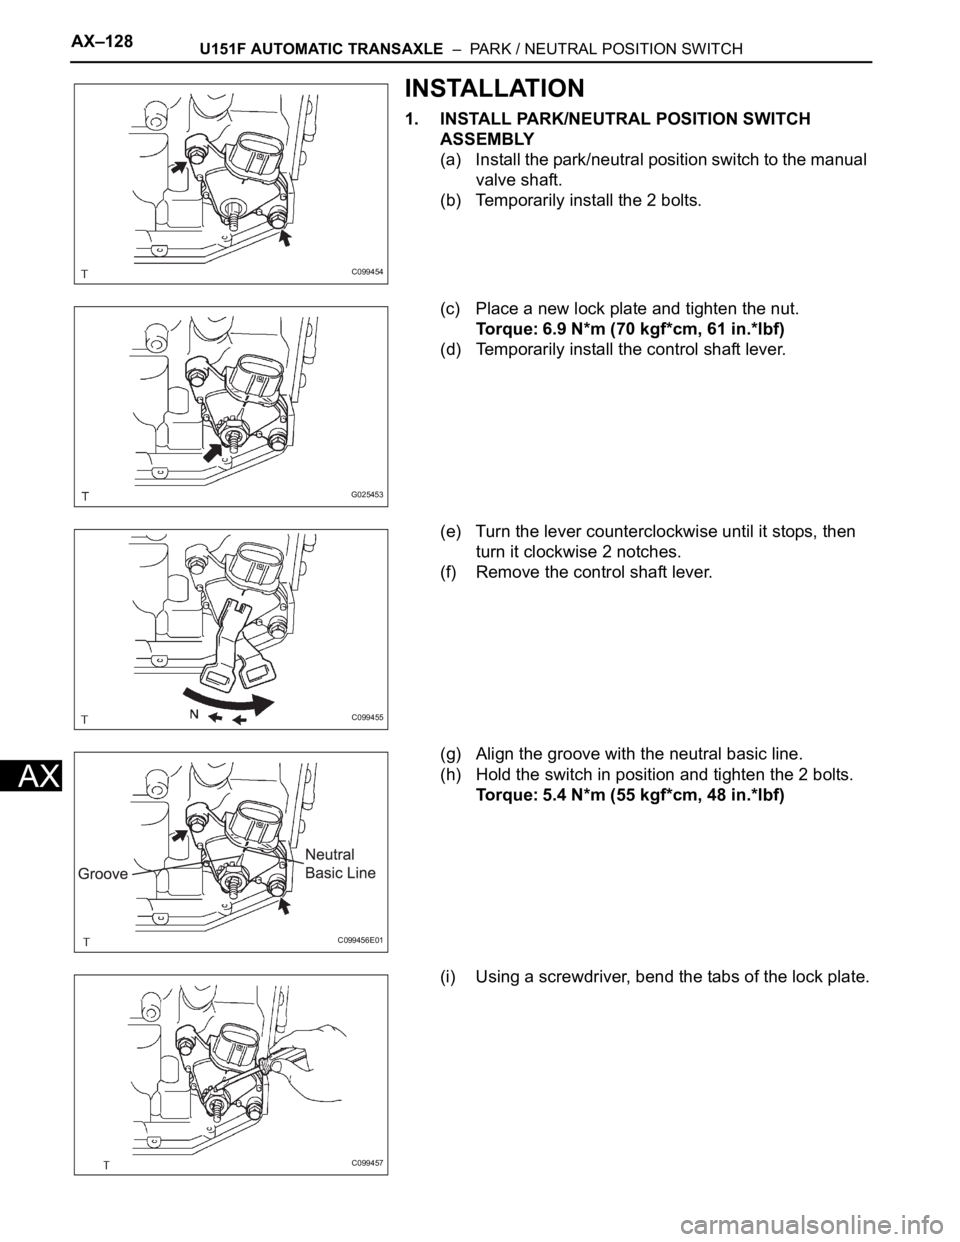
(a) Install the park/neutral position switch to the manual
valve shaft.
(b) Temporarily install the 2 bolts.
(c) Place a new lock plate and tighten the nut.
Torque: 6.9 N*m (70 kgf*cm, 61 in.*lbf)
(d) Temporarily install the control shaft lever.
(e) Turn the lever counterclockwise until it stops, then
turn it clockwise 2 notches.
(f) Remove the control shaft lever.
(g) Align the groove with the neutral basic line.
(h) Hold the switch in position and tighten the 2 bolts.
Torque: 5.4 N*m (55 kgf*cm, 48 in.*lbf)
(i) Using a screwdriver, bend the tabs of the lock plate.
C099454
G025453
C099455
C099456E01
C099457
Page 1812 of 3000
U151F AUTOMATIC TRANSAXLE – PARK / NEUTRAL POSITION SWITCHAX–129
AX
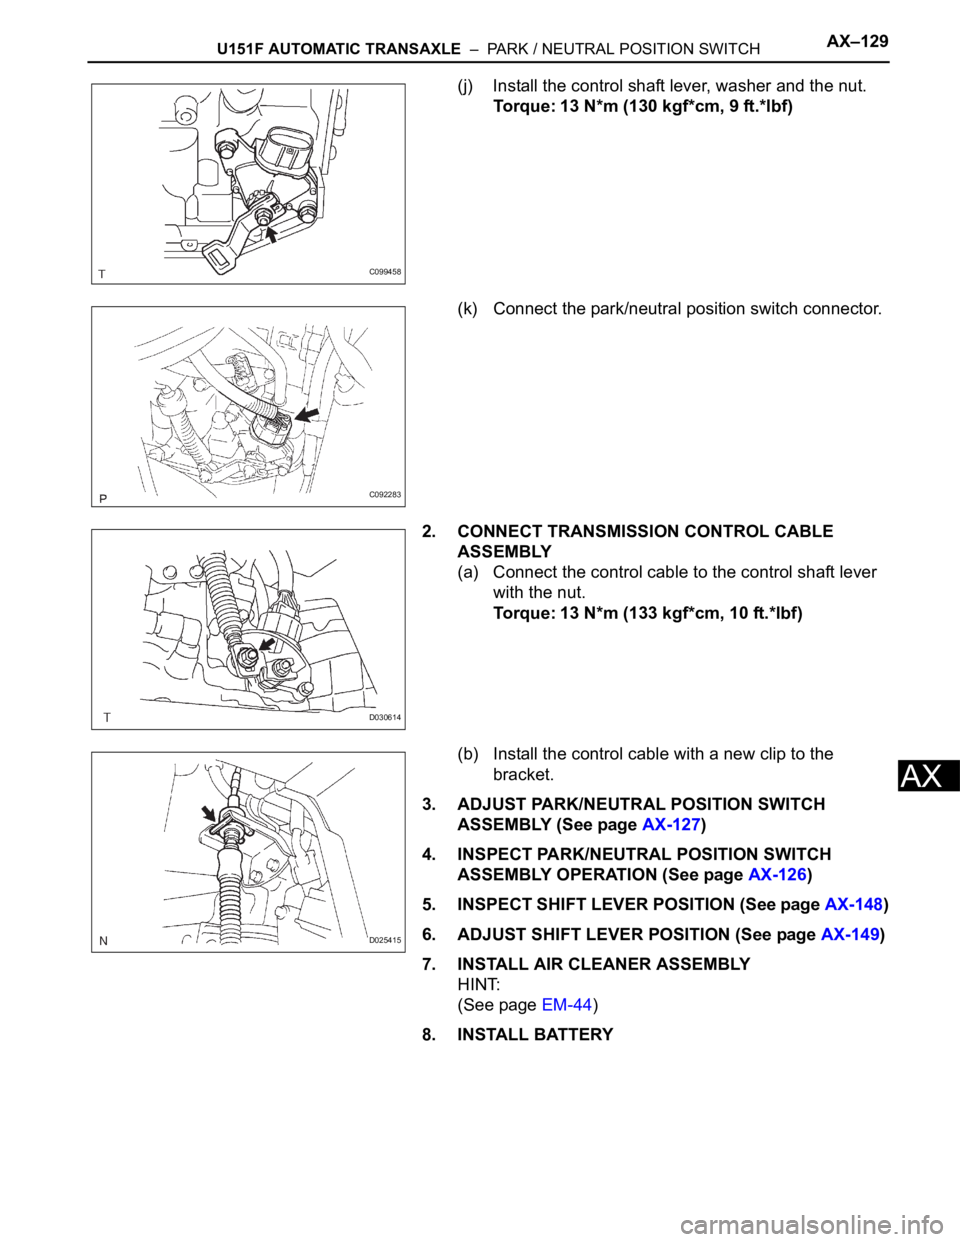
(j) Install the control shaft lever, washer and the nut.
Torque: 13 N*m (130 kgf*cm, 9 ft.*lbf)
(k) Connect the park/neutral position switch connector.
2. CONNECT TRANSMISSION CONTROL CABLE
ASSEMBLY
(a) Connect the control cable to the control shaft lever
with the nut.
Torque: 13 N*m (133 kgf*cm, 10 ft.*lbf)
(b) Install the control cable with a new clip to the
bracket.
3. ADJUST PARK/NEUTRAL POSITION SWITCH
ASSEMBLY (See page AX-127)
4. INSPECT PARK/NEUTRAL POSITION SWITCH
ASSEMBLY OPERATION (See page AX-126)
5. INSPECT SHIFT LEVER POSITION (See page AX-148)
6. ADJUST SHIFT LEVER POSITION (See page AX-149)
7. INSTALL AIR CLEANER ASSEMBLY
HINT:
(See page EM-44)
8. INSTALL BATTERY
C099458
C092283
D030614
D025415
Page 1813 of 3000
U151F AUTOMATIC TRANSAXLE – AUTOMATIC TRANSAXLE SYSTEMAX–17
AX
MANUAL SHIFTING TEST
1. PERFORM MANUAL SHIFTING TEST
HINT:
• With this test, it can be determined whether the
trouble occurs in the electrical circuit or is a
mechanical problem in the transaxle.
• If any abnormalities are found in the following test, the
problem is in the transaxle itself.
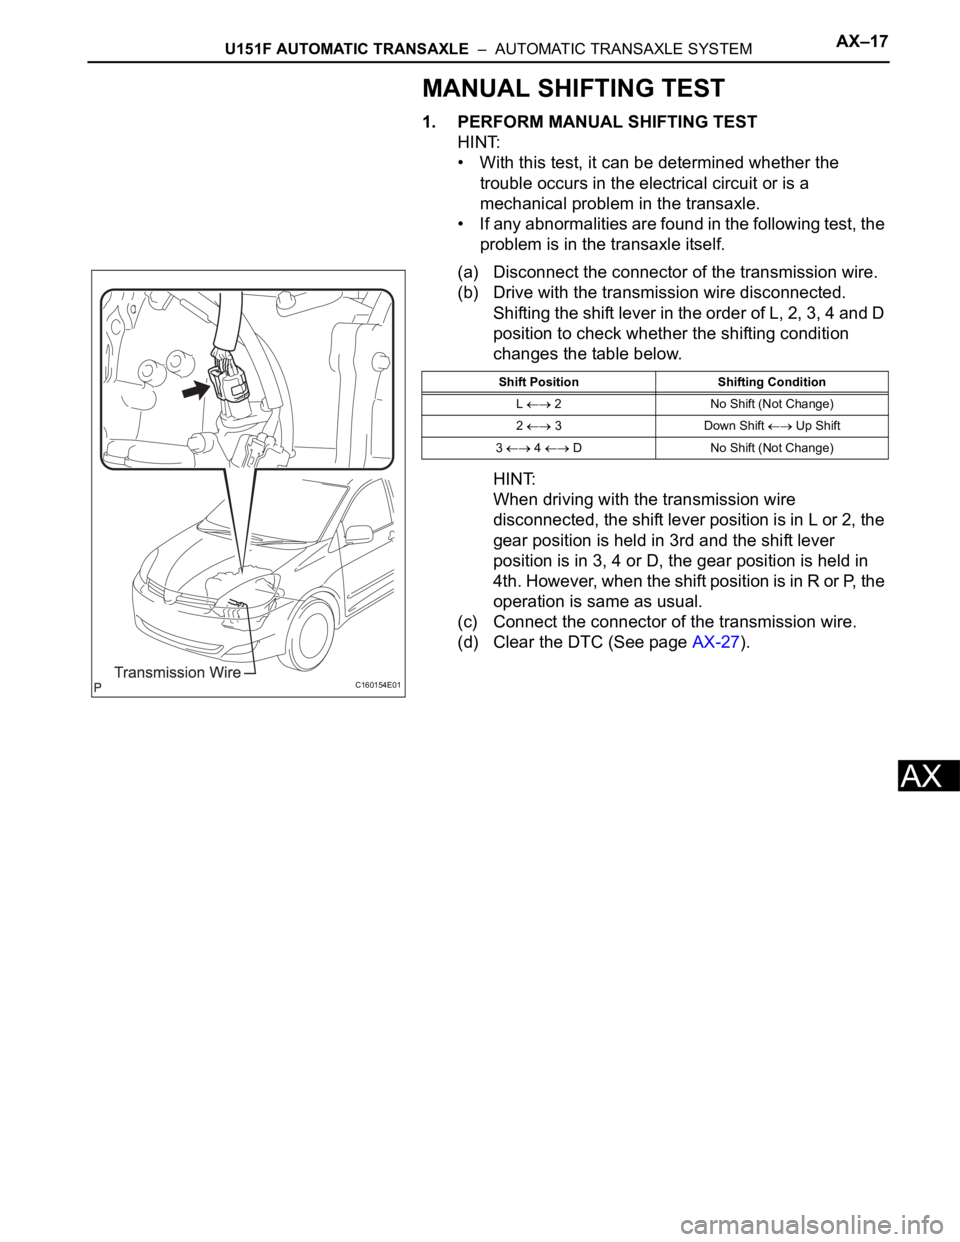
(a) Disconnect the connector of the transmission wire.
(b) Drive with the transmission wire disconnected.
Shifting the shift lever in the order of L, 2, 3, 4 and D
position to check whether the shifting condition
changes the table below.
HINT:
When driving with the transmission wire
disconnected, the shift lever position is in L or 2, the
gear position is held in 3rd and the shift lever
position is in 3, 4 or D, the gear position is held in
4th. However, when the shift position is in R or P, the
operation is same as usual.
(c) Connect the connector of the transmission wire.
(d) Clear the DTC (See page AX-27).
C160154E01
Shift Position Shifting Condition
L
2 No Shift (Not Change)
2
3 Down Shift Up Shift
3
4 D No Shift (Not Change)
Page 1814 of 3000

AX–18U151F AUTOMATIC TRANSAXLE – AUTOMATIC TRANSAXLE SYSTEM
AX
INITIALIZATION
1. RESET MEMORY
NOTICE:
• Perform the RESET MEMORY (AT initialization)
when replacing the automatic transaxle assembly,
engine assembly or ECM.
• The RESET MEMORY can be performed only with
the Intelligent tester.
HINT:
The ECM memorizes the condition that the ECT controls
the automatic transaxle assembly and engine assembly
according to those characteristics. Therefore, when the
automatic transaxle assembly, engine assembly, or ECM
has been replaced, it is necessary to reset the memory
so that the ECM can memorize the new information.
Reset procedure is as follows.
(a) Turn the engine switch off.
(b) Connect the intelligent tester together with the CAN
VIM (controller area network vehicle interface
module) to the DLC3.
(c) Turn the ignition switch to the ON position and push
the intelligent tester main switch on.
(d) Select the item "DIAGNOSIS / ENHANCED OBD
II".
(e) Perform the reset memory procedure from the
ENGINE menu.
CAUTION:
After performing the RESET MEMORY, be sure
to perform the ROAD TEST (See page AX-9)
described earlier.
HINT:
The ECM is learned by performing the ROAD TEST.
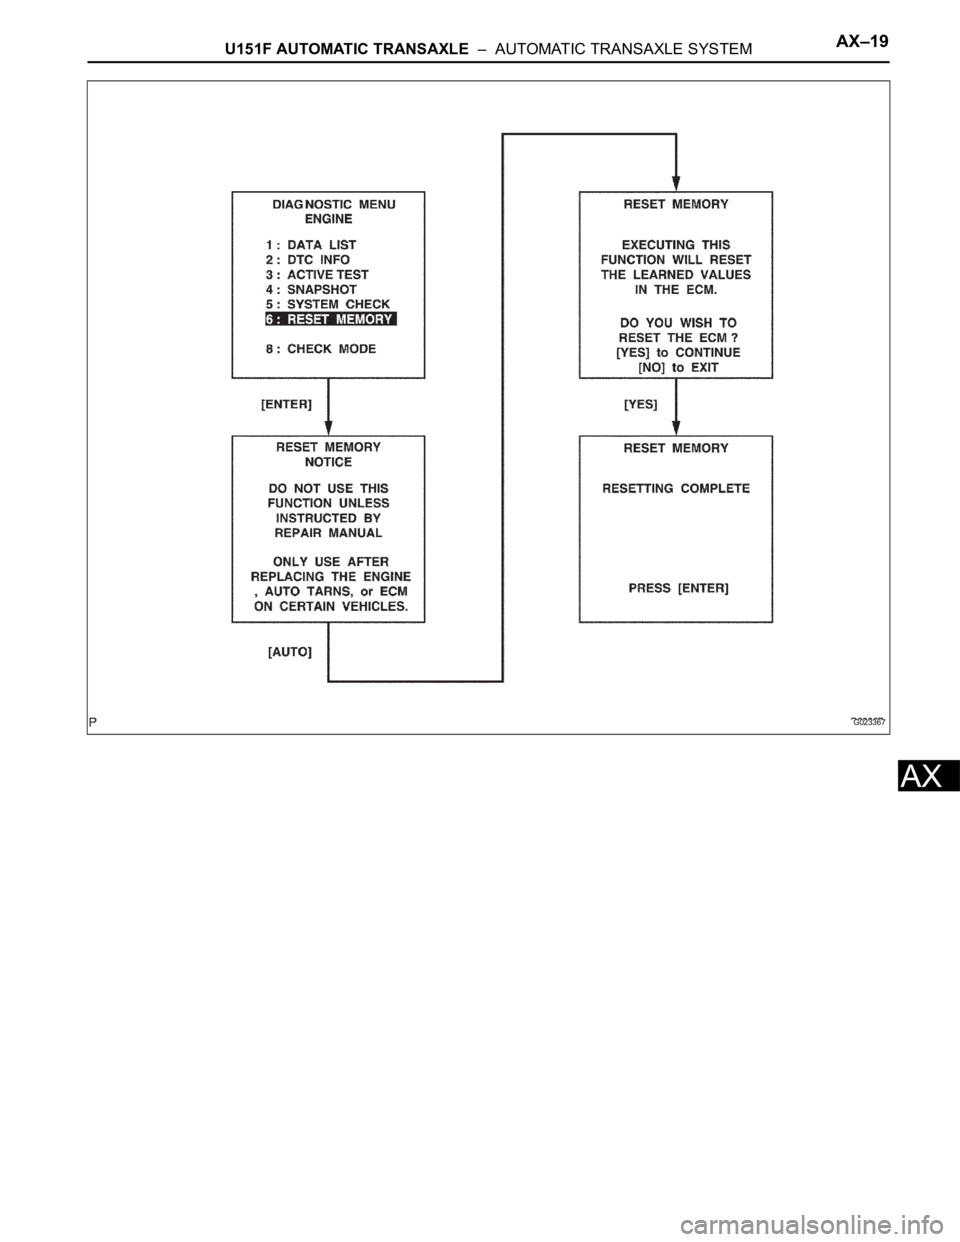
(1) Tester menu flow:
Page 1815 of 3000
U151F AUTOMATIC TRANSAXLE – AUTOMATIC TRANSAXLE SYSTEMAX–19
AX
G023367
Page 1816 of 3000
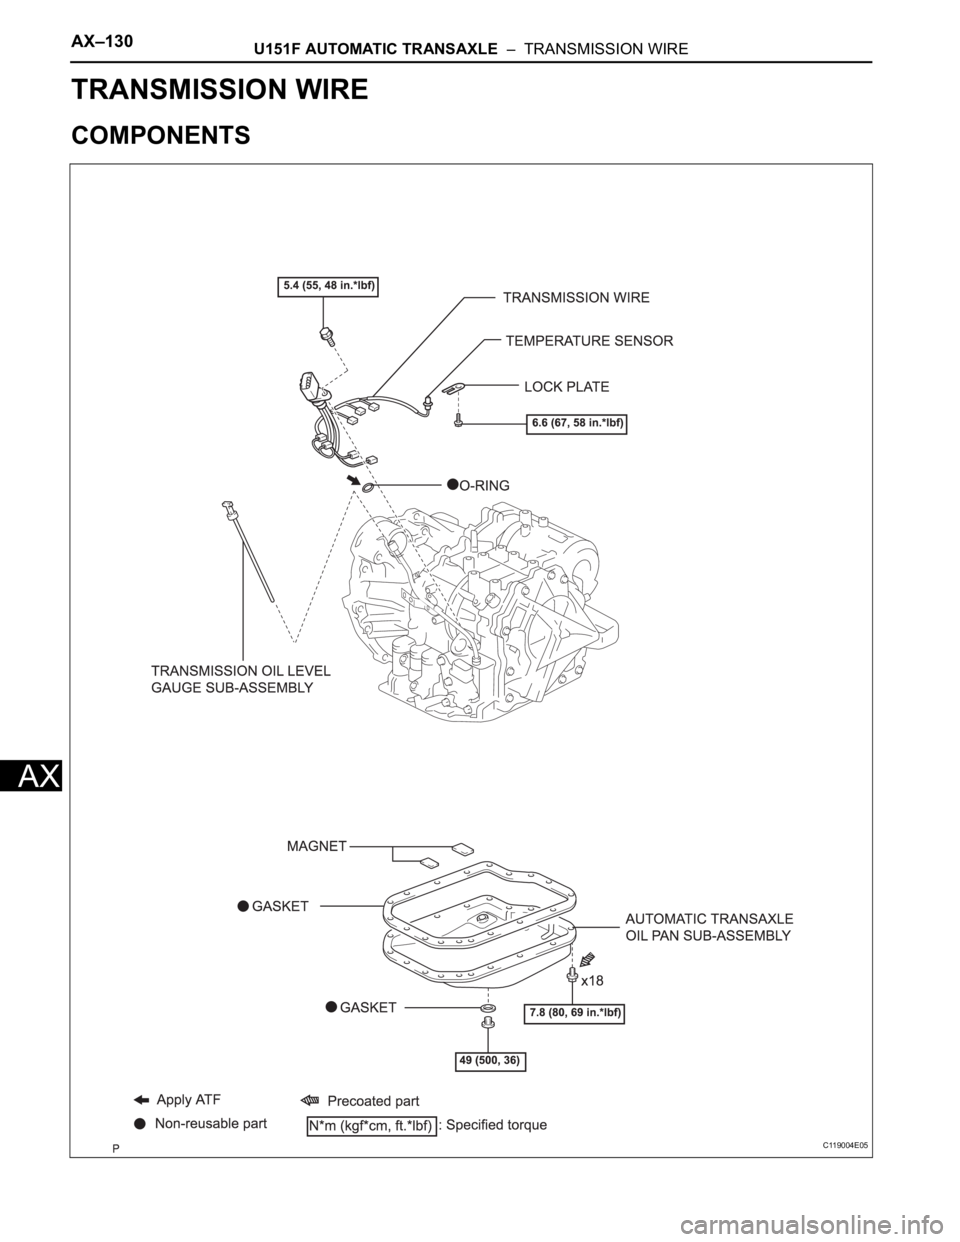
AX–130U151F AUTOMATIC TRANSAXLE – TRANSMISSION WIRE
AX
TRANSMISSION
U151F AUTOMATIC TRANSAXLE
TRANSMISSION WIRE
COMPONENTS
C119004E05
Page 1817 of 3000
U151F AUTOMATIC TRANSAXLE – TRANSMISSION WIREAX–131
AX
REMOVAL
1. DISCONNECT CABLE FROM NEGATIVE BATTERY
TERMINAL
2. REMOVE ENGINE UNDER COVER NO.1
3. DRAIN AUTOMATIC TRANSAXLE FLUID
(a) Remove the drain plug and gasket, and drain the
AT F.
(b) Install a new gasket and the drain plug.
Torque: 49 N*m (500 kgf*cm, 36 ft.*lbf)
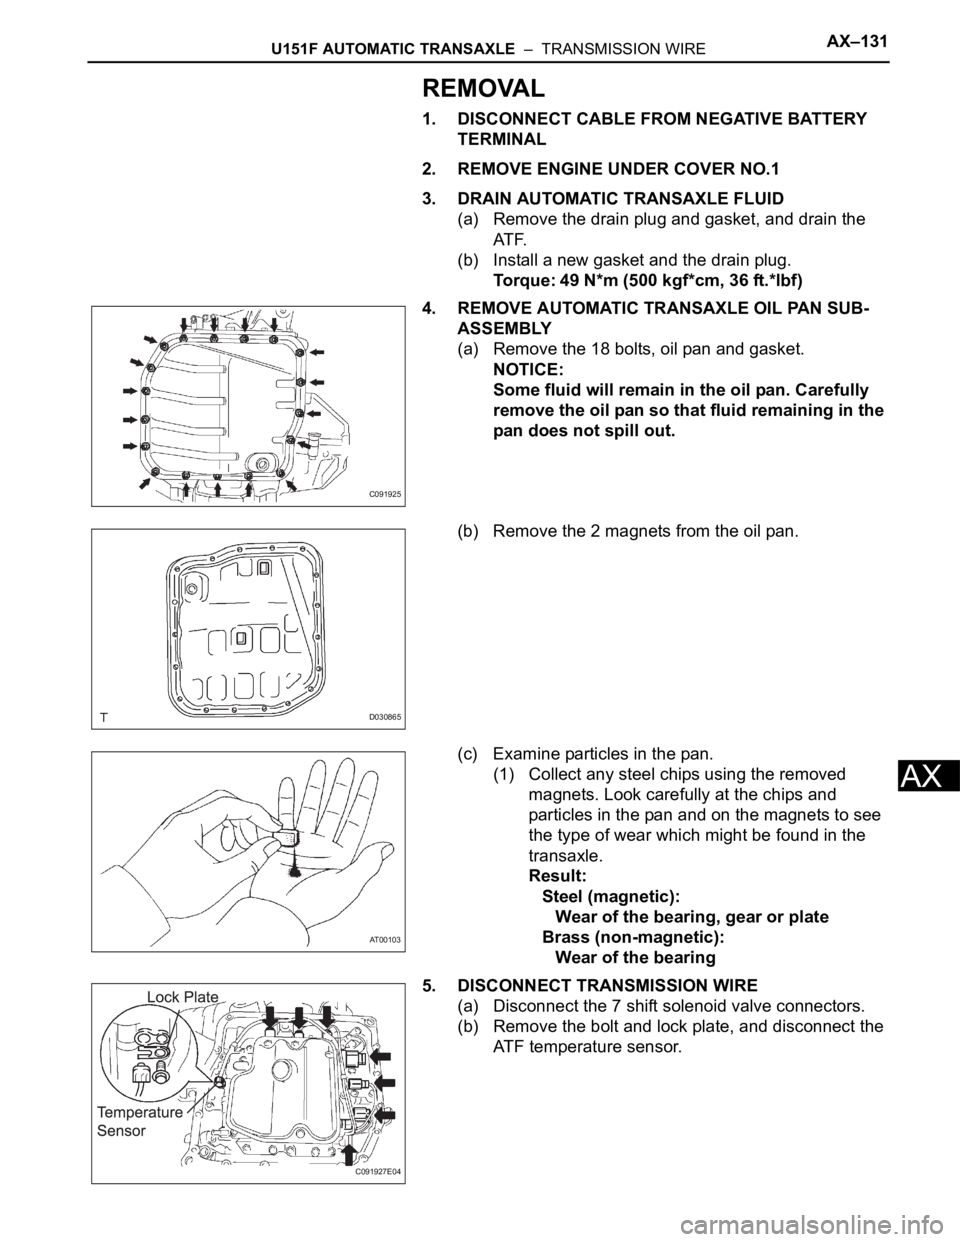
4. REMOVE AUTOMATIC TRANSAXLE OIL PAN SUB-
ASSEMBLY
(a) Remove the 18 bolts, oil pan and gasket.
NOTICE:
Some fluid will remain in the oil pan. Carefully
remove the oil pan so that fluid remaining in the
pan does not spill out.
(b) Remove the 2 magnets from the oil pan.
(c) Examine particles in the pan.
(1) Collect any steel chips using the removed
magnets. Look carefully at the chips and
particles in the pan and on the magnets to see
the type of wear which might be found in the
transaxle.
Result:
Steel (magnetic):
Wear of the bearing, gear or plate
Brass (non-magnetic):
Wear of the bearing
5. DISCONNECT TRANSMISSION WIRE
(a) Disconnect the 7 shift solenoid valve connectors.
(b) Remove the bolt and lock plate, and disconnect the
ATF temperature sensor.
C091925
D030865
AT00103
C091927E04
Page 1818 of 3000
AX–132U151F AUTOMATIC TRANSAXLE – TRANSMISSION WIRE
AX
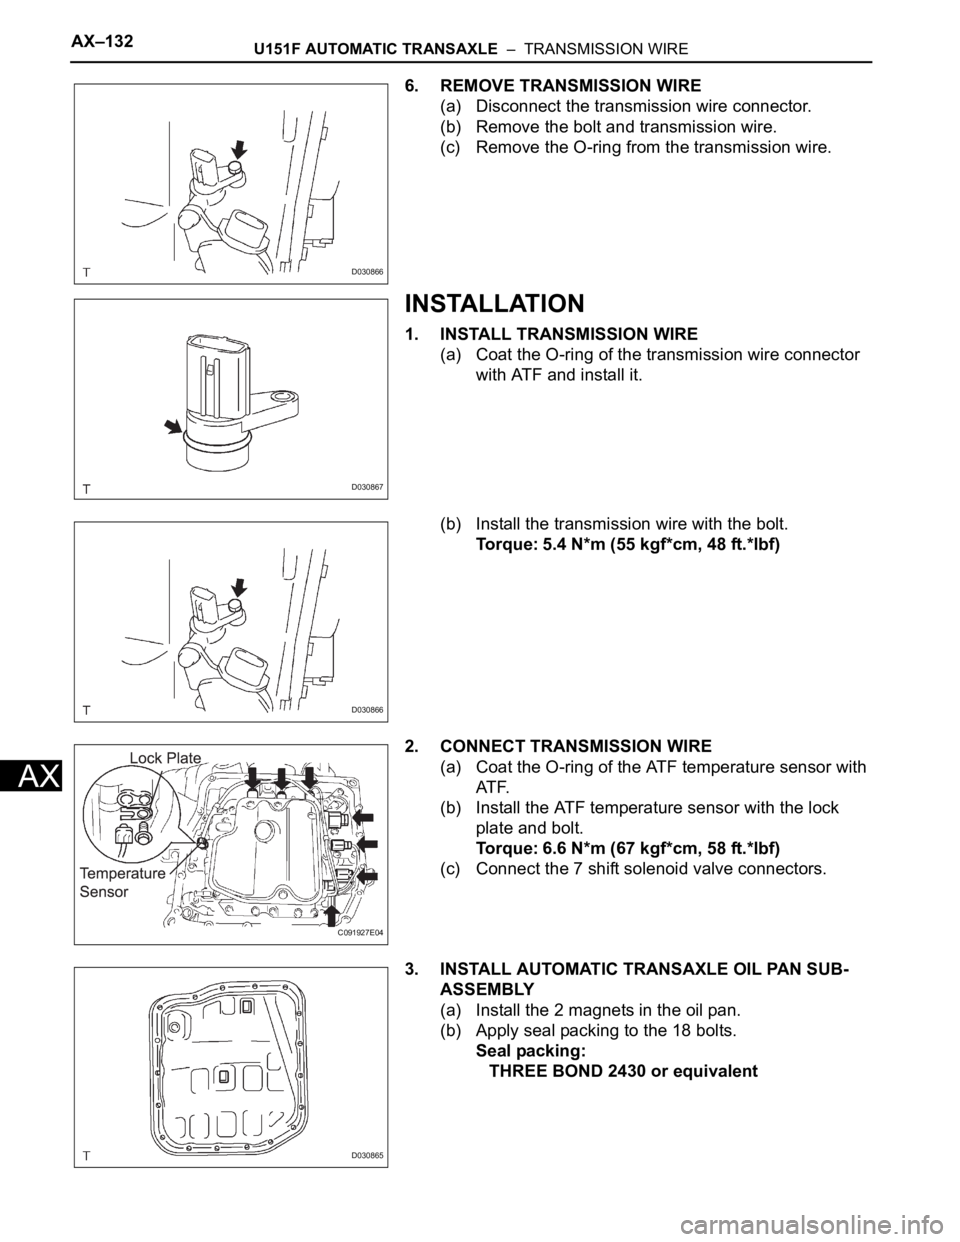
6. REMOVE TRANSMISSION WIRE
(a) Disconnect the transmission wire connector.
(b) Remove the bolt and transmission wire.
(c) Remove the O-ring from the transmission wire.
INSTALLATION
1. INSTALL TRANSMISSION WIRE
(a) Coat the O-ring of the transmission wire connector
with ATF and install it.
(b) Install the transmission wire with the bolt.
Torque: 5.4 N*m (55 kgf*cm, 48 ft.*lbf)
2. CONNECT TRANSMISSION WIRE
(a) Coat the O-ring of the ATF temperature sensor with
AT F.
(b) Install the ATF temperature sensor with the lock
plate and bolt.
Torque: 6.6 N*m (67 kgf*cm, 58 ft.*lbf)
(c) Connect the 7 shift solenoid valve connectors.
3. INSTALL AUTOMATIC TRANSAXLE OIL PAN SUB-
ASSEMBLY
(a) Install the 2 magnets in the oil pan.
(b) Apply seal packing to the 18 bolts.
Seal packing:
THREE BOND 2430 or equivalent
D030866
D030867
D030866
C091927E04
D030865
Page 1819 of 3000
U151F AUTOMATIC TRANSAXLE – TRANSMISSION WIREAX–133
AX
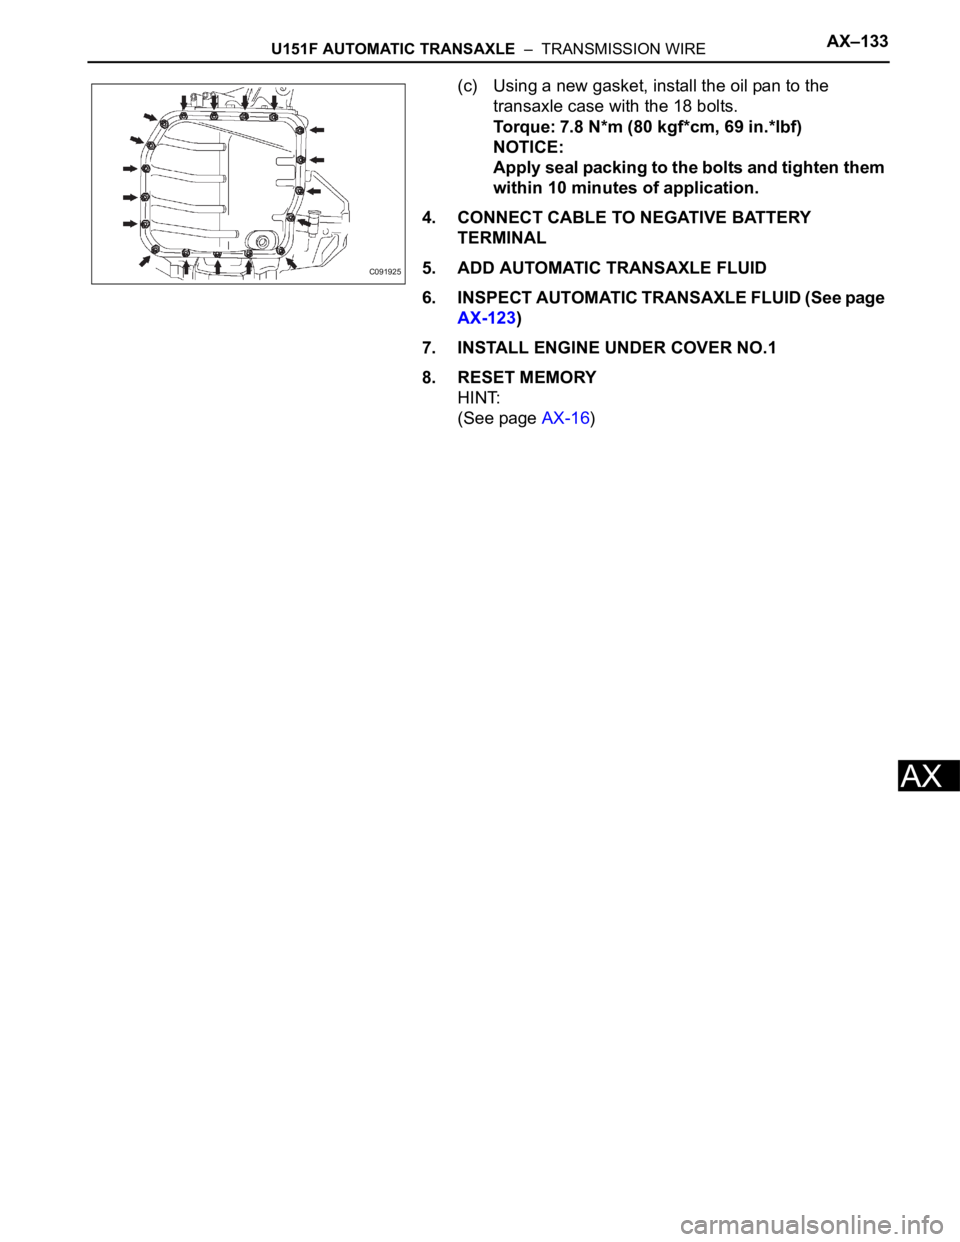
(c) Using a new gasket, install the oil pan to the
transaxle case with the 18 bolts.
Torque: 7.8 N*m (80 kgf*cm, 69 in.*lbf)
NOTICE:
Apply seal packing to the bolts and tighten them
within 10 minutes of application.
4. CONNECT CABLE TO NEGATIVE BATTERY
TERMINAL
5. ADD AUTOMATIC TRANSAXLE FLUID
6. INSPECT AUTOMATIC TRANSAXLE FLUID (See page
AX-123)
7. INSTALL ENGINE UNDER COVER NO.1
8. RESET MEMORY
HINT:
(See page AX-16)
C091925
Page 1820 of 3000

AX–20U151F AUTOMATIC TRANSAXLE – AUTOMATIC TRANSAXLE SYSTEM
AX
MONITOR DRIVE PATTERN
1. MONITOR DRIVE PATTERN FOR ECT TEST
(a) Perform this drive pattern as one method to
simulate the detection conditions of the ECT
malfunctions. (The DTCs may not be detected due
the actual driving conditions. And some codes may
not be detected through this drive pattern.)
HINT:
Preparation for driving
• Warm up the engine sufficiently. (Engine coolant
temperature is 60
C (140F) or higher)
• Drive the vehicle when the atmospheric
temperature is -10
C (14F) or higher.
(Malfunction is not detected when the
atmospheric temperature is less than -10
C
(14
F))
Driving note
• Drive the vehicle through all gears.
Stop
1st 2nd 3rd 4th 5th 5th
(lock-up ON).
• Repeat the above driving pattern three times or
more.
NOTICE:
• The monitor status can be checked using the
OBD II scan tool or intelligent tester. When
using the intelligent tester, monitor status
can be found in the "ENHANCED OBD II /
DATA LIST" or under "CARB OBD II".
• In the event that the drive pattern must be
interrupted (possibly due to traffic conditions
or other factors), the drive pattern can be
resumed and, in most cases, the monitor can
be completed.
• Perform this drive pattern on a level road as
much as possible and strictly observe the
posted speed limits and traffic laws while
driving.