VOLVO V90 2017 Owners Manual
Manufacturer: VOLVO, Model Year: 2017, Model line: V90, Model: VOLVO V90 2017Pages: 594, PDF Size: 15.07 MB
Page 151 of 594
INSTRUMENTS AND CONTROLS
}}
149
Continuous wipingRaise the stalk switch for the wipers to sweep at normal speed.
Raise the stalk switch further for the wip- ers to sweep at high speed.
IMPORTANT
Before activating the wipers - ensure that the wiper blades are not frozen in, and that anysnow or ice on the windscreen (and rear win-dow) is scraped away.
IMPORTANT
Use plenty of washer fluid when the wipers are cleaning the windscreen. The windscreenmust be wet when the windscreen wipers areoperating.
Related information
•Activating/deactivating the rain sensor (p. 149)
• Windscreen and headlamp washers (p. 150)
• Wiper blades in service position (p. 527)
Activating/deactivating the rain sensor
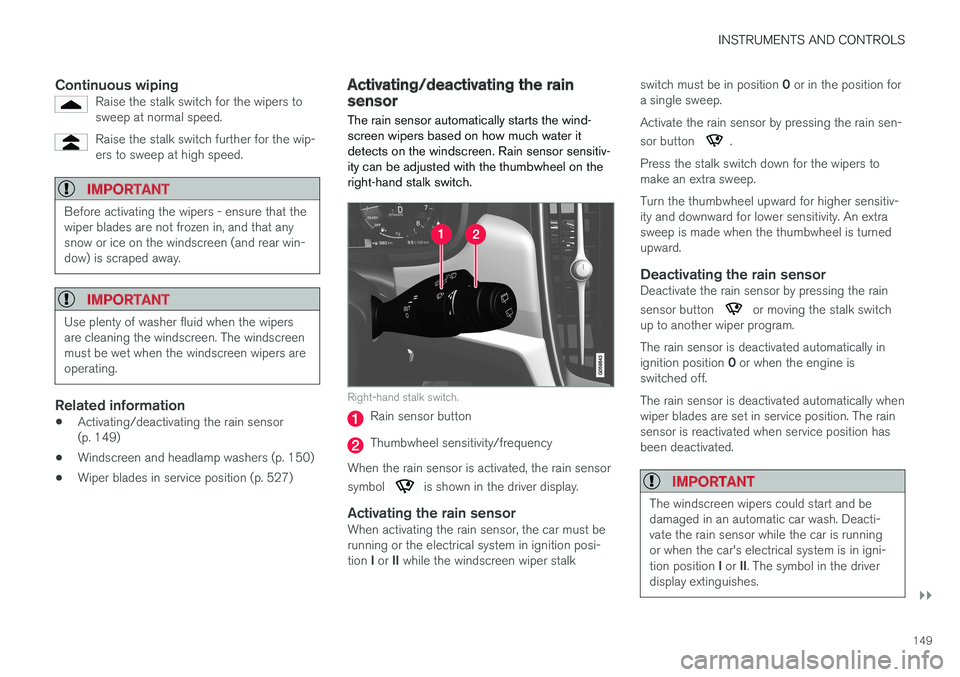
The rain sensor automatically starts the wind- screen wipers based on how much water itdetects on the windscreen. Rain sensor sensitiv-ity can be adjusted with the thumbwheel on theright-hand stalk switch.
Right-hand stalk switch.
Rain sensor button
Thumbwheel sensitivity/frequency
When the rain sensor is activated, the rain sensor symbol
is shown in the driver display.
Activating the rain sensorWhen activating the rain sensor, the car must be running or the electrical system in ignition posi- tion I or II while the windscreen wiper stalk switch must be in position
0 or in the position for
a single sweep. Activate the rain sensor by pressing the rain sen- sor button
.
Press the stalk switch down for the wipers to make an extra sweep. Turn the thumbwheel upward for higher sensitiv- ity and downward for lower sensitivity. An extrasweep is made when the thumbwheel is turnedupward.
Deactivating the rain sensorDeactivate the rain sensor by pressing the rain sensor button
or moving the stalk switch
up to another wiper program. The rain sensor is deactivated automatically in ignition position 0 or when the engine is
switched off. The rain sensor is deactivated automatically when wiper blades are set in service position. The rainsensor is reactivated when service position hasbeen deactivated.
IMPORTANT
The windscreen wipers could start and be damaged in an automatic car wash. Deacti-vate the rain sensor while the car is runningor when the car's electrical system is in igni- tion position I or II. The symbol in the driver
display extinguishes.
Page 152 of 594
||
INSTRUMENTS AND CONTROLS
* Option/accessory.
150
Activating/deactivating the memory function
The memory function for the rain sensor can be activated in such a way that the rain sensor but-ton does not need to be depressed each time thecar is started: 1.
Press
Settings in the top view in the centre
display.
2. Press
My CarWipers.
3. Select
Rain Sensor Memory to activate/
deactivate the memory function.
Related information
• Using windscreen wipers (p. 148)
• Wiper blades in service position (p. 527)
• Rear window wiper and washer (p. 151)
Windscreen and headlamp washers
Windscreen and headlamp washers clean the windscreen and headlamps. Washing/wiping isstarted by means of the right-hand stalk switch.
Starting windscreen and headlamp
washers
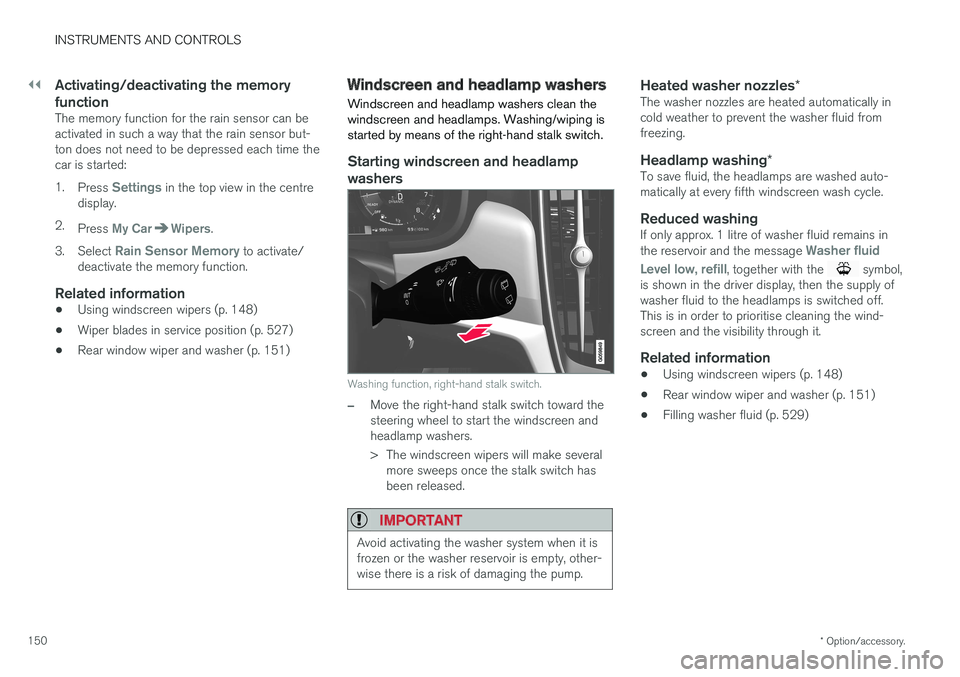
Washing function, right-hand stalk switch.
–Move the right-hand stalk switch toward the steering wheel to start the windscreen andheadlamp washers.
> The windscreen wipers will make several more sweeps once the stalk switch has been released.
IMPORTANT
Avoid activating the washer system when it is frozen or the washer reservoir is empty, other-wise there is a risk of damaging the pump.
Heated washer nozzles *The washer nozzles are heated automatically in cold weather to prevent the washer fluid fromfreezing.
Headlamp washing*To save fluid, the headlamps are washed auto-matically at every fifth windscreen wash cycle.
Reduced washingIf only approx. 1 litre of washer fluid remains in the reservoir and the message Washer fluid
Level low, refill
, together with the symbol,
is shown in the driver display, then the supply of washer fluid to the headlamps is switched off.This is in order to prioritise cleaning the wind-screen and the visibility through it.
Related information
• Using windscreen wipers (p. 148)
• Rear window wiper and washer (p. 151)
• Filling washer fluid (p. 529)
Page 153 of 594
INSTRUMENTS AND CONTROLS
* Option/accessory.151
Rear window wiper and washer
Rear window wiper and washer clean the rear window. Washing/wiping is started and settingsare changed by means of the right-hand steeringwheel stalk switch.
NOTE
The rear window wiper is equipped with over- heating protection which means that themotor is switched off if it overheats. The rearwindow wiper works again after a cooling-down period.
Using the rear window wiper and washer
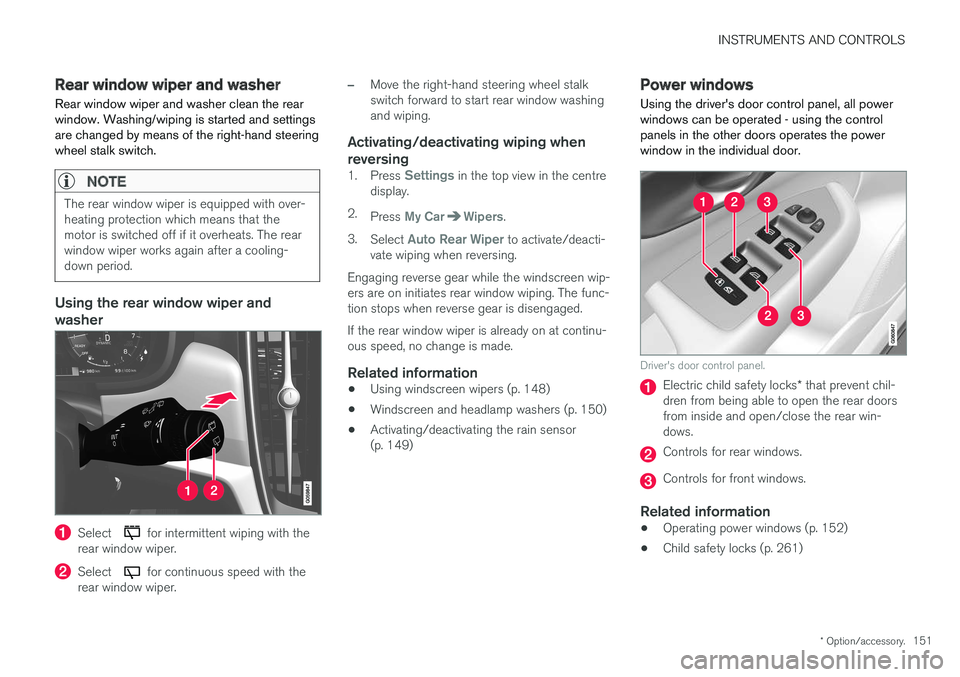
Select for intermittent wiping with the
rear window wiper.
Select for continuous speed with the
rear window wiper.
–Move the right-hand steering wheel stalk switch forward to start rear window washingand wiping.
Activating/deactivating wiping when reversing
1. Press Settings in the top view in the centre
display.
2. Press
My CarWipers.
3. Select
Auto Rear Wiper to activate/deacti-
vate wiping when reversing.
Engaging reverse gear while the windscreen wip- ers are on initiates rear window wiping. The func- tion stops when reverse gear is disengaged. If the rear window wiper is already on at continu- ous speed, no change is made.
Related information
• Using windscreen wipers (p. 148)
• Windscreen and headlamp washers (p. 150)
• Activating/deactivating the rain sensor(p. 149)
Power windows
Using the driver's door control panel, all power windows can be operated - using the controlpanels in the other doors operates the powerwindow in the individual door.
Driver's door control panel.
Electric child safety locks * that prevent chil-
dren from being able to open the rear doors from inside and open/close the rear win-dows.
Controls for rear windows.
Controls for front windows.
Related information
• Operating power windows (p. 152)
• Child safety locks (p. 261)
Page 154 of 594
INSTRUMENTS AND CONTROLS
152
Operating power windows Using the driver's door control panel, all power windows can be operated - using the controlpanels in the other doors operates the powerwindow in the individual door.
WARNING
Check that no children or other passengers are trapped when the windows are closedfrom the driver's door.
WARNING
Check that no children or other passengers are trapped if/when the windows are closedusing the remote control key.
WARNING
If there are children in the car - remember to always switch off the power supply to thepower windows by setting the car's electrical system in ignition position 0 and then take
the remote control key with you when leaving the car.
Operating
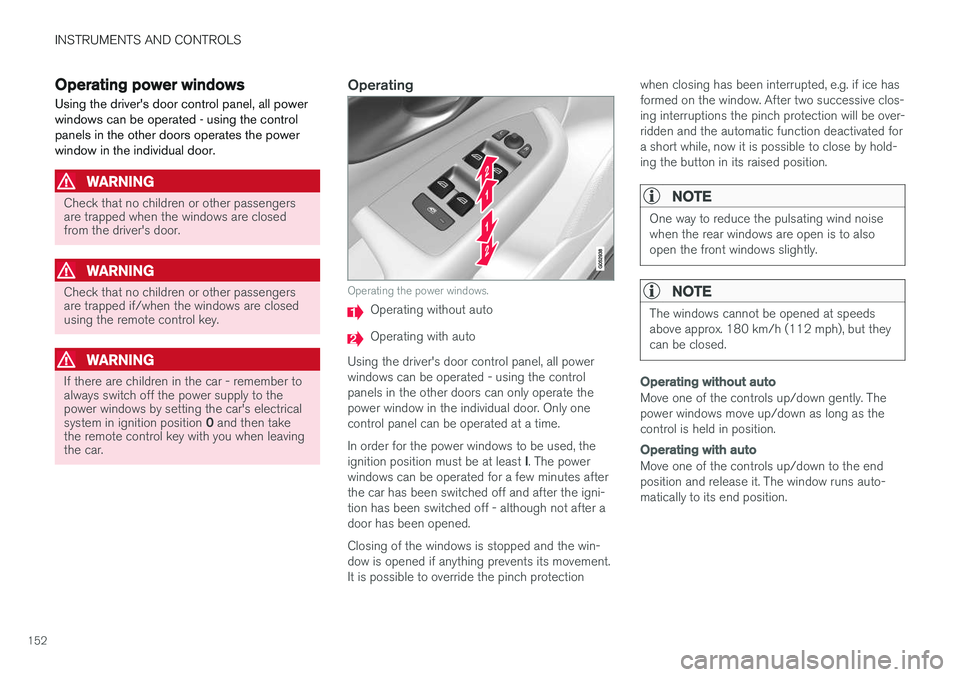
Operating the power windows.
Operating without auto
Operating with auto
Using the driver's door control panel, all power windows can be operated - using the controlpanels in the other doors can only operate thepower window in the individual door. Only onecontrol panel can be operated at a time. In order for the power windows to be used, the ignition position must be at least I. The power
windows can be operated for a few minutes after the car has been switched off and after the igni-tion has been switched off - although not after adoor has been opened. Closing of the windows is stopped and the win- dow is opened if anything prevents its movement.It is possible to override the pinch protection when closing has been interrupted, e.g. if ice hasformed on the window. After two successive clos-ing interruptions the pinch protection will be over-ridden and the automatic function deactivated fora short while, now it is possible to close by hold-ing the button in its raised position.
NOTE
One way to reduce the pulsating wind noise when the rear windows are open is to alsoopen the front windows slightly.
NOTE
The windows cannot be opened at speeds above approx. 180 km/h (112 mph), but theycan be closed.
Operating without auto
Move one of the controls up/down gently. The power windows move up/down as long as thecontrol is held in position.
Operating with auto
Move one of the controls up/down to the end position and release it. The window runs auto-matically to its end position.
Page 155 of 594
INSTRUMENTS AND CONTROLS
}}
* Option/accessory.153
Operating with the remote control key, door handle or central locking button
To control the power windows from the outside with the remote control key or door handle, orfrom the inside with the central locking button,see the section "Remote control key", "Locking/unlocking from the outside" or "Locking/unlock-ing from the inside".
ResettingIf the starter battery is disconnected then thefunction for automatic opening must be reset sothat it can work correctly.
1. Gently raise the front section of the button to
raise the window to its end position and hold it there for one second.
2. Release the button briefly.
3. Raise the front section of the button again for one second.
WARNING
A reset must take place for pinch protection to work.
Related information
• Power windows (p. 151)
• Ignition positions (p. 385)
• Remote control key (p. 236)
• Locking/unlocking from the outside (p. 241)
• Locking/unlocking from the inside (p. 245)
Using the sun blind
*
Sun blinds are built into each rear door.
In the rear door - manually operated
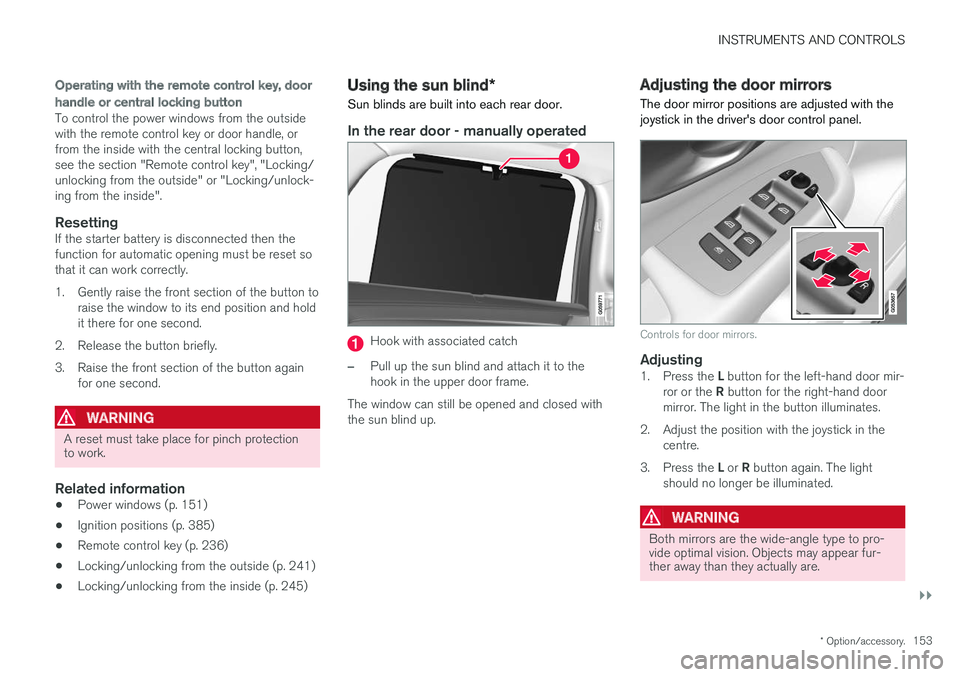
Hook with associated catch
–Pull up the sun blind and attach it to the hook in the upper door frame.
The window can still be opened and closed withthe sun blind up.
Adjusting the door mirrors
The door mirror positions are adjusted with the joystick in the driver's door control panel.
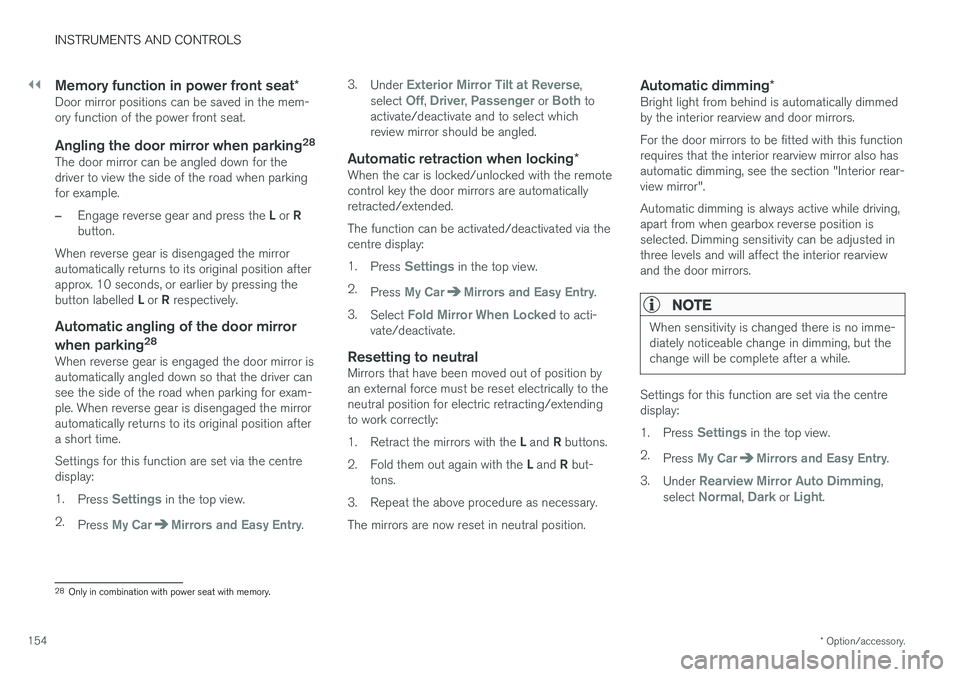
Controls for door mirrors.
Adjusting1. Press the L button for the left-hand door mir-
ror or the R button for the right-hand door
mirror. The light in the button illuminates.
2. Adjust the position with the joystick in the centre.
3. Press the L or R button again. The light
should no longer be illuminated.
WARNING
Both mirrors are the wide-angle type to pro- vide optimal vision. Objects may appear fur-ther away than they actually are.
Page 156 of 594
||
INSTRUMENTS AND CONTROLS
* Option/accessory.
154
Memory function in power front seat *Door mirror positions can be saved in the mem- ory function of the power front seat.
Angling the door mirror when parking 28The door mirror can be angled down for thedriver to view the side of the road when parkingfor example.
–Engage reverse gear and press the
L or R
button.
When reverse gear is disengaged the mirror automatically returns to its original position afterapprox. 10 seconds, or earlier by pressing the button labelled L or R respectively.
Automatic angling of the door mirror
when parking 28
When reverse gear is engaged the door mirror is automatically angled down so that the driver cansee the side of the road when parking for exam-ple. When reverse gear is disengaged the mirrorautomatically returns to its original position aftera short time. Settings for this function are set via the centre display: 1.
Press
Settings in the top view.
2. Press
My CarMirrors and Easy Entry. 3.
Under
Exterior Mirror Tilt at Reverse,
select Off, Driver, Passenger or Both to
activate/deactivate and to select which review mirror should be angled.
Automatic retraction when locking *When the car is locked/unlocked with the remotecontrol key the door mirrors are automaticallyretracted/extended. The function can be activated/deactivated via the centre display: 1.
Press
Settings in the top view.
2. Press
My CarMirrors and Easy Entry.
3. Select
Fold Mirror When Locked to acti-
vate/deactivate.
Resetting to neutralMirrors that have been moved out of position by an external force must be reset electrically to theneutral position for electric retracting/extendingto work correctly: 1. Retract the mirrors with the L and R buttons.
2. Fold them out again with the L and R but-
tons.
3. Repeat the above procedure as necessary.The mirrors are now reset in neutral position.
Automatic dimming *Bright light from behind is automatically dimmed by the interior rearview and door mirrors. For the door mirrors to be fitted with this function requires that the interior rearview mirror also hasautomatic dimming, see the section "Interior rear-view mirror". Automatic dimming is always active while driving, apart from when gearbox reverse position isselected. Dimming sensitivity can be adjusted inthree levels and will affect the interior rearviewand the door mirrors.
NOTE
When sensitivity is changed there is no imme- diately noticeable change in dimming, but thechange will be complete after a while.
Settings for this function are set via the centre display: 1.
Press
Settings in the top view.
2. Press
My CarMirrors and Easy Entry.
3. Under
Rearview Mirror Auto Dimming,
select Normal, Dark or Light.
28 Only in combination with power seat with memory.
Page 157 of 594
INSTRUMENTS AND CONTROLS
}}
* Option/accessory.155
Retractable power door mirrors *The mirrors can be retracted for parking/driving in narrow spaces: 1.
Depress the L and R buttons simultaneously
(ignition position must be at least I).
2. Release them after approximately 1 second. The mirrors automatically stop in the fully retracted position.
Fold out the mirrors by pressing down the L and
R buttons simultaneously. The mirrors automati-
cally stop in the fully extended position.
Related information
• Interior rearview mirror (p. 155)
• Settings view (p. 169)
• Using the memory function in the power front seat
* (p. 122)
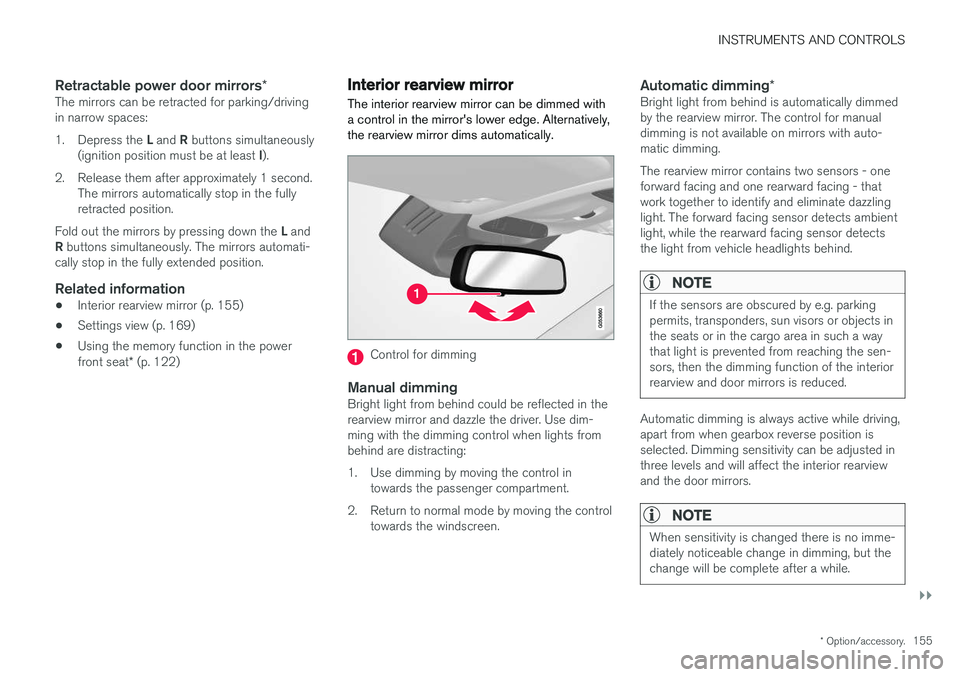
Interior rearview mirror The interior rearview mirror can be dimmed with a control in the mirror's lower edge. Alternatively,the rearview mirror dims automatically.
Control for dimming
Manual dimmingBright light from behind could be reflected in the rearview mirror and dazzle the driver. Use dim-ming with the dimming control when lights frombehind are distracting:
1. Use dimming by moving the control in
towards the passenger compartment.
2. Return to normal mode by moving the control towards the windscreen.
Automatic dimming *Bright light from behind is automatically dimmed by the rearview mirror. The control for manualdimming is not available on mirrors with auto-matic dimming. The rearview mirror contains two sensors - one forward facing and one rearward facing - thatwork together to identify and eliminate dazzlinglight. The forward facing sensor detects ambientlight, while the rearward facing sensor detectsthe light from vehicle headlights behind.
NOTE
If the sensors are obscured by e.g. parking permits, transponders, sun visors or objects inthe seats or in the cargo area in such a waythat light is prevented from reaching the sen-sors, then the dimming function of the interiorrearview and door mirrors is reduced.
Automatic dimming is always active while driving, apart from when gearbox reverse position isselected. Dimming sensitivity can be adjusted inthree levels and will affect the interior rearviewand the door mirrors.
NOTE
When sensitivity is changed there is no imme- diately noticeable change in dimming, but thechange will be complete after a while.
Page 158 of 594
||
INSTRUMENTS AND CONTROLS
* Option/accessory.
156 Settings for this function are set via the centre display: 1.
Press
Settings in the top view.
2. Press
My CarMirrors and Easy Entry.
3. Under
Rearview Mirror Auto Dimming,
select Normal, Dark or Light.
Related information
• Adjusting the door mirrors (p. 153)
• Settings view (p. 169)
Compass
*
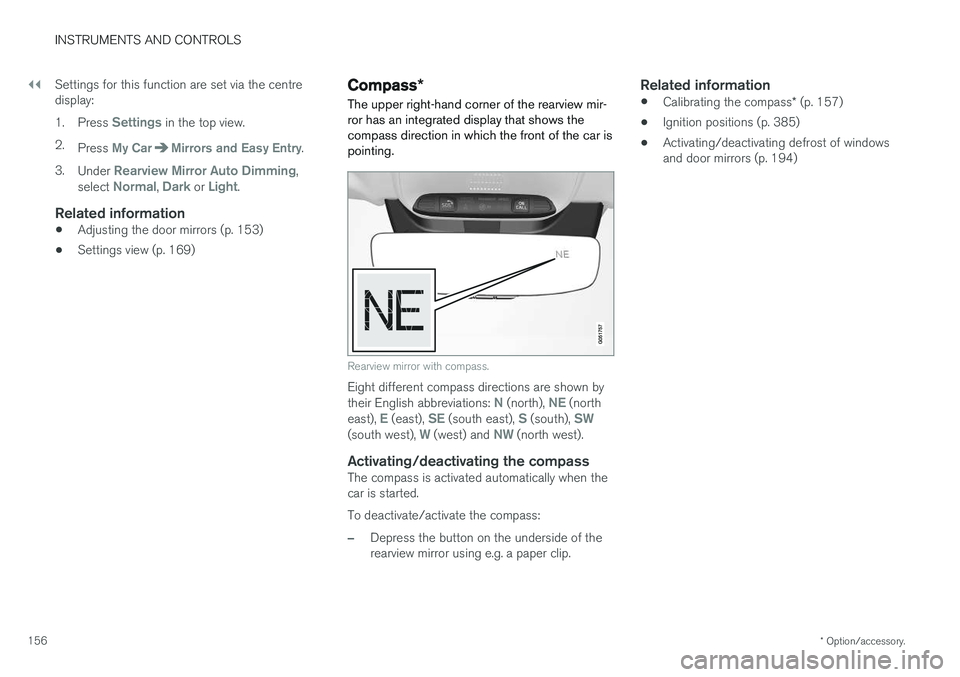
The upper right-hand corner of the rearview mir- ror has an integrated display that shows thecompass direction in which the front of the car ispointing.
Rearview mirror with compass.
Eight different compass directions are shown by their English abbreviations: N (north), NE (north
east), E (east), SE (south east), S (south), SW(south west), W (west) and NW (north west).
Activating/deactivating the compassThe compass is activated automatically when the car is started. To deactivate/activate the compass:
–Depress the button on the underside of the rearview mirror using e.g. a paper clip.
Related information
• Calibrating the compass
* (p. 157)
• Ignition positions (p. 385)
• Activating/deactivating defrost of windowsand door mirrors (p. 194)
Page 159 of 594
INSTRUMENTS AND CONTROLS
* Option/accessory.157
Calibrating the compass *
The earth is divided into 15 magnetic zones. The compass should be calibrated if the car ismoved between several magnetic zones.
Proceed as follows to perform calibration:
1. Stop the car in a large open area free from steel structures and high-voltage power lines.
2. Start the car and switch off all electrical equipment (air conditioning, wipers, etc.) and ensure that all doors are closed.
NOTE
Calibration may fail or not start at all if electri- cal equipment is not switched off.
3. Hold the button on the underside of the rear-view mirror depressed (use a paper clip or similar) for approx. 3 seconds. The number ofthe current magnetic zone is shown.
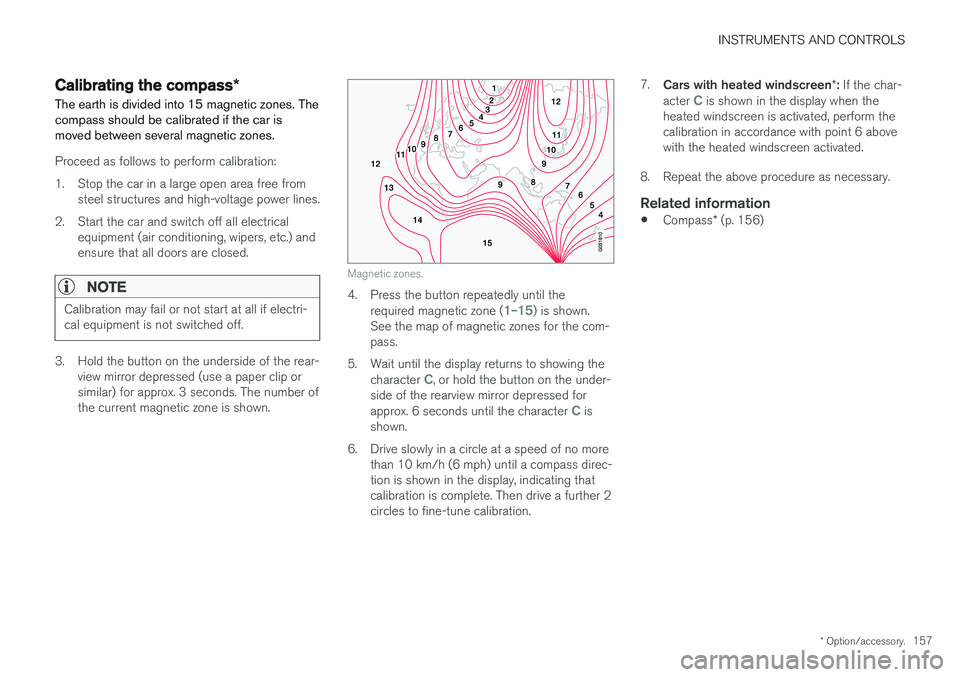
Magnetic zones.
4. Press the button repeatedly until the
required magnetic zone (1–15) is shown.
See the map of magnetic zones for the com- pass.
5. Wait until the display returns to showing the character
C, or hold the button on the under-
side of the rearview mirror depressed for approx. 6 seconds until the character
C is
shown.
6. Drive slowly in a circle at a speed of no more than 10 km/h (6 mph) until a compass direc- tion is shown in the display, indicating thatcalibration is complete. Then drive a further 2circles to fine-tune calibration. 7.
Cars with heated windscreen *: If the char-
acter
C is shown in the display when the
heated windscreen is activated, perform the calibration in accordance with point 6 abovewith the heated windscreen activated.
8. Repeat the above procedure as necessary.
Related information
• Compass
* (p. 156)
Page 160 of 594
INSTRUMENTS AND CONTROLS
* Option/accessory.
158
Panorama roof *
The panorama roof is divided into two glass sec- tions. The front section can be opened verticallyat the rear edge (ventilation position) or horizon-tally (open position). The rear section is fixedroof glass. The panoramic roof has a wind deflector.
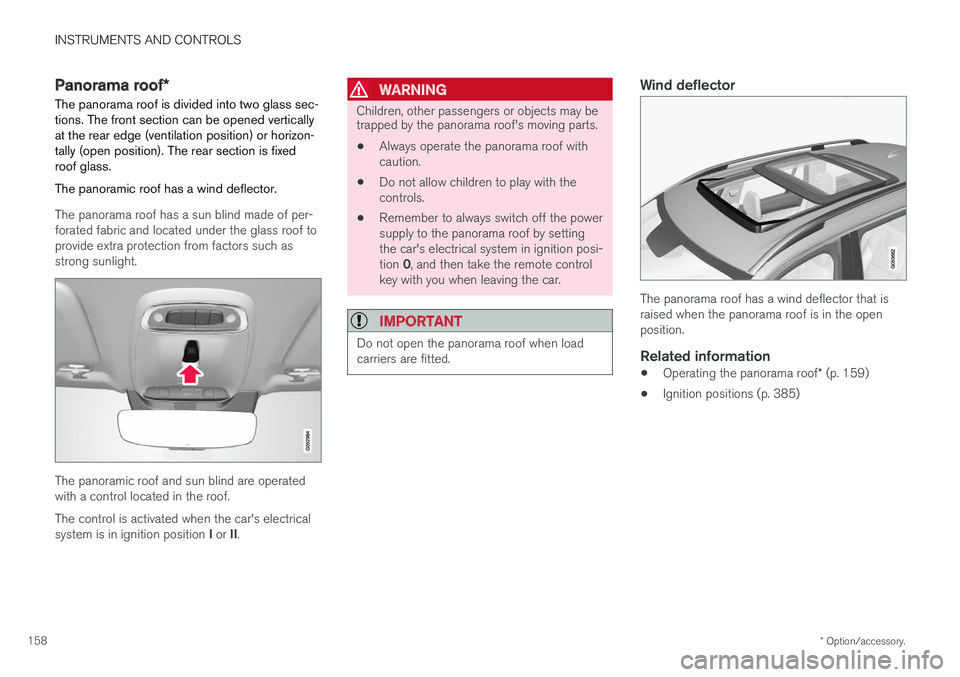
The panorama roof has a sun blind made of per- forated fabric and located under the glass roof toprovide extra protection from factors such asstrong sunlight.
The panoramic roof and sun blind are operated with a control located in the roof. The control is activated when the car's electrical system is in ignition position I or II.
WARNING
Children, other passengers or objects may be trapped by the panorama roof's moving parts.
• Always operate the panorama roof with caution.
• Do not allow children to play with thecontrols.
• Remember to always switch off the powersupply to the panorama roof by settingthe car's electrical system in ignition posi- tion
0, and then take the remote control
key with you when leaving the car.
IMPORTANT
Do not open the panorama roof when load carriers are fitted.
Wind deflector
The panorama roof has a wind deflector that is raised when the panorama roof is in the openposition.
Related information
• Operating the panorama roof
* (p. 159)
• Ignition positions (p. 385)