VOLVO V90 2017 Owners Manual
Manufacturer: VOLVO, Model Year: 2017, Model line: V90, Model: VOLVO V90 2017Pages: 594, PDF Size: 15.07 MB
Page 141 of 594
INSTRUMENTS AND CONTROLS
}}
* Option/accessory.139
Car with LED24
headlamps *
If the active main beam has the on/off functional- ity25
then the lighting returns to main beam about
a second after the camera sensor no longer detects the headlamp beams from oncomingtraffic or the rear lights from vehicles in front. If the active main beam has adaptive functional- ity 25
then, unlike what happens during conven-
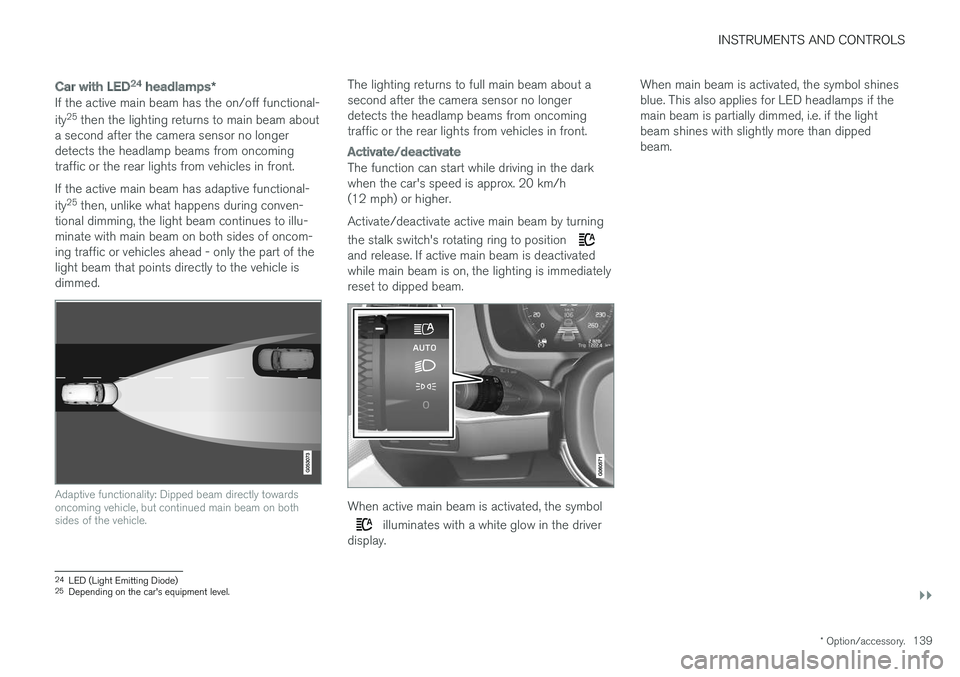
tional dimming, the light beam continues to illu- minate with main beam on both sides of oncom-ing traffic or vehicles ahead - only the part of thelight beam that points directly to the vehicle isdimmed.
Adaptive functionality: Dipped beam directly towards oncoming vehicle, but continued main beam on bothsides of the vehicle.
The lighting returns to full main beam about a second after the camera sensor no longerdetects the headlamp beams from oncomingtraffic or the rear lights from vehicles in front.
Activate/deactivate
The function can start while driving in the dark when the car's speed is approx. 20 km/h(12 mph) or higher. Activate/deactivate active main beam by turning the stalk switch's rotating ring to position
and release. If active main beam is deactivated while main beam is on, the lighting is immediatelyreset to dipped beam.
When active main beam is activated, the symbol
illuminates with a white glow in the driver
display. When main beam is activated, the symbol shines blue. This also applies for LED headlamps if themain beam is partially dimmed, i.e. if the lightbeam shines with slightly more than dippedbeam.
24
LED (Light Emitting Diode)25
Depending on the car's equipment level.
Page 142 of 594
||
INSTRUMENTS AND CONTROLS
140
Manual operation
NOTE
Keep the windscreen surface in front of the camera sensor free from ice, snow, mist anddirt. Do not stick or attach anything to the wind- screen in front of the camera sensor as thismay reduce effectiveness or cause one ormore of the systems dependent on the cam-era to stop working.
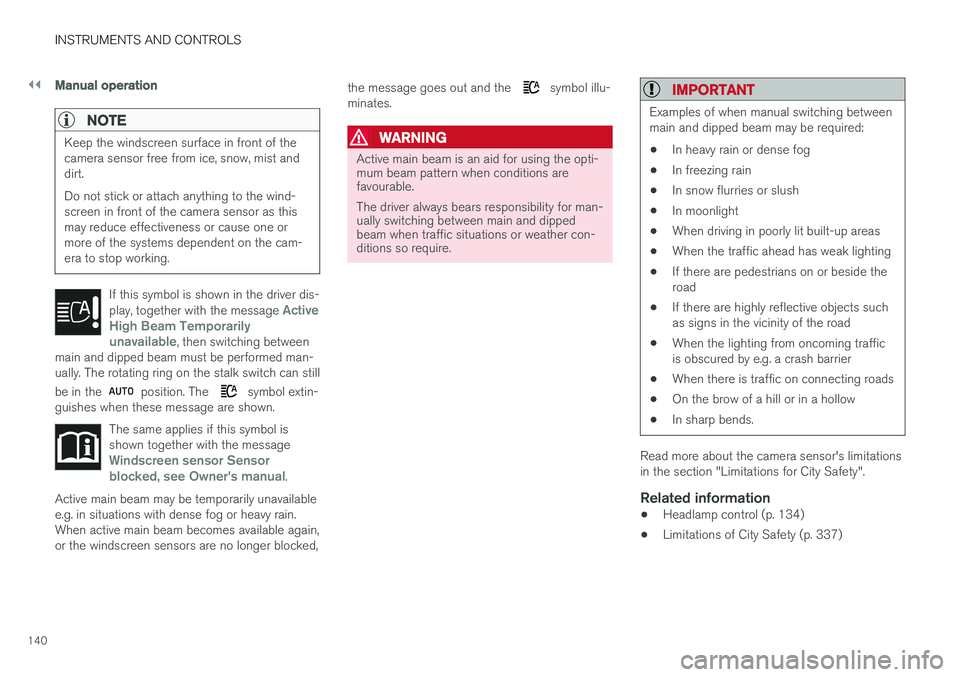
If this symbol is shown in the driver dis- play, together with the message Active
High Beam Temporarily
unavailable, then switching between
main and dipped beam must be performed man- ually. The rotating ring on the stalk switch can still be in the
position. The symbol extin-
guishes when these message are shown.
The same applies if this symbol is shown together with the message
Windscreen sensor Sensor
blocked, see Owner's manual.
Active main beam may be temporarily unavailable e.g. in situations with dense fog or heavy rain.When active main beam becomes available again,or the windscreen sensors are no longer blocked, the message goes out and the
symbol illu-
minates.
WARNING
Active main beam is an aid for using the opti- mum beam pattern when conditions arefavourable. The driver always bears responsibility for man- ually switching between main and dippedbeam when traffic situations or weather con-ditions so require.
IMPORTANT
Examples of when manual switching between main and dipped beam may be required:
• In heavy rain or dense fog
• In freezing rain
• In snow flurries or slush
• In moonlight
• When driving in poorly lit built-up areas
• When the traffic ahead has weak lighting
• If there are pedestrians on or beside theroad
• If there are highly reflective objects suchas signs in the vicinity of the road
• When the lighting from oncoming trafficis obscured by e.g. a crash barrier
• When there is traffic on connecting roads
• On the brow of a hill or in a hollow
• In sharp bends.
Read more about the camera sensor's limitations in the section "Limitations for City Safety".
Related information
• Headlamp control (p. 134)
• Limitations of City Safety (p. 337)
Page 143 of 594
INSTRUMENTS AND CONTROLS
* Option/accessory.141
Active bending lights *
Active bending lights are designed to provide maximum illumination in bends and junctions. Cars with LED 26
headlamps * can have active
bending lights, depending on the car's equip- ment level.
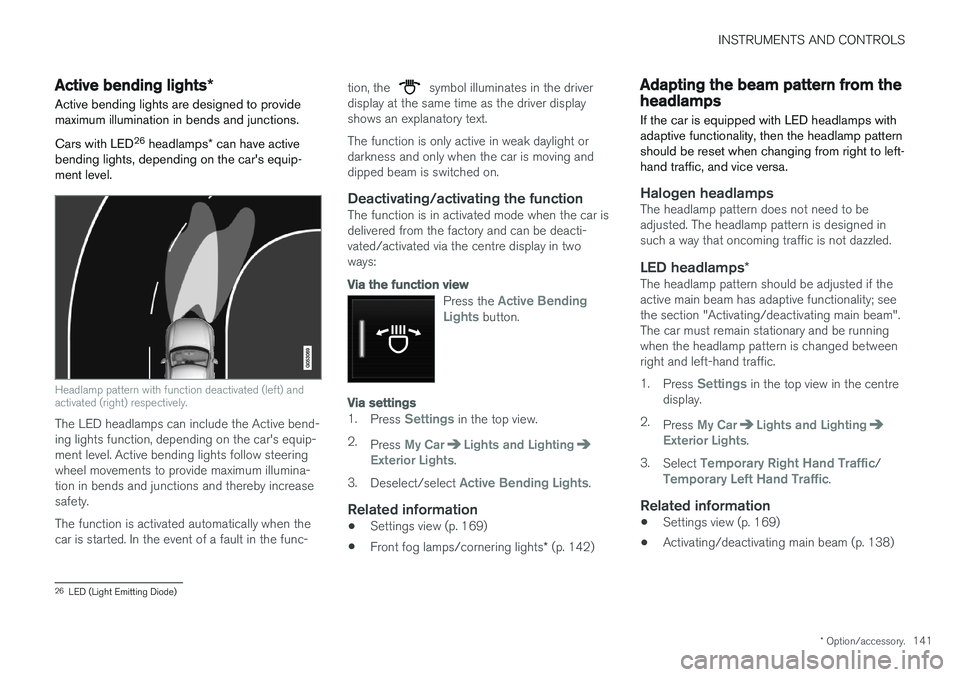
Headlamp pattern with function deactivated (left) and activated (right) respectively.
The LED headlamps can include the Active bend- ing lights function, depending on the car's equip-ment level. Active bending lights follow steeringwheel movements to provide maximum illumina-tion in bends and junctions and thereby increasesafety. The function is activated automatically when the car is started. In the event of a fault in the func- tion, the
symbol illuminates in the driver
display at the same time as the driver display shows an explanatory text. The function is only active in weak daylight or darkness and only when the car is moving anddipped beam is switched on.
Deactivating/activating the functionThe function is in activated mode when the car isdelivered from the factory and can be deacti-vated/activated via the centre display in twoways:
Via the function view
Press the Active Bending
Lights button.
Via settings
1. Press Settings in the top view.
2. Press
My CarLights and LightingExterior Lights.
3. Deselect/select
Active Bending Lights.
Related information
• Settings view (p. 169)
• Front fog lamps/cornering lights
* (p. 142)
Adapting the beam pattern from the headlamps
If the car is equipped with LED headlamps with adaptive functionality, then the headlamp patternshould be reset when changing from right to left-hand traffic, and vice versa.
Halogen headlampsThe headlamp pattern does not need to be adjusted. The headlamp pattern is designed insuch a way that oncoming traffic is not dazzled.
LED headlamps *The headlamp pattern should be adjusted if theactive main beam has adaptive functionality; seethe section "Activating/deactivating main beam".The car must remain stationary and be runningwhen the headlamp pattern is changed betweenright and left-hand traffic. 1.
Press
Settings in the top view in the centre
display.
2. Press
My CarLights and LightingExterior Lights.
3. Select
Temporary Right Hand Traffic/Temporary Left Hand Traffic.
Related information
• Settings view (p. 169)
• Activating/deactivating main beam (p. 138)
26
LED (Light Emitting Diode)
Page 144 of 594
INSTRUMENTS AND CONTROLS
* Option/accessory.
142
Front fog lamps/cornering lights *
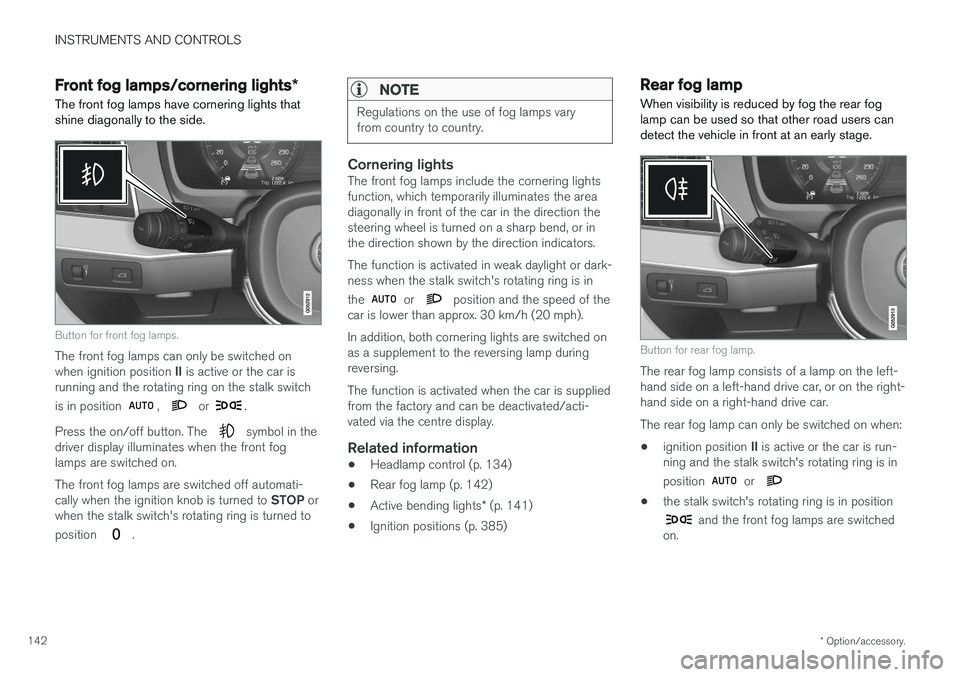
The front fog lamps have cornering lights that shine diagonally to the side.
Button for front fog lamps.
The front fog lamps can only be switched on when ignition position II is active or the car is
running and the rotating ring on the stalk switch is in position
, or .
Press the on/off button. The
symbol in the
driver display illuminates when the front fog lamps are switched on. The front fog lamps are switched off automati- cally when the ignition knob is turned to STOP or
when the stalk switch's rotating ring is turned to position
.
NOTE
Regulations on the use of fog lamps vary from country to country.
Cornering lightsThe front fog lamps include the cornering lights function, which temporarily illuminates the areadiagonally in front of the car in the direction thesteering wheel is turned on a sharp bend, or inthe direction shown by the direction indicators. The function is activated in weak daylight or dark- ness when the stalk switch's rotating ring is in the
or position and the speed of the
car is lower than approx. 30 km/h (20 mph). In addition, both cornering lights are switched on as a supplement to the reversing lamp duringreversing. The function is activated when the car is supplied from the factory and can be deactivated/acti-vated via the centre display.
Related information
• Headlamp control (p. 134)
• Rear fog lamp (p. 142)
• Active bending lights
* (p. 141)
• Ignition positions (p. 385)
Rear fog lamp
When visibility is reduced by fog the rear fog lamp can be used so that other road users candetect the vehicle in front at an early stage.
Button for rear fog lamp.
The rear fog lamp consists of a lamp on the left- hand side on a left-hand drive car, or on the right-hand side on a right-hand drive car. The rear fog lamp can only be switched on when:
• ignition position
II is active or the car is run-
ning and the stalk switch's rotating ring is in position
or
• the stalk switch's rotating ring is in position
and the front fog lamps are switched
on.
Page 145 of 594
INSTRUMENTS AND CONTROLS
}}
* Option/accessory.143
Press the on/off button. The
symbol in the
driver display illuminates when the rear fog lamp is switched on. The rear fog lamp is switched off automatically when:
• the ignition knob is turned to
STOP or when
the stalk switch's rotating ring is set in posi- tion
• the stalk switch's rotating ring is in position
and the front fog lamps are switched
off.
NOTE
Regulations on the use of rear fog lamps vary from country to country.
Related information
• Headlamp control (p. 134)
• Front fog lamps/cornering lights
* (p. 142)
• Ignition positions (p. 385)
Brake lights The brake light automatically comes on during braking.
The brake light is switched on when the brake pedal is depressed. In addition, it is switched onwhen one of driver support systems Adaptive cruise control
*, City Safety or Rear Collision
Warning brakes the car.
Related information
• Emergency brake lights (p. 408)
• Adaptive cruise control
* (p. 290)
• City Safety (p. 330)
• Rear Collision Warning (p. 340)
Hazard warning flashers
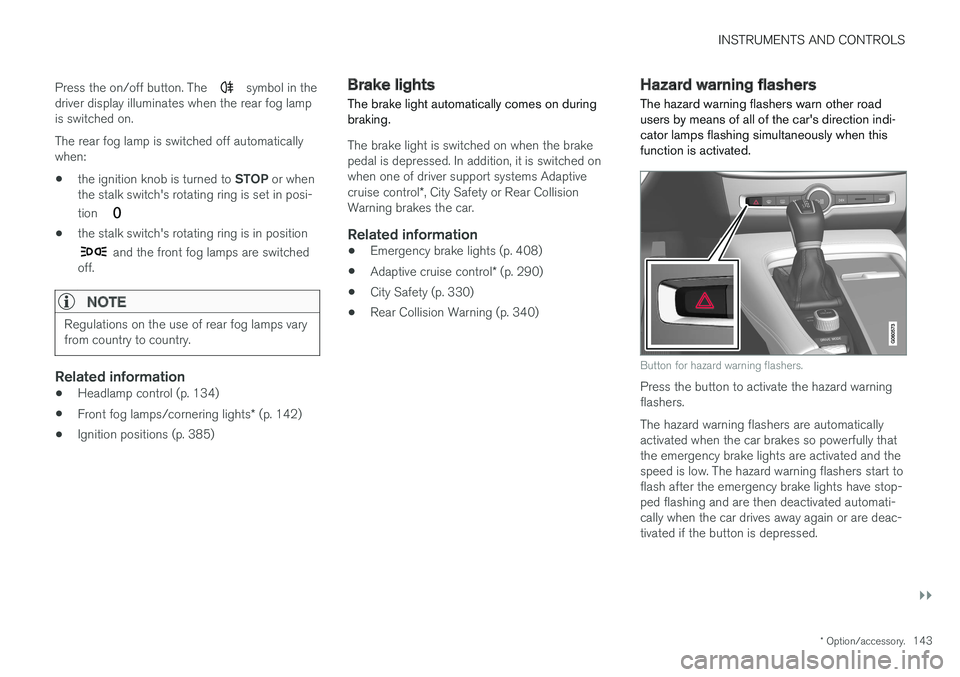
The hazard warning flashers warn other road users by means of all of the car's direction indi-cator lamps flashing simultaneously when thisfunction is activated.
Button for hazard warning flashers.
Press the button to activate the hazard warning flashers. The hazard warning flashers are automatically activated when the car brakes so powerfully thatthe emergency brake lights are activated and thespeed is low. The hazard warning flashers start toflash after the emergency brake lights have stop-ped flashing and are then deactivated automati-cally when the car drives away again or are deac-tivated if the button is depressed.
Page 146 of 594
||
INSTRUMENTS AND CONTROLS
144
Related information
•Using direction indicators (p. 144)
• Emergency brake lights (p. 408)
Using direction indicators
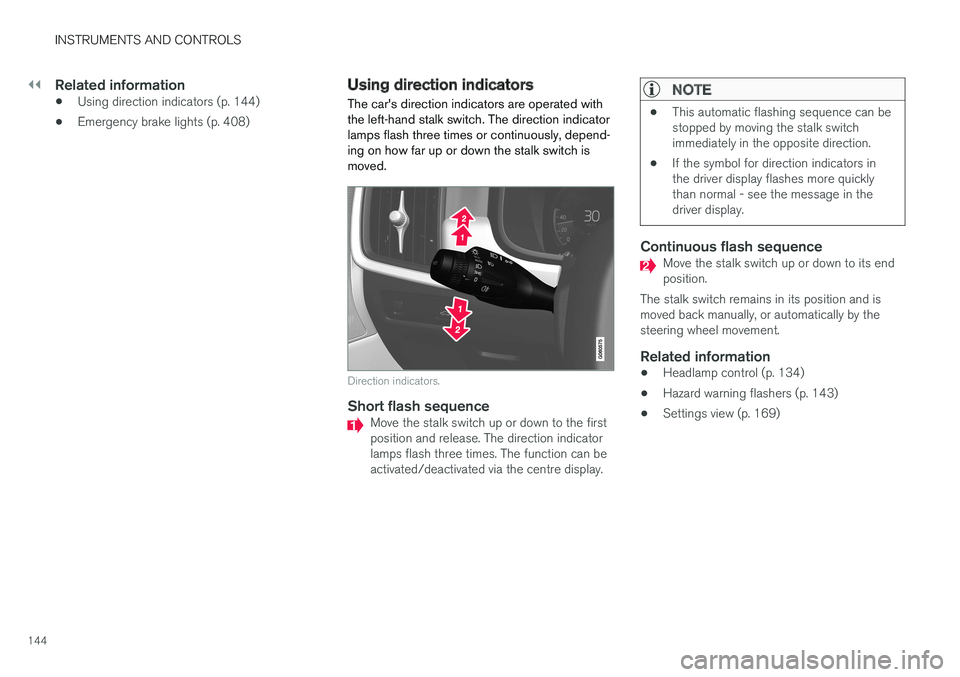
The car's direction indicators are operated with the left-hand stalk switch. The direction indicatorlamps flash three times or continuously, depend-ing on how far up or down the stalk switch ismoved.
Direction indicators.
Short flash sequenceMove the stalk switch up or down to the first position and release. The direction indicatorlamps flash three times. The function can beactivated/deactivated via the centre display.
NOTE
• This automatic flashing sequence can be stopped by moving the stalk switchimmediately in the opposite direction.
• If the symbol for direction indicators inthe driver display flashes more quicklythan normal - see the message in thedriver display.
Continuous flash sequenceMove the stalk switch up or down to its end position.
The stalk switch remains in its position and ismoved back manually, or automatically by thesteering wheel movement.
Related information
• Headlamp control (p. 134)
• Hazard warning flashers (p. 143)
• Settings view (p. 169)
Page 147 of 594
INSTRUMENTS AND CONTROLS
}}
145
Passenger compartment lighting
The passenger compartment lighting is acti- vated/deactivated with the buttons in the over-head controls above the front seats and the rearseat.
All lighting in the passenger compartment can be switched on and off manually within 30 minutesfrom when:
• the car has been switched off and its electri- cal system is in ignition position
0
• the car has been unlocked but it has not been started.
Front lighting
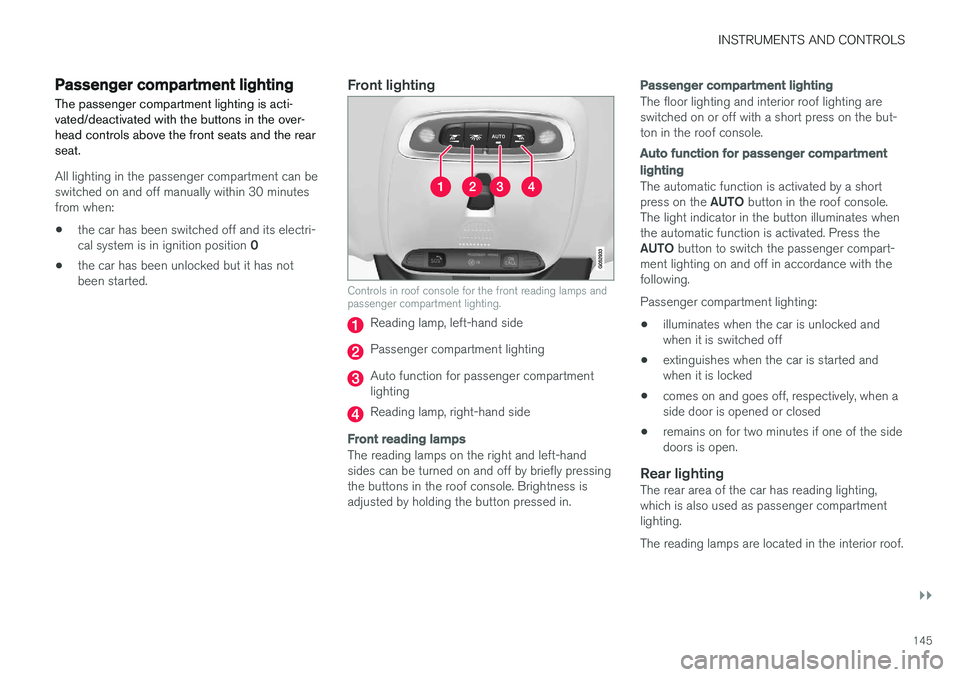
Controls in roof console for the front reading lamps and passenger compartment lighting.
Reading lamp, left-hand side
Passenger compartment lighting
Auto function for passenger compartment lighting
Reading lamp, right-hand side
Front reading lamps
The reading lamps on the right and left-hand sides can be turned on and off by briefly pressingthe buttons in the roof console. Brightness isadjusted by holding the button pressed in.
Passenger compartment lighting
The floor lighting and interior roof lighting are switched on or off with a short press on the but-ton in the roof console.
Auto function for passenger compartment lighting
The automatic function is activated by a short press on the
AUTO button in the roof console.
The light indicator in the button illuminates when the automatic function is activated. Press the AUTO button to switch the passenger compart-
ment lighting on and off in accordance with the following. Passenger compartment lighting: • illuminates when the car is unlocked and when it is switched off
• extinguishes when the car is started andwhen it is locked
• comes on and goes off, respectively, when aside door is opened or closed
• remains on for two minutes if one of the sidedoors is open.
Rear lightingThe rear area of the car has reading lighting,which is also used as passenger compartmentlighting. The reading lamps are located in the interior roof.
Page 148 of 594
||
INSTRUMENTS AND CONTROLS
* Option/accessory.
146
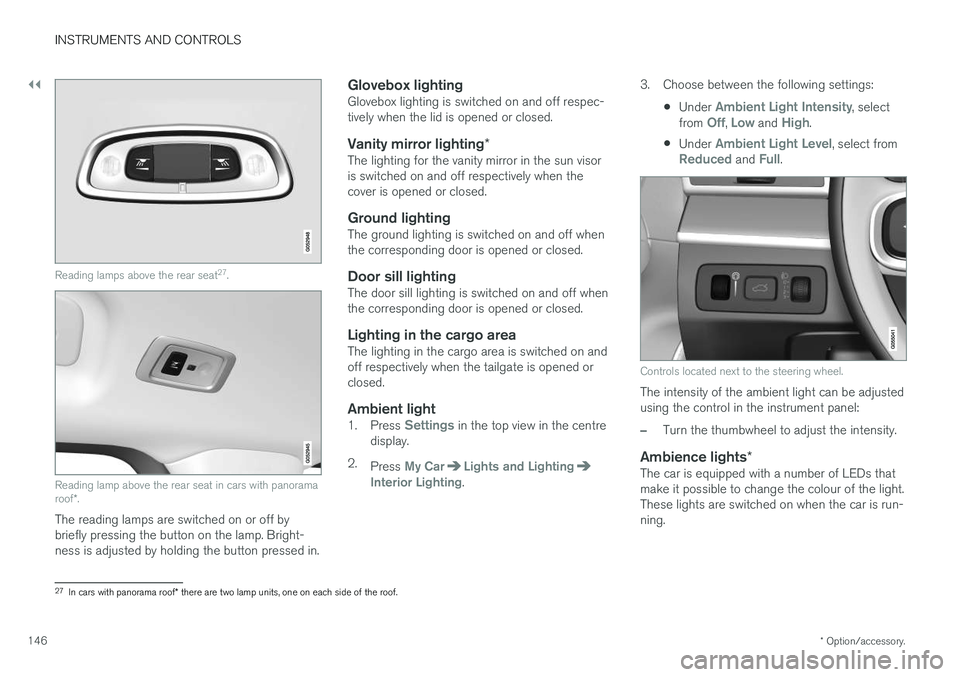
Reading lamps above the rear seat 27
.
Reading lamp above the rear seat in cars with panorama roof *.
The reading lamps are switched on or off by briefly pressing the button on the lamp. Bright-ness is adjusted by holding the button pressed in.
Glovebox lightingGlovebox lighting is switched on and off respec-tively when the lid is opened or closed.
Vanity mirror lighting *The lighting for the vanity mirror in the sun visoris switched on and off respectively when thecover is opened or closed.
Ground lightingThe ground lighting is switched on and off whenthe corresponding door is opened or closed.
Door sill lightingThe door sill lighting is switched on and off whenthe corresponding door is opened or closed.
Lighting in the cargo areaThe lighting in the cargo area is switched on andoff respectively when the tailgate is opened orclosed.
Ambient light1.
Press Settings in the top view in the centre
display.
2. Press
My CarLights and LightingInterior Lighting. 3. Choose between the following settings:
•Under
Ambient Light Intensity, select
from Off, Low and High.
• Under
Ambient Light Level, select fromReduced and Full.
Controls located next to the steering wheel.
The intensity of the ambient light can be adjusted using the control in the instrument panel:
–Turn the thumbwheel to adjust the intensity.
Ambience lights
*The car is equipped with a number of LEDs that make it possible to change the colour of the light.These lights are switched on when the car is run-ning.
27
In cars with panorama roof * there are two lamp units, one on each side of the roof.
Page 149 of 594

INSTRUMENTS AND CONTROLS
147
The ambience lights can be changed via the cen- tre display:
Changing the brightness of the lights
1.
Press Settings in the top view in the centre
display.
2. Press
My CarLights and Lighting
Interior LightingInterior Mood Lighting.
3. Under
Interior Mood Light Intensity, select
from Off, Low and High.
Changing the colour of the light
1. Press Settings in the top view in the centre
display.
2. Press
My CarLights and Lighting
Interior LightingInterior Mood Lighting.
3. Choose between
By Temperature, By
Colour and Theme Colours in order to
change the colour of the light. With colour option
By Temperature, the
colour of the light changes according to the set passenger compartment temperature.
Controls located next to the steering wheel.
The intensity of the ambience light can be adjusted using the controls in the instrumentpanel:
–Turn the thumbwheel to adjust the intensity.
Lighting in storage compartments in doors
The lighting in storage compartments in doors is switched on when the car is running. The bright-ness can be finely adjusted using the control inthe instrument panel.
Lighting in front cup holders in tunnel
console
The lighting in the front cup holders is switchedon when the car is unlocked and is switched offwhen the car is locked. The brightness can befinely adjusted using the control in the instrumentpanel.
Related information
• Headlamp control (p. 134)
• Ignition positions (p. 385)
• Settings view (p. 169)
Page 150 of 594
INSTRUMENTS AND CONTROLS
* Option/accessory.
148
Home safe light duration
Some of the exterior lighting can be kept switched on to work as home safe lighting afterthe car has been locked.
To activate the function:
1. Switch off the car.
2. Move the left-hand stalk switch forward toward the instrument panel and release.
3. Get out of the car and lock the door.When the function is activated, dipped beam, position lamps, lighting in the outside handles *
and number plate lighting are switched on. The length of time that home safe lighting remains on can be set via the centre display.
Related information
• Approach light duration (p. 148)
• Settings view (p. 169)
Approach light duration
Approach lighting is switched on when the car is unlocked and is used to switch on the car'slighting at a distance.
When the function is activated with the remote control key during unlocking, the position lamps, lighting in outer handles *, number plate lighting,
interior roof lighting and floor lighting will switch on. If a door is opened within the activation time, the time for the lighting in the outside handles *
and the interior lighting will be extended. The function can be deactivated/activated via the centre display.
Related information
• Home safe light duration (p. 148)
• Remote control key (p. 236)
• Settings view (p. 169)
Using windscreen wipers
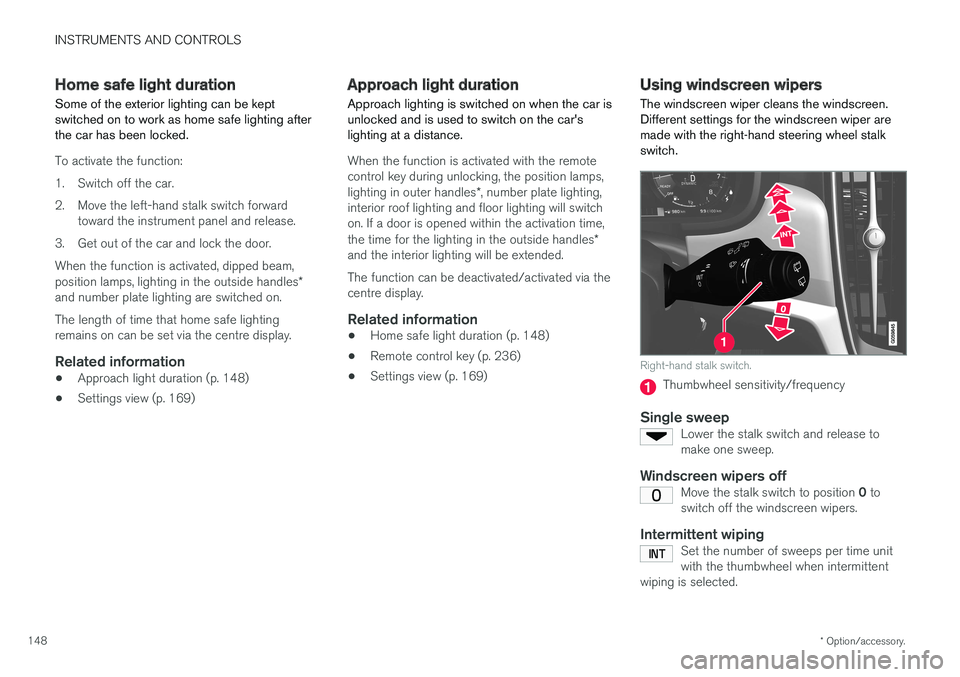
The windscreen wiper cleans the windscreen. Different settings for the windscreen wiper aremade with the right-hand steering wheel stalkswitch.
Right-hand stalk switch.
Thumbwheel sensitivity/frequency
Single sweepLower the stalk switch and release to make one sweep.
Windscreen wipers offMove the stalk switch to position 0 to
switch off the windscreen wipers.
Intermittent wipingSet the number of sweeps per time unit with the thumbwheel when intermittent
wiping is selected.