YAMAHA GIGGLE50 2009 Owner's Guide
Manufacturer: YAMAHA, Model Year: 2009, Model line: GIGGLE50, Model: YAMAHA GIGGLE50 2009Pages: 74, PDF Size: 0.9 MB
Page 31 of 74
4-31
1
2
3
4
5
6
7
8
9
EAU15582
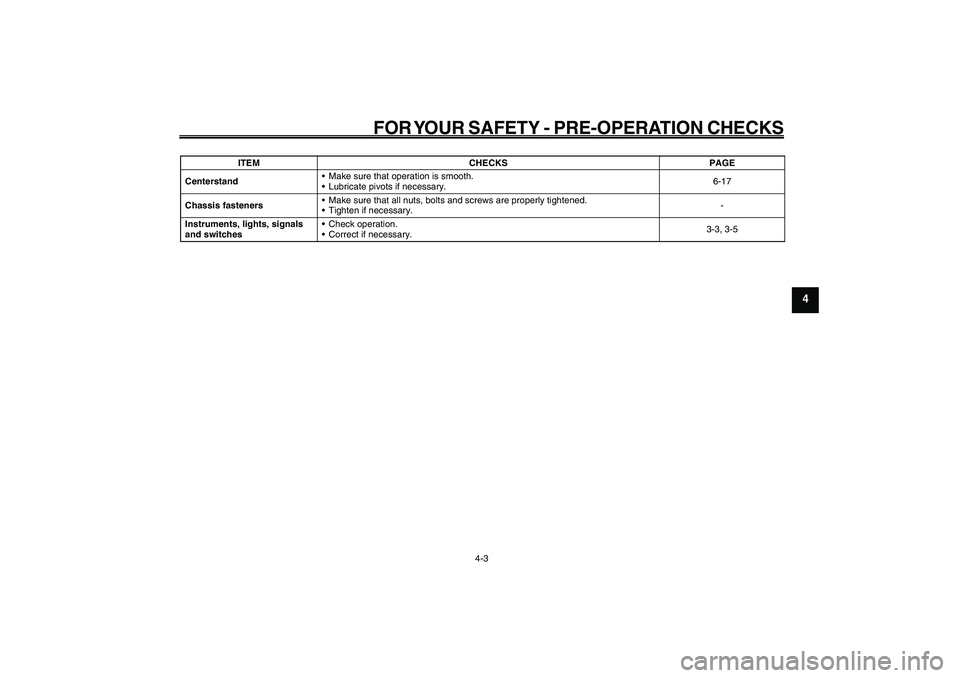
FOR YOUR SAFETY - PRE-OPERATION CHECKS
4-3
Centerstand• Make sure that operation is smooth.
• Lubricate pivots if necessary.6-17
Chassis fasteners• Make sure that all nuts, bolts and screws are properly tightened.
• Tighten if necessary.-
Instruments, lights, signals
and switches• Check operation.
• Correct if necessary.3-3, 3-5 ITEM CHECKS PAGE
Page 32 of 74
5-32
1
2
3
4
5
6
7
8
9
EAU15943
OPERATION AND IMPORTANT RIDING POINTS
EAU15943
OPERATION AND IMPORTANT RIDING POINTS
5-1
Starting the engine
EAU15951
Read the Owner’s Manual carefully to
become familiar with all controls. If there
is a control or function you do not un-
derstand, ask your Yamaha dealer.
EWA10271
WARNING
Failure to familiarize yourself with
the controls can lead to loss of con-
trol, which could cause an accident
or injury.
EAU45310
TIP
This model is equipped with a lean angle
sensor to stop the engine in case of a
turnover. To start the engine after a turn-
over, be sure to turn the main switch to
“OFF” and then to “ON”. Failing to do so
will prevent the engine from starting
even though the engine will crank when
pushing the start switch.
EAUT2251
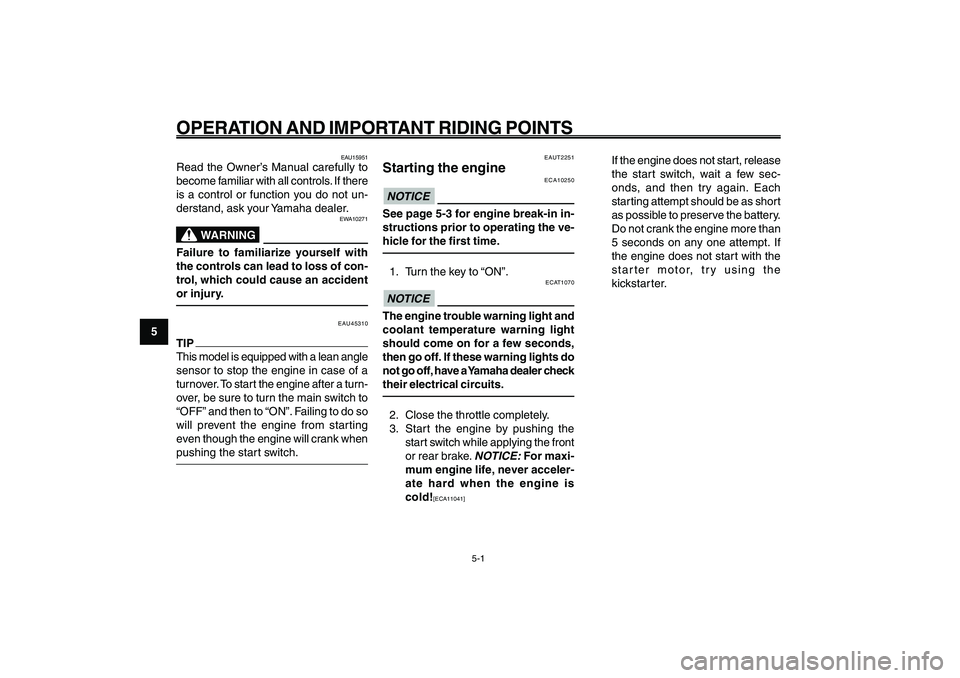
Starting the engine
ECA10250
NOTICESee page 5-3 for engine break-in in-
structions prior to operating the ve-
hicle for the first time.1. Turn the key to “ON”.
ECAT1070
NOTICEThe engine trouble warning light and
coolant temperature warning light
should come on for a few seconds,
then go off. If these warning lights do
not go off, have a Yamaha dealer check
their electrical circuits.2. Close the throttle completely.
3. Start the engine by pushing the
start switch while applying the front
or rear brake.
NOTICE:
For maxi-
mum engine life, never acceler-
ate hard when the engine is
cold!
[ECA11041]
If the engine does not start, release
the start switch, wait a few sec-
onds, and then try again. Each
starting attempt should be as short
as possible to preserve the battery.
Do not crank the engine more than
5 seconds on any one attempt. If
the engine does not start with the
starter motor, try using the
kickstar ter.
Page 33 of 74
5-33
1
2
3
4
5
6
7
8
9
EAU15943
OPERATION AND IMPORTANT RIDING POINTS
5-2
Starting off
Acceleration and deceleration
Braking
EAU16780
Acceleration and decelera-
tionZAUM00**
(a) (b)
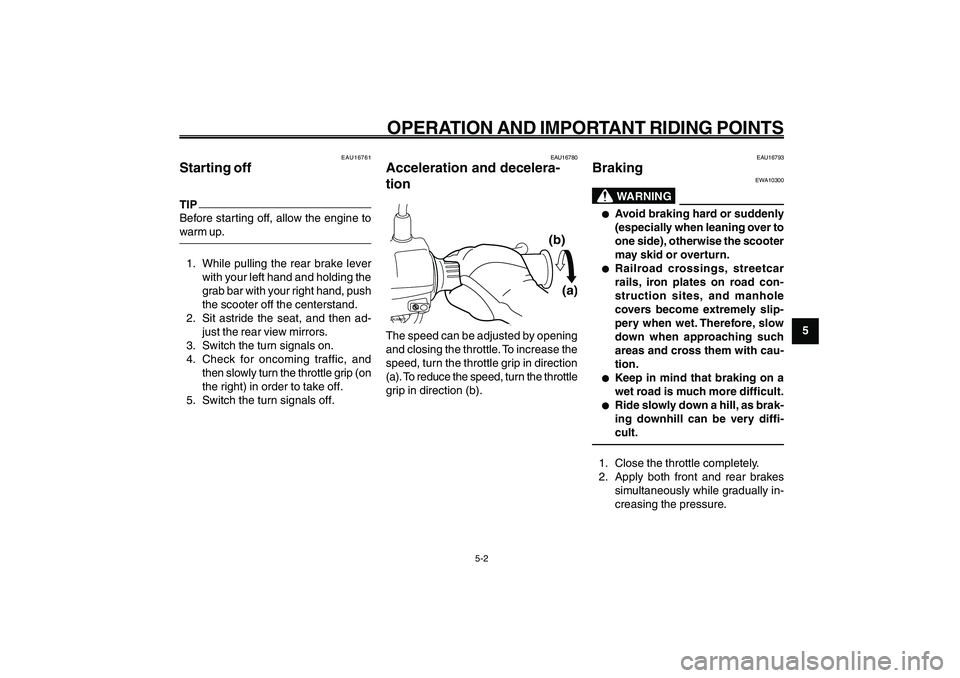
The speed can be adjusted by opening
and closing the throttle. To increase the
speed, turn the throttle grip in direction
(a). To reduce the speed, turn the throttle
grip in direction (b).
EAU16793
Braking
EWA10300
WARNING
● ●● ●
●
Avoid braking hard or suddenly
(especially when leaning over to
one side), otherwise the scooter
may skid or overturn.
● ●● ●
●
Railroad crossings, streetcar
rails, iron plates on road con-
struction sites, and manhole
covers become extremely slip-
pery when wet. Therefore, slow
down when approaching such
areas and cross them with cau-
tion.
● ●● ●
●
Keep in mind that braking on a
wet road is much more difficult.
● ●● ●
●
Ride slowly down a hill, as brak-
ing downhill can be very diffi-
cult.
1. Close the throttle completely.
2. Apply both front and rear brakes
simultaneously while gradually in-
creasing the pressure.
EAU16761
Starting offTIP
Before starting off, allow the engine to
warm up.1. While pulling the rear brake lever
with your left hand and holding the
grab bar with your right hand, push
the scooter off the centerstand.
2. Sit astride the seat, and then ad-
just the rear view mirrors.
3. Switch the turn signals on.
4. Check for oncoming traffic, and
then slowly turn the throttle grip (on
the right) in order to take off.
5. Switch the turn signals off.
Page 34 of 74
5-34
1
2
3
4
5
6
7
8
9
EAU15943
OPERATION AND IMPORTANT RIDING POINTS
5-3
EAU16830
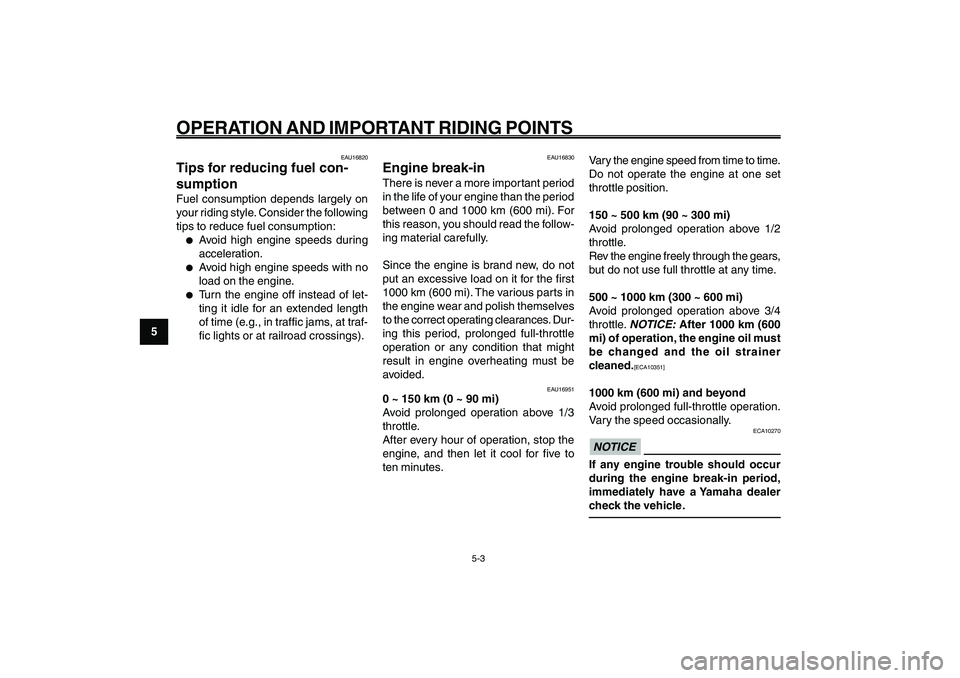
Engine break-inThere is never a more important period
in the life of your engine than the period
between 0 and 1000 km (600 mi). For
this reason, you should read the follow-
ing material carefully.
Since the engine is brand new, do not
put an excessive load on it for the first
1000 km (600 mi). The various parts in
the engine wear and polish themselves
to the correct operating clearances. Dur-
ing this period, prolonged full-throttle
operation or any condition that might
result in engine overheating must be
avoided. Fuel consumption, tips for reducing
Engine break-in
EAU16820
Tips for reducing fuel con-
sumptionFuel consumption depends largely on
your riding style. Consider the following
tips to reduce fuel consumption:●
Avoid high engine speeds during
acceleration.
●
Avoid high engine speeds with no
load on the engine.
●
Turn the engine off instead of let-
ting it idle for an extended length
of time (e.g., in traffic jams, at traf-
fic lights or at railroad crossings).
EAU16951
0 ~ 150 km (0 ~ 90 mi)
Avoid prolonged operation above 1/3
throttle.
After every hour of operation, stop the
engine, and then let it cool for five to
ten minutes.Vary the engine speed from time to time.
Do not operate the engine at one set
throttle position.
150 ~ 500 km (90 ~ 300 mi)
Avoid prolonged operation above 1/2
throttle.
Rev the engine freely through the gears,
but do not use full throttle at any time.
500 ~ 1000 km (300 ~ 600 mi)
Avoid prolonged operation above 3/4
throttle.
NOTICE:
After 1000 km (600
mi) of operation, the engine oil must
be changed and the oil strainer
cleaned.
[ECA10351]
1000 km (600 mi) and beyond
Avoid prolonged full-throttle operation.
Vary the speed occasionally.
ECA10270
NOTICEIf any engine trouble should occur
during the engine break-in period,
immediately have a Yamaha dealer
check the vehicle.
Page 35 of 74
5-35
1
2
3
4
5
6
7
8
9
EAU15943
OPERATION AND IMPORTANT RIDING POINTS
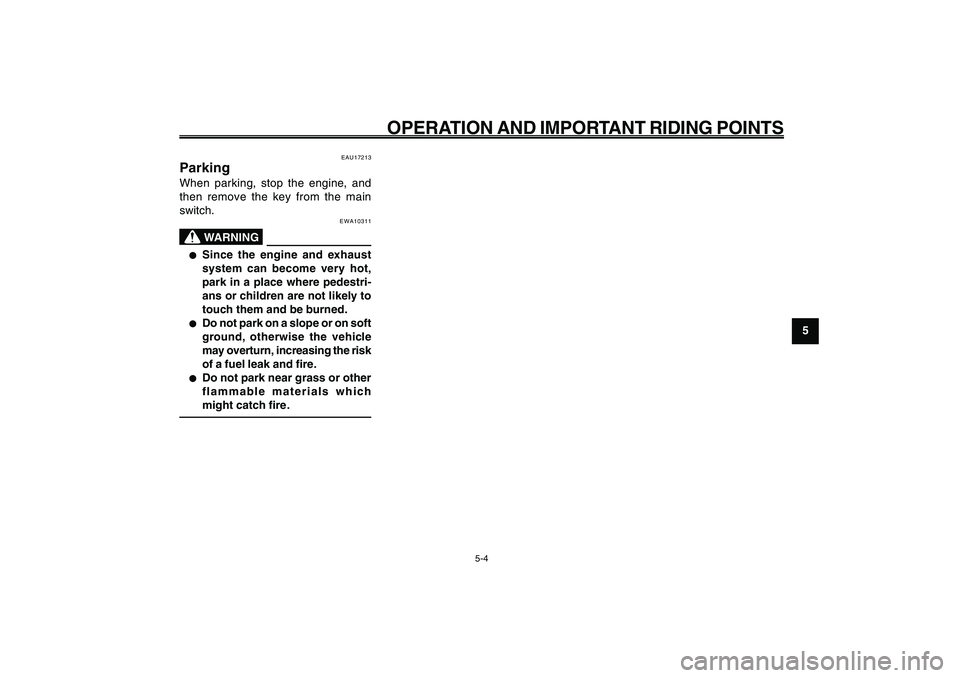
EAU17213
ParkingWhen parking, stop the engine, and
then remove the key from the main
switch.
EWA10311
WARNING
● ●● ●
●
Since the engine and exhaust
system can become very hot,
park in a place where pedestri-
ans or children are not likely to
touch them and be burned.
● ●● ●
●
Do not park on a slope or on soft
ground, otherwise the vehicle
may overturn, increasing the risk
of a fuel leak and fire.
● ●● ●
●
Do not park near grass or other
flammable materials which
might catch fire.
Parking
5-4
Page 36 of 74
6-36
1
2
3
4
5
6
7
8
9
EAU1722A
PERIODIC MAINTENANCE AND ADJUSTMENT
EAU1722A
PERIODIC MAINTENANCE AND ADJUSTMENT
6-1
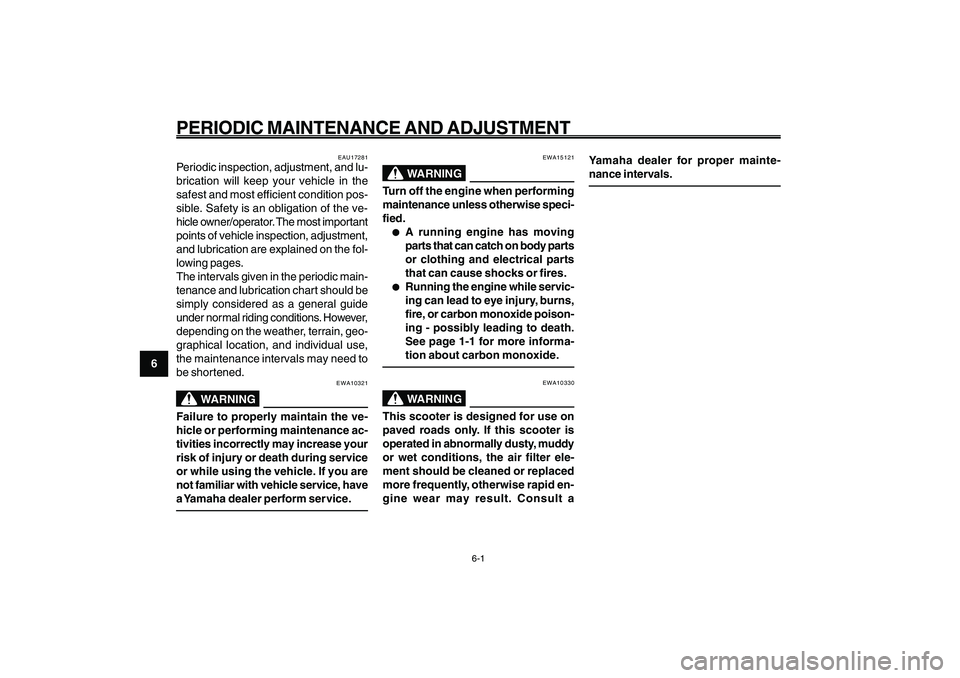
EAU17281
Periodic inspection, adjustment, and lu-
brication will keep your vehicle in the
safest and most efficient condition pos-
sible. Safety is an obligation of the ve-
hicle owner/operator. The most important
points of vehicle inspection, adjustment,
and lubrication are explained on the fol-
lowing pages.
The intervals given in the periodic main-
tenance and lubrication chart should be
simply considered as a general guide
under normal riding conditions. However,
depending on the weather, terrain, geo-
graphical location, and individual use,
the maintenance intervals may need to
be shortened.
EWA10321
WARNING
Failure to properly maintain the ve-
hicle or performing maintenance ac-
tivities incorrectly may increase your
risk of injury or death during service
or while using the vehicle. If you are
not familiar with vehicle service, have
a Yamaha dealer perform service.
EWA15121
WARNING
Turn off the engine when performing
maintenance unless otherwise speci-
fied.● ●● ●
●
A running engine has moving
parts that can catch on body parts
or clothing and electrical parts
that can cause shocks or fires.
● ●● ●
●
Running the engine while servic-
ing can lead to eye injury, burns,
fire, or carbon monoxide poison-
ing - possibly leading to death.
See page 1-1 for more informa-
tion about carbon monoxide.
EWA10330
WARNING
This scooter is designed for use on
paved roads only. If this scooter is
operated in abnormally dusty, muddy
or wet conditions, the air filter ele-
ment should be cleaned or replaced
more frequently, otherwise rapid en-
gine wear may result. Consult aYamaha dealer for proper mainte-
nance intervals.
Page 37 of 74
6-37
1
2
3
4
5
6
7
8
9
EAU1722A
PERIODIC MAINTENANCE AND ADJUSTMENT
6-2
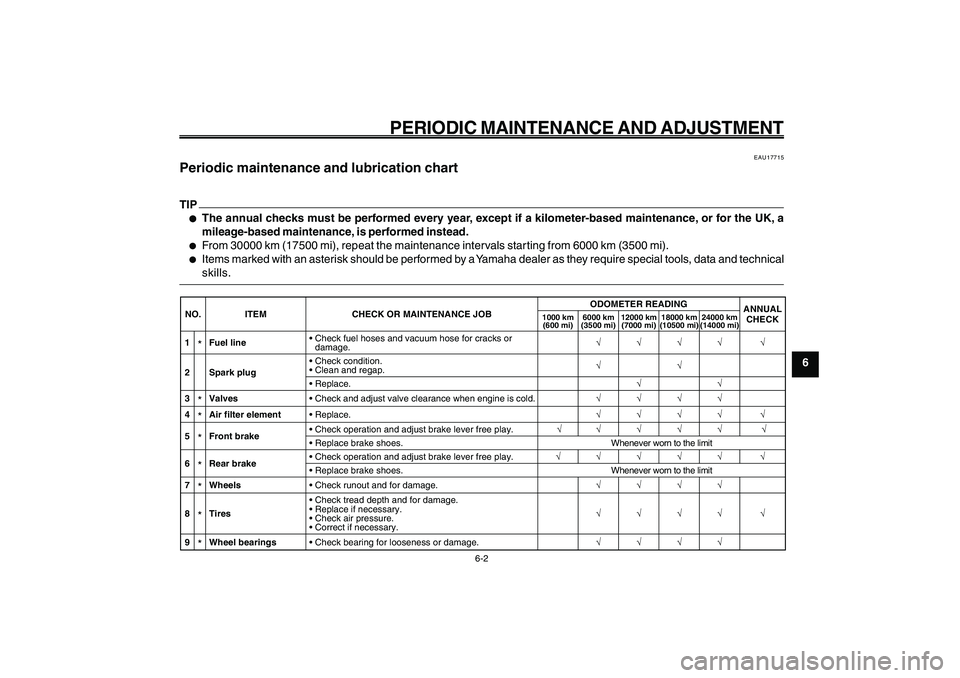
Periodic maintenance and lubrication chart
EAU17715
Periodic maintenance and lubrication chartTIP● ●● ●
●
The annual checks must be performed every year, except if a kilometer-based maintenance, or for the UK, a
mileage-based maintenance, is performed instead.
●
From 30000 km (17500 mi), repeat the maintenance intervals starting from 6000 km (3500 mi).
●
Items marked with an asterisk should be performed by a Yamaha dealer as they require special tools, data and technical
skills.
NO. ITEM CHECK OR MAINTENANCE JOBODOMETER READING
ANNUAL
CHECK
1000 km
(600 mi)6000 km
(3500 mi)12000 km
(7000 mi)18000 km
(10500 mi)24000 km
(14000 mi)
1
*Fuel line• Check fuel hoses and vacuum hose for cracks or
damage.�—�—�—�— �—
2 Spark plug• Check condition.
• Clean and regap.�—�—
• Replace.�—�—
3*Valves• Check and adjust valve clearance when engine is cold.�—�—�—�—
4*Air filter element• Replace.�—�—�—�— �—
5*Front brake• Check operation and adjust brake lever free play.�—�— �— �— �— �—
• Replace brake shoes. Whenever worn to the limit
6*Rear brake• Check operation and adjust brake lever free play.�—�—�—�—�— �—
• Replace brake shoes. Whenever worn to the limit
7*Wheels• Check runout and for damage.�—�—�—�—
8*Tires• Check tread depth and for damage.
• Replace if necessary.
• Check air pressure.
• Correct if necessary.�—�—�—�— �—
9*Wheel bearings• Check bearing for looseness or damage.�—�—�—�—
Page 38 of 74
6-38
1
2
3
4
5
6
7
8
9
EAU1722A
PERIODIC MAINTENANCE AND ADJUSTMENT
6-3
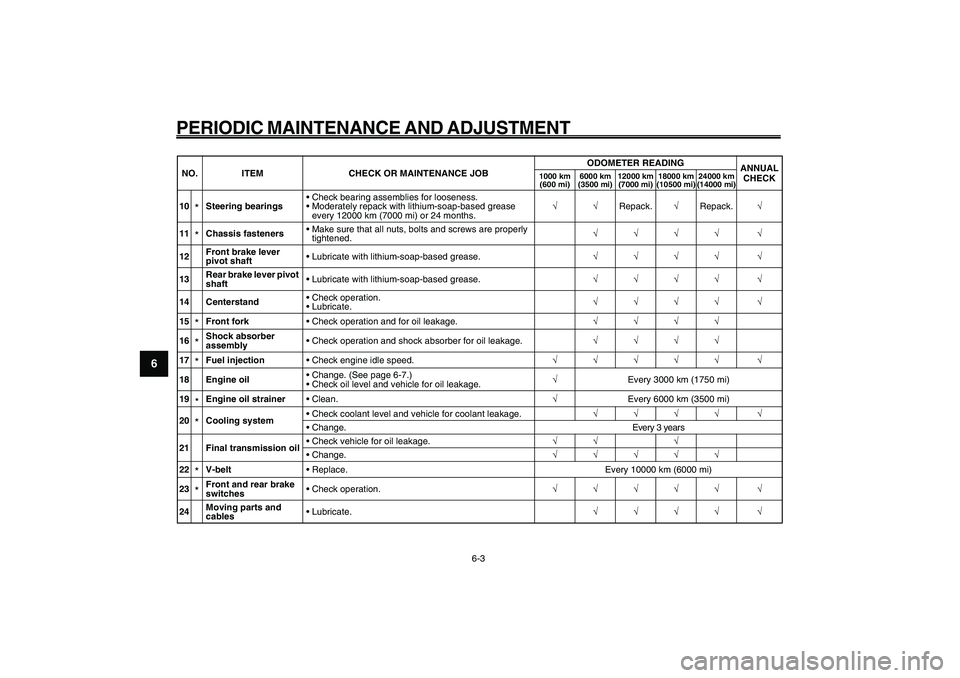
10
*Steering bearings• Check bearing assemblies for looseness.
• Moderately repack with lithium-soap-based grease
every 12000 km (7000 mi) or 24 months.�—�—Repack.�—Repack.�—
11*Chassis fasteners• Make sure that all nuts, bolts and screws are properly
tightened.�—�—�—�— �—
12Front brake lever
pivot shaft• Lubricate with lithium-soap-based grease.�—�—�—�— �—
13Rear brake lever pivot
shaft• Lubricate with lithium-soap-based grease.�—�—�—�— �—
14 Centerstand• Check operation.
• Lubricate.�—�—�—�— �—
15*Front fork• Check operation and for oil leakage.�—�—�—�—
16*Shock absorber
assembly• Check operation and shock absorber for oil leakage.�—�—�—�—
17*Fuel injection• Check engine idle speed.�—�—�—�—�— �—
18 Engine oil• Change. (See page 6-7.)
• Check oil level and vehicle for oil leakage.�—Every 3000 km (1750 mi)
19
*Engine oil strainer•Clean.�—Every 6000 km (3500 mi)
20*Cooling system• Check coolant level and vehicle for coolant leakage.�—�—�—�— �—
• Change. Every 3 years
21 Final transmission oil• Check vehicle for oil leakage.�—�— �—
• Change.�—�—�—�—�—
22*V-belt• Replace. Every 10000 km (6000 mi)
23*Front and rear brake
switches• Check operation.�—�—�—�—�— �—
24Moving parts and
cables• Lubricate.�—�—�—�— �— NO. ITEM CHECK OR MAINTENANCE JOBODOMETER READING
ANNUAL
CHECK
1000 km
(600 mi)6000 km
(3500 mi)12000 km
(7000 mi)18000 km
(10500 mi)24000 km
(14000 mi)
Page 39 of 74
6-39
1
2
3
4
5
6
7
8
9
EAU1722A
PERIODIC MAINTENANCE AND ADJUSTMENT
6-4
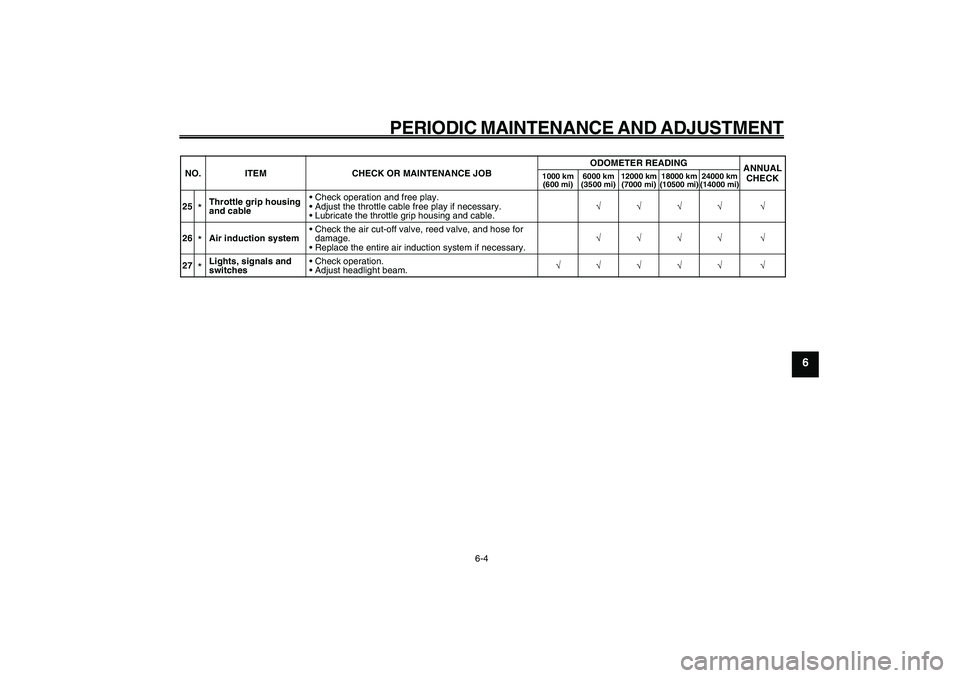
25
*Throttle grip housing
and cable• Check operation and free play.
• Adjust the throttle cable free play if necessary.
• Lubricate the throttle grip housing and cable.�—�—�—�— �—
26*Air induction system• Check the air cut-off valve, reed valve, and hose for
damage.
• Replace the entire air induction system if necessary.�—�—�—�— �—
27*Lights, signals and
switches• Check operation.
• Adjust headlight beam.�—�—�—�—�— �— NO. ITEM CHECK OR MAINTENANCE JOBODOMETER READING
ANNUAL
CHECK
1000 km
(600 mi)6000 km
(3500 mi)12000 km
(7000 mi)18000 km
(10500 mi)24000 km
(14000 mi)
Page 40 of 74
6-40
1
2
3
4
5
6
7
8
9
EAU1722A
PERIODIC MAINTENANCE AND ADJUSTMENT
6-5
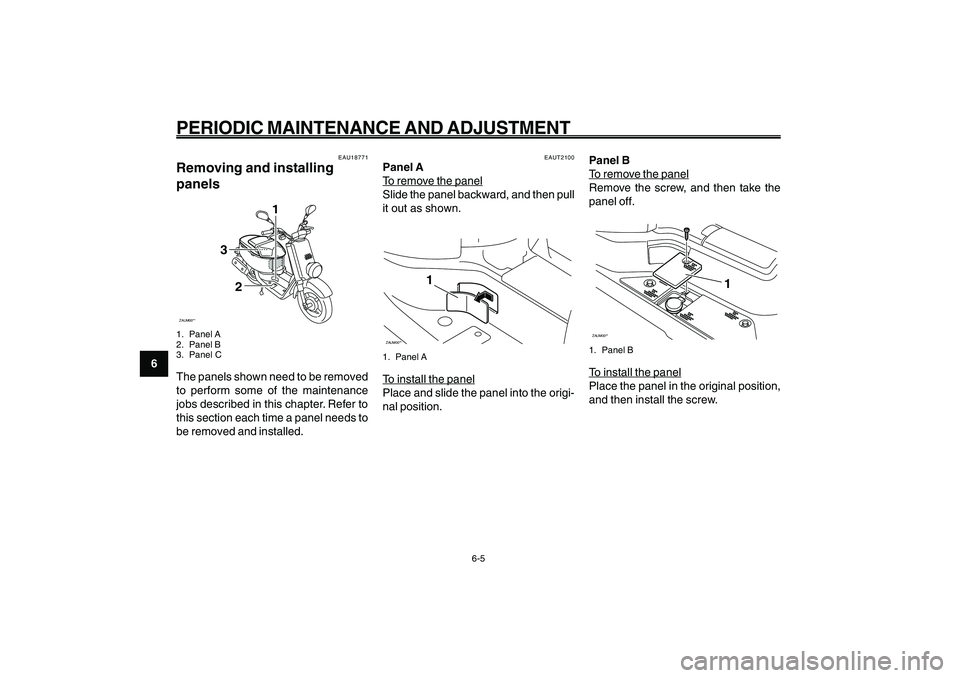
EAU18771
Removing and installing
panelsZAUM00**
3
1
2
1. Panel A
2. Panel B
3. Panel CThe panels shown need to be removed
to perform some of the maintenance
jobs described in this chapter. Refer to
this section each time a panel needs to
be removed and installed.
EAUT2100
Panel ATo remo
ve the panel
Slide the panel backward, and then pull
it out as shown.
ZAUM00**
1
1. Panel ATo install the panel
Place and slide the panel into the origi-
nal position.Panel B
To remo
ve the panel
Remove the screw, and then take the
panel off.
ZAUM00**
1
1. Panel BTo install the panel
Place the panel in the original position,
and then install the screw. Panels, removing and installing