YAMAHA RHINO 700 2013 Manual PDF
Manufacturer: YAMAHA, Model Year: 2013, Model line: RHINO 700, Model: YAMAHA RHINO 700 2013Pages: 188, PDF Size: 4.9 MB
Page 71 of 188
5-4
EVU00400Fuel
Make sure there is sufficient gasoline in the
tank.
WARNING
Gasoline and gasoline vapors are ex-
tremely flammable. To avoid fires and ex-
plosions and to reduce the risk of injury
when refueling, follow these instructions.1. Before refueling, turn off the engine andbe sure that no one is sitting in the vehi-
cle.
Never refuel while smoking, or while in
the vicinity of sparks, open flames, or oth-
er sources of ignition such as the pilot
lights of water heaters and clothes dry-
ers.
2. Do not overfill the fuel tank. Because fuel expands when it heats up, heat from the
engine or the sun can cause fuel to spill
out of the fuel tank.
3. Wipe up any spilled fuel immediately. 4. Be sure the fuel tank cap is closed se-
curely.
WARNING
Gasoline is poisonous and can cause inju-
ry or death. Handle gasoline with care.
Never siphon gasoline by mouth. If you
should swallow some gasoline or inhale a
lot of gasoline vapor, or get some gasoline
in your eyes, see your doctor immediately.
If gasoline spills on your skin, wash with
soap and water. If gasoline spills on your
clothing, change your clothes.Your Yamaha engine has been designed to
use regular unleaded gasoline with a re-
search octane number of 91 or higher (95 or
higher for Europe). If knocking or pinging oc-
curs, use a different brand of gasoline or pre-
mium unleaded fuel. Unleaded fuel will give
you longer spark plug life and reduced main-
tenance cost.
1RB7A_EE.book Page 4 Tuesday, April 24, 2012 9:07 AM
Page 72 of 188

5-5
Portable fuel containers
If you carry a portable fuel container in the bed
of the Rhino, be sure to secure it with the cap
tightened before driving the vehicle.
Always place a portable fuel container on the
ground before filling it. Before removing the
container cap, touch the container with the
fuel dispenser nozzle. Keep fuel dispenser
nozzle in contact with container inlet when fill-
ing. WARNING! Never refill a fuel container
in the bed of any vehicle. Fire may result
from a build-up of static electricity. The
discharge of this build-up while refueling
can cause a spark and ignite the gasoline.
Recommended fuel:
UNLEADED GASOLINE ONLY
For Europe: Regular unleaded gasoline
only with a research octane number of 95
or higher
Fuel tank capacity: 30.0 L (7.93 US gal, 6.60 Imp.gal)
1RB7A_EE.book Page 5 Tuesday, April 24, 2012 9:07 AM
Page 73 of 188
5-6
EVU00410Engine oil
Make sure the engine oil is at the specified
level. Add oil as necessary. (See pages 8-10–
8-15.)NOTICE●
In order to prevent clutch slippage
(since the engine oil also lubricates
the clutch), do not mix any chemical
additives with oil. Do not use oils with
a diesel specification of “CD” or oils
of a higher quality than specified. In
addition, do not use oils labeled “EN-
ERGY CONSERVING II” or higher.
●
Make sure that no foreign material en-
ters the crankcase.
EVU00420Coolant
Check the coolant level in the coolant reser-
voir when the engine is cold (the coolant level
will vary with engine temperature).
The coolant level is satisfactory if it is between
the minimum and maximum level marks on
the coolant reservoir. If the coolant level is at
or below the minimum level mark, add addi-
tional coolant to bring the level up to maxi-
mum level mark. If coolant is not available,
add distilled water. Change the coolant every
two years. (See pages 8-22–8-23 for details.)NOTICEHard water or salt water is harmful to the
engine. You may use soft water if you can-
not get distilled water.
Recommended engine oil type and
quantity:See pages 10-1–10-2.
Coolant reservoir capacity
(up to the maximum level mark):0.32 L (0.34 US qt, 0.28 Imp.qt)
1RB7A_EE.book Page 6 Tuesday, April 24, 2012 9:07 AM
Page 74 of 188

5-7
EVU00430Final gear oil
Make sure the final gear oil is at the specified
level. Add oil as necessary. (See pages 8-15–
8-18 for details.)
If desired, an SAE 80W-90 hypoid gear oil
may be used for all conditions.TIPTIPGL-4 is a quality and additive rating; GL-5 or
GL-6 rated hypoid gear oils may also be used.EVU00440Differential gear oil
Make sure the differential gear oil is at the
specified level. Add oil as necessary. (See
pages 8-18–8-21 for details.)
EVU00450Accelerator pedal
Check to see that the accelerator pedal oper-
ates correctly. It must operate smoothly and
spring back to the idle position fully when re-
leased. Have a Yamaha dealer repair as nec-
essary for proper operation.EVU00460Seat belts
Make sure that the seat belts are not frayed,
torn, stretched, or damaged. The seat belts
must move smoothly when pulled out and re-
tract on its own when released. The seat belts
must also lock up when quickly pulled out.
The latch plate should click securely into the
buckle and release when the release button is
pushed firmly. Wash off any dirt or mud that
could affect operation. Have a Yamaha dealer
repair as necessary for proper operation.
Recommended oil:
SAE 80 API GL-4 Hypoid gear oil
Recommended oil: SAE 80 API GL-4 Hypoid gear oil
1RB7A_EE.book Page 7 Tuesday, April 24, 2012 9:07 AM
Page 75 of 188

5-8
A crash can damage the restraint systems in
your vehicle. A damaged restraint system
may not properly protect the person using it,
resulting in serious injury or death in a crash.
To help make sure your restraint systems are
working properly after a crash, have them in-
spected and any necessary replacements
made as soon as possible.EVU01230Steering
Park on level ground. Turn the steering wheel
right and left. Check for excessive free play,
abnormal noises, or a rough feeling. Have a
Yamaha dealer repair as necessary for proper
operation.EVU00470Fittings and fasteners
Always check the tightness of chassis fittings
and fasteners before a ride. Take the vehicle
to a Yamaha dealer or refer to the Service
Manual for correct tightening torque.Instruments, lights and switches
Check that all instruments, lights and switches
are working properly. Correct if necessary.
Control cables
When riding in cold weather, always make
sure all control cables work smoothly before
you begin riding.
WARNING! Control cables
can freeze in cold weather and you could
be unable to control the vehicle.1RB7A_EE.book Page 8 Tuesday, April 24, 2012 9:07 AM
Page 76 of 188

5-9
EVU00500Tires
Check tire pressure regularly to make sure it
is at the recommended specifications. Also
check for wear and damage.EVU00510Tire pressure
Use the tire pressure gauge to check and ad-
just tire pressures when the tires are cold. Tire
pressures must be equal on both sides.
WARNING! Operation of this vehicle with improper tire pressure may cause severe
injury or death from loss of control or roll-
over. Tire pressure below the minimum
specified could also cause the tire to dis-
lodge from the rim under severe riding
conditions. Set tire pressures to the following specifica-
tions:
ACE-02EThe tire pressure gauge is included as stan-
dard equipment. Make two measurements of
the tire pressure and use the second reading.
Dust or dirt in the gauge could cause the first
reading to be incorrect.
Recommended pressure Minimum
Front 70 kPa
(0.70 kgf/cm
2, 10 psi) 63 kPa
(0.63 kgf/cm
2, 9 psi)
Rear 98 kPa
(0.98 kgf/cm
2, 14 psi) 91 kPa
(0.91 kgf/cm
2, 13 psi)
1RB7A_EE.book Page 9 Tuesday, April 24, 2012 9:07 AM
Page 77 of 188
5-10
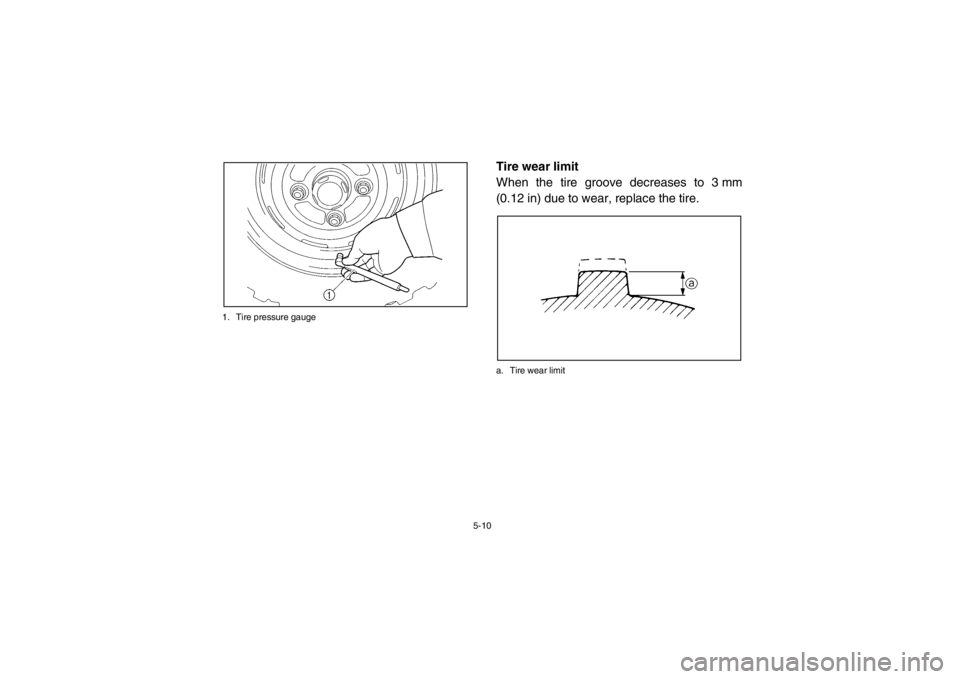
1. Tire pressure gauge
EVU00520Tire wear limit
When the tire groove decreases to 3 mm
(0.12 in) due to wear, replace the tire.a. Tire wear limit
1RB7A_EE.book Page 10 Tuesday, April 24, 2012 9:07 AM
Page 78 of 188
6-1
EVU00530
1-OPERATION
Read the Owner’s Manual carefully to be-
come familiar with all controls. If there is a
control or function you do not understand, ask
your Yamaha dealer.
WARNING
Failure to familiarize yourself with the con-
trols can lead to loss of control, which
could cause an accident or injury.
Engine break-in
There is never a more important period in the
life of your vehicle than the period between 0
and 20 hours.
For this reason, we ask that you read the fol-
lowing material carefully. Because the engine
is brand new, you must not put an excessive
load on it for the first several hours of opera-
tion. During the first 20 hours, the various
parts in the engine wear and polish them-
selves to achieve the correct operating clear-
ances.
During this period, prolonged full-throttle oper-
ation or any condition that might result in ex-
cessive engine heating must be avoided.
However, momentary (2–3 seconds maxi-
mum) full-throttle operation under load does
not harm the engine.
1RB7A_EE.book Page 1 Tuesday, April 24, 2012 9:07 AM
Page 79 of 188
6-2
1
2
3
4
56
7
8
9
10
11
12
13
14
Each full-throttle acceleration sequence
should be followed with a substantial rest pe-
riod for the engine, by cruising at lower r/min
so the engine can rid itself of the temporary
build-up of heat. If any abnormality is noticed
during this period, consult a Yamaha dealer.
0–10 hours:
Avoid continuous operation above half-throt-
tle. Allow a cooling-off period of 5 to 10 min-
utes after every hour of operation. Vary the
speed of the vehicle from time to time. Do not
operate it at one set throttle position.
10–20 hours:
Avoid prolonged operation above three-quar-
ter throttle.
After break-in:
The vehicle may now be operated normally.
5B410007Starting the engine1. Turn the key to “ON”.NOTICEThe coolant temperature warning light and
engine trouble warning light should come
on, then go off.
If a warning light does not go off, see pag-
es 4-4–4-5 for the corresponding warning
light circuit check.2. Apply the brake pedal.
3. Shift the drive select lever into the neutral position.
●
When the drive select lever is in the
neutral position, the neutral indicator
light should come on. If the neutral in-
dicator light does not come on, ask a
Yamaha dealer to inspect the electric circuit.
1RB7A_EE.book Page 2 Tuesday, April 24, 2012 9:07 AM
Page 80 of 188

6-3
●
The engine can be started in any gear
if the brake pedal is applied. However,
it is recommended to shift into neutral
before starting the engine.
4. With your foot off the accelerator pedal, start the engine by turning the key to
“START”.
If the engine fails to start, release the key, and
then try starting it again. Wait a few seconds
before the next attempt. Each attempt should
be as short as possible, to preserve battery
energy. NOTICE: Do not crank the engine
more than 5 seconds on each attempt, or
starter damage could occur. Wait at least 5
seconds between each operation of the
electric starter to let it cool.
Do not turn the key to the “START” position
with the engine running; otherwise, damage
to the electric starter may result.
TIPFor maximum engine life, never accelerate
hard when the engine is cold!
1RB7A_EE.book Page 3 Tuesday, April 24, 2012 9:07 AM