AUDI S8 2010 Owners Manual
Manufacturer: AUDI, Model Year: 2010, Model line: S8, Model: AUDI S8 2010Pages: 384, PDF Size: 90.95 MB
Page 91 of 384

Applies to vehicles : w ith individua l rear seats
Lumbar support
The lumbar support can be adjusted to the natural curva
ture of the spine .
0
Adjusting curvature
Fig. 9 1 Ind ividual rear
seats: Lumba r support
- Push the switch shell forward to increase the curvature .
- Push the switch shell to the rear to decrease the curvature .
Height adjustment
-Push the switch shell up to move the curvature higher .
- Push the switch shell down to move the curvature lower .
The lumbar support is pa rticularly effective in supporting the natural
curvature of the spine so that the seating position is more comfort
able over long distances.•
Contro ls and eq uip
m ent Vehicle
OP-eration
Seats and storage
Applies to vehicles : w ith ind ividual rear seats
Settings in the MMI
The easy entry function can be turned on and off in the
MMI.
: I·
I
'
Seat adjust ment
• Driver ·s seat ..
I
12 :00 ""' Fig. 92 MMI Display:
Seat adjustment
-Press the [ CAR] function button.
Select
Systems in the CAR menu.
Select
Seat adjustment . The Seat adjustment menu
appears => fig. 92 .
- Select
Left rear seat or Right rear seat .
-Select Easy entry on to turn on the easy entry function for
the corresponding seat or
off to turn off the function for
this seat .
Easy entry makes it more convenient to enter and leave the rear of the
vehicle . When the function is turned on, the seat au toma tically
moves to the rearmost position when the corresponding door is
opened. a
Vehicle care Do-it-yourselt service iTechnical data
Page 92 of 384
Seats and storage
Luggage compartment
Tie-down eyelets
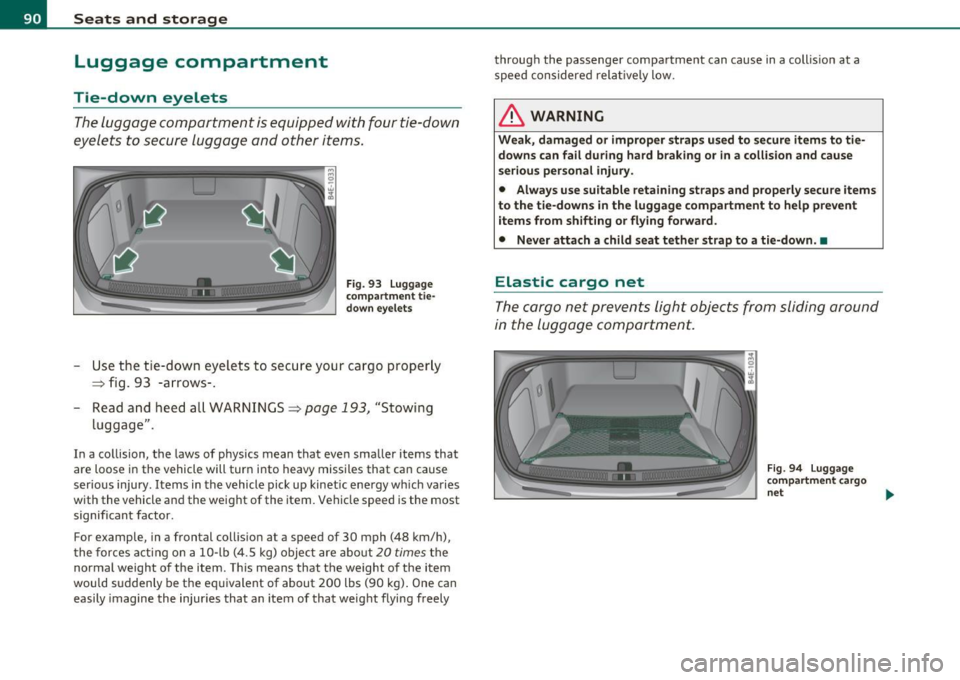
The luggage compartment is equipped with four tie-down
eyelets to secure luggage and other items.
Fig. 93 Luggage
compartment tie
down eyelets
Use the tie -down eyelets to secure your cargo properly
=> fig. 93 -arrows-.
- Read and heed all WARNINGS=>
page 193, "Stowing
luggage" .
In a collision, the laws of physics mean that even smaller items that
are loose in the vehicle will turn into heavy missiles that can cause
serious injury . Items in the vehicle pick up kinetic energy wh ich varies
with the vehicle and the weight of the item. Vehicle speed is the most
significant factor.
For example, in a frontal collision at a speed of 30 mph (48 km/h),
the forces acting on a 10-lb (4.5 kg) object are about 20
times the
normal weight of the item . This means that the weight of the item
would suddenly be the equivalent of about 200 lbs (90 kg). One can
easily imagine the injur ies that an item of that weight flying freely through the passenger compartment can cause in a collis
ion at a
speed considered relatively low.
& WARNING
Weak, damaged or improper straps used to secure items to tie
downs can fail during hard braking or in a collision and cause
serious personal injury.
• Always use suitable retaining straps and properly secure items
to the tie-downs in the luggage compartment to help prevent
items from shifting or flying forward.
• Never attach a child seat tether strap to a tie-down . •
Elastic cargo net
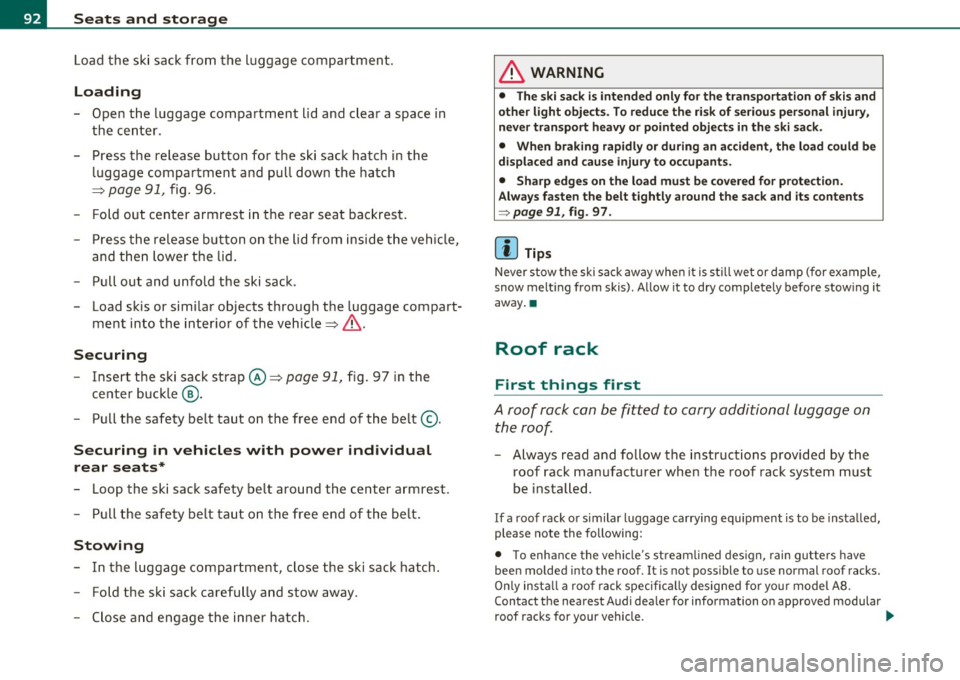
The cargo net prevents light objects from sliding around
in the luggage compartment.
Fig. 94 Luggage
compartment cargo
net ...
Page 93 of 384

Fig. 95 luggage
compartme nt cargo
net attached to
mou nting hooks
Securing objects to the luggage
compartm ent floor with the net
- Lay out the cargo net in the luggage compartment.
- Engage all four hooks into the fastening eyelets
~ page 90, fig . 94.
- Place objects to be secured under the net .
Configuring the net to restrain small objects
- Lay out the cargo net in the luggag e co mpartment.
- Engage all four hooks into the fastening eyelets
~ page 90, fig . 94.
- Pull down the mounting hooks © located below the base
of the rear w indow .
- Connect each loop on the net to the corresponding hook as
illustrated~ fig. 95.
- Place items inside the net .
Mounting ho oks
There are two mounting hook s under the base of the rear window
inside the l uggage compartment. You can attach the ca rgo net as well
as
light objects to these hooks.
Con trol s and equ ip
m ent Vehicle
OP-eration
Seats and storage
The mounting hooks are spring-loaded and will return to their normal
posit ion when not i n use .
& WARNING
For str ength-re lated r eason s, the m ounting h ooks c an only be
used to s ecur e object s weighing up to 1 0 lb . (5 kg). Heavier
obj ects w ill not be adequatel y secured -there i s a ri sk of injur y.•
App lies to ve hicl es : wit h sk i sac k
Ski sack
Use the ski sack to transport and protect skis and other
long, light items in the passenger compartment.
Vehicle care
0
Fig . 96 Lu ggage
compa rtment sk i sack
h atch
Fig. 97 Sk i sa ck :
s ecu rin g
Do-it-yourselt service iTechnical data
Page 94 of 384
Seats and storage
Load the ski sack from the luggage compartment .
Loading
-Open the luggage compartment lid and clear a space in
the center .
- Press the release button for the sk i sack hatch in the
luggage compartment and pull down the hatch
~ page 91, fig . 96.
- Fo ld out center armrest in the rear seat backrest .
- Press th e re le ase button on the lid from inside the v ehicle,
and then lower the lid .
- Pull out and unfold the ski sack.
- Load s kis or simi lar objects through t he luggage compart-
ment into the interior of the vehicle~& .
Securing
- Insert the ski sack strap © ~ page 91, fig. 97 in the
center buck le
@ .
- Pull t he sa fety belt taut on the free end of the belt@.
Securing in vehicles with power individual
rear seats*
- Loop the sk i sac k safety belt around the center armrest.
- Pu ll the safety bel t ta ut on the free end of the be lt.
Stowing
- In t he luggage compartme nt, close the ski sack hatch.
- F old the ski sack carefully and stow away.
- Close and engage the inne r hatch .
& WARNING
• The ski s ack is intended only for the transportation of skis and
other light object s. To redu ce the ri sk of serious per sonal injury ,
never transport heavy or pointed objects in the ski sack.
• When braking rapidly or during an accident, the load could be
d isplaced and cause injury to occupants .
• Sharp edg es on the load must be covered for prot ection .
Alw ays f aste n the belt t ightly a round the s ack and its contents
=> page 91 , fig . 97.
[ i ] Tips
N ever stow the ski sack aw ay when it is still we t or damp ( for ex ample ,
snow melt ing from skis). Allow it to dry completely before stow ing it
away .•
Roof rack
First things first
A roof rack can be fitted to carry additional luggage on
the roof.
- A lways read a nd follow the instruct ions provided by the
roof rack manufacturer when the roof rack system must
be ins ta lled.
If a roof rack or simila r luggage carrying equipment is to be installed,
please note the following :
• T o enh ance the vehi cle's st ream lined des ign, rain gu tters have
been molded into the roof. It is not possible to use normal roof racks.
On ly insta ll a roo f rack specifica lly designed fo r your model A 8.
Contact the nearest Audi dea ler for information on approved modular
roof rac ks for your vehicle. .,
Page 95 of 384

• These approved roof racks are the basis for a complete roof rack
system . Additional attachments for the basic roof rack are necessary
to safely transport luggage, bicycles, surf boards, skis or small boats .
All necessary hardware for these systems is ava ilable at your autho
rized Audi dealer .
• We recommend tha t you keep the installation instructions for
your roof rack system together with your Owner's literature in the
vehicle.
When should the roof rack be removed?
• Before going through an automat ic car wash (it is best to ask the
car wash operator fo r advice)
• When not in use, to reduce fuel consumpt ion, wind nois e and to
guard against theft.
& WARNING
• Use of an unapproved roof rack or incorrect mounting of an
approved roof rack can cause the roof rack or the items attached
to it to fall off the roof onto the road.
• Objects falling from the roof of a vehicle can cause a crash and
personal injury.
• Only mount the system between the markings shown in
=> fig. 98.
• The roof rack system must be installed exactly according to the
instructions provided.
0 Note
• Your vehicle warranty does not cover any damages to the vehicle
caused by using roof racks or mounting structures not approved by
Audi for your vehicle . The same applies to damage resulting from
incorrect roof rack installat ion .
• Always check the roof rack mountings and hardware before each
trip and dur ing a trip to make sure everything is sec urely tightened . If
Con tro ls a nd e quip
m en t Vehicle
OP-eration
Seats and storage
necessary, ret ighten the mountings and check the entire system from
time to time.
• After mounting a roof rack system, or when you transport objects
on the roof of your veh icle, the height of the vehicle is naturally
increased. Be careful when driving under low bridges or in parking
garages for example. This could cause damage to the load and even
the vehicle itself . •
Mounting Locations
Safe installation of a roof rack requires that the rack
supports are mounted between the small arrows marked
inside the door frames on all four doors.
Mounting
Fig. 98 Front and rear
markin gs
The roof rack system must be installed exactly according to the
instructions provided.
Mount th e roof racks supports in the side roof mo ldings . Make sure
to position the suppo rts on all four doors between the points marked
by small arrows=> fig. 98 . The markings can only be seen when the
doors are open. •
Vehicle care Do-it-yourselt service iTechnical data
Page 96 of 384
Seats and storage Loading the roof rack
Always dis tribute loads evenly . Make sure anything on
the roof rack is securely tied do wn.
- Always distribute the loads on the roof rack evenly .
- Always attach items to t he roof rac k securely before you
drive
off .
The maximum permissible roof weight is 220 lb (100 kg ). The roof
we igh t is made up of the weight of the roof rack system and the
we ight of the object be ing transported.
When using a roof rack system which has a lower load ca rrying
capac ity, you must not use up the total maxim um permissible load
carrying capacity specified above . Instead, you shou ld load the roof
ra ck system only to the maximum capacity specified by the manufac
turer of the roof rack system.
& WARNING
Weak, damaged or improper straps used to secure items to the
roof rack can fail during hard braking or in a collision and cause
seriou s personal injury.
• Make sure the roof rack is installed ex actly as specified above
~ page 93 .
• Always use suitable mounting straps for se curing items to the
roof rack to help prevent items from shifting or flying forward.
• Items on the roof rack must always be se curely mounted.
• The use of a roof rack can negatively affect the way a vehicle
handles . Ca rgo that is large , heavy, bulky , long o r flat will ha ve a
greater negative influence on the vehicle' s aerodyn amics, center
of gra vity and ove rall handling. Alw ays drive slowly, a void sudden
braking and maneuvers when tran sporting cargo on th e roof of
your veh icle.
& WARNING (contin u ed )
• Never e xceed the maximum permi ssible load carrying capacity
of the roof of your vehicle, the permi ssible a xle weights and the
permissible total weight of your vehicle~
page 3 5 7, "Weights".
• Alway s drive slowly, avoid sudd en braking and maneuv ers
when transporting cargo on the roof of your vehicle.
'£> For the sake of the environment
Sometimes it may be easier to leave a roof rack installed even tho ugh
you a re not using it. Due to the inc reased air resistance your veh icle
w ill unnecessarily use more fuel. Remove the roof rack if you are not
going to use i t. •
Cupholder
Cupholder in center console
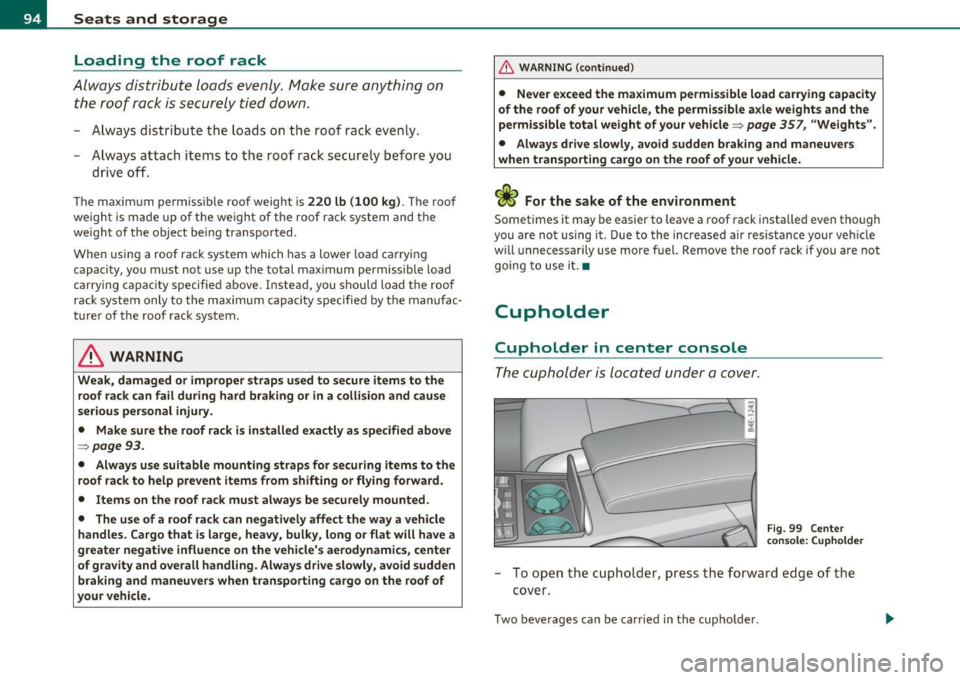
The cupholder is located under a cover.
Fi g. 99 Cente r
c on sole: ( uph old er
- To o pen the cu pholder, p ress the forward edge o f the
cover.
Two beverages can be carried in the cupholde r.
Page 97 of 384

& WARNING
Spilled hot liquid can cause an accident and p ers onal injury .
• N ever c arry any bev erage containers with hot liquid s, such a s
hot coffee or hot tea, in the vehicle wh ile it is moving. In case of
an accident, sudden braking or other vehicle movement, hot liquid
could sp ill, causing scalding burns. Spilled hot liqu id can also
cause an accident and personal injury .
• Use only soft cups in the cupholder . Hard cups and glasses can
c au se injury in an accident .
0 Note
Only drin k conta iners with lids shou ld be c arr ied in the c upholder.
Liquid could spill out and damage your vehicle's e lectronic equipment
or sta in t he upho lstery, etc .•
Cupholder in the rear center armrest
The cuphold er is locat ed in the c enter consol e.
Opening the cupholder
Fig . 100 Rear center
armrest : cuph old er
e xte nd ed
- Press bo th spots mar ked wit h 'i@ ~ &. Th e holder
extends ~ fig . 10 0.
Cont rols a nd e quip
m en t Vehicle
OP-eration
Seats and storage
Adjusting the cupholder individually
Press an d hold the retainer arm@ inward a nd ad just itto
fi t the c up size.
T he retainer arm s hould fit snugly around the cup or can. The
c up holder is designed to hold no more than two cups o r cans .
& WARNING
Spilled hot liquid can cau se an accident and p ers onal injury .
• Never carry any beverage containers w ith hot liquids, such a s
hot coffee or hot tea, in the vehicle while it i s moving . In case of
an accident, sudden braking or other vehicle mo vement , hot liquid
c ould spill, causing scalding burn s. Spilled hot liquid can also
cause an accident and pe rsonal injury .
• Use only soft cups in the cupholder. Hard cups and glasses can
cause injury in an accident .
0 Note
Only drink conta iners with lids should be carr ied in the c upholder.
L iq uid could spill ou t an d dam age yo ur vehicle 's elec tron ic eq uipment
or sta in the upholstery, etc. •
Vehicle care Do-it-yourselt service iTechnical data
Page 98 of 384
Seats and storage
Ashtray
Front ashtray
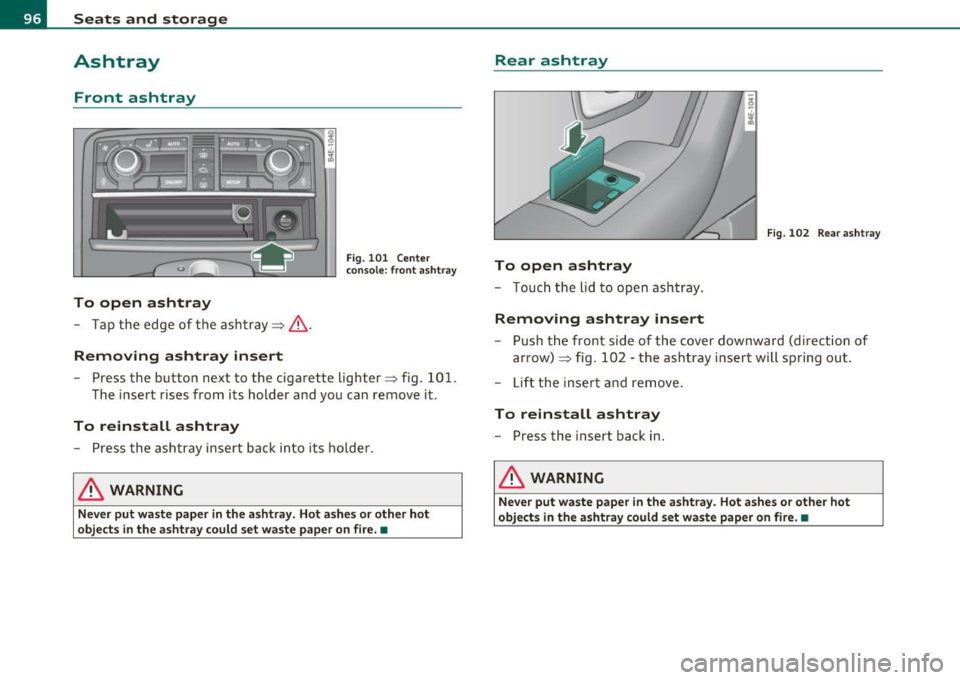
To open ashtray
- Tap the edge of the ashtray~& .
Remov ing ashtr ay insert
Fig. 1 01 Center
console: front as htray
- Press the button next to the cigarette lighter~ fig . 101 .
The insert rises from its holder and you can remove it .
To reinstall ashtray
- Press the ashtray insert back into its holder.
& WARNING
Never put wa ste pa per in the ash tray . Ho t ashe s or other h ot
object s in the ash tra y could set waste pape r on fire.•
Rear ashtray
Fig . 1 02 Rear as htray
To open ashtray
- Touch the lid to open ashtray .
Removing ashtray insert
- Push the front side of the cover downward (direction of
arrow) ~ fig . 102 - the ashtray insert will spring out .
Lift the inser t and remove .
To reinstall ashtray
-Press the insert back in.
& WARNING
Never put waste pap er in th e asht ray. Hot ashe s or othe r hot
obj ects in the a shtra y could set wa ste pap er on fire . •
Page 99 of 384

Cigarette lighter/socket
Cigarette lighter
Using the cigarette lighter
-Push the knob in .
Fig. 103 Open ashtray
with cigarette lighter
Fig . 104 Center
console rear: Cigarette
lighter
- Wait until the cigarette lighter knob pops out.
- Remove the cigarette lighter immediately and use it.
- Reinsert cigarette lighter into the socket after use.
Connecting an appliance
-Remove cigarette lighter.
Contro ls a nd e quip
m en t Vehicle
OP-eration
Seats and storage
-Plug in app liance to be used.
The socket of the cigarette lighter may be used for 12-volt appliances
with maximum consumption of up to 100 watts, such as a flash light,
small vacuum cleaner, etc.
Before you purchase any accessories, always read and follow the
information in~
page 363 , "Additional accessories and parts
rep lacement" .
& WARNING
Improper use of the cigarette lighter can cause serious injury or
start a fire.
• Be careful when using the cigarette lighter. If you do not pay
attention to what you are doing when you are using the cigarette
lighter you can burn yourself.
• The cigarette lighter and socket remain functional even if the
ignition is switched off or the ignition key is removed . Never leave
children inside the vehicle without supervision.
0 Note
• To avoid damag ing the socket, only use plugs that fi t properly.
• Only use the cigarette lighter socket as a power source for e lec
trical accessories for short durations. Use the sockets in the vehicle
when a power source is needed for longer durations .
[ i ] Tips
Whe n the engine is off and accessories are still plugged in and are on,
the vehicle battery can still be drained.•
Vehicle care Do-it-yourselt service iTechnical data
Page 100 of 384
Seats and storage
Long center console
Applies to vehicl es : w it h long ce nter co nso le
Overview
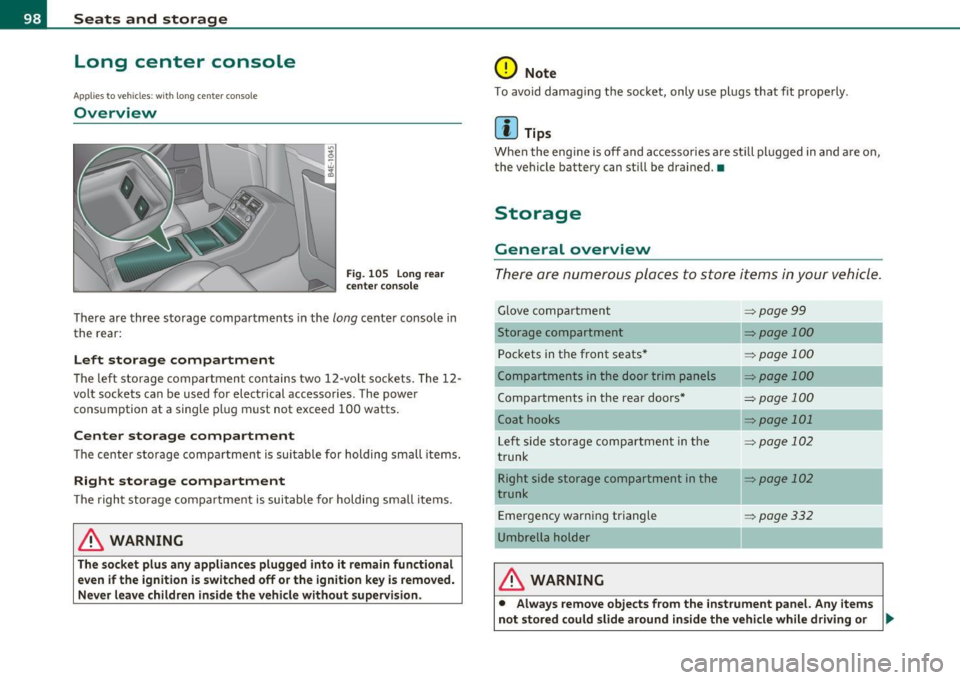
F ig. 105 Lo ng rear
c e nter conso le
There are three storage compartments in the long center console in
the rear:
Left storag e compartment
The left sto rage compartmen t contains two 12-vo lt sockets. The 12-
volt sockets can be used for electrical accessories. The power cons umption at a single plug must not exc eed 100 watts .
Center storage compartment
The center s torage compa rtment is sui table for holding small items .
Right stor age compartment
The righ t storage compartme nt is suitable for holding sma ll items.
& WARNING
The socket plu s any appliance s plugged into it remain functional
e ven if the ignition is switched off or the ignition key is removed .
Never leave children in side the vehicle without supervi sion.
0 Note
T o avoid damag ing the socket , only use plugs that fit prope rly .
[ i ] Tips
When the engine is off and acces sories a re st ill plugged in and a re o n,
the veh icle b attery ca n sti ll be dr ained. •
Storage
General overview
There are numerous places to store items in your vehicle.
Glove c ompar tment
Storage compartment Pockets in the front seats *
Compartments in the door trim panels
Compartments in the rear doors*
Coat hooks
L ef t side s to rage compar tment in the
trunk
Right side storage compartment in the
trunk
Emergency warni ng triangl e
Umbrella holder
& WARNING
=> page 99
=>page 100
=> pag e 100
=> page 100
=> page 100
=>page 101
=> page 102
=>page 102
=>page 332
• Alway s remove object s from the inst rument pa nel. Any it ems
not stored cou ld sl ide ar ound insi de the vehicl e while dr iving or .,