BMW MOTORRAD G 650 GS 2010 Rider's Manual (in English)
Manufacturer: BMW MOTORRAD, Model Year: 2010, Model line: G 650 GS, Model: BMW MOTORRAD G 650 GS 2010Pages: 136, PDF Size: 1.73 MB
Page 71 of 136
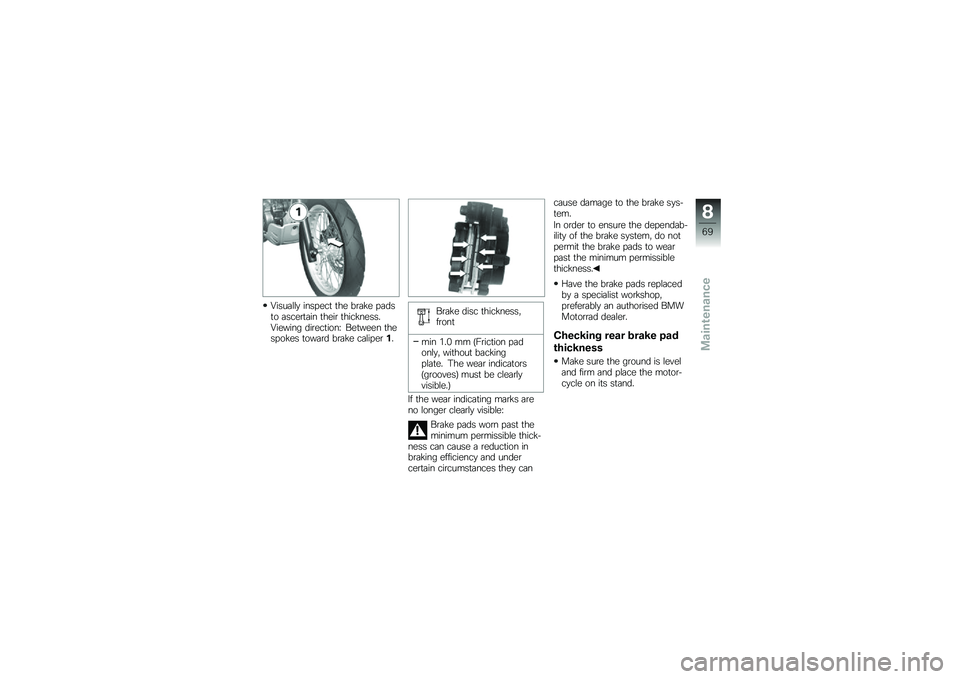
Visually inspect the brake padsto ascertain their thickness.Viewing direction: Between thespokes toward brake caliper1.
Brake disc thickness,front
min 1.0 mm (Friction padonly, without backingplate. The wear indicators(grooves) must be clearlyvisible.)
If the wear indicating marks areno longer clearly visible:
Brake pads worn past theminimum permissible thick-ness can cause a reduction inbraking efficiency and undercertain circumstances they can
cause damage to the brake sys-tem.
In order to ensure the dependab-ility of the brake system, do notpermit the brake pads to wearpast the minimum permissiblethickness.
Have the brake pads replacedby a specialist workshop,preferably an authorised BMWMotorrad dealer.
Checking rear brake pad
thickness
Make sure the ground is leveland firm and place the motor-cycle on its stand.
8
69
zMaintenance
Page 72 of 136
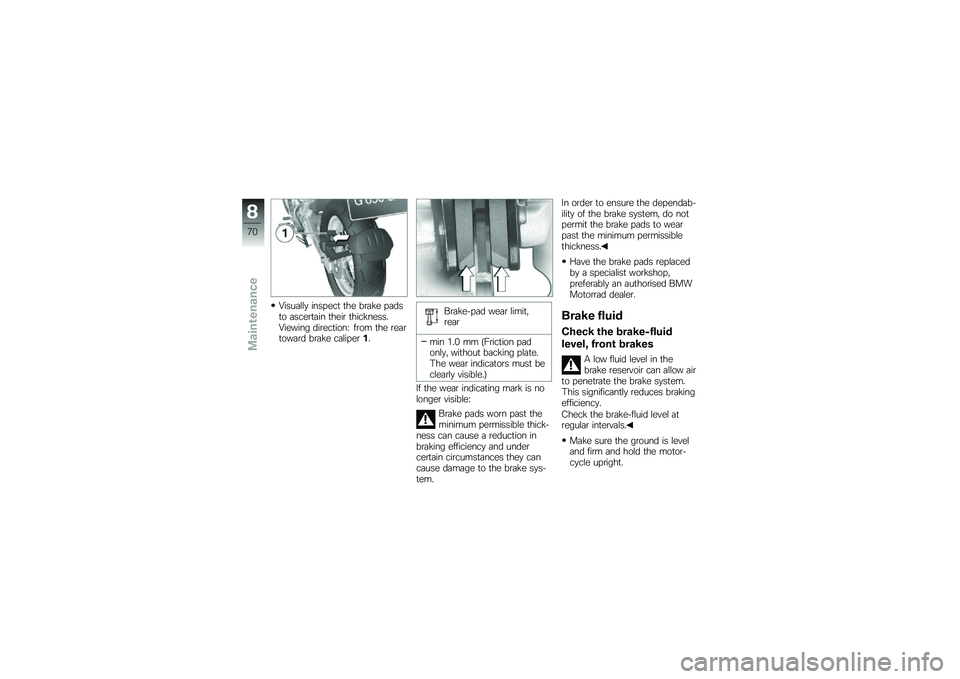
Visually inspect the brake padsto ascertain their thickness.Viewing direction: from the reartoward brake caliper1.
Brake-pad wear limit,rear
min 1.0 mm (Friction padonly, without backing plate.The wear indicators must beclearly visible.)
If the wear indicating mark is nolonger visible:
Brake pads worn past theminimum permissible thick-ness can cause a reduction inbraking efficiency and undercertain circumstances they cancause damage to the brake sys-tem.
In order to ensure the dependab-ility of the brake system, do notpermit the brake pads to wearpast the minimum permissiblethickness.
Have the brake pads replacedby a specialist workshop,preferably an authorised BMWMotorrad dealer.
Brake fluid
Check the brake-fluid
level, front brakes
A low fluid level in thebrake reservoir can allow airto penetrate the brake system.This significantly reduces brakingefficiency.
Check the brake-fluid level atregular intervals.
Make sure the ground is leveland firm and hold the motor-cycle upright.
8
70
zMaintenance
Page 73 of 136
with centre standOE
Make sure the ground is leveland firm and place the motor-cycle on its centre stand.
Move the handlebars to thestraight-ahead position.
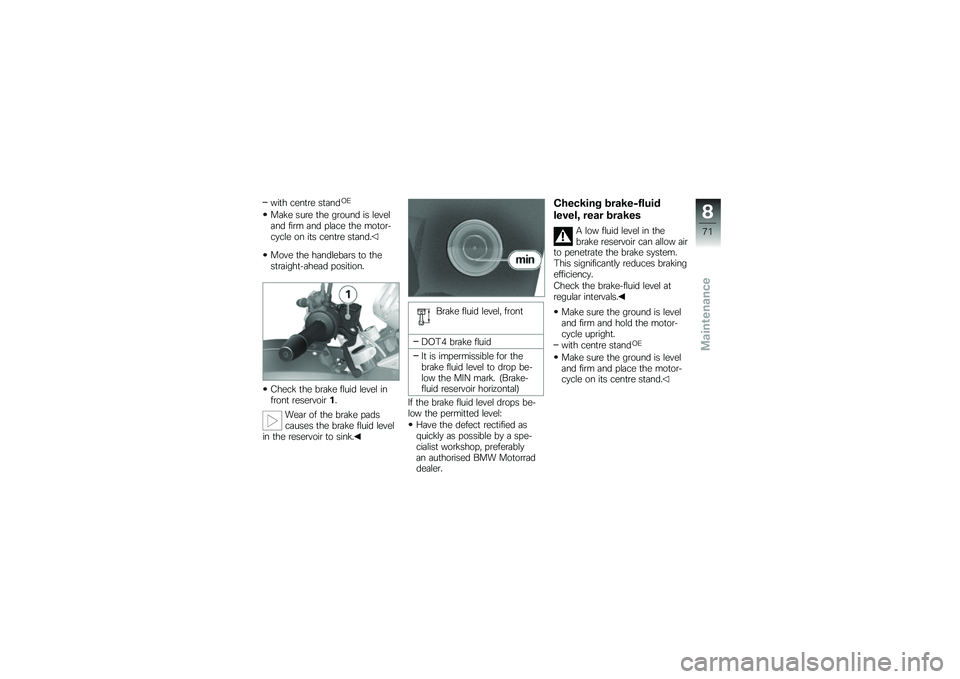
Check the brake fluid level infront reservoir1.
Wear of the brake padscauses the brake fluid levelin the reservoir to sink.
Brake fluid level, front
DOT4 brake fluid
It is impermissible for thebrake fluid level to drop be-low the MIN mark. (Brake-fluid reservoir horizontal)
If the brake fluid level drops be-low the permitted level:
Have the defect rectified asquickly as possible by a spe-cialist workshop, preferablyan authorised BMW Motorraddealer.
Checking brake-fluid
level, rear brakes
A low fluid level in thebrake reservoir can allow airto penetrate the brake system.This significantly reduces brakingefficiency.
Check the brake-fluid level atregular intervals.
Make sure the ground is leveland firm and hold the motor-cycle upright.
with centre standOE
Make sure the ground is leveland firm and place the motor-cycle on its centre stand.
8
71
zMaintenance
Page 74 of 136
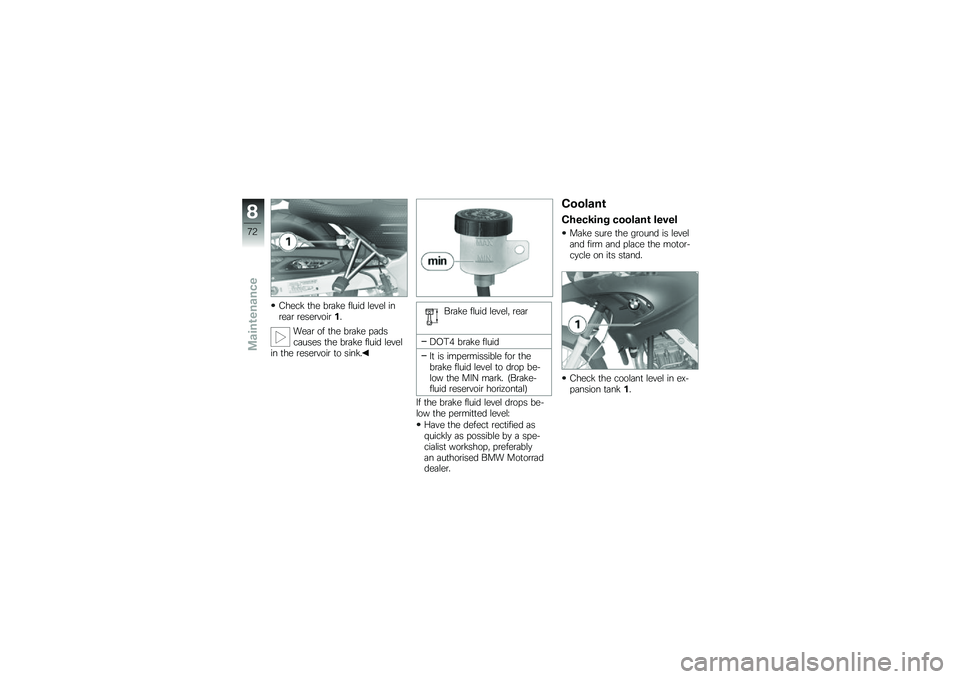
Check the brake fluid level inrear reservoir1.
Wear of the brake padscauses the brake fluid levelin the reservoir to sink.
Brake fluid level, rear
DOT4 brake fluid
It is impermissible for thebrake fluid level to drop be-low the MIN mark. (Brake-fluid reservoir horizontal)
If the brake fluid level drops be-low the permitted level:
Have the defect rectified asquickly as possible by a spe-cialist workshop, preferablyan authorised BMW Motorraddealer.
Coolant
Checking coolant level
Make sure the ground is leveland firm and place the motor-cycle on its stand.
Check the coolant level in ex-pansion tank1.
8
72
zMaintenance
Page 75 of 136
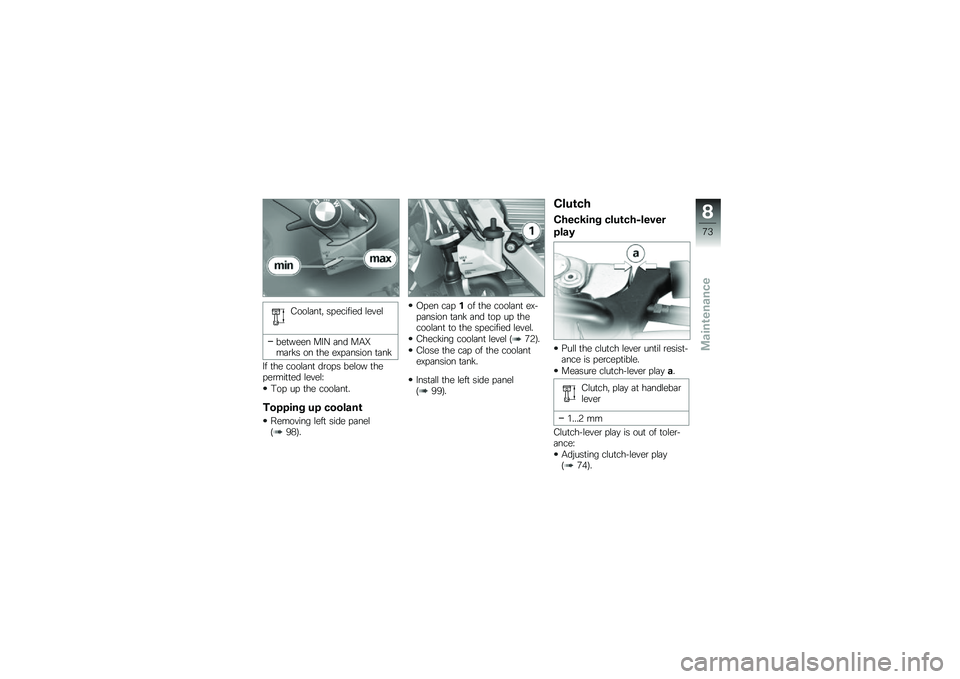
Coolant, specified level
between MIN and MAXmarks on the expansion tank
If the coolant drops below thepermitted level:
Top up the coolant.
Topping up coolant
Removing left side panel(98).
Open cap1of the coolant ex-pansion tank and top up thecoolant to the specified level.
Checking coolant level (72).
Close the cap of the coolantexpansion tank.
Install the left side panel(99).
Clutch
Checking clutch-lever
play
Pull the clutch lever until resist-ance is perceptible.
Measure clutch-lever playa.
Clutch, play at handlebarlever
1...2 mm
Clutch-lever play is out of toler-ance:
Adjusting clutch-lever play(74).
8
73
zMaintenance
Page 76 of 136
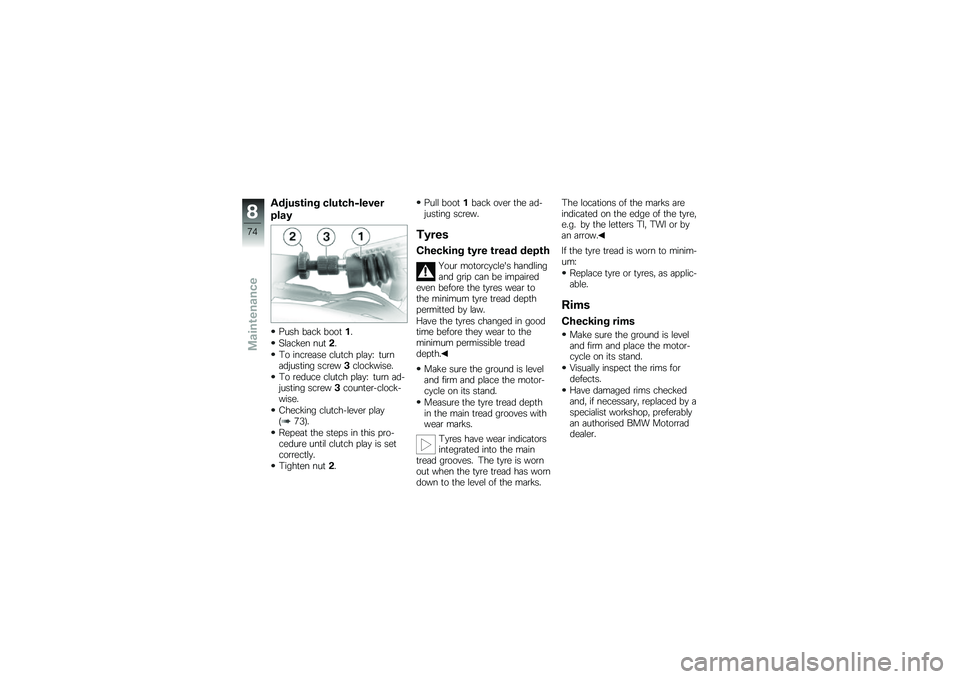
Adjusting clutch-lever
play
Push back boot1.
Slacken nut2.
To increase clutch play: turnadjusting screw3clockwise.
To reduce clutch play: turn ad-justing screw3counter-clock-wise.
Checking clutch-lever play(73).
Repeat the steps in this pro-cedure until clutch play is setcorrectly.
Tighten nut2.
Pull boot1back over the ad-justing screw.
Tyres
Checking tyre tread depth
Your motorcycle's handlingand grip can be impairedeven before the tyres wear tothe minimum tyre tread depthpermitted by law.
Have the tyres changed in goodtime before they wear to theminimum permissible treaddepth.
Make sure the ground is leveland firm and place the motor-cycle on its stand.
Measure the tyre tread depthin the main tread grooves withwear marks.
Tyres have wear indicatorsintegrated into the maintread grooves. The tyre is wornout when the tyre tread has worndown to the level of the marks.
The locations of the marks areindicated on the edge of the tyre,e.g. by the letters TI, TWI or byan arrow.
If the tyre tread is worn to minim-um:
Replace tyre or tyres, as applic-able.
Rims
Checking rims
Make sure the ground is leveland firm and place the motor-cycle on its stand.
Visually inspect the rims fordefects.
Have damaged rims checkedand, if necessary, replaced by aspecialist workshop, preferablyan authorised BMW Motorraddealer.
8
74
zMaintenance
Page 77 of 136
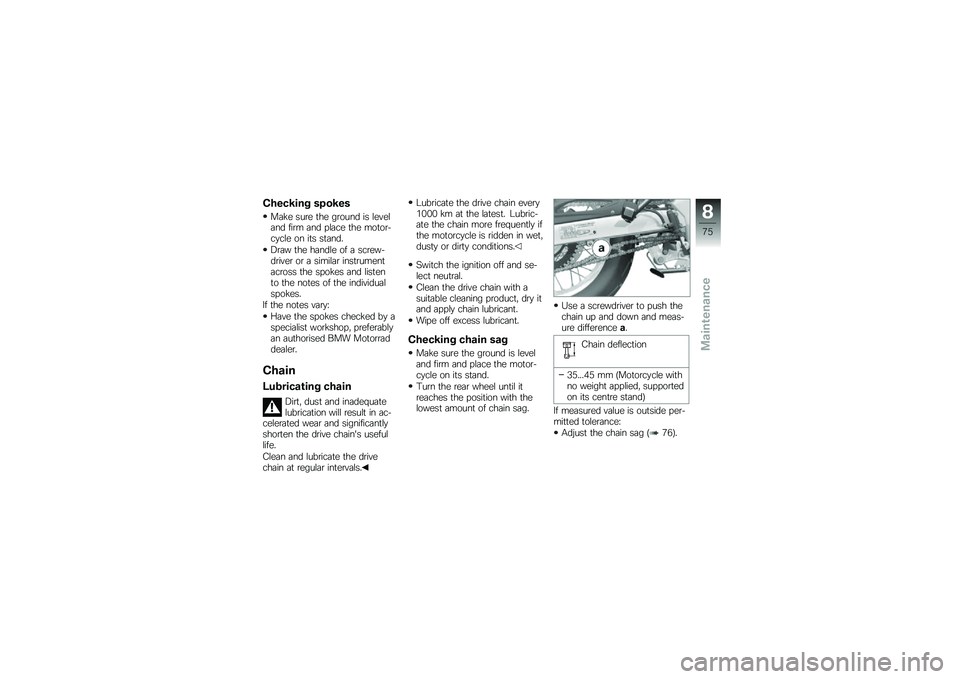
Checking spokes
Make sure the ground is leveland firm and place the motor-cycle on its stand.
Draw the handle of a screw-driver or a similar instrumentacross the spokes and listento the notes of the individualspokes.
If the notes vary:
Have the spokes checked by aspecialist workshop, preferablyan authorised BMW Motorraddealer.
Chain
Lubricating chain
Dirt, dust and inadequatelubrication will result in ac-celerated wear and significantlyshorten the drive chain's usefullife.
Clean and lubricate the drivechain at regular intervals.
Lubricate the drive chain every1000 km at the latest. Lubric-ate the chain more frequently ifthe motorcycle is ridden in wet,dusty or dirty conditions.
Switch the ignition off and se-lect neutral.
Clean the drive chain with asuitable cleaning product, dry itand apply chain lubricant.
Wipe off excess lubricant.
Checking chain sag
Make sure the ground is leveland firm and place the motor-cycle on its stand.
Turn the rear wheel until itreaches the position with thelowest amount of chain sag.
Use a screwdriver to push thechain up and down and meas-ure differencea.
Chain deflection
35...45 mm (Motorcycle withno weight applied, supportedon its centre stand)
If measured value is outside per-mitted tolerance:
Adjust the chain sag (76).
8
75
zMaintenance
Page 78 of 136
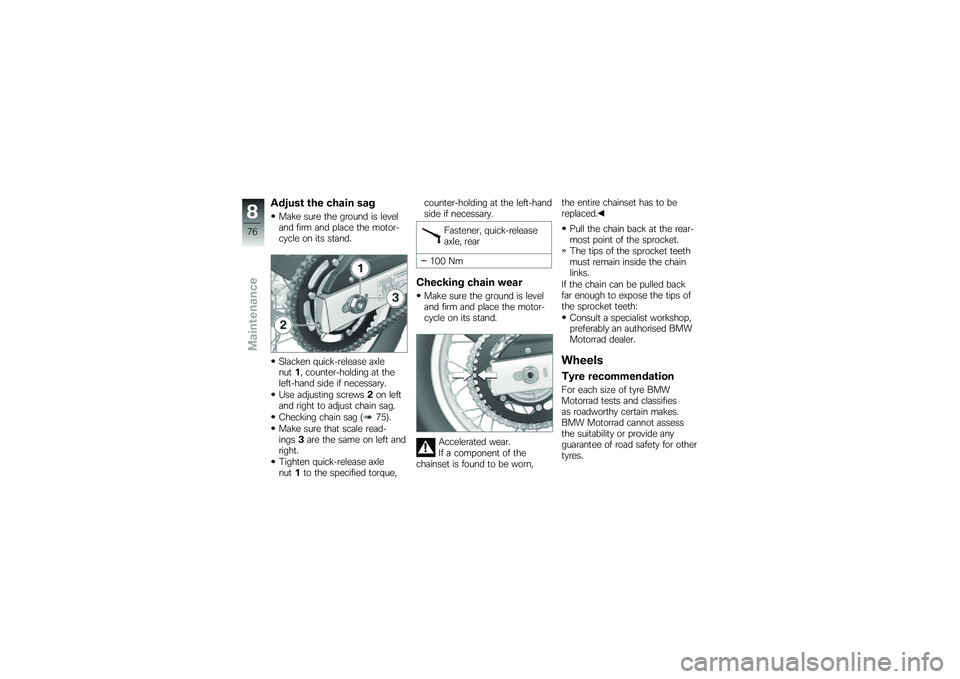
Adjust the chain sag
Make sure the ground is leveland firm and place the motor-cycle on its stand.
Slacken quick-release axlenut1, counter-holding at theleft-hand side if necessary.
Use adjusting screws2on leftand right to adjust chain sag.
Checking chain sag (75).
Make sure that scale read-ings3are the same on left andright.
Tighten quick-release axlenut1to the specified torque,
counter-holding at the left-handside if necessary.
Fastener, quick-releaseaxle, rear
100 Nm
Checking chain wear
Make sure the ground is leveland firm and place the motor-cycle on its stand.
Accelerated wear.
If a component of thechainset is found to be worn,
the entire chainset has to bereplaced.
Pull the chain back at the rear-most point of the sprocket.
The tips of the sprocket teethmust remain inside the chainlinks.
If the chain can be pulled backfar enough to expose the tips ofthe sprocket teeth:
Consult a specialist workshop,preferably an authorised BMWMotorrad dealer.
Wheels
Tyre recommendation
For each size of tyre BMWMotorrad tests and classifiesas roadworthy certain makes.BMW Motorrad cannot assessthe suitability or provide anyguarantee of road safety for othertyres.
8
76
zMaintenance
Page 79 of 136
BMW Motorrad recommendsusing only tyres tested by BMWMotorrad.
You can obtain detailed informa-tion from your authorised BMWMotorrad dealer or on the Inter-net at www.bmw-motorrad.com.
Effect of wheel size
on suspension-control
systems
Wheel size is very important as aparameter for the ABS. In partic-ular, the diameter and the widthof a motorcycle's wheels are pro-grammed into the control unitand are fundamental to all cal-culations. Any change in theseinfluencing variables, caused forexample by a switch to wheelsother than those installed ex-works, can have serious effectson the performance of the sys-tem.
The sensor rings are essential forcorrect road-speed calculation,
and they too must match themotorcycle's system and con-sequently cannot be changed.
If you decide that you would liketo fit non-standard wheels toyour motorcycle, it is very im-portant to consult a specialistworkshop beforehand, preferablyan authorised BMW Motorraddealer. In some cases, the dataprogrammed into the control unitcan be changed to suit the newwheel sizes.
Removing front wheel
without centre standOE
Make sure the ground is leveland firm and place the mo-torcycle on a suitable auxiliarystand.
with centre standOE
Make sure the ground is leveland firm and place the motor-cycle on its centre stand.
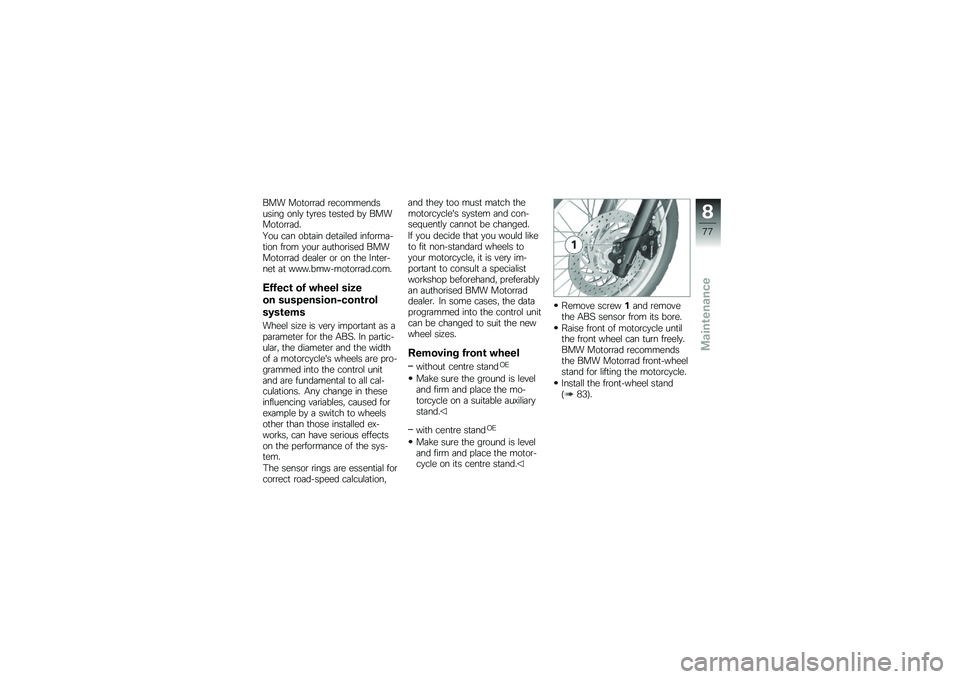
Remove screw1and removethe ABS sensor from its bore.
Raise front of motorcycle untilthe front wheel can turn freely.BMW Motorrad recommendsthe BMW Motorrad front-wheelstand for lifting the motorcycle.
Install the front-wheel stand(83).
8
77
zMaintenance
Page 80 of 136
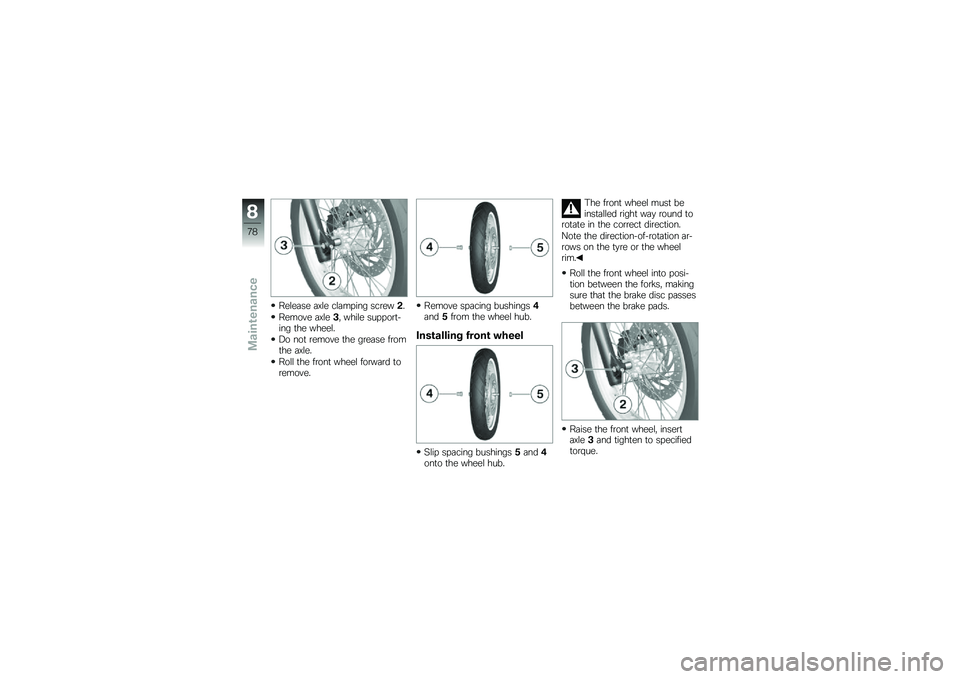
Release axle clamping screw2.
Remove axle3, while support-ing the wheel.
Do not remove the grease fromthe axle.
Roll the front wheel forward toremove.
Remove spacing bushings4and5from the wheel hub.
Installing front wheel
Slip spacing bushings5and4onto the wheel hub.
The front wheel must beinstalled right way round torotate in the correct direction.
Note the direction-of-rotation ar-rows on the tyre or the wheelrim.
Roll the front wheel into posi-tion between the forks, makingsure that the brake disc passesbetween the brake pads.
Raise the front wheel, insertaxle3and tighten to specifiedtorque.
8
78
zMaintenance