CADILLAC XLR 2009 1.G Owners Manual
Manufacturer: CADILLAC, Model Year: 2009, Model line: XLR, Model: CADILLAC XLR 2009 1.GPages: 462, PDF Size: 3.72 MB
Page 241 of 462
Enter Destination
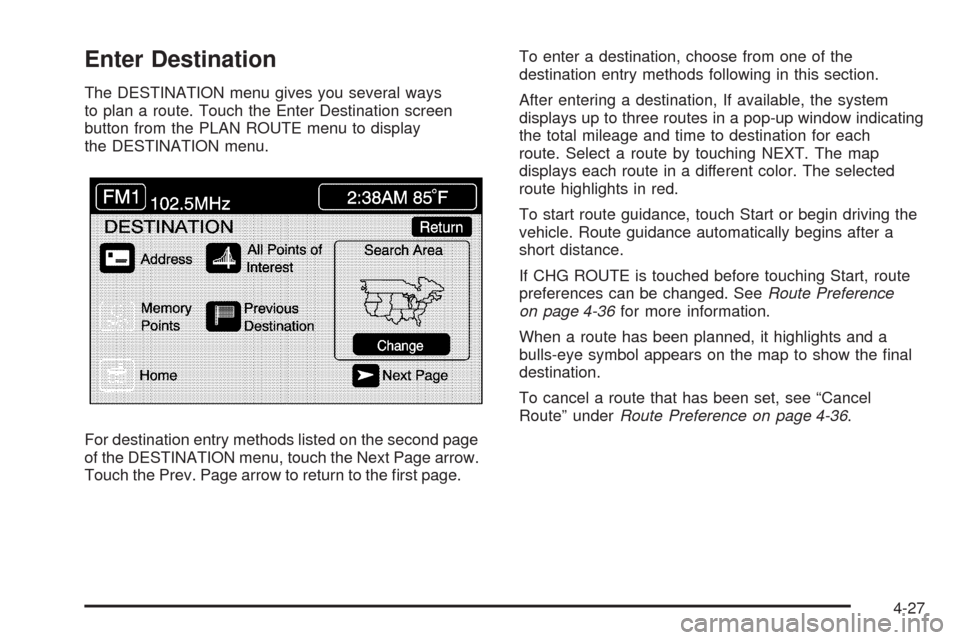
The DESTINATION menu gives you several ways
to plan a route. Touch the Enter Destination screen
button from the PLAN ROUTE menu to display
the DESTINATION menu.
For destination entry methods listed on the second page
of the DESTINATION menu, touch the Next Page arrow.
Touch the Prev. Page arrow to return to the �rst page.To enter a destination, choose from one of the
destination entry methods following in this section.
After entering a destination, If available, the system
displays up to three routes in a pop-up window indicating
the total mileage and time to destination for each
route. Select a route by touching NEXT. The map
displays each route in a different color. The selected
route highlights in red.
To start route guidance, touch Start or begin driving the
vehicle. Route guidance automatically begins after a
short distance.
If CHG ROUTE is touched before touching Start, route
preferences can be changed. SeeRoute Preference
on page 4-36for more information.
When a route has been planned, it highlights and a
bulls-eye symbol appears on the map to show the �nal
destination.
To cancel a route that has been set, see “Cancel
Route” underRoute Preference on page 4-36.
4-27
Page 242 of 462
Easy Planning Route
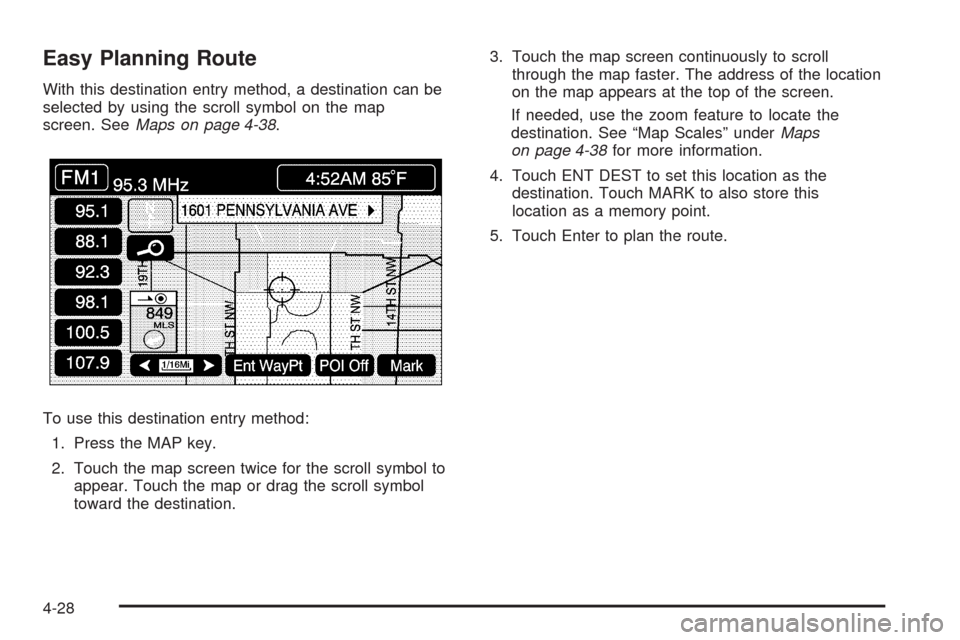
With this destination entry method, a destination can be
selected by using the scroll symbol on the map
screen. SeeMaps on page 4-38.
To use this destination entry method:
1. Press the MAP key.
2. Touch the map screen twice for the scroll symbol to
appear. Touch the map or drag the scroll symbol
toward the destination.3. Touch the map screen continuously to scroll
through the map faster. The address of the location
on the map appears at the top of the screen.
If needed, use the zoom feature to locate the
destination. See “Map Scales” underMaps
on page 4-38for more information.
4. Touch ENT DEST to set this location as the
destination. Touch MARK to also store this
location as a memory point.
5. Touch Enter to plan the route.
4-28
Page 243 of 462
Address
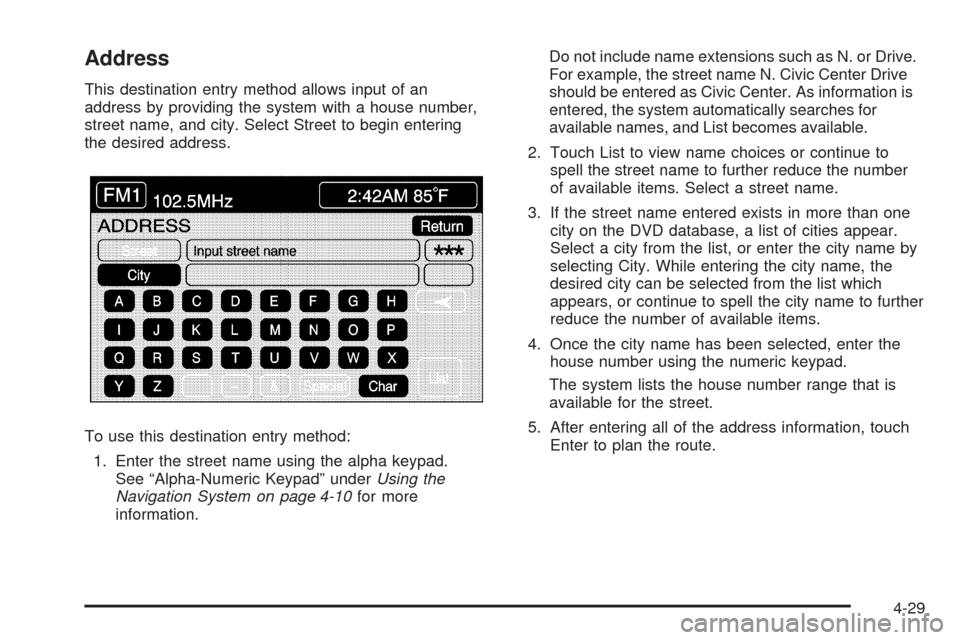
This destination entry method allows input of an
address by providing the system with a house number,
street name, and city. Select Street to begin entering
the desired address.
To use this destination entry method:
1. Enter the street name using the alpha keypad.
See “Alpha-Numeric Keypad” underUsing the
Navigation System on page 4-10for more
information.Do not include name extensions such as N. or Drive.
For example, the street name N. Civic Center Drive
should be entered as Civic Center. As information is
entered, the system automatically searches for
available names, and List becomes available.
2. Touch List to view name choices or continue to
spell the street name to further reduce the number
of available items. Select a street name.
3. If the street name entered exists in more than one
city on the DVD database, a list of cities appear.
Select a city from the list, or enter the city name by
selecting City. While entering the city name, the
desired city can be selected from the list which
appears, or continue to spell the city name to further
reduce the number of available items.
4. Once the city name has been selected, enter the
house number using the numeric keypad.
The system lists the house number range that is
available for the street.
5. After entering all of the address information, touch
Enter to plan the route.
4-29
Page 244 of 462
All Points of Interest
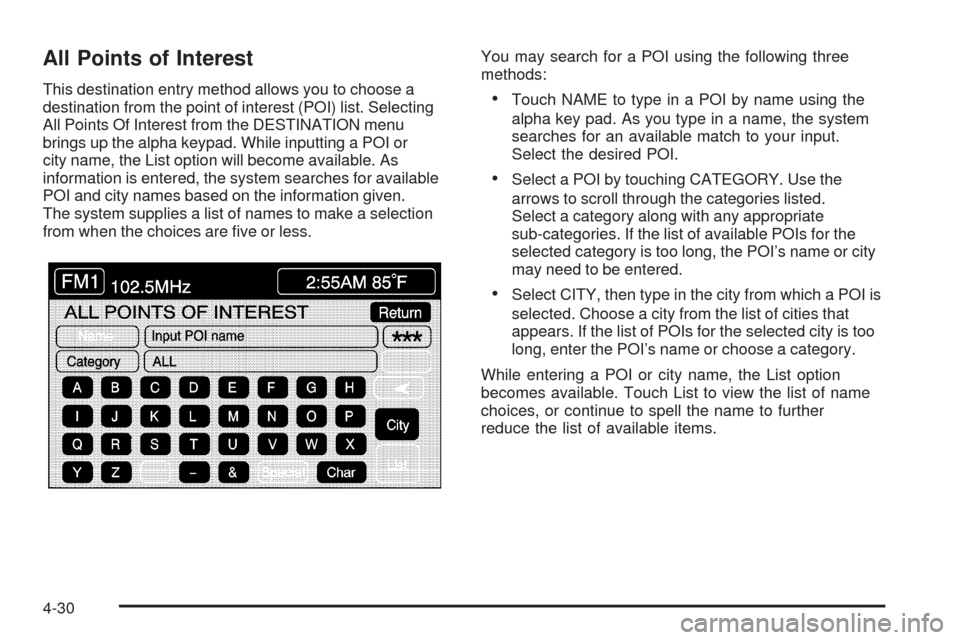
This destination entry method allows you to choose a
destination from the point of interest (POI) list. Selecting
All Points Of Interest from the DESTINATION menu
brings up the alpha keypad. While inputting a POI or
city name, the List option will become available. As
information is entered, the system searches for available
POI and city names based on the information given.
The system supplies a list of names to make a selection
from when the choices are �ve or less.You may search for a POI using the following three
methods:Touch NAME to type in a POI by name using the
alpha key pad. As you type in a name, the system
searches for an available match to your input.
Select the desired POI.
Select a POI by touching CATEGORY. Use the
arrows to scroll through the categories listed.
Select a category along with any appropriate
sub-categories. If the list of available POIs for the
selected category is too long, the POI’s name or city
may need to be entered.
Select CITY, then type in the city from which a POI is
selected. Choose a city from the list of cities that
appears. If the list of POIs for the selected city is too
long, enter the POI’s name or choose a category.
While entering a POI or city name, the List option
becomes available. Touch List to view the list of name
choices, or continue to spell the name to further
reduce the list of available items.
4-30
Page 245 of 462
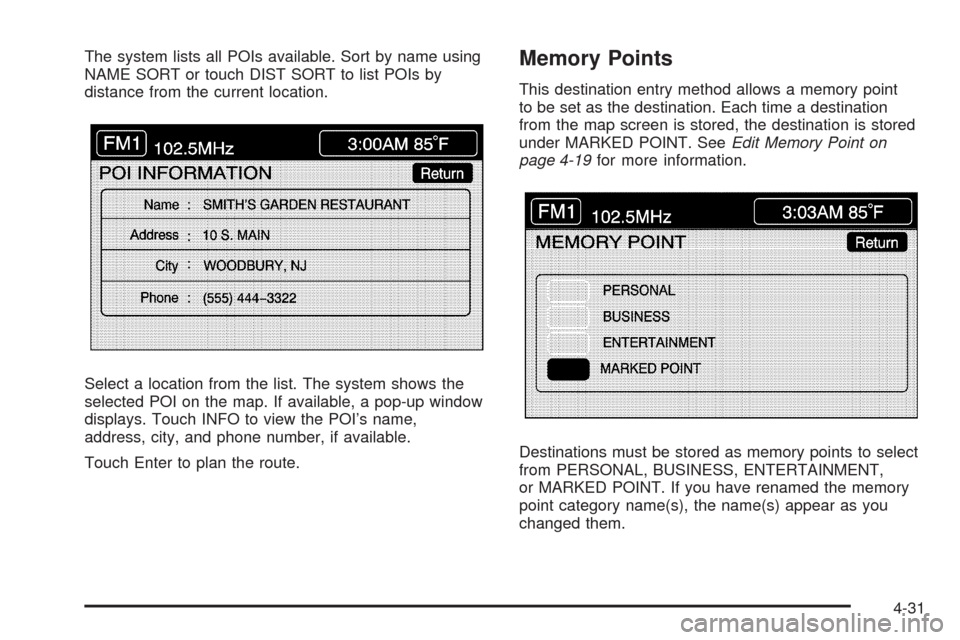
The system lists all POIs available. Sort by name using
NAME SORT or touch DIST SORT to list POIs by
distance from the current location.
Select a location from the list. The system shows the
selected POI on the map. If available, a pop-up window
displays. Touch INFO to view the POI’s name,
address, city, and phone number, if available.
Touch Enter to plan the route.Memory Points
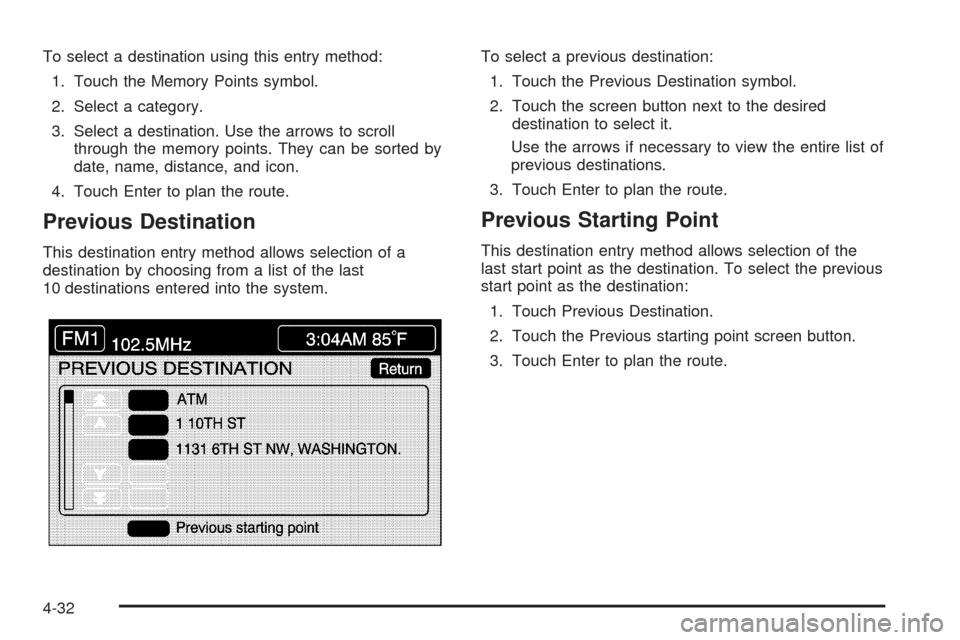
This destination entry method allows a memory point
to be set as the destination. Each time a destination
from the map screen is stored, the destination is stored
under MARKED POINT. SeeEdit Memory Point on
page 4-19for more information.
Destinations must be stored as memory points to select
from PERSONAL, BUSINESS, ENTERTAINMENT,
or MARKED POINT. If you have renamed the memory
point category name(s), the name(s) appear as you
changed them.
4-31
Page 246 of 462
To select a destination using this entry method:
1. Touch the Memory Points symbol.
2. Select a category.
3. Select a destination. Use the arrows to scroll
through the memory points. They can be sorted by
date, name, distance, and icon.
4. Touch Enter to plan the route.
Previous Destination
This destination entry method allows selection of a
destination by choosing from a list of the last
10 destinations entered into the system.To select a previous destination:
1. Touch the Previous Destination symbol.
2. Touch the screen button next to the desired
destination to select it.
Use the arrows if necessary to view the entire list of
previous destinations.
3. Touch Enter to plan the route.
Previous Starting Point
This destination entry method allows selection of the
last start point as the destination. To select the previous
start point as the destination:
1. Touch Previous Destination.
2. Touch the Previous starting point screen button.
3. Touch Enter to plan the route.
4-32
Page 247 of 462
Home
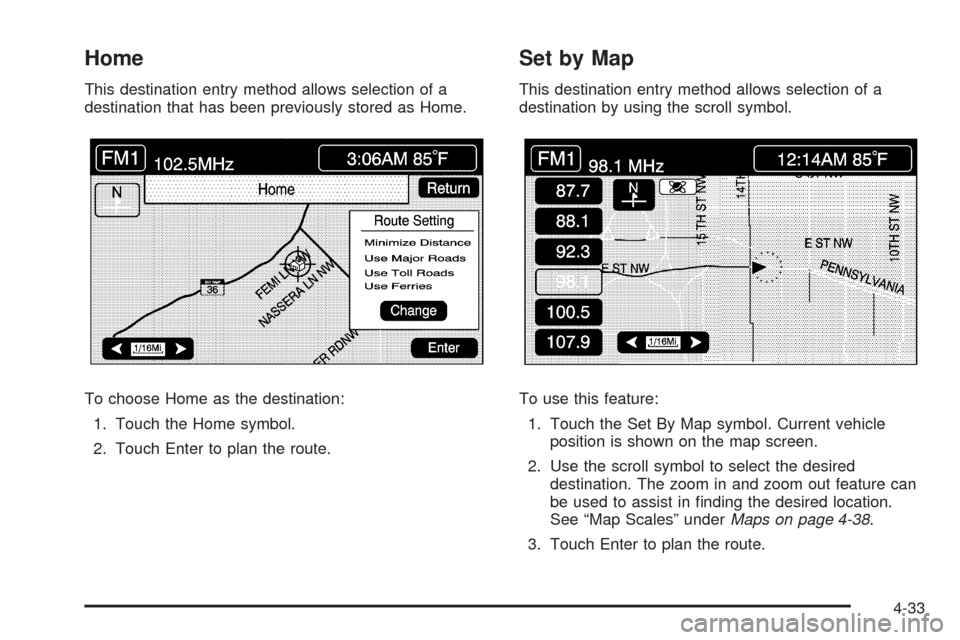
This destination entry method allows selection of a
destination that has been previously stored as Home.
To choose Home as the destination:
1. Touch the Home symbol.
2. Touch Enter to plan the route.
Set by Map
This destination entry method allows selection of a
destination by using the scroll symbol.
To use this feature:
1. Touch the Set By Map symbol. Current vehicle
position is shown on the map screen.
2. Use the scroll symbol to select the desired
destination. The zoom in and zoom out feature can
be used to assist in �nding the desired location.
See “Map Scales” underMaps on page 4-38.
3. Touch Enter to plan the route.
4-33
Page 248 of 462
Freeway Entrance/Exit
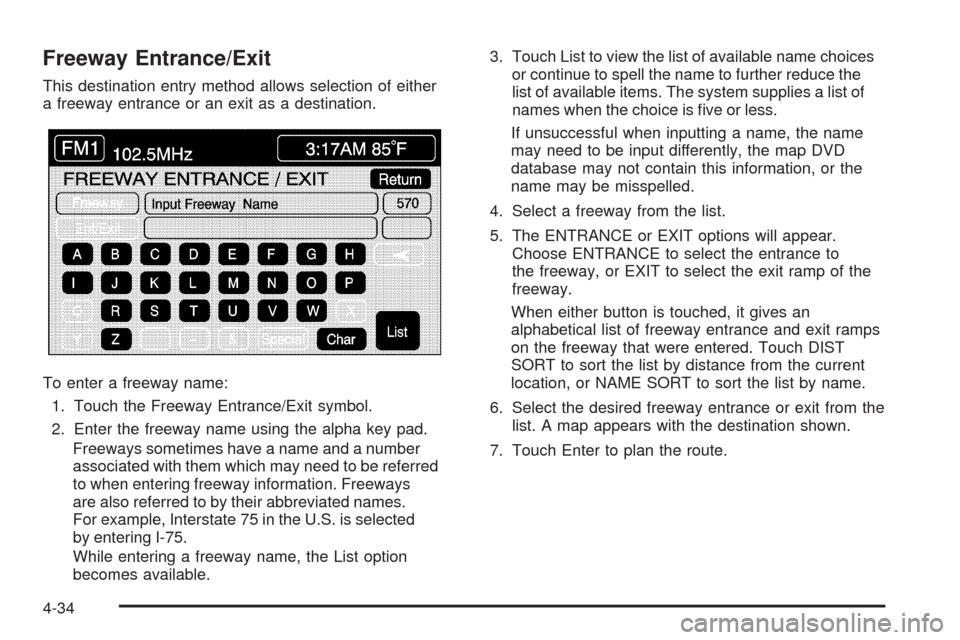
This destination entry method allows selection of either
a freeway entrance or an exit as a destination.
To enter a freeway name:
1. Touch the Freeway Entrance/Exit symbol.
2. Enter the freeway name using the alpha key pad.
Freeways sometimes have a name and a number
associated with them which may need to be referred
to when entering freeway information. Freeways
are also referred to by their abbreviated names.
For example, Interstate 75 in the U.S. is selected
by entering I-75.
While entering a freeway name, the List option
becomes available.3. Touch List to view the list of available name choices
or continue to spell the name to further reduce the
list of available items. The system supplies a list of
names when the choice is �ve or less.
If unsuccessful when inputting a name, the name
may need to be input differently, the map DVD
database may not contain this information, or the
name may be misspelled.
4. Select a freeway from the list.
5. The ENTRANCE or EXIT options will appear.
Choose ENTRANCE to select the entrance to
the freeway, or EXIT to select the exit ramp of the
freeway.
When either button is touched, it gives an
alphabetical list of freeway entrance and exit ramps
on the freeway that were entered. Touch DIST
SORT to sort the list by distance from the current
location, or NAME SORT to sort the list by name.
6. Select the desired freeway entrance or exit from the
list. A map appears with the destination shown.
7. Touch Enter to plan the route.
4-34
Page 249 of 462
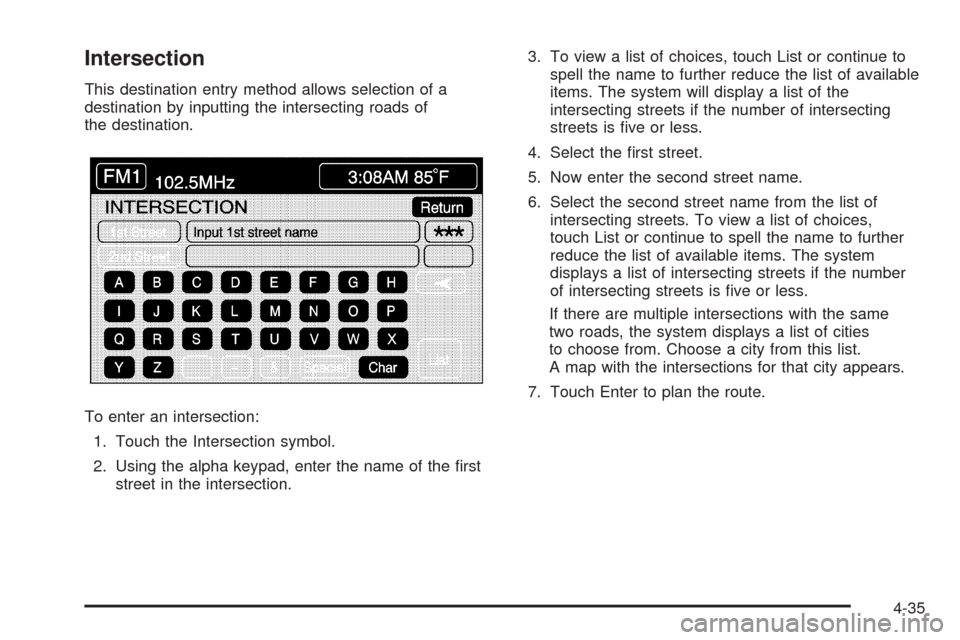
Intersection
This destination entry method allows selection of a
destination by inputting the intersecting roads of
the destination.
To enter an intersection:
1. Touch the Intersection symbol.
2. Using the alpha keypad, enter the name of the �rst
street in the intersection.3. To view a list of choices, touch List or continue to
spell the name to further reduce the list of available
items. The system will display a list of the
intersecting streets if the number of intersecting
streets is �ve or less.
4. Select the �rst street.
5. Now enter the second street name.
6. Select the second street name from the list of
intersecting streets. To view a list of choices,
touch List or continue to spell the name to further
reduce the list of available items. The system
displays a list of intersecting streets if the number
of intersecting streets is �ve or less.
If there are multiple intersections with the same
two roads, the system displays a list of cities
to choose from. Choose a city from this list.
A map with the intersections for that city appears.
7. Touch Enter to plan the route.
4-35
Page 250 of 462
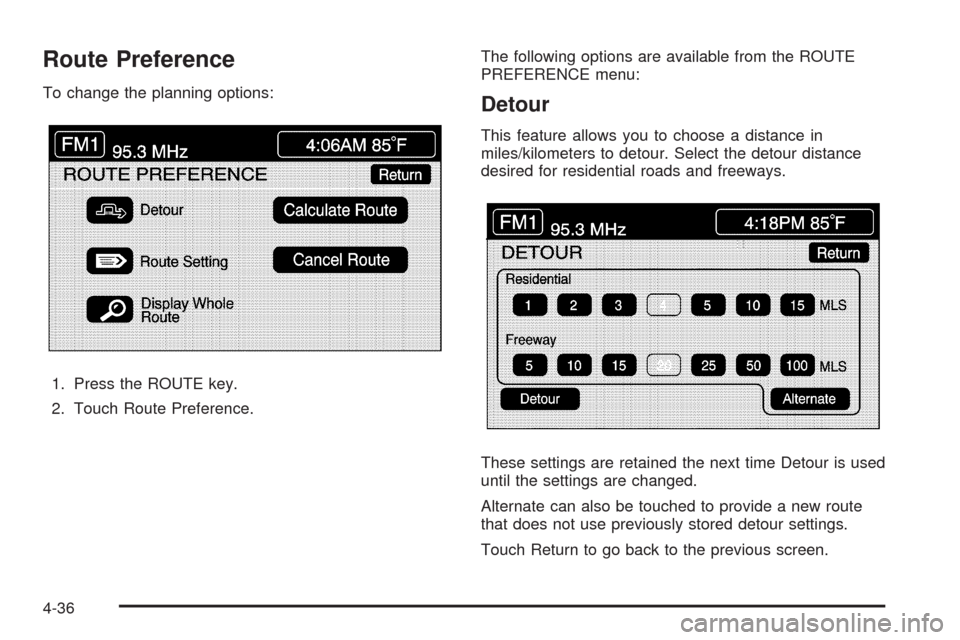
Route Preference
To change the planning options:
1. Press the ROUTE key.
2. Touch Route Preference.The following options are available from the ROUTE
PREFERENCE menu:Detour
This feature allows you to choose a distance in
miles/kilometers to detour. Select the detour distance
desired for residential roads and freeways.
These settings are retained the next time Detour is used
until the settings are changed.
Alternate can also be touched to provide a new route
that does not use previously stored detour settings.
Touch Return to go back to the previous screen.
4-36