FIAT DUCATO 244 2002 3.G Connect NavPlus Manual
Manufacturer: FIAT, Model Year: 2002, Model line: DUCATO 244, Model: FIAT DUCATO 244 2002 3.GPages: 246, PDF Size: 3.39 MB
Page 181 of 246
CONNECT Nav+
180
“LOC/DX” FUNCTION
(TUNER SENSITIVITY
ADJUSTMENT)
With this function it is possible to
change the sensitivity of automatic ra-
dio station searching. When low sen-
sitivity “LOC” is set, only stations with
excellent reception are sought; when
high sensitivity “DX” is set, all the sta-
tions are sought. If you are in an area
with a large number of broadcasters
and you want the ones with the
strongest signal, choose low sensitivi-
ty “LOC”.
To choose between low or high
tuner sensitivity, repeatedly press the
knob 22-fig. 1after selecting the
“LOC/DX” function. The abbreviation
of the sensitivity chosen will be shown
on the display:
– LOC = low sensitivity;
– DX = high sensitivity.“PTY” FUNCTION
(CHOOSING A TYPE OF
PROGRAMME)
The PTY function (Program Type),
when present, makes it possible to
give priority to broadcasters trans-
mitting programmes classified accord-
ing to the type of PTY. PTY pro-
grammes may concern emergency an-
nouncements or various subjects (e.g.
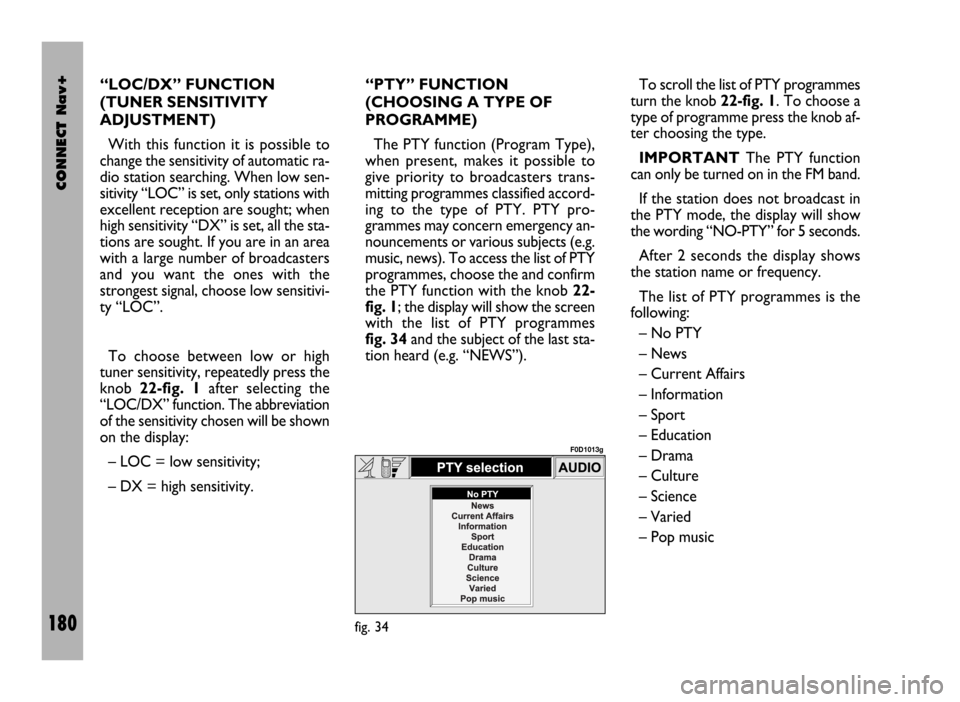
music, news). To access the list of PTY
programmes, choose the and confirm
the PTY function with the knob 22-
fig. 1; the display will show the screen
with the list of PTY programmes
fig. 34and the subject of the last sta-
tion heard (e.g. “NEWS”). To scroll the list of PTY programmes
turn the knob 22-fig. 1. To choose a
type of programme press the knob af-
ter choosing the type.
IMPORTANTThe PTY function
can only be turned on in the FM band.
If the station does not broadcast in
the PTY mode, the display will show
the wording “NO-PTY” for 5 seconds.
After 2 seconds the display shows
the station name or frequency.
The list of PTY programmes is the
following:
– No PTY
– News
– Current Affairs
– Information
– Sport
– Education
– Drama
– Culture
– Science
– Varied
– Pop music
fig. 34
F0D1013g
Page 182 of 246

CONNECT Nav+
181
– Rock music
– Easy Listening Music
– Light classical
– Serious classical
– Other music
– Weather
– Finance
– Children’s program
– Social Affairs
– Religion
– Phone in
– Travel
– Leisure
– Jazz music
– Country music
– National music
– Oldies music
– Folk music
– Documentary
– Alarm Test
– Alarm.To change the type of PTY pro-
gramme press keys 11-fig. 1oR 12-
fig. 1or one of the 6 preset keys. If
the display shows the frequency or
station name, pressing keys 11-fig. 1
or 12-fig. 1the type of the current
programme will be shown.
To store the current programme
type on one of the 6 preset keys, press
the required preset key at length (over
2 seconds).
To seek a station with this pro-
gramme, follow the instructions giv-
en in the “Automatic tuning” para-
graph.
If no station is available with this type
of programme, the station selected
previously is returned and for about 2
seconds the display will show “NO-
PTY”.
To exit the screen with the list of PTY
programmes, choose a type of pro-
gramme, or “No PTY” if you do not
wish to set a programme type. “EON” FUNCTION
(ENHANCED OTHER
NETWORK)
In certain countries there are circuits
which group together several stations
enabled to broadcast traffic informa-
tion.
In this case the programme of the
station being heard will be temporar-
ily interrupted to receive the traffic an-
nouncement (only with the TA func-
tion on), every time they are broad-
cast by one of the stations of the same
circuit.
When the station tuned belongs to
an EON circuit the display shows the
initials “EON”.
Page 183 of 246

CONNECT Nav+
182
To turn the Autostore function on
(automatic station storage) press the
knob 22-fig. 1after selecting it.
When this function is on, the radio
automatically stores the stations with
the strongest signal, in decreasing or-
der of intensity of the signal in the fre-
quency band tuned:
– 6 stations in the FM1, FM2 or FM3
band or
– 6 stations in the MW band or
– 6 stations in the LW band.
If the TA function is on (traffic infor-
mation), only stations that broadcast
traffic information will be stored. This
function can be turned on also when
playing a CD.
During automatic storage the display
shows the wording “Autostore”. To
interrupt the automatic storage
process, turn off the “Autostore”
function pressing the “ESC” key 23-
fig. 1; the radio will tune the station
heard before the function was acti-
vated. On the preset keys 1 ÷ 6-fig. 1the
stations that have a strong signal in
that moment will be stored, in the pre-
set band. After storage the radio tunes
automatically to the first station of the
FM1 band, corresponding to the fre-
quency stored on preset key 1-fig. 1.
Every station is stored only once, ex-
cept in the case of regional pro-
grammes which in certain cases might
be stored twice.
The behaviour of the set during Au-
tostore is as follows:
– at the beginning of the Autostore
function all the other functions are dis-
abled
– any change in volume is not shown
on the display– pressing one of the preset keys 1÷
6-fig. 1the automatic storage process
is interrupted and the station stored
with that key is tuned
– selecting and activating a radio
function (e.g. PTY) the automatic stor-
age process is interrupted, the last sta-
tion heard before tuning on Autostore
is tuned and the function associated
with the key pressed is run
– selecting and activating one or both
TA/AF functions during the automat-
ic storage process, automatic storage
will be interrupted, the TA (traffic in-
formation) and AF (alternative fre-
quencies) functions will be turned
on/off and a new automatic storage
process will be started
– changing the audio source (Radio,
CD) during the automatic storage
process, the Autostore function is not
interrupted.
IMPORTANTIt may occur that
the Autostore function is unable to
find 6 stations with a strong signal; in
this case only the stations found are
stored. “AUTOSTORE” FUNCTION (AUTOMATIC STATION STORAGE)
Page 184 of 246
CONNECT Nav+
183
“ST/MONO” FUNCTION
To turn on/off the Stereo function
(stereo station reception) press the
knob 22-fig. 1after selecting the
St/Mono function.
When stereo reception is on the dis-
play shows “STEREO”, when it is off
the display shows “MONO”.
When the signal of the station tuned
is weak, to improve the sound quality,
it is advisable to switch to “MONO”.CD MODE
To guarantee optimum playing, use
original CDs. If using R/RW CDs, use
top quality CDs duplicated at as low
as possible speed.
IMPORTANTNever use 8 mm
audio CDs, even with the specific
adapter, since this format will damage
the system.
Choosing the CD source with the
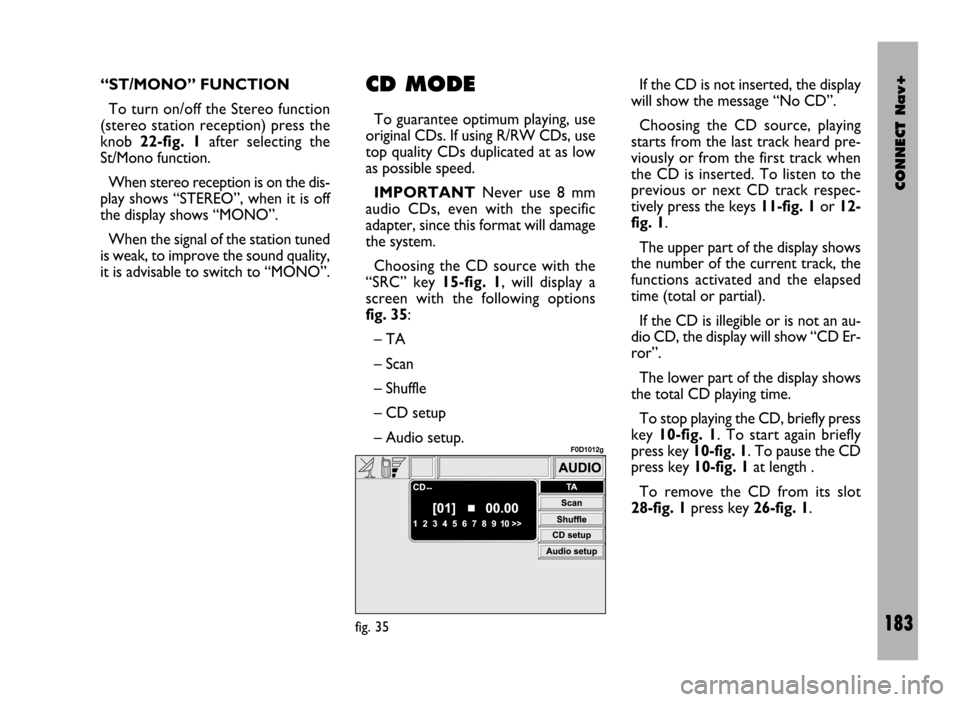
“SRC” key 15-fig. 1, will display a
screen with the following options
fig. 35:
– TA
– Scan
– Shuffle
– CD setup
– Audio setup.If the CD is not inserted, the display
will show the message “No CD”.
Choosing the CD source, playing
starts from the last track heard pre-
viously or from the first track when
the CD is inserted. To listen to the
previous or next CD track respec-
tively press the keys 11-fig. 1or 12-
fig. 1.
The upper part of the display shows
the number of the current track, the
functions activated and the elapsed
time (total or partial).
If the CD is illegible or is not an au-
dio CD, the display will show “CD Er-
ror”.
The lower part of the display shows
the total CD playing time.
To stop playing the CD, briefly press
key 10-fig. 1. To start again briefly
press key 10-fig. 1. To pause the CD
press key 10-fig. 1at length .
To remove the CD from its slot
28-fig. 1press key 26-fig. 1.
fig. 35
F0D1012g
Page 185 of 246
CONNECT Nav+
184
“TA” FUNCTION
(TRAFFIC INFORMATION)
To turn the TA function (Traffic An-
nouncement) on/off while listening to
a CD, press the knob 22-fig. 1after
selecting the function.
For the description of the function,
refer to the corresponding paragraph
in the “RADIO MODE” chapter.
“SCAN” FUNCTION
(BRIEF PLAYBACK)
The “Scan” function is turned on/off
pressing the knob 22-fig. 1after se-
lecting the function.
When this function is on, all the CD
tracks are played for about 10 seconds
in the actual sequence on the CD.
Press the knob again to turn the
function off 22-fig. 1.
The “Scan” function is turned off au-
tomatically when “Shuffle” is turned on.“SHUFFLE” FUNCTION
(RANDOM PLAYBACK)
The “Shuffle” function is turned on/off
pressing the knob 22-fig. 1after se-
lecting the function.
With this function on, the CD tracks
are played in random sequence. To
turn the function off press the knob
again 22-fig. 1. The “Shuffle” function
is turned off automatically when the
“Scan” function is turned on.
“CD SETUP” MENU
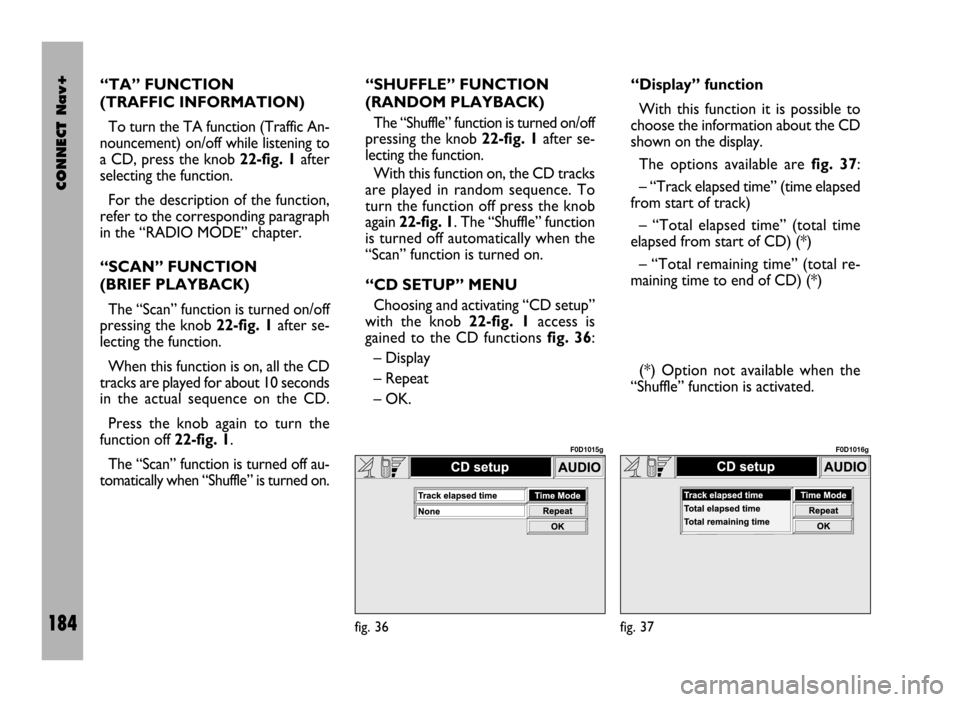
Choosing and activating “CD setup”
with the knob 22-fig. 1access is
gained to the CD functions fig. 36:
– Display
– Repeat
– OK.“Display” function
With this function it is possible to
choose the information about the CD
shown on the display.
The options available are fig. 37:
– “Track elapsed time” (time elapsed
from start of track)
– “Total elapsed time” (total time
elapsed from start of CD) (*)
– “Total remaining time” (total re-
maining time to end of CD) (*)
(*) Option not available when the
“Shuffle” function is activated.
fig. 36
F0D1015g
fig. 37
F0D1016g
Page 186 of 246
CONNECT Nav+
185
To choose an option turn and press
the knob 22-fig. 1after selecting the
“Display” function.
To store the option chosen, choose
and confirm “OK” with the knob 22-
fig. 1.“Repeat” function
With this function it is possible to turn
on/off the continuous repetition of the
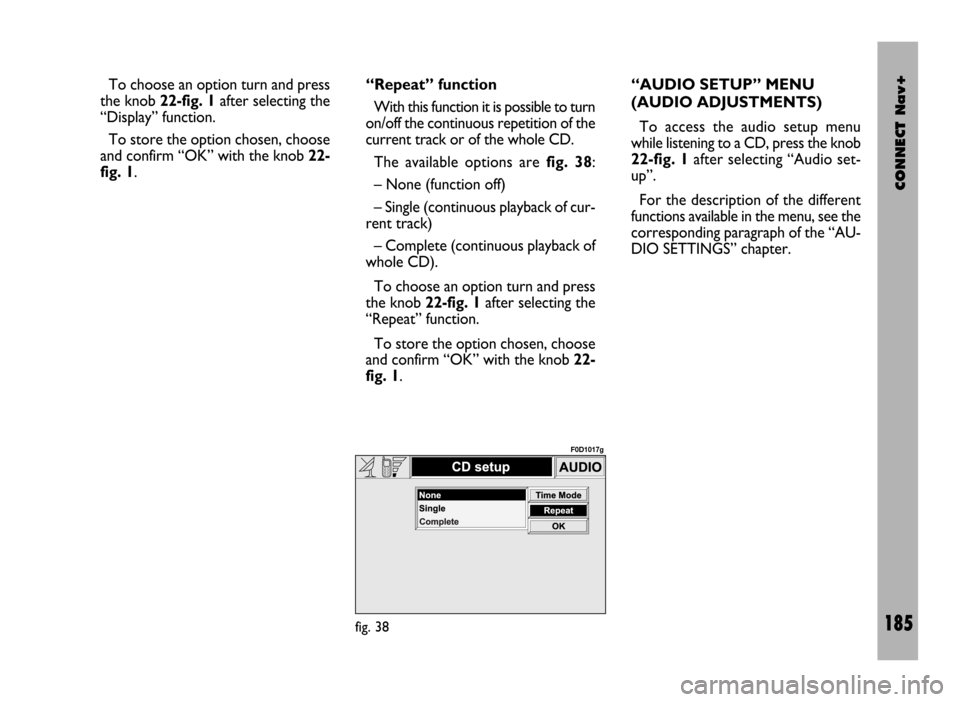
current track or of the whole CD.
The available options are fig. 38:
– None (function off)
– Single (continuous playback of cur-
rent track)
– Complete (continuous playback of
whole CD).
To choose an option turn and press
the knob 22-fig. 1after selecting the
“Repeat” function.
To store the option chosen, choose
and confirm “OK” with the knob 22-
fig. 1.“AUDIO SETUP” MENU
(AUDIO ADJUSTMENTS)
To access the audio setup menu
while listening to a CD, press the knob
22-fig. 1after selecting “Audio set-
up”.
For the description of the different
functions available in the menu, see the
corresponding paragraph of the “AU-
DIO SETTINGS” chapter.
fig. 38
F0D1017g
Page 187 of 246
CONNECT Nav+
186
The CONNECT Nav+ is fitted with
a Dual Band GMS cellular telephone
with handsfree feature. The GSM
(Global System for Mobile Commu-
nication) standard is now available in
many countries and offers excellent
coverage: for information about the
areas served currently by the GSM
networks and those available in the fu-
ture, contact your network provider.
The cellular telephone functions are
displayed by pressing briefly the “TEL”
19-fig. 1or the telephone key 13-
fig. 1. If the telephone screen is accessed
pressing key 13-fig. 1, the display will
show the last number called without
actually calling it: to make the call,
press the 13-fig. 1again. Press “ESC”
23-fig. 1to return to the main tele-
phone screen.
To clear the telephone function
menu from the display, keep the “TEL”
key 19-fig. 1pressed; to display it
again, press the key briefly.GENERAL
INFORMATION
The cellular telephone has many
functions which simplify use:
– PIN code (Personal Identification
Number) to prevent unauthorised
telephone use
– PIN change
– activation/deactivation of PIN re-
quest at access
– incoming calls acceptance and re-
fusal
– start a telephone call
– emergency call (even without SIM
card and without entering PIN code)
– reading the telephone numbers
stored on the SIM card
– entering a new telephone number
on the SIM card
– deleting a telephone number from
the SIM card
C C
E E
L L
L L
U U
L L
A A
R R
T T
E E
L L
E E
P P
H H
O O
N N
E E
( (
T T
E E
L L
) )
Page 188 of 246
CONNECT Nav+
187
– information on SIM card conditions
(correct or wrong insertion and space
available in the memory)
– access to the list of the last 10
numbers dialled to facilitate frequent
calls
– access to the list of the last 10 calls
received
– SMS function (Short Message Ser-
vice) to receive and send short text
messages
– activation and deactivation of ac-
cess to SIM card (Subscriber Identifi-
cation Module)
– access and change of the lists con-
taining the most frequently dialled
numbers and to telephone directory;
– manual number dialling
– DTMF setting (Dual Tone Multi
Frequency) to repeat dialling and in-
hibit the own identification number
transmission
– selection of network provider
– setting volume
– display of remaining credit in case
of prepaid SIM card (if the Network
Provider makes these data available)– display of signal field intensity and
other status warnings with symbols
and words:
telephone wordings not active or
lack of network service or telephone
not included in network
êfield intensity shown by lit sec-
tors
call signal off wording
ï“forwarding” function activated
ñSMS message received
and already read
óSMS message received
and not read yet
íSMS message written
and already sent
îSMS message written,
but not sent yet.
PRELIMINARY OPERATIONS
Telephone card insertion
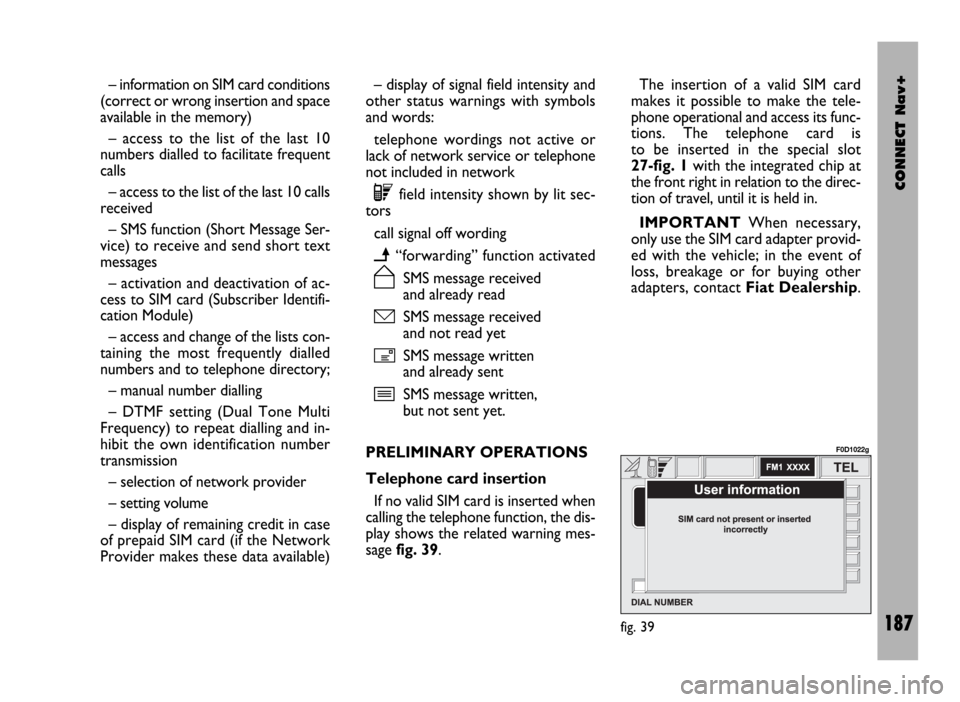
If no valid SIM card is inserted when
calling the telephone function, the dis-
play shows the related warning mes-
sage fig. 39.The insertion of a valid SIM card
makes it possible to make the tele-
phone operational and access its func-
tions. The telephone card is
to be inserted in the special slot
27-fig. 1with the integrated chip at
the front right in relation to the direc-
tion of travel, until it is held in.
IMPORTANTWhen necessary,
only use the SIM card adapter provid-
ed with the vehicle; in the event of
loss, breakage or for buying other
adapters, contact Fiat Dealership.
fig. 39
F0D1022g
Page 189 of 246
CONNECT Nav+
188
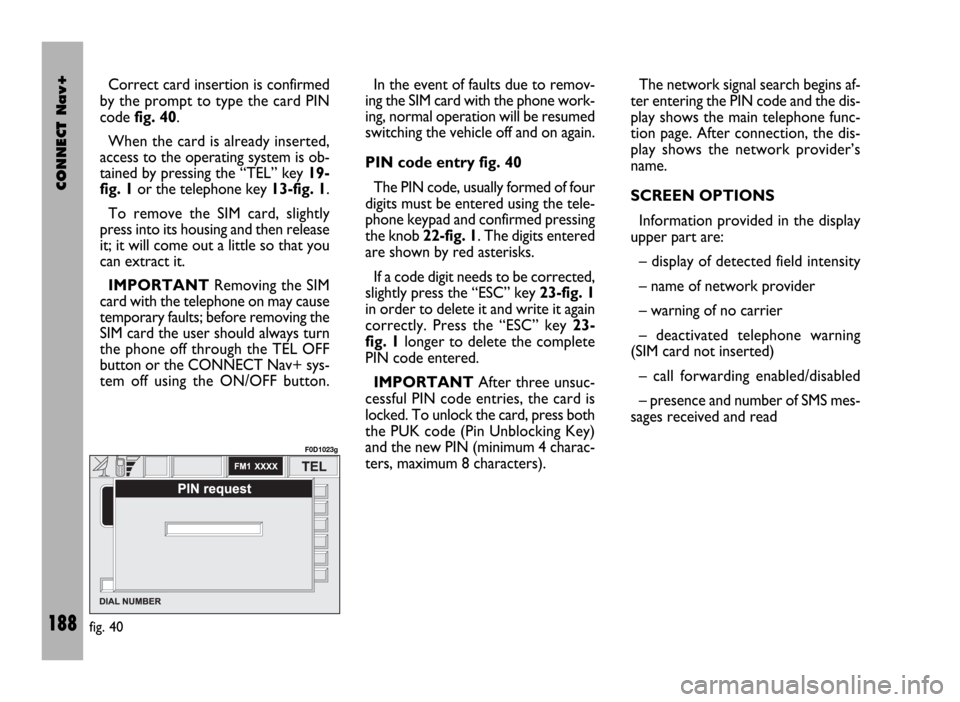
Correct card insertion is confirmed
by the prompt to type the card PIN
code fig. 40.
When the card is already inserted,
access to the operating system is ob-
tained by pressing the “TEL” key 19-
fig. 1or the telephone key 13-fig. 1.
To remove the SIM card, slightly
press into its housing and then release
it; it will come out a little so that you
can extract it.
IMPORTANTRemoving the SIM
card with the telephone on may cause
temporary faults; before removing the
SIM card the user should always turn
the phone off through the TEL OFF
button or the CONNECT Nav+ sys-
tem off using the ON/OFF button.In the event of faults due to remov-
ing the SIM card with the phone work-
ing, normal operation will be resumed
switching the vehicle off and on again.
PIN code entry fig. 40
The PIN code, usually formed of four
digits must be entered using the tele-
phone keypad and confirmed pressing
the knob 22-fig. 1. The digits entered
are shown by red asterisks.
If a code digit needs to be corrected,
slightly press the “ESC” key 23-fig. 1
in order to delete it and write it again
correctly. Press the “ESC” key 23-
fig. 1longer to delete the complete
PIN code entered.
IMPORTANTAfter three unsuc-
cessful PIN code entries, the card is
locked. To unlock the card, press both
the PUK code (Pin Unblocking Key)
and the new PIN (minimum 4 charac-
ters, maximum 8 characters).The network signal search begins af-
ter entering the PIN code and the dis-
play shows the main telephone func-
tion page. After connection, the dis-
play shows the network provider’s
name.
SCREEN OPTIONS
Information provided in the display
upper part are:
– display of detected field intensity
– name of network provider
– warning of no carrier
– deactivated telephone warning
(SIM card not inserted)
– call forwarding enabled/disabled
– presence and number of SMS mes-
sages received and read
fig. 40
F0D1023g
Page 190 of 246

CONNECT Nav+
189
– emergency call in progress warning
– credit available in case of a prepaid
SIM card (if the Network Provider
makes these data available).
During an incoming or outgoing call,
the lower part of the display provides
the following information:
– interlocutor’s name (if present in
the telephone directory) or telephone
number (for calls received, if available)
– interlocutor telephone number (if
made available by the network
provider)
– time from beginning of the call (mm
: ss - minutes and seconds).
Information provided in the display
lower part are replaced, at the end of
the call, by the telephone number di-
alling sector.ACCEPTING CALLS
Any incoming call while a conversa-
tion is in progress is shown on the dis-
play by the name (if present in the di-
rectory) and by the number (if avail-
able) of the caller and by the options
“Accept” or “Refuse”. To choose and
confirm the options use the knob 22-
fig. 1.
If the new call is accepted, the pre-
vious one will wait till the end of the
new call or till the interlocutor decides
to hang up.
If the incoming call is refused, the dis-
played message disappears and the
first telephone call continues with no
disturbance.
Incoming calls are signalled, regard-
less of the active mode of the inte-
grated system (radio, CD player etc.),
by a screen that shows the caller’s
name (if present in the directory) and
number (if available) and the prompt
to accept or refuse the call.
To accept the call, briefly press key
ò13-fig. 1, to refuse the call keep the
key pressed longer.
To interrupt a telephone call, press
key
ò13-fig. 1at length.TELEPHONE CALL
To make a telephone call, select the
“telephone” function using key 19-
fig. 1, then press key
ò13-fig. 1af-
ter dialling the telephone number us-
ing the keypad located on the control
panel left-hand side or after retriev-
ing it using one of the dedicated menu
functions (directory, frequent num-
bers, last received or called numbers).
When calling, the display left-hand
side shows information associated
with the call in progress, the vehicle
radio is switched off, connection is
made and, if the called person an-
swers, the call duration counter is
started.
To interrupt the forwarding of a
call, keep key
ò13-fig. 1pressed.