FIAT DUCATO 244 2002 3.G Connect NavPlus Manual
Manufacturer: FIAT, Model Year: 2002, Model line: DUCATO 244, Model: FIAT DUCATO 244 2002 3.GPages: 246, PDF Size: 3.39 MB
Page 191 of 246
CONNECT Nav+
190
MAIN MENU
FUNCTIONS
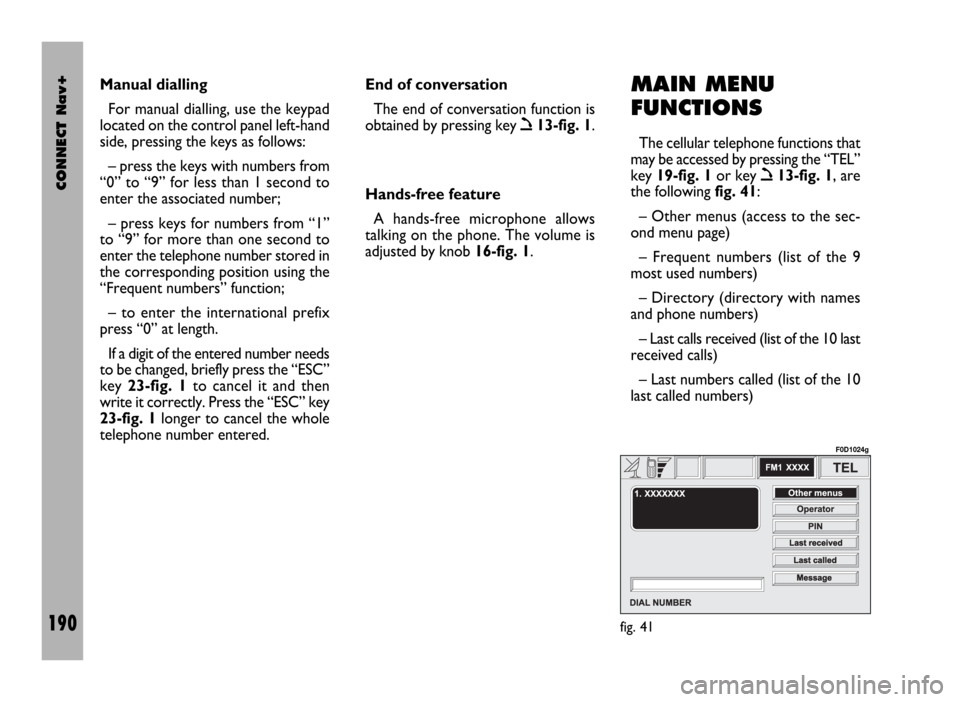
The cellular telephone functions that
may be accessed by pressing the “TEL”
key 19-fig. 1or key
ò13-fig. 1, are
the following fig. 41:
– Other menus (access to the sec-
ond menu page)
– Frequent numbers (list of the 9
most used numbers)
– Directory (directory with names
and phone numbers)
– Last calls received (list of the 10 last
received calls)
– Last numbers called (list of the 10
last called numbers) Manual dialling
For manual dialling, use the keypad
located on the control panel left-hand
side, pressing the keys as follows:
– press the keys with numbers from
“0” to “9” for less than 1 second to
enter the associated number;
– press keys for numbers from “1”
to “9” for more than one second to
enter the telephone number stored in
the corresponding position using the
“Frequent numbers” function;
– to enter the international prefix
press “0” at length.
If a digit of the entered number needs
to be changed, briefly press the “ESC”
key 23-fig. 1to cancel it and then
write it correctly. Press the “ESC” key
23-fig. 1longer to cancel the whole
telephone number entered. End of conversation
The end of conversation function is
obtained by pressing key
ò13-fig. 1.
Hands-free feature
A hands-free microphone allows
talking on the phone. The volume is
adjusted by knob 16-fig. 1.
fig. 41
F0D1024g
Page 192 of 246
CONNECT Nav+
191
– Messages (SMS – short text mes-
sages)
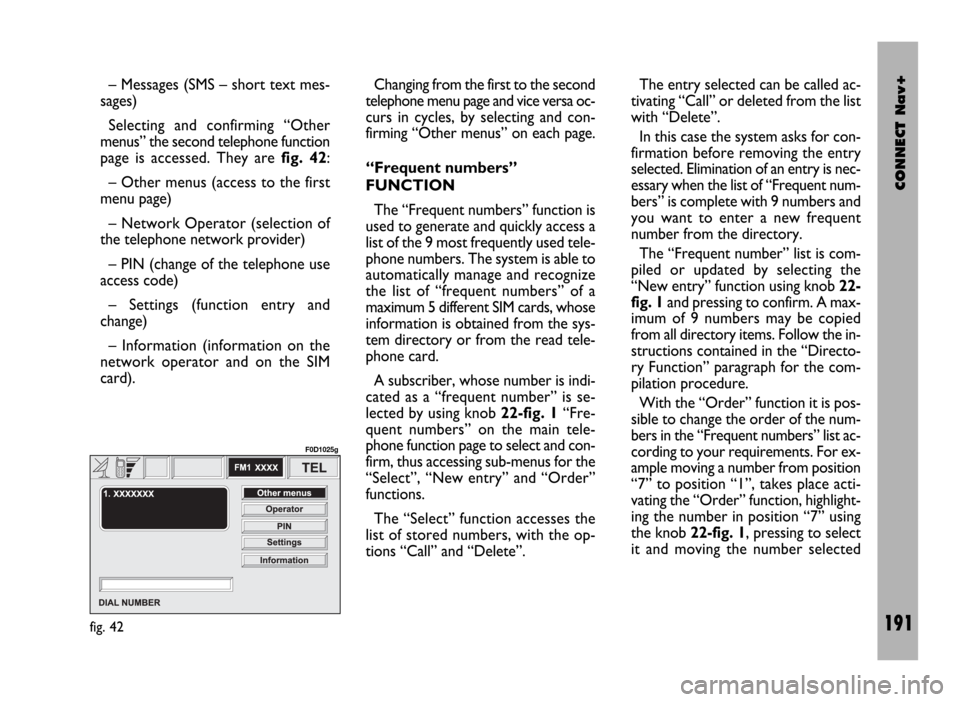
Selecting and confirming “Other
menus” the second telephone function
page is accessed. They are fig. 42:
– Other menus (access to the first
menu page)
– Network Operator (selection of
the telephone network provider)
– PIN (change of the telephone use
access code)
– Settings (function entry and
change)
– Information (information on the
network operator and on the SIM
card).Changing from the first to the second
telephone menu page and vice versa oc-
curs in cycles, by selecting and con-
firming “Other menus” on each page.
“Frequent numbers”
FUNCTION
The “Frequent numbers” function is
used to generate and quickly access a
list of the 9 most frequently used tele-
phone numbers. The system is able to
automatically manage and recognize
the list of “frequent numbers” of a
maximum 5 different SIM cards, whose
information is obtained from the sys-
tem directory or from the read tele-
phone card.
A subscriber, whose number is indi-
cated as a “frequent number” is se-
lected by using knob 22-fig. 1“Fre-
quent numbers” on the main tele-
phone function page to select and con-
firm, thus accessing sub-menus for the
“Select”, “New entry” and “Order”
functions.
The “Select” function accesses the
list of stored numbers, with the op-
tions “Call” and “Delete”. The entry selected can be called ac-
tivating “Call” or deleted from the list
with “Delete”.
In this case the system asks for con-
firmation before removing the entry
selected. Elimination of an entry is nec-
essary when the list of “Frequent num-
bers” is complete with 9 numbers and
you want to enter a new frequent
number from the directory.
The “Frequent number” list is com-
piled or updated by selecting the
“New entry” function using knob 22-
fig. 1and pressing to confirm. A max-
imum of 9 numbers may be copied
from all directory items. Follow the in-
structions contained in the “Directo-
ry Function” paragraph for the com-
pilation procedure.
With the “Order” function it is pos-
sible to change the order of the num-
bers in the “Frequent numbers” list ac-
cording to your requirements. For ex-
ample moving a number from position
“7” to position “1”, takes place acti-
vating the “Order” function, highlight-
ing the number in position “7” using
the knob 22-fig. 1, pressing to select
it and moving the number selected
fig. 42
F0D1025g
Page 193 of 246
CONNECT Nav+
192
with the knob 22-fig. 1from position
“7” to position “1”. The operation is
stored pressing the knob 22-fig. 1.
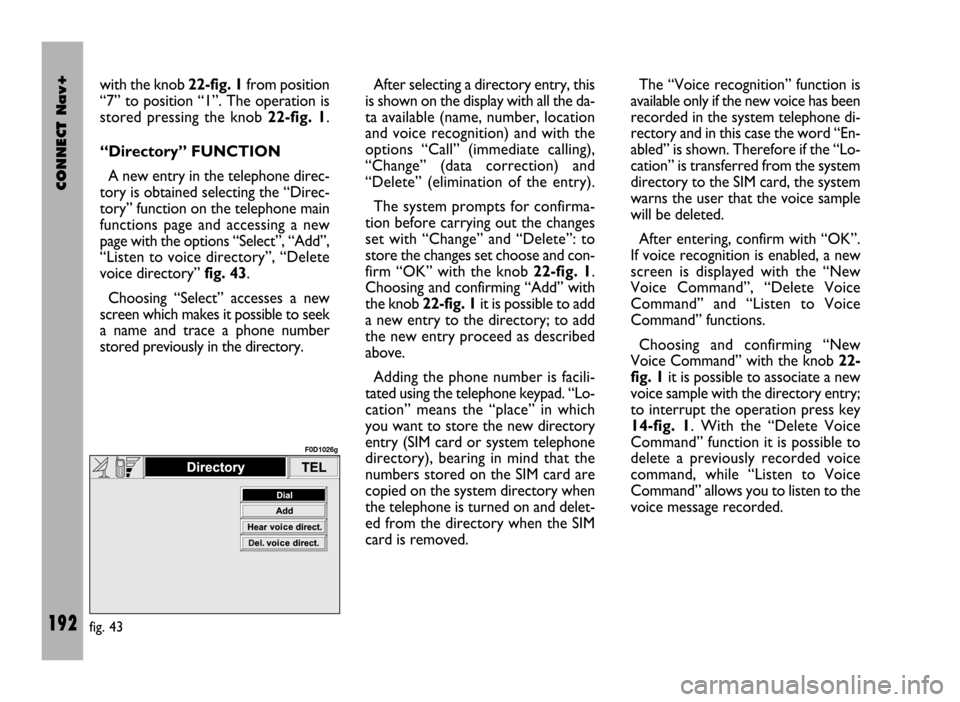
“Directory” FUNCTION
A new entry in the telephone direc-
tory is obtained selecting the “Direc-
tory” function on the telephone main
functions page and accessing a new
page with the options “Select”, “Add”,
“Listen to voice directory”, “Delete
voice directory” fig. 43.
Choosing “Select” accesses a new
screen which makes it possible to seek
a name and trace a phone number
stored previously in the directory. After selecting a directory entry, this
is shown on the display with all the da-
ta available (name, number, location
and voice recognition) and with the
options “Call” (immediate calling),
“Change” (data correction) and
“Delete” (elimination of the entry).
The system prompts for confirma-
tion before carrying out the changes
set with “Change” and “Delete”: to
store the changes set choose and con-
firm “OK” with the knob 22-fig. 1.
Choosing and confirming “Add” with
the knob 22-fig. 1it is possible to add
a new entry to the directory; to add
the new entry proceed as described
above.
Adding the phone number is facili-
tated using the telephone keypad. “Lo-
cation” means the “place” in which
you want to store the new directory
entry (SIM card or system telephone
directory), bearing in mind that the
numbers stored on the SIM card are
copied on the system directory when
the telephone is turned on and delet-
ed from the directory when the SIM
card is removed.The “Voice recognition” function is
available only if the new voice has been
recorded in the system telephone di-
rectory and in this case the word “En-
abled” is shown. Therefore if the “Lo-
cation” is transferred from the system
directory to the SIM card, the system
warns the user that the voice sample
will be deleted.
After entering, confirm with “OK”.
If voice recognition is enabled, a new
screen is displayed with the “New
Voice Command”, “Delete Voice
Command” and “Listen to Voice
Command” functions.
Choosing and confirming “New
Voice Command” with the knob 22-
fig. 1it is possible to associate a new
voice sample with the directory entry;
to interrupt the operation press key
14-fig. 1. With the “Delete Voice
Command” function it is possible to
delete a previously recorded voice
command, while “Listen to Voice
Command” allows you to listen to the
voice message recorded.
fig. 43
F0D1026g
Page 194 of 246
CONNECT Nav+
193
Choosing and confirming “Listen to
voice directory” with the knob 22-
fig. 1it is possible to hear the entire
contents of the voice directory; to
stop it press the “ESC” button 23-
fig. 1.
Choosing and confirming “Delete
voice directory” it is possible to delete
the entire contents of the voice di-
rectory: to delete press the knob 22-
fig. 1to go back to the previous
screen press the “ESC” button 23-
fig. 1.
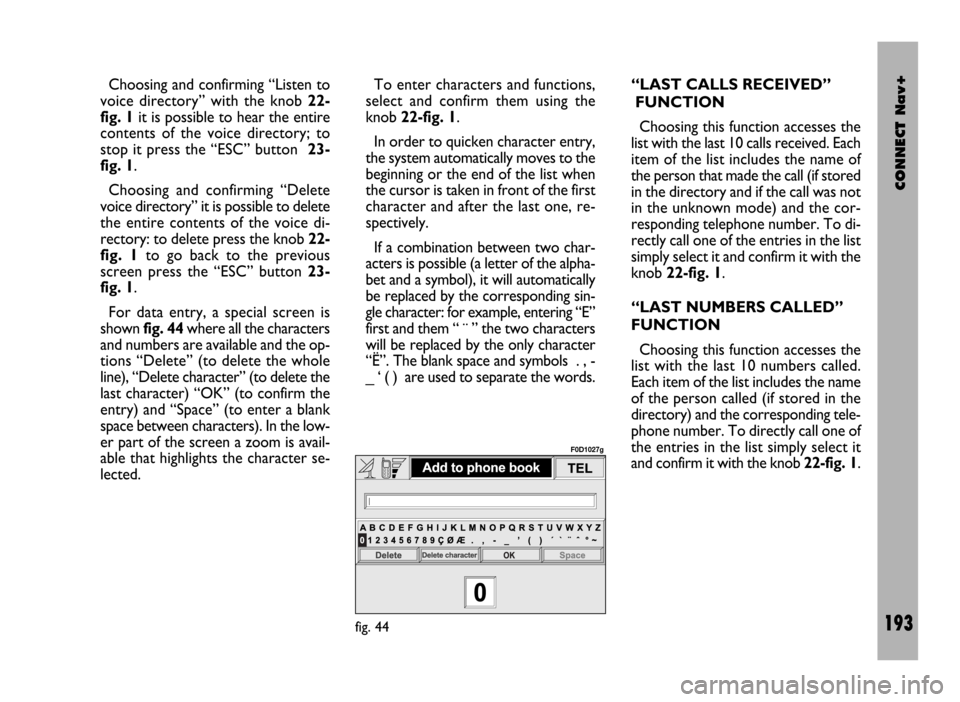
For data entry, a special screen is
shown fig. 44where all the characters
and numbers are available and the op-
tions “Delete” (to delete the whole
line), “Delete character” (to delete the
last character) “OK” (to confirm the
entry) and “Space” (to enter a blank
space between characters). In the low-
er part of the screen a zoom is avail-
able that highlights the character se-
lected.To enter characters and functions,
select and confirm them using the
knob 22-fig. 1.
In order to quicken character entry,
the system automatically moves to the
beginning or the end of the list when
the cursor is taken in front of the first
character and after the last one, re-
spectively.
If a combination between two char-
acters is possible (a letter of the alpha-
bet and a symbol), it will automatically
be replaced by the corresponding sin-
gle character: for example, entering “E”
first and them “ ¨ ” the two characters
will be replaced by the only character
“Ë”. The blank space and symbols . , -
_ ‘ ( ) are used to separate the words.“LAST CALLS RECEIVED”
FUNCTION
Choosing this function accesses the
list with the last 10 calls received. Each
item of the list includes the name of
the person that made the call (if stored
in the directory and if the call was not
in the unknown mode) and the cor-
responding telephone number. To di-
rectly call one of the entries in the list
simply select it and confirm it with the
knob 22-fig. 1.
“LAST NUMBERS CALLED”
FUNCTION
Choosing this function accesses the
list with the last 10 numbers called.
Each item of the list includes the name
of the person called (if stored in the
directory) and the corresponding tele-
phone number. To directly call one of
the entries in the list simply select it
and confirm it with the knob 22-fig. 1.
fig. 44
F0D1027g
Page 195 of 246
CONNECT Nav+
194
“Messages” FUNCTION
This function allows access to the SMS
message page (short text messages),
that can be received and sent, and
which displays a menu with the follow-
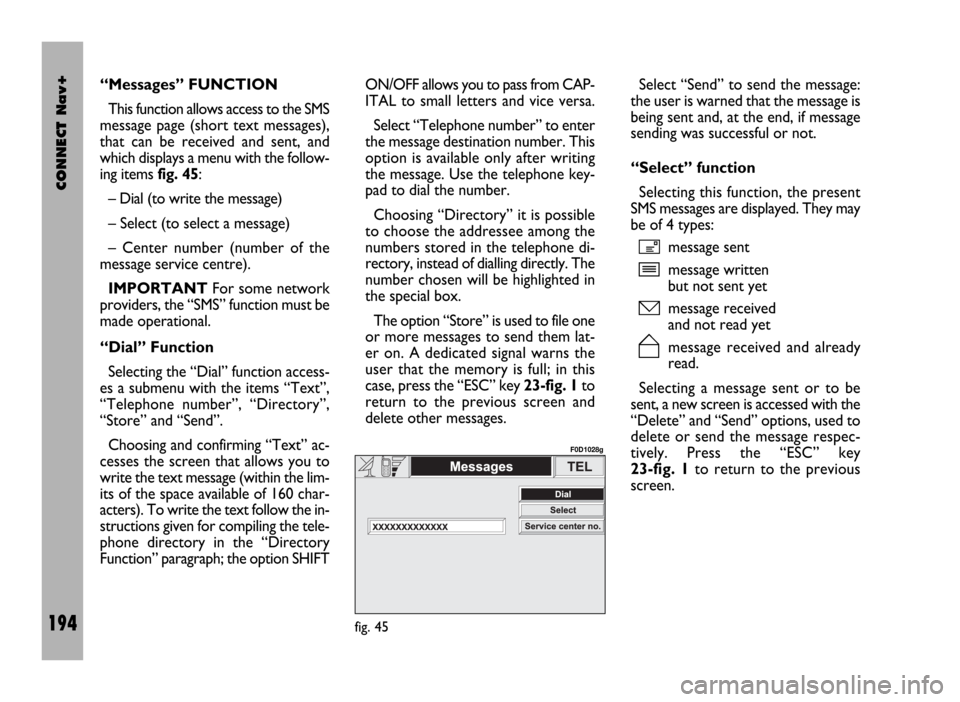
ing items fig. 45:
– Dial (to write the message)
– Select (to select a message)
– Center number (number of the
message service centre).
IMPORTANTFor some network
providers, the “SMS” function must be
made operational.
“Dial” Function
Selecting the “Dial” function access-
es a submenu with the items “Text”,
“Telephone number”, “Directory”,
“Store” and “Send”.
Choosing and confirming “Text” ac-
cesses the screen that allows you to
write the text message (within the lim-
its of the space available of 160 char-
acters). To write the text follow the in-
structions given for compiling the tele-
phone directory in the “Directory
Function” paragraph; the option SHIFTON/OFF allows you to pass from CAP-
ITAL to small letters and vice versa.
Select “Telephone number” to enter
the message destination number. This
option is available only after writing
the message. Use the telephone key-
pad to dial the number.
Choosing “Directory” it is possible
to choose the addressee among the
numbers stored in the telephone di-
rectory, instead of dialling directly. The
number chosen will be highlighted in
the special box.
The option “Store” is used to file one
or more messages to send them lat-
er on. A dedicated signal warns the
user that the memory is full; in this
case, press the “ESC” key 23-fig. 1to
return to the previous screen and
delete other messages.Select “Send” to send the message:
the user is warned that the message is
being sent and, at the end, if message
sending was successful or not.
“Select” function
Selecting this function, the present
SMS messages are displayed. They may
be of 4 types:
ímessage sent
îmessage written
but not sent yet
ómessage received
and not read yet
ñmessage received and already
read.
Selecting a message sent or to be
sent, a new screen is accessed with the
“Delete” and “Send” options, used to
delete or send the message respec-
tively. Press the “ESC” key
23-fig. 1to return to the previous
screen.
fig. 45
F0D1028g
Page 196 of 246

CONNECT Nav+
195
Selecting a received message already
read or to be read, will display a new
screen with “Delete”, “Call” and “An-
swer” that shall be used to delete the
message, call the sender telephone
number or send him/her an answer
message. Press the “ESC” key to re-
turn to the previous screen 23-fig. 1.
“Center number” Function
This function is used to enter, the
SMS message service provider number
using the telephone keypad.
“NETWORK OPERATOR”
FUNCTION
This function, that may be accessed
from the second telephone menu
page, makes the following network
provider management options avail-
able:
– Select (to define the criteria for
choosing the operator)
– Operator (to select a provider,
when possible)
– OK (to confirm settings).“Select” function
This function is used to define the
criteria used to select the network
provider:
– Automatic
– Manual
– Preferential.
The “Automatic” provider selection
is performed directly by the telemat-
ic system based on the GSM field in-
tensity provided by each available
provider; therefore, the “Operator”
function is not available with this func-
tion.
The “Manual” selection allows the
user to select the preferred provider
using the “Operator” function but, in
case of insufficient GSM field, the tele-
phone will not be able to receive or
make calls.
The “Preferential” selection allows
the user to select the provider that the
system must select, using the “Oper-
ator” option, when the provided GSM
field is sufficient.“Operator” Function
This function is available in “Manu-
al” or “Preferential” mode only and it
is used to select and set the network
provider using knob 22-fig. 1.
“OK”
Selecting and confirming “OK” us-
ing knob 22-fig. 1the set type of se-
lection and provider name are stored.
“PIN” FUNCTION
This function is used to access the
“PIN” code setting page, through the
“Change PIN”, “Enable PIN Request”,
“Recall last PIN “ and “OK” options.
For obvious safety reasons in use of
the telephone, whenever the user
needs to access this menu functions,
the system requires entering the cur-
rent PIN.
Page 197 of 246
CONNECT Nav+
196
“Change PIN” Function
The “Change PIN” function allows
changing the SIM card PIN number, ac-
cessing a new page with following op-
tions:
– Old PIN
– New PIN 1
– New PIN 2
– OK.
First of all, the current PIN code
must be entered in the first page and
then enter the new PIN twice in the
“ New PIN 1” and “ New PIN 2”
fields.
If the system finds that the two new
PINs are different, an error message
is issued for a few seconds: in this case,
the user must repeat the whole PIN
change procedure, except for the old
PIN that remains valid.
At the end of this operation, in or-
der to store the new PIN, select and
confirm “OK” with the knob 22-fig. 1.
Pressing “ESC” 23-fig. 1the system
returns to the previous display and re-
stores the old PIN code.“Enable PIN request” Function
This function is used to enable or dis-
able the PIN code request whenever
the SIM card is inserted. In order to
engage/disengage this option, select it
and press knob 22-fig. 1:
– YES: function enabled (PIN request
each time the SIM card is inserted)
– NO: function disabled (direct ac-
cess to telephone functions inserting
the SIM card).
“Recall last PIN “ Function
Setting “YES” or “NO”, this function
enables the system to store the first
PIN code entered by the user, or not.
Setting “YES”, the system will send the
PIN code directly to the SIM card at
each request, without prompting the
user to enter it.
“OK”
Selecting and confirming “OK” with
the knob 22-fig. 1the selection is
stored; instead, press the “ESC” key
23-fig. 1to return to the previous
screen and restore the previous set-
ting.“SETTINGS” FUNCTION
Selecting and confirming this function
using knob 22-fig. 1, the telephone
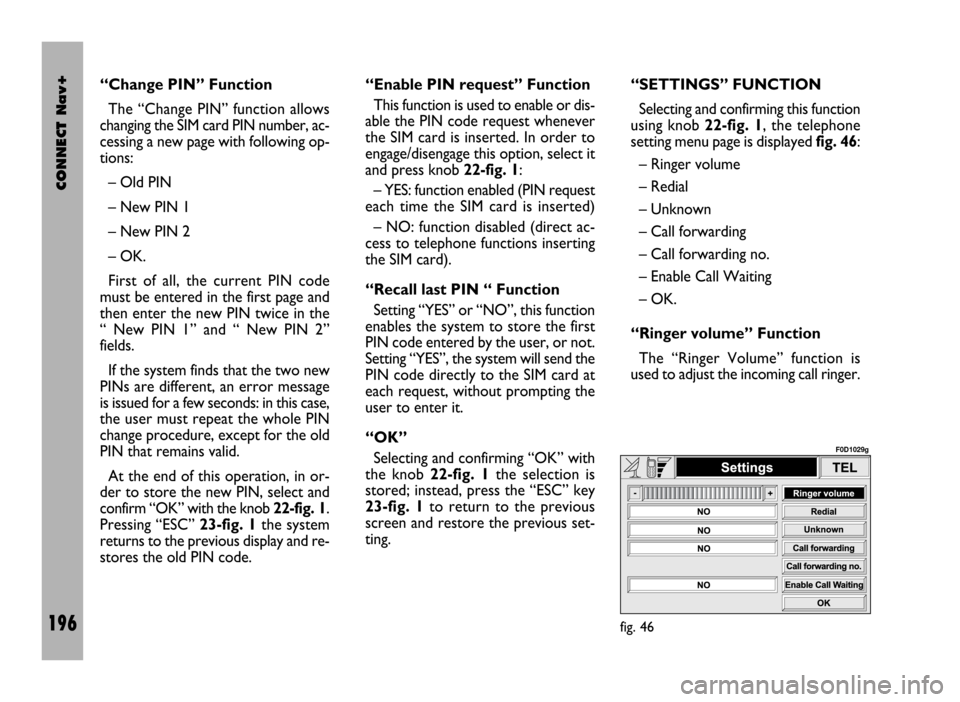
setting menu page is displayed fig. 46:
– Ringer volume
– Redial
– Unknown
– Call forwarding
– Call forwarding no.
– Enable Call Waiting
– OK.
“Ringer volume” Function
The “Ringer Volume” function is
used to adjust the incoming call ringer.
fig. 46
F0D1029g
Page 198 of 246

CONNECT Nav+
197
Proceed as follows:
– select and confirm this function us-
ing knob 22-fig. 1;
– rotate knob 22-fig. 1clockwise to
increase ringer volume and anti-clock-
wise to reduce it.
At the end, press knob to confirm
setting and continue with the other pa-
rameter settings.
“Redial” Function
This function enables or disables
(YES/NO) the automatic redial option
for a few times, in case the number
called is busy. However, even if this
option is active, it is always possible to
interrupt the call keeping key
ò13-
fig. 1pressed.
“Unknown” function
This function enables or disables
(NO/YES) telephone number identifi-
cation by the receiver, when the user
makes a call. The availability of this
function depends on the network ac-
cess provider.“Call forwarding” Function
The “Call forwarding” function en-
ables or disables (YES/NO) incoming
call forwarding.
Call forwarding is indicated by the
system with some messages informing
that forwarding is in progress and
whether the result is successful or not.
“Call forwarding no.” Function
Selecting this function, it is possible
to enter the “Call forwarding no.”, re-
ceiving the unanswered calls. This
function availability depends on the
network access provider. Use the tele-
phone keypad to enter the call for-
warding number.
“Enable call waiting” Function
This function is used to enable or dis-
able the call waiting message
(YES/NO). “OK”
Selecting and confirming “OK” with
the knob 22-fig. 1settings are stored;
press the “ESC” key 23-fig. 1to re-
turn to the previous screen and re-
store the previous setting.
“INFORMATION”
FUNCTION
The “Information” function allows
displaying the network access provider
name and/or acronym, the entered
SIM card telephone number (own tele-
phone number) as well as the system
telephone module electronic serial
number (IMEI = International Mobile
Equipment Identity).
Not all SIM cards allow you to dis-
play your telephone number; in this
case, to store the number it must be
entered in the telephone directory,
following the instructions given in the
corresponding paragraph.
Page 199 of 246
CONNECT Nav+
198
GENERAL
INFORMATION
The navigator integrated in the
CONNECT Nav+ allows you to reach
the chosen destination by visual and
voice instructions. Use of the naviga-
tion system is quick, convenient, safe
and above all very flexible because it al-
lows you to call up already pro-
grammed destinations or points of ref-
erence such as hotels, monuments,
public structures, fuel stations or Fi-
at Dealerships.
The vehicle position is determined
through the GPS system (Global Posi-
tioning System) installed on the vehicle.
The GPS system is fitted with an an-
tenna and a reception module inte-
grated in the telematic system. This sys-
tem configuration dynamically process-
es the satellite signals, those from the
right and left odometer, the reversing
signal and the information of the gyro-
scope integrated in the navigation com-
puter, integrating them with the cur-
rent position of the vehicle to obtain an
“estimated vehicle point”.The signals from the right and left
odometer make it possible to deter-
mine the movement of the vehicle, the
gyroscope signal identifies any turn-
ing and the reversing sensor distin-
guishes the direction of travel.
The Fiat navigation system helps the
driver while he/ahe drives by suggest-
ing vocally and graphically the opti-
mum routing to reach the preset des-
tination.IMPORTANT NOTES
– GPS reception is difficult under
trees, among tall buildings, in multi-lev-
el car parks, tunnels and everywhere
reception of the satellite antenna may
be hindered.
– The GPS system needs about 15
minutes for activation if the vehicle
battery is disconnected.
– The GPS system needs a few min-
utes to determine the new position of
the vehicle if it is turned off and the ve-
hicle is moved with the system off (e.g.:
by breakdown van).
– In the lack of satellite information,
the system uses information from the
gyroscope and from the special sen-
sors for temporary data analysis.
– The GPS satellite aerial must not
be covered with metal or damp ob-
jects.
N N
A A
V V
I I
G G
A A
T T
O O
R R
( (
N N
A A
V V
) )
The navigation system sug-
gestions do not exempt the
driver from full responsibility due to
his driving behaviour and to com-
pliance with road and other traffic
regulations. The responsibility for
road safety always and in any case
lies with the vehicle driver.
WARNING
Page 200 of 246
CONNECT Nav+
199
The instantaneous vehicle position is
identified in the CD-ROM and shown
on the display together with the topo-
graphic characteristics of the area
memorised on the CD-ROM. Access
to data on the CD-ROM requires a
few moments waiting for the map dis-
plays.
The system constantly compares da-
ta from the speed sensor, from the re-
verse gear sensor, from the GPS an-
tenna and the gyroscope to automat-
ically compensate changes in temper-
ature, pressure or any other occur-
rence that may lead to a false position
detection in any way.
IMPORTANT NOTES
– Accurate self-adjustment of the
navigation system requires approx.
1-10 km of travel the first time and
when tyres are changed.– Continuous lack of grip at the
wheels (for example skidding on ice),
makes the system temporarily detect
an incorrect position.
The navigation system is completely
managed by the telematic system,
therefore the only operations that may
be required are replacement of the
CD-ROM to set the map of another
area or an updated map.
Access to the navigation main func-
tions is gained by short push on
“NAV” key 20-fig. 1after turning on. Long push on “NAV” key 20-fig. 1
engages the navigation system Mute
function, which will therefore no
longer provide voice instructions.
When the Mute function is on, the dis-
play shows “Nav Mute”. To turn the
Mute function off press again the
“NAV” key 20-fig. 1at length.
Each time you start the engine and
select the navigation function, the dis-
play will show a page with the cautions
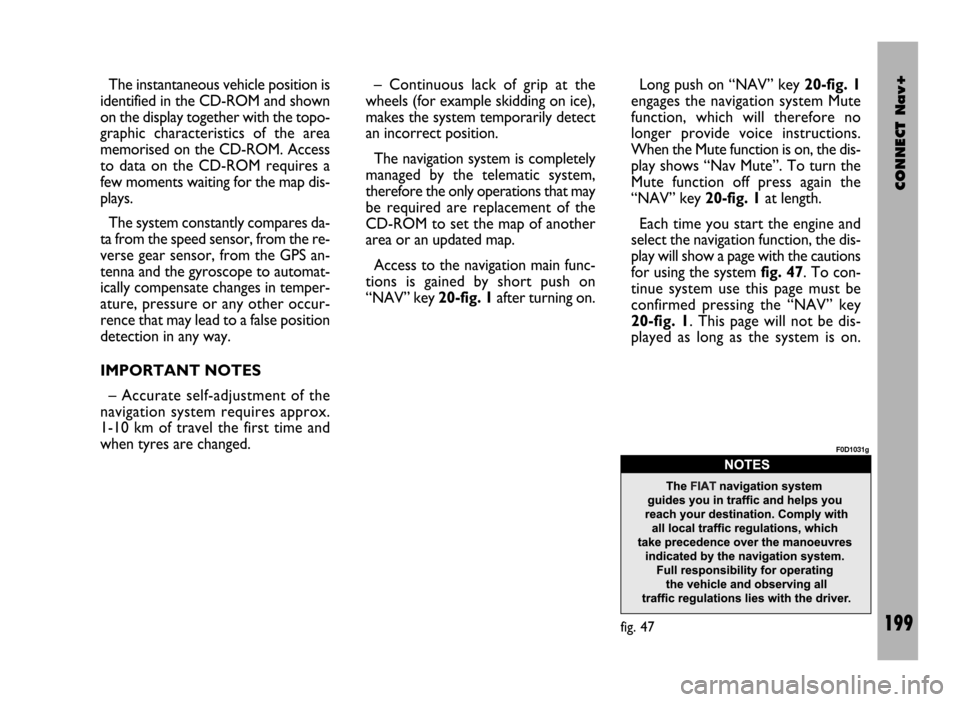
for using the system fig. 47. To con-
tinue system use this page must be
confirmed pressing the “NAV” key
20-fig. 1. This page will not be dis-
played as long as the system is on.
fig. 47
F0D1031g