FIAT DUCATO 244 2005 3.G Repair Manual
Manufacturer: FIAT, Model Year: 2005, Model line: DUCATO 244, Model: FIAT DUCATO 244 2005 3.GPages: 258, PDF Size: 4.05 MB
Page 61 of 258
60GETTING TO KNOW YOUR VEHICLE
– a control unit connected to the
heater/ventilation unit for automatic
operation;
– an electronic control unit to check
and adjusted the integrated heater
burner;
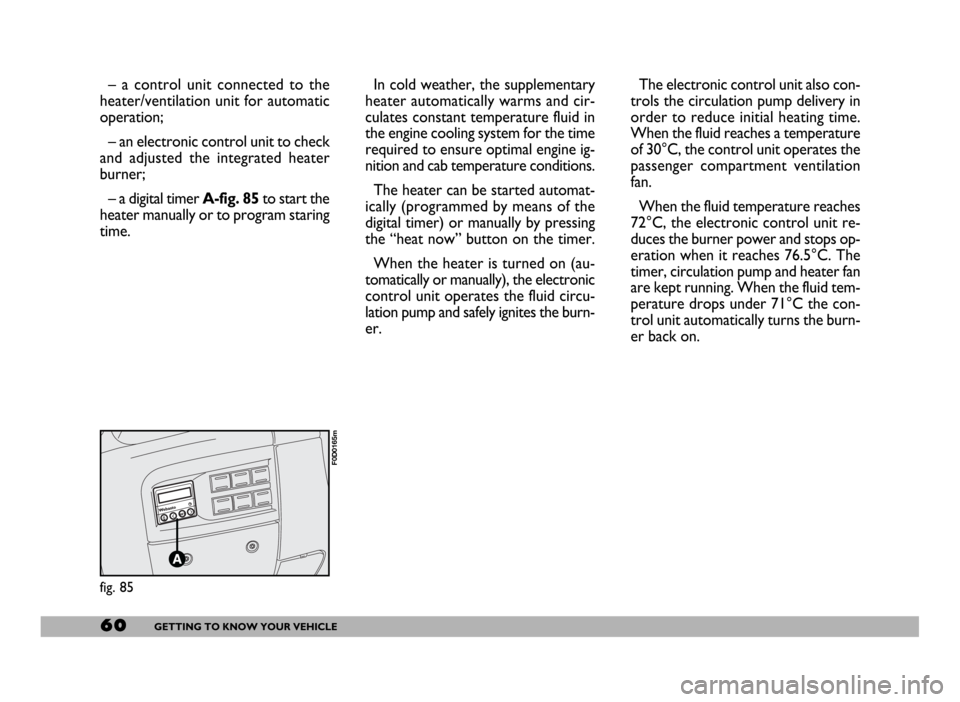
– a digital timer A-fig. 85to start the
heater manually or to program staring
time.In cold weather, the supplementary
heater automatically warms and cir-
culates constant temperature fluid in
the engine cooling system for the time
required to ensure optimal engine ig-
nition and cab temperature conditions.
The heater can be started automat-
ically (programmed by means of the
digital timer) or manually by pressing
the “heat now” button on the timer.
When the heater is turned on (au-
tomatically or manually), the electronic
control unit operates the fluid circu-
lation pump and safely ignites the burn-
er.The electronic control unit also con-
trols the circulation pump delivery in
order to reduce initial heating time.
When the fluid reaches a temperature
of 30°C, the control unit operates the
passenger compartment ventilation
fan.
When the fluid temperature reaches
72°C, the electronic control unit re-
duces the burner power and stops op-
eration when it reaches 76.5°C. The
timer, circulation pump and heater fan
are kept running. When the fluid tem-
perature drops under 71°C the con-
trol unit automatically turns the burn-
er back on.
fig. 85
F0D0165m
Page 62 of 258
61GETTING TO KNOW YOUR VEHICLE
IMPORTANTThe heater is
equipped with a thermal switch which
cuts off the heater in the event of
overheating caused by low or leaking
coolant. In this case, press the pro-
gram selection button to start the
heater again after repairing the cool-
ing system fault and/or topping up the
fluid.
The heater can turn itself off after en-
gine ignition or if the flame goes out.
In this case, turn the heater off man-
ually and attempt to turn it back on
again. If you cannot turn the heater on,
contact a Fiat Dealership.Turning the heater on
Before turning the heater on check
that:
– the heating/ventilation unit knob is
turned to “warm air”;
– the heating/ventilation fan speed
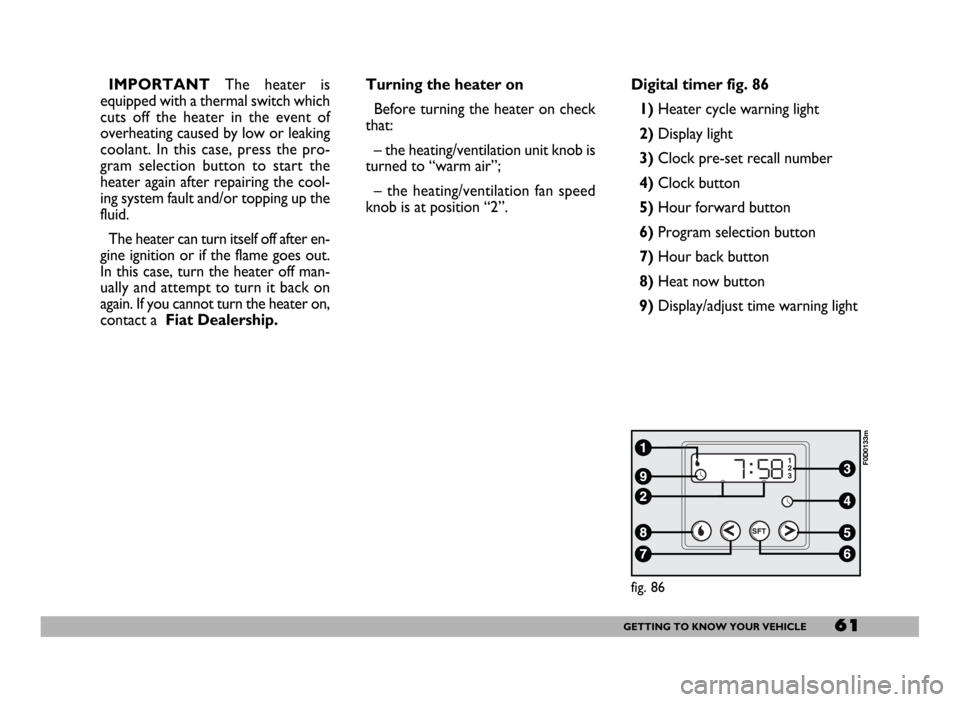
knob is at position “2”.Digital timer fig. 86
1) Heater cycle warning light
2)Display light
3)Clock pre-set recall number
4)Clock button
5)Hour forward button
6)Program selection button
7)Hour back button
8) Heat now button
9) Display/adjust time warning light
fig. 86
F0D0133m
Page 63 of 258
62GETTING TO KNOW YOUR VEHICLE
fig. 87
F0D0132m
fig. 88
F0D0134m
fig. 89
F0D0136m
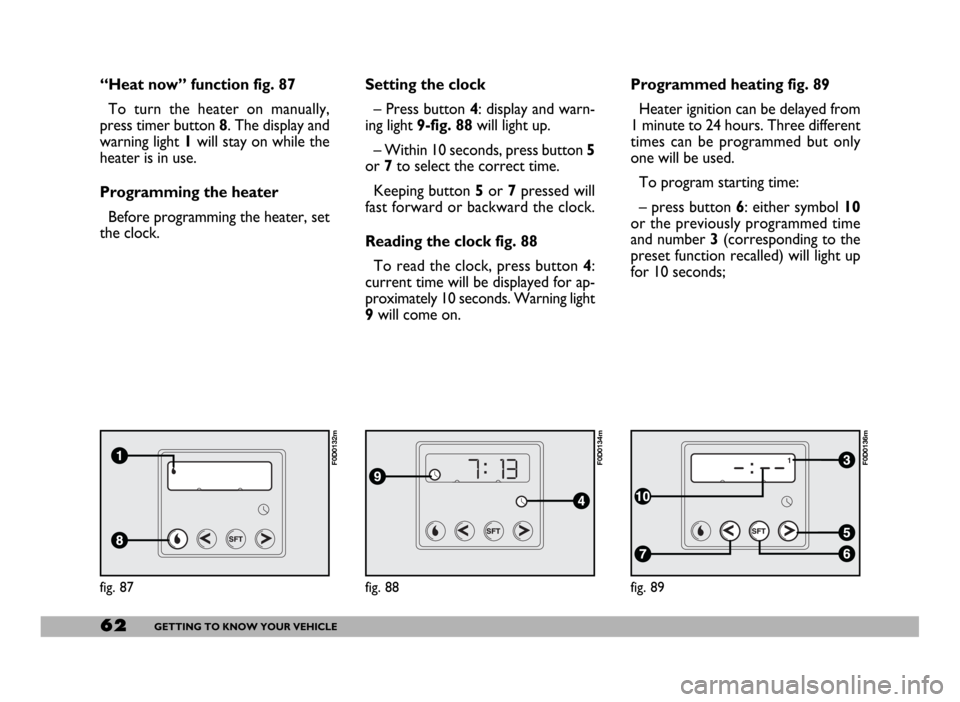
“Heat now” function fig. 87
To turn the heater on manually,
press timer button 8. The display and
warning light 1will stay on while the
heater is in use.
Programming the heater
Before programming the heater, set
the clock.Setting the clock
– Press button 4: display and warn-
ing light 9-fig. 88will light up.
– Within 10 seconds, press button 5
or 7to select the correct time.
Keeping button 5or 7pressed will
fast forward or backward the clock.
Reading the clock fig. 88
To read the clock, press button 4:
current time will be displayed for ap-
proximately 10 seconds. Warning light
9will come on.Programmed heating fig. 89
Heater ignition can be delayed from
1 minute to 24 hours. Three different
times can be programmed but only
one will be used.
To program starting time:
– press button 6: either symbol 10
or the previously programmed time
and number 3 (corresponding to the
preset function recalled) will light up
for 10 seconds;
Page 64 of 258
63GETTING TO KNOW YOUR VEHICLE
IMPORTANTTo recall other pre-
set times, press button 6within 10
seconds.
– press button 5or 7to select the
starting time required within 10 sec-
onds.
IMPORTANTStarting time disap-
pears and the number 3(correspond-
ing to the selected preset time) ap-
pears on the display to confirm the
starting time has been entered.
Deleting a programmed
starting time fig. 89
To delete the programmed starting
time, press button 6briefly: the dis-
play light will go off and number 3cor-
responding to the selected preset
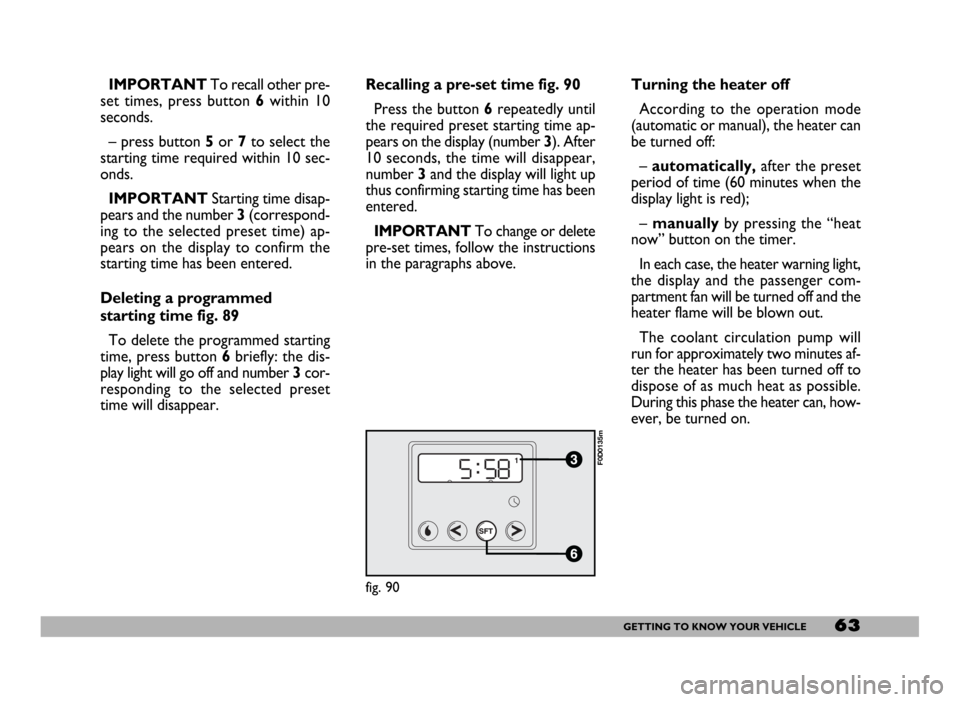
time will disappear.Recalling a pre-set time fig. 90
Press the button 6repeatedly until
the required preset starting time ap-
pears on the display (number 3). After
10 seconds, the time will disappear,
number 3and the display will light up
thus confirming starting time has been
entered.
IMPORTANTTo change or delete
pre-set times, follow the instructions
in the paragraphs above.Turning the heater off
According to the operation mode
(automatic or manual), the heater can
be turned off:
–automatically,after the preset
period of time (60 minutes when the
display light is red);
– manuallyby pressing the “heat
now” button on the timer.
In each case, the heater warning light,
the display and the passenger com-
partment fan will be turned off and the
heater flame will be blown out.
The coolant circulation pump will
run for approximately two minutes af-
ter the heater has been turned off to
dispose of as much heat as possible.
During this phase the heater can, how-
ever, be turned on.
fig. 90
F0D0135m
Page 65 of 258
64GETTING TO KNOW YOUR VEHICLE
– Always remember to turn the
heater off when refuelling or standing
in service stations to avoid fires and
explosions.
– Do not park the vehicle over in-
flammable material such as paper, dry
grass or leaves: fire risk!
– The temperature near the heater
must never exceed 120°C (e.g. during
painting operations in a workshop
oven). Higher temperatures could
damage the electronic control unit
components.
– When the engine is off, the heater
runs off the battery: it is consequently
important to run the engine for a cer-
tain period of time in order to restore
the battery charge.– Follow the prescriptions in “Vehi-
cle maintenance” section at paragraph
“Engine coolant level” to check the
coolant level. The coolant in the cir-
cuit must contain at least 10% an-
tifreeze fluid.
– Maintenance and repairs must al-
ways be carried out by a Fiat Deal-
ershipand only genuine spare parts
must be used.
MAINTENANCE
Have the heater checked at a Fiat
Dealership periodically (always be-
fore winter). This will ensure safe and
cheap running and long appliance life.
The heater burns fuel in the
same way as the engine,
though, of course, to a lesser degree
and therefore to avoid intoxication
and suffocation, never use the sup-
plementary heater in closed areas,
garages or workshops not equipped
with specific exhaust evacuation
devices even for short periods of
time.
WARNING
Page 66 of 258
65GETTING TO KNOW YOUR VEHICLE
STEERING COLUMN
STALKS
LEFT-HAND STALK
The left-hand stalk operates most of
the external lights.
The external lights can only be
switched on when the ignition key is
at MAR. The instrument panel and
the heating/ventilation (or climate con-
trol system) controls and the cigar
lighter ring will come on with the ex-
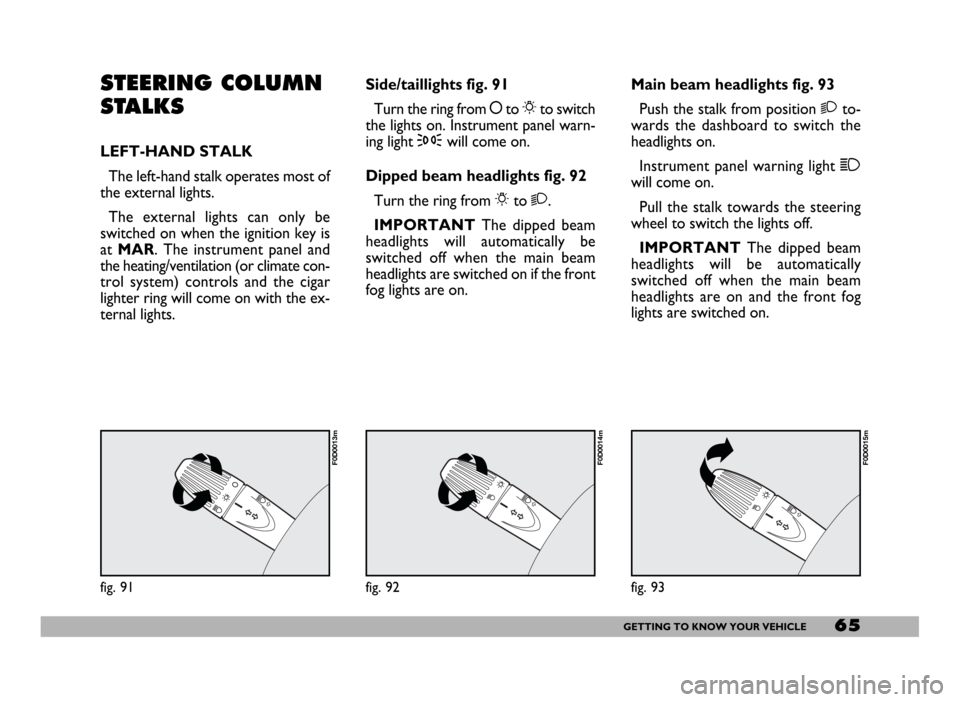
ternal lights.Side/taillights fig. 91
Turn the ring from åto 6to switch
the lights on. Instrument panel warn-
ing light 3will come on.
Dipped beam headlights fig. 92
Turn the ring from 6to 2.
IMPORTANTThe dipped beam
headlights will automatically be
switched off when the main beam
headlights are switched on if the front
fog lights are on.Main beam headlights fig. 93
Push the stalk from position 2to-
wards the dashboard to switch the
headlights on.
Instrument panel warning light 1
will come on.
Pull the stalk towards the steering
wheel to switch the lights off.
IMPORTANTThe dipped beam
headlights will be automatically
switched off when the main beam
headlights are on and the front fog
lights are switched on.
fig. 91
F0D0013m
fig. 92
F0D0014m
fig. 93
F0D0015m
Page 67 of 258
66GETTING TO KNOW YOUR VEHICLE
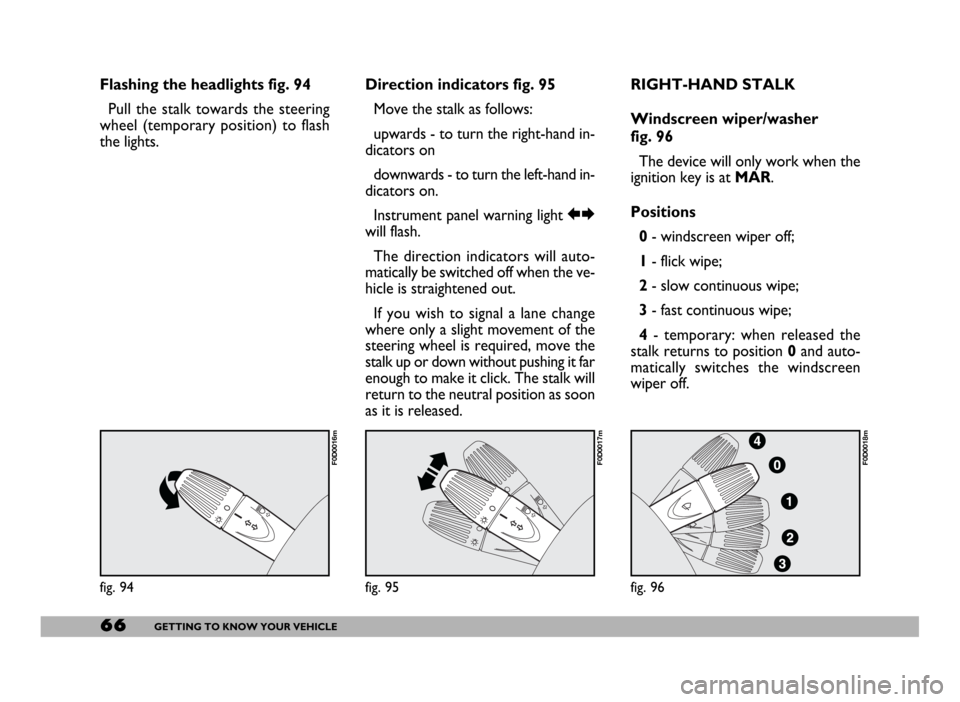
Flashing the headlights fig. 94
Pull the stalk towards the steering
wheel (temporary position) to flash
the lights.Direction indicators fig. 95
Move the stalk as follows:
upwards - to turn the right-hand in-
dicators on
downwards - to turn the left-hand in-
dicators on.
Instrument panel warning light RE
will flash.
The direction indicators will auto-
matically be switched off when the ve-
hicle is straightened out.
If you wish to signal a lane change
where only a slight movement of the
steering wheel is required, move the
stalk up or down without pushing it far
enough to make it click. The stalk will
return to the neutral position as soon
as it is released.RIGHT-HAND STALK
Windscreen wiper/washer
fig. 96
The device will only work when the
ignition key is at MAR.
Positions
0- windscreen wiper off;
1- flick wipe;
2- slow continuous wipe;
3- fast continuous wipe;
4- temporary: when released the
stalk returns to position 0and auto-
matically switches the windscreen
wiper off.
fig. 94
F0D0016m
fig. 95
F0D0017m
fig. 96
F0D0018m
Page 68 of 258
67GETTING TO KNOW YOUR VEHICLE
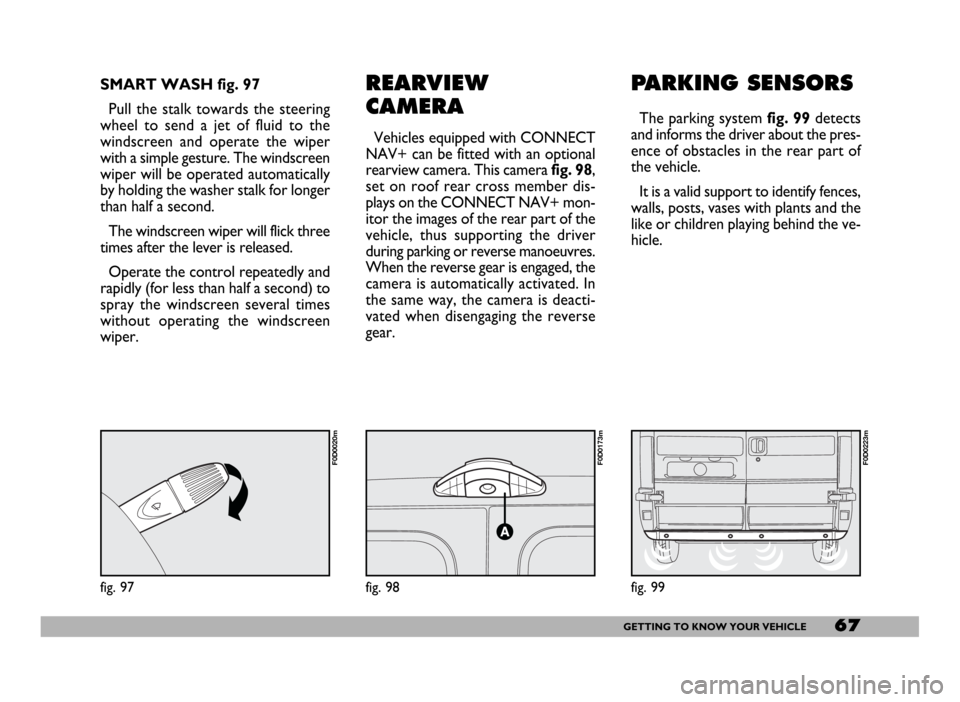
REARVIEW
CAMERA
Vehicles equipped with CONNECT
NAV+ can be fitted with an optional
rearview camera. This camerafig. 98,
set on roof rear cross member dis-
plays on the CONNECT NAV+ mon-
itor the images of the rear part of the
vehicle, thus supporting the driver
during parking or reverse manoeuvres.
When the reverse gear is engaged, the
camera is automatically activated. In
the same way, the camera is deacti-
vated when disengaging the reverse
gear.
PARKING SENSORS
The parking system fig. 99detects
and informs the driver about the pres-
ence of obstacles in the rear part of
the vehicle.
It is a valid support to identify fences,
walls, posts, vases with plants and the
like or children playing behind the ve-
hicle.
fig. 98
F0D0173m
SMART WASH fig. 97
Pull the stalk towards the steering
wheel to send a jet of fluid to the
windscreen and operate the wiper
with a simple gesture. The windscreen
wiper will be operated automatically
by holding the washer stalk for longer
than half a second.
The windscreen wiper will flick three
times after the lever is released.
Operate the control repeatedly and
rapidly (for less than half a second) to
spray the windscreen several times
without operating the windscreen
wiper.
fig. 97
F0D0020m
fig. 99
F0D0223m
Page 69 of 258
68GETTING TO KNOW YOUR VEHICLE
IMPORTANTThe cruise control
can be engaged only with speeds high-
er than 40 km/h.
The device is automatically discon-
nected in one of the following cases:
– pressing the brake pedal;
– pressing the clutch pedal;
– inadvertently moving the automat-
ic gearbox selector to N. A special horn warns any people near
the vehicle that the driver is manoeu-
vring it.
Through four sensors located in the
bumper, the system detects the dis-
tance between the vehicle and possi-
ble obstacles; the driver is warned by
an intermittent acoustic signal with in-
creasing frequency, which is automat-
ically activated when the reverse gear
is engaged.CRUISE CONTROL
GENERAL FEATURES
The cruise control, with electronic
control, allows driving the vehicle at
a desired speed, without pressing the
accelerator pedal. This allows reduc-
ing the driving fatigue on motorways,
especially during long journeys, be-
cause the memorised speed is auto-
matically maintained.
Never set gear selector to
N (vehicles fitted with au-
tomatic gearbox) when the vehicle
is moving.
WARNING
The Cruise Control must be
activated only when the
traffic and the path allow keeping,
for a distance long enough, a con-
stant speed in complete safety.
WARNING
Page 70 of 258
69GETTING TO KNOW YOUR VEHICLE
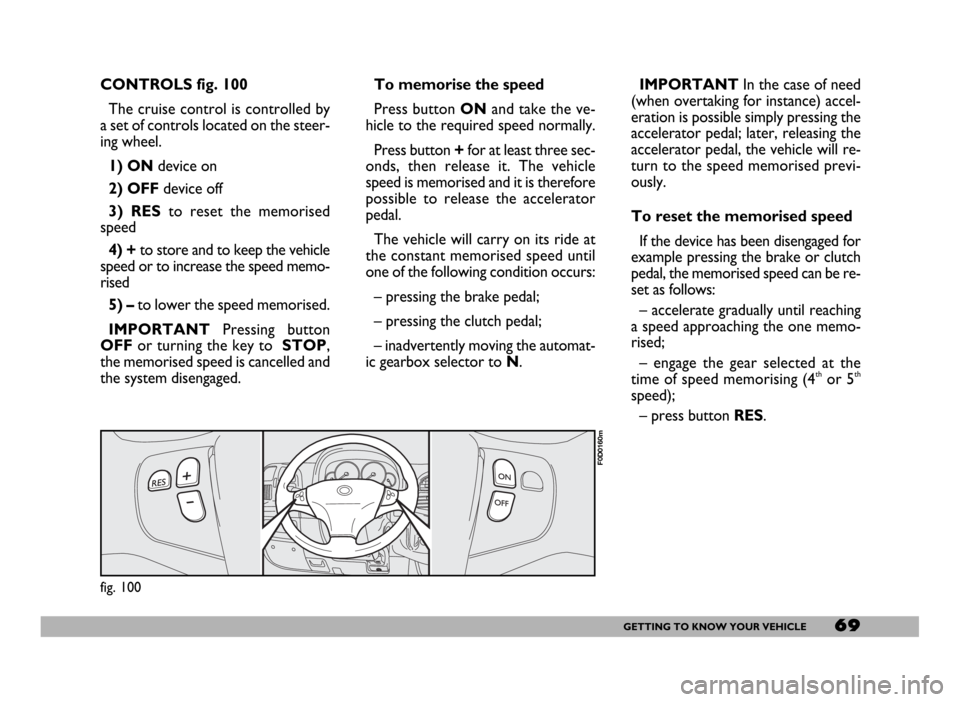
CONTROLS fig. 100
The cruise control is controlled by
a set of controls located on the steer-
ing wheel.
1) ONdevice on
2) OFFdevice off
3) RESto reset the memorised
speed
4) +to store and to keep the vehicle
speed or to increase the speed memo-
rised
5) – to lower the speed memorised.
IMPORTANTPressing button
OFFor turning the key to STOP,
the memorised speed is cancelled and
the system disengaged.IMPORTANTIn the case of need
(when overtaking for instance) accel-
eration is possible simply pressing the
accelerator pedal; later, releasing the
accelerator pedal, the vehicle will re-
turn to the speed memorised previ-
ously.
To reset the memorised speed
If the device has been disengaged for
example pressing the brake or clutch
pedal, the memorised speed can be re-
set as follows:
– accelerate gradually until reaching
a speed approaching the one memo-
rised;
– engage the gear selected at the
time of speed memorising (4
thor 5th
speed);
– press button RES. To memorise the speed
Press button ONand take the ve-
hicle to the required speed normally.
Press button +for at least three sec-
onds, then release it. The vehicle
speed is memorised and it is therefore
possible to release the accelerator
pedal.
The vehicle will carry on its ride at
the constant memorised speed until
one of the following condition occurs:
– pressing the brake pedal;
– pressing the clutch pedal;
– inadvertently moving the automat-
ic gearbox selector to N.
fig. 100
F0D0160m