FIAT UNO 1983 Service Service Manual
Manufacturer: FIAT, Model Year: 1983, Model line: UNO, Model: FIAT UNO 1983Pages: 303, PDF Size: 10.36 MB
Page 41 of 303
2The big-end bearing shells can be renewed
without having to remove the cylinder head if
the caps are unbolted and the
piston/connecting rod pushed gently about
one inch up the bore (the crankpin being at its
lowest point). If these shells are worn,
however, the main bearing shells will almost
certainly be worn as well. In this case, the
engine should be removed for complete
overhaul including crankshaft removal.
3To remove the piston/connecting rods,
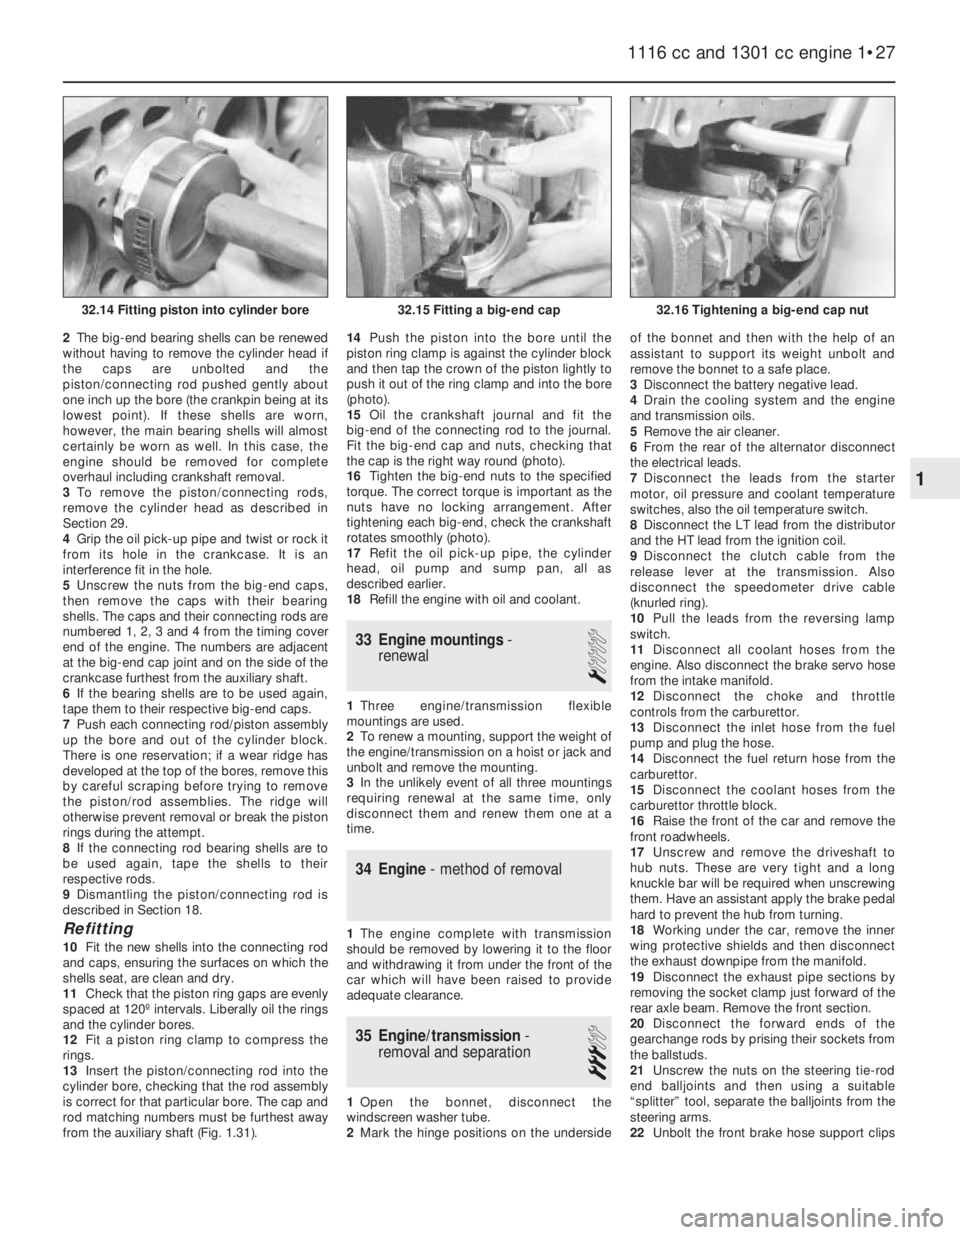
remove the cylinder head as described in
Section 29.
4Grip the oil pick-up pipe and twist or rock it
from its hole in the crankcase. It is an
interference fit in the hole.
5Unscrew the nuts from the big-end caps,
then remove the caps with their bearing
shells. The caps and their connecting rods are
numbered 1, 2, 3 and 4 from the timing cover
end of the engine. The numbers are adjacent
at the big-end cap joint and on the side of the
crankcase furthest from the auxiliary shaft.
6If the bearing shells are to be used again,
tape them to their respective big-end caps.
7Push each connecting rod/piston assembly
up the bore and out of the cylinder block.
There is one reservation; if a wear ridge has
developed at the top of the bores, remove this
by careful scraping before trying to remove
the piston/rod assemblies. The ridge will
otherwise prevent removal or break the piston
rings during the attempt.
8If the connecting rod bearing shells are to
be used again, tape the shells to their
respective rods.
9Dismantling the piston/connecting rod is
described in Section 18.
Refitting
10Fit the new shells into the connecting rod
and caps, ensuring the surfaces on which the
shells seat, are clean and dry.
11Check that the piston ring gaps are evenly
spaced at 120º intervals. Liberally oil the rings
and the cylinder bores.
12Fit a piston ring clamp to compress the
rings.
13Insert the piston/connecting rod into the
cylinder bore, checking that the rod assembly
is correct for that particular bore. The cap and
rod matching numbers must be furthest away
from the auxiliary shaft (Fig. 1.31).14Push the piston into the bore until the
piston ring clamp is against the cylinder block
and then tap the crown of the piston lightly to
push it out of the ring clamp and into the bore
(photo).
15Oil the crankshaft journal and fit the
big-end of the connecting rod to the journal.
Fit the big-end cap and nuts, checking that
the cap is the right way round (photo).
16Tighten the big-end nuts to the specified
torque. The correct torque is important as the
nuts have no locking arrangement. After
tightening each big-end, check the crankshaft
rotates smoothly (photo).
17Refit the oil pick-up pipe, the cylinder
head, oil pump and sump pan, all as
described earlier.
18Refill the engine with oil and coolant.
33 Engine mountings-
renewal
1
1Three engine/transmission flexible
mountings are used.
2To renew a mounting, support the weight of
the engine/transmission on a hoist or jack and
unbolt and remove the mounting.
3In the unlikely event of all three mountings
requiring renewal at the same time, only
disconnect them and renew them one at a
time.
34 Engine- method of removal
1The engine complete with transmission
should be removed by lowering it to the floor
and withdrawing it from under the front of the
car which will have been raised to provide
adequate clearance.
35 Engine/transmission-
removal and separation
3
1Open the bonnet, disconnect the
windscreen washer tube.
2Mark the hinge positions on the undersideof the bonnet and then with the help of an
assistant to support its weight unbolt and
remove the bonnet to a safe place.
3Disconnect the battery negative lead.
4Drain the cooling system and the engine
and transmission oils.
5Remove the air cleaner.
6From the rear of the alternator disconnect
the electrical leads.
7Disconnect the leads from the starter
motor, oil pressure and coolant temperature
switches, also the oil temperature switch.
8Disconnect the LT lead from the distributor
and the HT lead from the ignition coil.
9Disconnect the clutch cable from the
release lever at the transmission. Also
disconnect the speedometer drive cable
(knurled ring).
10Pull the leads from the reversing lamp
switch.
11Disconnect all coolant hoses from the
engine. Also disconnect the brake servo hose
from the intake manifold.
12Disconnect the choke and throttle
controls from the carburettor.
13Disconnect the inlet hose from the fuel
pump and plug the hose.
14Disconnect the fuel return hose from the
carburettor.
15Disconnect the coolant hoses from the
carburettor throttle block.
16Raise the front of the car and remove the
front roadwheels.
17Unscrew and remove the driveshaft to
hub nuts. These are very tight and a long
knuckle bar will be required when unscrewing
them. Have an assistant apply the brake pedal
hard to prevent the hub from turning.
18Working under the car, remove the inner
wing protective shields and then disconnect
the exhaust downpipe from the manifold.
19Disconnect the exhaust pipe sections by
removing the socket clamp just forward of the
rear axle beam. Remove the front section.
20Disconnect the forward ends of the
gearchange rods by prising their sockets from
the ballstuds.
21Unscrew the nuts on the steering tie-rod
end balljoints and then using a suitable
“splitter” tool, separate the balljoints from the
steering arms.
22Unbolt the front brake hose support clips
1116 cc and 1301 cc engine 1•27
32.16 Tightening a big-end cap nut32.15 Fitting a big-end cap32.14 Fitting piston into cylinder bore
1
Page 42 of 303
from the suspension struts and then remove
the bolts which secure the hub carriers to the
U-clamps at the base of the suspension
struts.
23Pull the tops of the hub carriers down and
then outwards and push the driveshafts from
them.
24Unbolt the driveshaft inboard boot
retainers and then remove the driveshafts
from the transmission.
25Support the engine on a hoist or use a
trolley jack under the engine/transmission.
Remove the bottom mounting and then the
upper left and right-hand ones.
26Lower the power unit to the floor by
pushing it to the left-hand side to clear the
right-hand mounting bracket and then swivel
the gearbox towards the rear of the car.
Withdraw the engine/transmission from under
the car.
27External dirt and grease should now be
removed using paraffin and a stiff brush or a
water-soluble solvent.
28Unbolt and remove the engine mounting
brackets and the starter motor.
29Unbolt and remove the cover plate with
the gearchange ball stud strut from the lower
front face of the flywheel housing.
30With the engine resting squarely on its
sump pan, unscrew the flywheel housing
connecting bolts, noting the location of any
lifting lugs and hose and wiring clips.
31Support the weight of the transmission
and withdraw it in a straight line from the
engine.
36 Engine- dismantling (general)
Refer to Section 14, Part 2.
37 Engine ancillary components
- removal
Refer to Section 15, Part 2 and also remove
the intake manifold.
38 Engine-
complete dismantling
3
1Have the engine resting squarely and
supported securely on the work surface.
2Unbolt and remove the timing belt cover.
3Grip the now exposed timing belt with the
hands and loosen the camshaft sprocket.
4Release the timing belt tensioner pulley
centre bolt, then slip the belt from the pulley
and sprockets to remove it. Note which way
round the belt is fitted, usually so that the
lettering on the belt can be read from the
crankshaft pulley end of the engine.
5Remove the camshaft sprocket.6Unbolt and remove the camshaft timing belt
cover backing plate.
7Unbolt and remove the camshaft carrier
cover.
8Unbolt the camshaft carrier and lift it off
very slowly, at the same time pushing the cam
followers and their shims down with the
fingers securely onto their respective valve
springs. It is easy to remove the camshaft
carrier too quickly with some of the cam
followers stuck in it and as the carrier is lifted
away, the cam followers will fall out. If this
happens, the valve clearances will be upset as
the cam followers and shims cannot be
returned, with any certainty, to their original
positions. Keep the cam followers and shims
in their originally fitted order.
9Unscrew and remove the cylinder head
bolts and nuts, grip the manifold, rock the
head and remove the complete cylinder
head/manifold/carburettor assembly. Remove
and discard the cylinder head gasket.
10Unbolt the coolant pump from the side of
the cylinder block and remove it complete
with coolant distribution pipe. Remove the
crankcase breather.
11Remove the distributor/oil pump
driveshaft. This is simply carried out by
inserting a finger into the hole vacated by the
distributor and wedging it in the hole in the
end of the driveshaft. Lift the shaft out of
mesh with the auxiliary shaft. Where the
distributor is driven by the camshaft, a cover
plate retains the oil pump driveshaft in
position.
12Unbolt and remove the sprocket from the
end of the auxiliary shaft. The sprocket is held
to the shaft with a Woodruff key.
13Unbolt the auxiliary shaft retainer and
withdraw the shaft from the crankcase.
14Unscrew and remove the crankshaft
pulley nut. This is very tight and the flywheel
starter ring gear will have to be jammed with a
cold chisel or a suitably bent piece of steel to
prevent the crankshaft rotating.
15Withdraw the crankshaft sprocket, which
is located by the Woodruff key.
16Unbolt the front engine mounting bracket
from the cylinder block, together with the
timing belt cover screw anchor bush. Unbolt
and remove the timing belt tensioner pulley.
17Unscrew the flywheel securing bolts. Thestarter ring gear will again have to be jammed
to prevent the crankshaft rotating as the bolts
are unscrewed. Mark the flywheel position in
relation to the crankshaft mounting flange,
then remove it.
18Unbolt the front and rear crankshaft oil
seal retainer bolts from the crankcase and the
sump. Remove the oil seal retainers.
19Turn the engine on its side, extract the
remaining sump bolts and remove the sump.
If it is stuck, try tapping it gently with a
soft-faced hammer. If this fails, cut all round
the sump-to-gasket flange with a sharp knife.
Do not try prising with a large screwdriver; this
will only distort the sump mating flange.
20With the sump removed, unbolt and
remove the oil pump.
21Grip the oil pick-up pipe and twist or rock
it from its hole in the crankcase. It is an
interference fit in the hole.
22Remove the piston/connecting rods as
described in Section 32.
23Before unbolting the main bearing caps,
note that they are marked with one, two, three
or four notches. No. 5 main bearing cap is
unmarked. Note that the notches are nearer
the auxiliary shaft side.
24Unbolt and remove the main bearing
caps. If the bearing shells are to be used
again, tape them to their respective caps. The
bearing shell at the centre position is plain,
the others have a lubricating groove.
25Carefully, lift the crankshaft from the
crankcase, noting the thrust washers at No. 5
main bearing. These control the crankshaft
endfloat.
39 Cylinder head- dismantling
and decarbonising
4
1The operations are similar to those
described for the ohv engine in Section 17 in
respect of decarbonising and valve grinding.
2To remove a valve, use a valve spring
compressor to compress the first valve and
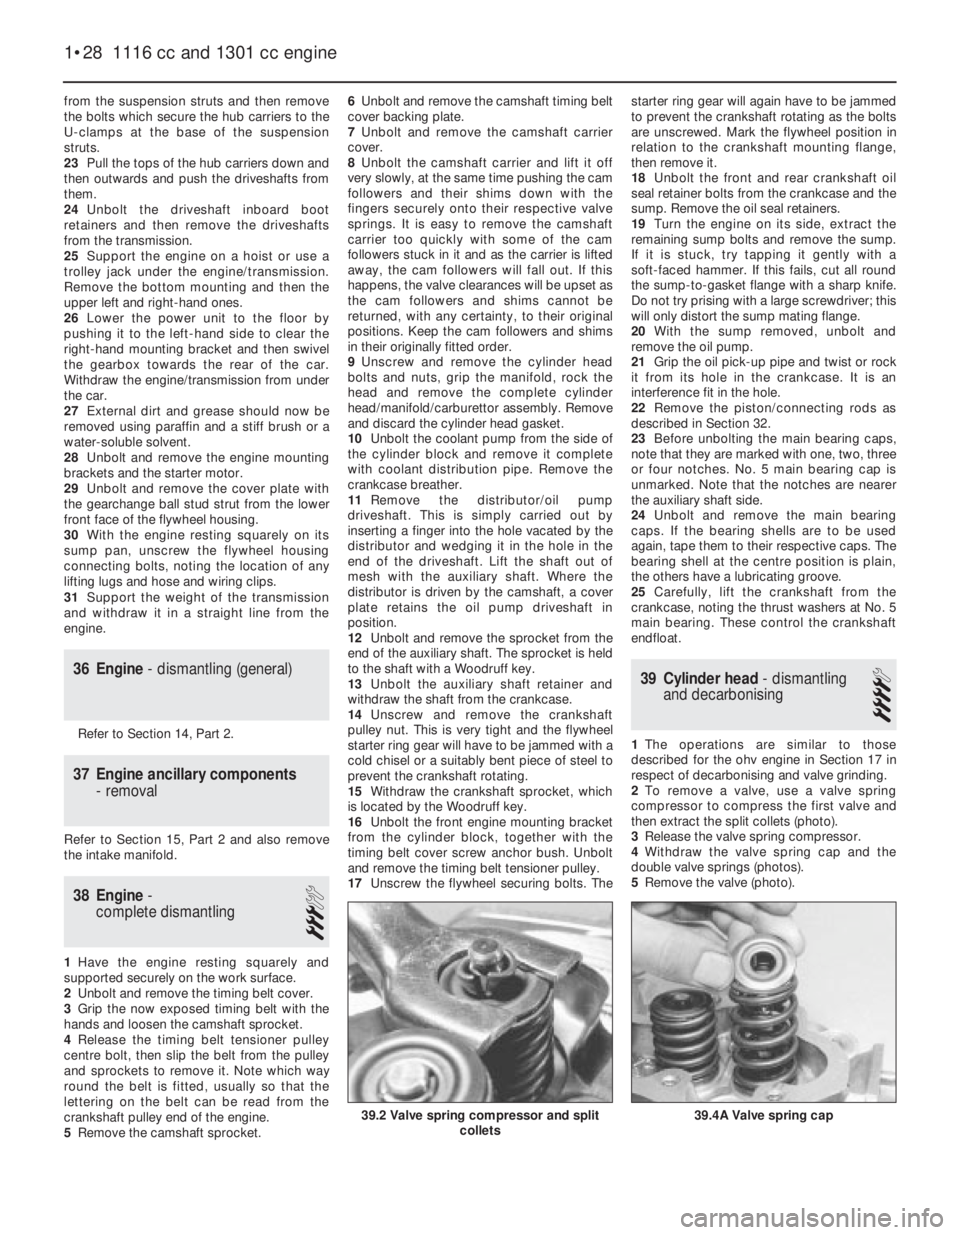
then extract the split collets (photo).
3Release the valve spring compressor.
4Withdraw the valve spring cap and the
double valve springs (photos).
5Remove the valve (photo).
1•28 1116 cc and 1301 cc engine
39.4A Valve spring cap39.2 Valve spring compressor and split
collets
Page 43 of 303
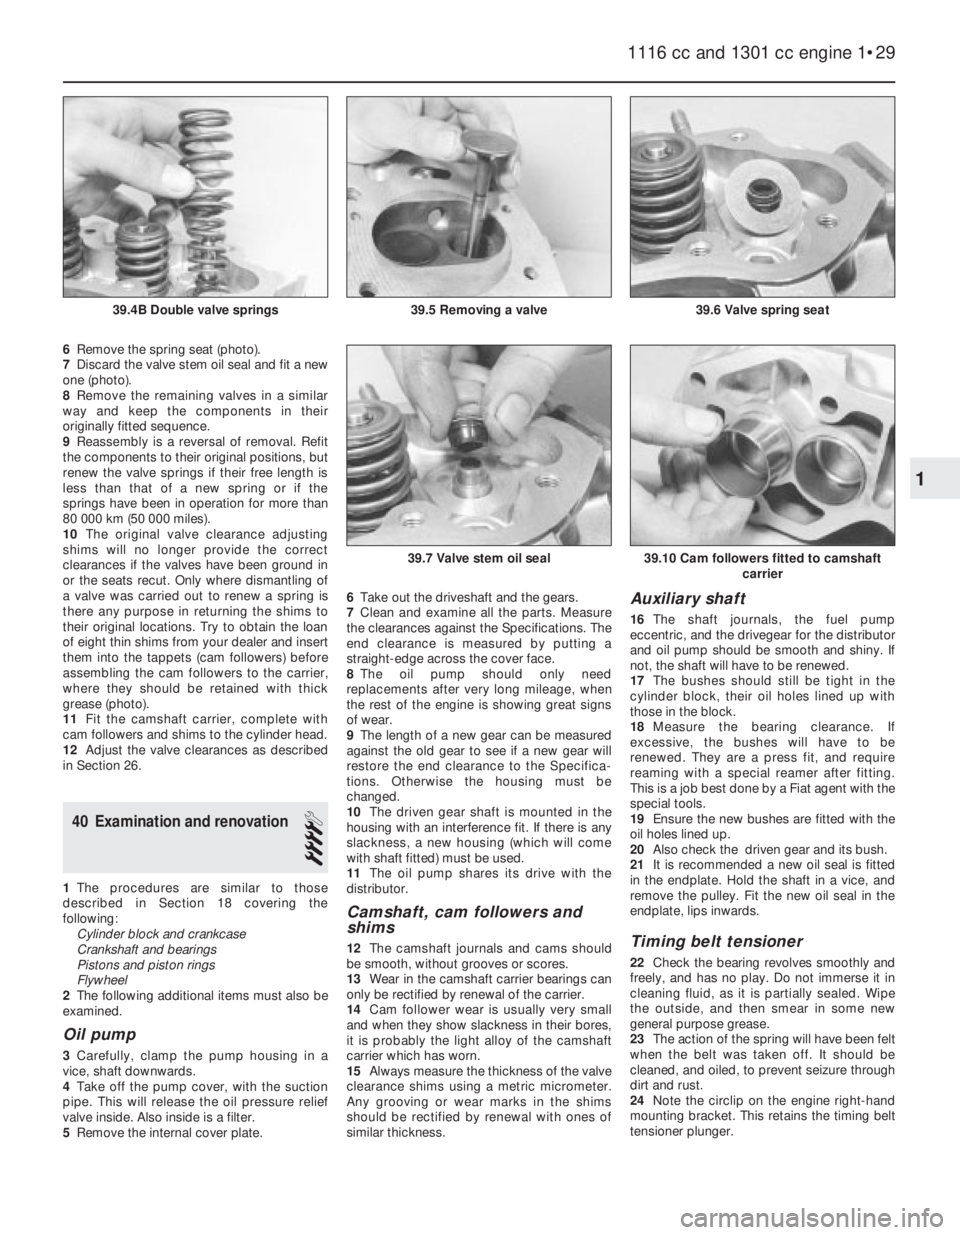
6Remove the spring seat (photo).
7Discard the valve stem oil seal and fit a new
one (photo).
8Remove the remaining valves in a similar
way and keep the components in their
originally fitted sequence.
9Reassembly is a reversal of removal. Refit
the components to their original positions, but
renew the valve springs if their free length is
less than that of a new spring or if the
springs have been in operation for more than
80 000 km (50 000 miles).
10The original valve clearance adjusting
shims will no longer provide the correct
clearances if the valves have been ground in
or the seats recut. Only where dismantling of
a valve was carried out to renew a spring is
there any purpose in returning the shims to
their original locations. Try to obtain the loan
of eight thin shims from your dealer and insert
them into the tappets (cam followers) before
assembling the cam followers to the carrier,
where they should be retained with thick
grease (photo).
11Fit the camshaft carrier, complete with
cam followers and shims to the cylinder head.
12Adjust the valve clearances as described
in Section 26.
40 Examination and renovation
4
1The procedures are similar to those
described in Section 18 covering the
following:
Cylinder block and crankcase
Crankshaft and bearings
Pistons and piston rings
Flywheel
2The following additional items must also be
examined.
Oil pump
3Carefully, clamp the pump housing in a
vice, shaft downwards.
4Take off the pump cover, with the suction
pipe. This will release the oil pressure relief
valve inside. Also inside is a filter.
5Remove the internal cover plate.6Take out the driveshaft and the gears.
7Clean and examine all the parts. Measure
the clearances against the Specifications. The
end clearance is measured by putting a
straight-edge across the cover face.
8The oil pump should only need
replacements after very long mileage, when
the rest of the engine is showing great signs
of wear.
9The length of a new gear can be measured
against the old gear to see if a new gear will
restore the end clearance to the Specifica-
tions. Otherwise the housing must be
changed.
10The driven gear shaft is mounted in the
housing with an interference fit. If there is any
slackness, a new housing (which will come
with shaft fitted) must be used.
11The oil pump shares its drive with the
distributor.
Camshaft, cam followers and
shims
12The camshaft journals and cams should
be smooth, without grooves or scores.
13Wear in the camshaft carrier bearings can
only be rectified by renewal of the carrier.
14Cam follower wear is usually very small
and when they show slackness in their bores,
it is probably the light alloy of the camshaft
carrier which has worn.
15Always measure the thickness of the valve
clearance shims using a metric micrometer.
Any grooving or wear marks in the shims
should be rectified by renewal with ones of
similar thickness.
Auxiliary shaft
16The shaft journals, the fuel pump
eccentric, and the drivegear for the distributor
and oil pump should be smooth and shiny. If
not, the shaft will have to be renewed.
17The bushes should still be tight in the
cylinder block, their oil holes lined up with
those in the block.
18Measure the bearing clearance. If
excessive, the bushes will have to be
renewed. They are a press fit, and require
reaming with a special reamer after fitting.
This is a job best done by a Fiat agent with the
special tools.
19Ensure the new bushes are fitted with the
oil holes lined up.
20Also check the driven gear and its bush.
21It is recommended a new oil seal is fitted
in the endplate. Hold the shaft in a vice, and
remove the pulley. Fit the new oil seal in the
endplate, lips inwards.
Timing belt tensioner
22Check the bearing revolves smoothly and
freely, and has no play. Do not immerse it in
cleaning fluid, as it is partially sealed. Wipe
the outside, and then smear in some new
general purpose grease.
23The action of the spring will have been felt
when the belt was taken off. It should be
cleaned, and oiled, to prevent seizure through
dirt and rust.
24Note the circlip on the engine right-hand
mounting bracket. This retains the timing belt
tensioner plunger.
1116 cc and 1301 cc engine 1•29
39.6 Valve spring seat39.5 Removing a valve39.4B Double valve springs
39.10 Cam followers fitted to camshaft
carrier39.7 Valve stem oil seal
1
Page 44 of 303
42.9 Fitting the auxiliary shaft
41 Engine- reassembly (general)
Refer to Section 19, Part 2.
42 Engine-
complete reassembly
4
Crankshaft and main bearings
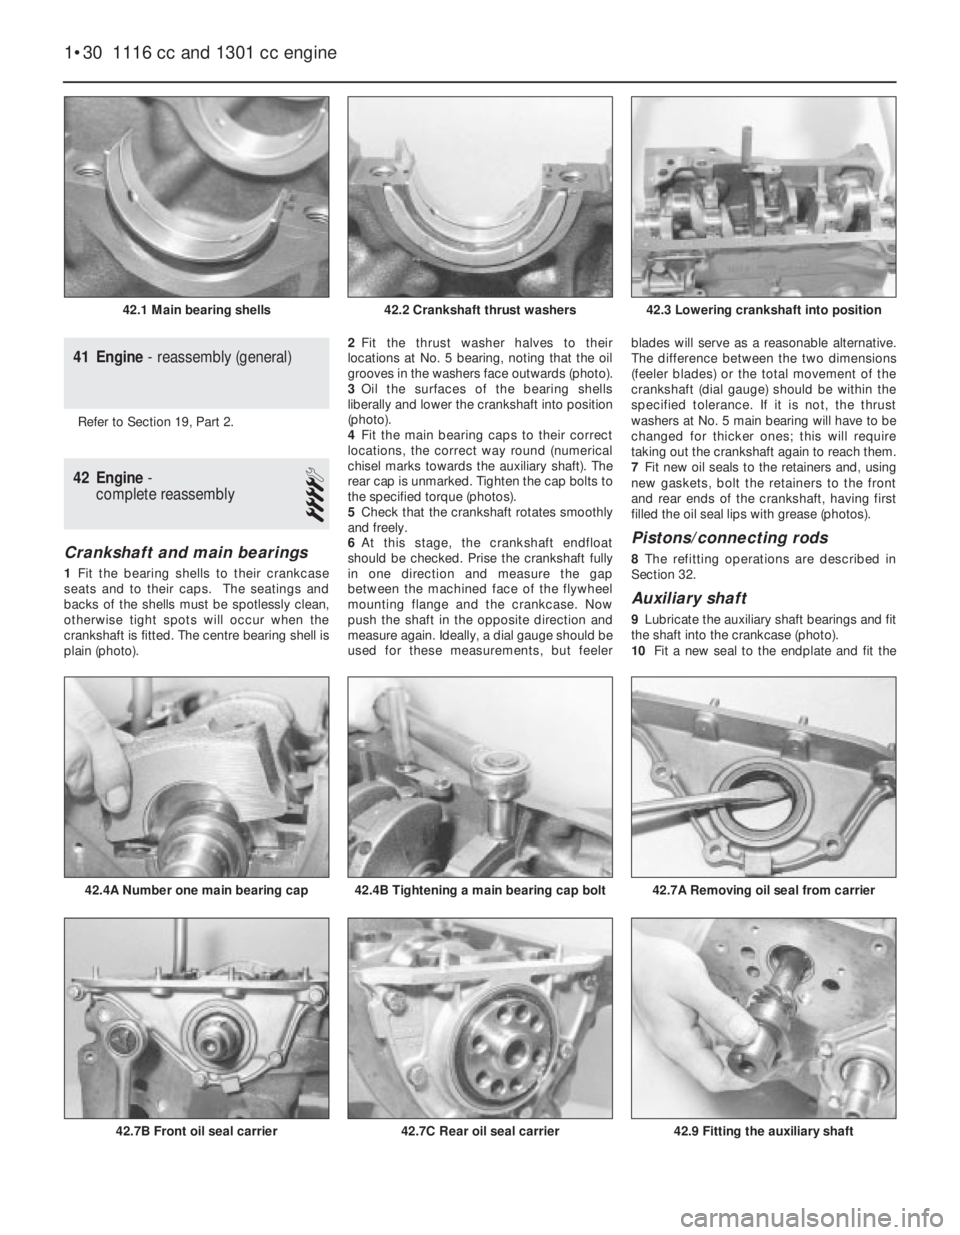
1Fit the bearing shells to their crankcase
seats and to their caps. The seatings and
backs of the shells must be spotlessly clean,
otherwise tight spots will occur when the
crankshaft is fitted. The centre bearing shell is
plain (photo).2Fit the thrust washer halves to their
locations at No. 5 bearing, noting that the oil
grooves in the washers face outwards (photo).
3Oil the surfaces of the bearing shells
liberally and lower the crankshaft into position
(photo).
4Fit the main bearing caps to their correct
locations, the correct way round (numerical
chisel marks towards the auxiliary shaft). The
rear cap is unmarked. Tighten the cap bolts to
the specified torque (photos).
5Check that the crankshaft rotates smoothly
and freely.
6At this stage, the crankshaft endfloat
should be checked. Prise the crankshaft fully
in one direction and measure the gap
between the machined face of the flywheel
mounting flange and the crankcase. Now
push the shaft in the opposite direction and
measure again. Ideally, a dial gauge should be
used for these measurements, but feelerblades will serve as a reasonable alternative.
The difference between the two dimensions
(feeler blades) or the total movement of the
crankshaft (dial gauge) should be within the
specified tolerance. If it is not, the thrust
washers at No. 5 main bearing will have to be
changed for thicker ones; this will require
taking out the crankshaft again to reach them.
7Fit new oil seals to the retainers and, using
new gaskets, bolt the retainers to the front
and rear ends of the crankshaft, having first
filled the oil seal lips with grease (photos).
Pistons/connecting rods
8The refitting operations are described in
Section 32.
Auxiliary shaft
9Lubricate the auxiliary shaft bearings and fit
the shaft into the crankcase (photo).
10Fit a new seal to the endplate and fit the
1•30 1116 cc and 1301 cc engine
42.7C Rear oil seal carrier42.7B Front oil seal carrier
42.7A Removing oil seal from carrier42.4B Tightening a main bearing cap bolt42.4A Number one main bearing cap
42.3 Lowering crankshaft into position42.2 Crankshaft thrust washers42.1 Main bearing shells
Page 45 of 303
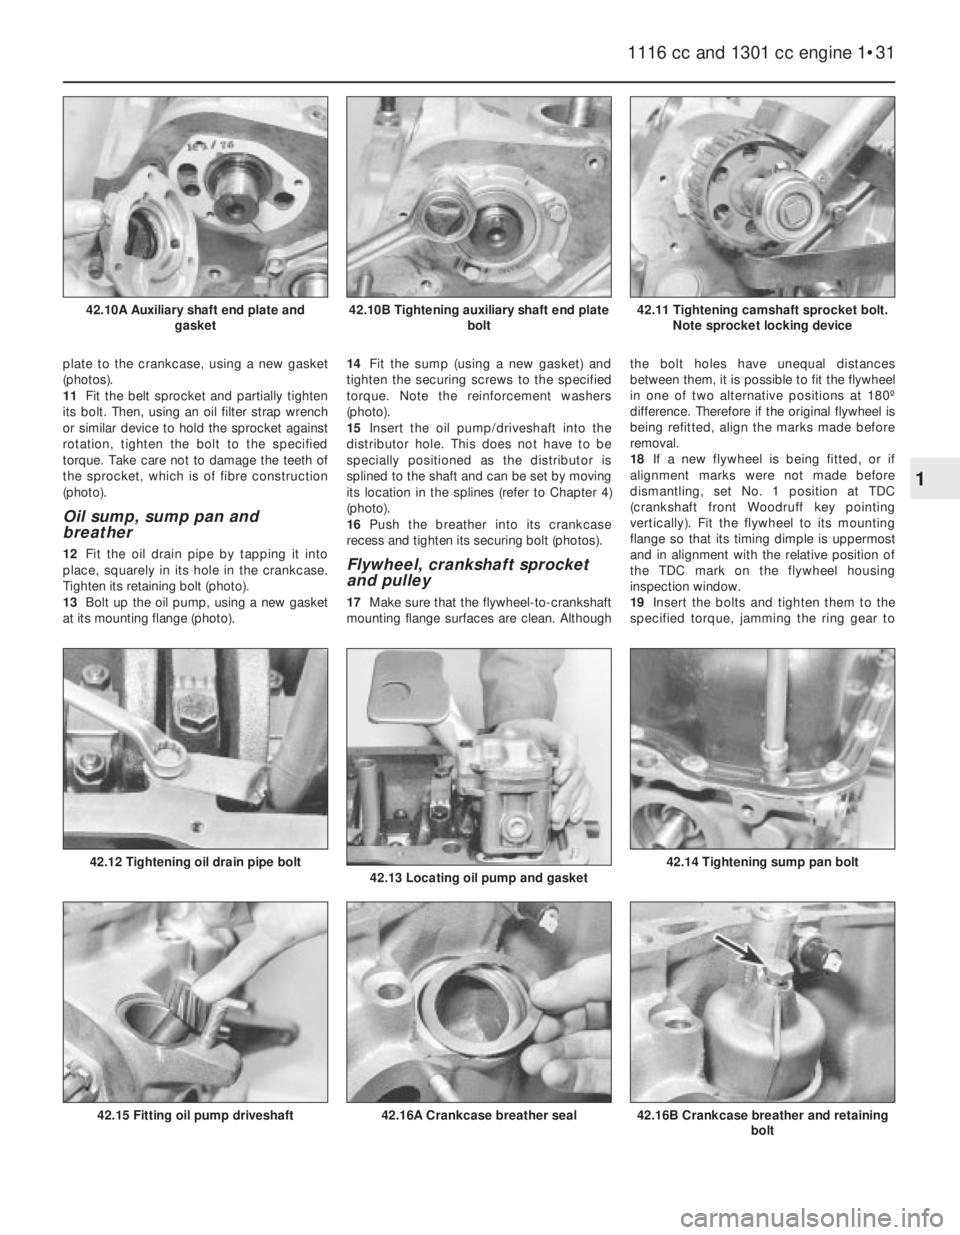
plate to the crankcase, using a new gasket
(photos).
11Fit the belt sprocket and partially tighten
its bolt. Then, using an oil filter strap wrench
or similar device to hold the sprocket against
rotation, tighten the bolt to the specified
torque. Take care not to damage the teeth of
the sprocket, which is of fibre construction
(photo).
Oil sump, sump pan and
breather
12Fit the oil drain pipe by tapping it into
place, squarely in its hole in the crankcase.
Tighten its retaining bolt (photo).
13Bolt up the oil pump, using a new gasket
at its mounting flange (photo).14Fit the sump (using a new gasket) and
tighten the securing screws to the specified
torque. Note the reinforcement washers
(photo).
15Insert the oil pump/driveshaft into the
distributor hole. This does not have to be
specially positioned as the distributor is
splined to the shaft and can be set by moving
its location in the splines (refer to Chapter 4)
(photo).
16Push the breather into its crankcase
recess and tighten its securing bolt (photos).Flywheel, crankshaft sprocket
and pulley
17Make sure that the flywheel-to-crankshaft
mounting flange surfaces are clean. Althoughthe bolt holes have unequal distances
between them, it is possible to fit the flywheel
in one of two alternative positions at 180º
difference. Therefore if the original flywheel is
being refitted, align the marks made before
removal.
18If a new flywheel is being fitted, or if
alignment marks were not made before
dismantling, set No. 1 position at TDC
(crankshaft front Woodruff key pointing
vertically). Fit the flywheel to its mounting
flange so that its timing dimple is uppermost
and in alignment with the relative position of
the TDC mark on the flywheel housing
inspection window.
19Insert the bolts and tighten them to the
specified torque, jamming the ring gear to
1116 cc and 1301 cc engine 1•31
42.11 Tightening camshaft sprocket bolt.
Note sprocket locking device42.10B Tightening auxiliary shaft end plate
bolt42.10A Auxiliary shaft end plate and
gasket
42.16B Crankcase breather and retaining
bolt42.16A Crankcase breather seal42.15 Fitting oil pump driveshaft
42.14 Tightening sump pan bolt42.13 Locating oil pump and gasket42.12 Tightening oil drain pipe bolt
1
Page 46 of 303
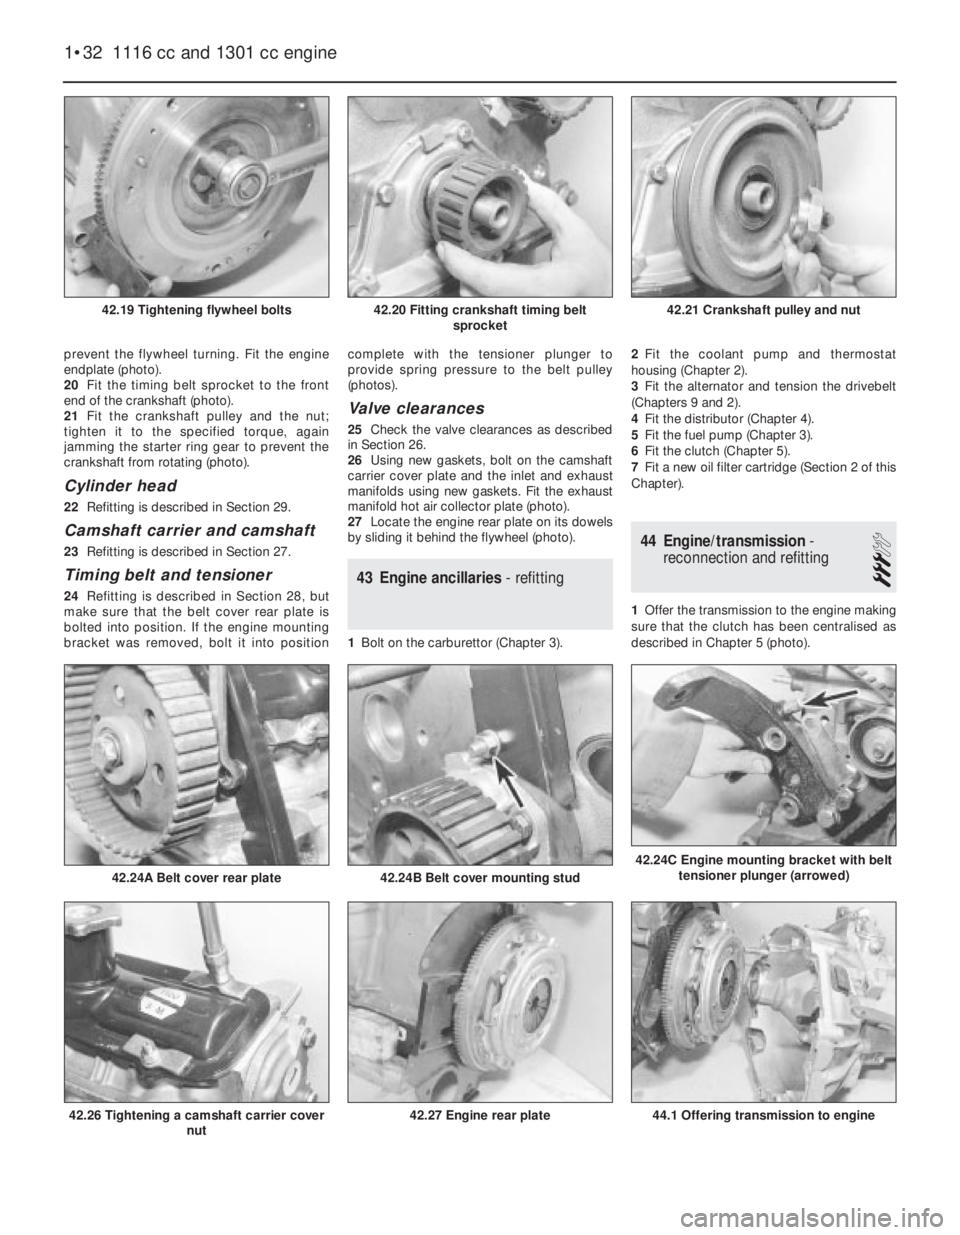
prevent the flywheel turning. Fit the engine
endplate (photo).
20Fit the timing belt sprocket to the front
end of the crankshaft (photo).
21Fit the crankshaft pulley and the nut;
tighten it to the specified torque, again
jamming the starter ring gear to prevent the
crankshaft from rotating (photo).
Cylinder head
22Refitting is described in Section 29.
Camshaft carrier and camshaft
23Refitting is described in Section 27.
Timing belt and tensioner
24Refitting is described in Section 28, but
make sure that the belt cover rear plate is
bolted into position. If the engine mounting
bracket was removed, bolt it into positioncomplete with the tensioner plunger to
provide spring pressure to the belt pulley
(photos).
Valve clearances
25Check the valve clearances as described
in Section 26.
26Using new gaskets, bolt on the camshaft
carrier cover plate and the inlet and exhaust
manifolds using new gaskets. Fit the exhaust
manifold hot air collector plate (photo).
27Locate the engine rear plate on its dowels
by sliding it behind the flywheel (photo).
43 Engine ancillaries- refitting
1Bolt on the carburettor (Chapter 3). 2Fit the coolant pump and thermostat
housing (Chapter 2).
3Fit the alternator and tension the drivebelt
(Chapters 9 and 2).
4Fit the distributor (Chapter 4).
5Fit the fuel pump (Chapter 3).
6Fit the clutch (Chapter 5).
7Fit a new oil filter cartridge (Section 2 of this
Chapter).
44 Engine/transmission-
reconnection and refitting
3
1Offer the transmission to the engine making
sure that the clutch has been centralised as
described in Chapter 5 (photo).
1•32 1116 cc and 1301 cc engine
44.1 Offering transmission to engine42.27 Engine rear plate42.26 Tightening a camshaft carrier cover
nut
42.24C Engine mounting bracket with belt
tensioner plunger (arrowed)
42.24B Belt cover mounting stud42.24A Belt cover rear plate
42.21 Crankshaft pulley and nut42.20 Fitting crankshaft timing belt
sprocket42.19 Tightening flywheel bolts
Page 47 of 303
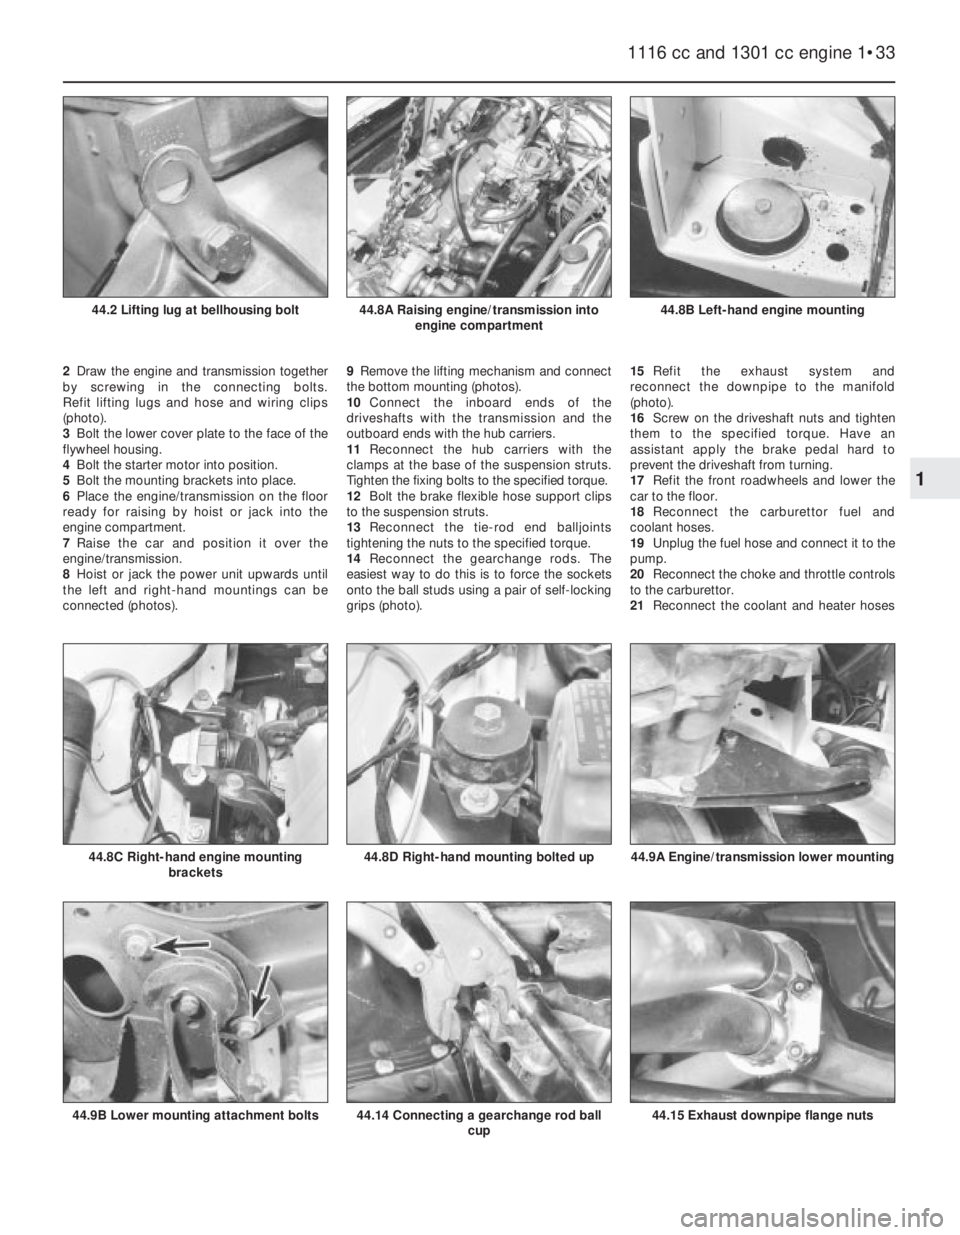
2Draw the engine and transmission together
by screwing in the connecting bolts.
Refit lifting lugs and hose and wiring clips
(photo).
3Bolt the lower cover plate to the face of the
flywheel housing.
4Bolt the starter motor into position.
5Bolt the mounting brackets into place.
6Place the engine/transmission on the floor
ready for raising by hoist or jack into the
engine compartment.
7Raise the car and position it over the
engine/transmission.
8Hoist or jack the power unit upwards until
the left and right-hand mountings can be
connected (photos).9Remove the lifting mechanism and connect
the bottom mounting (photos).
10Connect the inboard ends of the
driveshafts with the transmission and the
outboard ends with the hub carriers.
11Reconnect the hub carriers with the
clamps at the base of the suspension struts.
Tighten the fixing bolts to the specified torque.
12Bolt the brake flexible hose support clips
to the suspension struts.
13Reconnect the tie-rod end balljoints
tightening the nuts to the specified torque.
14Reconnect the gearchange rods. The
easiest way to do this is to force the sockets
onto the ball studs using a pair of self-locking
grips (photo).15Refit the exhaust system and
reconnect the downpipe to the manifold
(photo).
16Screw on the driveshaft nuts and tighten
them to the specified torque. Have an
assistant apply the brake pedal hard to
prevent the driveshaft from turning.
17Refit the front roadwheels and lower the
car to the floor.
18Reconnect the carburettor fuel and
coolant hoses.
19Unplug the fuel hose and connect it to the
pump.
20Reconnect the choke and throttle controls
to the carburettor.
21Reconnect the coolant and heater hoses
1116 cc and 1301 cc engine 1•33
44.8B Left-hand engine mounting44.8A Raising engine/transmission into
engine compartment44.2 Lifting lug at bellhousing bolt
44.15 Exhaust downpipe flange nuts44.14 Connecting a gearchange rod ball
cup44.9B Lower mounting attachment bolts
44.9A Engine/transmission lower mounting44.8D Right-hand mounting bolted up44.8C Right-hand engine mounting
brackets
1
Page 48 of 303
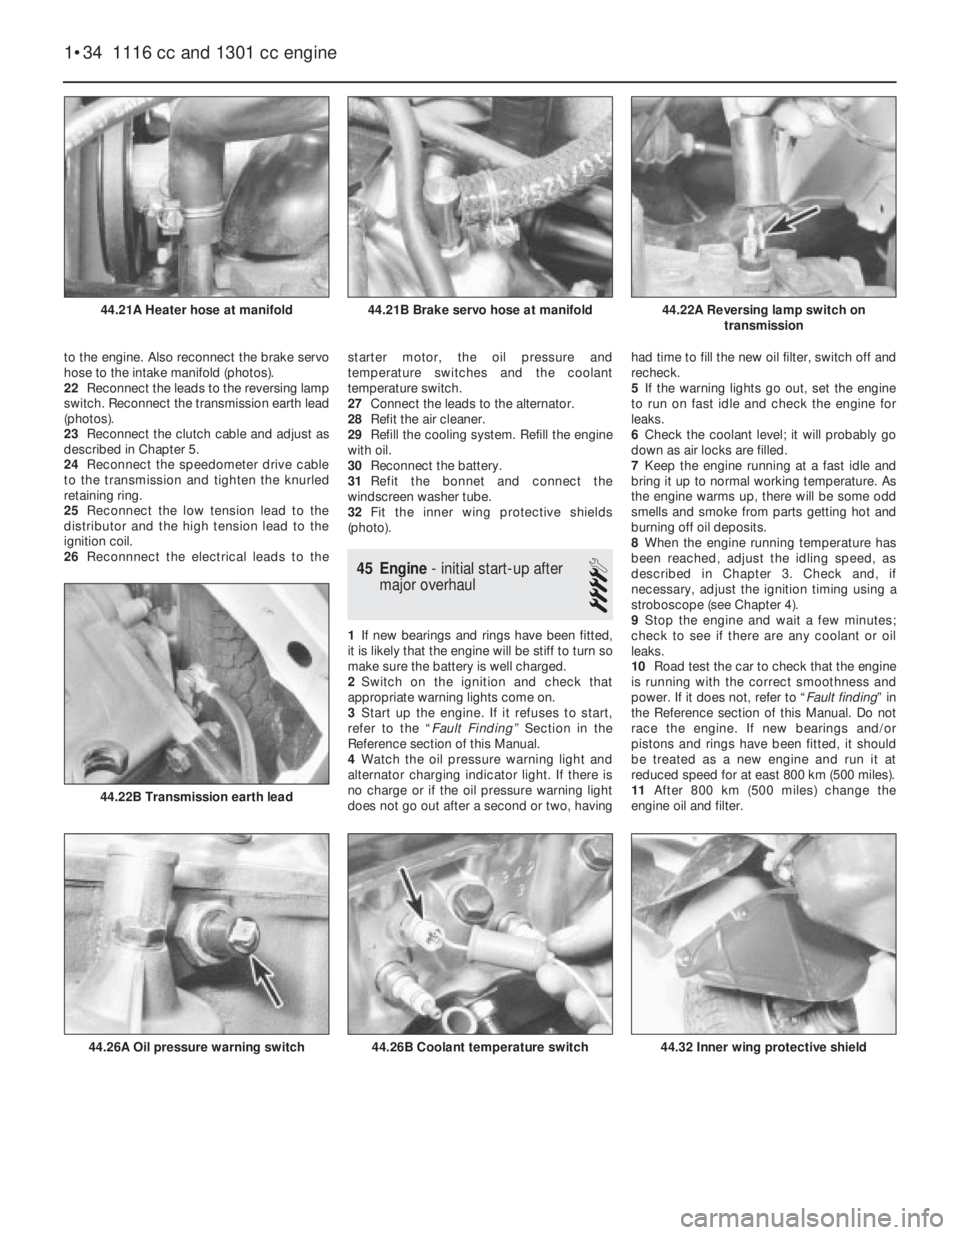
to the engine. Also reconnect the brake servo
hose to the intake manifold (photos).
22Reconnect the leads to the reversing lamp
switch. Reconnect the transmission earth lead
(photos).
23Reconnect the clutch cable and adjust as
described in Chapter 5.
24Reconnect the speedometer drive cable
to the transmission and tighten the knurled
retaining ring.
25Reconnect the low tension lead to the
distributor and the high tension lead to the
ignition coil.
26Reconnnect the electrical leads to thestarter motor, the oil pressure and
temperature switches and the coolant
temperature switch.
27Connect the leads to the alternator.
28Refit the air cleaner.
29Refill the cooling system. Refill the engine
with oil.
30Reconnect the battery.
31Refit the bonnet and connect the
windscreen washer tube.
32Fit the inner wing protective shields
(photo).
45 Engine- initial start-up after
major overhaul
4
1If new bearings and rings have been fitted,
it is likely that the engine will be stiff to turn so
make sure the battery is well charged.
2Switch on the ignition and check that
appropriate warning lights come on.
3Start up the engine. If it refuses to start,
refer to the “Fault Finding” Section in the
Reference section of this Manual.
4Watch the oil pressure warning light and
alternator charging indicator light. If there is
no charge or if the oil pressure warning light
does not go out after a second or two, havinghad time to fill the new oil filter, switch off and
recheck.
5If the warning lights go out, set the engine
to run on fast idle and check the engine for
leaks.
6Check the coolant level; it will probably go
down as air locks are filled.
7Keep the engine running at a fast idle and
bring it up to normal working temperature. As
the engine warms up, there will be some odd
smells and smoke from parts getting hot and
burning off oil deposits.
8When the engine running temperature has
been reached, adjust the idling speed, as
described in Chapter 3. Check and, if
necessary, adjust the ignition timing using a
stroboscope (see Chapter 4).
9Stop the engine and wait a few minutes;
check to see if there are any coolant or oil
leaks.
10Road test the car to check that the engine
is running with the correct smoothness and
power. If it does not, refer to “Fault finding” in
the Reference section of this Manual. Do not
race the engine. If new bearings and/or
pistons and rings have been fitted, it should
be treated as a new engine and run it at
reduced speed for at east 800 km (500 miles).
11After 800 km (500 miles) change the
engine oil and filter.
1•34 1116 cc and 1301 cc engine
44.32 Inner wing protective shield44.26B Coolant temperature switch44.26A Oil pressure warning switch
44.22B Transmission earth lead
44.22A Reversing lamp switch on
transmission44.21B Brake servo hose at manifold44.21A Heater hose at manifold
Page 49 of 303
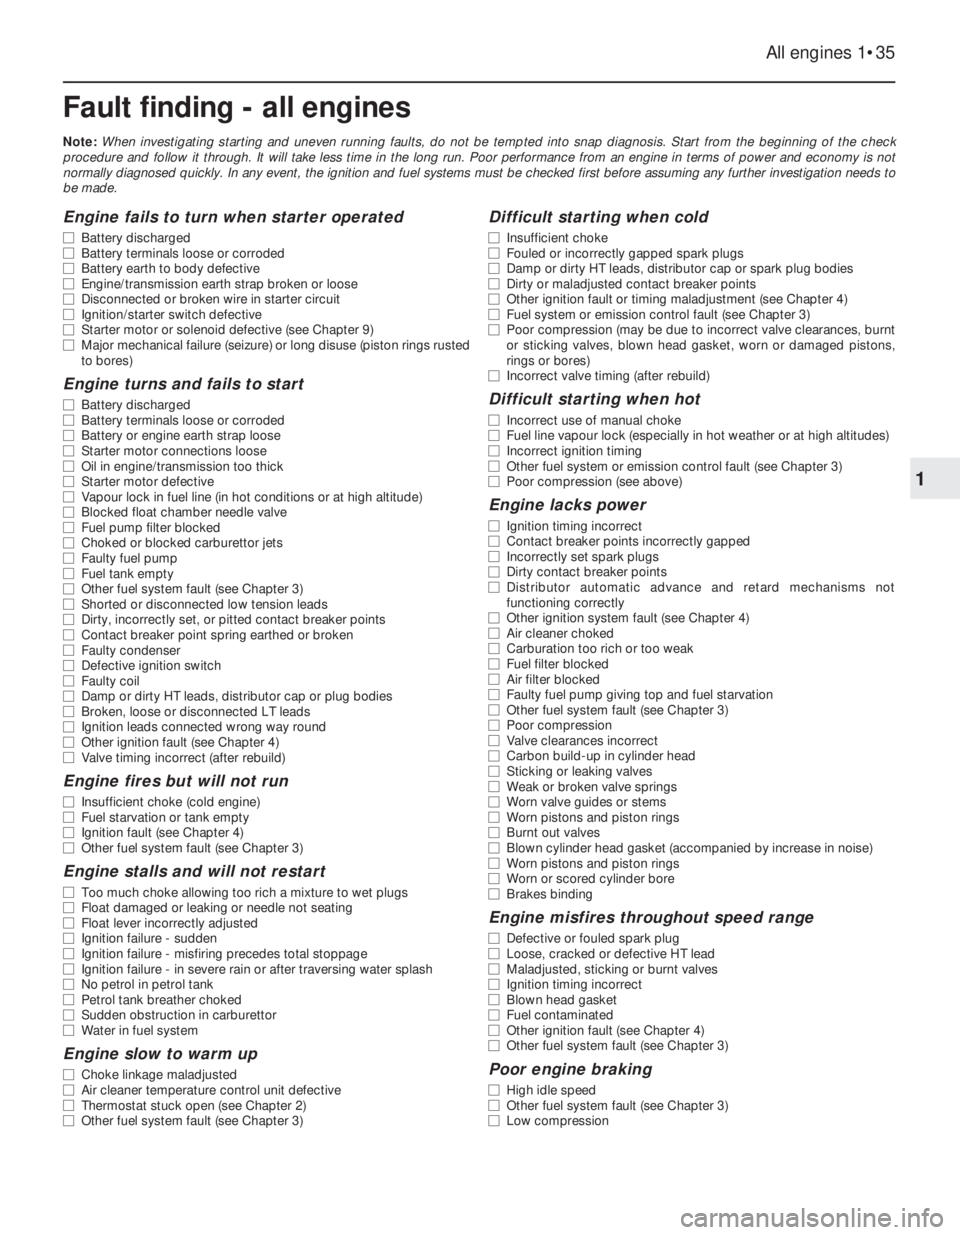
Fault finding - all engines
Note: When investigating starting and uneven running faults, do not be tempted into snap diagnosis. Start from the beginning of the check
procedure and follow it through. It will take less time in the long run. Poor performance from an engine in terms of power and economy is not
normally diagnosed quickly. In any event, the ignition and fuel systems must be checked first before assuming any further investigation needs to
be made.
All engines 1•35
1
Engine fails to turn when starter operated
m mBattery discharged
m mBattery terminals loose or corroded
m mBattery earth to body defective
m mEngine/transmission earth strap broken or loose
m mDisconnected or broken wire in starter circuit
m mIgnition/starter switch defective
m mStarter motor or solenoid defective (see Chapter 9)
m mMajor mechanical failure (seizure) or long disuse (piston rings rusted
to bores)
Engine turns and fails to start
m mBattery discharged
m mBattery terminals loose or corroded
m mBattery or engine earth strap loose
m mStarter motor connections loose
m mOil in engine/transmission too thick
m mStarter motor defective
m mVapour lock in fuel line (in hot conditions or at high altitude)
m mBlocked float chamber needle valve
m mFuel pump filter blocked
m mChoked or blocked carburettor jets
m mFaulty fuel pump
m mFuel tank empty
m mOther fuel system fault (see Chapter 3)
m mShorted or disconnected low tension leads
m mDirty, incorrectly set, or pitted contact breaker points
m mContact breaker point spring earthed or broken
m mFaulty condenser
m mDefective ignition switch
m mFaulty coil
m mDamp or dirty HT leads, distributor cap or plug bodies
m mBroken, loose or disconnected LT leads
m mIgnition leads connected wrong way round
m mOther ignition fault (see Chapter 4)
m mValve timing incorrect (after rebuild)
Engine fires but will not run
m
mInsufficient choke (cold engine)
m mFuel starvation or tank empty
m mIgnition fault (see Chapter 4)
m mOther fuel system fault (see Chapter 3)
Engine stalls and will not restart
m
mToo much choke allowing too rich a mixture to wet plugs
m mFloat damaged or leaking or needle not seating
m mFloat lever incorrectly adjusted
m mIgnition failure - sudden
m mIgnition failure - misfiring precedes total stoppage
m mIgnition failure - in severe rain or after traversing water splash
m mNo petrol in petrol tank
m mPetrol tank breather choked
m mSudden obstruction in carburettor
m mWater in fuel system
Engine slow to warm up
m
mChoke linkage maladjusted
m mAir cleaner temperature control unit defective
m mThermostat stuck open (see Chapter 2)
m mOther fuel system fault (see Chapter 3)
Difficult starting when cold
m
mInsufficient choke
m mFouled or incorrectly gapped spark plugs
m mDamp or dirty HT leads, distributor cap or spark plug bodies
m mDirty or maladjusted contact breaker points
m mOther ignition fault or timing maladjustment (see Chapter 4)
m mFuel system or emission control fault (see Chapter 3)
m mPoor compression (may be due to incorrect valve clearances, burnt
or sticking valves, blown head gasket, worn or damaged pistons,
rings or bores)
m mIncorrect valve timing (after rebuild)
Difficult starting when hot
m
mIncorrect use of manual choke
m mFuel line vapour lock (especially in hot weather or at high altitudes)
m mIncorrect ignition timing
m mOther fuel system or emission control fault (see Chapter 3)
m mPoor compression (see above)
Engine lacks power
m
mIgnition timing incorrect
m mContact breaker points incorrectly gapped
m mIncorrectly set spark plugs
m mDirty contact breaker points
m mDistributor automatic advance and retard mechanisms not
functioning correctly
m mOther ignition system fault (see Chapter 4)
m mAir cleaner choked
m mCarburation too rich or too weak
m mFuel filter blocked
m mAir filter blocked
m mFaulty fuel pump giving top and fuel starvation
m mOther fuel system fault (see Chapter 3)
m mPoor compression
m mValve clearances incorrect
m mCarbon build-up in cylinder head
m mSticking or leaking valves
m mWeak or broken valve springs
m mWorn valve guides or stems
m mWorn pistons and piston rings
m mBurnt out valves
m mBlown cylinder head gasket (accompanied by increase in noise)
m mWorn pistons and piston rings
m mWorn or scored cylinder bore
m mBrakes binding
Engine misfires throughout speed range
m
mDefective or fouled spark plug
m mLoose, cracked or defective HT lead
m mMaladjusted, sticking or burnt valves
m mIgnition timing incorrect
m mBlown head gasket
m mFuel contaminated
m mOther ignition fault (see Chapter 4)
m mOther fuel system fault (see Chapter 3)
Poor engine braking
m
mHigh idle speed
m mOther fuel system fault (see Chapter 3)
m mLow compression
Page 50 of 303
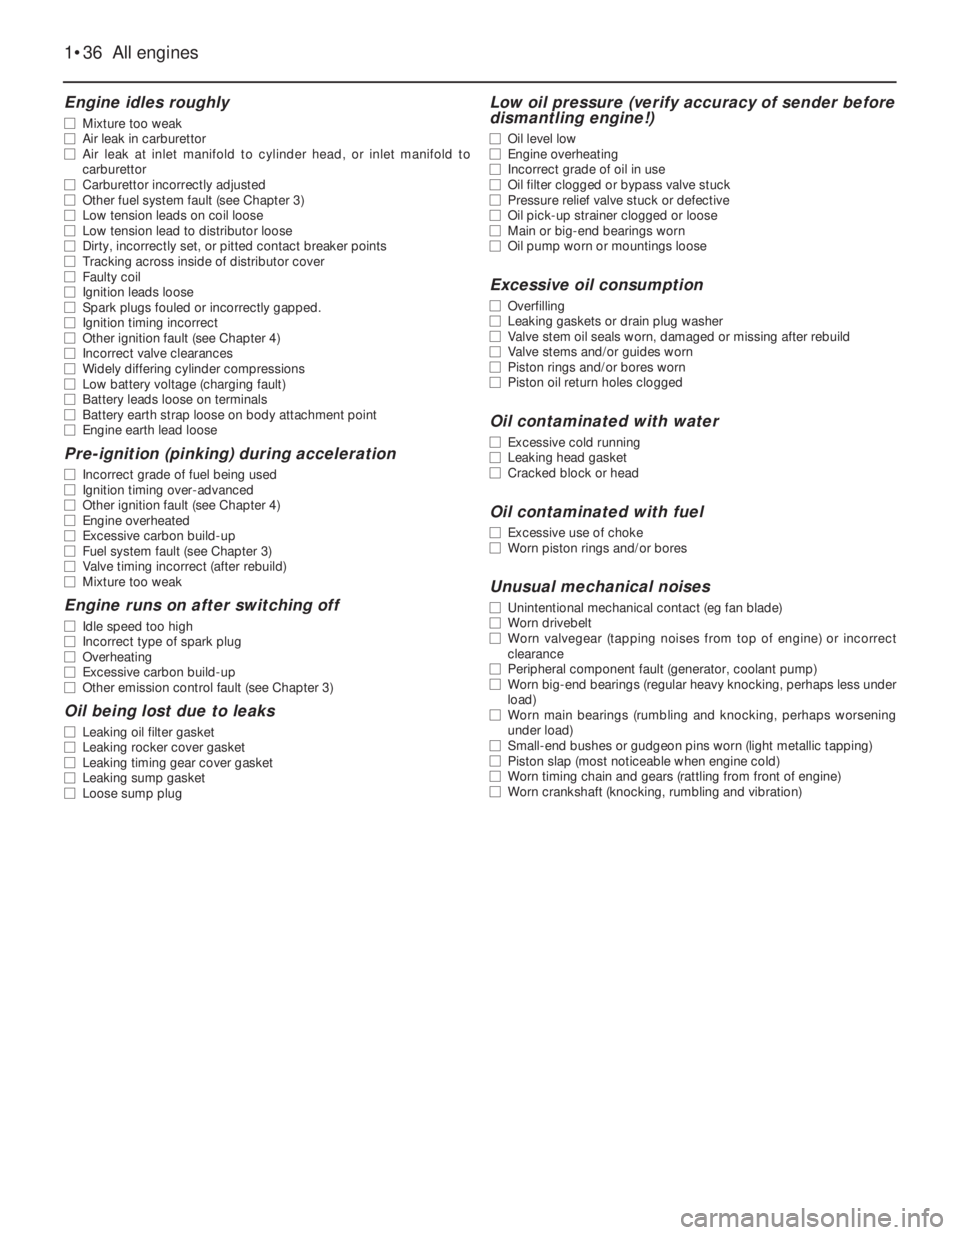
Engine idles roughly
m mMixture too weak
m mAir leak in carburettor
m mAir leak at inlet manifold to cylinder head, or inlet manifold to
carburettor
m mCarburettor incorrectly adjusted
m mOther fuel system fault (see Chapter 3)
m mLow tension leads on coil loose
m mLow tension lead to distributor loose
m mDirty, incorrectly set, or pitted contact breaker points
m mTracking across inside of distributor cover
m mFaulty coil
m mIgnition leads loose
m mSpark plugs fouled or incorrectly gapped.
m mIgnition timing incorrect
m mOther ignition fault (see Chapter 4)
m mIncorrect valve clearances
m mWidely differing cylinder compressions
m mLow battery voltage (charging fault)
m mBattery leads loose on terminals
m mBattery earth strap loose on body attachment point
m mEngine earth lead loose
Pre-ignition (pinking) during acceleration
m
mIncorrect grade of fuel being used
m mIgnition timing over-advanced
m mOther ignition fault (see Chapter 4)
m mEngine overheated
m mExcessive carbon build-up
m mFuel system fault (see Chapter 3)
m mValve timing incorrect (after rebuild)
m mMixture too weak
Engine runs on after switching off
m
mIdle speed too high
m mIncorrect type of spark plug
m mOverheating
m mExcessive carbon build-up
m mOther emission control fault (see Chapter 3)
Oil being lost due to leaks
m
mLeaking oil filter gasket
m mLeaking rocker cover gasket
m mLeaking timing gear cover gasket
m mLeaking sump gasket
m mLoose sump plug
Low oil pressure (verify accuracy of sender before
dismantling engine!)
m mOil level low
m mEngine overheating
m mIncorrect grade of oil in use
m mOil filter clogged or bypass valve stuck
m mPressure relief valve stuck or defective
m mOil pick-up strainer clogged or loose
m mMain or big-end bearings worn
m mOil pump worn or mountings loose
Excessive oil consumption
m
mOverfilling
m mLeaking gaskets or drain plug washer
m mValve stem oil seals worn, damaged or missing after rebuild
m mValve stems and/or guides worn
m mPiston rings and/or bores worn
m mPiston oil return holes clogged
Oil contaminated with water
m
mExcessive cold running
m mLeaking head gasket
m mCracked block or head
Oil contaminated with fuel
m
mExcessive use of choke
m mWorn piston rings and/or bores
Unusual mechanical noises
m
mUnintentional mechanical contact (eg fan blade)
m mWorn drivebelt
m mWorn valvegear (tapping noises from top of engine) or incorrect
clearance
m mPeripheral component fault (generator, coolant pump)
m mWorn big-end bearings (regular heavy knocking, perhaps less under
load)
m mWorn main bearings (rumbling and knocking, perhaps worsening
under load)
m mSmall-end bushes or gudgeon pins worn (light metallic tapping)
m mPiston slap (most noticeable when engine cold)
m mWorn timing chain and gears (rattling from front of engine)
m mWorn crankshaft (knocking, rumbling and vibration)
1•36 All engines