ISUZU KB P190 2007 Workshop Repair Manual
KB P190 2007
ISUZU
ISUZU
https://www.carmanualsonline.info/img/61/57177/w960_57177-0.png
ISUZU KB P190 2007 Workshop Repair Manual
Trending: engine coolant, headlight aiming, relay, coolant reservoir, spare wheel, wheel torque, battery replacement
Page 5351 of 6020
ELECTRICAL-BODY AND CHASSIS 8A-413
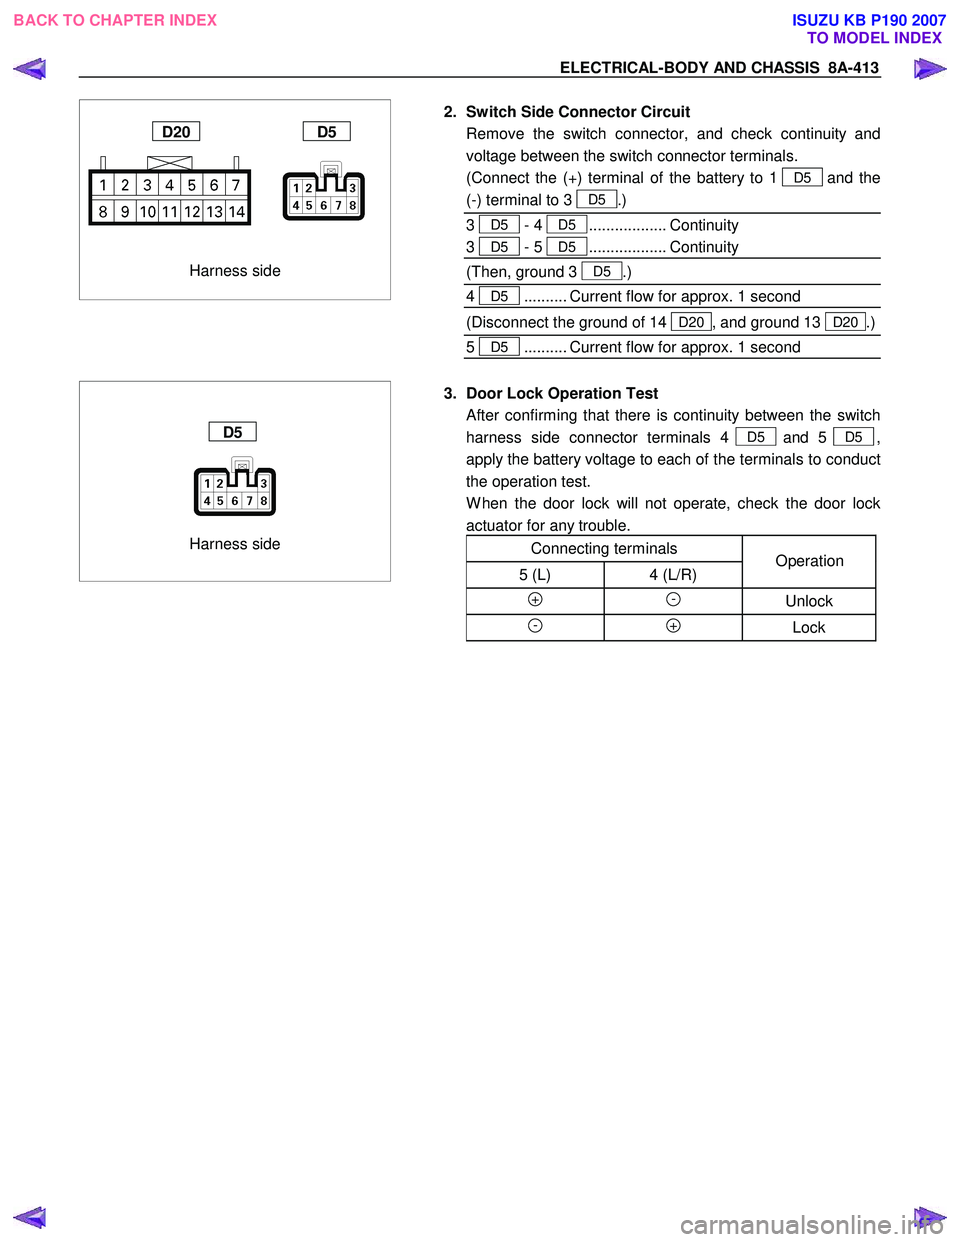
Harness side
D20 D5
2. Switch Side Connector Circuit
Remove the switch connector, and check continuity and voltage between the switch connector terminals.
(Connect the (+) terminal of the battery to 1
D5and the
(-) terminal to 3
D5.)
3
D5 - 4 D5.................. Continuity
3 D5 - 5 D5.................. Continuity
(Then, ground 3 D5.)
4
D5.......... Current flow for approx. 1 second
(Disconnect the ground of 14 D20 , and ground 13 D20.)
5
D5.......... Current flow for approx. 1 second
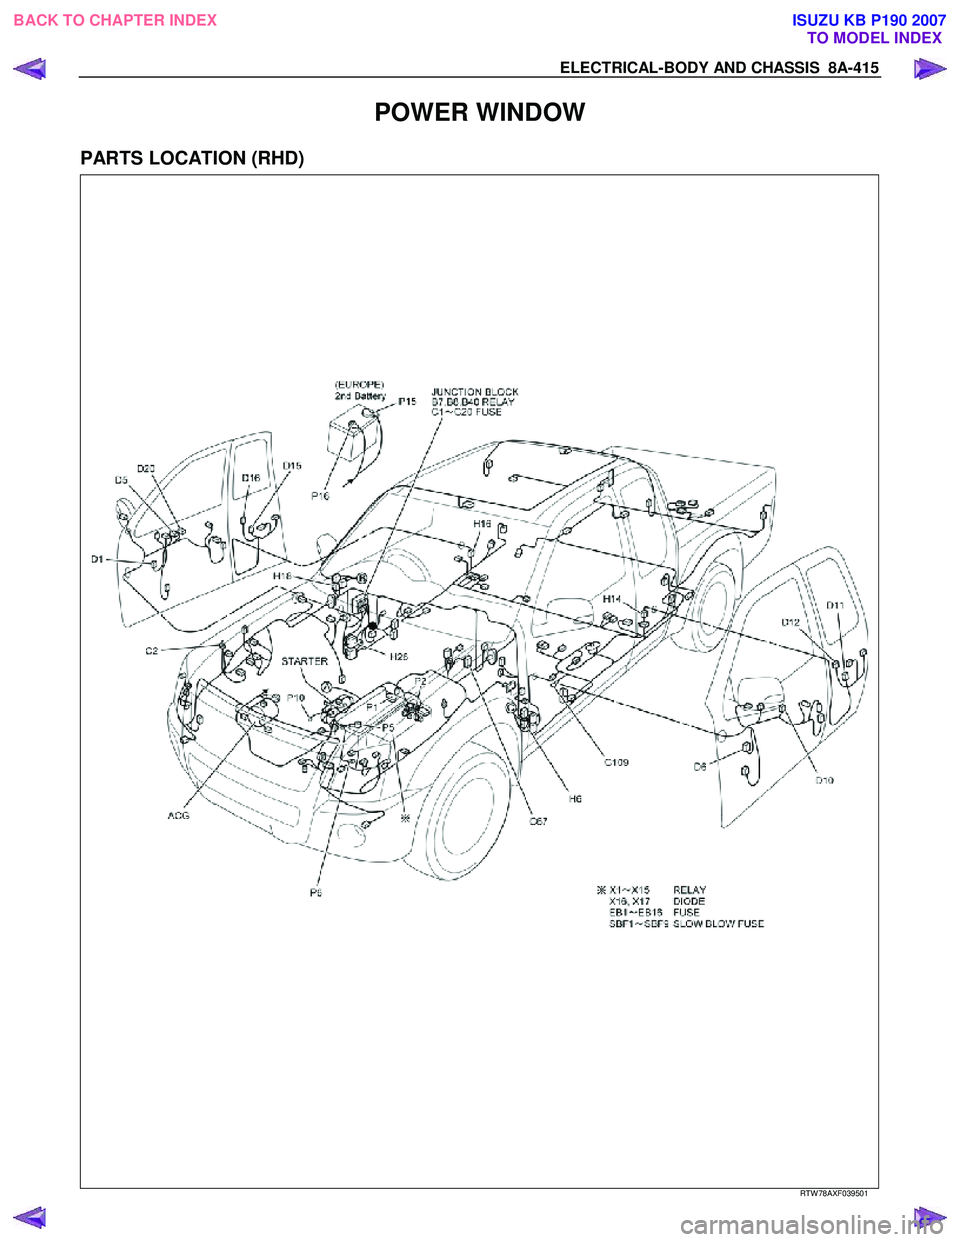
Harness side
D5
3. Door Lock Operation Test
After confirming that there is continuity between the switch
harness side connector terminals 4
D5 and 5 D5,
apply the battery voltage to each of the terminals to conduct
the operation test.
W hen the door lock will not operate, check the door lock actuator for any trouble.
Connecting terminals
5 (L) 4 (L/R)
+ - Unlock
- + Lock
Operation
BACK TO CHAPTER INDEX TO MODEL INDEXISUZU KB P190 2007
Page 5352 of 6020
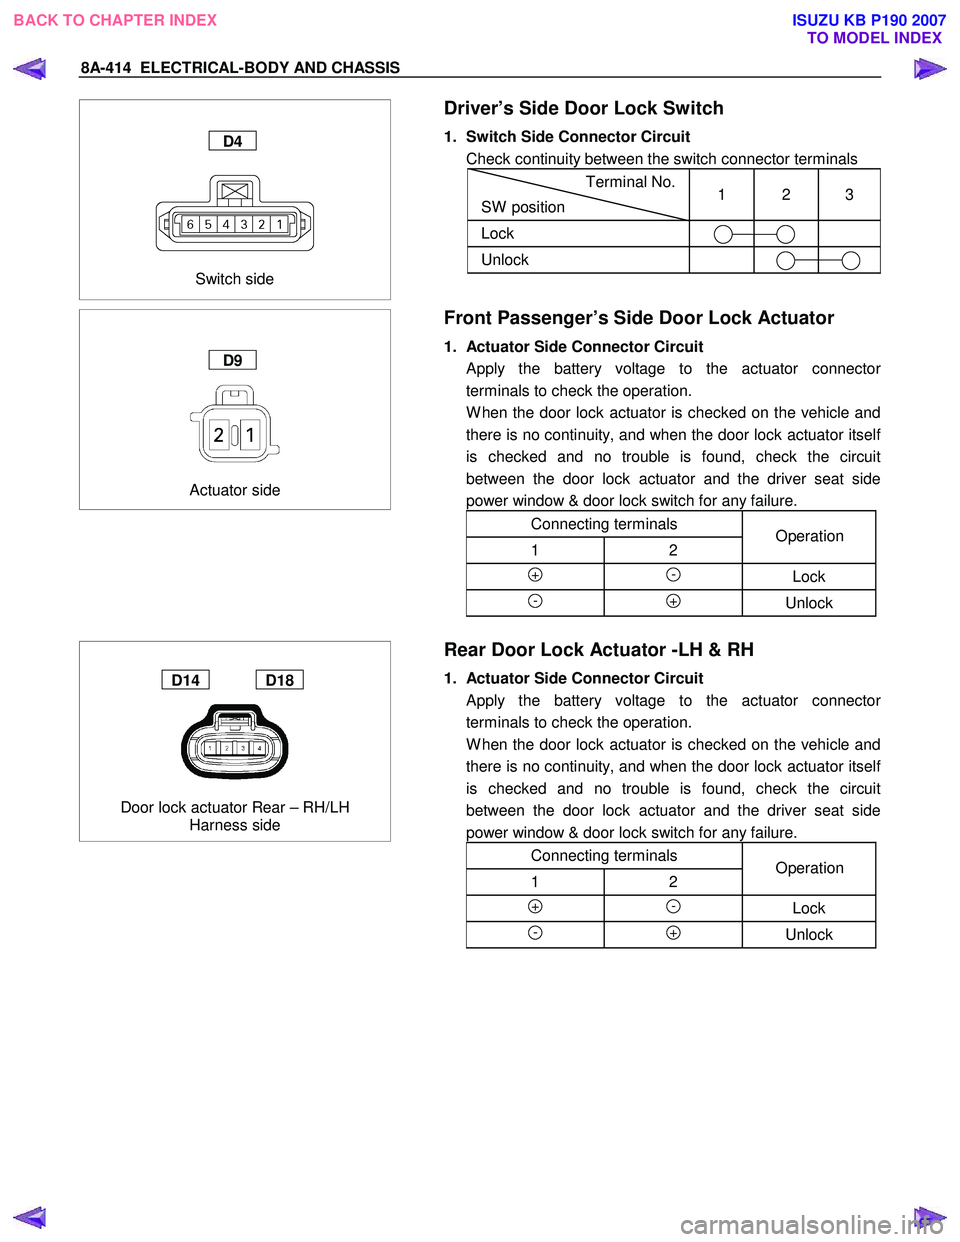
8A-414 ELECTRICAL-BODY AND CHASSIS
Switch side
D4
Driver’s Side Door Lock Switch
1. Switch Side Connector Circuit
Check continuity between the switch connector terminals
Terminal No.
SW position 1 2 3
Lock
Unlock
Actuator side
D9
Front Passenger’s Side Door Lock Actuator
1. Actuator Side Connector Circuit
Apply the battery voltage to the actuator connecto
r
terminals to check the operation.
W hen the door lock actuator is checked on the vehicle and there is no continuity, and when the door lock actuator itsel
f
is checked and no trouble is found, check the circuit
between the door lock actuator and the driver seat side
power window & door lock switch for any failure.
Connecting terminals
1 2
+ - Lock
- + Unlock
Operation
Door lock actuator Rear – RH/LH Harness side
D14 D18
Rear Door Lock Actuator -LH & RH
1. Actuator Side Connector Circuit
Apply the battery voltage to the actuator connecto
r
terminals to check the operation.
W hen the door lock actuator is checked on the vehicle and there is no continuity, and when the door lock actuator itsel
f
is checked and no trouble is found, check the circuit
between the door lock actuator and the driver seat side
power window & door lock switch for any failure.
Connecting terminals
1 2
+ - Lock
- + Unlock
Operation
BACK TO CHAPTER INDEX TO MODEL INDEXISUZU KB P190 2007
Page 5353 of 6020
ELECTRICAL-BODY AND CHASSIS 8A-415
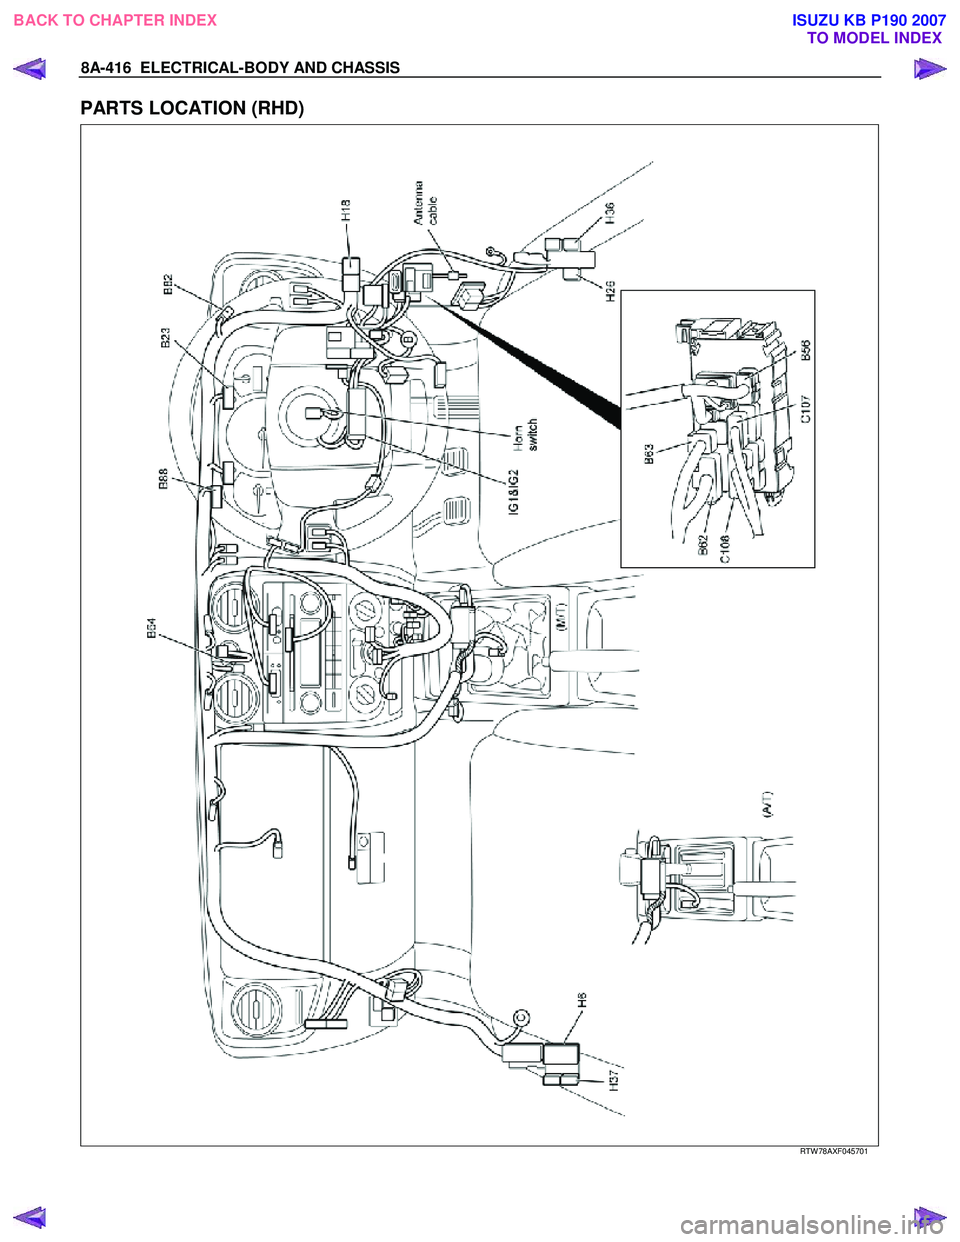
POWER WINDOW
PARTS LOCATION (RHD)
RTW 78AXF039501
BACK TO CHAPTER INDEX TO MODEL INDEXISUZU KB P190 2007
Page 5354 of 6020
8A-416 ELECTRICAL-BODY AND CHASSIS
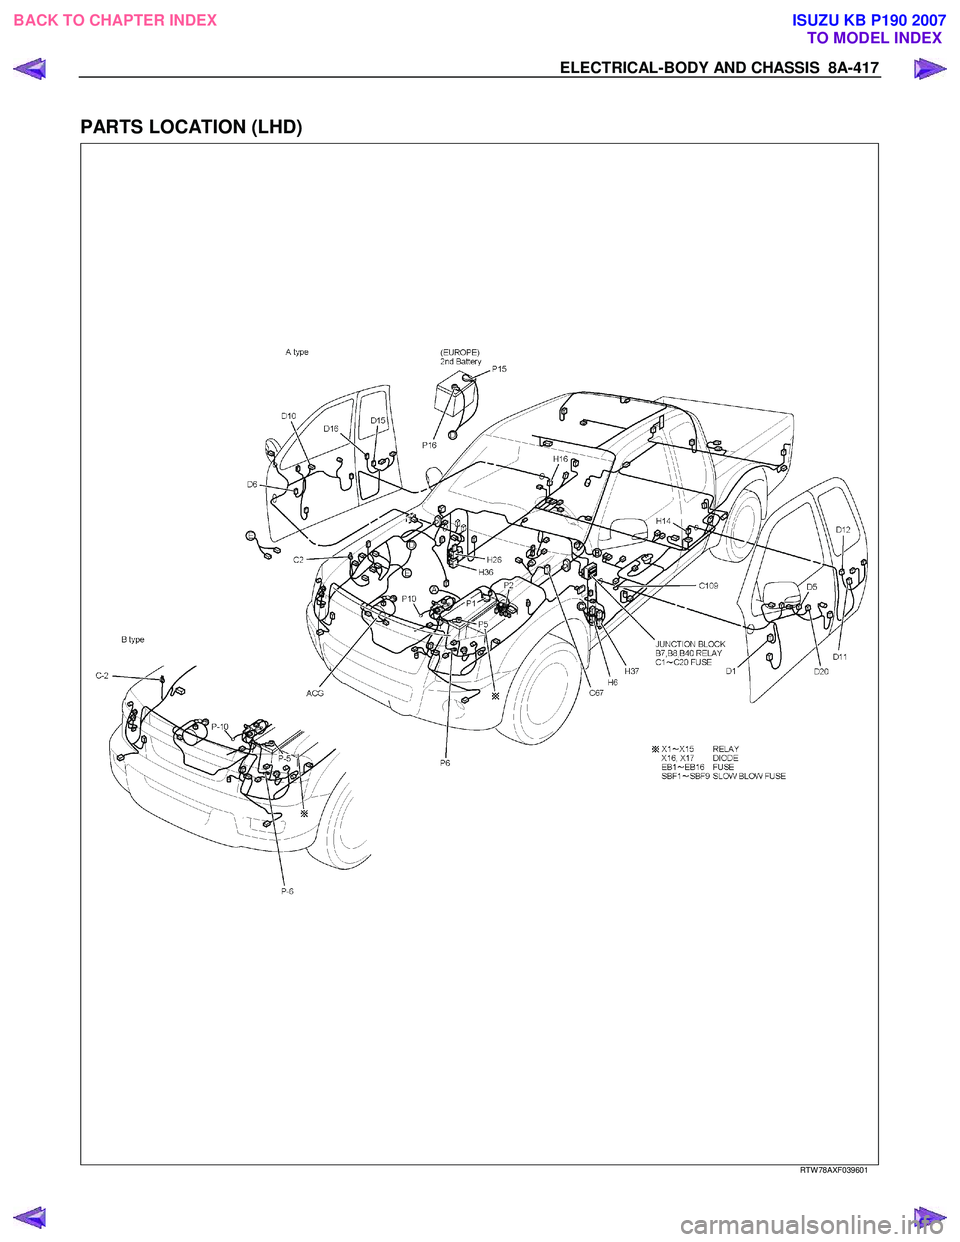
PARTS LOCATION (RHD)
RTW 78AXF045701
BACK TO CHAPTER INDEX TO MODEL INDEXISUZU KB P190 2007
Page 5355 of 6020
ELECTRICAL-BODY AND CHASSIS 8A-417
PARTS LOCATION (LHD)
RTW 78AXF039601
BACK TO CHAPTER INDEX TO MODEL INDEXISUZU KB P190 2007
Page 5356 of 6020
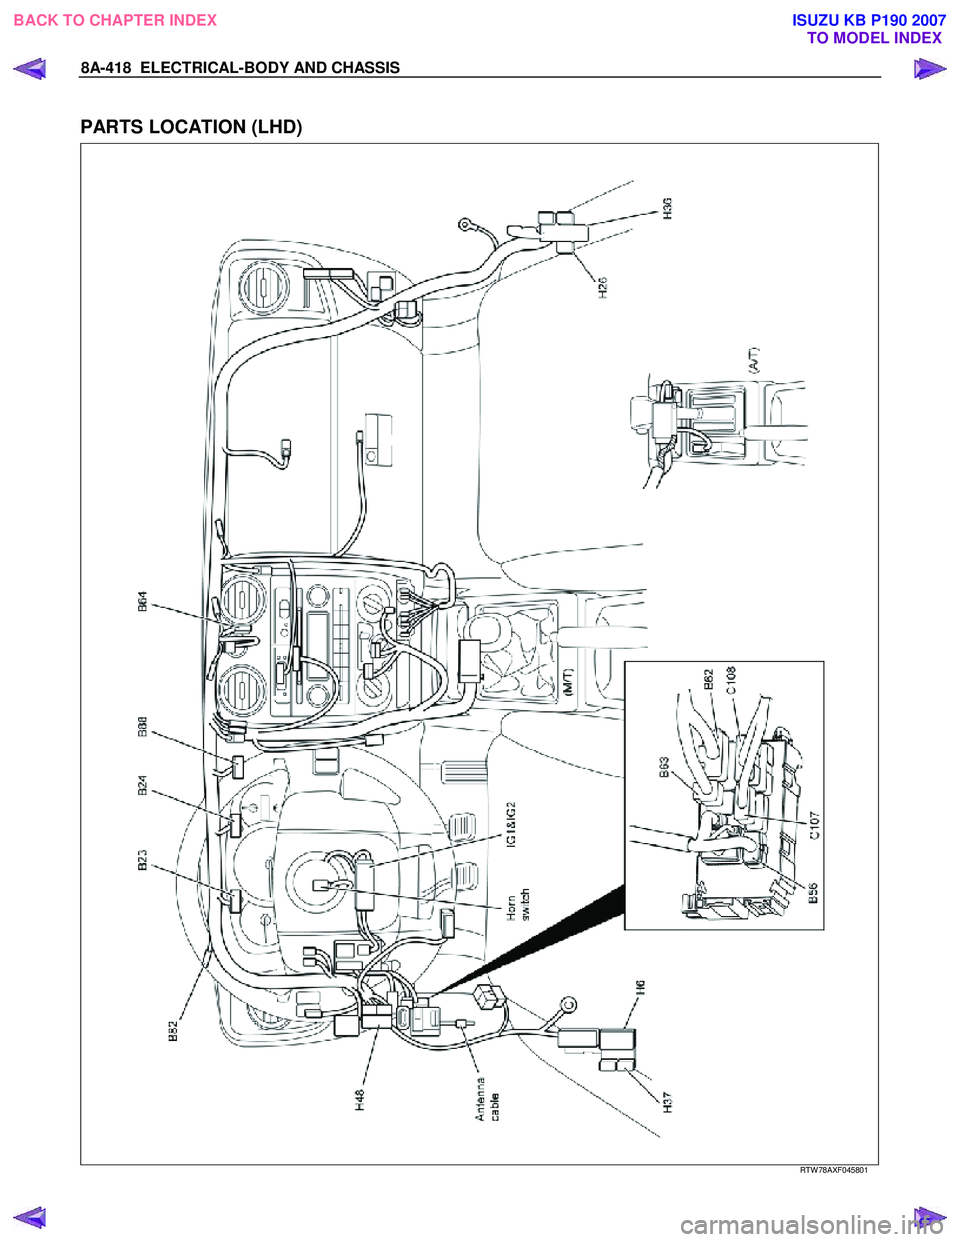
8A-418 ELECTRICAL-BODY AND CHASSIS
PARTS LOCATION (LHD)
RTW 78AXF045801
BACK TO CHAPTER INDEX TO MODEL INDEXISUZU KB P190 2007
Page 5357 of 6020
ELECTRICAL-BODY AND CHASSIS 8A-419
CIRCUIT DIAGRAM C24SE (RHD)
RTW 680XF013001
BACK TO CHAPTER INDEX
TO MODEL INDEXISUZU KB P190 2007
Page 5358 of 6020
8A-420 ELECTRICAL-BODY AND CHASSIS
CIRCUIT DIAGRAM HFV6 (RHD)
RTW 78AXF003501
BACK TO CHAPTER INDEX
TO MODEL INDEXISUZU KB P190 2007
Page 5359 of 6020
ELECTRICAL-BODY AND CHASSIS 8A-421
CIRCUIT DIAGRAM 4JJ1-TC/4JK1-TC (RHD) EXCEPT SOUTH AFRICA
RTW 78AXF017801
BACK TO CHAPTER INDEX
TO MODEL INDEXISUZU KB P190 2007
Page 5360 of 6020
8A-422 ELECTRICAL-BODY AND CHASSIS
CIRCUIT DIAGRAM 4JA1T (L) Sheet 1/2
RTW 78AXF010001
BACK TO CHAPTER INDEX TO MODEL INDEXISUZU KB P190 2007
Trending: fuse box, keyless entry, wiring diagram, bolt pattern, octane, transmission fluid, 4wd switch
