transmission ISUZU TROOPER 1995 Workshop Manual
[x] Cancel search | Manufacturer: ISUZU, Model Year: 1995, Model line: TROOPER, Model: ISUZU TROOPER 1995Pages: 1928
Page 1364 of 1928
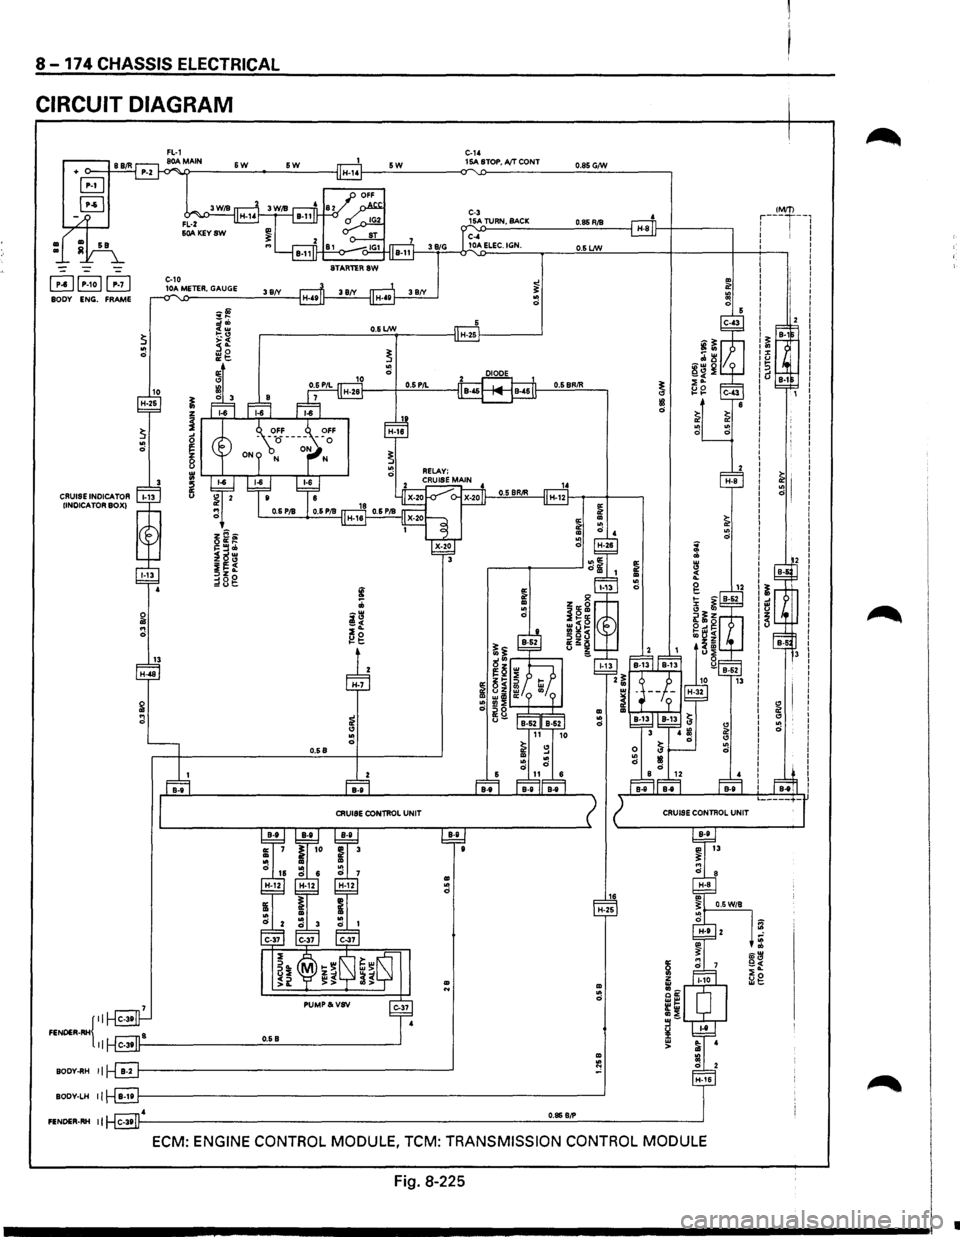
8-174 CHASSIS ELECTRICAL
CIRCUIT DIAGRAM
+ BB/R
B
~
sa
=
=
~~~ BODY ENG. FRAME
CRUISE INDICA TOR !INDICATOR BOX)
{II FENDER-RH II
BODY-RH II
BODY-LH II
FENDER-RH II
&W
C-10
10A ME'IIOR, GAUGE
10
C-1' &W sw 15A STOP, AfT CONT
STAR'IIORSW
38('(
O.&Lm ,-----------'-"--'--1-------1 H-25!------'
0.58
8-8
CRUISE ODNTROL UNIT
0.85 G/W
O.SLNJ
~ "' II! 0
~ :
~ g
ECM: ENGINE CONTROL MODULE, TCM: TRANSMISSION CONTROL MODULE
Fig. 8-225
IM/T) r---r--,
..
"' 1:1 0
;: .. :r ~ 1:> ld I
I
I
I
I
I
I
I
I
I
I
I
I
I
I
~I
I I
I
I
I
I
I
~ I
I .. I 0
12
~ .: u
5
•
Page 1377 of 1928
::!! (Q 00 I ....., w ..,..
(
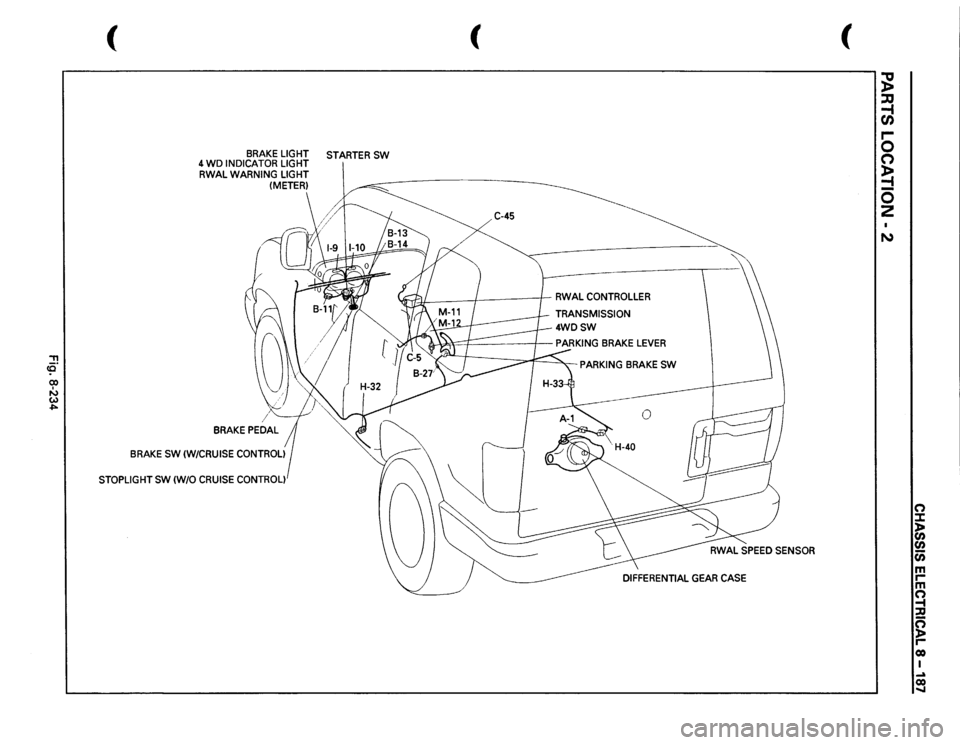
BRAKE
LIGHT
STARTER
SW
4 WD
INDICATOR
LIGHT
RWAL
WARNING
LIGHT (METER)
BRAKE
SW
(W/CRUISE
CONTROL)
STOPLIGHT
SW
(W/0
CRUISE
CONTROL)
(
C-45
JfJI:
/
I
RWAL
CONTROLLER
TRANSMISSION
4WDSW
PARKING
BRAKE
SW
(
;g ::JJ -1 en .... 0 0 ~ -0 2 N
n :I: l> en en c;; m rm n -t :a g reo I ~ co .....
Page 1382 of 1928
8-192 CHASSIS ELECTRICAL
TRANSMISSION CONTROL MODULE (TCM)
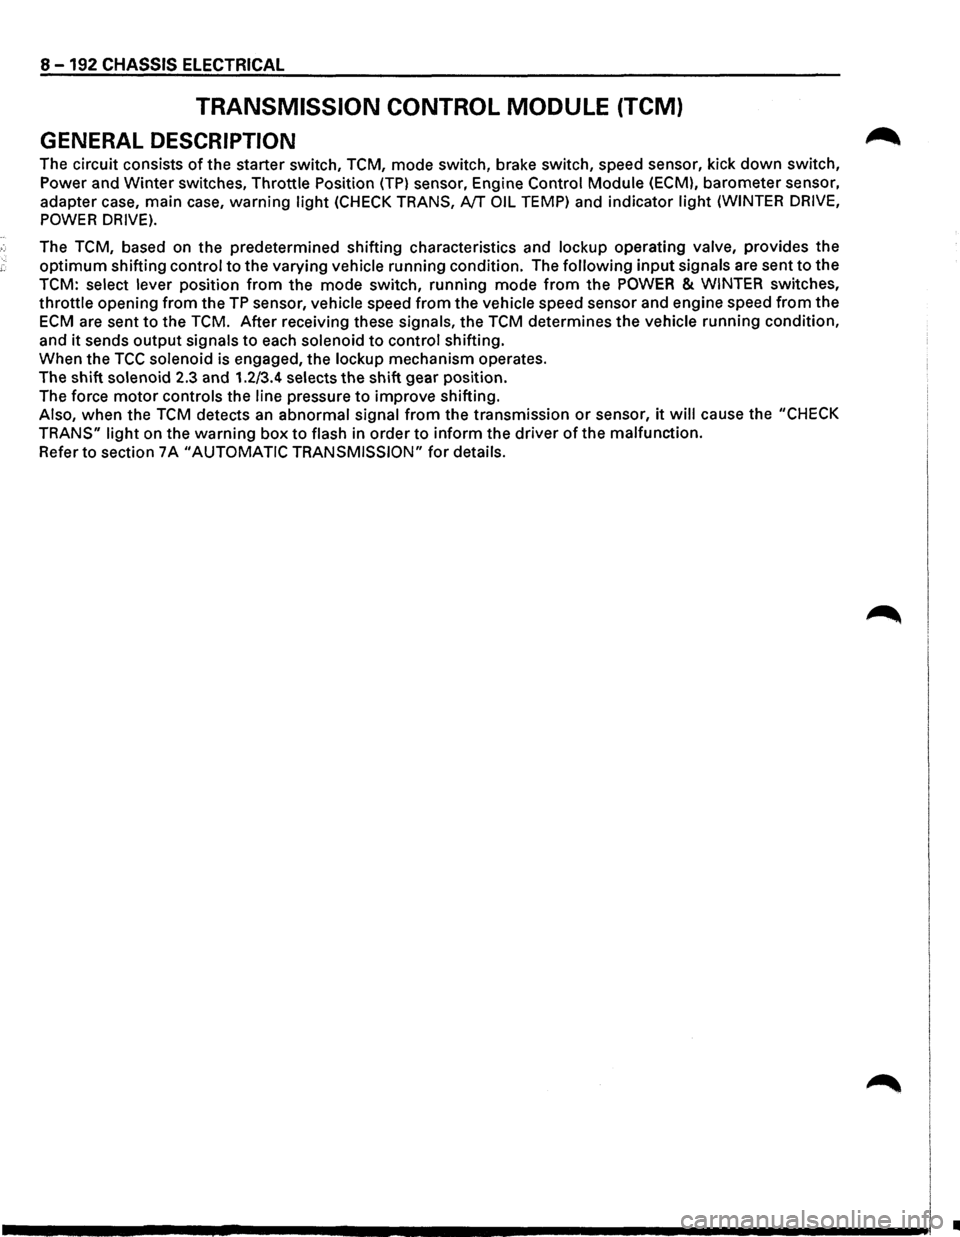
GENERAL DESCRIPTION
The circuit consists of the starter switch, TCM, mode switch, brake switch, speed sensor, kick down switch,
Power and
Winter switches, Throttle Position (TP) sensor, Engine Control Module (ECM), barometer sensor,
adapter case, main case,
warning light (CHECK TRANS, NT OIL TEMP) and indicator light (WINTER DRIVE,
POWER DRIVE).
The TCM, based on the predetermined shifting characteristics and lockup operating valve, provides the
optimum shifting control to the varying vehicle running condition. The following input signals are sent to the
TCM: select lever position from the mode switch, running mode from the POWER & WINTER switches,
throttle opening from the TP sensor, vehicle speed from the vehicle speed sensor and engine speed from the
ECM are sent to the TCM. After receiving these signals, the TCM determines the vehicle running condition,
and
it sends output signals to each solenoid to control shifting.
When the
TCC solenoid is engaged, the lockup mechanism operates.
The shift
solenoid 2.3 and 1.2/3.4 selects the shift gear position.
The force
motor controls the line pressure to improve shifting.
Also, when the TCM detects an abnormal signal from the transmission or sensor, it will cause the "CHECK
TRANS"
light on the warning box to flash in order to inform the driver of the malfunction.
Refer to section 7 A "AUTOMATIC TRANSMISSION" for details.
•
Page 1383 of 1928
, cE" 00 I I'J w 00
(
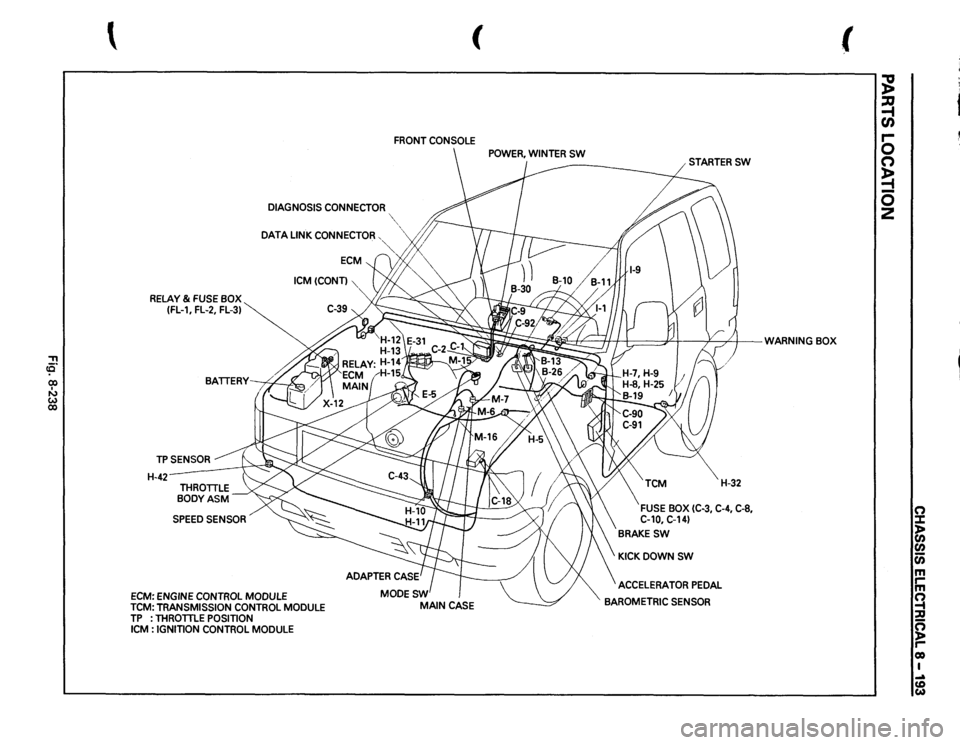
FRONT
CONSOLE
DIAGNOSIS
CONNECTOR
"~",
DATA
LINK
CONNECTOR,
·~
RELAY
& FUSE
BOX
(FL-1,
FL-2,
FL-3)
TPSENSOR H-42-
SPEED
SENSOR
ECM:
ENGINE
CONTROL
MODULE
ICM(CONT)
TCM:
TRANSMISSION
CONTROL
MODULE
TP
: THROTTLE
POSITION
ICM
: IGNITION
CONTROL
MODULE
~;
t I:;::==PI
v
/)
WARNING
BOX
' .
!I
/;;'
H-32
FUSE
BOX
(C-3,
C-4, C-8,
C-10,
C-14)
BRAKESW
KICKDOWNSW ACCELERATOR
PEDAL
BAROMETRIC
SENSOR
(
;g ~ en r-0 (") ~ 0 2
0 :::1: )> (I) (I) c;; m rm ~ :;Q ~ co I .... (D w
Page 1394 of 1928
·;.
8 -204 CHASSIS ELECTRICAL
STARTER SWITCH
Refer to "START AND CHARGING" in this section.
STOPLIGHT
STOPLIGHT SWITCH
BRAKE SWITCH
Refer to "STOPLIGHT AND REAR DEFOGGER" in
,c, this section.
SHIFT LOCK CONTROLLER
Refer to the shift lock controller in Section 7 A
"AUTOMATIC TRANSMISSION."
SHIFT LOCK SOLENOID
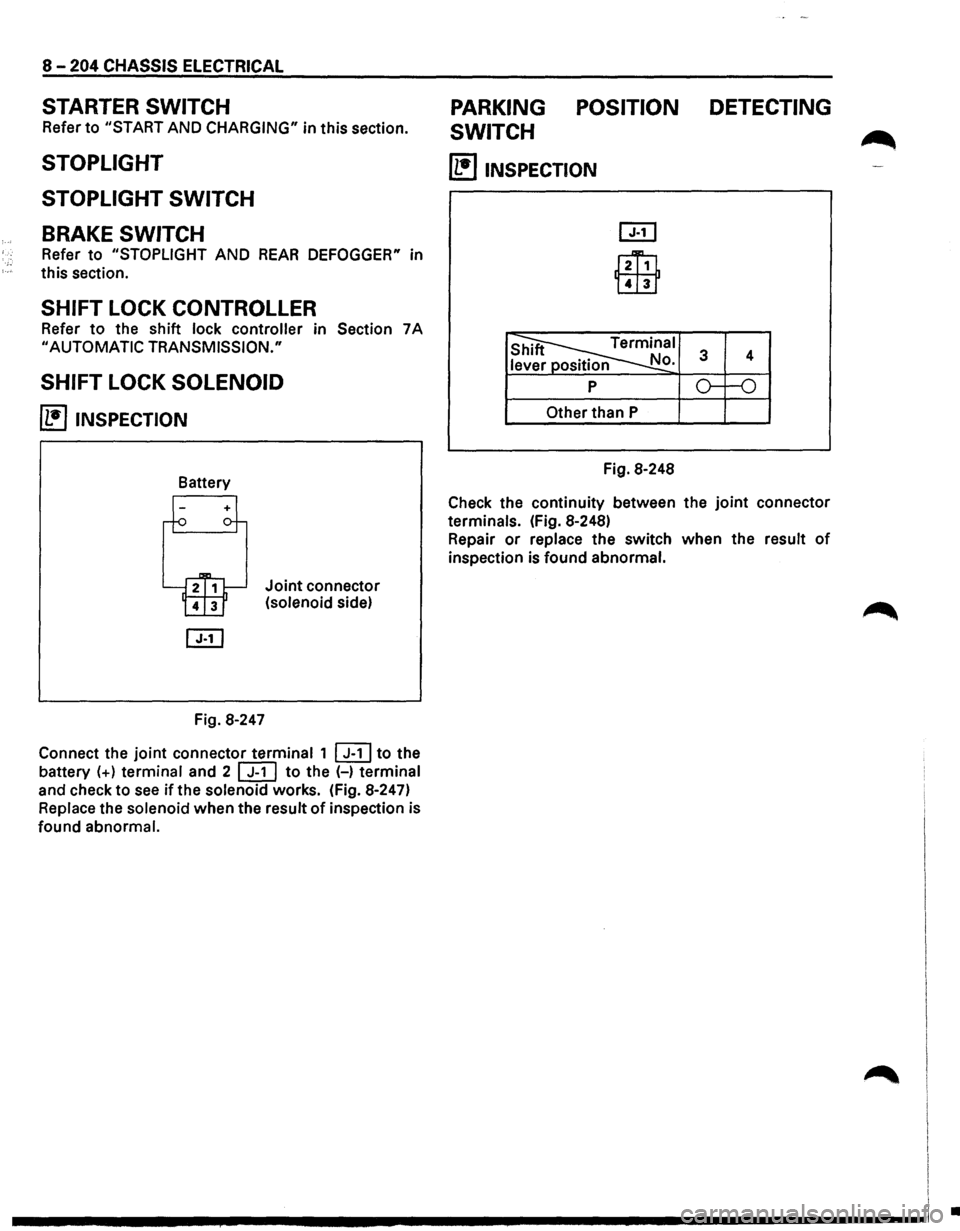
~ INSPECTION
Fig. 8-247
Joint connector
(solenoid side)
Connect the
joint connector terminal 1 ~to the
battery
(+) terminal and 2 [ill to the (-) terminal
and check to
see if the solenoid works. (Fig. 8-247)
Replace the solenoid when the result
of inspection is
found abnormal.
PARKING POSITION DETECTING
SWITCH
~
(1!]1NSPECTION
l2Ti1
Lill1
Other than P
Fig. 8-248
Check the continuity between the
joint connector
terminals. (Fig. 8-248)
Repair
or replace the switch when the result of
inspection is found abnormal.
I
I I
.............. ~ ................................ -----------------1 .
Page 1457 of 1928
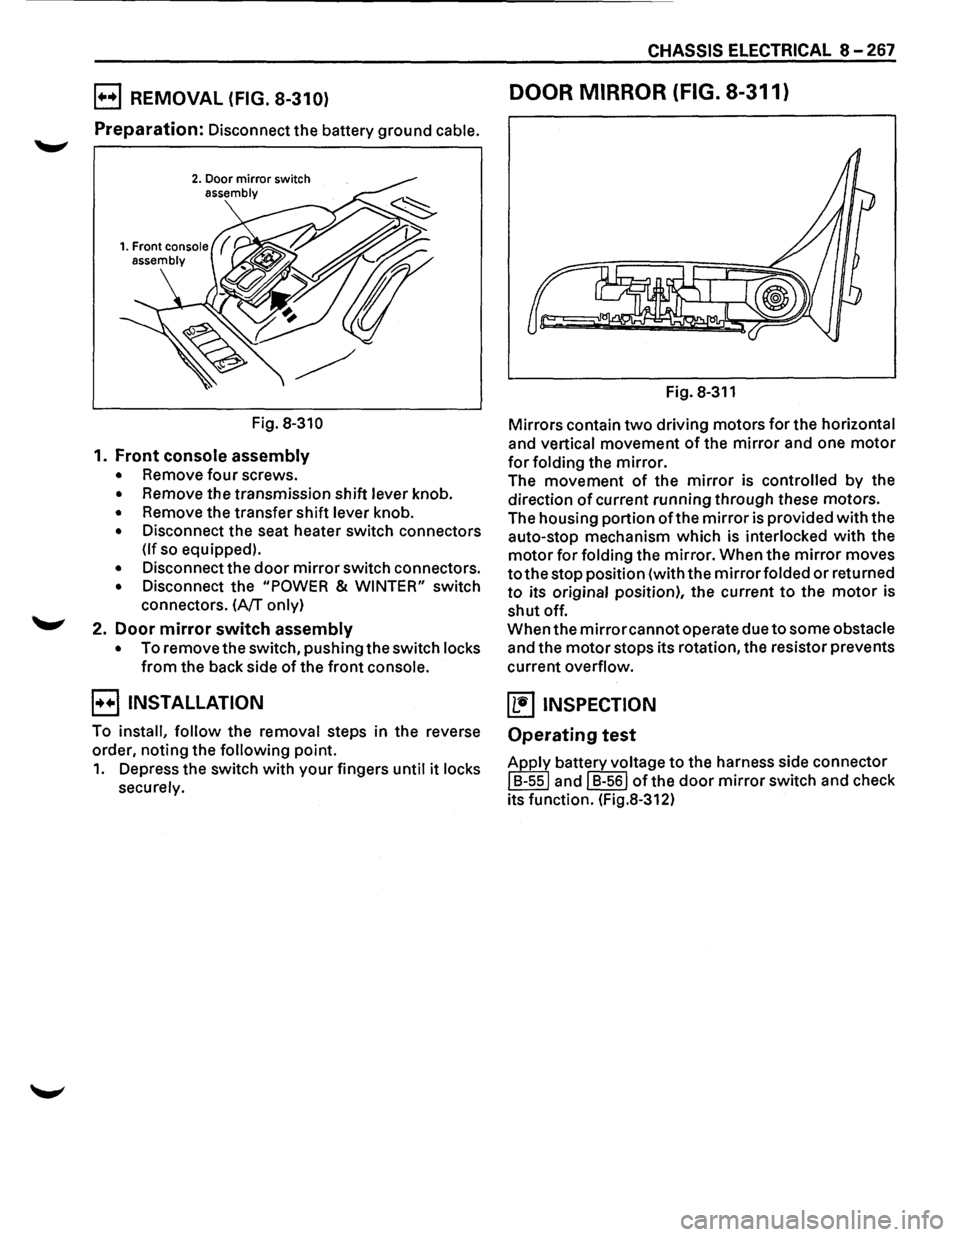
E) REMOVAL (FIG. 8-310)
Preparation: Disconnect the battery ground cable.
2. Door mirror switch assembly
Fig. 8-310
1. Front console assembly
• Remove four screws.
• Remove the transmission shift lever knob.
• Remove the transfer shift lever knob.
• Disconnect the seat heater switch connectors
(If so equipped).
• Disconnect the door mirror switch connectors.
• Disconnect the "POWER & WINTER" switch
connectors.
(A/T only)
2. Door mirror switch assembly
• To remove the switch, pushing the switch locks
from the back side of the front console.
B INSTALLATION
To install, follow the removal steps in the reverse
order, noting the
following point.
1. Depress the switch with your fingers until it locks
securely.
CHASSIS ELECTRICAL 8-267
DOOR MIRROR (FIG. 8-311)
Fig. 8-311
Mirrors contain two driving motors for the horizontal
and vertical movement of the mirror and one motor
for folding the mirror.
The movement of the mirror is controlled by the
direction
of current running through these motors.
The housing portion
ofthe mirror is provided with the
auto-stop mechanism which is
interlocked with the
motor for folding the mirror. When the mirror moves
to the stop position (with the mirror folded or returned
to its original position), the current to the motor is
shut off.
When the
mirror cannot operate due to some obstacle
and the motor stops its rotation, the resistor prevents
current
overflow.
~ INSPECTION
Operating test
Apply battery voltage to the harness side connector
I B-ssl and I B-561 of the door mirror switch and check
its function. (Fig.8-312)
Page 1461 of 1928
'"T1 !fl' co I w _. (11
I i i, ~
(
RR
DOOR
LOCK
ACTUATOR
{RHJ
FRT
DOOR
LOCK
SW
(RH
FRT
DOOR
KEY
SW,
(RH),
( ANTI-THEFT
CONTROLLER
RR
DOOR
SW
(RHJ
-------
FRT
DOOR
SW,
(RH)
.~""··
\
/;'~
~
"'··
FRT
DOOR
LOCK
ACTUATOR
(RH)
'-, ..,/j.
',
H-14
'L
y'JIJ.
"·,
H-15"
82
ANTI-THEFT
HORN~-20
"-,
-
RELAY
& FUSE
BOX
~
{FL-1,
FL-2,
F-3)
~
RELAY:
STARTER BATTERY
X::
H-41 B-39 DIODE
B-40 DIODE
B-43 DIODE FUSE
BOX MODESW
TRANSMISSION ,
TAILGATE
LOCK
ACTUATOR
TAILGATE
KEY
SW
TAILGATESW
FRT
DOOR
LOCK
&
/'POWER
WINDOW
SW
H-37 H-38 RRDOOR SW,(LH)
.
RR
DOOR
LOCK
-~ACTUATOR
{LHJ
FRT
DOOR
KEY
SW,
{LH)
-H-28,
H-29
FRT
DOOR
LOCK
ACTUA
TOR
(LH)
(
;g ~ C/) 5 C') ~ 0 z
n :X: ~ (/) 0 m rm ~ n ):a r-0) I N ..... -
Page 1478 of 1928
8-288 CHASSIS ELECTRICAL
METER AND WARNING/INDICATOR LIGHT
GENERAL DESCRIPTION
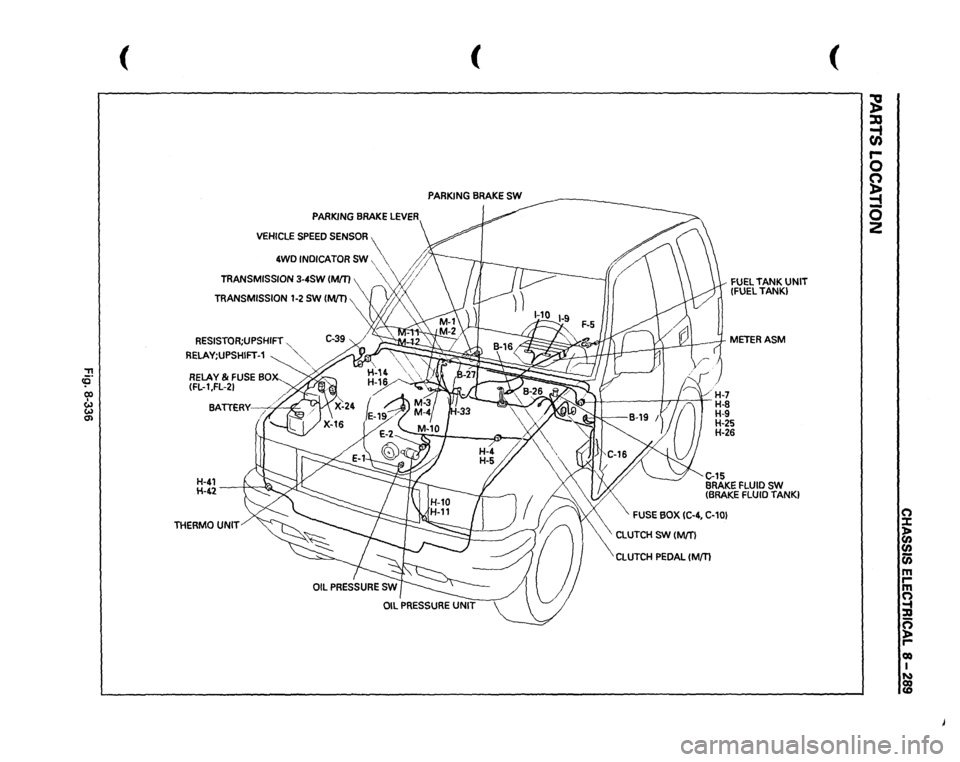
The circuit consists of the starter switch, meter assembly, vehicle speed sensor, clutch switch, transmission
switch, lighting switch,
turn signal switch, thermo unit, oil pressure unit, Engine Control Module, fuel tank unit,
4WD
SW, oil pressure switch, parking brake switch, brake fluid switch, seat belt switch and illumination
controller.
The meter ASM contains the speedometer, tachometer, voltmeter, engine coolant temperature gauge, oil
pressure gauge, fuel gauge and warning/indicator lights.
The meter warning/indicator lights and
their bulb sockets are a unit, they are installed from the back of the
speedometer assembly.
Page 1479 of 1928
::!!
(
(
PARKING
BRAKE
SW
PARKING
BRAKE
LEVER
VEHICLE
SPEED
SENSOR
4WD
INDICATOR
SW,
~
' '
/;~>
TRANSMISSION
3-4SW
IMJT)
"vf;/
RESISTOR;UPSHIFT
."
RELAY;UPSHIFT-1
~":'""
RELAY
& FUSE
BOX-_
(FL-1
,FL-21 BA.
TTERY--.;:;4"~
H-41 H-42
-----;1-"'.,.,-~
THERMO
UNIT
FUEL
TANK
UNIT
(FUEL
TANK)
METERASM
~
16)
1 /
1
(
H-7
/'1'-J
? I n
H-8 H-9 H-25
H-26 C..15 BRAKE
FLUID
SW
(BRAKE
FLUID
TANK}
FUSE
BOX
IC-4,
C-10}
\CLUTCH
SW
(M/T)
CLUTCH
PEDAL
(Mm
(
~ ::xs ~ r-0 0 ~ -0 2
(") :X: ~ en (i) m rm (") ~ g roo I ~
Page 1508 of 1928
8-318 CHASSIS ELECTRICAL
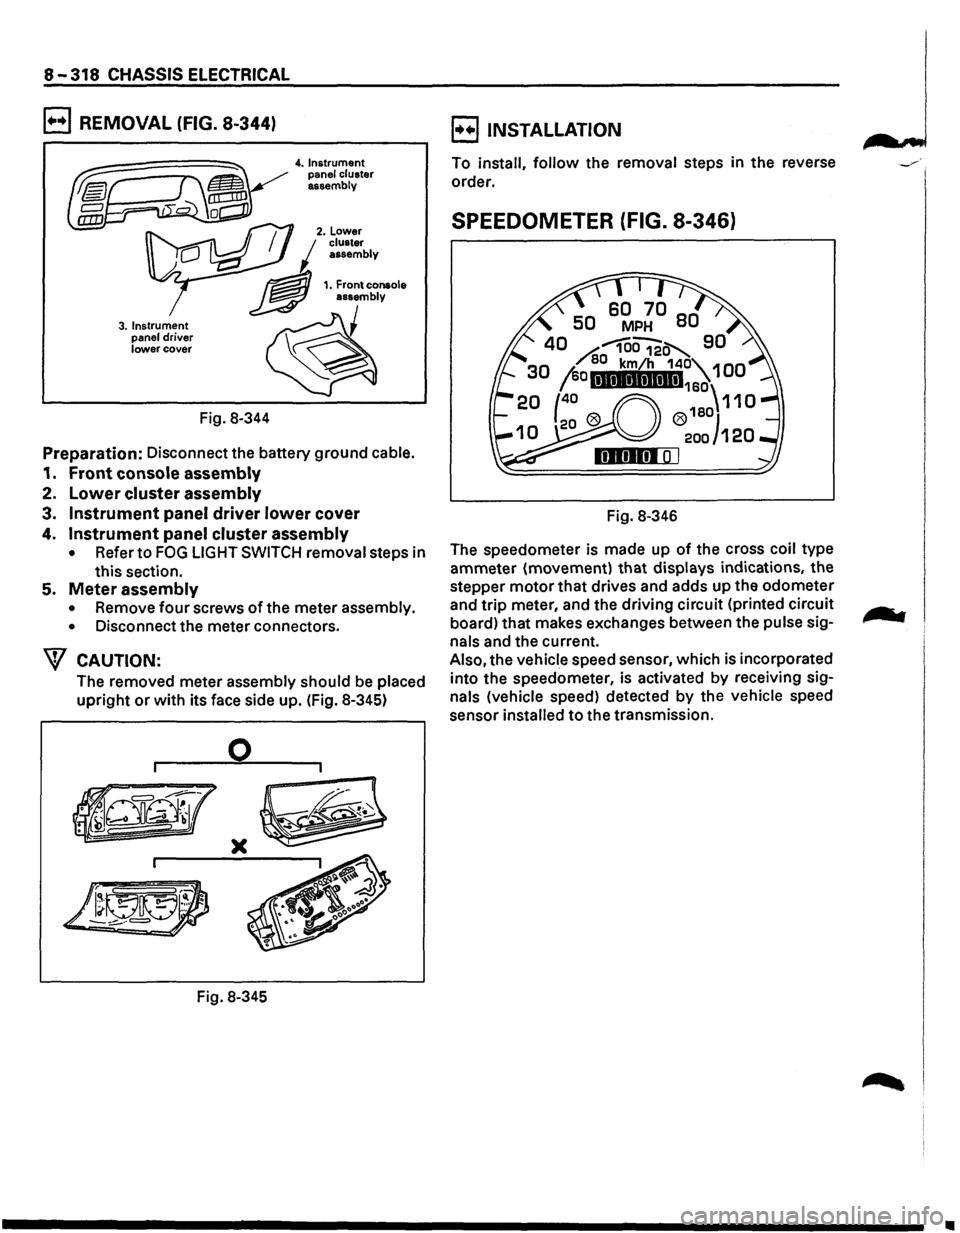
B REMOVAL (FIG. 8-344)
3. Instrument
panel driver lower cover
Fig. 8-344
4. Instrument
panel cluster
assembly
Preparation: Disconnect the battery ground cable.
1. Front console assembly
2. Lower cluster assembly
3. Instrument panel driver lower cover
4. Instrument panel cluster assembly
• Refer to FOG LIGHT SWITCH removal steps in
this section.
5. Meter assembly
• Remove four screws of the meter assembly.
•
Disconnect the meter connectors.
W CAUTION:
The removed meter assembly should be placed
upright or with its face side up. (Fig. 8-345)
0
)(
Fig. 8-345
B INSTALLATION
To install, follow the removal steps in the reverse
order.
SPEEDOMETER (FIG. 8-346)
Fig. 8-346
The speedometer is made up
of the cross coil type
ammeter (movement)
that displays indications, the
stepper
motor that drives and adds up the odometer
and
trip meter, and the driving circuit (printed circuit
board) that makes exchanges between the
pulse sig
nals and the current.
Also, the vehicle speed sensor, which is incorporated
into the speedometer, is activated
by receiving sig
nals (vehicle speed) detected by the vehicle speed
sensor
installed to the transmission.
•