JAGUAR X308 1998 2.G Workshop Manual
X308 1998 2.G
JAGUAR
JAGUAR
https://www.carmanualsonline.info/img/21/7640/w960_7640-0.png
JAGUAR X308 1998 2.G Workshop Manual
Page 1360 of 2490
Automatic Transmission/Transaxle - 4.0L NA V8 - AJ27/3.2L NA V8 - AJ26
- Transmission Fluid Pan
In-vehicle Repair
Removal
Installation
1.
Raise the vehicle for access and drain the transmission fluid.
2. Remove the fluid pan.
пЃ¬Remove the twenty-two bolts.
3. Discard the fluid pan gasket and clean the mating faces.
4. Remove the magnets from the fluid pan.
пЃ¬Clean the magnets and refit them to the fluid pan.
1. Installation is th e reverse of the re moval procedure:
2. Tighten the fluid pan bolts to the specified torque figure.
3. Refill the transmission fluid. Refer to Operation 44.24.02.
Page 1361 of 2490
Automatic Transmission/Transaxle - 4.0L NA V8 - AJ27/3.2L NA V8 - AJ26
- Transmission Fluid Pan Gasket
In-vehicle Repair
Removal
Installation
1.
Raise the vehicle for access and drain the transmission fluid.
2. Remove the fluid pan.
пЃ¬Remove the twenty-two bolts.
3. Discard the fluid pan gasket and clean the mating faces.
4. Remove the magnets from the fluid pan.
пЃ¬Clean the magnets and refit them to the fluid pan.
1. Installation is th e reverse of the re moval procedure:
2. Tighten the fluid pan bolts to the specified torque figure.
3. Refill the transmission fluid. Refer to Operation 44.24.02.
Page 1365 of 2490
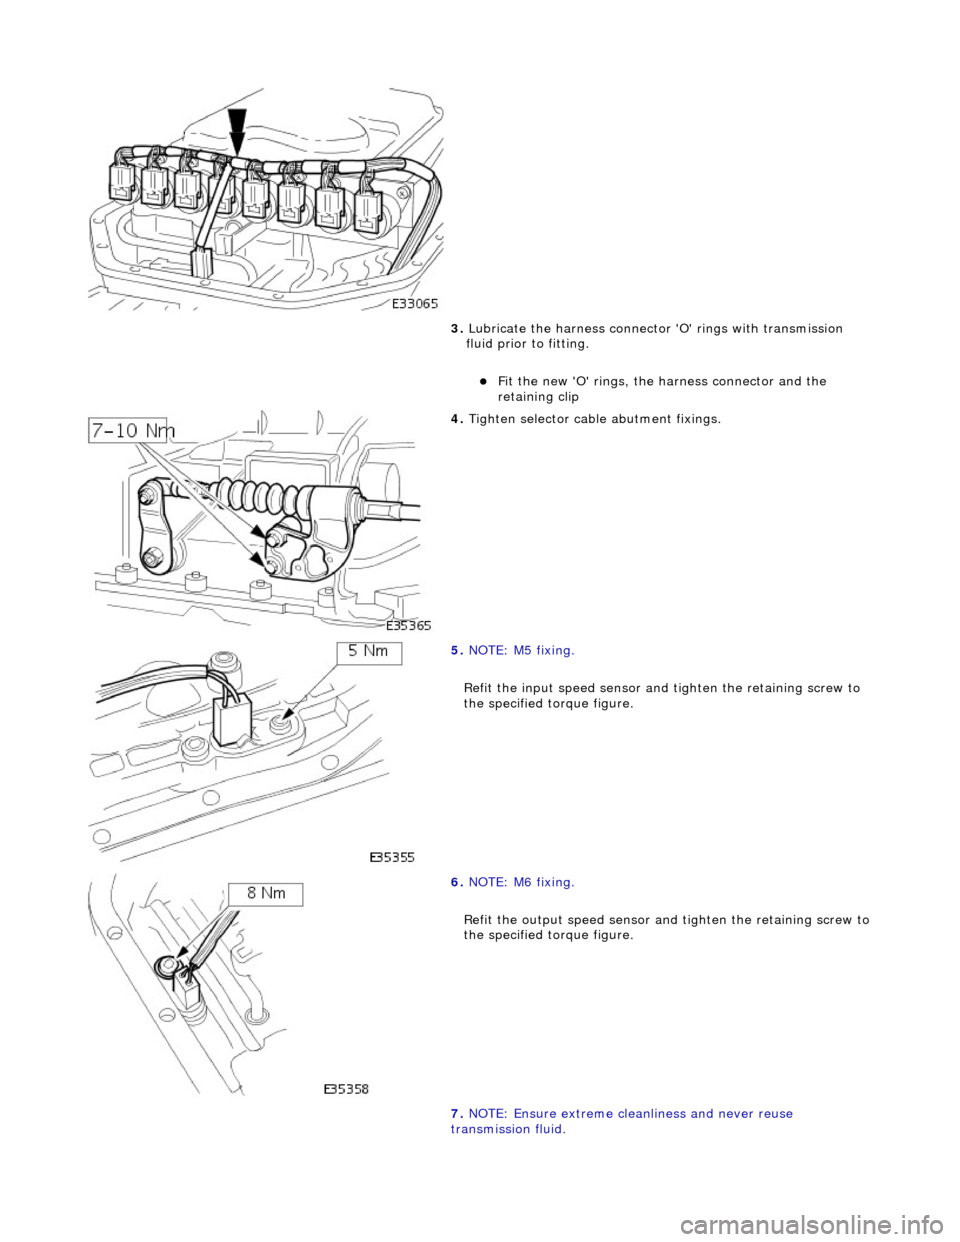
3. Lubricate the harness connector 'O' rings with transmission
fluid prior to fitting.
пЃ¬Fit the new 'O' rings, the harness connector and the
retaining clip
4. Tighten selector cable abutment fixings.
5. NOTE: M5 fixing.
Refit the input speed sensor and tighten the retaining screw to
the specified torque figure.
6. NOTE: M6 fixing.
Refit the output speed sensor and tighten the retaining screw to
the specified torque figure.
7. NOTE: Ensure extreme clea nliness and never reuse
transmission fluid.
Page 1366 of 2490
Using a new gasket, install the fluid pan and tighten the twenty-
two bolts to the specified torque figure.
8. Connect the battery and fit the battery cover..
пЃ¬Reset the radio and the clock.
9. Refer to (44.24.02) for fluid fill procedure.
Page 1368 of 2490
Installation
1. Installation is the reverse of the removal procedure noting
that:
2. Lubricate the new 'O' rings prior to fitting.
3. Tighten the securing bolts, selector cable bracket to
transmission casing, to th e specified torque figure.
4. Connect the battery and fit the battery cover..
пЃ¬Reset the radio and the clock.
5. Refer to (44.24.02) for fluid fill procedure.
Page 1370 of 2490
Installation
1. Fitting a new rotary switch is the reverse of the removal
procedure noting that the fixi ngs must be tightened to the
specified torque figure.
2. Connect the battery and fit the battery cover.
пЃ¬Reset the radio and the clock.
Page 1374 of 2490
Installation
1.
NOTE: M5 fixing.
Connect the multiplug, install the input speed sensor and
securing bracket. Tighten the screw to the specified torque
figure.
2. NOTE: Ensure extreme clea nliness and never reuse
transmission fluid.
Using a new gasket, install the fl uid pan and tighten the twenty-
two fixings to the specified. torque figure.
3. Connect the battery and fit the battery cover..
пЃ¬Reset the radio and the clock.
4. Refer to (44.24.02) for fluid fill procedure.
Page 1378 of 2490
21. Detach the rotary switch.
1. Remove the switch fixings.
2. Displace the switch harness from the clips.
22. Disconnect the fluid cooler pipes.
пЃ¬Unscrew the cooler pipe tube nu ts, one at each side of the
transmission casing.
пЃ¬Discard the 'O' rings.
пЃ¬Plug the pipes an d transmission.
23. Remove the three bolts which se cure the torque converter to
the drive plate.
1. Remove the access cover.
2. Rotate the crankshaft and hold to prevent movement, and remove the bolts.
24. Remove the LH and RH cataly st mounting brackets from the
transmission case.
пЃ¬Remove the bolts.
Page 1380 of 2490
31.
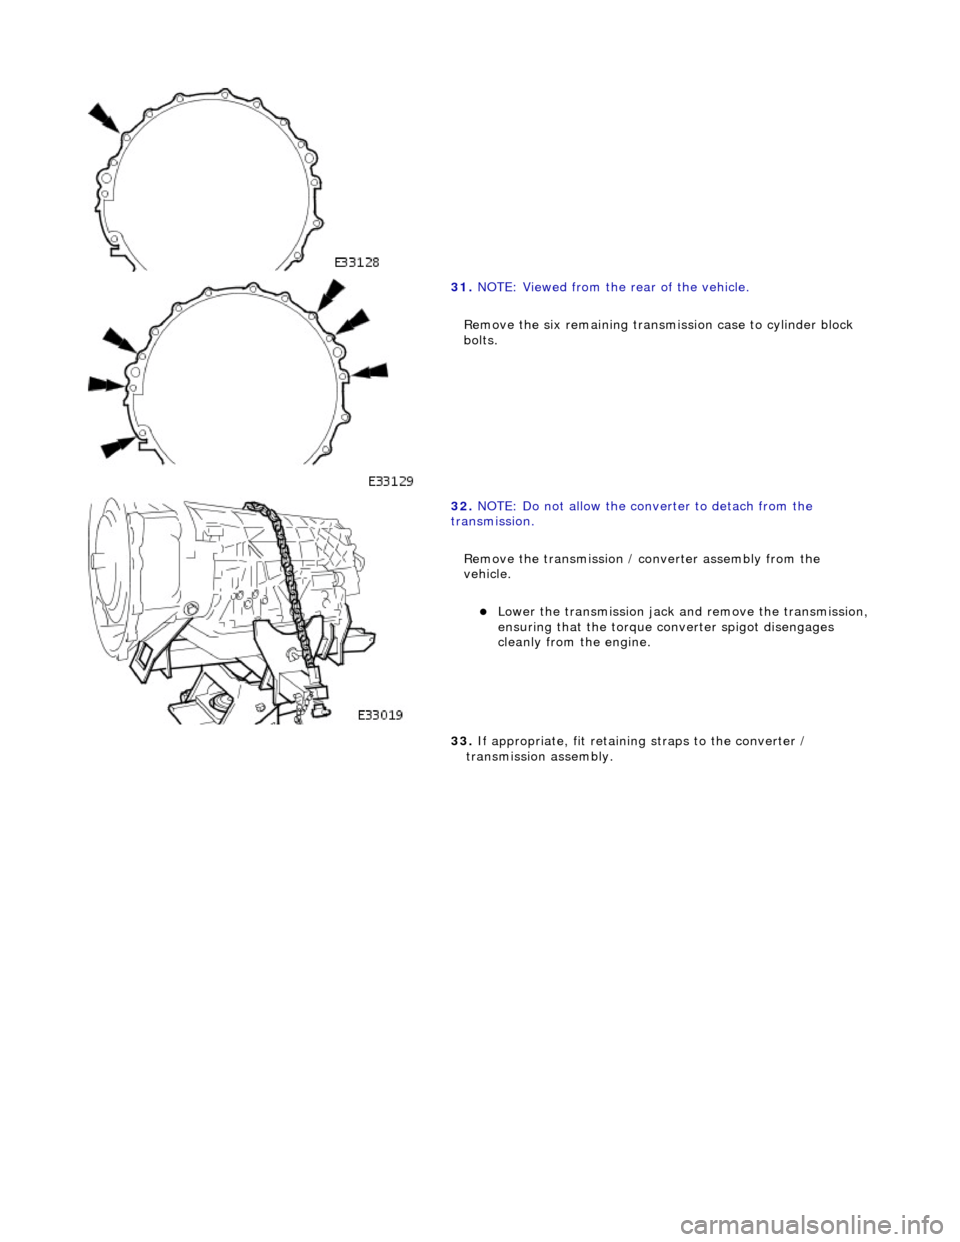
NOTE: Viewed from the rear of the vehicle.
Remove the six remaining transmission case to cylinder block
bolts.
32. NOTE: Do not allow the converter to detach from the
transmission.
Remove the transmission / converter assembly from the
vehicle.
пЃ¬Lower the transmission jack and remove the transmission,
ensuring that the torque co nverter spigot disengages
cleanly from the engine.
33. If appropriate, fit retainin g straps to the converter /
transmission assembly.
Page 1381 of 2490
Automatic Transmission/Transaxle - 4.0L NA V8 - AJ27/3.2L NA V8 - AJ26
- Input Shaft Seal
Disassembly and Assembly of Subassemblies
Special Tool(s)
Oil seal replacer
307-357
1. Remove the transmission unit, 44.20.01.
2. Remove the torque converter from the transmission unit,
44.17.07.
3. Remove the front pump seal.
пЃ¬Remove and discard the seal retaining snap-ring.
пЃ¬Using a 'Snap-on' oil seal puller, remove and discard the
seal.
4. Clean the seal housing.
5. Installation is th e reverse of the re moval procedure.
6. Use tool 307 - 357 to install the seal.
пЃ¬Lubricate the seal pr ior to fitting.


