Seat JAGUAR X308 1998 2.G Workshop Manual
[x] Cancel search | Manufacturer: JAGUAR, Model Year: 1998, Model line: X308, Model: JAGUAR X308 1998 2.GPages: 2490, PDF Size: 69.81 MB
Page 2067 of 2490

2.
Install clips at hinge centre securing screw positions.
3. Position hinges on veneer panel and install securing screws.
4. Position hinges on seat back finisher and install securing
screws.
Page 2068 of 2490

Interior Trim and Ornamentation - Folding Tray Finish Panel
Removal and Installation
Removal
Installation
1. Move picnic tray to fully down position.
2. Remove screws securing picnic tray hinges to back finisher
and remove tray from seat.
3. Remove the two back finisher to seat securing screws.
4. Release finisher from side mount ing clips and remove finisher
from seat.
5. Remove three screws se curing picnic tray top rail veneer panel
to seat finisher and remove veneer panel.
Page 2069 of 2490

1.
Position top rail veneer panel on finisher, locate two dowels
and install securing screws.
2. Position back finisher on seat and install lower securing screws.
3. Position and fully seat fini sher side securing clips.
4. Position picnic tray on back fi nisher and install hinge securing
screws.
5. Move picnic tray to up position.
Page 2071 of 2490

Interior Trim and Ornamentation - Front Door Trim Panel Finish Panel
Removal and Installation
Removal
Installation
1. Remove interior door handle escutcheon.
Remove cover from door ha ndle escutcheon securing
screw and slacken and remove screw.
Pull door handle inwards and exercising care to avoid
damaging tweeter, remove escutcheon from casing.
2. Remove veneer panel from casing.
1. Using a thin plastic leve r, carefully ease rear of
veneer panel inwards to release the two rear
securing tangs.
2. Slide veneer panel re arwards to release front
retainers.
1. Position veneer panel on casing and slide forward to engage
front retainers.
2. Using a soft pad or cloth, press re ar of panel firmly to seat the
securing tangs.
3. Fit door handle escutcheon.
Page 2075 of 2490

Installation
1. Release puddle lamp harness from clips at base of door pocket.
2. Slacken and remove th e two screws securing
bottom of pocket to casing.
3. Remove two spring clips securing top of pocket to casing.
14. Lift pocket from casing.
15. Slacken and remove door sp eaker securing screws and
remove speaker from casing.
1. Fit and fully seat casing securing clips.
2. Position speaker grill in casing align speaker and fit and tighten
securing screws.
3. Position pocket in casing and secure with screws and spring
clips.
4. Fit puddle lamp to casing, fit and tighten securing screws and
position harness in pocket clips.
5. Fit door armrest to casing. Refer to 76.34.23.
6. Fit inner waist seal holder to casing and fit and tighten the
securing screws.
7. Align and fit inner waist seal.
8. Fit door armrest to casing. Refer to .
9. Check that armrest tang locater and screw insert are correctly
positioned in door panel.
10. Position casing for access and connect tweeter, speaker,
puddle lamp and switchpack harnesses.
11. Finally position casing locating fold over waist flange and
firmly press armrest to locate retaining tang in door panel.
12. Commencing at front , press and firmly seat casing lower
fasteners in door inserts.
13. Fit and tighten armrest centre se curing screw in door insert.
14. Fit door casing veneer panel. Refer to 76.47.11.
15. Position door handle escutche on on casing, fit and tighten
securing screw and fit cover over screw.
Page 2082 of 2490

1.
Position liner on trunk lid and pass lamp harness multiplugs
through apertures.
2. Align and fully seat liner on trunk lid and secure with new
fasteners.
3. Position finisher over trunk lid latch, fit and tighten securing
bolts and fit bolt covers..
4. Position warning triangle mounti ng bracket and fit and tighten
securing screws.
5. Install triangle on mounting br acket and secure with clips.
6. Install trunk lamp assemblies. Refer to 86.45.16.
Page 2083 of 2490

Interior Trim and Ornamentation - Luggage Compartment Rear Trim Panel
Removal and Installation
Removal
Installation
1. Remove tail lamp covers.
2. Remove trunk floor and battery cover. Refer to operations in
this section.
3. Remove and discard the two fir tr ee fasteners securing finisher
to trunk rear panel.
4. Pull rear finisher upwards to release upper spring clips and
remove finisher from trunk.
1. Position finisher on trunk rear panel and press firmly
downwards to engage spring clips.
2. Fit and fully seat fir tree fasteners.
3. Fit trunk floor and battery cover. Refer to operations in this
section.
4. Fit tail lamp covers.
Page 2084 of 2490

Interior Trim and Ornamentation - Luggage Compartment Side Trim Panel
Removal and Installation
Removal
Installation
1.
Remove trunk floor carpet.
2. Remove trunk front liner. Refer to 76.19.31.
3. Remove trunk rear finisher. Refer to 76.19.44.
4. Remove literature pack from tr unk side liner (RH side only).
5. Remove side liner from trunk.
1. Position and fully seat side liner in trunk.
2. Install literature pack on side liner (RH side only).
3. Fit trunk rear finisher.Refer to 76.19.44.
4. Fit trunk front liner. Refer to 76.19.31.
5. Fit trunk floor carpet.
Page 2085 of 2490

Interior Trim and Ornamentation - Overhead Console Finish Panel
Removal and Installation
Removal
Installation
1.
Remove battery cover and disc onnect ground cable from
battery terminal. Refer to 86.15.19.
2. Remove roof console. Refer to 76.13.69.90.
3. Bend back veneer panel retain ing tangs from console and using a thin blade, carefully release panel from console.
1. Remove backing paper and apply adhesive pad to back of
panel.
2. Position and fully seat ve neer panel on console.
3. Bend retaining tangs to secure veneer panel to console.
4. Install roof console. Refer to 76.13.69.90.
5. Connect ground cable to batter y terminal and install battery
cover. Refer to 86.15.15.
Page 2086 of 2490

Interior Trim and Ornamentation - Parcel Shelf
Removal and Installation
Removal
Installation
1.
Open both rear doors.
2. Remove rear seat cushion. Refer to 76.70.37.
3. Remove rear seat squa b. Refer to 76.70.38.
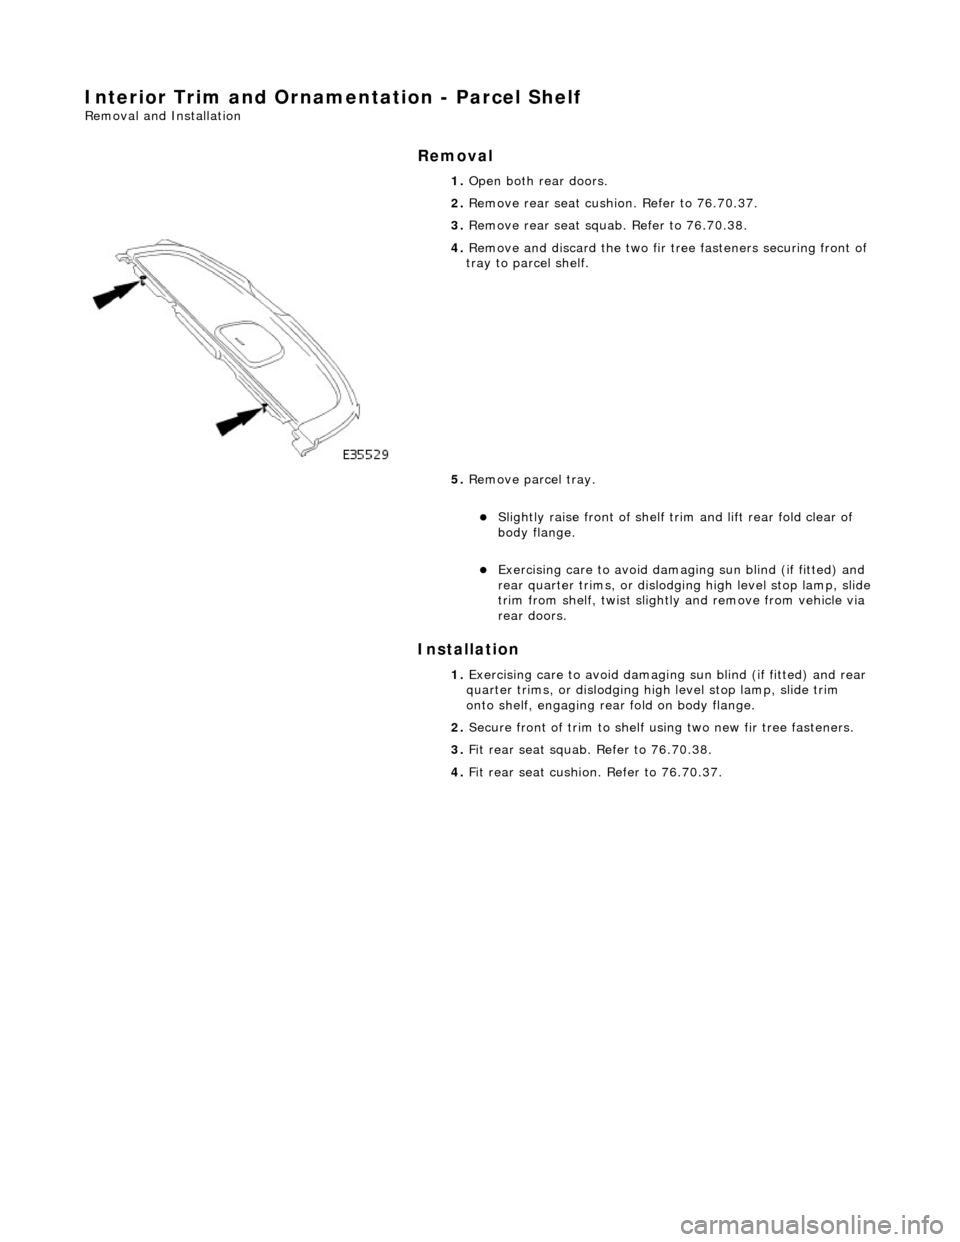
4. Remove and discard the two fir tr ee fasteners securing front of
tray to parcel shelf.
5. Remove parcel tray.
Slightly raise front of shelf trim and lift rear fold clear of
body flange.
Exercising care to avoid dama ging sun blind (if fitted) and
rear quarter trims, or dislodging high level stop lamp, slide trim from shelf, twist slightly and remove from vehicle via
rear doors.
1. Exercising care to avoid damaging sun blind (if fitted) and rear
quarter trims, or dislodging hi gh level stop lamp, slide trim
onto shelf, engaging rear fold on body flange.
2. Secure front of trim to shelf using two new fir tr ee fasteners.
3. Fit rear seat squab. Refer to 76.70.38.
4. Fit rear seat cushion. Refer to 76.70.37.