303 00 JAGUAR XFR 2010 1.G Owner's Manual
[x] Cancel search | Manufacturer: JAGUAR, Model Year: 2010, Model line: XFR, Model: JAGUAR XFR 2010 1.GPages: 3039, PDF Size: 58.49 MB
Page 839 of 3039
Published: 09-Apr-2014
Engine System - General Information - Cylinder Compression Test V8 S/C 5.0L
Petrol
General Procedures
Check
CAUTION: Before disconnecting or removing components, make sure the area around the joint faces and connections are
clean. Plug open connections to prevent contamination.
NOTES:
Removal steps in this procedure may contain installation details.
Some variation in the illustrations may occur, but the essential information is always correct.
The vehicle battery must be in good condition and fully charged before carrying out this procedure.
1. Refer to: Ignition Coil-On-Plug - V8 S/C 5.0L Petrol (303-07B Engine Ignition - V8 5.0L Petrol/V8 S/C 5.0L Petrol, Removal and Installation).
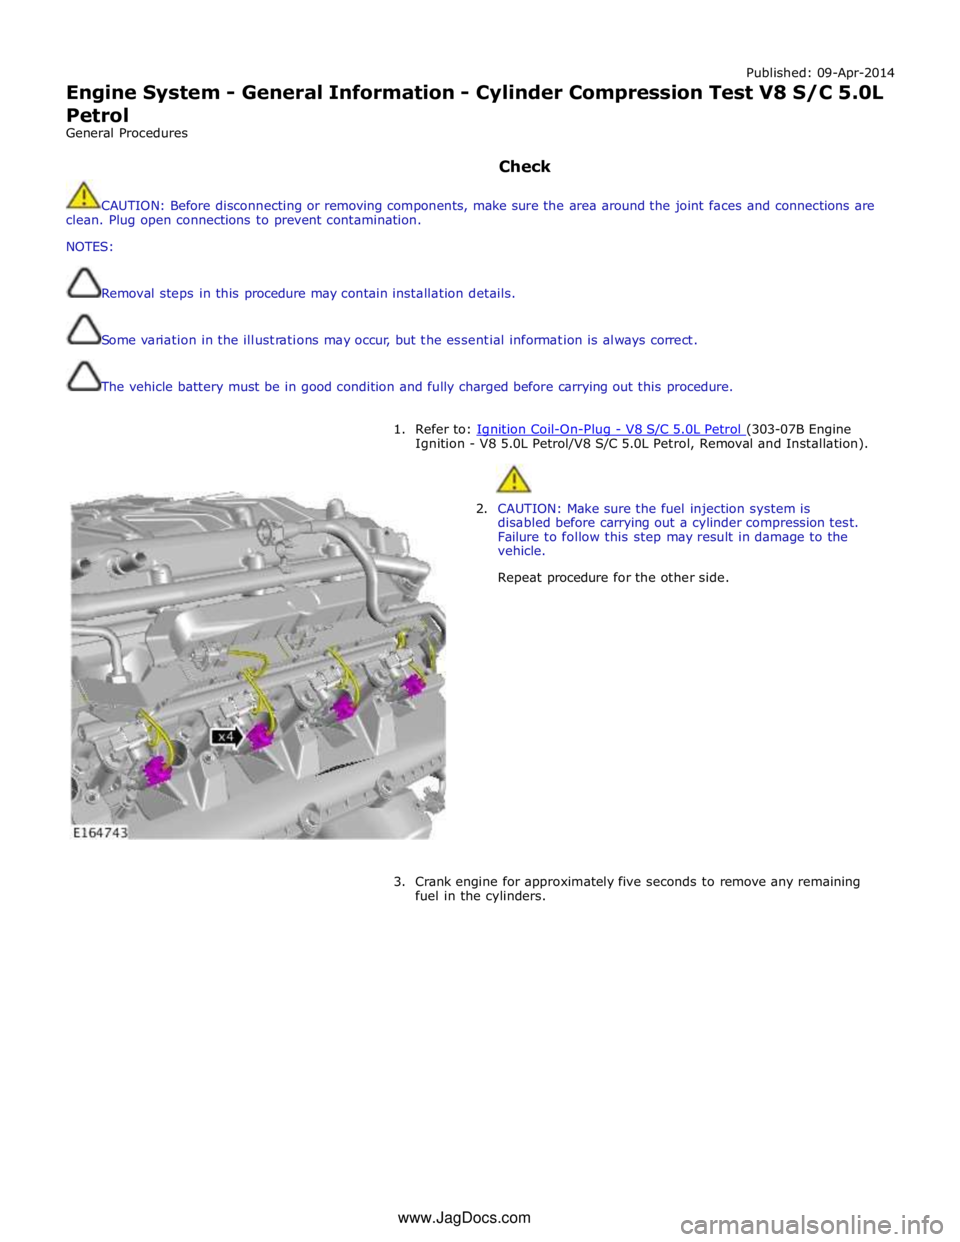
2. CAUTION: Make sure the fuel injection system is
disabled before carrying out a cylinder compression test.
Failure to follow this step may result in damage to the
vehicle.
Repeat procedure for the other side.
3. Crank engine for approximately five seconds to remove any remaining
fuel in the cylinders. www.JagDocs.com
Page 869 of 3039
Operating Temperature Range -40 to 160 °C (-40 to 320 °F) Oil Level Check
For additional information, refer to Engine Oil Draining and Filling (303-01A, General Procedures).
For accuracy, oil level checks should be performed with the vehicle on level ground when the oil is hot. The vehicle needs to
stand for approximately 10 minutes, after the engine is switched off, to allow the oil to drain back into the sump pan and the
oil level to stabilize. The oil level system will not give a reading until the oil level has stabilized.
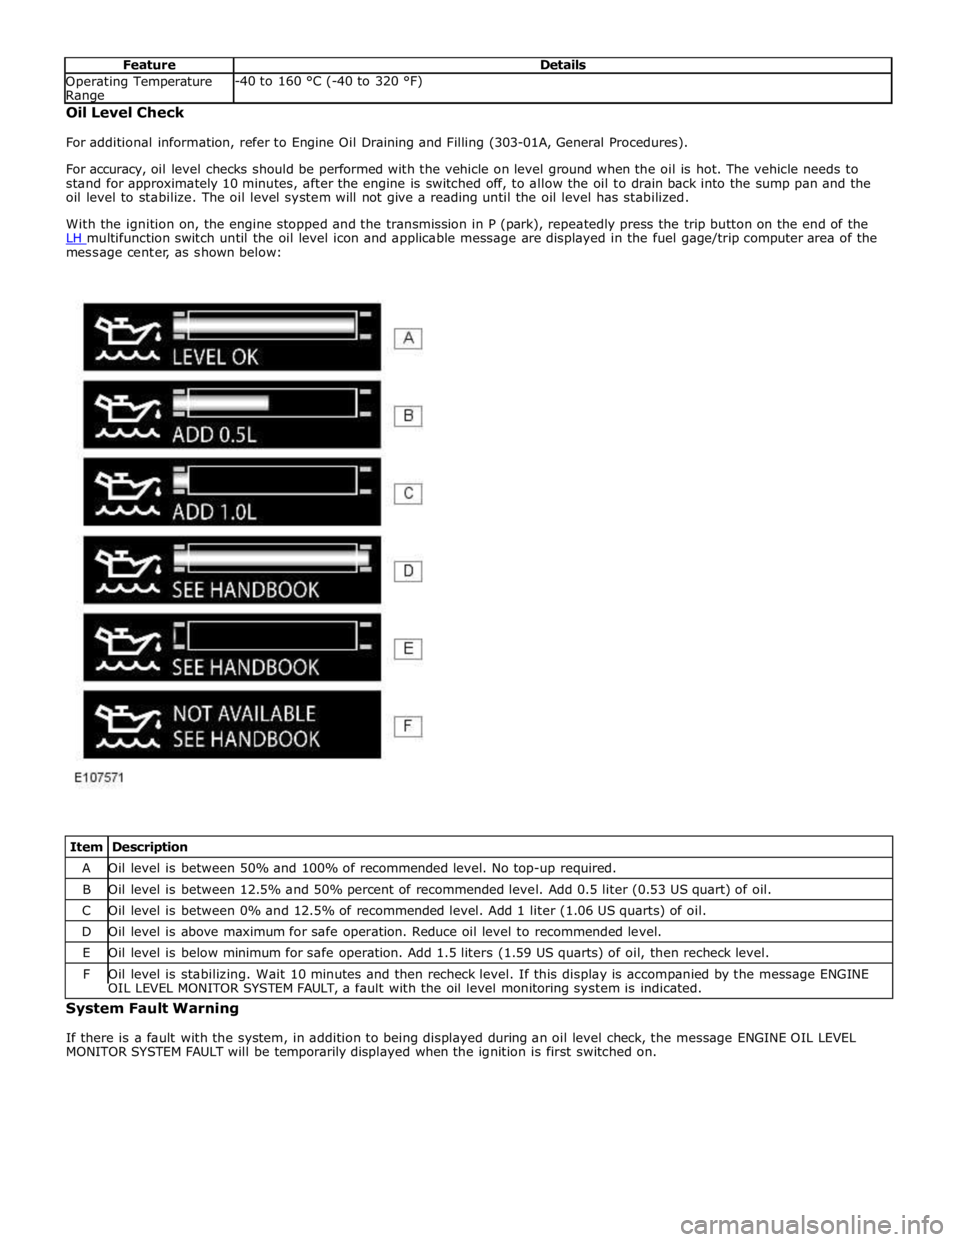
With the ignition on, the engine stopped and the transmission in P (park), repeatedly press the trip button on the end of the
LH multifunction switch until the oil level icon and applicable message are displayed in the fuel gage/trip computer area of the message center, as shown below:
Item Description A Oil level is between 50% and 100% of recommended level. No top-up required. B Oil level is between 12.5% and 50% percent of recommended level. Add 0.5 liter (0.53 US quart) of oil. C Oil level is between 0% and 12.5% of recommended level. Add 1 liter (1.06 US quarts) of oil. D Oil level is above maximum for safe operation. Reduce oil level to recommended level. E Oil level is below minimum for safe operation. Add 1.5 liters (1.59 US quarts) of oil, then recheck level. F Oil level is stabilizing. Wait 10 minutes and then recheck level. If this display is accompanied by the message ENGINE OIL LEVEL MONITOR SYSTEM FAULT, a fault with the oil level monitoring system is indicated. System Fault Warning
If there is a fault with the system, in addition to being displayed during an oil level check, the message ENGINE OIL LEVEL
MONITOR SYSTEM FAULT will be temporarily displayed when the ignition is first switched on.
Page 873 of 3039

Filling
1. CAUTION: Make sure that the area around the
component is clean and free of foreign material.
NOTE: Install a new sealing washer.
Torque: 24 Nm
2. Refer to: Air Deflector (501-02 Front End Body Panels, Removal and Installation).
3. NOTE: Install new O-ring seals.
Lubricate the oil filter element O-ring seal with clean
engine oil.
4. CAUTION: Tighten the component finger tight first.
Torque: 25 Nm
5. CAUTION: Make sure that the vehicle is left for 5 minutes from
filling with oil and that the engine oil level is reading at least minimum
(by following Steps 9-13), before starting the engine.
Fill the engine with oil - for filling values on vehicles without
supercharger:
Refer to: Specifications (303-01C Engine - V8 5.0L Petrol, Specifications).
Fill the engine with oil - for filling values on vehicles with
supercharger:
Page 874 of 3039
Refer to: Specifications (303-01D Engine - V8 S/C 5.0L Petrol, Specifications).
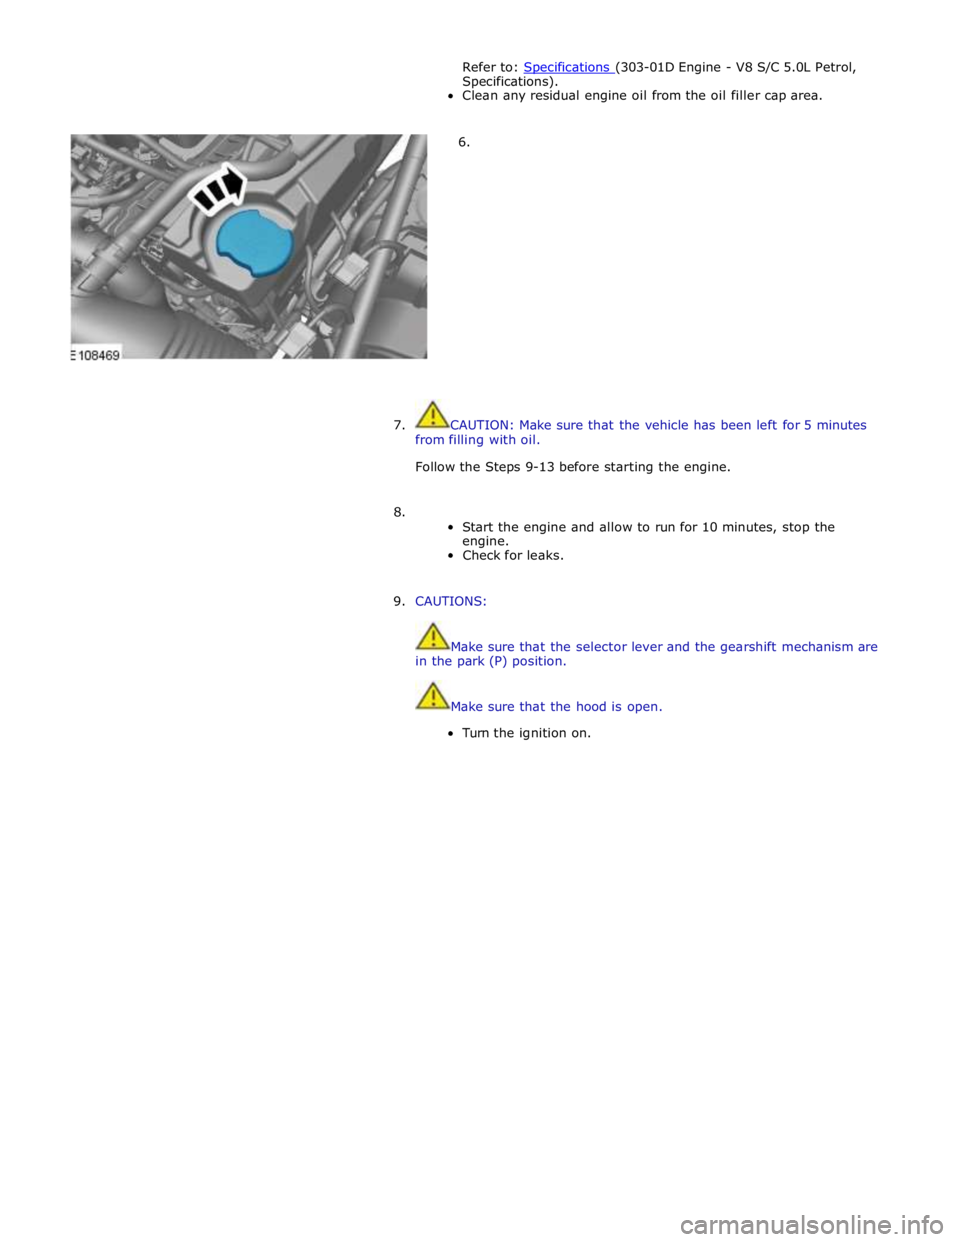
Clean any residual engine oil from the oil filler cap area.
6.
7. CAUTION: Make sure that the vehicle has been left for 5 minutes
from filling with oil.
Follow the Steps 9-13 before starting the engine.
8.
Start the engine and allow to run for 10 minutes, stop the
engine.
Check for leaks.
9. CAUTIONS:
Make sure that the selector lever and the gearshift mechanism are
in the park (P) position.
Make sure that the hood is open.
Turn the ignition on.
Page 878 of 3039

Published: 11-May-2011
Engine - V8 S/C 5.0L Petrol - Engine Oil Vacuum Draining and Filling
General Procedures
Special Tool(s)
303-1484
Vacuum Pump, Oil Drain
303-1484-01
Adapter for 303-1484
Draining
WARNING: The spilling of hot engine oil is unavoidable during this procedure, care must be taken to prevent scalding.
CAUTION: Correct installation of the oil filler cap can be obtained by tightening the cap until hard stop.
NOTES:
Make sure that the vehicle is parked on level ground.
Clean the components general area prior to dismantling.
1.
Start the engine and allow to run for 10 minutes, stop the
engine.
2. CAUTION: Allow 10 minutes from turning the engine off
before starting oil extraction.
3. Refer to: Engine Cover - V8 5.0L Petrol/V8 S/C 5.0L Petrol (501-05 Interior Trim and Ornamentation, Removal and Installation).
Page 880 of 3039

8. NOTE: Discard the O-ring seals.
Filling
1. NOTE: Install new O-ring seals.
Lubricate the oil filter element O-ring seal with clean
engine oil.
2. CAUTION: Tighten the component finger tight first.
Torque: 25 Nm
3. CAUTION: Make sure that the vehicle is left for 5 minutes from
filling with oil and that the engine oil level is reading at least minimum
(by following Steps 7-11), before starting the engine.
Fill the engine with oil - for filling values on vehicles without
supercharger:
Refer to: Specifications (303-01C Engine - V8 5.0L Petrol, Specifications).
Fill the engine with oil - for filling values on vehicles with
supercharger:
Refer to: Specifications (303-01D Engine - V8 S/C 5.0L Petrol,
Page 885 of 3039
Engine - V8 S/C 5.0L Petrol - Fuel Pump Camshaft Timing Check
General Procedures
Special Tool(s)
303-1447
Timing Tool
JLR-303-1621
Alignment Tool, Fuel Pump Camshaft Timing
Check Published: 16-Dec-2013
1. Refer to: Battery Disconnect and Connect (414-01 Battery, Mounting and Cables, General Procedures).
2. WARNING: Do not work on or under a vehicle supported only by a jack. Always
support the vehicle on safety stands.
Raise and support the vehicle.
3. Refer to: Air Deflector (501-02 Front End Body Panels, Removal and Installation).
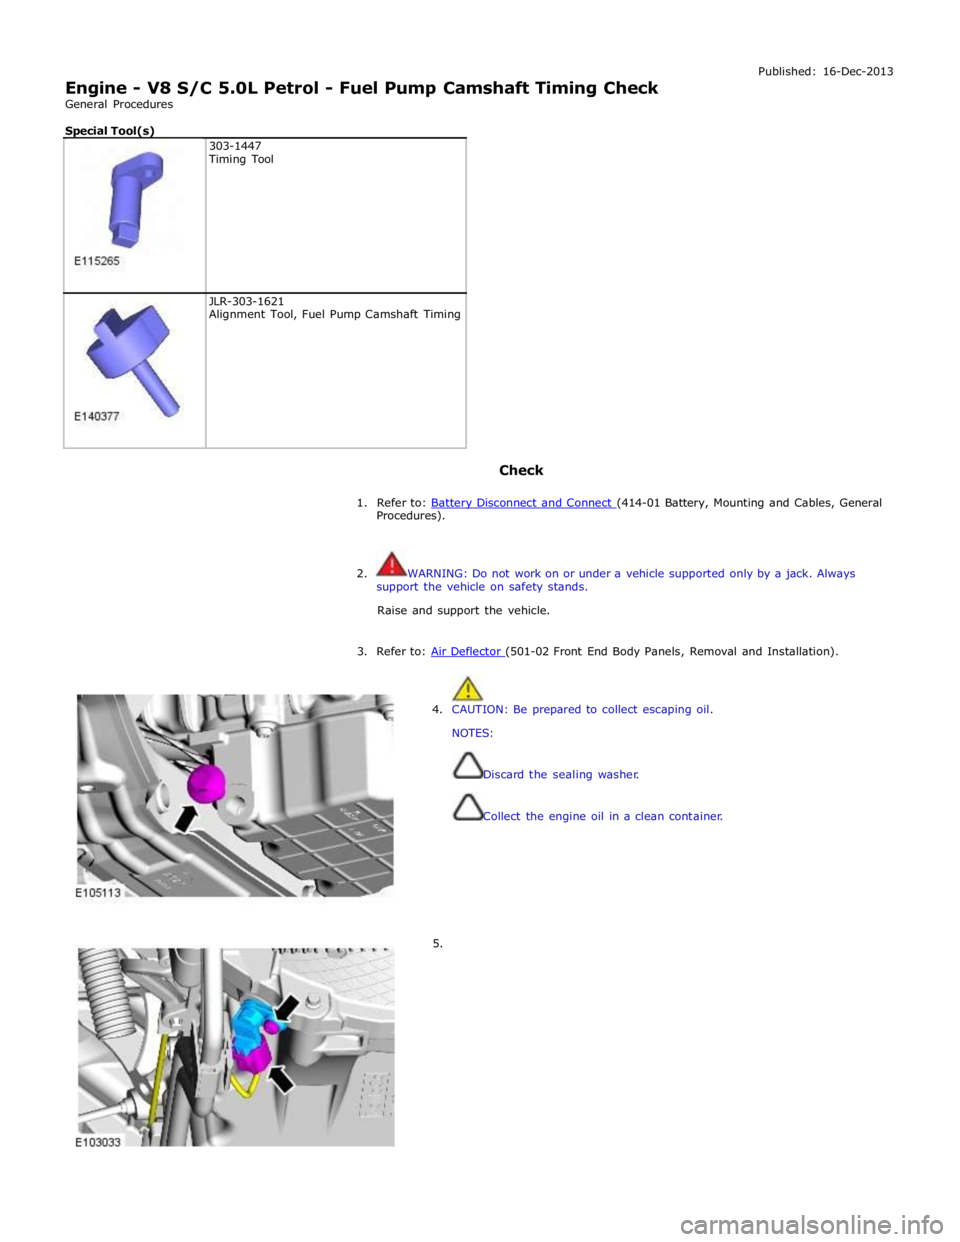
4. CAUTION: Be prepared to collect escaping oil.
NOTES:
Discard the sealing washer.
Collect the engine oil in a clean container.
5.
Page 886 of 3039
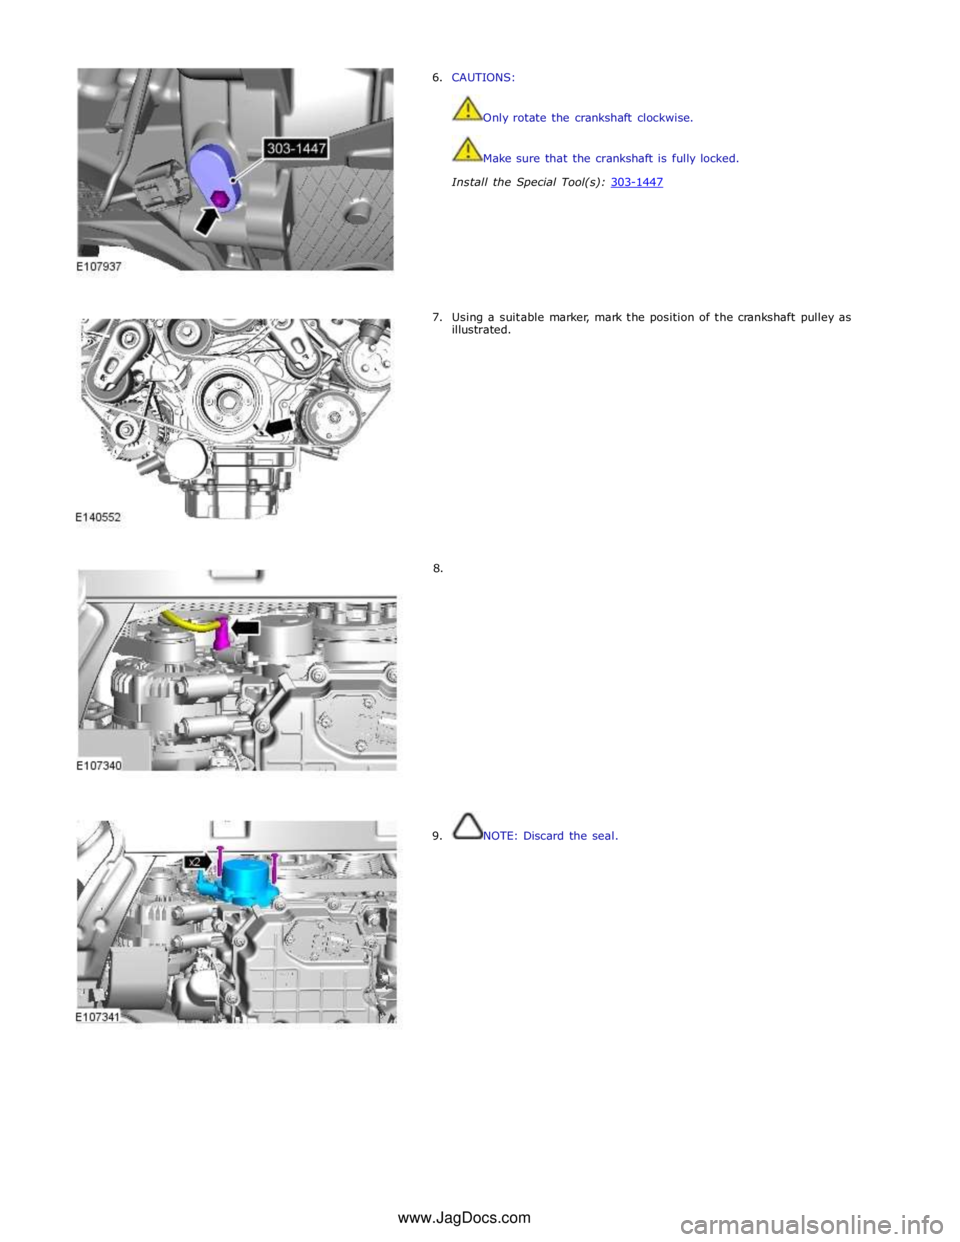
6. CAUTIONS:
Only rotate the crankshaft clockwise.
Make sure that the crankshaft is fully locked.
Install the Special Tool(s): 303-1447
7. Using a suitable marker, mark the position of the crankshaft pulley as
illustrated.
8.
9. NOTE: Discard the seal. www.JagDocs.com
Page 887 of 3039

10. Remove the Special Tool(s): 303-1447
11.
If required,
carefully
adjust the
crankshaft
position to
allow correct
installation
of the
special tool.
Install the
Special
Tool(s):
JLR-303-1621
12.
CAUTION: Do not use excessive force when adjusting the crankshaft
position.
NOTE: If the crankshaft timing tool cannot be installed, adjustment of
the fuel pump camshaft timing will be required.
If required, carefully adjust the crankshaft position to allow correct
installation of the special tool.
Install the Special Tool(s): 303-1447 If the crankshaft timing tool cannot be installed, adjustment of the
fuel pump camshaft timing will be required.
Refer to: Fuel Pump Camshaft Timing Adjustment (303-01C Engine - V8 5.0L Petrol, General Procedures).
Page 888 of 3039
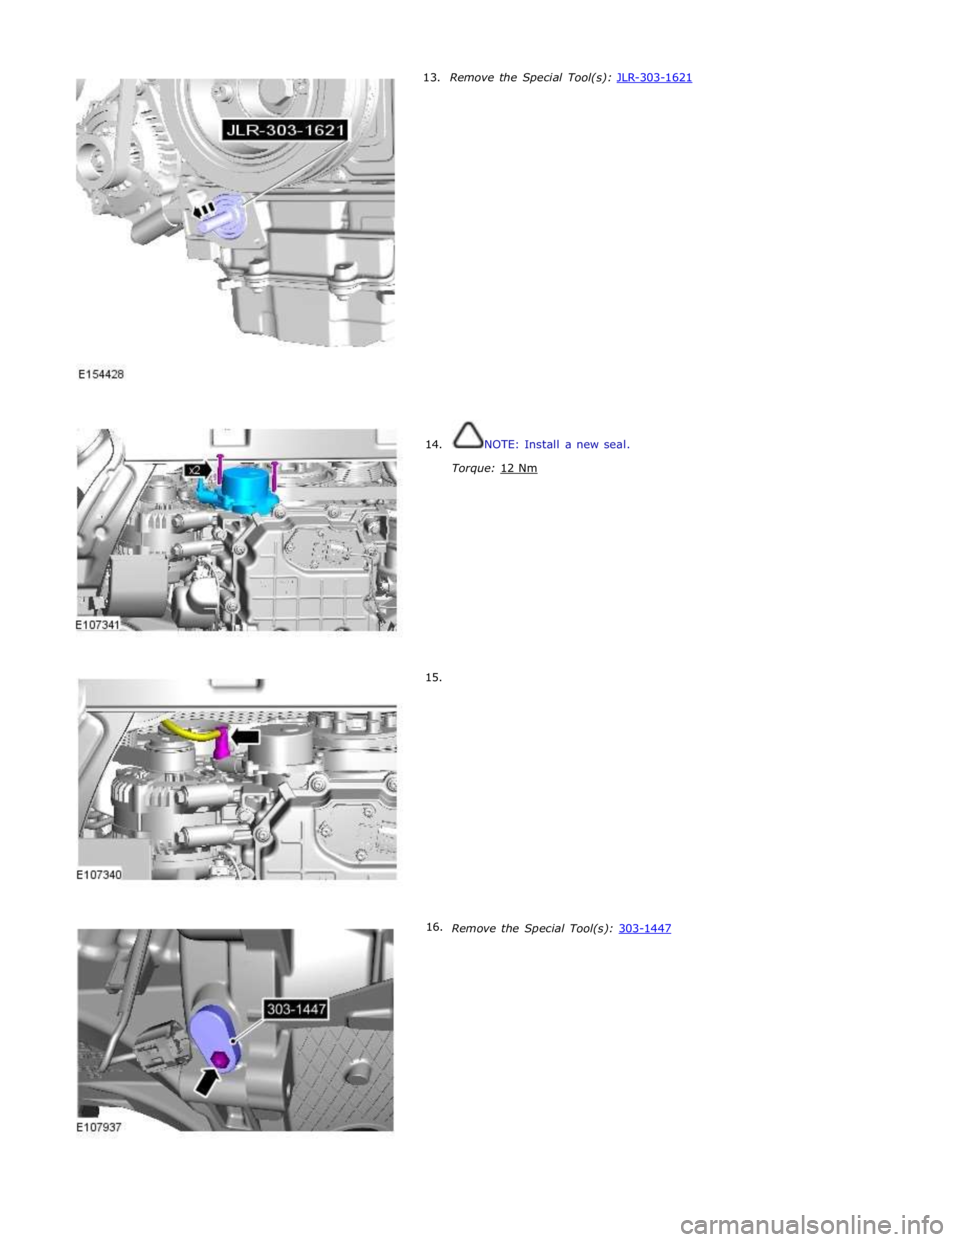
13.
14.
15.
16. Remove the Special Tool(s): JLR-303-1621
NOTE: Install a new seal.
Torque: 12 Nm
Remove the Special Tool(s): 303-1447