303 00 JAGUAR XFR 2010 1.G Owner's Guide
[x] Cancel search | Manufacturer: JAGUAR, Model Year: 2010, Model line: XFR, Model: JAGUAR XFR 2010 1.GPages: 3039, PDF Size: 58.49 MB
Page 889 of 3039
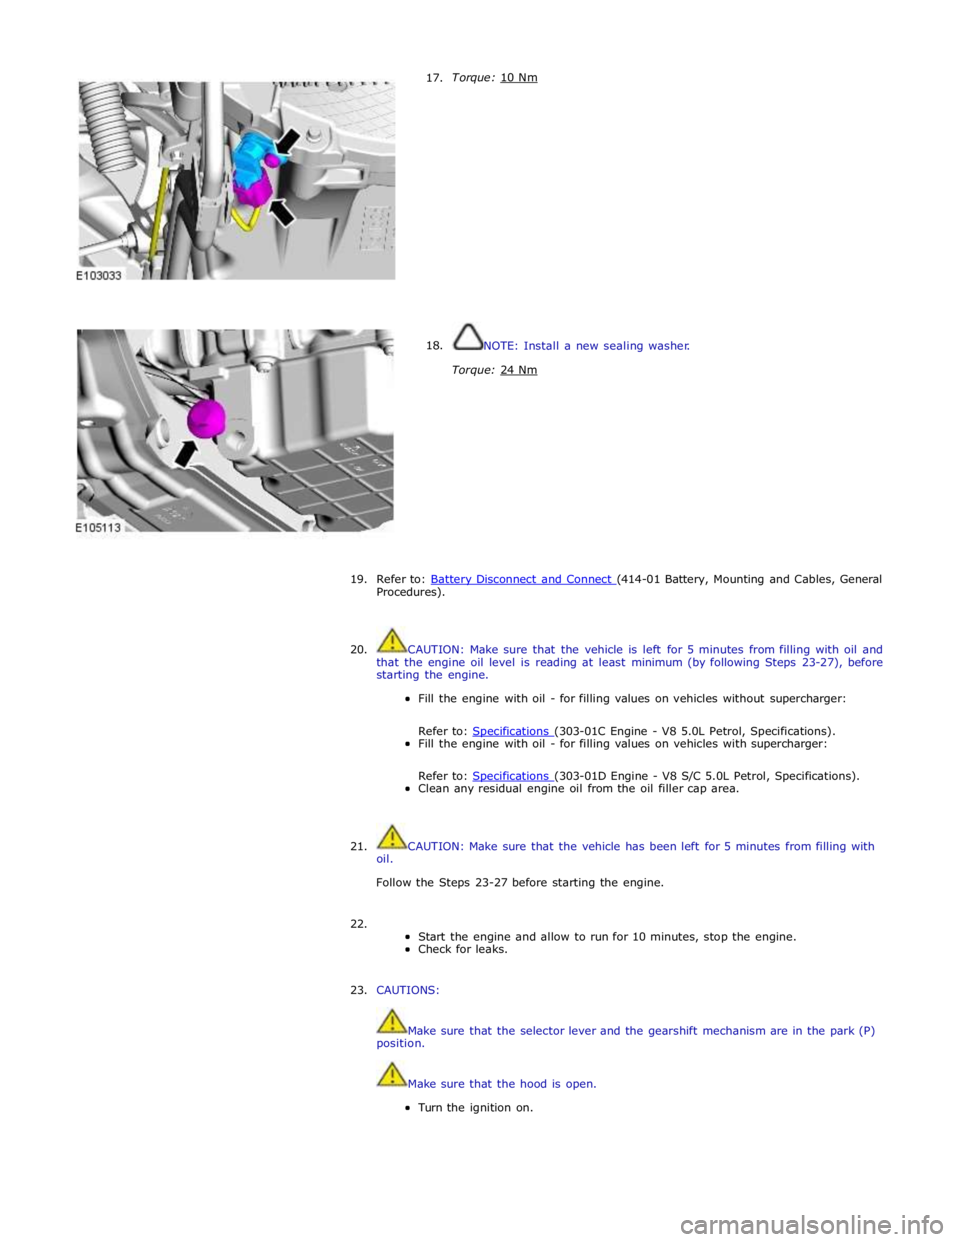
17.
18. Torque: 10 Nm
NOTE: Install a new sealing washer.
Torque: 24 Nm
19.
20. Refer to: Battery Disconnect and Connect (414-01 Battery, Mounting and Cables, General Procedures).
CAUTION: Make sure that the vehicle is left for 5 minutes from filling with oil and
that the engine oil level is reading at least minimum (by following Steps 23-27), before
starting the engine.
Fill the engine with oil - for filling values on vehicles without supercharger:
Refer to: Specifications (303-01C Engine - V8 5.0L Petrol, Specifications). Fill the engine with oil - for filling values on vehicles with supercharger:
Refer to: Specifications (303-01D Engine - V8 S/C 5.0L Petrol, Specifications). Clean any residual engine oil from the oil filler cap area.
21.
oil. CAUTION: Make sure that the vehicle has been left for 5 minutes from filling with
Follow the Steps 23-27 before starting the engine.
22.
Start the engine and allow to run for 10 minutes, stop the engine.
Check for leaks.
23. CAUTIONS:
Make sure that the selector lever and the gearshift mechanism are in the park (P)
position.
Make sure that the hood is open.
Turn the ignition on.
Page 893 of 3039

Published: 21-Dec-2011
Engine - V8 S/C 5.0L Petrol - Fuel Pump Camshaft Timing Adjustment
General Procedures
Special Tool(s)
303-1447
Timing Tool
JLR-303-1613
Alignment Tool, Fuel Pump Camshaft Timing
Adjustment
1. Refer to: Battery Disconnect and Connect (414-01 Battery, Mounting and Cables, General Procedures).
2. WARNING: Do not work on or under a vehicle supported only by a jack.
Always support the vehicle on safety stands.
Raise and support the vehicle.
3. Refer to: Fuel Pump Camshaft Timing Check (303-01D Engine - V8 S/C 5.0L Petrol, General Procedures).
4. Refer to: Lower Timing Cover (303-01C Engine - V8 5.0L Petrol, Removal and Installation).
Refer to: Lower Timing Cover (303-01D Engine - V8 S/C 5.0L Petrol, Removal and Installation).
Page 894 of 3039
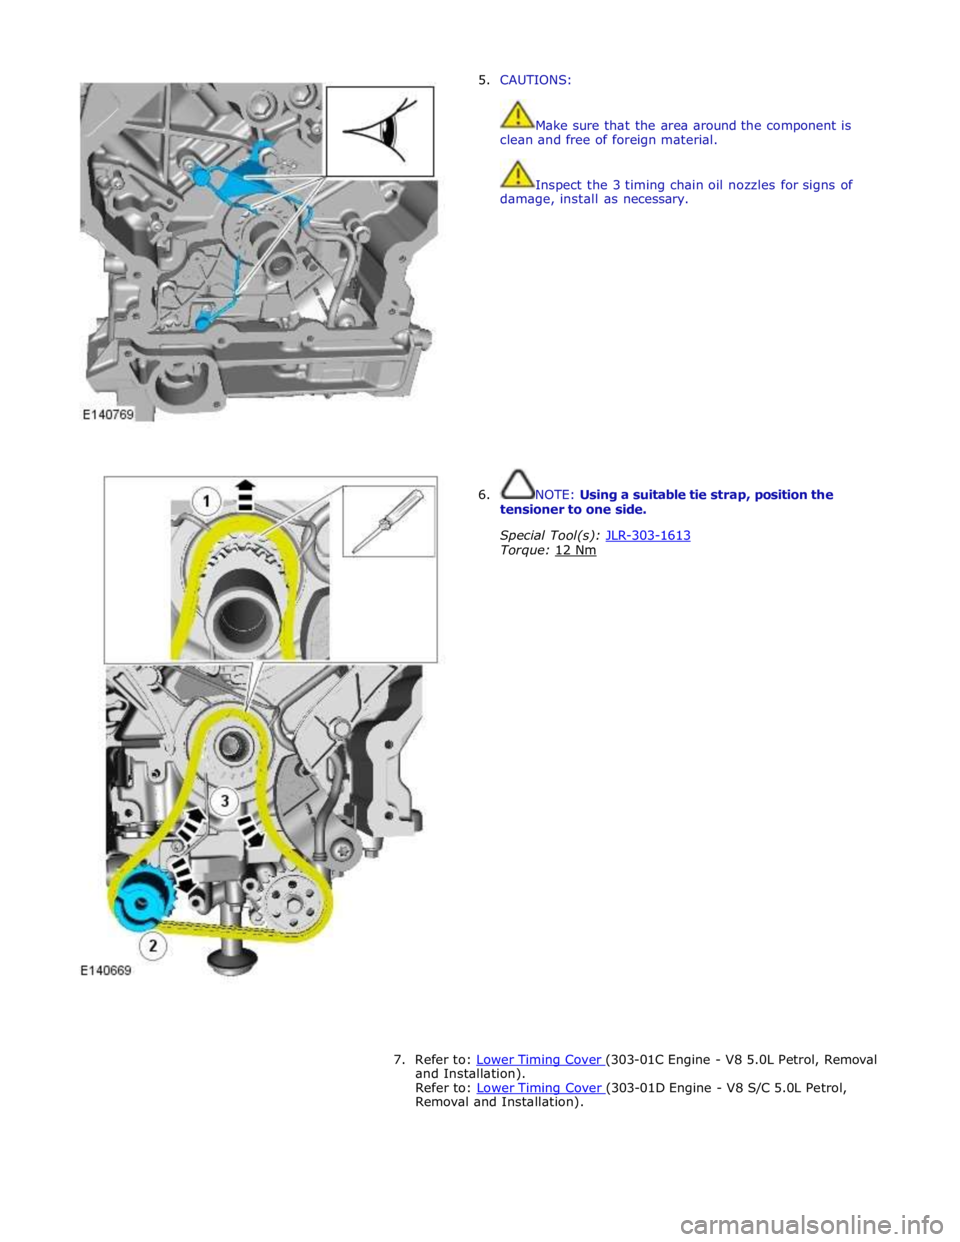
5. CAUTIONS:
Make sure that the area around the component is
clean and free of foreign material.
Inspect the 3 timing chain oil nozzles for signs of
damage, install as necessary.
6. NOTE: Using a suitable tie strap, position the
tensioner to one side.
Special Tool(s): JLR-303-1613 Torque: 12 Nm
7. Refer to: Lower Timing Cover (303-01C Engine - V8 5.0L Petrol, Removal and Installation).
Refer to: Lower Timing Cover (303-01D Engine - V8 S/C 5.0L Petrol, Removal and Installation).
Page 895 of 3039
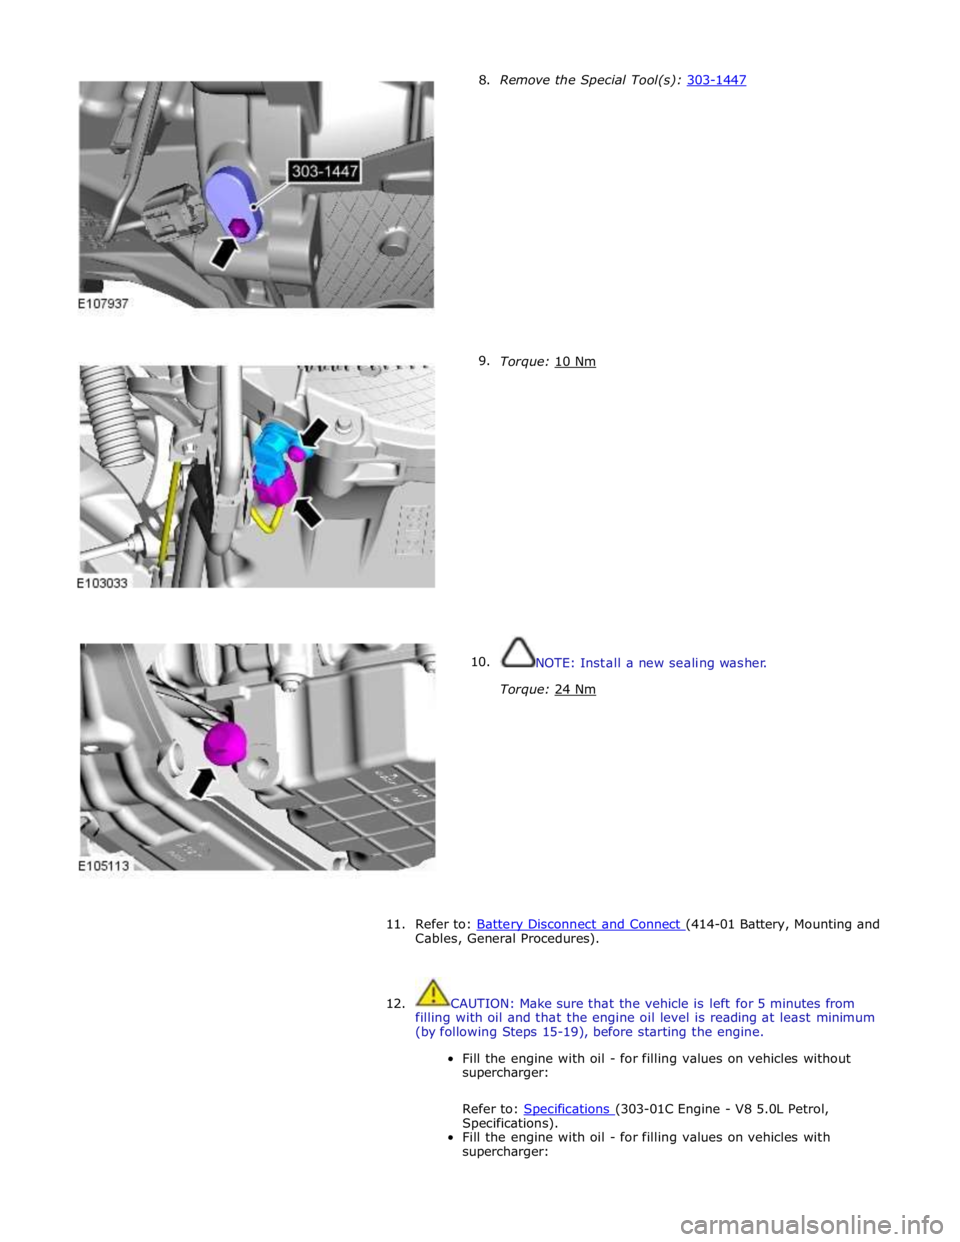
8.
9.
10. Remove the Special Tool(s): 303-1447
Torque: 10 Nm
NOTE: Install a new sealing washer.
Torque: 24 Nm
11. Refer to: Battery Disconnect and Connect (414-01 Battery, Mounting and Cables, General Procedures).
12. CAUTION: Make sure that the vehicle is left for 5 minutes from
filling with oil and that the engine oil level is reading at least minimum
(by following Steps 15-19), before starting the engine.
Fill the engine with oil - for filling values on vehicles without
supercharger:
Refer to: Specifications (303-01C Engine - V8 5.0L Petrol, Specifications).
Fill the engine with oil - for filling values on vehicles with
supercharger:
Page 896 of 3039
Refer to: Specifications (303-01D Engine - V8 S/C 5.0L Petrol, Specifications).
Clean any residual engine oil from the oil filler cap area.
13. CAUTION: Make sure that the vehicle has been left for 5 minutes
from filling with oil.
Follow the Steps 15-19 before starting the engine.
14.
Start the engine and allow to run for 10 minutes, stop the
engine.
Check for leaks.
15. CAUTIONS:
Make sure that the selector lever and the gearshift mechanism are
in the park (P) position.
Make sure that the hood is open.
Turn the ignition on.
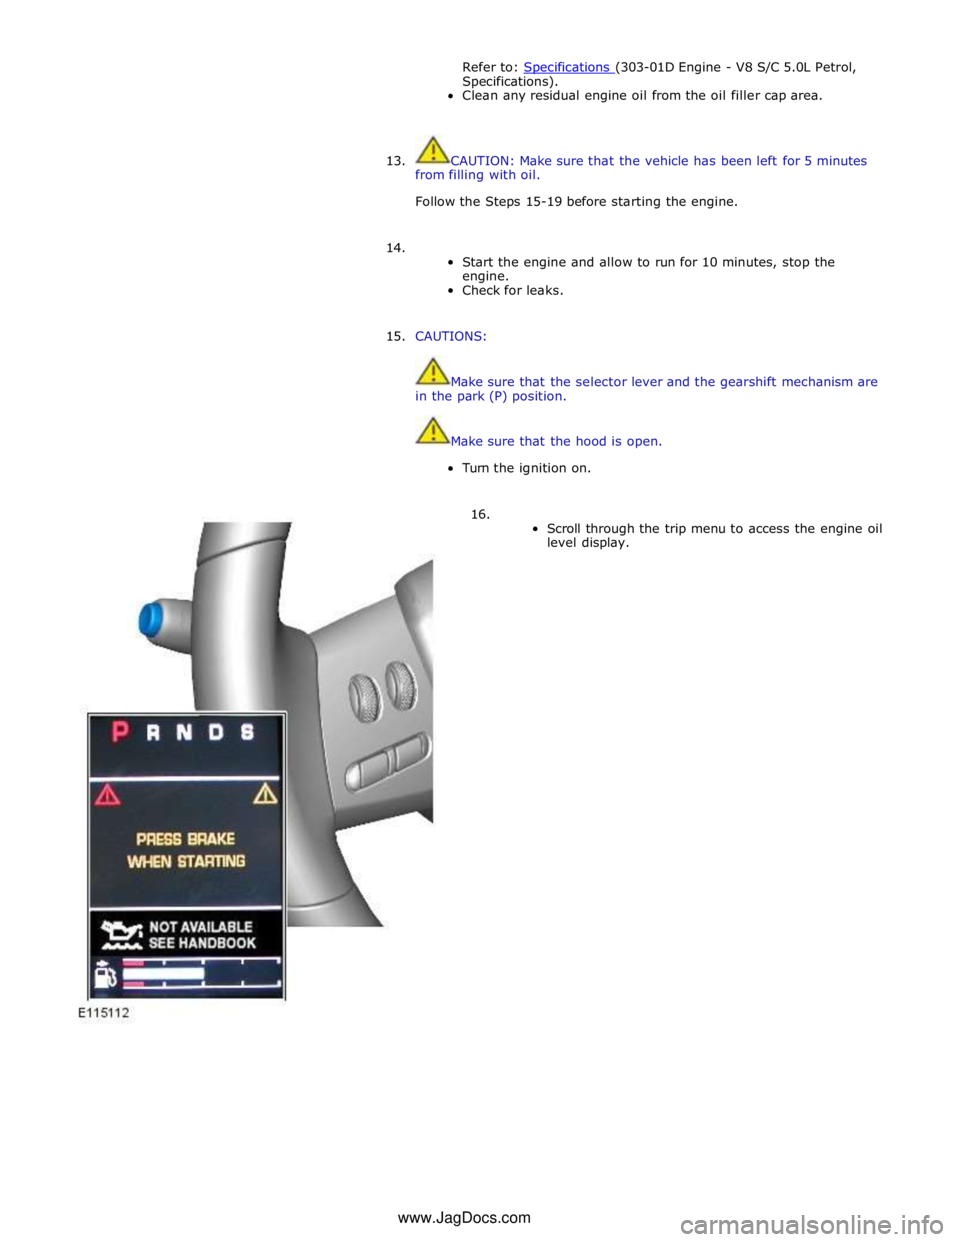
16.
Scroll through the trip menu to access the engine oil
level display. www.JagDocs.com
Page 899 of 3039

Engine - V8 S/C 5.0L Petrol - Valve Clearance Check
General Procedures
Check Published: 10-Jul-2013
1. Refer to: Battery Disconnect and Connect (414-01 Battery, Mounting and Cables, General Procedures).
2. WARNING: Do not work on or under a vehicle supported only by a jack.
Always support the vehicle on safety stands.
Raise and support the vehicle.
3. Refer to: Valve Cover LH (303-01D Engine - V8 S/C 5.0L Petrol, Removal and Installation).
4. Refer to: Valve Cover RH (303-01D Engine - V8 S/C 5.0L Petrol, Removal and Installation).
5. CAUTIONS:
Rotate the engine clockwise until the camshafts are positioned as
shown.
Do not rotate the crankshaft counterclockwise. The timing chains
may bind causing engine damage.
Camshaft lobes must be 180 degrees away from each valve tappet
or valve clearance will be incorrect.
NOTE: Using feeler gauge check the gap between the tappet and
the camshaft lobe and check against specifications table.
Using feeler gauge check the gap between the tappet and the
camshaft lobe and check against specifications table.
Repeat for the remaining valve tappets.
Page 901 of 3039

Engine - V8 S/C 5.0L Petrol - Valve Clearance Adjustment
General Procedures
Check Published: 10-Jul-2013
1. Refer to: Battery Disconnect and Connect (414-01 Battery, Mounting and Cables, General Procedures).
2. WARNING: Do not work on or under a vehicle supported only by a jack.
Always support the vehicle on safety stands.
Raise and support the vehicle.
3. Refer to: Valve Clearance Check (303-01D Engine - V8 S/C 5.0L Petrol, General Procedures).
Adjustment
1. Refer to: Camshaft LH (303-01D Engine - V8 S/C 5.0L Petrol, Removal and Installation).
2. Refer to: Camshaft RH (303-01D Engine - V8 S/C 5.0L Petrol, Removal and Installation).
3. www.JagDocs.com
Page 908 of 3039

Engine - V8 S/C 5.0L Petrol - Crankshaft Front Seal
Removal and Installation Published: 11-May-2011
Removal
NOTE: Removal steps in this procedure may contain installation details.
1. Refer to: Battery Disconnect and Connect (414-01 Battery, Mounting and Cables, General Procedures).
2. Refer to: Crankshaft Pulley (303-01D Engine - V8 S/C 5.0L Petrol, Removal and Installation).
3. CAUTION: Do not over tighten the crankshaft front seal.
Failure to follow this instruction may result in damage to
the vehicle.
Special Tool(s): 303-1434 303-1434
Remover/Installer, Front Crankshaft Seal Special Tool(s)
Page 910 of 3039
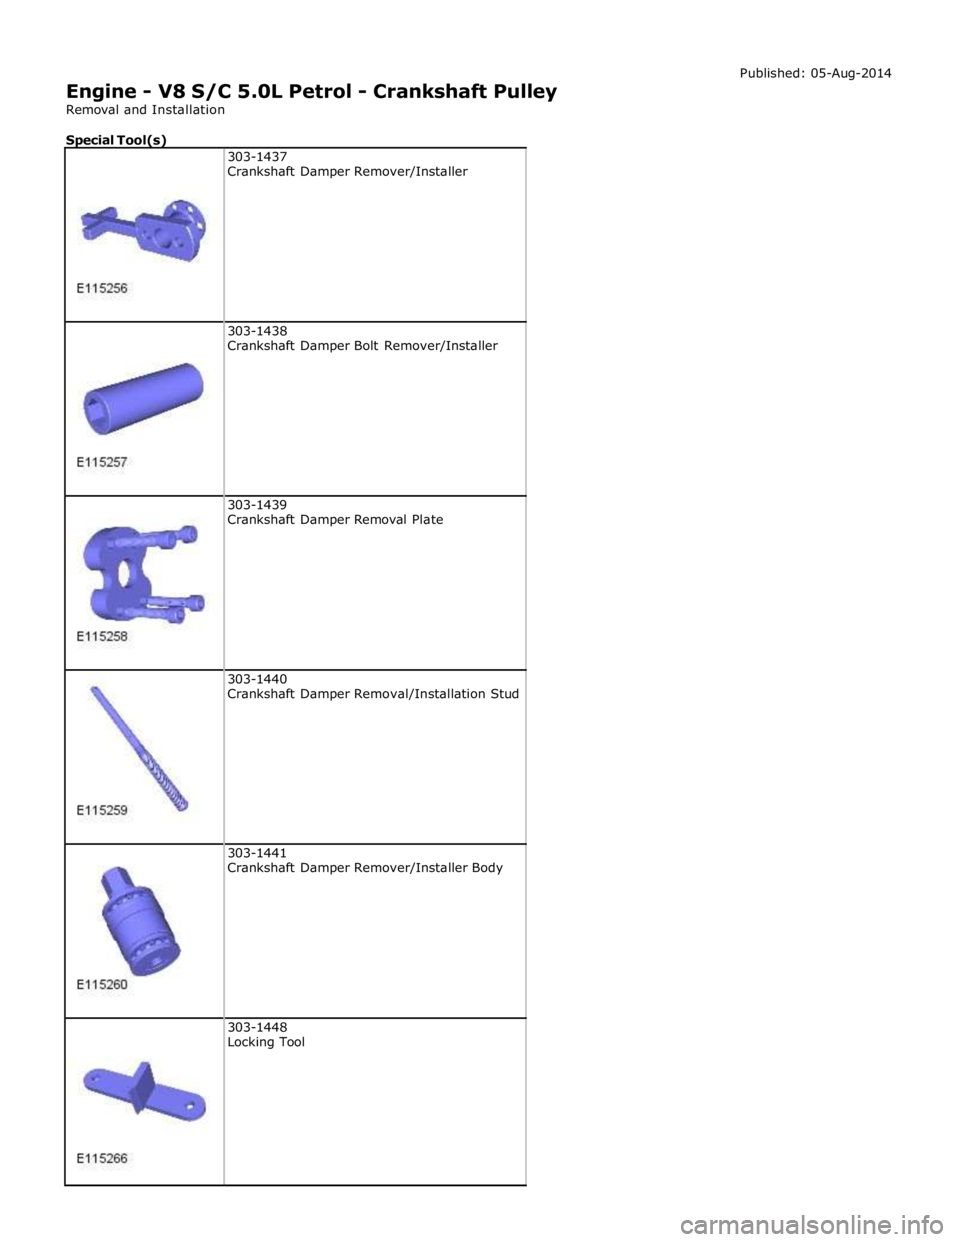
303-1438
Crankshaft Damper Bolt Remover/Installer
303-1439
Crankshaft Damper Removal Plate
303-1440
Crankshaft Damper Removal/Installation Stud
303-1441
Crankshaft Damper Remover/Installer Body
303-1448
Locking Tool
Page 911 of 3039
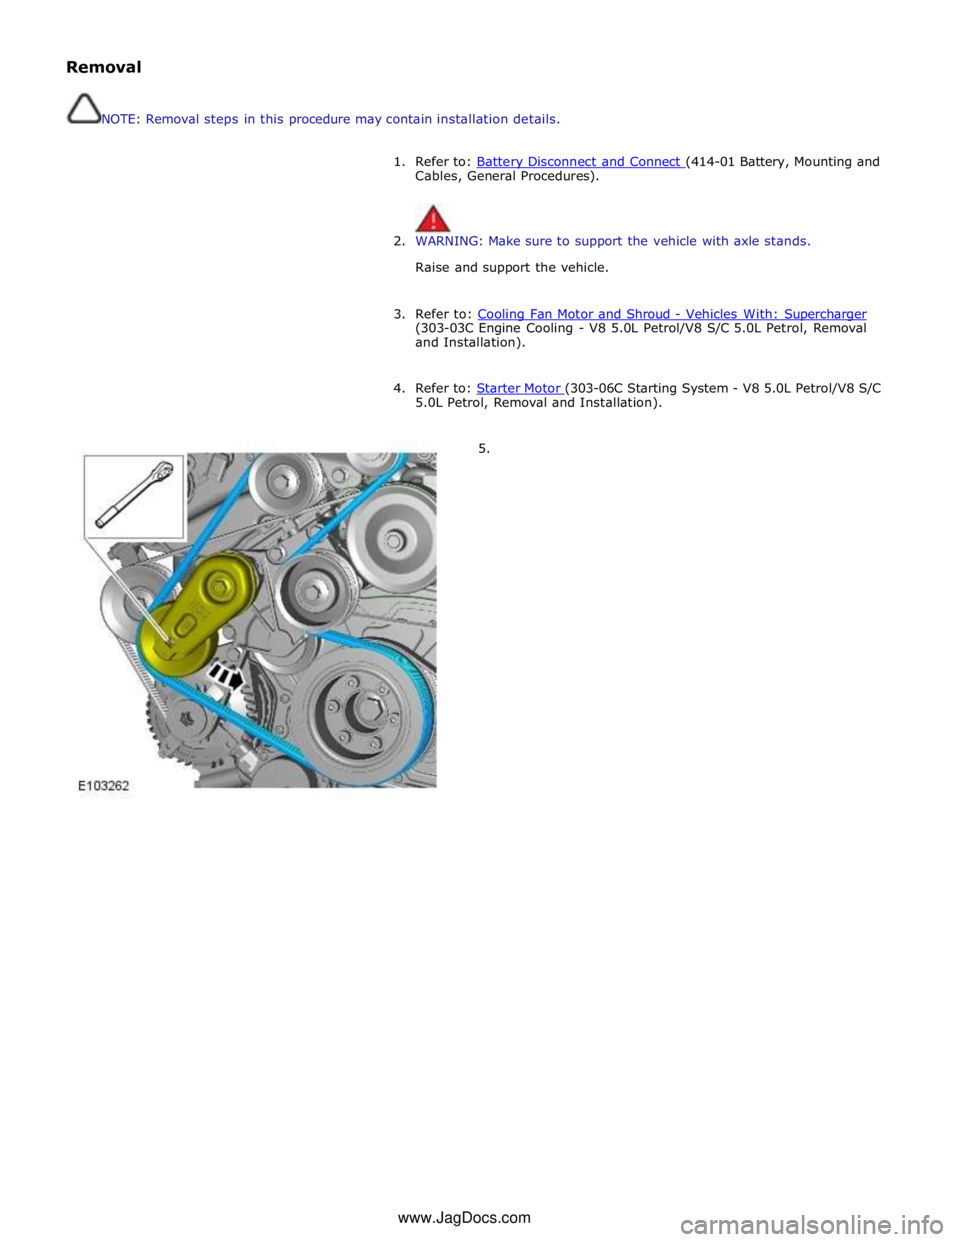
Removal
NOTE: Removal steps in this procedure may contain installation details.
1. Refer to: Battery Disconnect and Connect (414-01 Battery, Mounting and Cables, General Procedures).
2. WARNING: Make sure to support the vehicle with axle stands.
Raise and support the vehicle.
3. Refer to: Cooling Fan Motor and Shroud - Vehicles With: Supercharger (303-03C Engine Cooling - V8 5.0L Petrol/V8 S/C 5.0L Petrol, Removal
and Installation).
4. Refer to: Starter Motor (303-06C Starting System - V8 5.0L Petrol/V8 S/C 5.0L Petrol, Removal and Installation).
5. www.JagDocs.com