JAGUAR XFR 2010 1.G Workshop Manual
Manufacturer: JAGUAR, Model Year: 2010, Model line: XFR, Model: JAGUAR XFR 2010 1.GPages: 3039, PDF Size: 58.49 MB
Page 781 of 3039
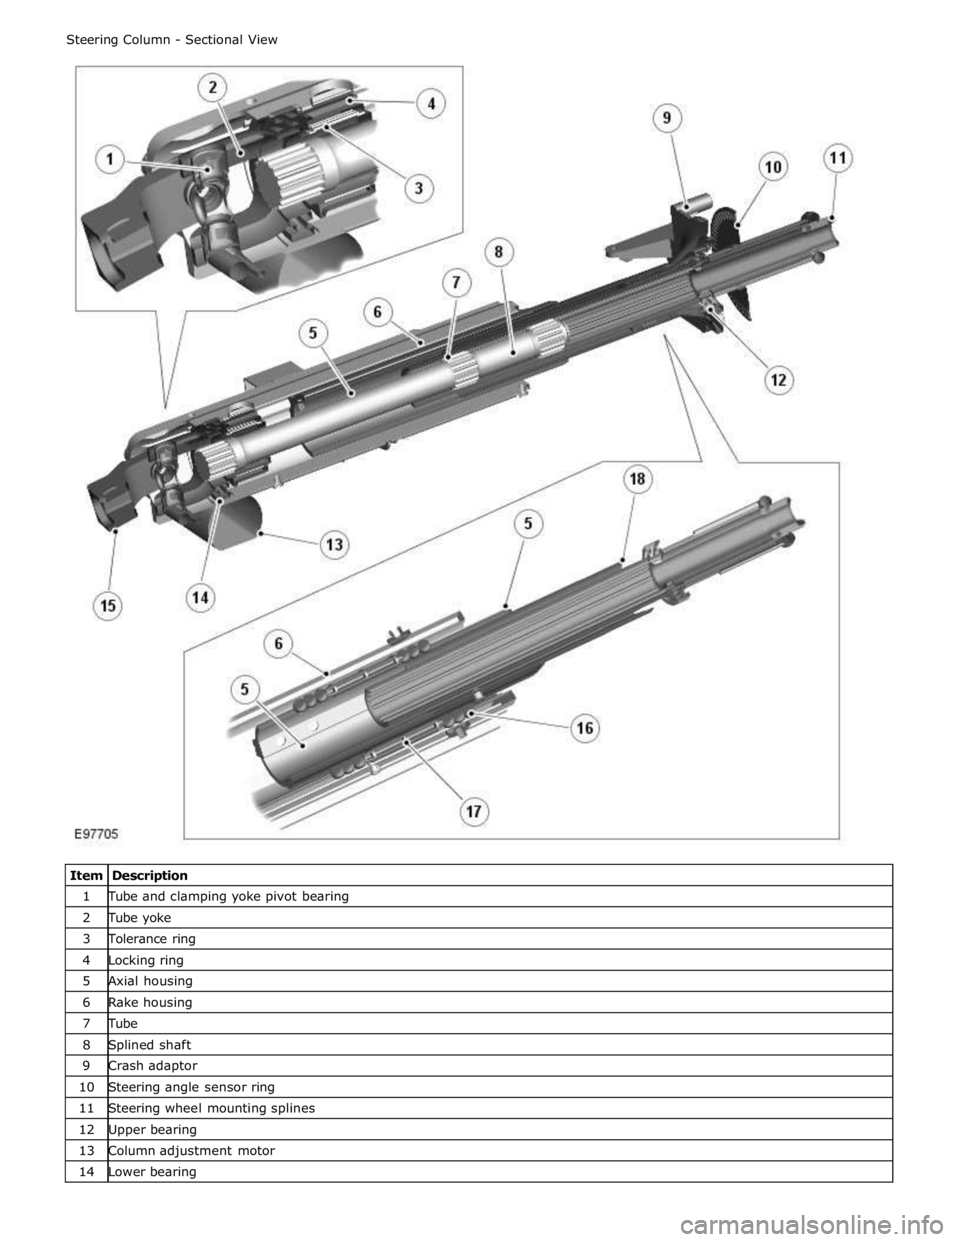
1 Tube and clamping yoke pivot bearing 2 Tube yoke 3 Tolerance ring 4 Locking ring 5 Axial housing 6 Rake housing 7 Tube 8 Splined shaft 9 Crash adaptor 10 Steering angle sensor ring 11 Steering wheel mounting splines 12 Upper bearing 13 Column adjustment motor 14 Lower bearing
Page 782 of 3039
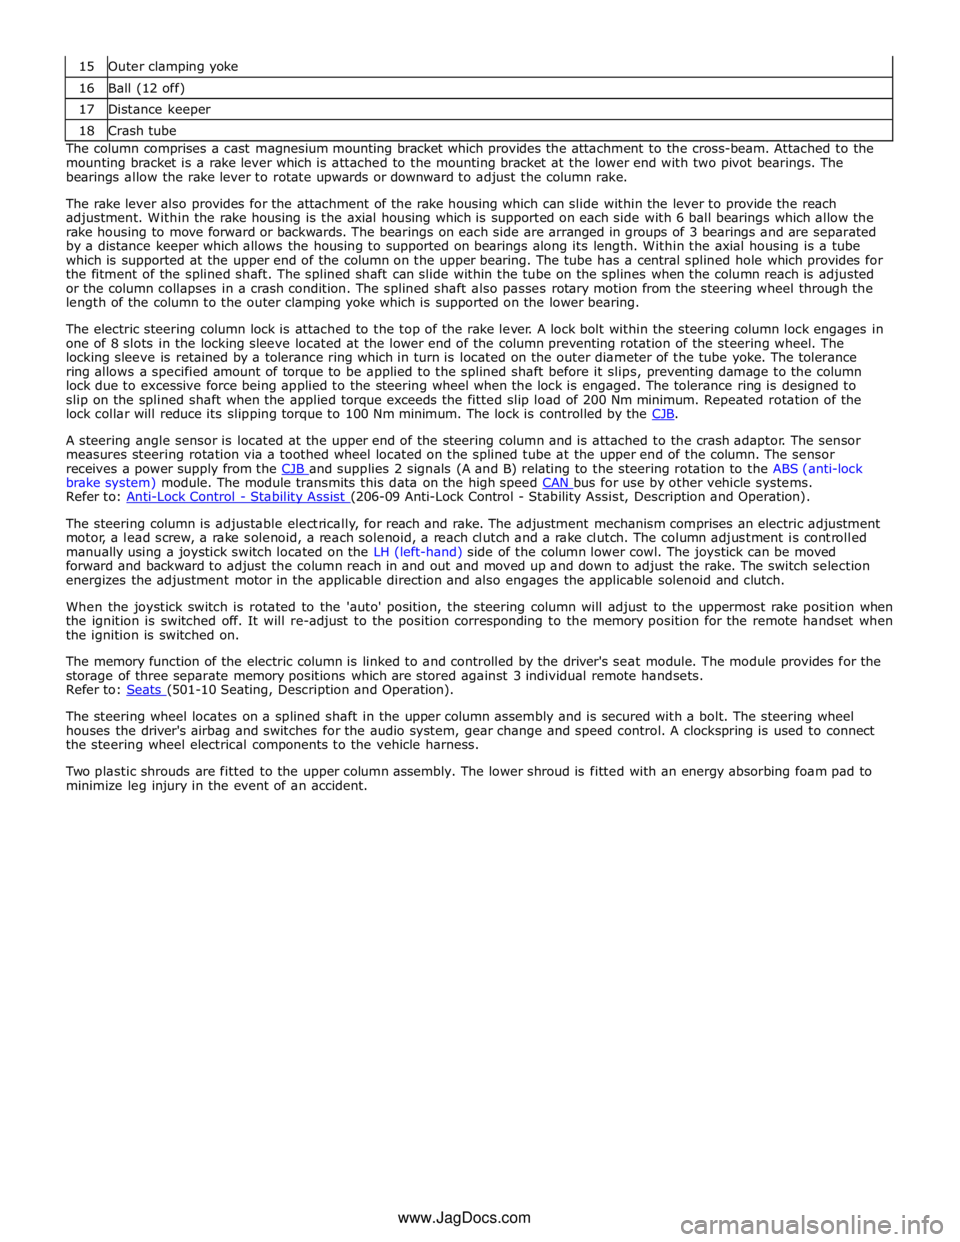
16 Ball (12 off) 17 Distance keeper 18 Crash tube The column comprises a cast magnesium mounting bracket which provides the attachment to the cross-beam. Attached to the
mounting bracket is a rake lever which is attached to the mounting bracket at the lower end with two pivot bearings. The
bearings allow the rake lever to rotate upwards or downward to adjust the column rake.
The rake lever also provides for the attachment of the rake housing which can slide within the lever to provide the reach
adjustment. Within the rake housing is the axial housing which is supported on each side with 6 ball bearings which allow the
rake housing to move forward or backwards. The bearings on each side are arranged in groups of 3 bearings and are separated
by a distance keeper which allows the housing to supported on bearings along its length. Within the axial housing is a tube
which is supported at the upper end of the column on the upper bearing. The tube has a central splined hole which provides for
the fitment of the splined shaft. The splined shaft can slide within the tube on the splines when the column reach is adjusted
or the column collapses in a crash condition. The splined shaft also passes rotary motion from the steering wheel through the
length of the column to the outer clamping yoke which is supported on the lower bearing.
The electric steering column lock is attached to the top of the rake lever. A lock bolt within the steering column lock engages in
one of 8 slots in the locking sleeve located at the lower end of the column preventing rotation of the steering wheel. The
locking sleeve is retained by a tolerance ring which in turn is located on the outer diameter of the tube yoke. The tolerance
ring allows a specified amount of torque to be applied to the splined shaft before it slips, preventing damage to the column
lock due to excessive force being applied to the steering wheel when the lock is engaged. The tolerance ring is designed to
slip on the splined shaft when the applied torque exceeds the fitted slip load of 200 Nm minimum. Repeated rotation of the
lock collar will reduce its slipping torque to 100 Nm minimum. The lock is controlled by the CJB.
A steering angle sensor is located at the upper end of the steering column and is attached to the crash adaptor. The sensor
measures steering rotation via a toothed wheel located on the splined tube at the upper end of the column. The sensor
receives a power supply from the CJB and supplies 2 signals (A and B) relating to the steering rotation to the ABS (anti-lock brake system) module. The module transmits this data on the high speed CAN bus for use by other vehicle systems. Refer to: Anti-Lock Control - Stability Assist (206-09 Anti-Lock Control - Stability Assist, Description and Operation).
The steering column is adjustable electrically, for reach and rake. The adjustment mechanism comprises an electric adjustment
motor, a lead screw, a rake solenoid, a reach solenoid, a reach clutch and a rake clutch. The column adjustment is controlled
manually using a joystick switch located on the LH (left-hand) side of the column lower cowl. The joystick can be moved
forward and backward to adjust the column reach in and out and moved up and down to adjust the rake. The switch selection
energizes the adjustment motor in the applicable direction and also engages the applicable solenoid and clutch.
When the joystick switch is rotated to the 'auto' position, the steering column will adjust to the uppermost rake position when
the ignition is switched off. It will re-adjust to the position corresponding to the memory position for the remote handset when
the ignition is switched on.
The memory function of the electric column is linked to and controlled by the driver's seat module. The module provides for the
storage of three separate memory positions which are stored against 3 individual remote handsets.
Refer to: Seats (501-10 Seating, Description and Operation).
The steering wheel locates on a splined shaft in the upper column assembly and is secured with a bolt. The steering wheel
houses the driver's airbag and switches for the audio system, gear change and speed control. A clockspring is used to connect
the steering wheel electrical components to the vehicle harness.
Two plastic shrouds are fitted to the upper column assembly. The lower shroud is fitted with an energy absorbing foam pad to
minimize leg injury in the event of an accident.
www.JagDocs.com
Page 783 of 3039
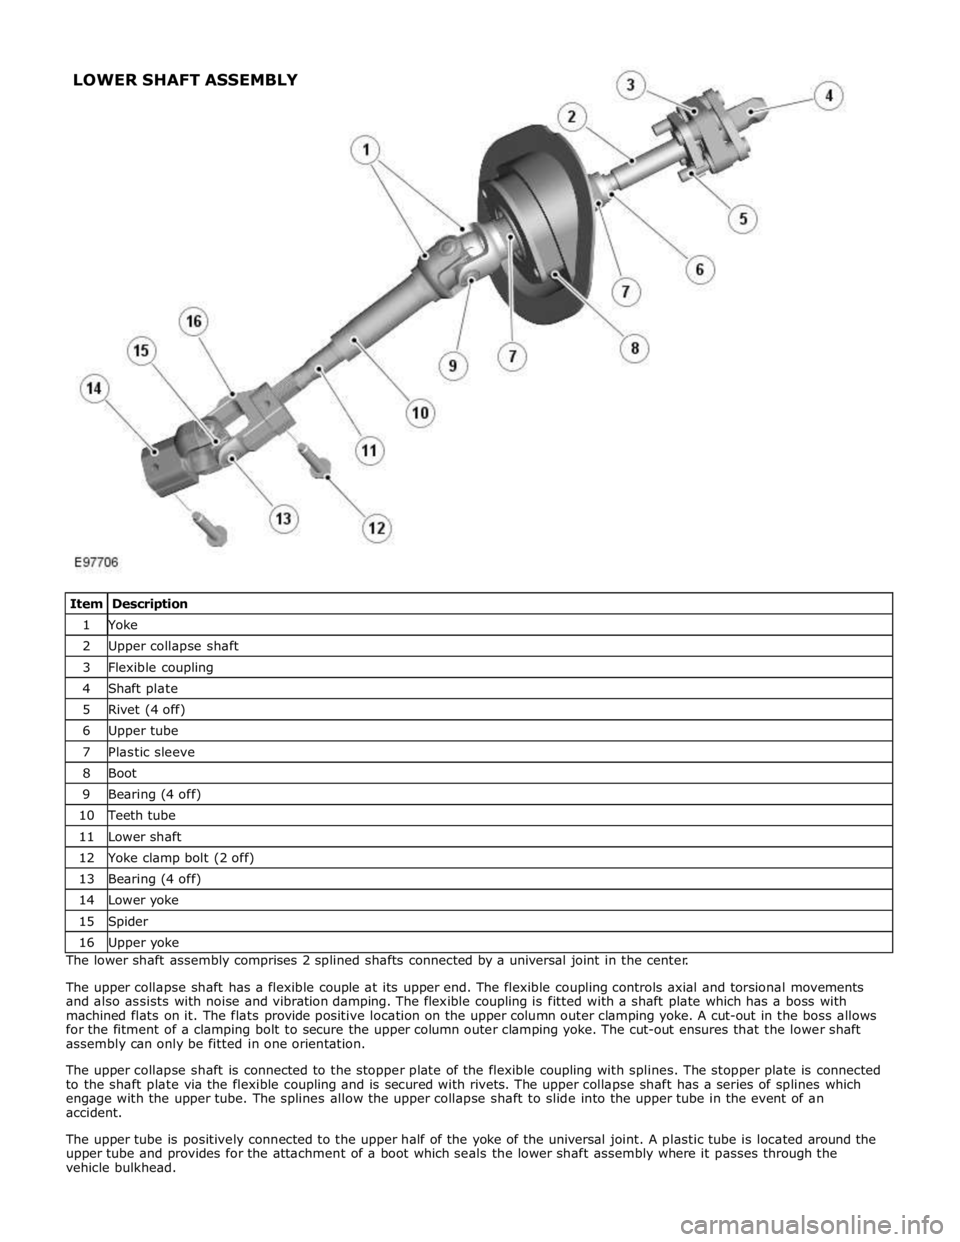
1 Yoke 2 Upper collapse shaft 3 Flexible coupling 4 Shaft plate 5 Rivet (4 off) 6 Upper tube 7 Plastic sleeve 8 Boot 9 Bearing (4 off) 10 Teeth tube 11 Lower shaft 12 Yoke clamp bolt (2 off) 13 Bearing (4 off) 14 Lower yoke 15 Spider 16 Upper yoke The lower shaft assembly comprises 2 splined shafts connected by a universal joint in the center.
The upper collapse shaft has a flexible couple at its upper end. The flexible coupling controls axial and torsional movements
and also assists with noise and vibration damping. The flexible coupling is fitted with a shaft plate which has a boss with
machined flats on it. The flats provide positive location on the upper column outer clamping yoke. A cut-out in the boss allows
for the fitment of a clamping bolt to secure the upper column outer clamping yoke. The cut-out ensures that the lower shaft
assembly can only be fitted in one orientation.
The upper collapse shaft is connected to the stopper plate of the flexible coupling with splines. The stopper plate is connected
to the shaft plate via the flexible coupling and is secured with rivets. The upper collapse shaft has a series of splines which
engage with the upper tube. The splines allow the upper collapse shaft to slide into the upper tube in the event of an
accident.
The upper tube is positively connected to the upper half of the yoke of the universal joint. A plastic tube is located around the
upper tube and provides for the attachment of a boot which seals the lower shaft assembly where it passes through the
vehicle bulkhead. LOWER SHAFT ASSEMBLY
Page 784 of 3039

The yoke is attached to the teeth tube which in turn is located over the lower shaft on splines. The teeth tube is fitted with a
tolerance ring which provides resistance to movement of the splines on the lower shaft. The splines of the lower shaft allow it
to slide into the teeth tube with the tolerance ring controlling the collapse.
The lower shaft is fitted with a yoke which provides the attachment to the torsion bar of the steering valve unit.
Page 785 of 3039

Published: 11-May-2011
Page 786 of 3039

Steering Column - Steering Column
Removal and Installation
Removal
NOTE: Removal steps in this procedure may contain installation details. Published: 26-Jun-2014
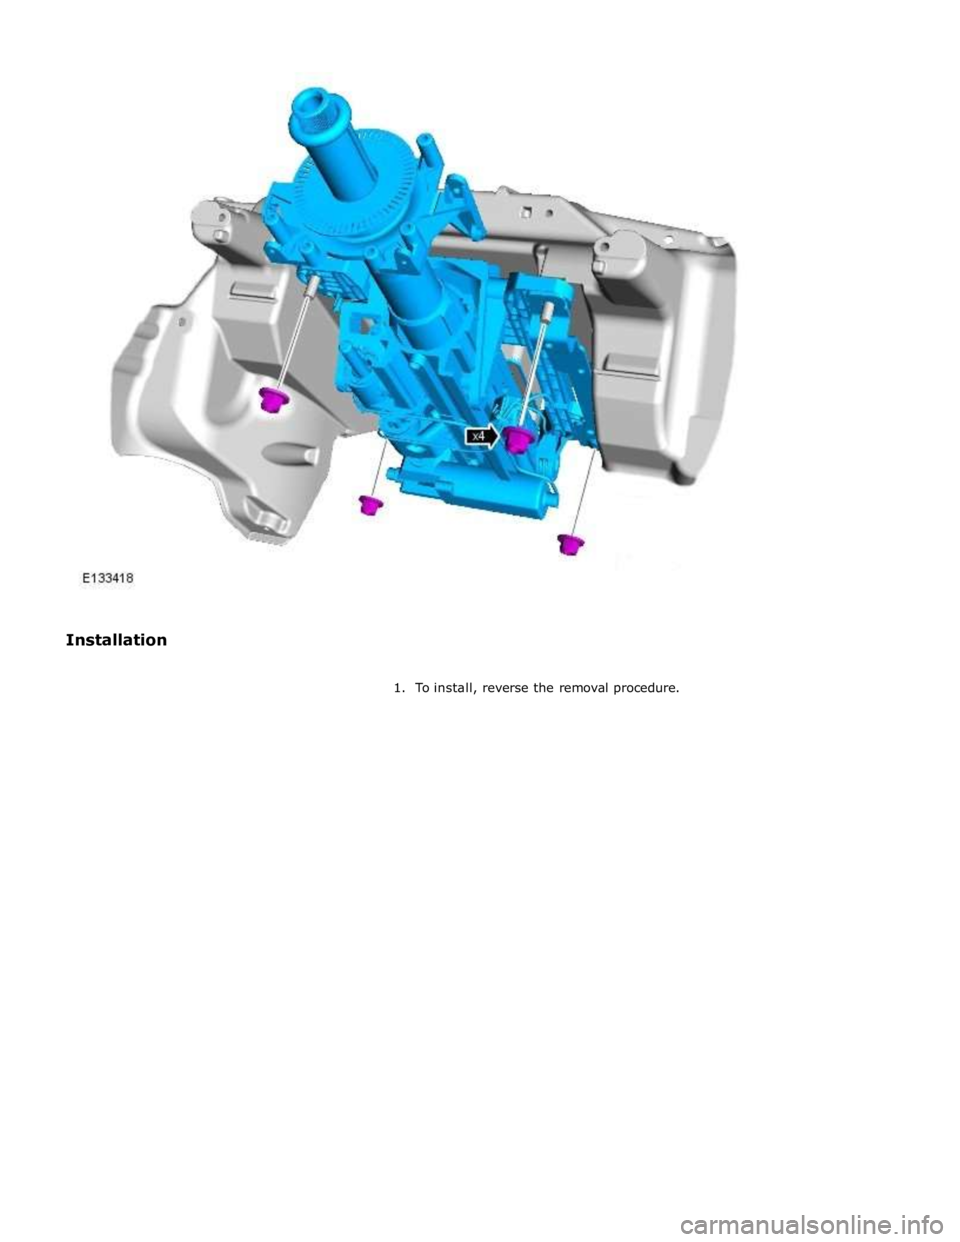
1. Refer to: Battery Disconnect and Connect (414-01 Battery, Mounting and Cables, General Procedures).
2. Refer to: Instrument Panel Lower Trim Panel (501-12 Instrument Panel and Console, Removal and Installation).
3. Refer to: Steering Wheel Rotation Sensor (206-09 Anti-Lock Control - Stability Assist, Removal and Installation).
4.
5.
Page 787 of 3039
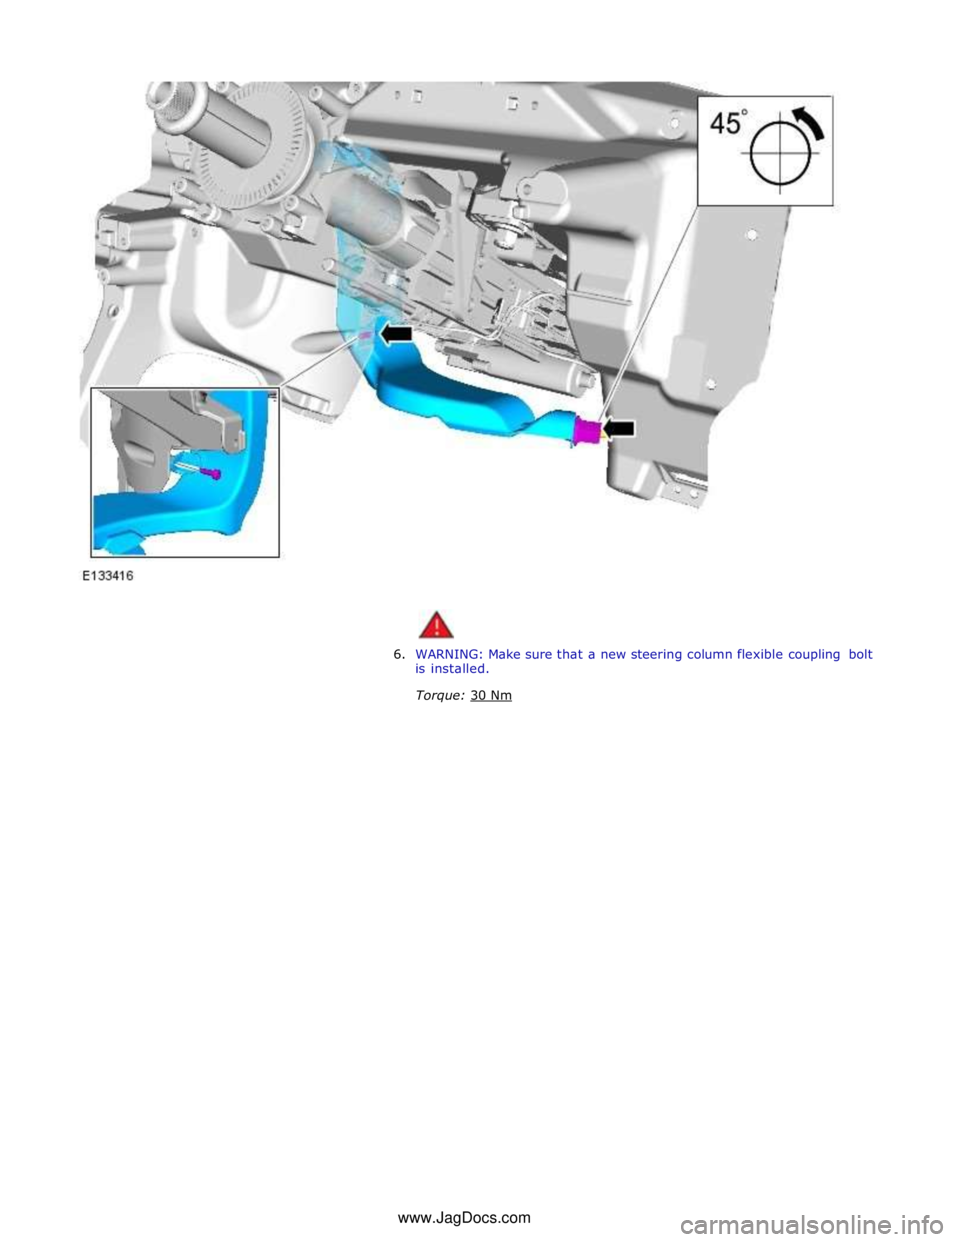
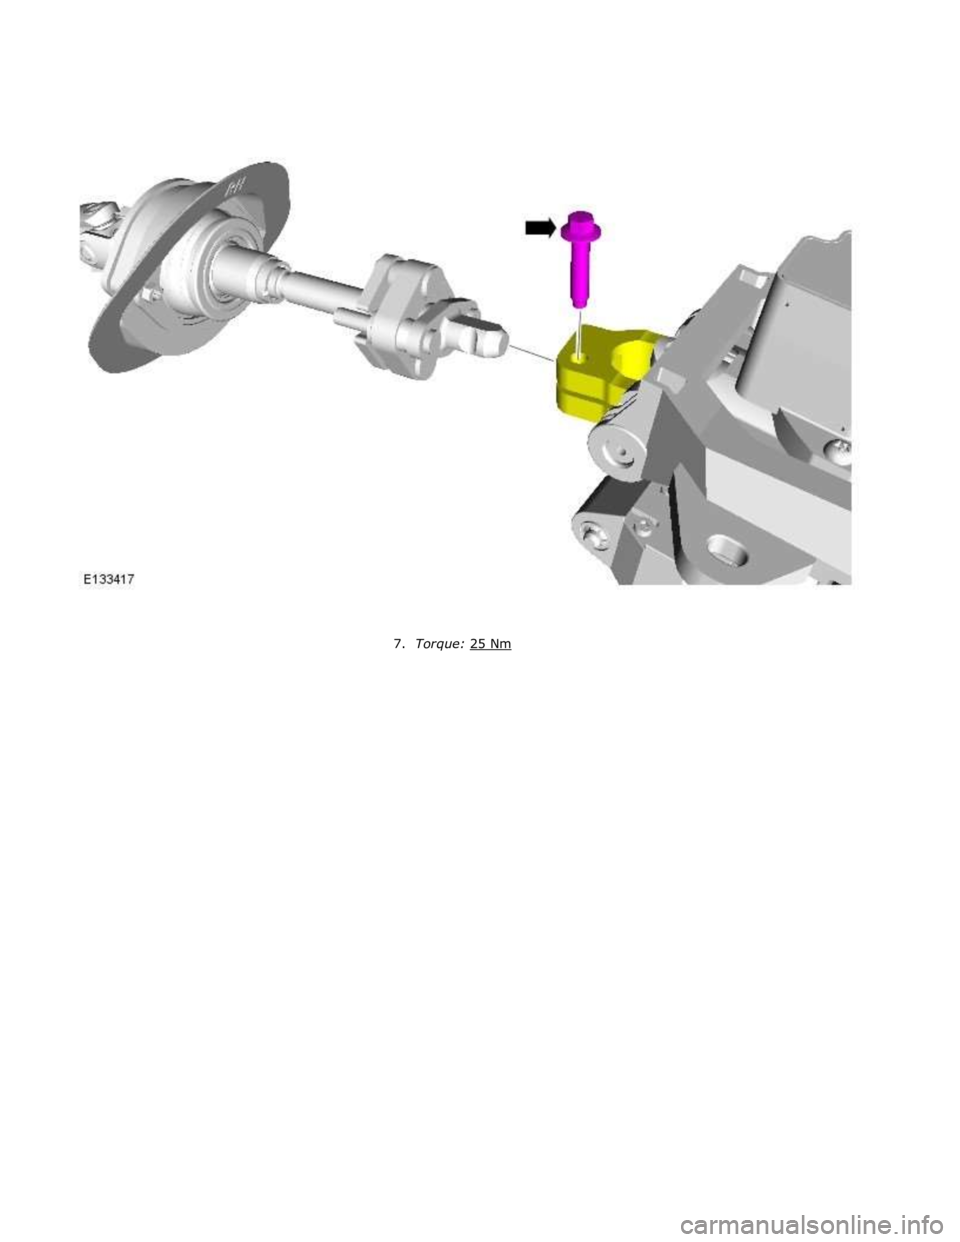
6. WARNING: Make sure that a new steering column flexible coupling bolt
is installed.
Torque: 30 Nm www.JagDocs.com
Page 788 of 3039
Page 789 of 3039
Page 790 of 3039
Steering Column - Steering Column Flexible Coupling
Removal and Installation
Removal
NOTE: Removal steps in this procedure may contain installation details. Published: 11-May-2011
1. Refer to: Battery Disconnect and Connect (414-01 Battery, Mounting and Cables, General Procedures).
2. WARNING: Make sure to support the vehicle with axle stands.
Raise and support the vehicle.
3. Refer to: Air Deflector (501-02 Front End Body Panels, Removal and Installation).
4. Refer to: Instrument Panel Lower Trim Panel (501-12 Instrument Panel and Console, Removal and Installation).
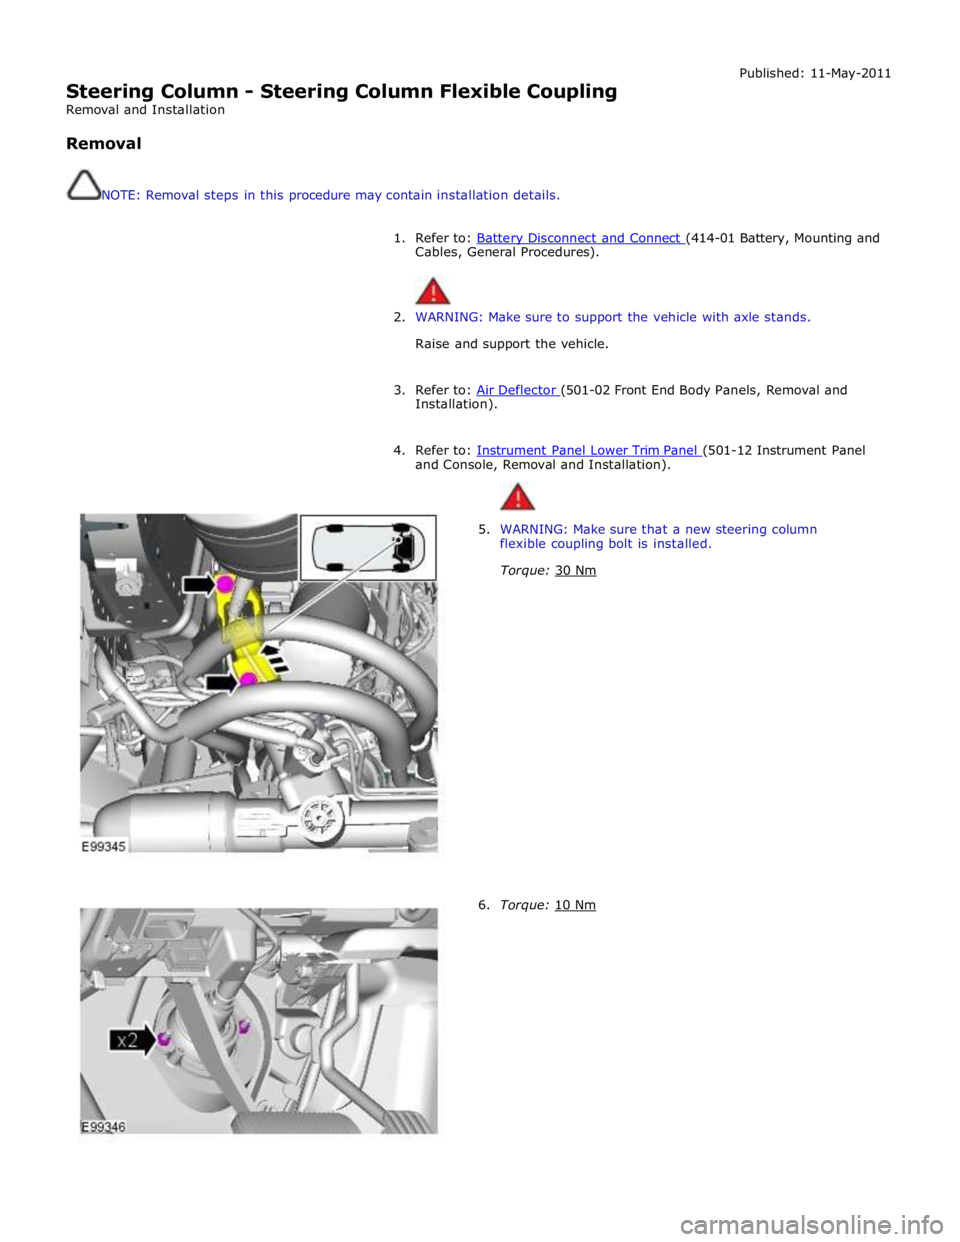
5. WARNING: Make sure that a new steering column
flexible coupling bolt is installed.
Torque: 30 Nm
6. Torque: 10 Nm