303 00 JAGUAR XFR 2010 1.G Manual Online
[x] Cancel search | Manufacturer: JAGUAR, Model Year: 2010, Model line: XFR, Model: JAGUAR XFR 2010 1.GPages: 3039, PDF Size: 58.49 MB
Page 1062 of 3039

Installation 7. NOTE: Some variation in the illustrations may occur,
but the essential information is always correct.
1. CAUTIONS:
Use only a plastic scraper when removing the sealing
material.
Use lint free cloth.
Make sure that the mating faces are clean and free of
corrosion and foreign material.
Installation of the valve cover and tightening must be
carried out within 7 minutes of applying the sealant.
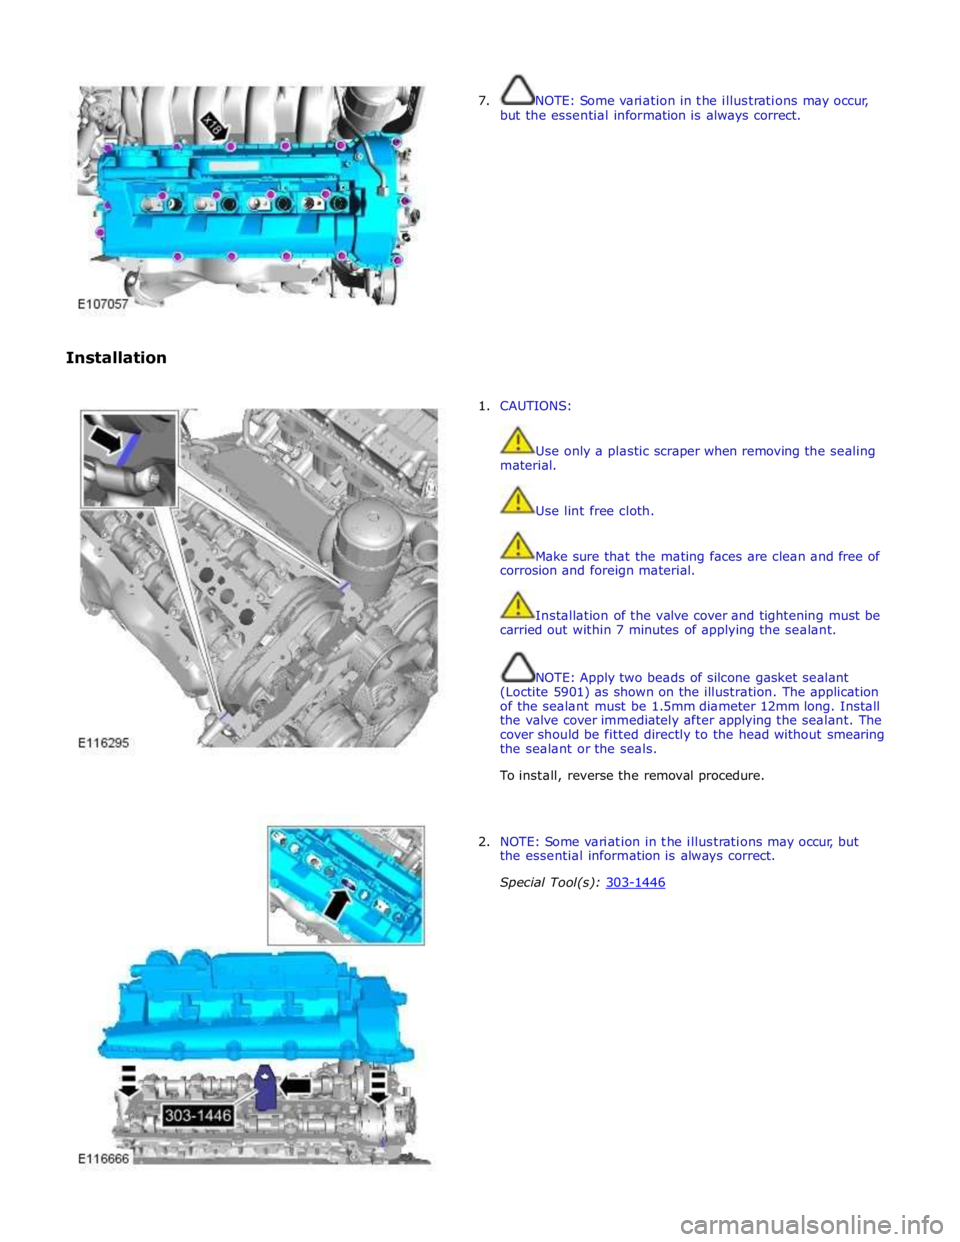
NOTE: Apply two beads of silcone gasket sealant
(Loctite 5901) as shown on the illustration. The application
of the sealant must be 1.5mm diameter 12mm long. Install
the valve cover immediately after applying the sealant. The
cover should be fitted directly to the head without smearing
the sealant or the seals.
To install, reverse the removal procedure.
2. NOTE: Some variation in the illustrations may occur, but
the essential information is always correct.
Special Tool(s): 303-1446
Page 1064 of 3039

Engine - V8 S/C 5.0L Petrol - Cylinder Block Oil Gallery Plug
Removal and Installation
Removal
NOTES:
Removal steps in this procedure may contain installation details.
Some variation in the illustrations may occur, but the essential information is always correct. Published: 23-Jul-2011
1. Refer to: Battery Disconnect and Connect (414-01 Battery, Mounting and Cables, General Procedures).
2. WARNING: Make sure to support the vehicle with axle stands.
Raise and support the vehicle.
3. Refer to: Exhaust Manifold RH (303-01C Engine - V8 5.0L Petrol, Removal and Installation).
4.
Page 1067 of 3039

Published: 10-Oct-2011
Engine - V8 S/C 5.0L Petrol - Fuel Pump Camshaft Assembly Part Number:
INA Timing Drive
Removal and Installation
Removal
NOTE: Some illustrations may show the engine removed for clarity.
1. Refer to: Battery Disconnect and Connect (414-01 Battery, Mounting and Cables, General Procedures).
2. WARNING: Make sure to support the vehicle with axle stands.
Raise and support the vehicle.
3. Refer to: Oil Pan Extension (303-01D Engine - V8 S/C 5.0L Petrol, Removal and Installation).
4.
Page 1071 of 3039

7. Refer to: Oil Pan Extension (303-01D Engine - V8 S/C 5.0L Petrol, Removal and Installation).
8. Refer to: Battery Disconnect and Connect (414-01 Battery, Mounting and Cables, General Procedures). www.JagDocs.com
Page 1072 of 3039

Published: 10-Oct-2011
Engine - V8 S/C 5.0L Petrol - Fuel Pump Camshaft Assembly Part Number:
Tsubaki Timing Drive
Removal and Installation
Removal
NOTE: Some illustrations may show the engine removed for clarity.
1. Refer to: Battery Disconnect and Connect (414-01 Battery, Mounting and Cables, General Procedures).
2. WARNING: Make sure to support the vehicle with axle stands.
Raise and support the vehicle.
3. Refer to: Oil Pan Extension (303-01D Engine - V8 S/C 5.0L Petrol, Removal and Installation).
4.
5.
Page 1075 of 3039

7. Refer to: Oil Pan Extension (303-01D Engine - V8 S/C 5.0L Petrol, Removal and Installation).
8. Connect the battery ground cable.
Refer to: Battery Disconnect and Connect (414-01 Battery, Mounting and Cables, General Procedures).
Page 1076 of 3039

Engine - V8 S/C 5.0L Petrol - Lower Timing Cover
Removal and Installation Published: 19-Dec-2011
Removal
1. Refer to: Battery Disconnect and Connect (414-01 Battery, Mounting and Cables, General Procedures).
2. WARNING: Make sure to support the vehicle with axle stands.
Raise and support the vehicle.
3. Refer to: Crankshaft Pulley (303-01D Engine - V8 S/C 5.0L Petrol, Removal and Installation).
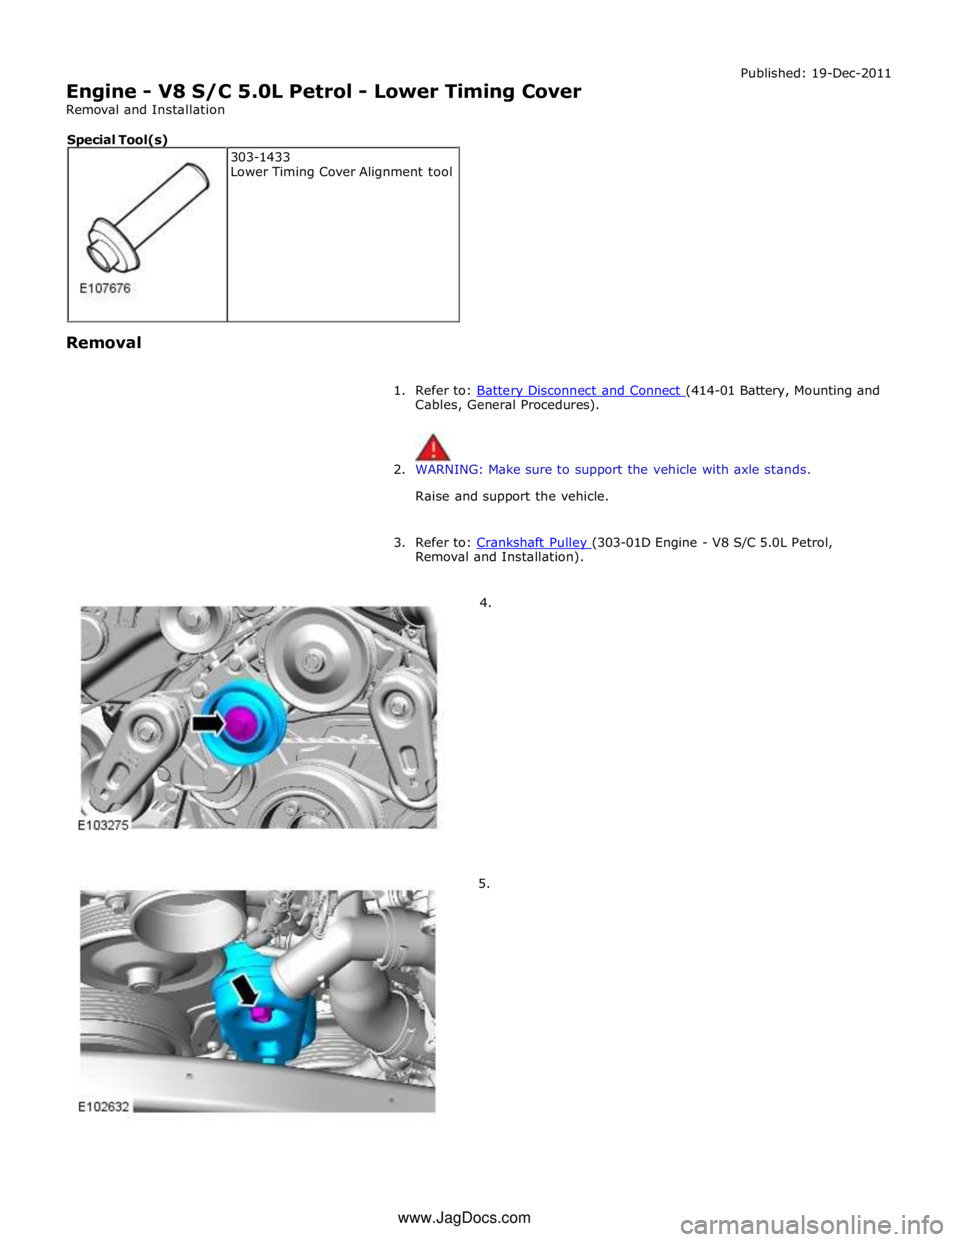
4.
5. 303-1433
Lower Timing Cover Alignment tool Special Tool(s) www.JagDocs.com
Page 1080 of 3039

7. NOTE: Install the bolt finger tight before final
tightening.
Torque: 40 Nm
8. Torque: 40 Nm
9. Refer to: Crankshaft Pulley (303-01D Engine - V8 S/C 5.0L Petrol, Removal and Installation).
10. Refer to: Battery Disconnect and Connect (414-01 Battery, Mounting and Cables, General Procedures).
11. CAUTION: Make sure that the vehicle is left for 5 minutes from
filling with oil and that the engine oil level is reading at least minimum
(by following Steps 14-18), before starting the engine.
Fill the engine with oil - for filling values on vehicles without
supercharger:
Refer to: Specifications (303-01C Engine - V8 5.0L Petrol, Specifications).
Fill the engine with oil - for filling values on vehicles with
supercharger:
Refer to: Specifications (303-01D Engine - V8 S/C 5.0L Petrol, Specifications).
Clean any residual engine oil from the oil filler cap area.
12. CAUTION: Make sure that the vehicle has been left for 5 minutes
from filling with oil.
Follow the Steps 14-18 before starting the engine.
13.
Start the engine and allow to run for 10 minutes, stop the
engine.
Page 1084 of 3039

Engine - V8 S/C 5.0L Petrol - Valves
Removal and Installation
Removal Published: 10-Jul-2013
1. Refer to: Battery Disconnect and Connect (414-01 Battery, Mounting and Cables, General Procedures).
2. WARNING: Do not work on or under a vehicle supported only by a jack.
Always support the vehicle on safety stands.
Raise and support the vehicle.
3. Refer to: Cylinder Head LH (303-01D Engine - V8 S/C 5.0L Petrol, Removal and Installation).
4. Refer to: Cylinder Head RH (303-01D Engine - V8 S/C 5.0L Petrol, Removal and Installation).
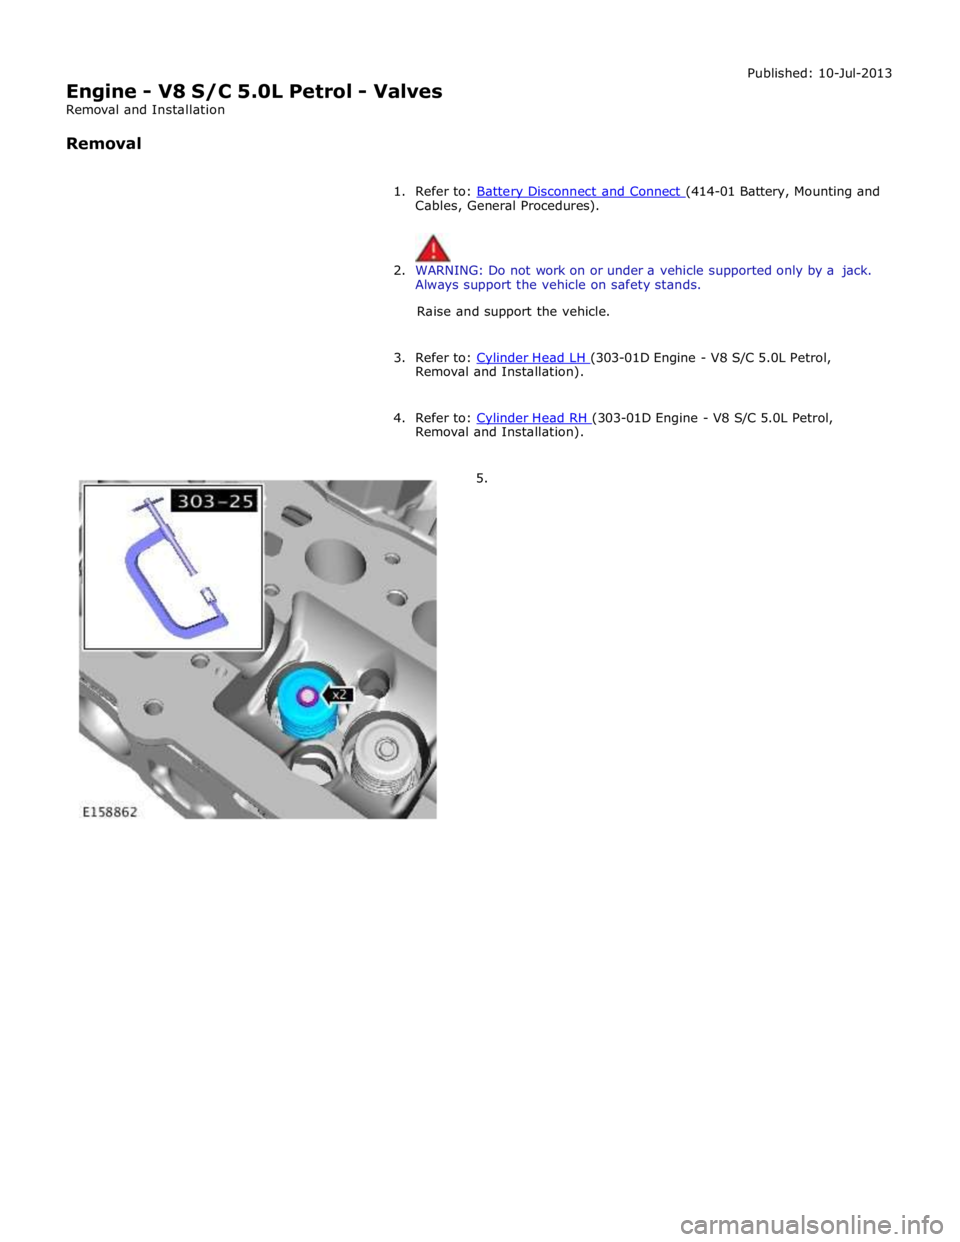
5.
Page 1087 of 3039

Engine - V8 S/C 5.0L Petrol - Engine
Removal Published: 19-Nov-2013
NOTES:
Some variation in the illustrations may occur, but the essential information is always correct.
If a new engine is to be installed, remove the intake manifold to access the top transmission retaining bolts.
1. Refer to: Battery Disconnect and Connect (414-01 Battery, Mounting and Cables, General Procedures).
2. WARNING: Make sure to support the vehicle with axle stands.
Raise and support the vehicle.
3. Refer to: Cowl Vent Screen (501-02 Front End Body Panels, Removal and Installation).
4. Refer to: Air Cleaner LH (303-12C Intake Air Distribution and Filtering - V8 5.0L Petrol, Removal and Installation).
5. Refer to: Air Cleaner RH (303-12C Intake Air Distribution and Filtering - V8 5.0L Petrol, Removal and Installation).
6. Refer to: Cooling System Partial Draining, Filling and Bleeding - V8 S/C 5.0L Petrol (303-03C Engine Cooling - V8 5.0L Petrol/V8 S/C 5.0L Petrol, General Procedures).
7. Refer to: Air Conditioning (A/C) System Recovery, Evacuation and Charging (412-00 Climate Control System - General Information, General Procedures).
8. Refer to: Hood (501-02 Front End Body Panels, Removal and Installation).
9. Refer to: Cooling Fan Motor and Shroud - Vehicles With: Supercharger (303-03C Engine Cooling - V8 5.0L Petrol/V8 S/C 5.0L Petrol, Removal
and Installation).
10. Refer to: Transmission - V8 5.0L Petrol/V8 S/C 5.0L Petrol (307-01B Automatic Transmission/Transaxle - TDV6 3.0L Diesel /V8 5.0L Petrol/V8
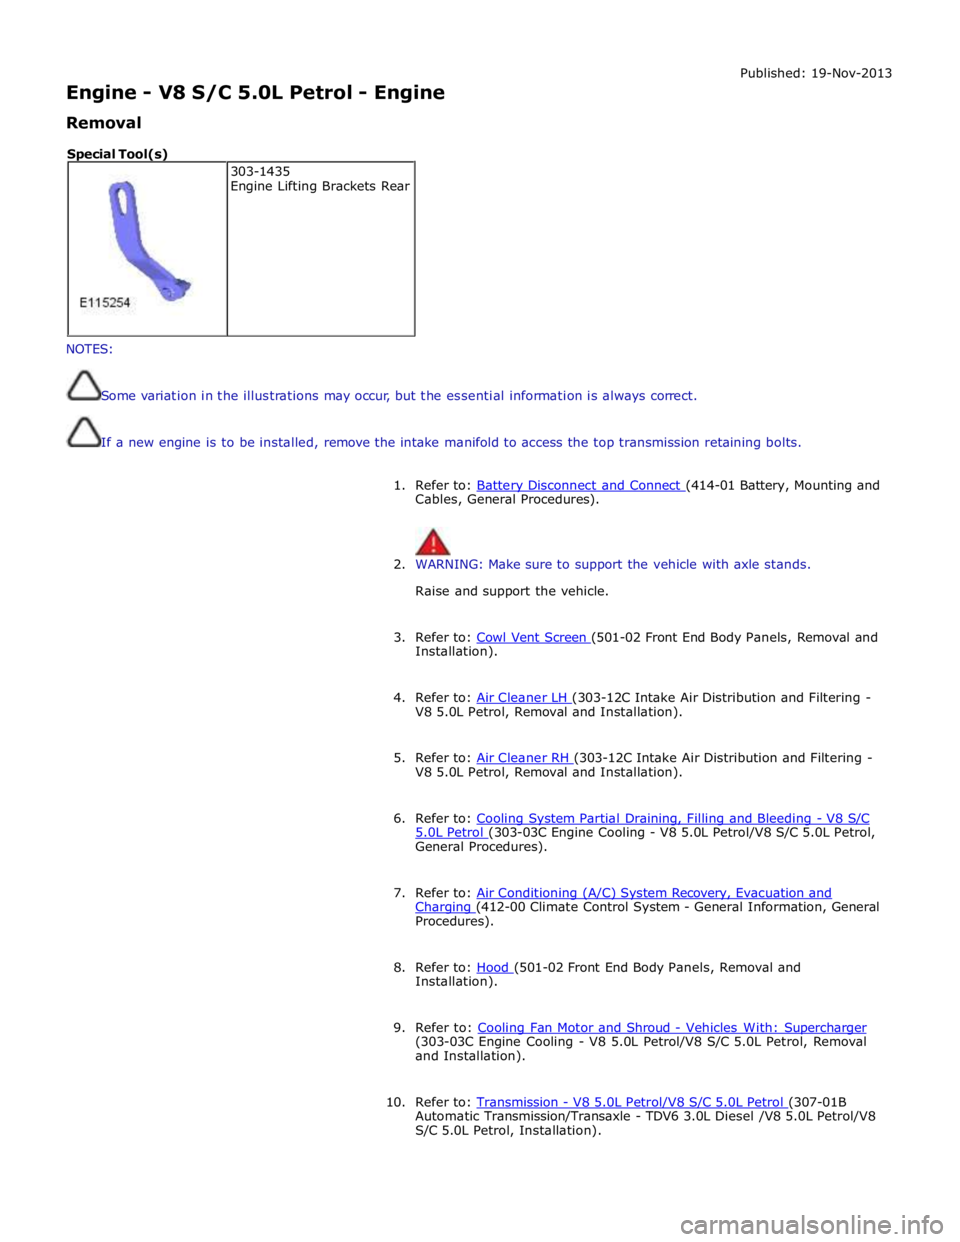
S/C 5.0L Petrol, Installation). 303-1435
Engine Lifting Brackets Rear Special Tool(s)