JAGUAR XFR 2010 1.G Manual PDF
XFR 2010 1.G
JAGUAR
JAGUAR
https://www.carmanualsonline.info/img/21/7642/w960_7642-0.png
JAGUAR XFR 2010 1.G Manual PDF
Page 1041 of 3039
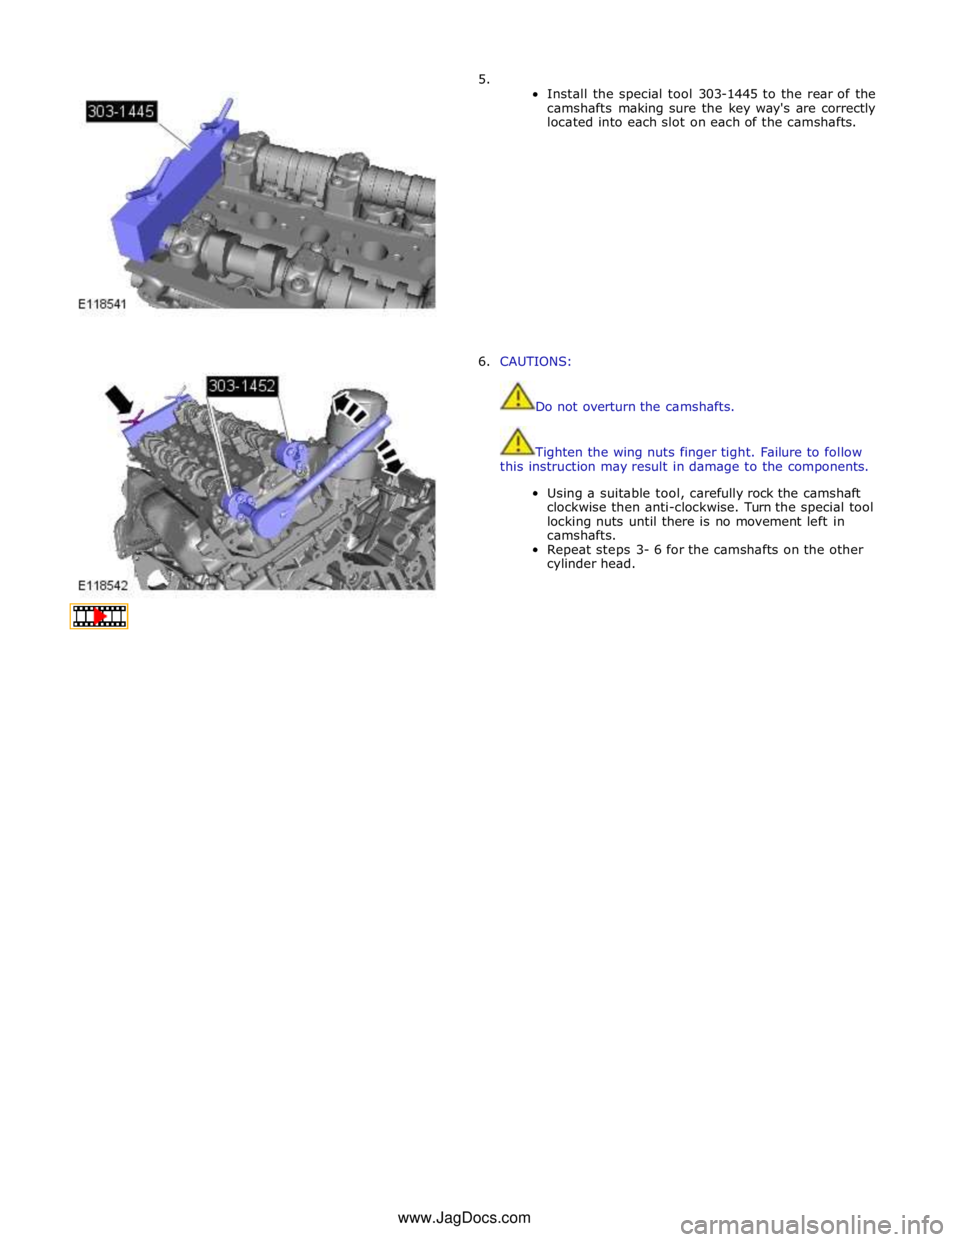
5.
Install the special tool 303-1445 to the rear of the
camshafts making sure the key way's are correctly
located into each slot on each of the camshafts.
6. CAUTIONS:
Do not overturn the camshafts.
Tighten the wing nuts finger tight. Failure to follow
this instruction may result in damage to the components.
Using a suitable tool, carefully rock the camshaft
clockwise then anti-clockwise. Turn the special tool
locking nuts until there is no movement left in
camshafts.
Repeat steps 3- 6 for the camshafts on the other
cylinder head. www.JagDocs.com
Page 1049 of 3039
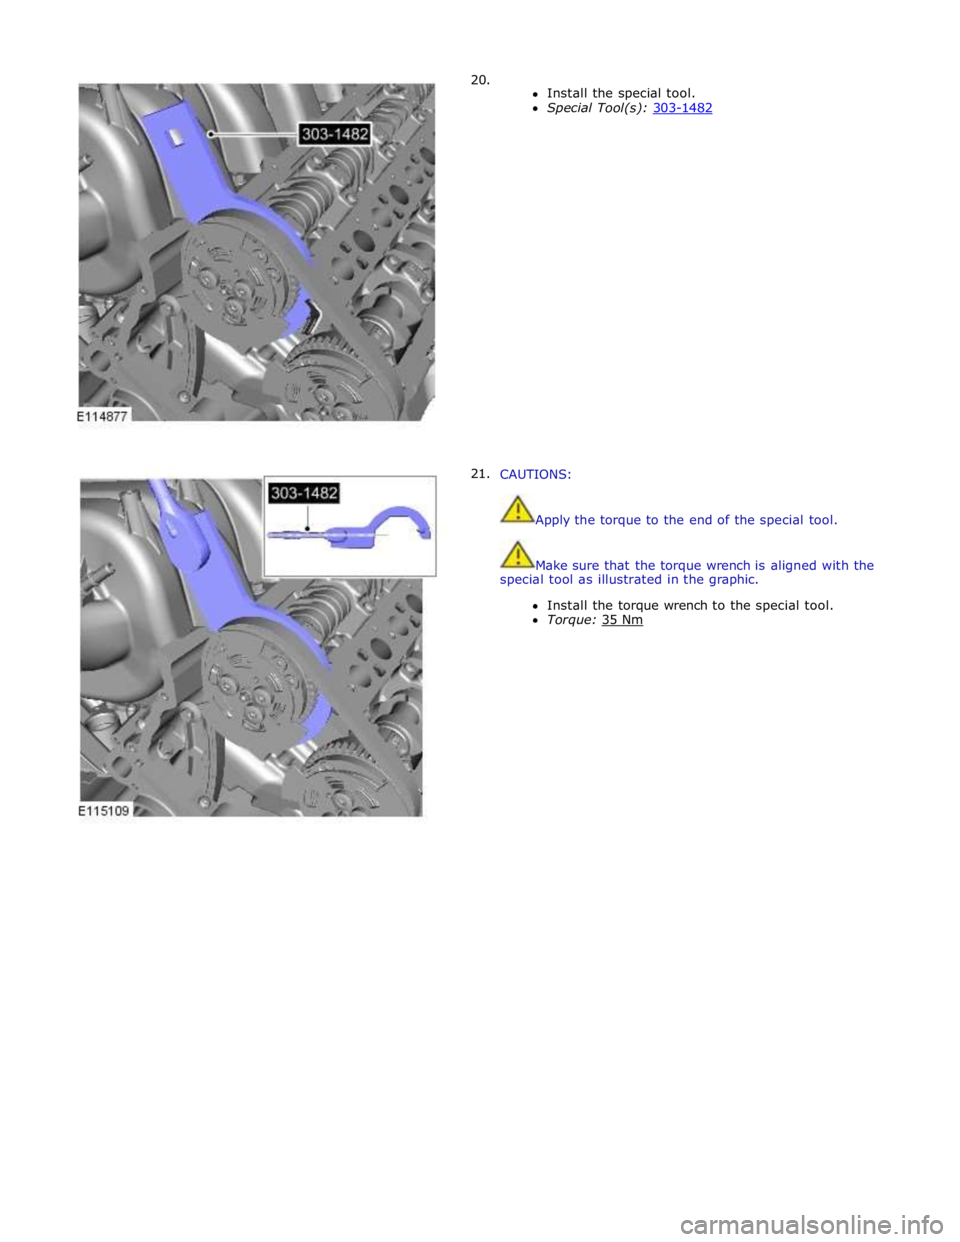
20.
21.
Install the special tool.
Special Tool(s): 303-1482
CAUTIONS:
Apply the torque to the end of the special tool.
Make sure that the torque wrench is aligned with the
special tool as illustrated in the graphic.
Install the torque wrench to the special tool.
Torque: 35 Nm
Page 1050 of 3039
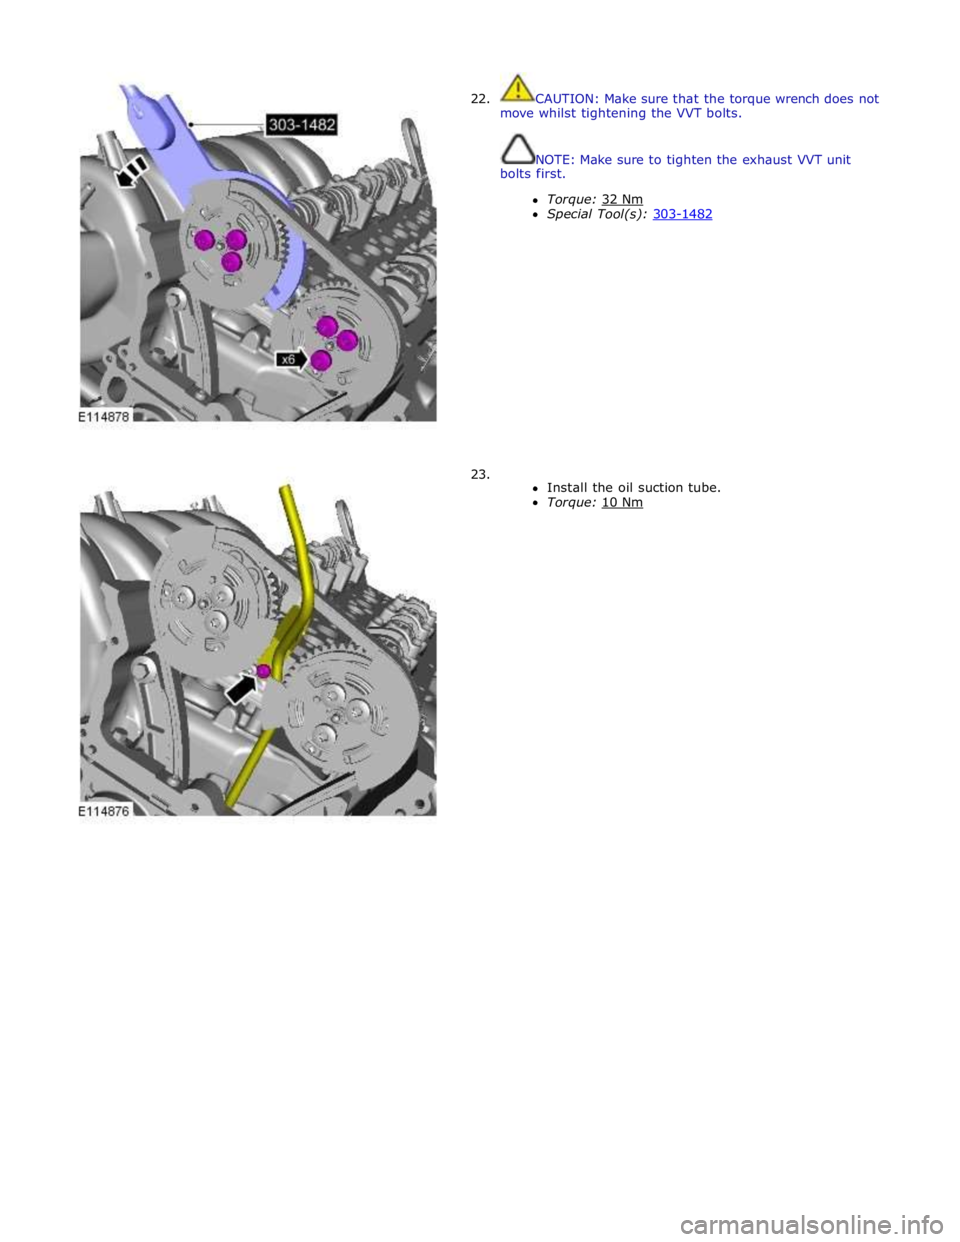
22.
23. CAUTION: Make sure that the torque wrench does not
move whilst tightening the VVT bolts.
NOTE: Make sure to tighten the exhaust VVT unit
bolts first.
Torque: 32 Nm Special Tool(s): 303-1482
Install the oil suction tube.
Torque: 10 Nm
Page 1051 of 3039
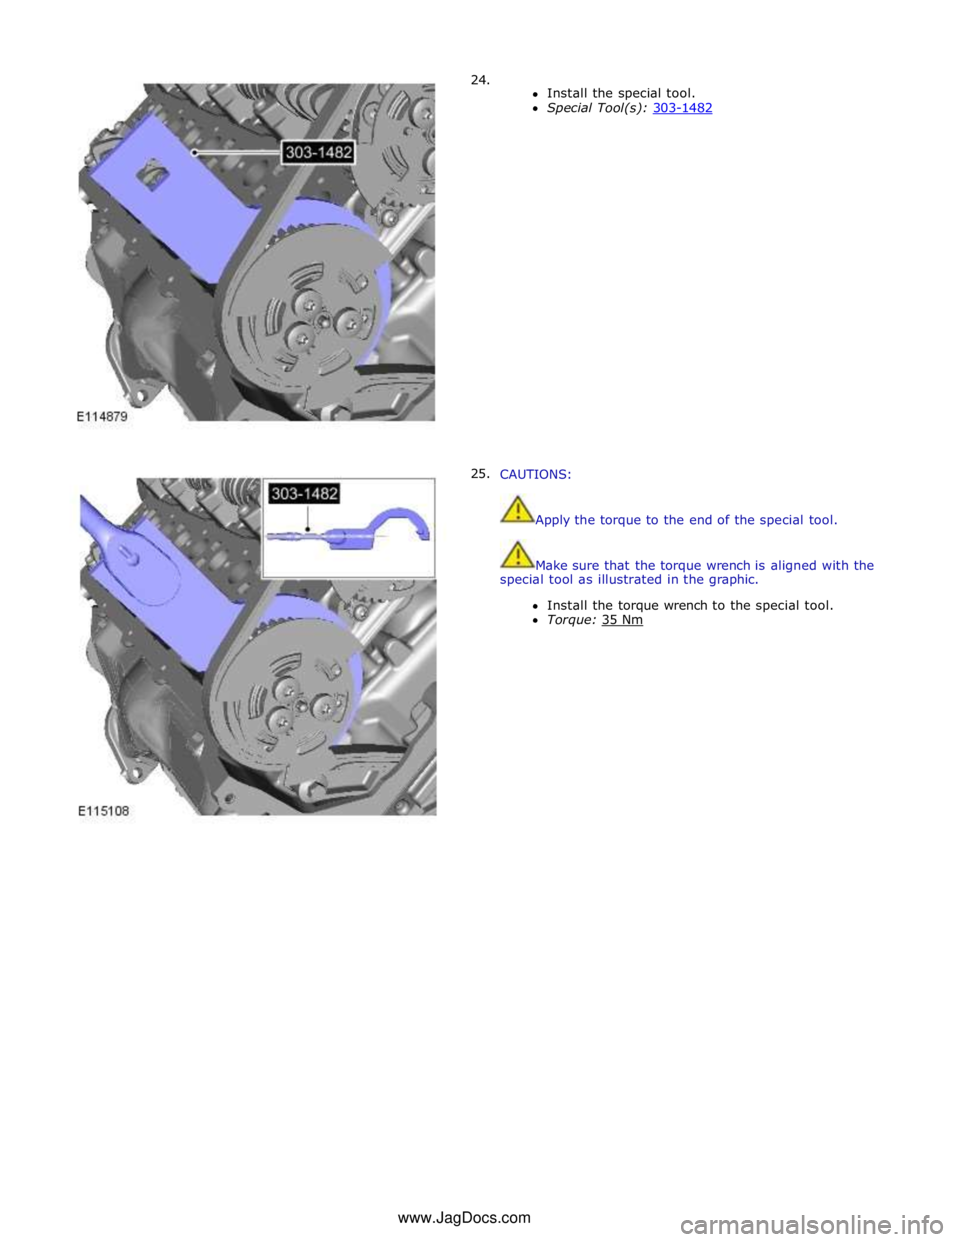
24.
25.
Install the special tool.
Special Tool(s): 303-1482
CAUTIONS:
Apply the torque to the end of the special tool.
Make sure that the torque wrench is aligned with the
special tool as illustrated in the graphic.
Install the torque wrench to the special tool.
Torque: 35 Nm www.JagDocs.com
Page 1053 of 3039
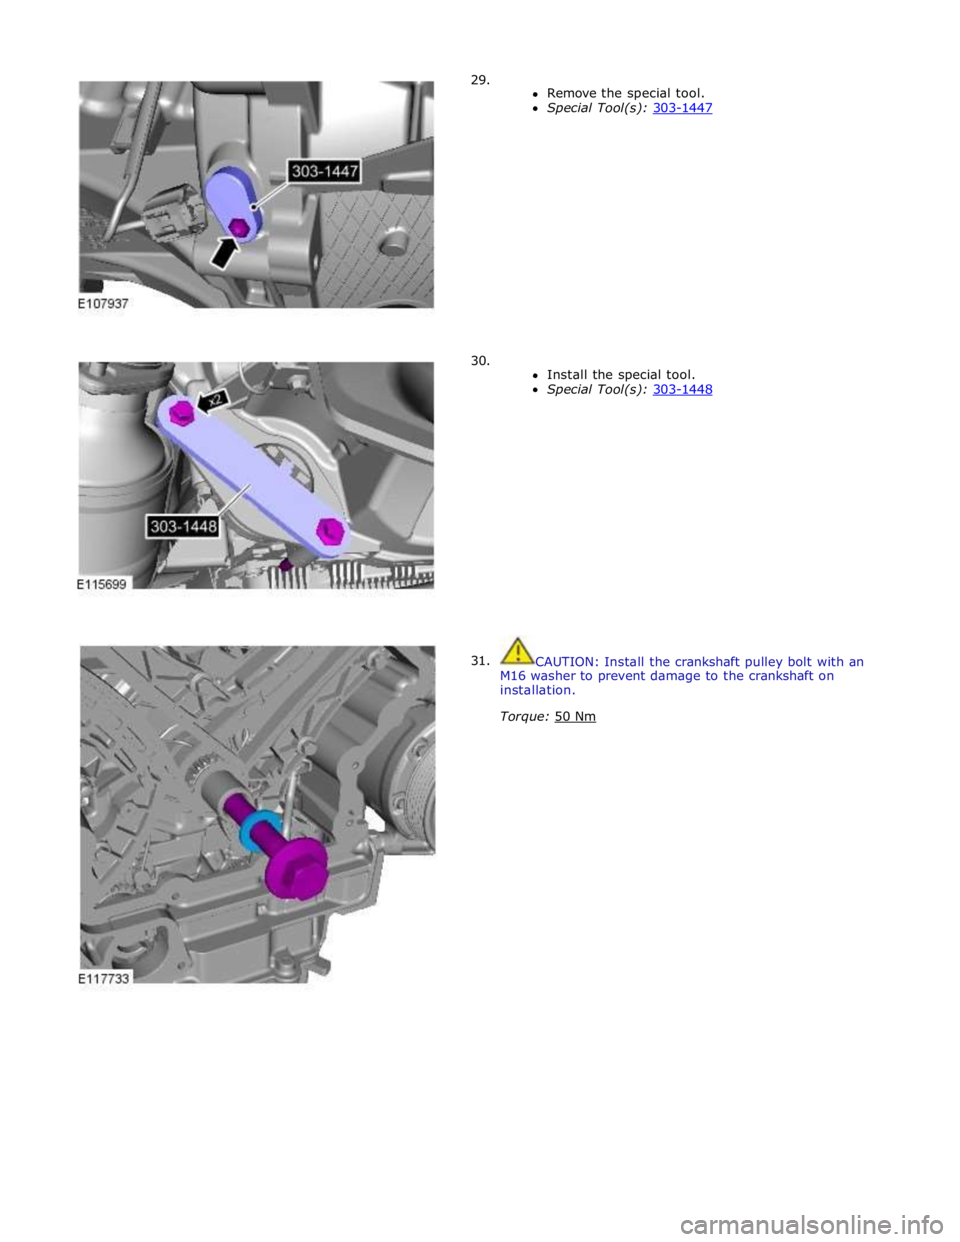
29.
30.
31.
Remove the special tool.
Special Tool(s): 303-1447
Install the special tool.
Special Tool(s): 303-1448
CAUTION: Install the crankshaft pulley bolt with an
M16 washer to prevent damage to the crankshaft on
installation.
Torque: 50 Nm
Page 1054 of 3039
32.
Remove the special tool.
Special Tool(s): 303-1448
33. Rotate the engine two complete turns clockwise.
34.
35. CAUTION: Only rotate the crankshaft clockwise.
Install the special tool.
Special Tool(s): 303-1447
Install the special tool.
Special Tool(s): 303-1448
Page 1055 of 3039
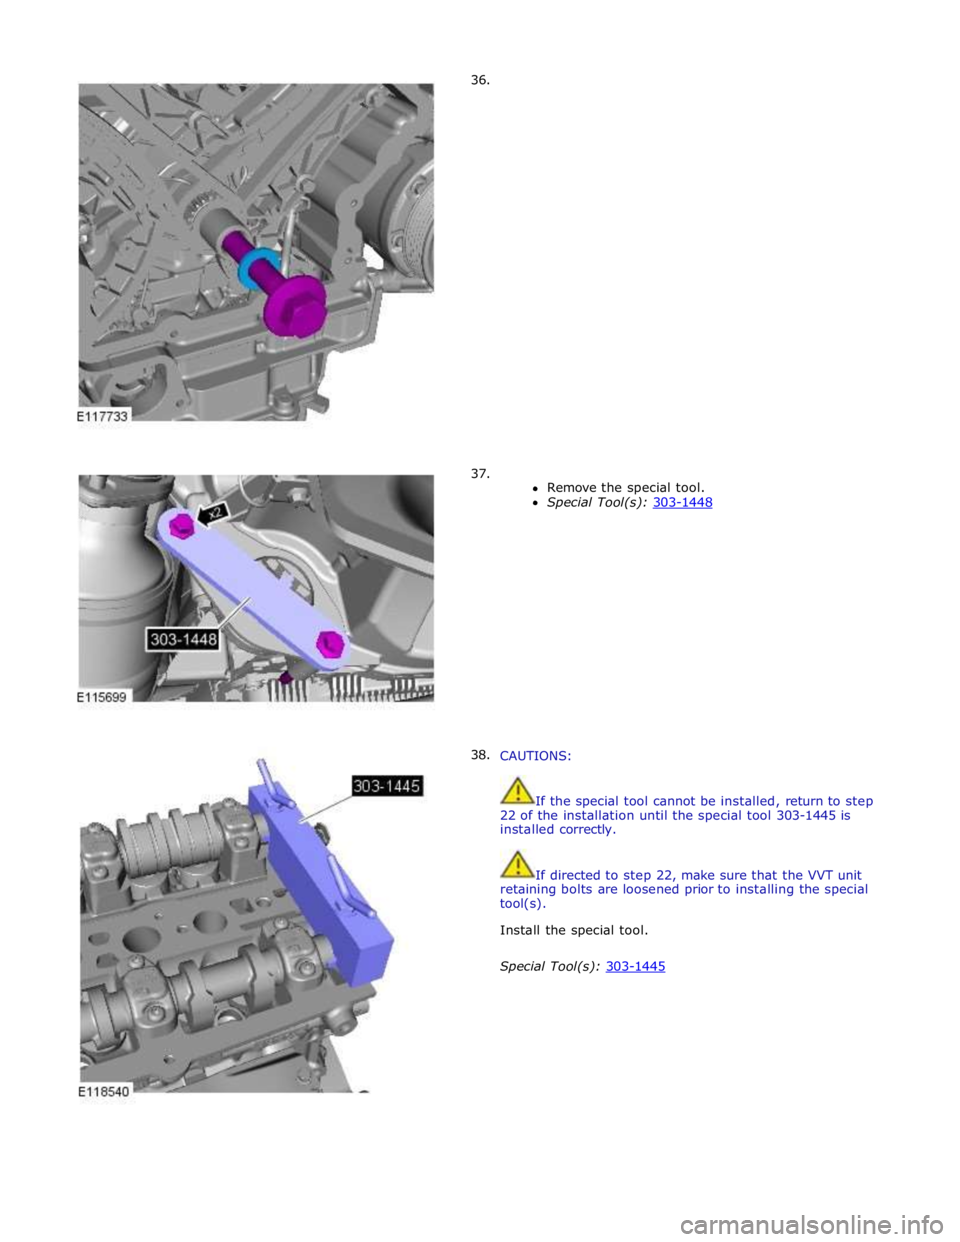
36.
37.
38.
Remove the special tool.
Special Tool(s): 303-1448
CAUTIONS:
If the special tool cannot be installed, return to step
22 of the installation until the special tool 303-1445 is
installed correctly.
If directed to step 22, make sure that the VVT unit
retaining bolts are loosened prior to installing the special
tool(s).
Install the special tool.
Special Tool(s): 303-1445
Page 1057 of 3039
42.
43.
Remove the special tool.
Special Tool(s): 303-1447
Torque: 10 Nm
44.
Refer to: Timing Cover (303-01C Engine - V8 5.0L Petrol, Removal and Installation).
45. Connect the battery ground cable.
Refer to: Battery Disconnect and Connect (414-01 Battery, Mounting and Cables, General Procedures).
Page 1058 of 3039
Engine - V8 S/C 5.0L Petrol - Valve Cover LH
Removal and Installation Published: 11-May-2011
Removal
NOTE: Removal steps in this procedure may contain installation details.
1. Refer to: Battery Disconnect and Connect (414-01 Battery, Mounting and Cables, General Procedures).
2. Refer to: Supercharger (303-12D Intake Air Distribution and Filtering - V8 S/C 5.0L Petrol, Removal and Installation).
3. Refer to: Secondary Bulkhead Panel LH - TDV6 3.0L Diesel /V8 5.0L Petrol/V8 S/C 5.0L Petrol (501-02 Front End Body Panels, Removal and Installation).
4. Refer to: Air Cleaner Outlet Pipe LH (303-12D Intake Air Distribution and Filtering - V8 S/C 5.0L Petrol, Removal and Installation).
5. Refer to: Fuel Rail LH (303-04E Fuel Charging and Controls - V8 S/C 5.0L Petrol, Removal and Installation).
6. Torque: 10 Nm 303-1446
Valve Cover Alignment Tool Special Tool(s)
Page 1061 of 3039
Engine - V8 S/C 5.0L Petrol - Valve Cover RH
Removal and Installation Published: 11-May-2011
Removal
NOTE: Removal steps in this procedure may contain installation details.
1. Refer to: Battery Disconnect and Connect (414-01 Battery, Mounting and Cables, General Procedures).
2. Refer to: Supercharger (303-12D Intake Air Distribution and Filtering - V8 S/C 5.0L Petrol, Removal and Installation).
3. Refer to: Secondary Bulkhead Panel RH - TDV6 3.0L Diesel /V8 5.0L Petrol/V8 S/C 5.0L Petrol (501-02 Front End Body Panels, Removal and Installation).
4. Refer to: Air Cleaner Outlet Pipe RH (303-12D Intake Air Distribution and Filtering - V8 S/C 5.0L Petrol, Removal and Installation).
5. Refer to: Fuel Rail RH (303-04E Fuel Charging and Controls - V8 S/C 5.0L Petrol, Removal and Installation).
6. NOTE: Some variation in the illustrations may occur, but
the essential information is always correct. 303-1446
Valve Cover Alignment Tool Special Tool(s) www.JagDocs.com
